Susan + Beth’s Laser Cut Wood Veneer Wedding Invitations

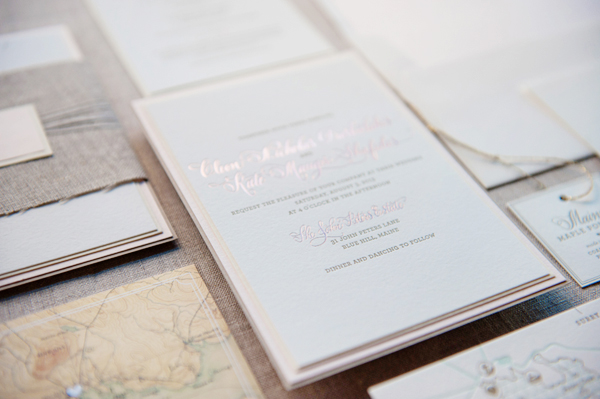
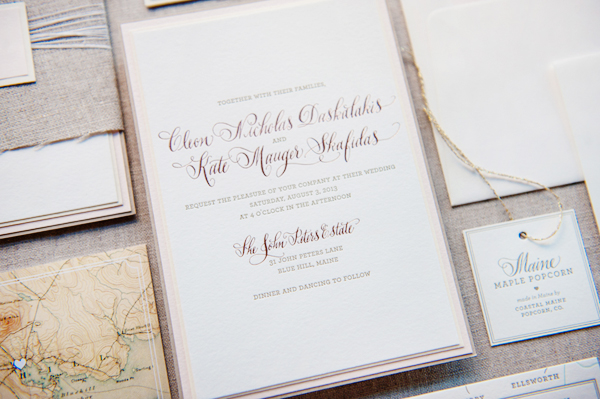
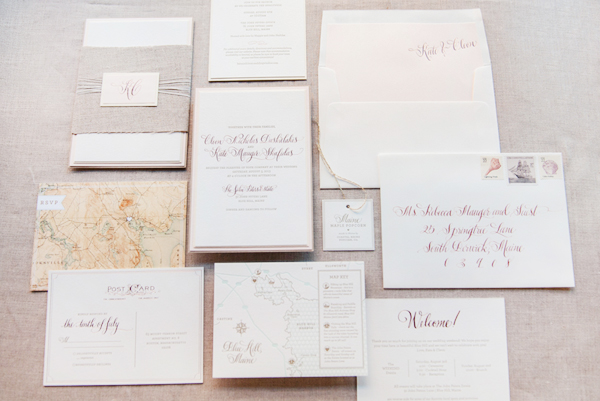
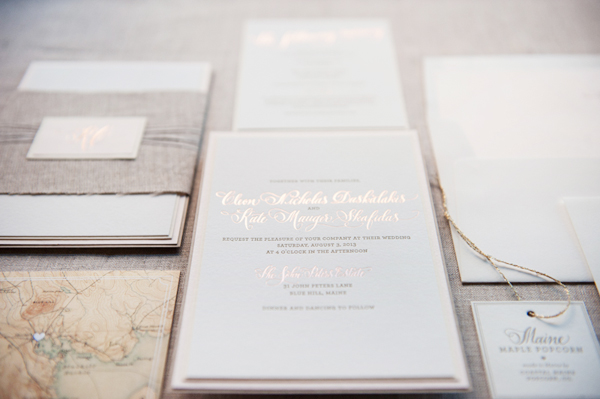
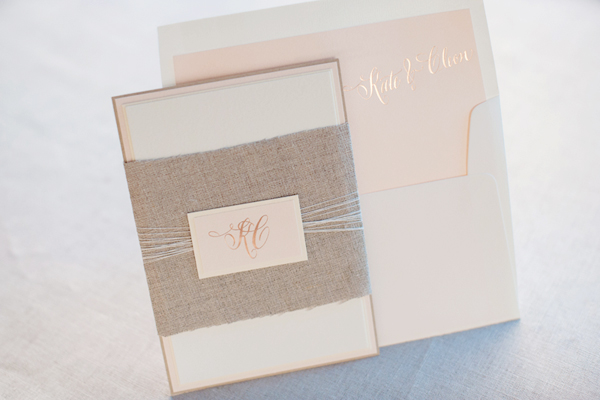
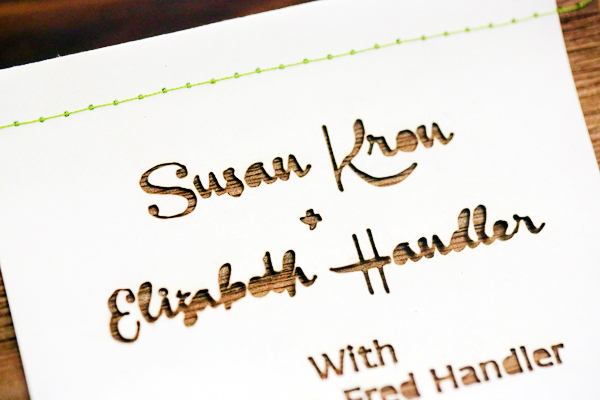
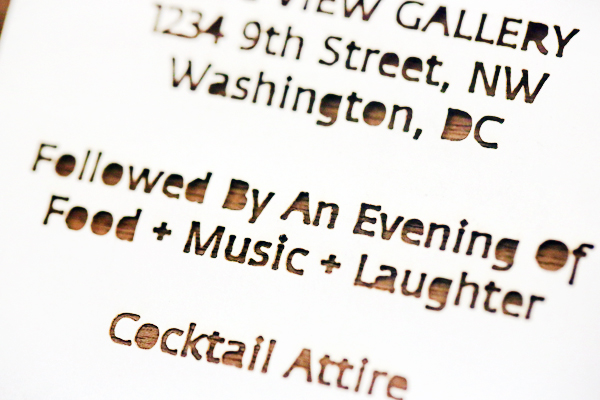
I’m a big fan of laser cut details in a wedding invitation suite – and these modern invitations from Emily and Dianna of Fourth Year Studio are no exception. Emily and Dianna paired paper and laser cut text with thin walnut wood veneer, which in turn could be rolled into a scroll! Such a cool idea!

Laser-Cut-Wood-Wedding-Invitations-Fourth-Year-Studio3

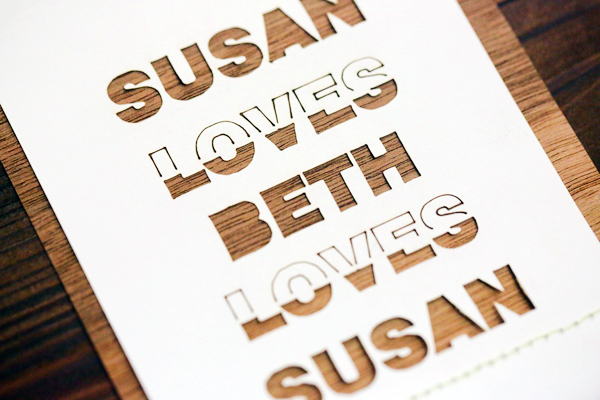
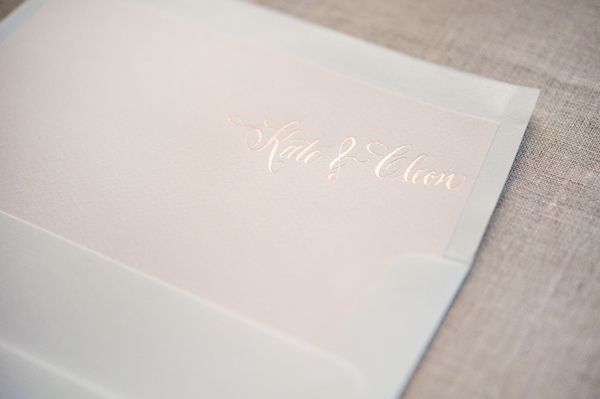
From Emily and Dianna: Beth and Susan came to us in search of a modern wedding invitation set to compliment their unique relationship. They have been together for many years and are now able to get married. It was a true celebration of their love and we were thrilled for the opportunity to help spread the word with their friends and family.

Laser-Cut-Wood-Wedding-Invitations-Fourth-Year-Studio5Laser-Cut-Wood-Wedding-Invitations-Fourth-Year-Studio6

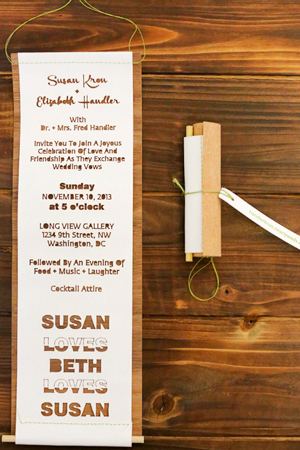
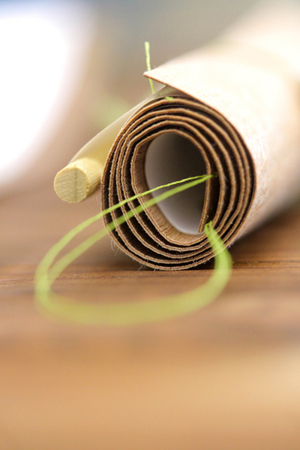
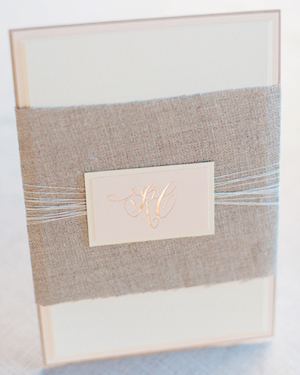
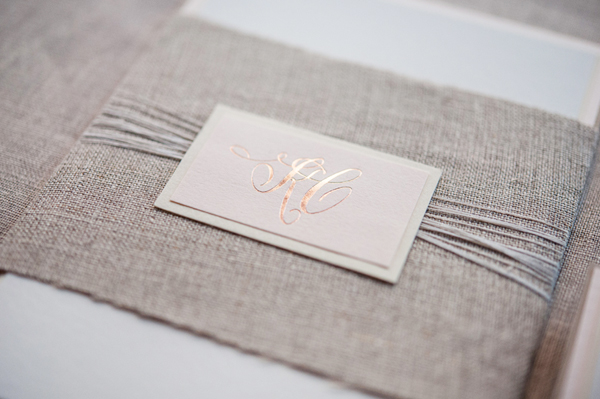
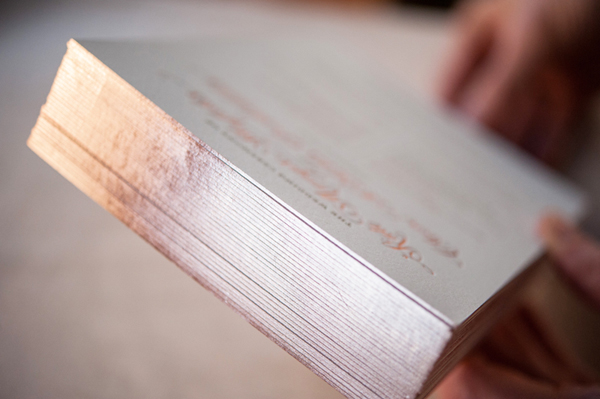
A laser cut scroll style invitation was backed with a walnut veneer. Along the top we stitched a line with green thread to provide a spot for a dowel to pass through so it could be flattened and hung. The scroll was rolled and tied with a tag before it was all packaged inside kraft box with a matching label.

Laser-Cut-Wood-Wedding-Invitations-Fourth-Year-Studio

Laser-Cut-Wood-Wedding-Invitations-Fourth-Year-Studio4

Laser-Cut-Wood-Wedding-Invitations-Fourth-Year-Studio7

Laser-Cut-Wood-Wedding-Invitations-Fourth-Year-Studio9

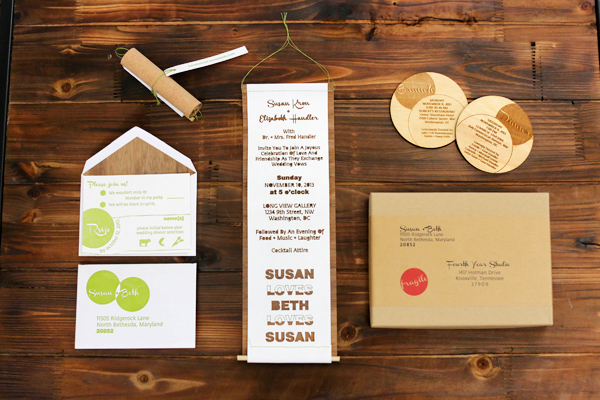
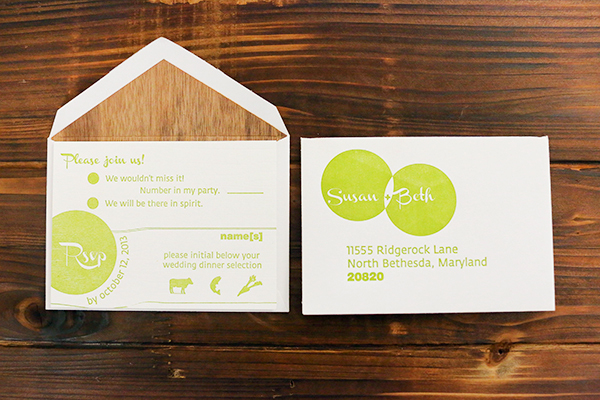
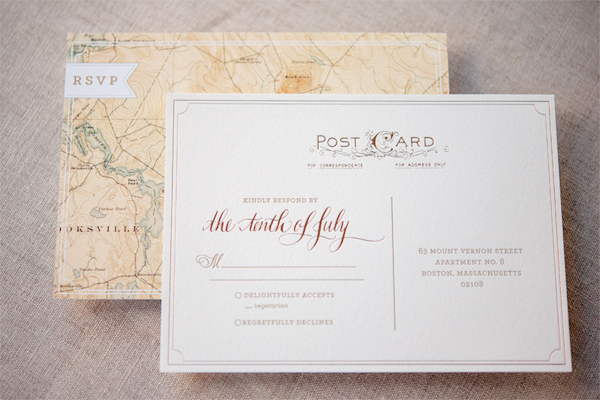
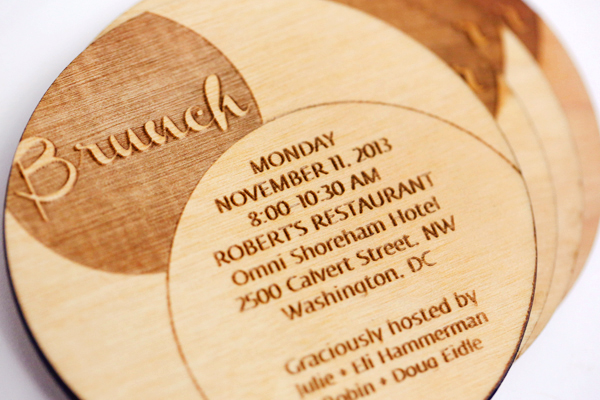
The RSVP card was letterpress printed in green with a simple linked rings design. We laser cut walnut veneer for lining the RSVP envelope. A wooden laser etched coaster invited guests to both the rehearsal dinner and the morning after brunch.

Laser-Cut-Wood-Wedding-Invitations-Fourth-Year-Studio8

Thanks Emily and Dianna!

Design + Letterpress Printing: Fourth Year Studio

Check out the Designer Rolodex for more tal­ented wed­ding invi­ta­tion design­ers and the real invi­ta­tions gallery for more wedding invitation ideas!

Photos Credits: Julie Roberts

DIY Fabric Bar Tool Roll Up Pouch

I find inspiration for DIY projects all over, and this time it came in the form of the cutest little tea towel that I ever laid my eyes on. My little orange and strawberry-adorned find serves as the perfect starting point for keeping bar tools nice and organized: a fabric bar tool roll-up pouch! Make one for yourself, or grab a few of your favorite new or vintage tea towels and make a bunch to give as hostess gifts! –Mandy Pellegrin of Fabric Paper Glue

DIY Tutorial: Fabric Bar Tool Roll Up Pouch via Oh So Beautiful Paper

DIY Tutorial: Fabric Bar Tool Roll Up Pouch via Oh So Beautiful PaperDIY Tutorial: Fabric Bar Tool Roll Up Pouch via Oh So Beautiful Paper

Bar Tool Roll-Up OSBP 4

Supplies and Tools

Tea towel
Marking pencil
Approximately 2′ of ribbon
Thread
Sewing machine

DIY Tutorial: Fabric Bar Tool Roll Up Pouch via Oh So Beautiful Paper

Step One: With the towel oriented vertically, fold the bottom 7″ and the top 5″ towards the center of the back, and press.

DIY Tutorial: Fabric Bar Tool Roll Up Pouch via Oh So Beautiful Paper

Step Two: On the bottom flap, measure and mark out 6 to 7 evenly-spaced vertical lines.

DIY Tutorial: Fabric Bar Tool Roll Up Pouch via Oh So Beautiful Paper

Step Three: Stitch along the edges and marked lines on the bottom flaps to create pockets for the tools.

DIY Tutorial: Fabric Bar Tool Roll Up Pouch via Oh So Beautiful Paper

Step Four: Stitch 1/2″ from the fold of the top flap in order to help keep the tools from falling out of the top of the roll-up.

DIY Tutorial: Fabric Bar Tool Roll Up Pouch via Oh So Beautiful Paper

Step Five: Fold a piece of ribbon approximately 24″ long in half. Stitch the folded edge to the middle of one of the edges of the roll-up.

DIY Tutorial: Fabric Bar Tool Roll Up Pouch via Oh So Beautiful Paper

DIY Tutorial: Fabric Bar Tool Roll Up Pouch via Oh So Beautiful PaperDIY Tutorial: Fabric Bar Tool Roll Up Pouch via Oh So Beautiful Paper

DIY Tutorial: Fabric Bar Tool Roll Up Pouch via Oh So Beautiful Paper

Photo Credits: Mandy Pellegrin for Oh So Beautiful Paper

Party Paper: A Watermelon Party

We all know the pineapple is the fruit of the moment, but here on OSBP it seems the watermelon is trying to snag the spotlight! So today, I’m helping it along on its mission with some fun paper goods for the perfect watermelon party! This would be such a fun theme for a picnic birthday or a summer baby shower. Just add fruit! (Ok, and maybe some ice cream too… we can’t let the watermelon have all the fun!) —Kelly

Watermelon Party Ideas via Oh So Beautiful Paper

No. 1 Watermelon Garland from Paper Source, No. 2 Ice Cream Cups from Sucre Shop, No. 3 Paper Straws from Urbanic, No. 4 Watermelon Party Pics from Naissance, No. 5 Watermelon Tags from Pinwheel Lane, No. 6 Watermelon Napkins from Crate & Barrel

{images via their respective sources}

DIY Color Dipped Picnic Bottles

DIY-Color-Dipped-Bottles-OSBP

These DIY color dipped bottles from last week’s cocktail party picnic are such a fun way to add a dose of color to any party – and the DIY tutorial couldn’t be easier! I chose a few bright summery colors for our little picnic, but you could easily choose just two colors to distinguish cocktails from non-alcoholic drinks or fit in with your own party. I hope you enjoy making these as much as I did!

Summer Cocktail Picnic Party Inspiration by Oh So Beautiful Paper

DIY-Color-Dipped-Bottles-OSBP-7

Supplies and Tools

Glass swing bottles – Ikea has large 34 oz ones, or you can find a smaller 17 oz size here

Craft paint – I chose paints from the Martha Stewart Crafts collection since I liked the colors best (I used metallic rose copper, wild salmon, pool, and pollen) and it works on glass, but feel free to use whatever you have on hand

Paintbrushes

Painter’s tape

Rubbing alcohol (not pictured)

DIY-Color-Dipped-Bottles-OSBP-42

Start by prepping your bottles by quickly wiping them down with rubbing alcohol. Then wrap the painter’s tape around the bottle at a slight angle to get a nice dipped look. Don’t worry if the tape bunches up as you wrap it, but make sure you press down and smooth out the bottom edge to ensure a nice clean line. Squeeze a small amount of paint (you really only need a quarter-size dollop) onto a paint palette or other surface.

DIY-Color-Dipped-Bottles-OSBP-11DIY-Color-Dipped-Bottles-OSBP-15

Apply your first coat of paint. You’ll get the best results by applying several light coats – and I found that each color needed around 3 coats to get to my desired level of opaqueness. You could also do this with spray paint (I’d wrap a plastic bag over the unpainted top of the bottle, under the painter’s tape), but I chose to use craft paint so I’d have more control and ability to avoid drips. Turn bottle over and allow to dry for 1-2 hours, then repeat for coats 2-3.

DIY-Color-Dipped-Bottles-OSBP-16DIY-Color-Dipped-Bottles-OSBP-31

After the desired number of coats, remove the painter’s tape – and voila! If necessary, use the blade of an exacto knife to gently scrape away any errant paint along the dipped line.

DIY-Color-Dipped-Bottles-OSBP-37

DIY-Color-Dipped-Bottles-OSBP-48

DIY-Color-Dipped-Bottles-OSBP-41

Fill with your favorite cocktail or beverage – and enjoy!

DIY-Color-Dipped-Bottles-OSBP-51OSBP-July-4th-Cocktail-Picnic-Inspiration-3

A quick note: I recommend making these bottles about a week ahead to allow time for the paint to cure, otherwise condensation from ice or cold liquids could cause air bubbles to appear beneath the paint or for some of the paint to peel away from the glass. So just plan a head if you think this is something you’d like to use for your own party!

DIY-Color-Dipped-Bottles-OSBP-58

Photo Credits: Nole Garey for Oh So Beautiful Paper

Kate + Cleon’s Romantic Rose Gold Foil Wedding Invitations

Aaaah, rose gold – even in the smallest of doses, this beautiful metallic makes my heart go pitter patter. Combine rose gold foil with stunning calligraphy in a beautiful wedding invitation suite from Samantha and Whitney of Gus & Ruby Letterpress? Absolute perfection!

Romantic-Rose-Gold-Wedding-Invitations-Gus-and-Ruby-Letterpress4

From Samantha and Whitney: This custom suite was designed for a sweet couple who were married by the sea in Blue Hill, Maine. The bride and groom wanted the invitation suite to reflect the romantic, textural, and elegant design that they had in mind for their fête.

Romantic-Rose-Gold-Wedding-Invitations-Gus-and-Ruby-Letterpress2

Romantic-Rose-Gold-Wedding-Invitations-Gus-and-Ruby-Letterpress

Each invitation was triple mounted on a variety of colored stocks in a neutral palette to give a dramatic layering effect and a luxurious weight to the piece. The invitation and insert pieces all featured classic typesetting letterpress printed in a warm grey ink and beautiful custom calligraphy done by Kelle McCarter of Designs Girl foil stamped in a romantic rose gold foil.

Romantic-Rose-Gold-Wedding-Invitations-Gus-and-Ruby-Letterpress3

Romantic-Rose-Gold-Wedding-Invitations-Gus-and-Ruby-Letterpress10

Romantic-Rose-Gold-Wedding-Invitations-Gus-and-Ruby-Letterpress6Romantic-Rose-Gold-Wedding-Invitations-Gus-and-Ruby-Letterpress7

A reply postcard featured a vintage topographical map of the venue location, further highlighting the lovely destination. All pieces were then wrapped in a hand-stitched, textural linen band with a layered, foil-stamped tag and coils of super-fine paper thread.

Romantic-Rose-Gold-Wedding-Invitations-Gus-and-Ruby-Letterpress5

Romantic-Rose-Gold-Wedding-Invitations-Gus-and-Ruby-Letterpress9

A soft-pink cotton envelope liner foil stamped with Kate and Cleon’s names added yet another pop of color and shine. The pieces were lovingly letterpress printed by hand on our antique press on beautiful, textural, super thick 100% cotton paper.

Romantic-Rose-Gold-Wedding-Invitations-Gus-and-Ruby-Letterpress8

Day of pieces included programs printed on double-thick cotton featuring rose-gold foil edging, a welcome bag note showcasing a custom map detailing fun area activities for guests, favor tags, custom koozies, and so much more!

Romantic-Rose-Gold-Wedding-Invitations-Gus-and-Ruby-Letterpress11

Romantic-Rose-Gold-Wedding-Invitations-Gus-and-Ruby-Letterpress12

Romantic-Rose-Gold-Wedding-Invitations-Gus-and-Ruby-Letterpress13

Romantic-Rose-Gold-Wedding-Invitations-Gus-and-Ruby-Letterpress14

Thanks so much Sam and Whit!

Design and Letterpress Printing: Gus & Ruby Letterpress

Calligraphy: Kelle McCarter of Designs Girl

Gus & Ruby Letterpress is a member of the Designer Rolodex – check out more of their beautiful work right here or visit the real invi­ta­tions gallery for more wedding invitation ideas!

Photo Credits: Brea McDonald Photography for Gus & Ruby Letterpress