Perpetually Chic’s Letterpress + Calligraphy Business Stationery

I love love love a beautiful business card – who doesn’t?!? So I was thrilled when Sarah from Studio SloMo sent over the letterpress and foil stamped business cards and custom business stationery that she designed for her friend Lauren of Perpetually Chic. I love the crisp navy and white color palette – and of course the beautiful calligraphy logo by Julie Song Ink!

Blue-White-Calligraphy-Letterpress-Stationery-Studio-SloMo-OSBP3

From Sarah: My good friend Lauren Craig of Perpetually Chic came to me for help in redesigning her blog from logo to stationery to website. She loves all things simple and timeless which comes across well in this paired down set of business stationery. We used a white and navy duplexed paper with letterpress printing on one side and white foil stamp on the other for her business cards. The clean letterpress printed notecard showcases the “Perpetually Chic” logo Julie Song so beautifully hand lettered. Lauren typically uses a metallic gold pen to address the deep navy envelopes.

Blue-White-Calligraphy-Letterpress-Stationery-Studio-SloMo-OSBP

Blue-White-Calligraphy-Letterpress-Stationery-Studio-SloMo-OSBP2

Blue-White-Calligraphy-Letterpress-Stationery-Studio-SloMo-OSBP4

Blue-White-Calligraphy-Letterpress-Stationery-Studio-SloMo-OSBP5

Thanks Sarah!

Logo Design: Julie Song Ink

Stationery Design + Printing: Studio SloMo

Studio SloMo is a member of the Designer Rolodex – you can check out more of Sarah’s beautiful work right here!

Photo Credits: Studio SloMo

DIY Wedding Reception Table Numbers

Summer brings wedding galore, and for us…that means party decor! We’ve been helping clients create gorgeous day of stationery and in the process have come up with some fun and festive table numbers that you can do yourself! We know that by the time couples usually think about reception stationery, they’re usually over their budget and are short on time. Luckily, these table numbers are not costly or time consuming. You could easily knock them out in an afternoon. There are endless options once you have the basics of creating them…so the only limit to the project is your imagination! We’ll show you three different styles to kick start your creativity. To complete your tablescape, we’ll also show you place cards to complement to each design. – Bailey and Emma of Antiquaria

DIY Tutorial: Wedding Reception Table Numbers by Antiquaria for Oh So Beautiful Paper

Up until adding the actual numbers to the cards, the process is exactly the same. We will be making 5.5″ square tented cards (showing the pattern on both sides) and the size works perfectly with a standard 8.5″ x 11″ piece of card stock.

DIY Tutorial: Wedding Reception Table Numbers by Antiquaria for Oh So Beautiful Paper

Step One: Select your paper and cut the cards to size. Cut a rectangle measuring 5.5″ x 11″. If you’re using a standard sheet of paper like we did, that is only one cut (since the length is already 11″).

DIY Tutorial: Wedding Reception Table Numbers by Antiquaria for Oh So Beautiful Paper

Step Two: To make the tented card and have a clean fold, you’ll want to score the paper at the 5.5″ mark on a score board. Repeat steps one and two until you have enough cards to accommodate all of your tables (usually between 8-25 for a standard wedding).

Option One: Painted Script Floral

For the first version that we put together, we used our “Paloma” Blue Floral Card Stock and painted the table numbers (spelled out) in navy blue acrylic paint. The effect is playful and traditional at the same time.

DIY Tutorial: Wedding Reception Table Numbers by Antiquaria for Oh So Beautiful Paper

With a small pointed paint brush, write out the table number in cursive across the middle of the card. Go back over the letters, adding weight to the lines (as shown above). If you need help finding out where the weights should go or what shape to paint the letters, refer to a favorite script font or perhaps your invitation suite! That way, everything will coordinate.

DIY Tutorial: Wedding Reception Table Numbers by Antiquaria for Oh So Beautiful Paper

DIY Tutorial: Wedding Reception Table Numbers by Antiquaria for Oh So Beautiful Paper

Option Two: Modern Neon Geometric

In this interpretation, we’ve put a modern spin on the technique. We used our “Geo” patterned card stock and wrote the number in a simplistic style to create the look. Pops of neon pink painted on help add some punch to the cards.

DIY Tutorial: Wedding Reception Table Numbers by Antiquaria for Oh So Beautiful Paper

First you’ll write the table number in the center using a permanent black marker. Fill in and bulk up the number as needed (shown above).

DIY Tutorial: Wedding Reception Table Numbers by Antiquaria for Oh So Beautiful Paper

Next you’ll add the final touch of neon using hot pink gouache. We painted into different shapes already printed on the paper making sure they all balanced with one another.

DIY Tutorial: Wedding Reception Table Numbers by Antiquaria for Oh So Beautiful Paper

DIY Tutorial: Wedding Reception Table Numbers by Antiquaria for Oh So Beautiful Paper

Option Three: Autumn Garden Floral

For our final interpretation, we used our “Diana” floral card stock to create the perfect garden inspired table decor. The gorgeous rich shades of the pattern mean that this style would just as easily work for fall and winter weddings.

DIY Tutorial: Wedding Reception Table Numbers by Antiquaria for Oh So Beautiful Paper

With a small pointed paint brush, paint the word “TABLE” about 1 inch from the fold with white acrylic paint. Below that, in cursive, paint the word “Number,” trying to center it as much as possible. Finally, you’ll add the numeral centered below. Go back over the number, adding weight to the lines (as shown above). It would be extremely helpful to have these cards planned out on a separate sheet of paper before painting on the lettering. That way, you can know exactly how to center the text, and how large you should make it.

DIY Tutorial: Wedding Reception Table Numbers by Antiquaria for Oh So Beautiful Paper

TableNumberDIY-Diana-Placecard-2

TableNumberDIY-Diana-Final-2

Materials

Patterned Paper

Self Healing Mat

Craft Knife

Metal Ruler

Scoreboard

Acrylic paints

Permanent Marker

Anti­quaria is a mem­ber of the Designer Rolodex – you can see more of their beau­ti­ful work right here!

Photo Credits: Antiquaria for Oh So Beautiful Paper

Modern Tiki Party Cocktail Recipes

It’s Tiki time! Tiki drinks have a pretty bad reputation, probably because there’s no other category of modern drinks that has been more abused and more misunderstood. Chances are, if you’ve encountered a Tiki drinks, it’s been a brightly colored, syrupy mess. But it doesn’t have to be this way! Tiki drinks can be silly and fruity and kitschy and escapist, but still good. All that takes are a few things: fresh ingredients, balanced complex spices, and fun. â€“ Andrew

Modern-Tiki-Cocktail-Party-Recipes-OSBP-StGermain

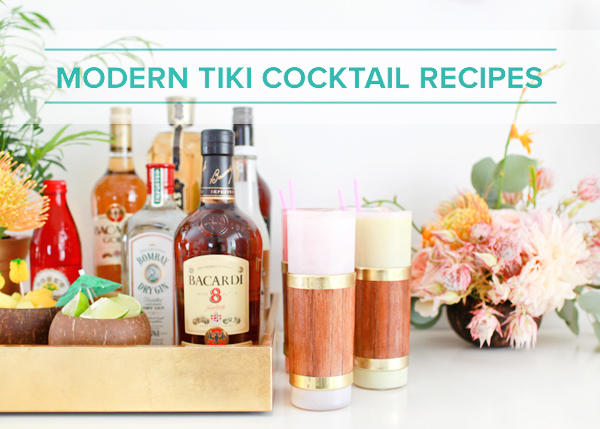
Tiki had its start in the 1930s. A couple of entrepreneurs – Ernest “Don the Beachcomber” Gantt and Victor “Trader Vic” Bergeron – started restaurants meant to evoke the exotic South Pacific. They combined a fantasy version of Pacific Islands culture with cocktails, mostly Caribbean-inspired, that became the foundation of Tiki culture. They offered escapism to a country emerging from decades of sacrifice, after the Great Depression and the Second World War. These are drinks with ridiculous names: the Zombie and the Scorpion and the Navy Grog. They are often, but not exclusively, full of rum. They should be sweet and fruity without being cloying. They should have layers of complex spicy flavors. They should be full of freshness – fresh fruits and fresh juices and homemade syrups, not artificially colored, factory made ingredients. They’re supposed to be fun and completely self-aware.
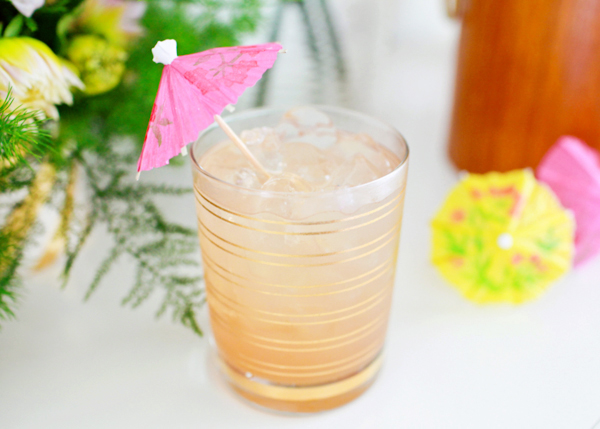
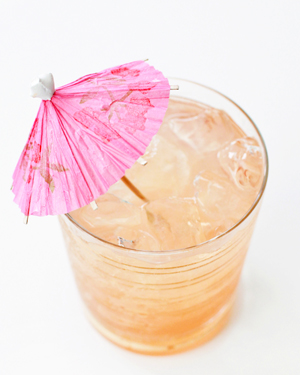
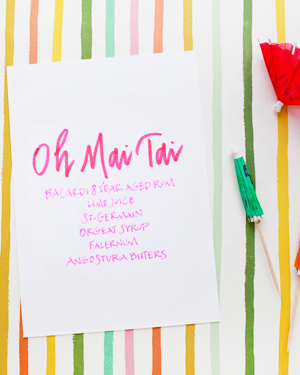
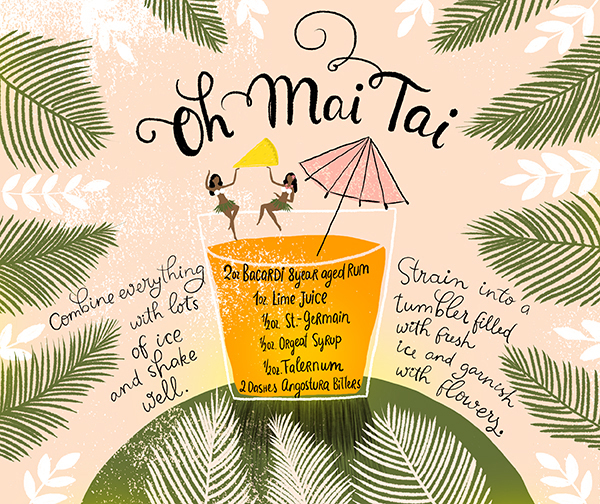
Modern-Tiki-Cocktail-Party-Inspiration-OSBP-Bacardi-StGermain-Mai-Tai3

Modern-Tiki-Cocktail-Party-Inspiration-OSBP-Bacardi-StGermain-Mai-Tai7Tiki-Cocktail-Party-Menu-Cards-OSBP-Meant-to-Be-Calligraphy-28

Oh My Tai

2 oz Bacardi 8 Year Aged Rum
1 oz Lime Juice
1/2 oz St-Germain
1/2 oz Orgeat Syrup
1/2 oz Falernum
2 Dashes Angostura Bitters

Combine everything with lots of ice and shake well. Strain into a tumbler filled with fresh ice.

Mai Tai Cocktail Recipe Card Illustration by Dinara Mirtalipova for Oh So Beautiful Paper

All illustrations by Dinara Mirtalipova for Oh So Beautiful Paper

The Mai Tai is the queen of Tiki drinks, a intensely flavorful rum sour with tons of spicy flavor. Both Don the Beachcomber and Trader Vic claimed to have invented the Mai Tai and there are about a million different versions of the recipe out there – and you know what? It doesn’t really matter. As long as you throw together some rum, some lime, and some orgeat – that ancient Middle Eastern almond almond syrup that should have no business in a Polynesian-themed drink but is amazing there anyway – you can mess around with other ingredients and still end up with an awesome drink. We added St-Germain to ours for some fruity, floral notes and falernum, a syrup made from rum, lime, and spices like cloves, vanilla, allspice, maybe ginger and almonds. It’s sweet and tart and full of flavor and delicious.
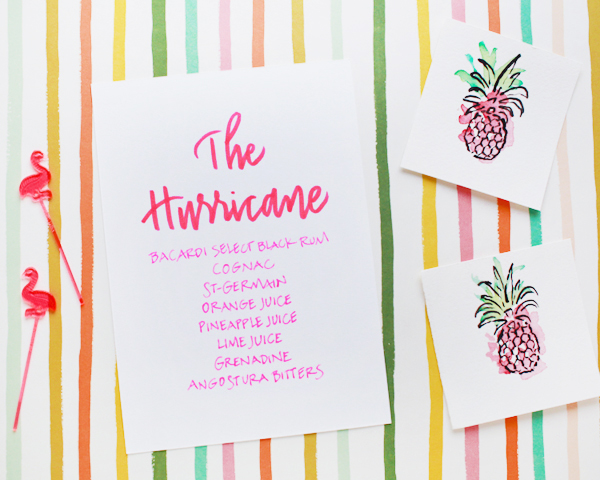
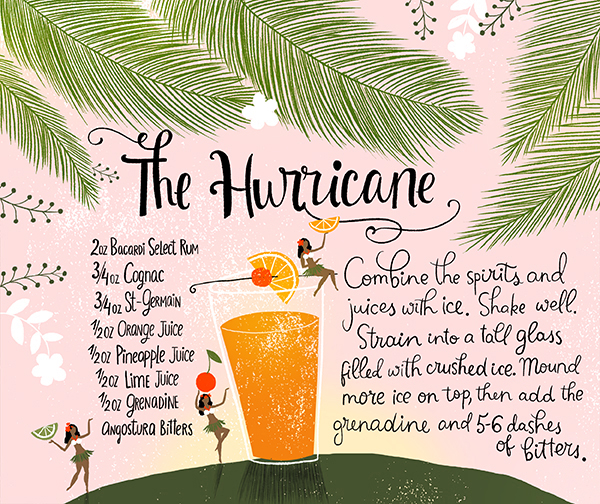
*   *   *   *  *

Modern-Tiki-Cocktail-Party-Inspiration-OSBP-Bacardi-StGermain-The-Hurricane

Tiki-Cocktail-Party-Menu-Cards-OSBP-Meant-to-Be-Calligraphy-12

The Hurricane

2 oz Bacardi Select Black Rum
3/4 oz Cognac
3/4 oz St-Germain
1/2 oz Orange Juice
1/2 oz Pineapple Juice
1/2 oz Lime Juice
1/2 oz Grenadine
Angostura Bitters

Combine the spirits and juices with ice and shake well. Strain into a tall glass filled with crushed ice. Mound more ice on top, then add the grenadine and 5-6 dashes of bitters.

The Hurricane Cocktail Recipe Card Illustration by Dinara Mirtalipova for Oh So Beautiful Paper

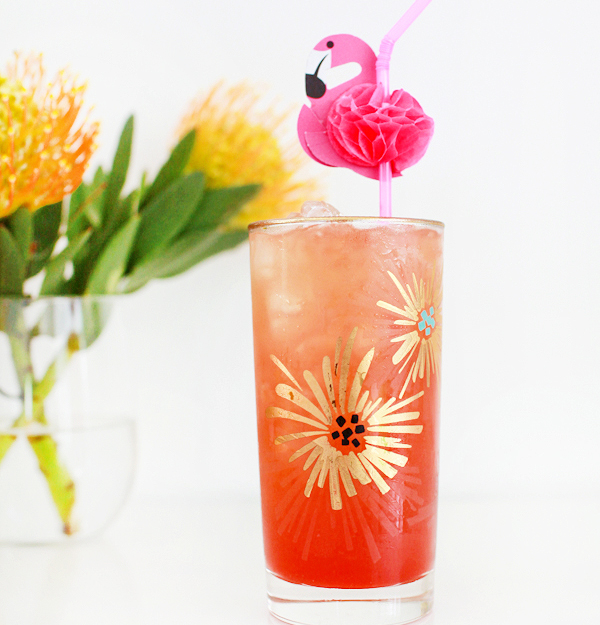
This is our spin on the classic Hurricane, a Tiki drink invented in New Orleans in the 1940s that takes its name from the hurricane lamp-shaped glass they were first served in. We use a big bold dark rum as a foundation for all those other flavors but mellow it out a bit with the Cognac. St-Germain’s fruitiness, reminiscent of lychee fruit, takes the place of the original’s passion fruit syrup. I love saving the grenadine and bitters for last, because drizzling them on top will produce fun streaks of bright red that eventually turn the drink a pale red – like watching a tropical sunset. The Hurricane is a big bold Tiki drink full of tons of flavor and a hint of bite. Wonderful.
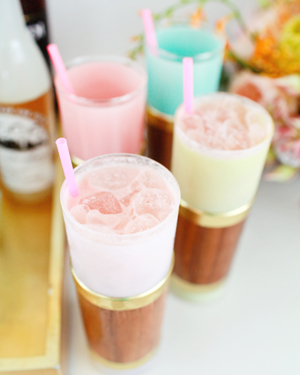
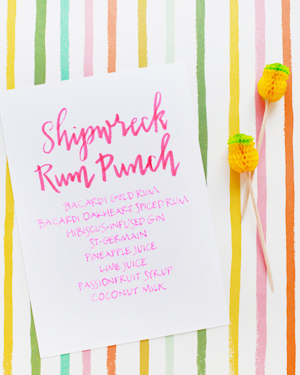
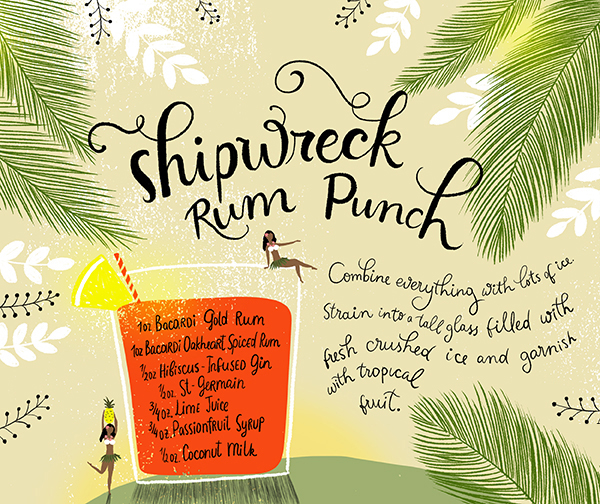
*   *   *   *   *

Modern-Tiki-Cocktail-Party-Inspiration-OSBP-Bacardi-StGermain-Shipwreck-Rum-Punch5Tiki-Cocktail-Party-Menu-Cards-OSBP-Meant-to-Be-Calligraphy-6

Modern-Tiki-Cocktail-Party-Inspiration-OSBP-Bacardi-StGermain-Shipwreck-Rum-Punch

Shipwreck Punch

1 oz Bacardi Gold Rum
1 oz Bacardi Oakheart Spiced Rum
1/2 oz Hibiscus-Infused Gin
1/2 oz St-Germain
3/4 oz Pineapple Juice
3/4 oz Lime Juice
3/4 oz Passion Fruit Syrup
1/2 oz Coconut Milk

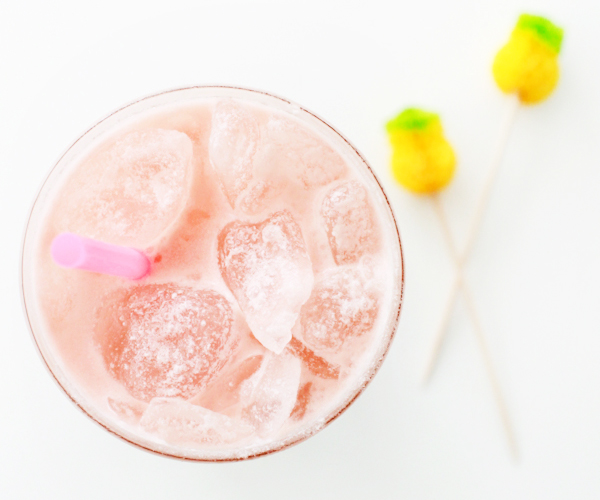
Combine everything with lots of ice and shake well. Strain into a tall glass filled with fresh crushed ice and garnish with tropical fruit.

Rum Punch Cocktail Recipe Card Illustration by Dinara Mirtalipova for Oh So Beautiful Paper

Ok, there’s clearly a lot going on in this drink – two kinds of rum and some hibiscus gin just to start, demonstrating Tiki’s layers of flavor but also showing that Tiki doesn’t just have to mean rum. Two kinds of citrus juice balanced by St-Germain’s fruity, flowery sweetness, and the rich, creamy coconut, and that passion fruit syrup – sweet and tart, with hints of mango and lots of tropical flavor. (To make our passion fruit syrup, we dissolved equal parts sugar and passion fruit juice over low heat.) This drink started out as something of a spin on the Piña Colada, mixing rum with coconut and pineapple, but quickly spiraled into something very different. It’s sweet and creamy without being cloying, thanks to a deep spiciness. Plus, it’s pink! Which is a bit ridiculous but still fun and friendly.

And that’s what Tiki should be. There’s no formula, no rule set for Tiki recipes. But if you can put together some fresh ingredients with lots of flavor, in rich layers, that’s still fun and friendly, that evokes some tropical beach and helps you escape for a few moments – then you’ve nailed it.

All illustrations by Dinara Mirtalipova for Oh So Beautiful Paper

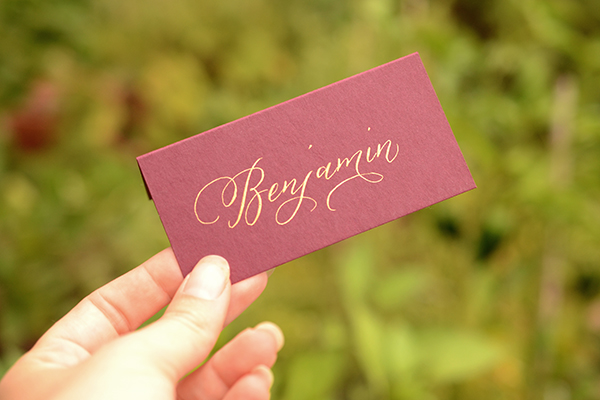
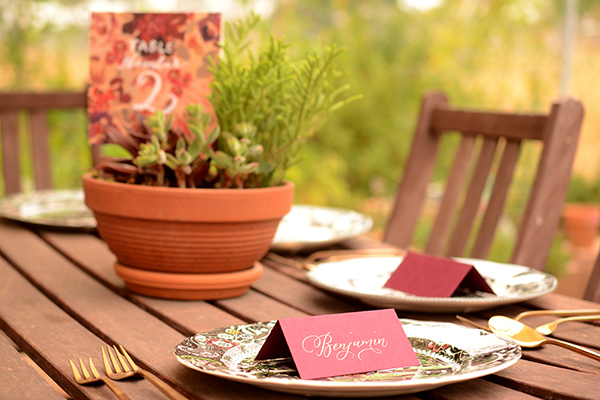
Calligraphy Cocktail Menu Cards: Meant to Be Calligraphy

Photo Credits: Nole Garey for Oh So Beautiful Paper

This post is brought to you in collaboration with Bacardi and St-Germain. All content, photos, recipes, and words are our own. Thank you for supporting the sponsors that help make Oh So Beautiful Paper possible!

Urbanic Faves | Live in the Sunshine

Fire up the barbecues, dip your toes in the water, and find a hammock to nap in, it’s Summertime! We’re embracing the salt air over here at Urbanic and  have gathered up some of our favorite things from around the shop that capture the spirit of sunshine. Hoping that wherever you are, you’re wearing flip flops! xo – Audrey

Urbanic Summertime Faves for Oh So Beautiful Paper

 1. Linda and Harriet notepads; 2. Fringe Studio soap dish set; 3. Salty Road salt water taffy; 4. Cardtorial wood cards; 5. Baggu coin purses; 6. Linnea’s Lights ocean candle; 7 Joanne Dugan summertime book 8. Fugu Fugu Press love card ; 9. Fringe Studio notebook; 10. Paddywax lantern candle; 11. Rifle Paper Co. phone case; 12. Orange Circle message in a bottle kit ; 13.Paddywax candle; 14. Sugar Paper anchor wrap

{images via their respective sources}

How to Create Unique Personal Stationery with Rubber Stamps

Wedding season is officially here and events of all kinds are in full swing. And with that… of course comes thank you notes! We’ve been designing lots of personal stationery as thank you notes for our clients recently so we put together some DIY versions to show how fun it can be to craft your own personal stationery. We used the same monogram rubber stamp for all three designs and the results couldn’t be more different! – Bailey and Emma of Antiquaria

DIY Tutorial: Rubber Stamp Personal Stationery by Antiquaria via Oh So Beautiful Paper

It’s always good to have some monogrammed stationery on hand for when a last minute occasion arrises. Make a bunch at one time and store them in a pretty box with pens and postage. Monogrammed stationery also makes for a really great handmade gift!

DIY Tutorial: How to Create Unique Personal Stationery with Rubber Stamps by Antiquaria for Oh So Beautiful Paper

 Option One: Blue and white is such a classic color combination. We put a painterly spin on it with this gorgeous watercolor card. Adding white embossing on top of the paint really elevates the design and makes the monogram pop off of the card, literally!

DIY Tutorial: How to Create Unique Personal Stationery with Rubber Stamps by Antiquaria for Oh So Beautiful Paper

Step One: On the front of the card, in the center, paint a loose oval with indigo colored watercolor paint. Add multiple layers so that parts of the circle are darker than others. After the circle is complete, splash a little extra paint around the circle for a splattered effect. To do this we simply flicked the tip of the brush with our fingertip over the card. Set aside to dry completely.

DIY Tutorial: How to Create Unique Personal Stationery with Rubber Stamps by Antiquaria for Oh So Beautiful Paper

Step Two: Stamp your monogram in the center of the watercolor oval using a white ink pad. Quickly sprinkle embossing powder over the stamped image. Shift it around until the monogram is completely covered with powder. Tip the excess off onto a scrap piece of paper.

DIY Tutorial: How to Create Unique Personal Stationery with Rubber Stamps by Antiquaria for Oh So Beautiful Paper

Step Three: Using a embossing heat tool, melt the powder. You can watch our video tutorial of the process here.

DIY Tutorial: How to Create Unique Personal Stationery with Rubber Stamps by Antiquaria for Oh So Beautiful Paper

DIY Tutorial: How to Create Unique Personal Stationery with Rubber Stamps by Antiquaria for Oh So Beautiful Paper

Option Two: Wreaths have been a popular design element in stationery for a while now. We just can’t get enough of them – especially when they’re hand painted in shades of green!

DIY Tutorial: How to Create Unique Personal Stationery with Rubber Stamps by Antiquaria for Oh So Beautiful Paper

Step One: After stamping your monogram in the center of the front of your card, paint a little vine circle around it, leaving the bottom open (as shown above). Don’t try to make the oval perfect, a meandering vine will be more natural once the leaves are painted around it!

DIY Tutorial: How to Create Unique Personal Stationery with Rubber Stamps by Antiquaria for Oh So Beautiful Paper

Step Two: Add your leaves to the oval. The technique is simple: just load your brush with watercolor paint, lay it down flat, and then pick it up, dragging up to the point as you lift it off. This will give you the shape of the leaf with very little effort! Practice first before starting on the final cards until you get it down. Varying the size and color of the leaves will help give a more natural look to the card. Paint the leaves starting at the bottom and finishing at the top. Where they meet, leave a little space and paint a small dot in the top center to finish it off.

DIY Tutorial: How to Create Unique Personal Stationery with Rubber Stamps by Antiquaria for Oh So Beautiful Paper

Step Three: We also added little leaf adornments to each corner, using the same technique to finish off the card design.

DIY Tutorial: How to Create Unique Personal Stationery with Rubber Stamps by Antiquaria for Oh So Beautiful Paper

Option Three: This stunning, black and white design is both modern and whimsical at the same time. Plus, you don’t even have to pull out the paint for this one!

DIY Tutorial: How to Create Unique Personal Stationery with Rubber Stamps by Antiquaria for Oh So Beautiful Paper

Step One: Stamp your monogram in the front center of the card in black ink. Set it aside to dry.

DIY Tutorial: How to Create Unique Personal Stationery with Rubber Stamps by Antiquaria for Oh So Beautiful Paper

Step Two: Find a circle on your template that is â…›” to ¼” larger than the design, and trace it using a black felt tipped pen.

DIY Tutorial: How to Create Unique Personal Stationery with Rubber Stamps by Antiquaria for Oh So Beautiful Paper

Step Three: With a brush pen, add little black polka dots around the circle – but make sure not to put any inside. We didn’t make the size or pattern of the dots even for this design, so it has a lovely organic irregularity… plus it’s easier to do!

DIY Tutorial: How to Create Unique Personal Stationery with Rubber Stamps by Antiquaria for Oh So Beautiful PaperP-Stationery-final2

Step Four: Add little bitty dots around your polka dots to fill in the white spaces of your design by touching only the very tip of the pen to the paper.

DIY Tutorial: How to Create Unique Personal Stationery with Rubber Stamps by Antiquaria for Oh So Beautiful Paper

Materials

Antique Monogram Stamp

A2 Folded Card, preferably made of Watercolor Paper (90lb hot press). We cut an art sheet down into rectangles (5.5″ x 8.5″) and scored them down the middle to make our own cards.

Envelope liner templates

Double Sided Tape or Stick Glue (to adhere liners into envelopes)

Option One:

Watercolor Paint

Paint Brushes

Frost White Stamp Pad

White Embossing Powder

Envelope Liner Watercolor Stripe Ocean Text Patterned Paper

A2 Envelope in night

Option Two:

Watercolor Paint

Paint Brushes

Stamp Pad in Olive

Envelope Liner Natalia Floral Text Patterned Paper

A2 Envelope in Sage

Option Three:

Circle Stencil Template

Black Brush Pen

Black Felt Tip Pen

Stamp Pad in Black

Envelope Liner Brushed Floral No.1  Text Patterned paper

A2 Envelope in Black

Photography by Antiquaria for Oh So Beautiful Paper