NYNOW Winter 2015, Part 4

I’m back with more highlights from the NYNOW winter 2015 market! This time we’re touring a section of the show called Accent on Design, which for me was all about texture and color, from wood to ceramics and textiles. The metal pieces – particularly all the brass and copper on display – really stole my heart at the show, so let’s start there!

NYNOW Winter 2015 Highlights from Accent on Design by Oh So Beautiful Paper

1. The most beautiful copper flasks (!!) and wood candlesticks from Surname Goods

2. A stunning ceramic French press and geometric brass stands from Yield Design Co.

3. Copper hair ties to elevate an everyday ponytail from Caravan Pacific

4. Beautiful brass candlesticks from Avandi Studio

5. + 6. Brass coasters two ways! Gorgeously minimalist from Fruit Super and clean and modern from Kiel Mead

For more from NYNOW – just search #OSBPatNYNOW on Instagram!

DIY Tutorial: Balloon Engagement Cocktail Party Invitation

It’s clear by the details that go into wedding and event invitations that the goal is to get guests excited for what’s to come. And I can’t think of anything that will get them more excited than receiving a small gift with – or even within – the invitation. This DIY balloon party invitation is a gift in and of itself as a mini cocktail kit. I love this idea for an engagement cocktail party! – Lauren

DIY Tutorial: Balloon Party Invitation and Mini Cocktail Kit by A Fabulous Fete for Oh So Beautiful Paper

cocktail-party-balloon-invite-1

Supplies

Clear plastic cocktail shaker

Small cocktail glass

Mini bottle of your favorite liquor (I used Hendricks)

Fresh herbs that will mix well with the liquor (I chose thyme to go with the gin)

Balloon

Cocktail stirrer

Permanent Pen (I used a gold Sharpie)

DIY Tutorial: Balloon Party Invitation and Mini Cocktail Kit by A Fabulous Fete for Oh So Beautiful Paper

Step 1. Start by designing the main part of the package, the invitation! Blow up the balloon and secure (temporarily), I used a clothespin.

DIY Tutorial: Balloon Party Invitation and Mini Cocktail Kit by A Fabulous Fete for Oh So Beautiful Paper

Step 2. Letter your invitation text straight onto the balloon with your permanent pen and let dry.

DIY Tutorial: Balloon Party Invitation and Mini Cocktail Kit by A Fabulous Fete for Oh So Beautiful Paper

Step 3. Once they have dried, deflate the balloons.

DIY Tutorial: Balloon Party Invitation and Mini Cocktail Kit by A Fabulous Fete for Oh So Beautiful Paper

Step 4. Pack all of the pieces inside of the clear cocktail shaker. You can even write the directions for making your cocktail on the outside of the shaker.

DIY Tutorial: Balloon Party Invitation and Mini Cocktail Kit by A Fabulous Fete for Oh So Beautiful Paper

Step 5. Deliver and let your guests enjoy!

DIY Tutorial: Balloon Party Invitation and Mini Cocktail Kit by A Fabulous Fete for Oh So Beautiful Paper

What ingredients would you include in a pre-party cocktail kit?

Photo Credits: A Fabulous Fete for Oh So Beautiful Paper

Jessica + Chris’s Navy and Hot Pink Lace-Inspired Wedding Invitations

Navy and hot pink is such a classic color combination – especially when paired with beautiful lace-inspired details! Jackie from Sincerely, Jackie sent over this elegant invitation suite with modern hot pink edge painting and blind impression lace patterns. So pretty!

Navy-Hot-Pink-Blind-Impression-Lace-Wedding-Invitations-Sincerely-Jackie-OSBP

From Jackie: I absolutely love when couples come to me looking for classic, elegant designs with a fun, individual twist. Jessica and Chris wanted their invitations to exude simplicity at first glance, but a bit of fun and whimsy when you look a bit closer. The entire suite is letterpress printed on 220lb double thick bright white Crane’s Lettra cotton paper and feature classic navy blue ink, blind (no ink) lace impressions, and then accented with a perfectly playful pop of hot pink edging. The blind lace impression is my personal favorite detail, which gives a sweet nod to Jessica’s all-lace gown.

Navy-Hot-Pink-Blind-Impression-Lace-Wedding-Invitations-Sincerely-Jackie-OSBP7

Navy-Hot-Pink-Blind-Impression-Lace-Wedding-Invitations-Sincerely-Jackie-OSBP2

Navy-Hot-Pink-Blind-Impression-Lace-Wedding-Invitations-Sincerely-Jackie-OSBP8

Jess and Chris really wanted their guests to be a part of the invitation experience, so we came up with a unique and fun way for guests to reply. A mad-lib style reply card, allowing the guests to get creative in their responses – guests even got to tell the DJ what to play, or not to play! The reply cards were printed in a slightly larger size, giving plenty of room for guests to fill in the blanks.

Navy-Hot-Pink-Blind-Impression-Lace-Wedding-Invitations-Sincerely-Jackie-OSBP9

Navy-Hot-Pink-Blind-Impression-Lace-Wedding-Invitations-Sincerely-Jackie-OSBP10

The suite was finished off with an information card pointing guests to the wedding website, and a simple monogram tag and navy blue ribbon tying it all together. The pink edging is such a fun detail when the items are assembled!

Navy-Hot-Pink-Blind-Impression-Lace-Wedding-Invitations-Sincerely-Jackie-OSBP6

Navy-Hot-Pink-Blind-Impression-Lace-Wedding-Invitations-Sincerely-Jackie-OSBP4

Thanks Jackie!

Check out the Designer Rolodex for more tal­ented wed­ding invi­ta­tion design­ers and the real invi­ta­tions gallery for more wedding invitation ideas!

Photo Credits: Sincerely, Jackie

DIY Tutorial: Post-it Brand World of Color Collections Cocktail Party Menu

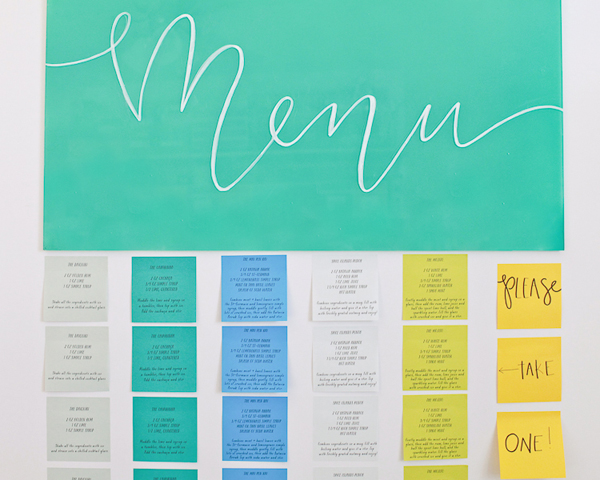
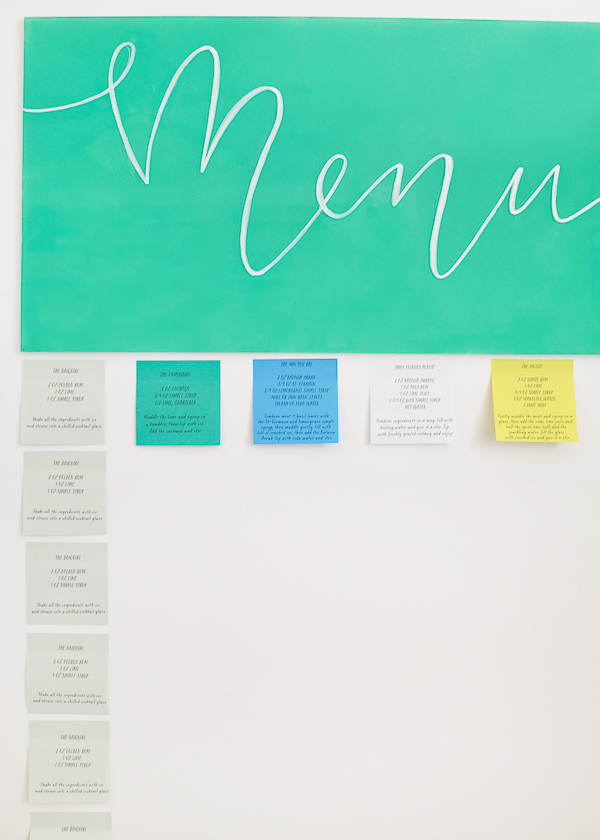
Last week I shared a fun idea that I put together using the new Post-it Brand World of Color collections â€“ a cocktail party menu! I love the pop of color this menu brings to any party, and it’s so easy to create using Post-it® Notes from the new World of Color collections. I’m back to share the full instructions for this project so you can create your own for your next gathering!
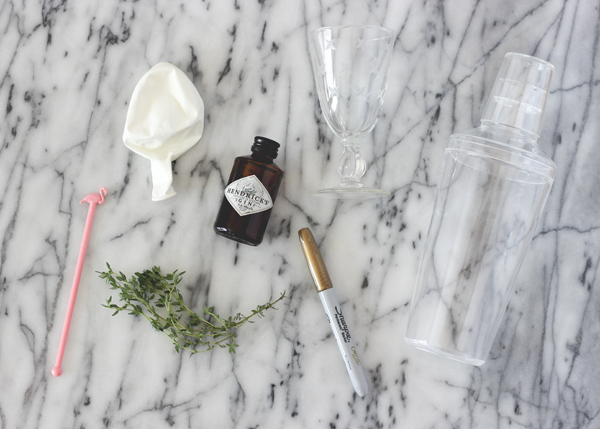
Post-it-Cocktail-Party-Menu-OSBP-33

Materials

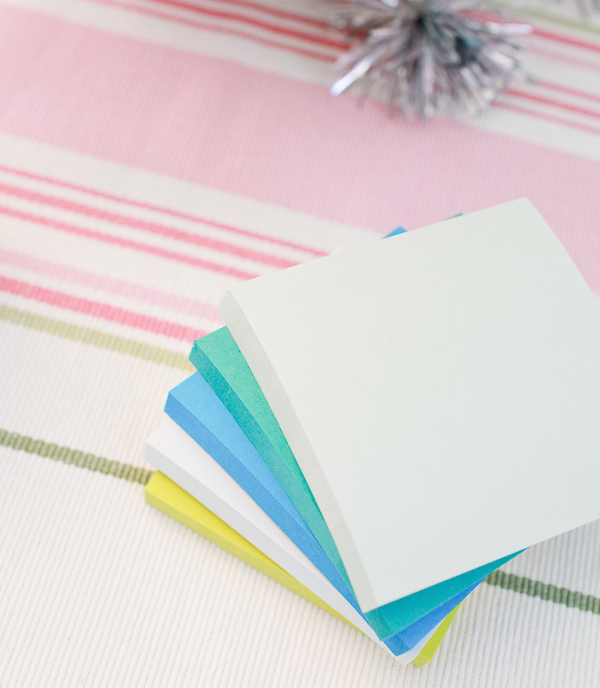
Post-it Brand A World of Color Notes 3″ x 3″ (I used the Bora Bora collection)

Black Pen

Black markers of varying thicknesses

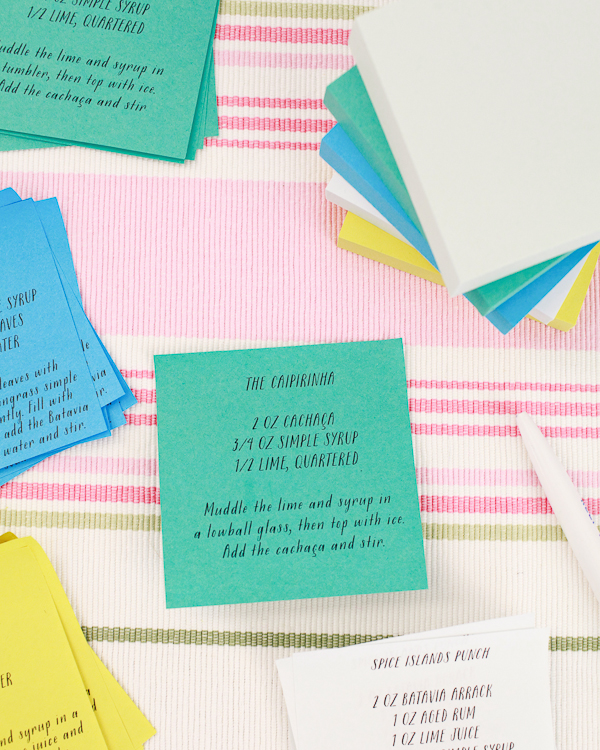
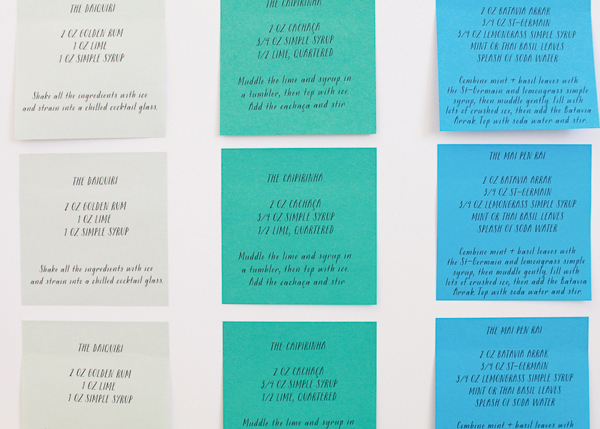
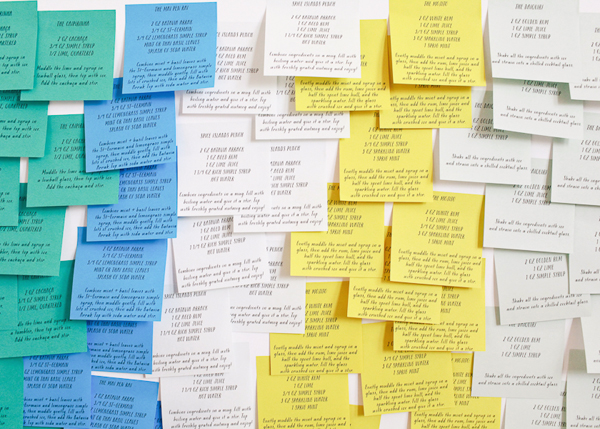
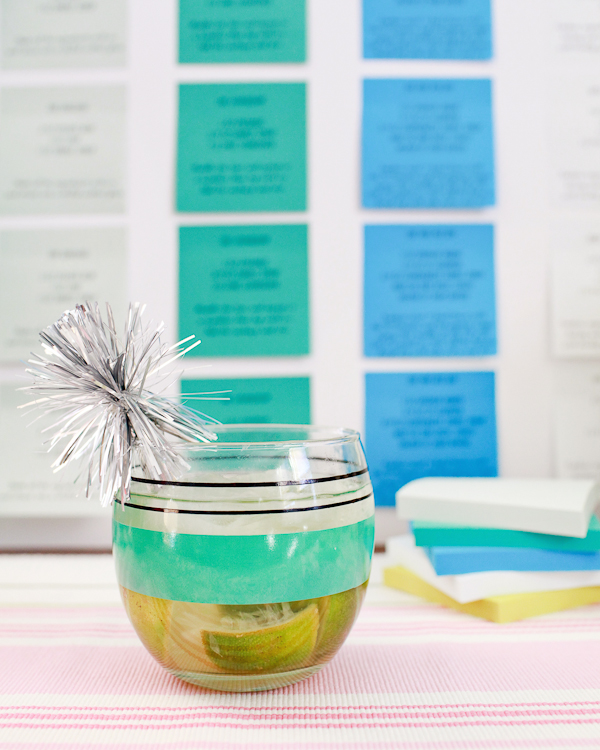
Step 1: Assign each cocktail a note color from the chosen collection. The Bora Bora collection comes in five colors of tropical blues and greens, so we used five cocktail recipes: The Caipirinha, The Mai Pen Rai, Spice Islands Punch, The Mojito, and The Daiquiri.

Post-it-Cocktail-Party-Menu-OSBP-17

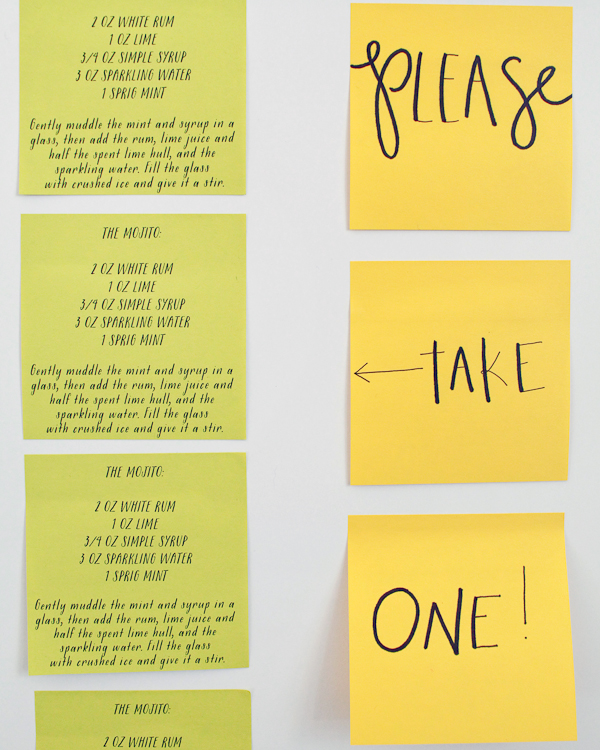
Step 2: Write out the recipe of each cocktail on the corresponding Post-it® Note, starting with the ingredients and followed by the instructions. A fine ball point or roller ball pen will work best for smaller text. If needed, draw very light pencil lines on each Post-it® Note with a ruler to help guide and center your text – then erase the pencil lines once your ink is fully dry. You’ll want to create at least one Post-it® Note of each cocktail for every guest at the party. If you’re worried that your guests won’t be able to read your handwriting, try writing in all caps – that’s my go-to method when I need to be sure that someone can read my writing. Don’t forget the title of the drink so your friends know how to recreate it at home later!

Post-it-Cocktail-Party-Menu-OSBP-101

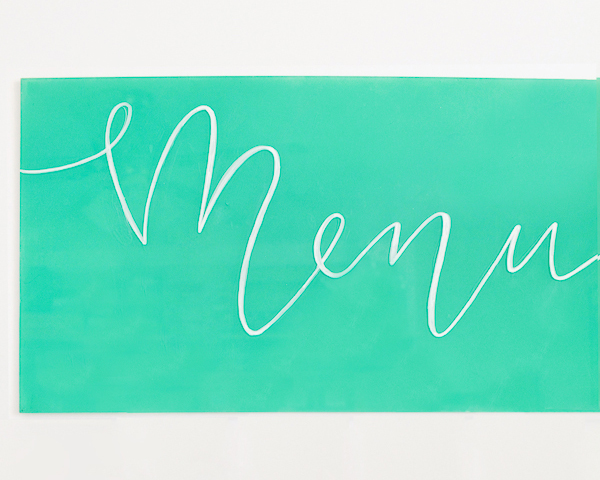
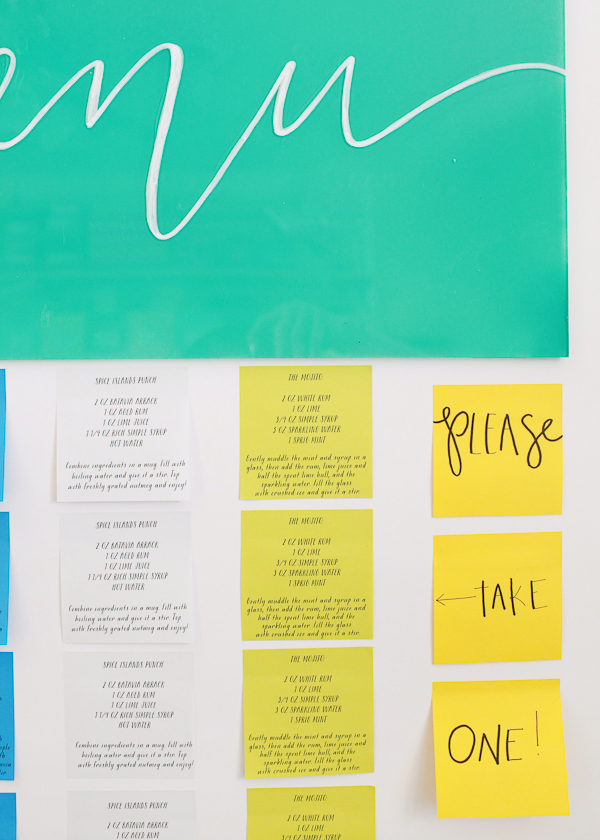
Step 3: I used this DIY tutorial to create the acrylic menu sign in a vibrant teal – it’s so easy and one of my favorite tutorials that we’ve ever done on Oh So Beautiful Paper.

Post-it-Cocktail-Party-Menu-OSBP-110

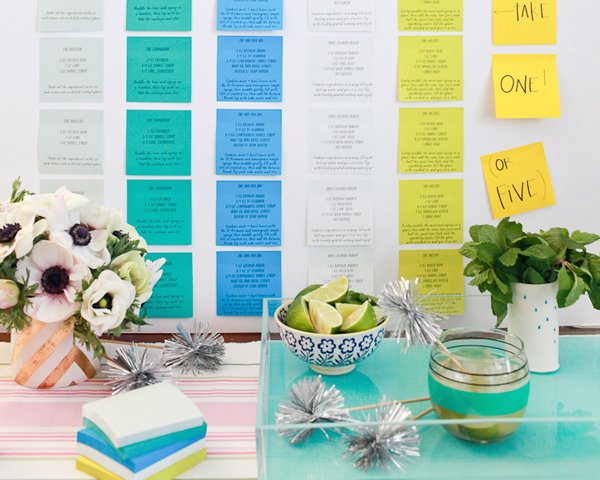
Step 4: Begin laying out your cocktail Post-it® Notes! I found it easiest to place the top row of notes first using a ruler. I lined the first Post-it® Note up with the left edge of my menu sign, then placed each note roughly 1 1/4″ apart for nice neat rows.

Post-it-Brand-Cocktail-Party-Menu-Repeat

Step 5: Continue each row of cocktail Post-it® Notes down the wall. The amount of space between each note will be determined by the number of guests at your party, so you can space them out or layer them according to your needs. Don’t worry about being totally perfect with the alignment or spacing on the way down, it’s meant to look fun and playful – not fussy.

Post-it-Cocktail-Party-Menu-OSBP-104

Post-it-Cocktail-Party-Menu-OSBP-44

Post-it-Cocktail-Party-Menu-OSBP-95

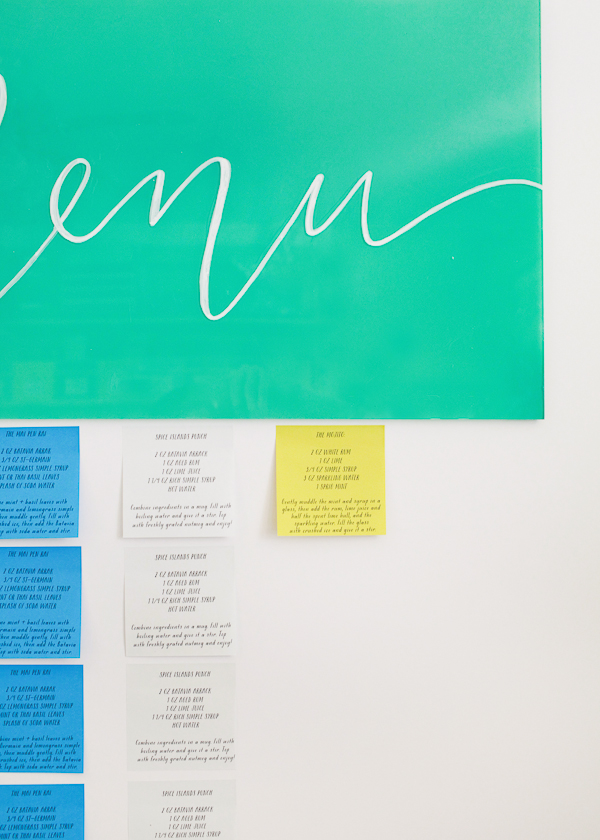
Optional: If you’re going for the layered look with lots of Post-it® Notes for a larger gathering, start from the bottom and work your way to the top, staggering the notes as you go. I placed my Post-it® Notes in columns of roughly two notes per color, with plenty of overlap along the way. The Post-it Brand A World of Color collections includes an array of bright and beautiful tones, so you can easily use more colors for larger gatherings!

Post-it-Brand-Cocktail-Party-Menu-OSBP-198

Post-it-Brand-Cocktail-Party-Menu-OSBP-196

Step 6: Create the “please take one” notes. Write one word per Post-it® Note in large script or capital letters using black markers. I used a bright yellow 3″ x 3″ Post-it® Note from the New York City collection. For a whimsical hand lettered look, use markers with different thicknesses for different portions of the lettering. I used a thin marker to write out each word, then went over some sections with a thicker marker for contrast. You can also try mixing script letters, lowercase letters, and capital letters! Place the Post-it® Notes on the wall, with the right edge of your top note aligned with the right edge of the cocktail menu sign.

Post-it-Cocktail-Party-Menu-OSBP-55

Post-it-Cocktail-Party-Menu-OSBP-21

Step 7: Style your bar and enjoy the party!

Post-it-Brand-Cocktail-Party-Menu-OSBP-170

Post-it-Cocktail-Party-Menu-OSBP-75

How will you use the Post-it Brand World of Color collections?

Photo Credits: Nole Garey for Oh So Beautiful Paper

This post is sponsored by Post-it Brand. Thank you for supporting the sponsors that help make Oh So Beautiful Paper possible!

Alice’s Hand Painted Rose Gold Foil Birth Announcements

Happy Monday everyone! My family welcomed our second little girl back in September – and today I’m excited to share her birth announcements! I was delighted to work with the amazing Jenna of Mon Voir and Bella Figura to bring my daughter Alice’s announcements to life. I couldn’t be more thrilled with the way they turned out!

Hand-Painted-Rose-Gold-Foil-Birth-Announcements-Mon-Voir-Calligraphy-Bella-Figura-OSBP-200

Since Alice is most likely our last baby, I wanted to do something really special for her announcements. I’ve been drawn to the combination of calligraphy and abstract painting for a while now. I came across a couple of painted pieces by Jenna on Instagram and thought she’d be the perfect fit for what I had in mind. I wanted Alice’s announcements to feel colorful and modern and just a little bit romantic.

Hand-Painted-Rose-Gold-Foil-Birth-Announcements-Mon-Voir-Calligraphy-Bella-Figura-OSBP-182

Hand-Painted-Rose-Gold-Foil-Birth-Announcements-Mon-Voir-Calligraphy-Bella-Figura-OSBP-98

We started with the text, which combined Jenna’s calligraphy with a classic serif font. For the wording, I really wanted the announcement to be Sophie introducing her new baby sister – so that’s exactly what we did! We sent the text over to Bella Figura and they printed the announcement on their gorgeous new smooth cotton paper in rose gold shine foil with vibrant pink edge painting.

Hand-Painted-Rose-Gold-Foil-Birth-Announcements-Mon-Voir-Calligraphy-Bella-Figura-OSBP-137

Hand-Painted-Rose-Gold-Foil-Birth-Announcements-Mon-Voir-Calligraphy-Bella-Figura-OSBP-139

Hand-Painted-Rose-Gold-Foil-Birth-Announcements-Mon-Voir-Calligraphy-Bella-Figura-OSBP-147

Jenna then hand painted each individual announcement using a color palette of pink, peach, yellow, and blue. Jenna and I came up with a general concept of how we wanted the announcements to look, but she made each one completely unique with different color combinations and brush patterns.

Hand-Painted-Rose-Gold-Foil-Birth-Announcements-Mon-Voir-Calligraphy-Bella-Figura-OSBP-132

Hand-Painted-Rose-Gold-Foil-Birth-Announcements-Mon-Voir-Calligraphy-Bella-Figura-OSBP-166

Hand-Painted-Rose-Gold-Foil-Birth-Announcements-Mon-Voir-Calligraphy-Bella-Figura-OSBP-161

Hand-Painted-Rose-Gold-Foil-Birth-Announcements-Mon-Voir-Calligraphy-Bella-Figura-OSBP-174

We included a cute photo of Alice taken by the ladies of Sweet Root Village and tied both pieces together with Angela Liguori’s gold metallic line cotton ribbon.

Hand-Painted-Rose-Gold-Foil-Birth-Announcements-Mon-Voir-Calligraphy-Bella-Figura-OSBP-185

For the envelopes, we went with a classic kraft paper and one of Bella Figura‘s stunning new foil-printed envelope liners (also in rose gold shine foil). I had originally considered doing a graphic pattern like polka dots or stripes to contrast against the painterly elements, but the minute I saw that floral pattern I knew it was the perfect fit. Jenna addressed the envelopes in white ink in her signature calligraphy style.

Hand-Painted-Rose-Gold-Foil-Birth-Announcements-Mon-Voir-Calligraphy-Bella-Figura-OSBP-118

Hand-Painted-Rose-Gold-Foil-Birth-Announcements-Mon-Voir-Calligraphy-Bella-Figura-OSBP-115

I hope you love Alice’s announcements as much as I do!

Calligraphy and Hand Painting: Jenna Rainey of Mon Voir

Printing, Edge Painting and Envelope Liners: Bella Figura

Metallic Cotton Ribbon: Angela Liguori

Photo Credits: Nole Garey for Oh So Beautiful Paper / Alice’s newborn photo by Sweet Root Village