Happy Weekend!

Happy Friday everyone! I’ve had a busy week behind the scenes both personally and professionally. My dad came to visit and helped us check a lot of things off our pre-baby to do list (yay!), and spent a lot of quality time with Sophie. She’s finally at the stage where she can remember and recognize relatives that she doesn’t see too often, and my heart pretty much burst every time she greeted my dad by exclaiming “Grandpa!” in her tiny little voice. We’ve also been busy preparing for the next installment in our summer cocktail series – coming next week! But in the meantime…

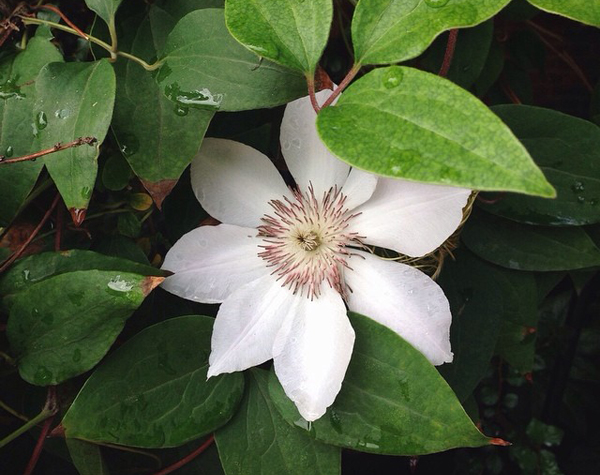
OSBP-Clematis-Flower-Instagram

Photo by me via Instagram

…a few links for your weekend:

This week on Oh So Beautiful Paper:

Check back soon for this week’s cocktail! I hope you all have a wonderful weekend, and I’ll see you back here next week! xoxo

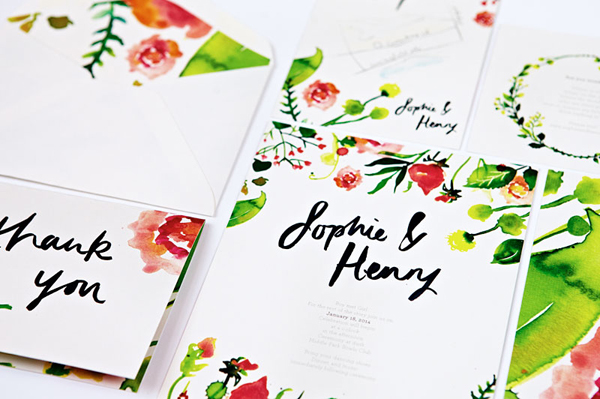
Sophie + Henry’s Vibrant Garden Party Wedding Invitations

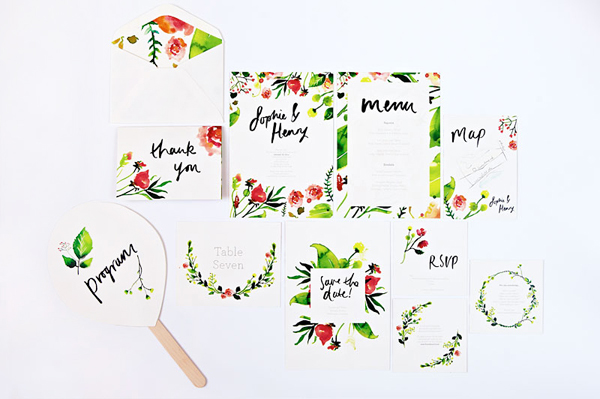
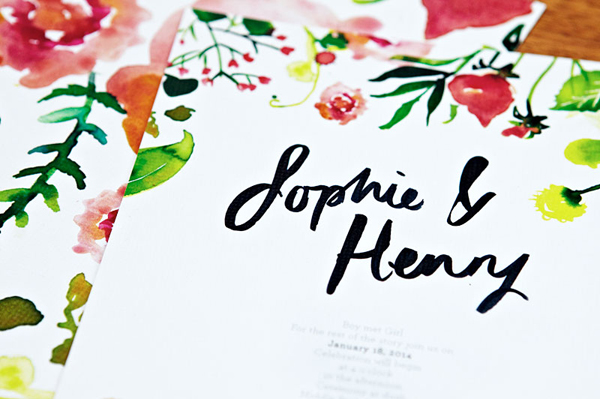
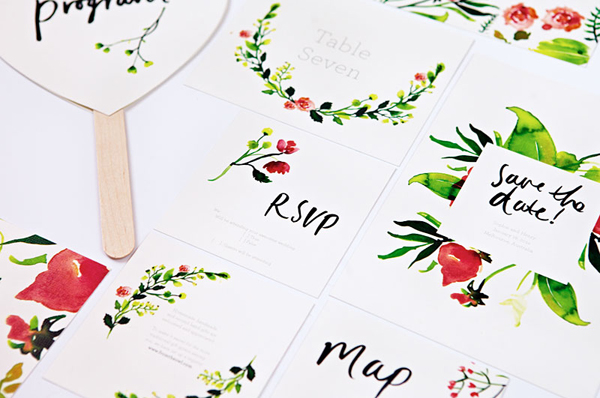
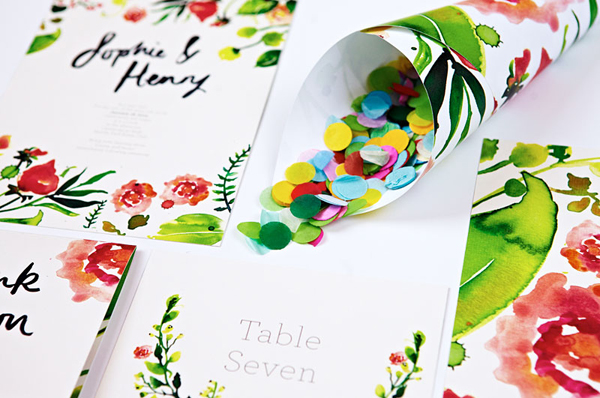
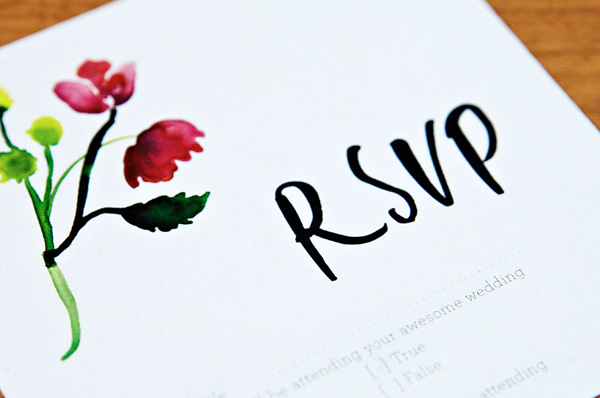
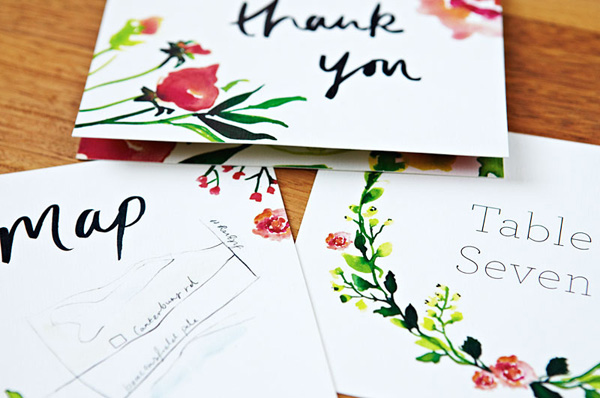
Happy Monday everyone – I hope you had a great weekend! I love the concept of a garden party wedding, and vibrant watercolor invitations to match? Even better! Sarah from Santiago Sunbird created these custom watercolor invitations for a summer garden wedding with colors inspired by the bride’s bouquet!

Vibrant-Garden-Party-Wedding-invitations-Santiago-Sunbird3

From Sarah: Sophie and Henry got in touch with us to create custom watercolor invitations and day-of stationery that represented their garden party wedding. The suite was inspired by Sophie’s bridal flowers, which included an array of vibrant colors in shades of red and green.

Vibrant-Garden-Party-Wedding-invitations-Santiago-Sunbird2

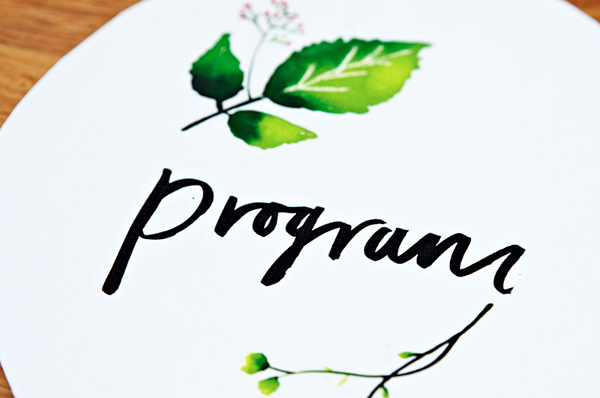
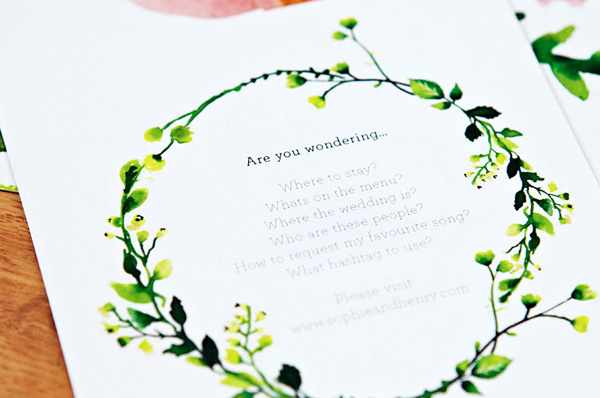
The floral garden party theme was carried across all the wedding stationery – including confetti cones, table numbers, rsvp, info cards, menu, map, and paddle fan ceremony programs perfect for the hazy summer wedding date!

Vibrant-Garden-Party-Wedding-invitations-Santiago-Sunbird6

Vibrant-Garden-Party-Wedding-invitations-Santiago-Sunbird4

Vibrant-Garden-Party-Wedding-invitations-Santiago-Sunbird5

Vibrant-Garden-Party-Wedding-invitations-Santiago-Sunbird7

Vibrant-Garden-Party-Wedding-invitations-Santiago-Sunbird8

Vibrant-Garden-Party-Wedding-invitations-Santiago-Sunbird9

Vibrant-Garden-Party-Wedding-invitations-Santiago-Sunbird10

Thanks Sarah!

Check out the Designer Rolodex for more tal­ented wed­ding invi­ta­tion design­ers and the real invi­ta­tions gallery for more wedding invitation ideas!

Photo Credits: Santiago Sunbird

DIY Modern Color Splash Save the Dates

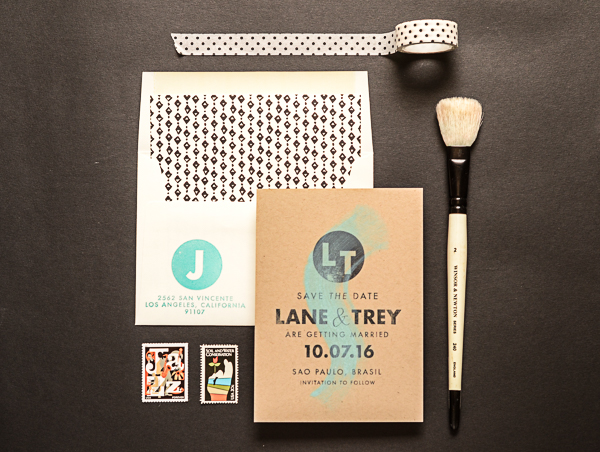
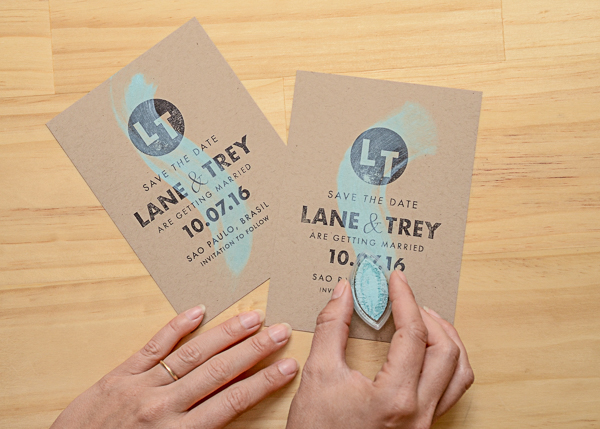
We’ve been up to our ears with floral patterns and soft pastels all summer. Don’t get us wrong, we love it – but we were craving something fresh! We dreamt up this new stamp collection and DIY project with a modern edge and bold, classic type, and we’re in love. The palette of black, white, and kraft was craving a pop of color so we added in a fun swash of turquoise as icing on the cake. – Bailey and Emma of Antiquaria
DIY Tutorial: Modern Save the Date with a Splash of Color by Antiquaria for Oh So Beautiful Paper

DIY Tutorial: Modern Save the Date with a Splash of Color by Antiquaria for Oh So Beautiful Paper

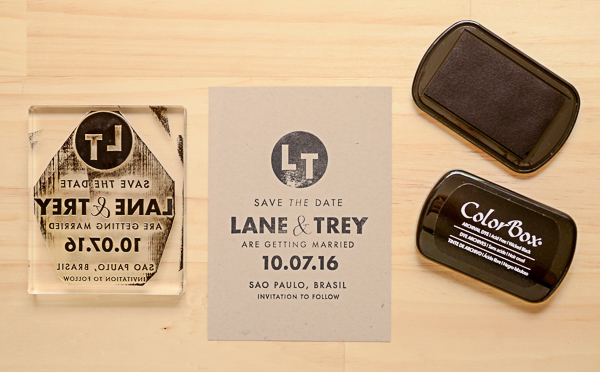
Step One: Stamp your save the date (we used our Modern Type Save the Date stamp) on an A6 kraft card. You’ll want to use a permanent ink, such as Color Box archival, so that it doesn’t bleed when the second color is added. Press firmly but moderately when printing on a flat surface, using your hands to make sure that the entire stamp has been printed. Let dry.

DIY Tutorial: Modern Save the Date with a Splash of Color by Antiquaria for Oh So Beautiful Paper

Step Two: To add our pop of turquoise color, we “splashed” a small cat eye stamp pad down the design, ending slightly below the wording. If you don’t get the coverage you’re looking for, you can touch it up as after your first pass. The benefit to using a small stamp pad vs. paint is that the water content in paint tends to warp the paper as it dries.

DIY Tutorial: Modern Save the Date with a Splash of Color by Antiquaria for Oh So Beautiful Paper

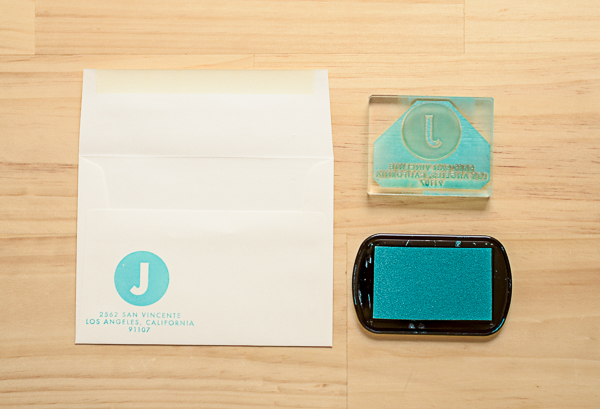
Step Three: Stamp your return address (we used our Modern Type Return Address stamp) with turquoise ink on a cream A6 envelope. We stamped the return address on the back in the lower left hand corner.

DIY Tutorial: Modern Save the Date with a Splash of Color by Antiquaria for Oh So Beautiful Paper

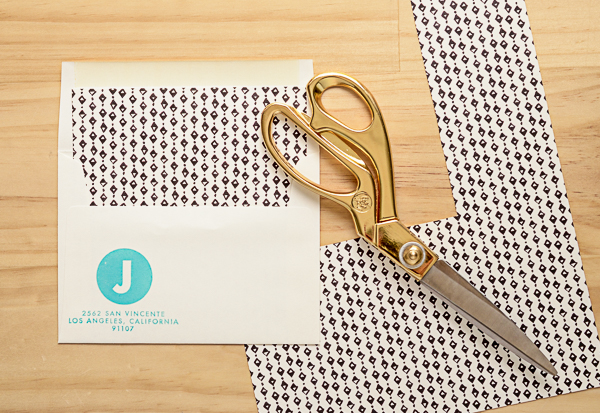
Step Four: For a bold graphic element, we added an envelope liner made with our Brushed Geo, No.2 Patterned paper cut to a 5.75″ x 6.25″ rectangle. Install the liner by taping it in right below the gum line using double sided tape.

Materials

Modern Type Save the Date Stamp

Modern Type Return Address Stamp

Brushed Geo, No.2 patterned paper, in text weight

A6 Notecards in Paper Bag (or other kraft paper A6 flat cards)

A6 Envelopes in Natural

Stamp Pads (full size) in archival black and pigment turquoise

Stamp Pad (small cat eye) in Aqua

Scissors

Double Sided Tape

Anti­quaria is a mem­ber of the Designer Rolodex – you can see more of their beau­ti­ful work right here!

Photo Credits: Antiquaria for Oh So Beautiful Paper

Happy Weekend!

Happy Friday everyone! This summer is flying by crazy fast – this week in particular felt like it went by in two seconds. I’m hoping time will slow down just a teensy wee bit in August? I need a bit more time before September (and baby #2) roll around – aaah! But in the meantime

Bird-and-Bloke-Globe-Photo

Globe photo print by Bird and Bloke

…a few links for your weekend:

This week on Oh So Beautiful Paper:

Check back soon for this week’s cocktail! I hope you all have a wonderful weekend, and I’ll see you back here next week! xoxo

DIY Wedding Reception Table Numbers

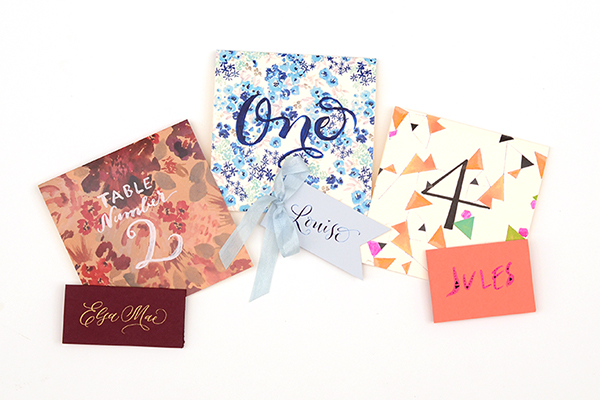
Summer brings wedding galore, and for us…that means party decor! We’ve been helping clients create gorgeous day of stationery and in the process have come up with some fun and festive table numbers that you can do yourself! We know that by the time couples usually think about reception stationery, they’re usually over their budget and are short on time. Luckily, these table numbers are not costly or time consuming. You could easily knock them out in an afternoon. There are endless options once you have the basics of creating them…so the only limit to the project is your imagination! We’ll show you three different styles to kick start your creativity. To complete your tablescape, we’ll also show you place cards to complement to each design. – Bailey and Emma of Antiquaria
DIY Tutorial: Wedding Reception Table Numbers by Antiquaria for Oh So Beautiful Paper

Up until adding the actual numbers to the cards, the process is exactly the same. We will be making 5.5″ square tented cards (showing the pattern on both sides) and the size works perfectly with a standard 8.5″ x 11″ piece of card stock.
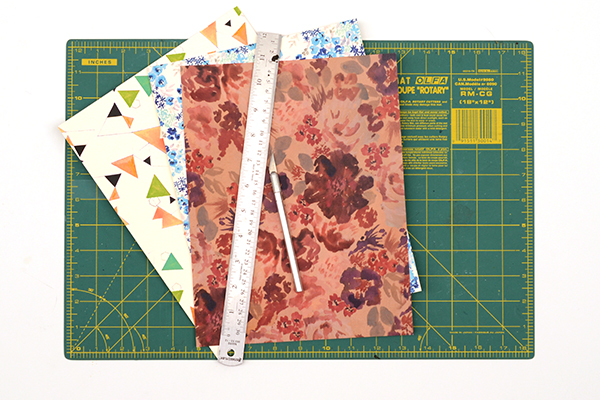
DIY Tutorial: Wedding Reception Table Numbers by Antiquaria for Oh So Beautiful Paper

Step One: Select your paper and cut the cards to size. Cut a rectangle measuring 5.5″ x 11″. If you’re using a standard sheet of paper like we did, that is only one cut (since the length is already 11″).
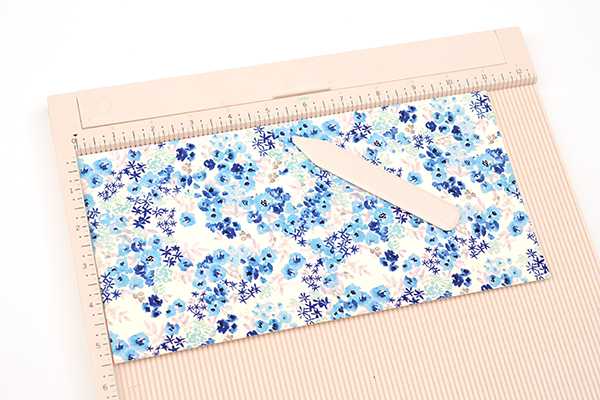
DIY Tutorial: Wedding Reception Table Numbers by Antiquaria for Oh So Beautiful Paper

Step Two: To make the tented card and have a clean fold, you’ll want to score the paper at the 5.5″ mark on a score board. Repeat steps one and two until you have enough cards to accommodate all of your tables (usually between 8-25 for a standard wedding).

Option One: Painted Script Floral

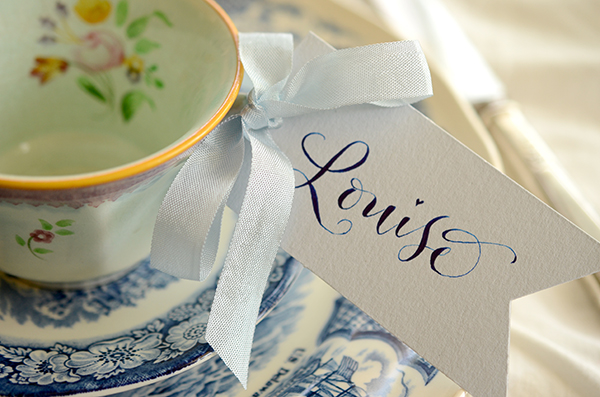
For the first version that we put together, we used our “Paloma” Blue Floral Card Stock and painted the table numbers (spelled out) in navy blue acrylic paint. The effect is playful and traditional at the same time.
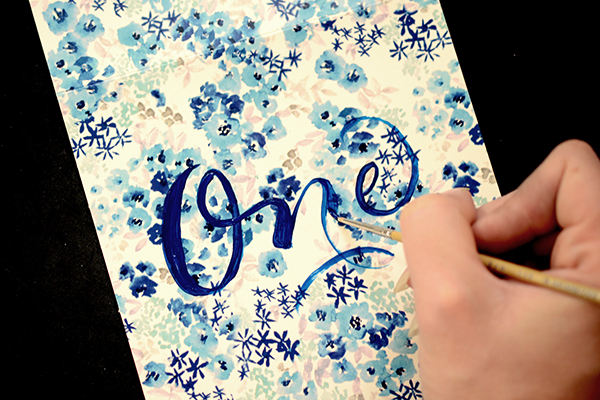
DIY Tutorial: Wedding Reception Table Numbers by Antiquaria for Oh So Beautiful Paper

With a small pointed paint brush, write out the table number in cursive across the middle of the card. Go back over the letters, adding weight to the lines (as shown above). If you need help finding out where the weights should go or what shape to paint the letters, refer to a favorite script font or perhaps your invitation suite! That way, everything will coordinate.
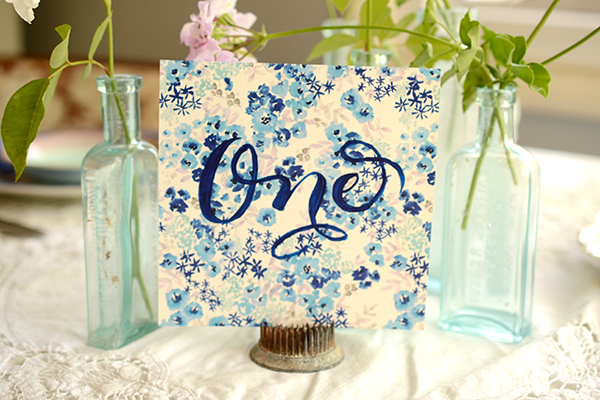
DIY Tutorial: Wedding Reception Table Numbers by Antiquaria for Oh So Beautiful Paper

DIY Tutorial: Wedding Reception Table Numbers by Antiquaria for Oh So Beautiful Paper

Option Two: Modern Neon Geometric

In this interpretation, we’ve put a modern spin on the technique. We used our “Geo” patterned card stock and wrote the number in a simplistic style to create the look. Pops of neon pink painted on help add some punch to the cards.
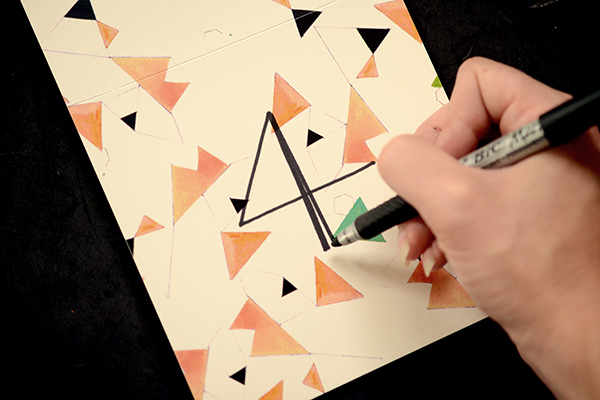
DIY Tutorial: Wedding Reception Table Numbers by Antiquaria for Oh So Beautiful Paper

First you’ll write the table number in the center using a permanent black marker. Fill in and bulk up the number as needed (shown above).
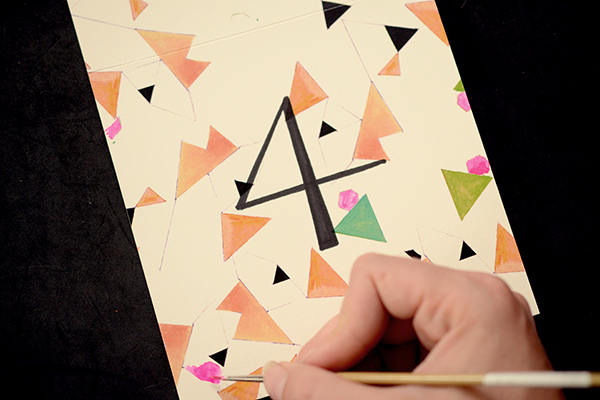
DIY Tutorial: Wedding Reception Table Numbers by Antiquaria for Oh So Beautiful Paper

Next you’ll add the final touch of neon using hot pink gouache. We painted into different shapes already printed on the paper making sure they all balanced with one another.
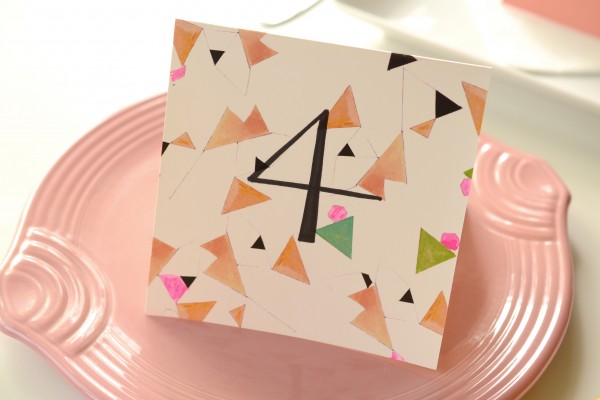
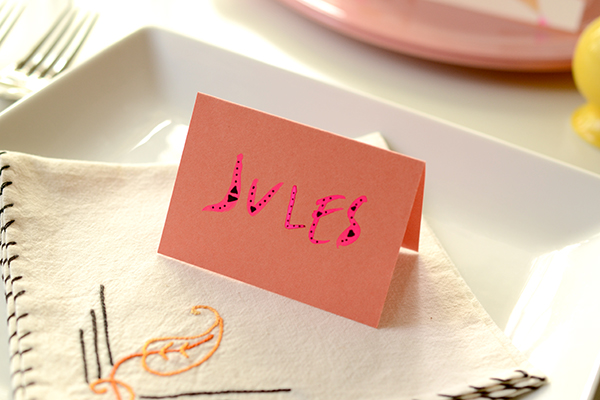
DIY Tutorial: Wedding Reception Table Numbers by Antiquaria for Oh So Beautiful Paper

DIY Tutorial: Wedding Reception Table Numbers by Antiquaria for Oh So Beautiful Paper

Option Three: Autumn Garden Floral

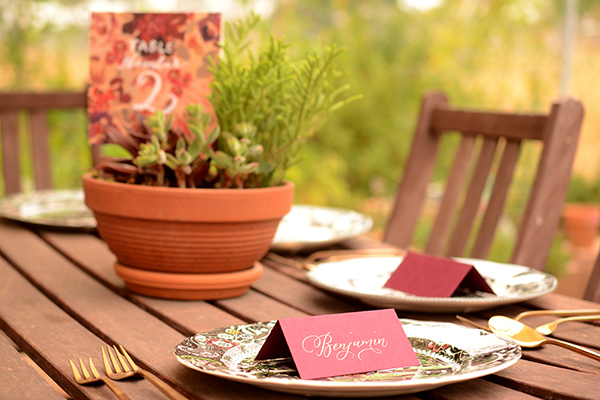
For our final interpretation, we used our “Diana” floral card stock to create the perfect garden inspired table decor. The gorgeous rich shades of the pattern mean that this style would just as easily work for fall and winter weddings.
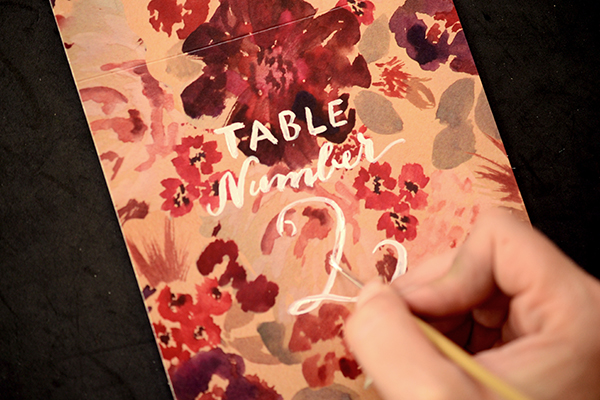
DIY Tutorial: Wedding Reception Table Numbers by Antiquaria for Oh So Beautiful Paper

With a small pointed paint brush, paint the word “TABLE” about 1 inch from the fold with white acrylic paint. Below that, in cursive, paint the word “Number,” trying to center it as much as possible. Finally, you’ll add the numeral centered below. Go back over the number, adding weight to the lines (as shown above). It would be extremely helpful to have these cards planned out on a separate sheet of paper before painting on the lettering. That way, you can know exactly how to center the text, and how large you should make it.
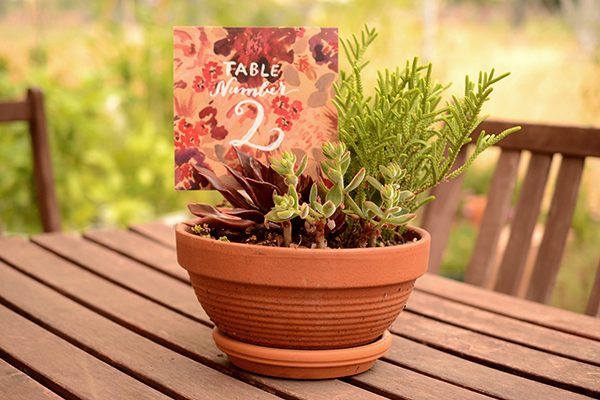
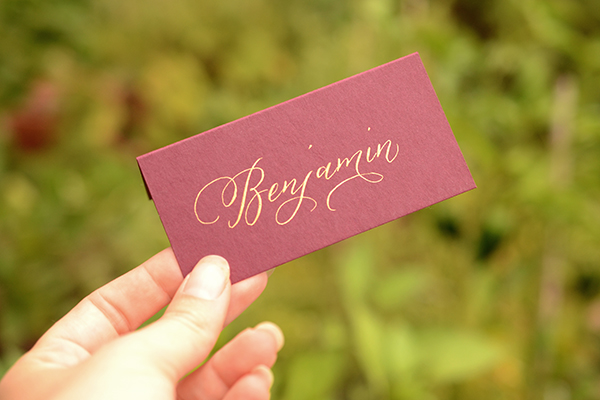
DIY Tutorial: Wedding Reception Table Numbers by Antiquaria for Oh So Beautiful Paper
TableNumberDIY-Diana-Placecard-2

TableNumberDIY-Diana-Final-2

Materials

Patterned Paper

Self Healing Mat

Craft Knife

Metal Ruler

Scoreboard

Acrylic paints

Permanent Marker

Anti­quaria is a mem­ber of the Designer Rolodex – you can see more of their beau­ti­ful work right here!

Photo Credits: Antiquaria for Oh So Beautiful Paper