{happy weekend!}

I’m beginning to suspect that I’m coming down with a case of the winter blues, which definitely isn’t helped by the lack of progress in our house hunt. So I’m actually really excited to break up our routine this weekend – we’re heading to New York City for a few days! My husband and Sophie are coming along, so I’ll be attending the New York International Gift Fair and serving as a judge for the Louie Awards during the day and then meeting back up with them later in the afternoon. We’re taking the train (my favorite way to travel from DC to NYC), so right now I’m trying to figure out how on earth I’m going to fit all of our clothes and baby gear into a reasonable amount of luggage. Next week I’ll report back with some of my favorites from NYIGF! But in the meantime…

Tabletop Made

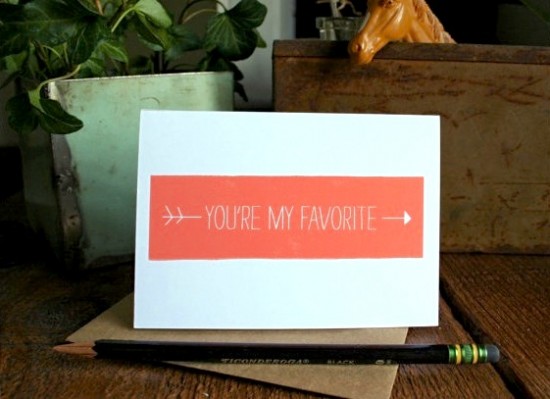
You’re My Favorite card by Tabletop Made

…a few links for your weekend!

This week on Oh So Beautiful Paper:

That’s it for me this week! I hope you all have a lovely weekend, and I’ll see you back here on Monday! xoxo

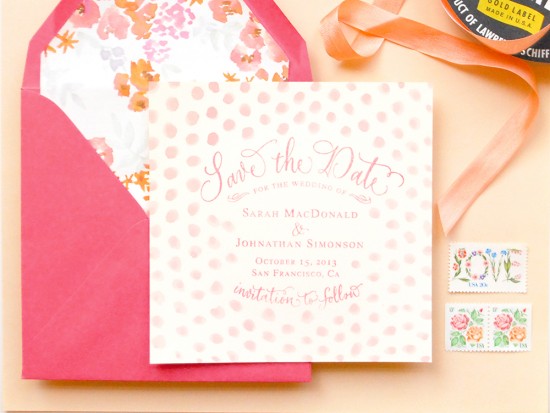
DIY Tutorial: Pink Polka Dot Watercolor Save the Date

With Valentine’s Day speedily approaching, we’ve got definitely got  love on the brain. Today’s save the date DIY tutorial is a great example of pattern mixing in stationery – and of course includes a ton of pink! This look is super easy to achieve, and the colorful design will help set the tone for a fun nuptial bash!  – Bailey and Emma of Antiquaria

DIY Tutorial: Pink Polka Dot Watercolor Save the Dates by Antiquaria via Oh So Beautiful Paper

DIY Tutorial: Pink Polka Dot Watercolor Save the Dates by Antiquaria via Oh So Beautiful Paper

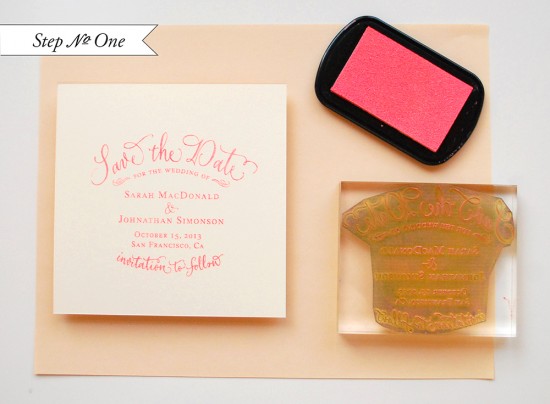
Step One: Lay a 5 1/2″ square notecard down on a firm, clean work surface. Ink your stamp (we used our Vintage Calligraphy Save the Date stamp) and center it over the square card. When ready, press the stamp down on the card, using moderate pressure (too much can give a muddy image). Lift stamp off and set aside to let the print dry. For more details on how to ink and print the stamp please visit here (see step 1).

DIY Tutorial: Pink Polka Dot Watercolor Save the Dates by Antiquaria via Oh So Beautiful Paper

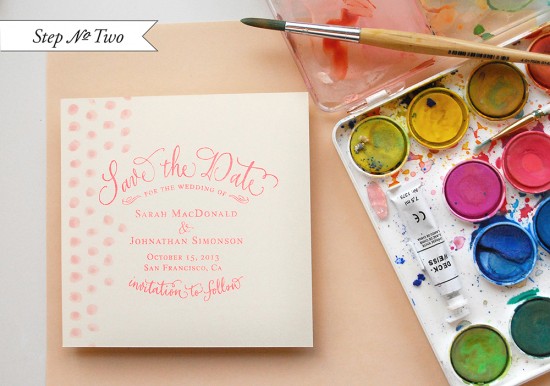
Step Two: Once you’ve made all of your prints and they are dry, you will move on to the watercoloring. With a pastel pink watercolor, paint dots in vertical rows from left to right (if right handed or right to left if left handed). Be cautious not to use too much water as it may run or warp the paper.

DIY Tutorial: Pink Polka Dot Watercolor Save the Dates by Antiquaria via Oh So Beautiful Paper

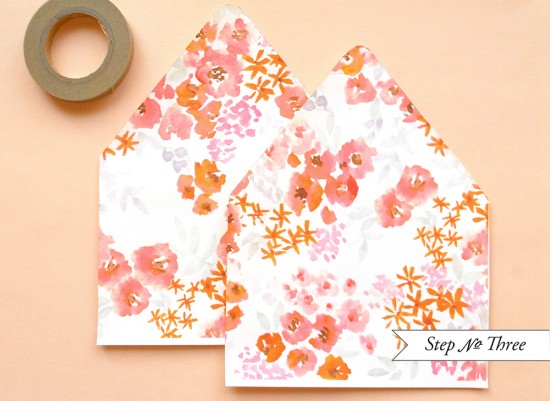
Step Three: Using envelope liner templates, cut liners out of a fun pattern. Simply use stick glue or double sided tape to install the liners into the envelopes (adhere around the top triangle).

DIY Tutorial: Pink Polka Dot Watercolor Save the Dates by Antiquaria via Oh So Beautiful Paper

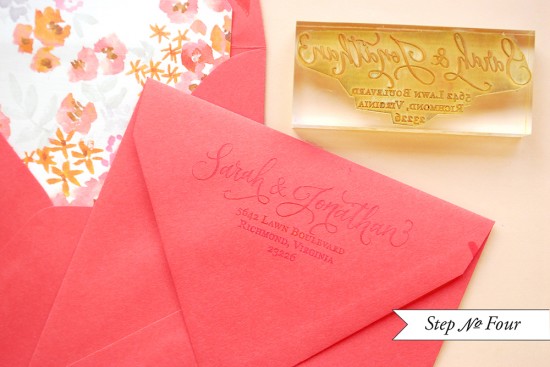
Step Four: Lastly, you’ll want to stamp your return address (we used our Calligraphy Ampersand Return Address stamp) on the back flap of the envelope. We’ve been loving the tonal look lately (gold on gold, pink on pink…etc.) so that what we’ve chosen here with this design. Now all you have to do is address them, add postage, and send them on their merry way!

Materials:

Vintage Calligraphy Save the Date Stamp

Calligraphy Ampersand Return Address Stamp

Stamp Pad

5 1/2″ square cards

Watercolors, paintbrush, and water jar

5 3/4″ square envelopes

Liner Paper – custom watercolor floral pattern from Antiquaria Design Studio

Liner Templates

Anti­quaria is a mem­ber of the Designer Rolodex – you can see more of their beau­ti­ful work right here or visit the real wedding invitations gallery for more wedding invitation ideas!

Photo Credits: Antiquaria

Beth + Michael’s Pink and Gold Foil Wedding Invitations

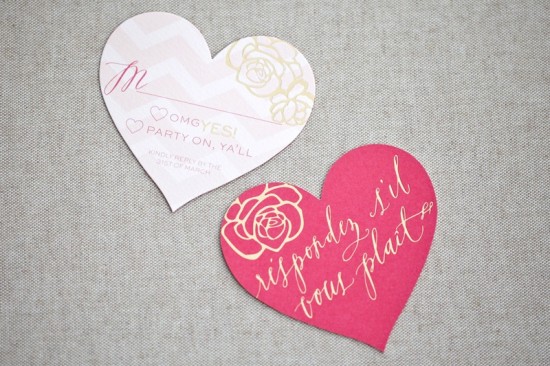
These chevron + die cut save the dates were one of my favorite features from 2012, so I was thrilled when Sarah from August Blume sent over the corresponding wedding invitations! Sarah continued the chevron pattern from the save the dates, this time working with a gold and pink color palette, along with beautiful calligraphy from Alissa of Feast Calligraphy. Sarah once again included a fun die cut shape, this time in the form of a heart for the rsvp cards. So creative!

Pink + Gold Foil Heart Wedding Invitations by August Blume via Oh So Beautiful Paper (5)

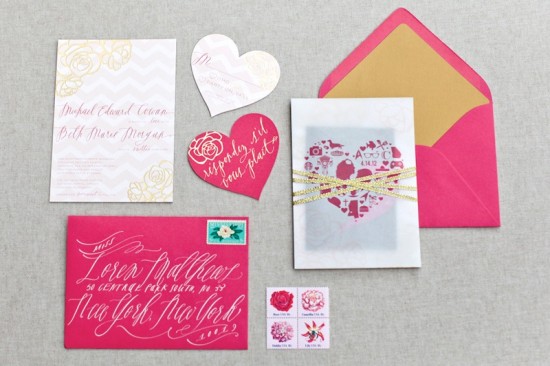
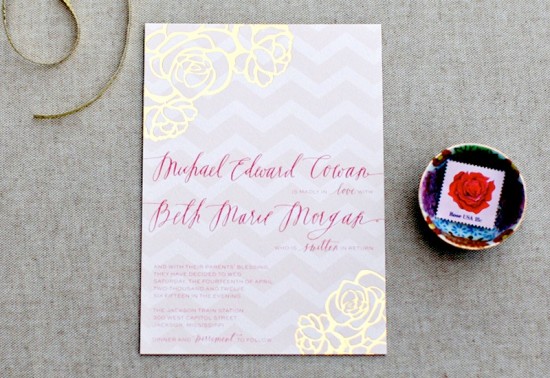
From Sarah: Beth and Michael’s wedding suite was a very special project! They wanted a suite that would tie in to their save the date, but also feature their pink and gold wedding-day palette. The invitation was completed with a combination of gold foil and offset printing on a custom duplexed pale pink cotton paper, backed with an antique gold metallic stock.

Pink + Gold Foil Heart Wedding Invitations by August Blume via Oh So Beautiful Paper (3)

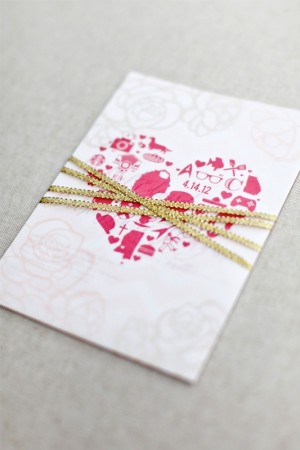
The same antique gold was used an envelope liner for an extra pop of glam. The suite was packaged with a printed vellum overlay that included their silhouettes and various icons representing their love: a stack of pancakes (a nod to their first date at IHOP), their adorable dogs, and even a zombie! The vellum overlay and the invitation were tied together with a metallic gold ribbon wrap.

Pink + Gold Foil Heart Wedding Invitations by August Blume via Oh So Beautiful Paper (2) 

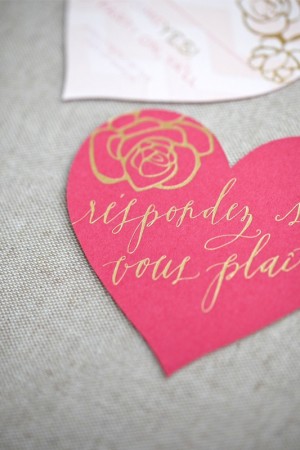
Tucked inside was the die cut reply card, also printed with gold foil and offset inks, on an additional custom duplexed stock: pale pink letterpress chevron paper backed with a deep strawberry hue. Vintage Mississippi postage stamps and (my favorite) vintage floral postage stamps were used to tie in Beth’s roots to the South. All calligraphy was penned by Alissa Mazzenga of Feast Calligraphy.

Pink + Gold Foil Heart Wedding Invitations by August Blume via Oh So Beautiful Paper (4)

Thanks Sarah!

Design: August Blume

Calligraphy: Feast Calligraphy

Check out the Designer Rolodex for more tal­ented wed­ding invi­ta­tion design­ers and the real invi­ta­tions gallery for more wedding invitation ideas!

Photo Credits: Kristin Vanzant Photography

New Giveaway! Calligraphy Address Stamp from Kathryn Murray

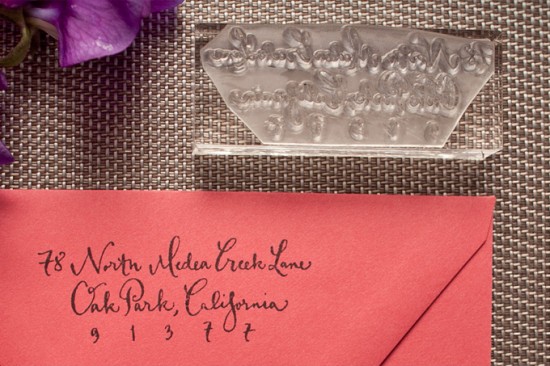
We looooove calligraphy here at Oh So Beautiful Paper, from traditional flourishes to modern styles and everything in between. We’ve had the pleasure of featuring the beautiful calligraphy of Kathryn Murray in our monthly calligraphy feature and love seeing her work on wedding invitation envelopes and place cards. And today we’re super excited, because Kathryn is giving away her beautiful custom calligraphy address stamps to TWO lucky readers!

Kathryn Murray Calligraphy via Oh So Beautiful Paper (2)

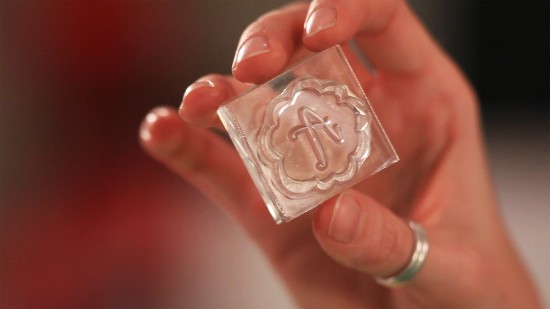
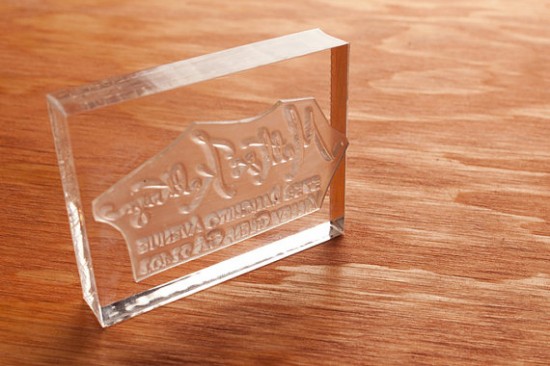
The lucky readers will each receive one acrylic address stamp (so you can see where you’re placing the address on the envelope!), a calligraphy monogram stamp, ink pad, and set of 8 blank cards and envelopes – you’ll be able to start writing letters to your friends and family right away!

Kathryn Murray Calligraphy via Oh So Beautiful Paper (1)

To enter, visit Kathryn’s website and browse through her gorgeous calligraphy portfolio. Then come back here and leave a comment telling us who you love writing letters to the most and why! Perhaps your sister, parents, or an old friend from high school or college?

Kathryn Murray Calligraphy via Oh So Beautiful Paper (4)

Kathryn Murray Calligraphy via Oh So Beautiful Paper (3)

You’ll have until 11:59 p.m. on Friday, January 25 to enter the giveaway. One winner will be selected randomly and notified via email. Bonne chance!

*This giveaway is courtesy of Kathryn Murray Calligraphy.  Official sweepstakes rules here.

Photo Credits: Kathryn Murray Calligraphy

Mary’s Sweet + Feminine Letterpress Baby Announcements

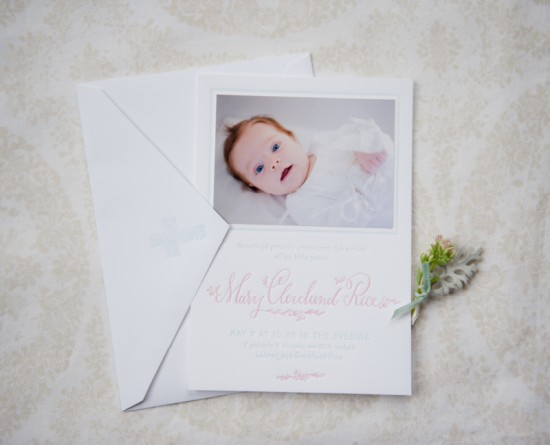
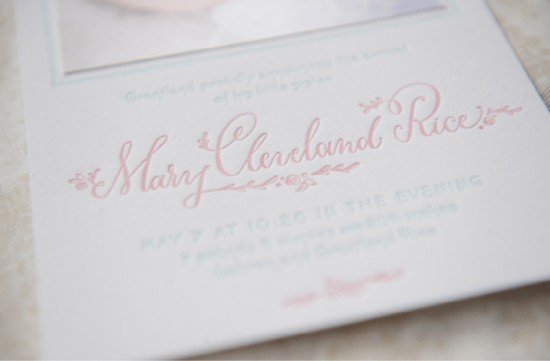
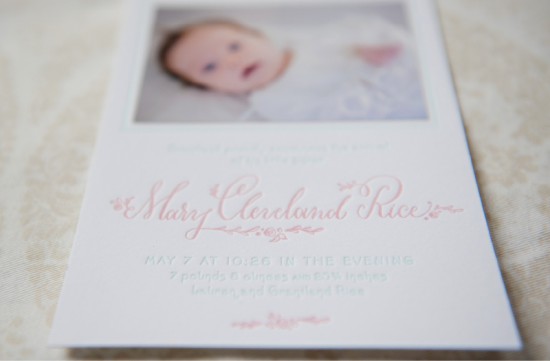
These adorable baby announcements combine calligraphy and letterpress printing in a beautiful pink and blue color palette – so perfect for a tiny baby girl! Designer and calligrapher Holly Hollon even embellished her own calligraphy with tiny roses around the baby’s name for an added feminine touch. So sweet!

Feminine Letterpress Birth Announcements by Holly Hollon Design and Calligraphy via Oh So Beautiful Paper (3)

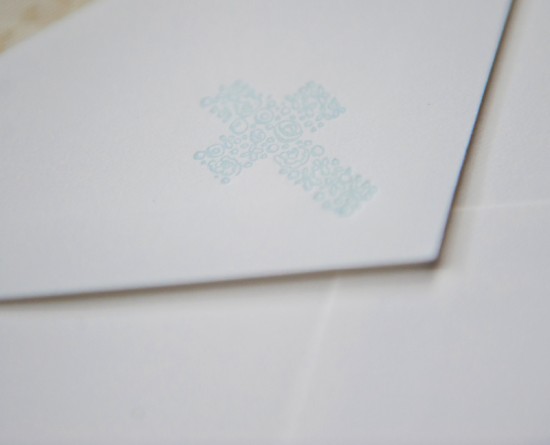
From Holly: The client wanted to combine letterpress printing with a photo. I designed the announcements to have a dainty border in which the photo would nest. We used MPix to print the photo. The color palette is a light aqua blue and light coral pink. I embellished the calligraphy of the baby’s full name with dainty roses that matched to the floral cross used on the envelope flap.

Feminine Letterpress Birth Announcements by Holly Hollon Design and Calligraphy via Oh So Beautiful Paper (2)

Feminine Letterpress Birth Announcements by Holly Hollon Design and Calligraphy via Oh So Beautiful Paper (1)

Feminine Letterpress Birth Announcements by Holly Hollon Design and Calligraphy via Oh So Beautiful Paper (4)

Thanks Holly!

Design: Holly Hollon Design + Calligraphy

Letterpress Printing: Four Hats Press

Photo Credits: Stacy Richardson Photography