Beth + Tomu’s Woodsy Screen Printed Walnut Wedding Invitations

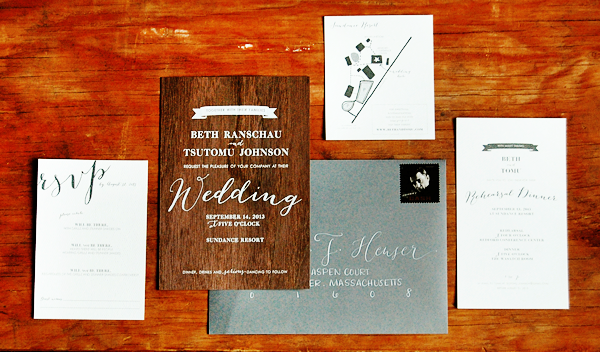
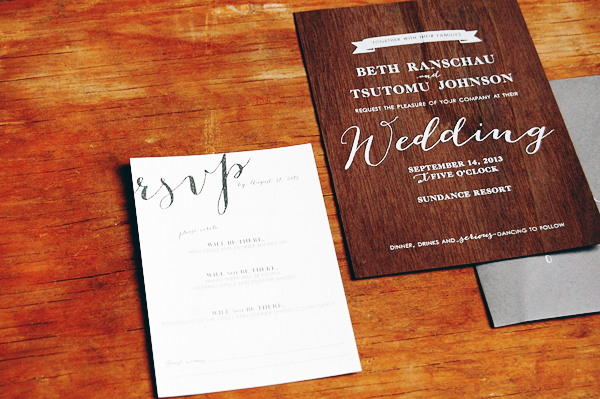
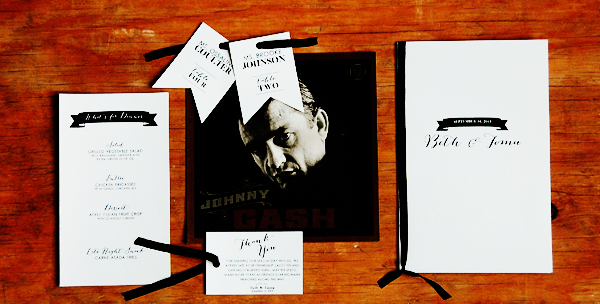
Nikkol from Peter Loves Jane sent over these lovely invitations for a wedding at the Sundance Resort! The bride and groom wanted to evoke the woodsy feeling of their wedding venue without being too rustic. Nikkol came up with the perfect solution: walnut wood veneer with white screen printed text! Nikkol paired the wood invitations with gray and white enclosures and gray envelopes to complete the suite.

Screen-Printed-Rustic-Walnut-Wedding-Invitations-Peter-Loves-Jane

From Nikkol: Beth and Tomu are both sophisticated successful attorneys that are socially aware but have a spontaneous and fun side. Beth and Tomu decided to get married at Sundance Resort, which is nestled in the mountains and surrounded by towering evergreens. Beth already knew she wanted a woodsy element in her invitations, but wanted to steer clear of any rustic intonations.

Screen-Printed-Rustic-Walnut-Wedding-Invitations-Peter-Loves-Jane3

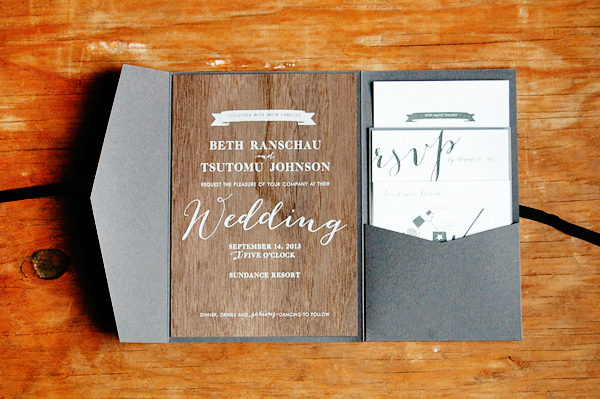
White screen printing on a walnut veneer was the perfect choice.  I used a recycled paper for the additional items in the suite and tucked it all inside a grey pocket enclosure tied each with a black silk ribbon.

Screen-Printed-Rustic-Walnut-Wedding-Invitations-Peter-Loves-Jane2

Screen-Printed-Rustic-Walnut-Wedding-Invitations-Peter-Loves-Jane4

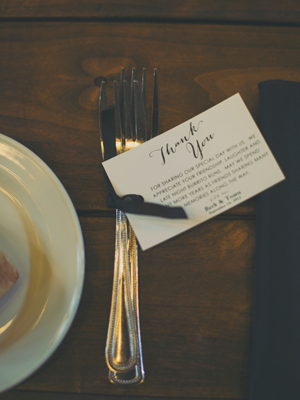
It was important to Beth and Tomu to thank each guest individually, so I designed playful thank you flags that we tied to the flatware at each place setting.  That way if a guest wanted to eat, they had to read the note!

Screen-Printed-Rustic-Walnut-Wedding-Invitations-Peter-Loves-Jane6Screen-Printed-Rustic-Walnut-Wedding-Invitations-Peter-Loves-Jane7

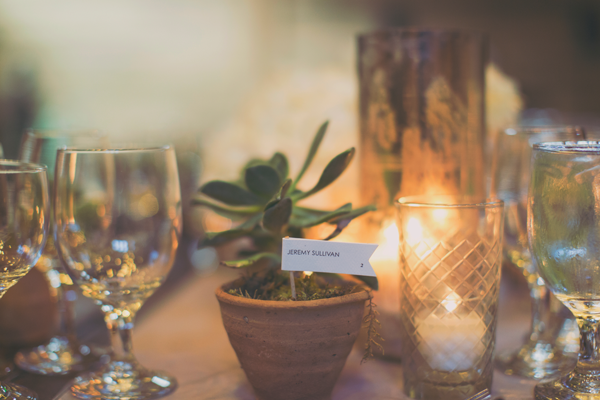
To add interest to the centerpieces and place settings, place card designs varied.  Some place cards were tented above their plates, while others were marked with flags in potted succulents.  The succulents were given to each guest as a favor at the end of the evening.

Screen-Printed-Rustic-Walnut-Wedding-Invitations-Peter-Loves-Jane8

Thanks Nikkol!

Design: Peter Loves Jane

Screen Printing: Cards of Wood

Calligraphy: BP Calligraphy

Wedding Photography: Alixann Loosle Photography

Event Planning: Attention 2 Detail

Photo Credits: Peter Loves Jane and Alixann Loosle Photography

Geri + Bryce’s Elegant Gold Foil Wedding Invitations

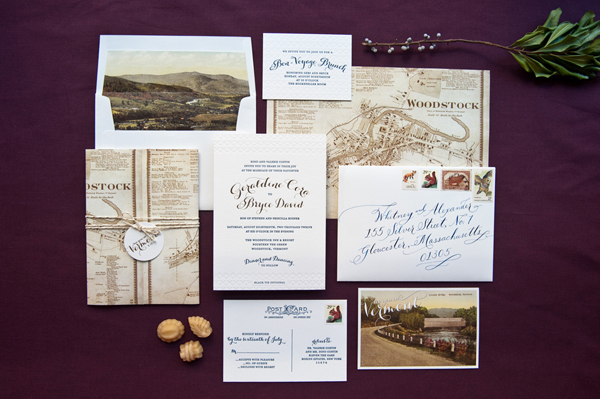
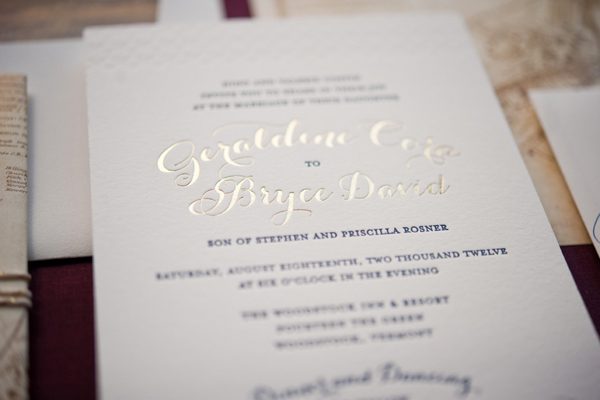
Happy Monday everyone! I’m back from Alt Summit and feeling ready to take on the world, so let’s start with some beautiful wedding invitations! I always know it’s going to be a good week when I start with a custom design from Samantha and Whitney of Gus & Ruby Letterpress. Created for a wedding in a small town in Vermont, these invitations feature elegant gold foil, classic navy, vintage imagery, and map details – with absolutely stunning results!

Elegant-Gold-Foil-Wedding-Invitations-Gus-Ruby-Letterpress

From Samantha and Whitney: This custom suite was designed for a fabulous New York couple who were getting married at the stunning Woodstock Inn in Woodstock, Vermont. The bride and groom wanted the invitation suite to get their guests – coming from all over – excited about a trip to the gorgeous green hills of Vermont and quaint town of Woodstock while still speaking to their chic sense of style.

Elegant-Gold-Foil-Wedding-Invitations-Gus-Ruby-Letterpress2

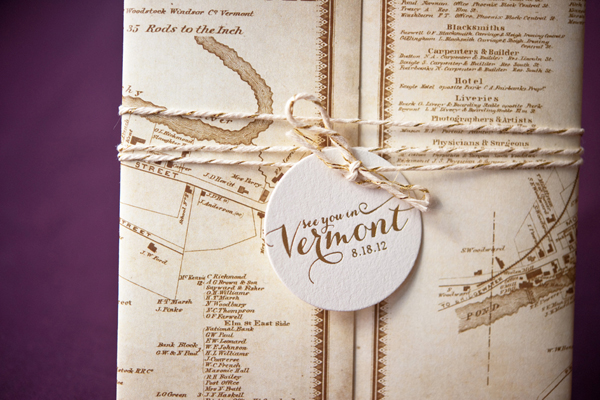
A flat-printed folio featuring a vintage map of the Woodstock area was wrapped around the invitation panel and secured with gold threaded twine and a foil-stamped die-cut tag. The fun “See you in Vermont!” wording and location-specific wrap right away set the tone for this rustic-elegant destination wedding.

Elegant-Gold-Foil-Wedding-Invitations-Gus-Ruby-Letterpress3

Elegant-Gold-Foil-Wedding-Invitations-Gus-Ruby-Letterpress10Elegant-Gold-Foil-Wedding-Invitations-Gus-Ruby-Letterpress11

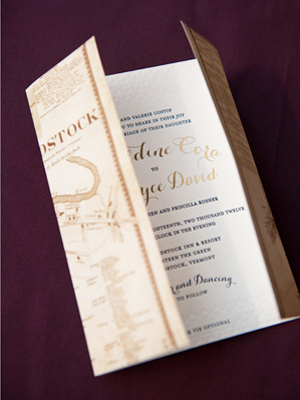
Inside the wrap, an invitation featuring gorgeous gold foil and elegant navy typography and some blind printed pattern for texture gave a fun twist on a classic layout – perfect for the couple’s vision of marrying the old-world charm of Vermont with their informed and stylish aesthetic.

Elegant-Gold-Foil-Wedding-Invitations-Gus-Ruby-Letterpress5

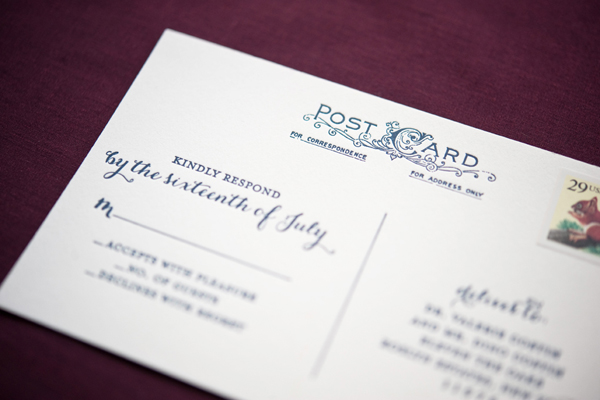
The invitations and reply postcards featured a mix of classic serif fonts and a whimsical, romantic script. Each invitation was printed on double-thick 220# cotton paper. As always, all the pieces were lovingly letterpress printed by hand on our antique press.

Elegant-Gold-Foil-Wedding-Invitations-Gus-Ruby-Letterpress6

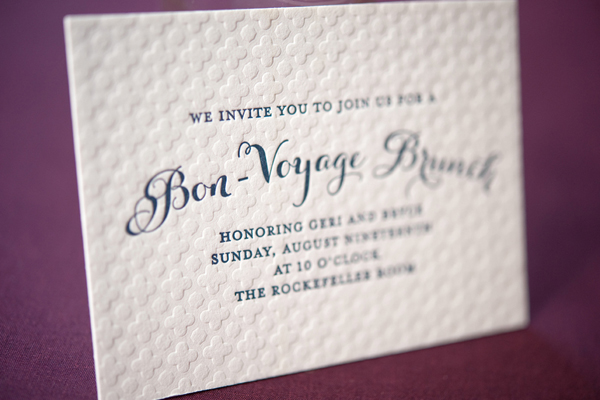
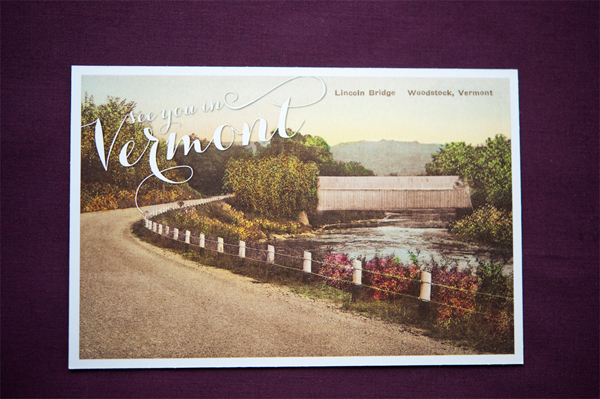
Reply postcards featured a flat printed vintage postcard image of a covered bridge in Woodstock, Vermont duplexed together with a letterpress printed backside. A small brunch card featured a full flood of blind-printed pattern that gave the piece incredible texture and visual interest.

Elegant-Gold-Foil-Wedding-Invitations-Gus-Ruby-Letterpress7

Elegant-Gold-Foil-Wedding-Invitations-Gus-Ruby-Letterpress8

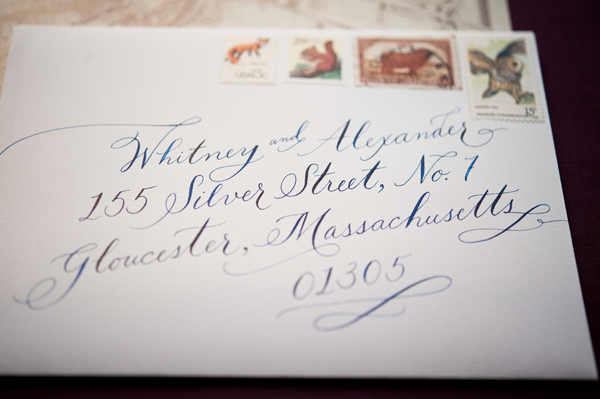
A custom envelope liner featuring another vintage Vermont image added an additional element of interest and our dear friend, Jenna, of Love, Jenna Calligraphy added her incredible hand-calligraphy on the envelope shown in the photos, too!

Elegant-Gold-Foil-Wedding-Invitations-Gus-Ruby-Letterpress9

Thanks so much Sam and Whit!

Design and Letterpress Printing: Gus & Ruby Letterpress

Calligraphy: Love, Jenna Calligraphy

Gus & Ruby Letterpress is a member of the Designer Rolodex – check out more of their beautiful work right here or visit the real invi­ta­tions gallery for more wedding invitation ideas!

Photo Credits: Brea McDonald Photography for Gus & Ruby Letterpress

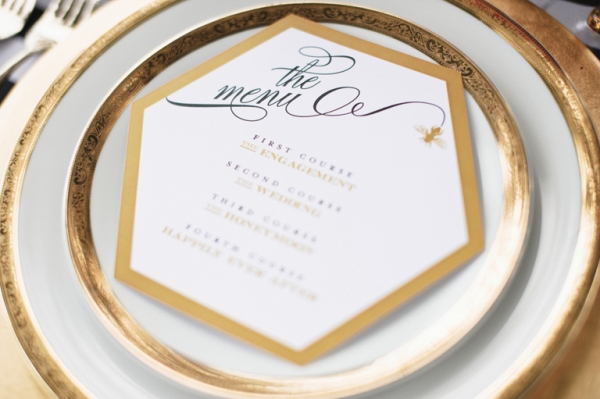
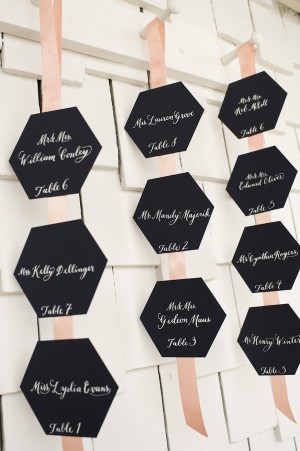
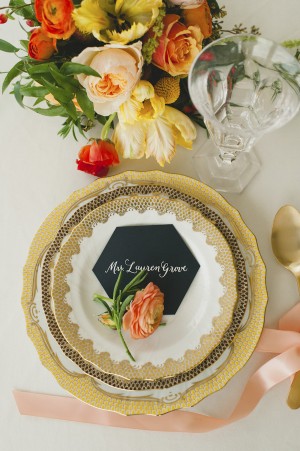
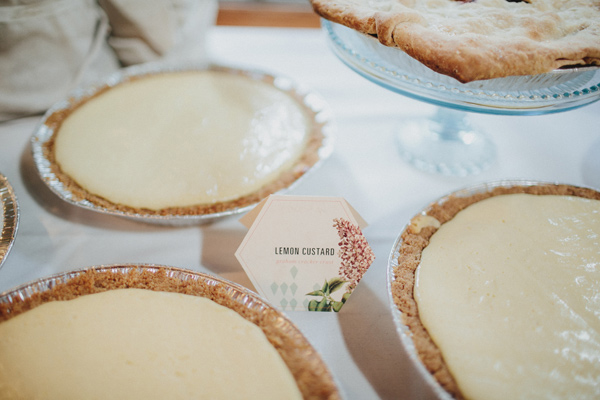
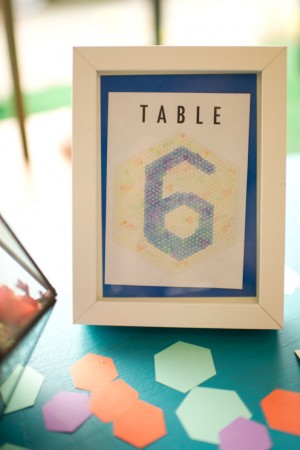
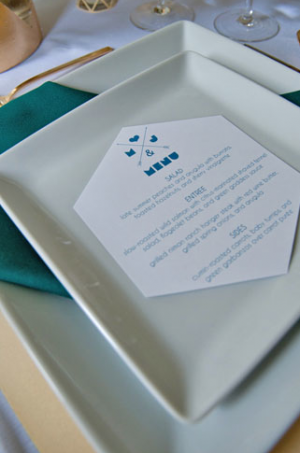
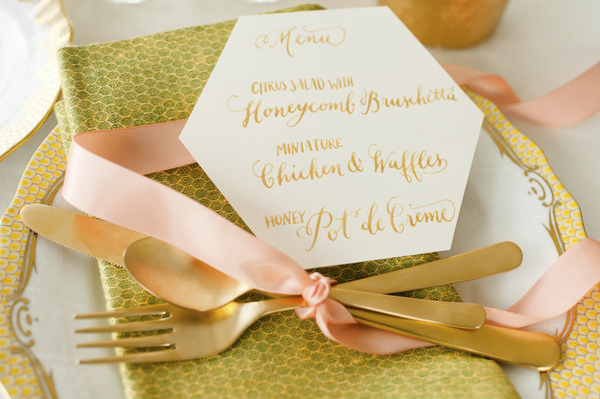
Wedding Stationery Inspiration: Hexagons

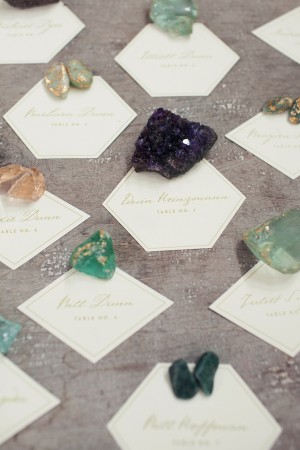
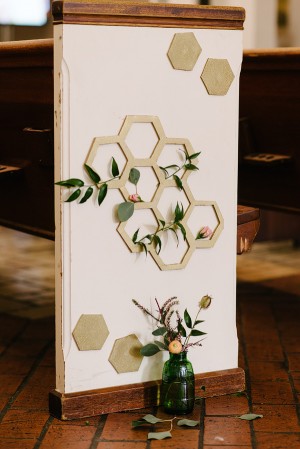
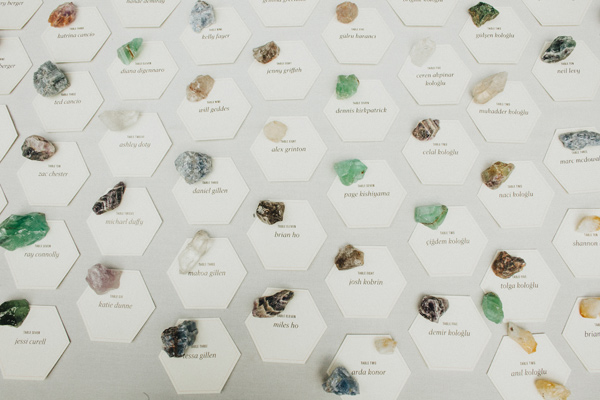
We’ve discussed the geometric trend in weddings before, but have you noticed that hexagons are really having a moment? They’ve recently come out as one of the front runners in the geo trend and can be found in all sizes as escort cards, table numbers, menus and more! Here’s a few of my favorite ways I’ve seen them used in wedding stationery! —Kelly

Day-of Wedding Stationery Inspiration Ideas: Hexagons via Oh So Beautiful PaperDay-of Wedding Stationery Inspiration Ideas: Hexagons via Oh So Beautiful Paper

Photo by Love Is A Big Deal, Escort Cards by Be True Designs via Ruffled (right), Photo by Kimberly Michelle Gibson Photography via Ruffled (left)

Day-of Wedding Stationery Inspiration Ideas: Hexagons via Oh So Beautiful Paper

Photo by Sean Flanigan, Escort Cards by Tor Weeks and Alper Kologlu via Ruffled

Day-of Wedding Stationery Inspiration Ideas: Hexagons via Oh So Beautiful Paper

Photo by Josh Gull Wedding Photography, Menu by Nico and Lala via Ruffled

Day-of Wedding Stationery Inspiration Ideas: Hexagons via Oh So Beautiful PaperDay-of Wedding Stationery Inspiration Ideas: Hexagons via Oh So Beautiful Paper

Photo by Spindle Photography, Calligraphy by Kelly Cummings via Every Last Detail

Day-of Wedding Stationery Inspiration Ideas: Hexagons via Oh So Beautiful Paper

Photo by Sean Flanigan, Dessert Labels by Tor Weeks and Alper Kologlu via Ruffled

Day-of Wedding Stationery Inspiration Ideas: Hexagons via Oh So Beautiful PaperDay-of Wedding Stationery Inspiration Ideas: Hexagons via Oh So Beautiful Paper

Photo by Spindle Photography via Every Last Detail (left), Photo by Captured by Aimee, Menu by Sweet Emilia Jane via Green Wedding Shoes (right)

Day-of Wedding Stationery Inspiration Ideas: Hexagons via Oh So Beautiful Paper

Photo by Spindle Photography, Calligraphy by Kelly Cummings via Junebug Weddings

{images via their respective sources}

Vivi Mae’s Peach + Gold Birth Announcements

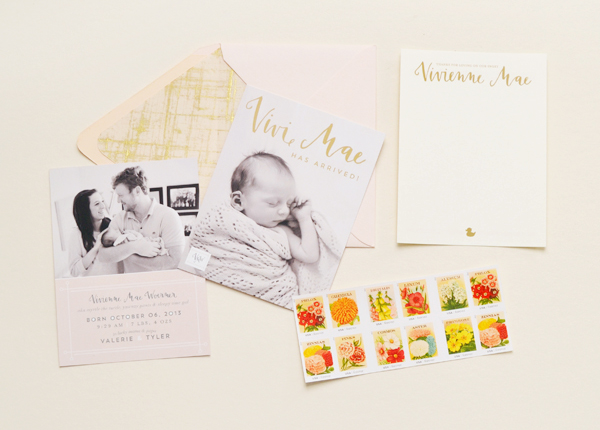
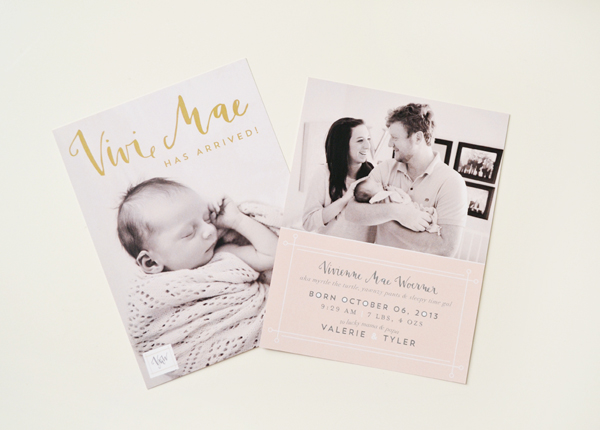
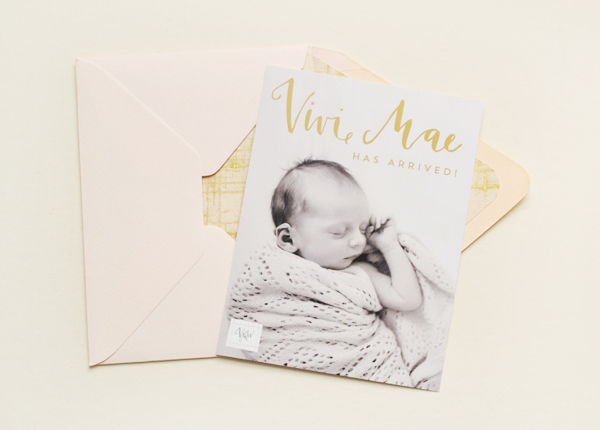
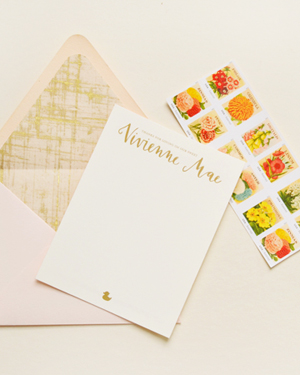
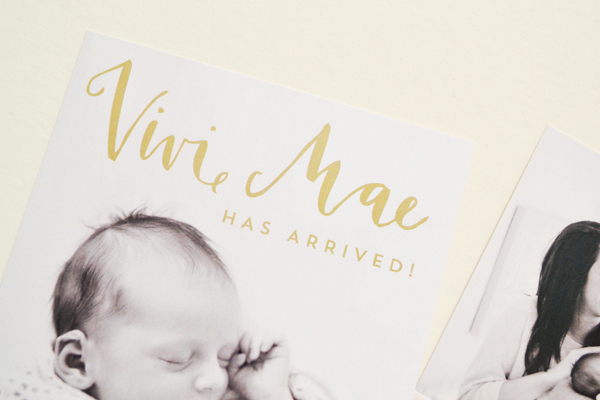
Happy Monday everyone! For those of you not enjoying a long weekend, I thought I’d start the week with these beautiful peach and gold baby announcements from Val Marie Paper! After welcoming her first child – an adorable daughter named Vivienne Mae – Valerie drew inspiration from gold envelope liners for the birth announcements. Valerie made sure to include Vivi’s stats and a photo of the happy new family of three while also conveying Vivi’s nickname to friends and family. So sweet!

Peach-Gold-Girl-Baby-Announcements-Val-Marie-Paper

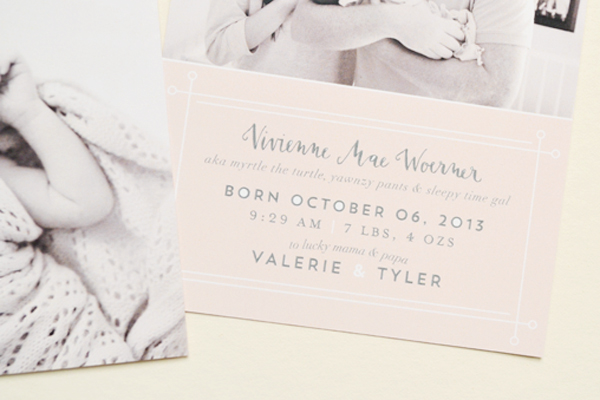
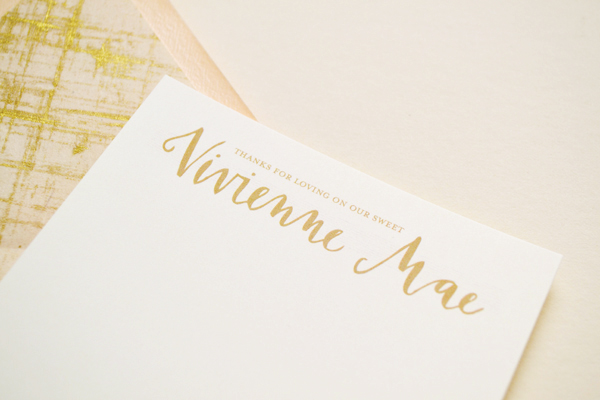
From Valerie: As a designer, I had been eyeing some beautiful envelope liners from Paper Source and knew they would be perfect for Vivi’s peach and gold color palette. From there, I teamed up with Katherine Holly to calligraph Vivi’s name. We wanted to incorporate a few fun aspects knowing many of our friends and family had met Vivi before they received the announcements. We included some of Vivi’s nicknames during the first few weeks. She has even more now!

Peach-Gold-Girl-Baby-Announcements-Val-Marie-Paper6

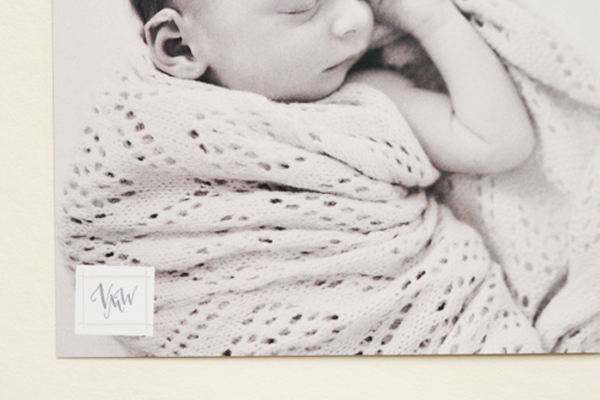
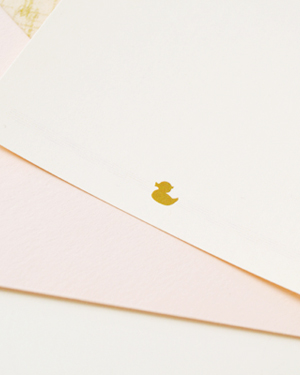
We also wanted to include a photo our new little family. I know when I see friends with new little ones, I always love to see photos of the parents too in their new element. And this being the year of Prince Edward, I thought it would be fun to add a little seal of Vivi’s initials that we can use on future designs. Not quite as fancy as the future king of England’s but fun nonetheless!

Peach-Gold-Girl-Baby-Announcements-Val-Marie-Paper2

Peach-Gold-Girl-Baby-Announcements-Val-Marie-Paper4

Peach-Gold-Girl-Baby-Announcements-Val-Marie-Paper3

Peach-Gold-Girl-Baby-Announcements-Val-Marie-Paper5

Part of our challenge was including her full name but letting people know what we would be calling her. Creating a two-sided card with her full name and info on the back seemed like the best solution for us!

Peach-Gold-Girl-Baby-Announcements-Val-Marie-Paper7Peach-Gold-Girl-Baby-Announcements-Val-Marie-Paper9

Peach-Gold-Girl-Baby-Announcements-Val-Marie-Paper8

Thanks Valerie!

Design: Val Marie Paper

Newborn Photo: Ell Photography

Calligraphy: Katherine Holly

Photo Credits: Val Marie Paper

DIY Tutorial: Tropical Invitation Suite + Fabric Envelope

This week we’re fighting off winter blues with a fun and colorful tropical inspired invitation suite! The best part of this design? The awesome fabric inner envelope. As soon as we stumbled on this adorable tutorial on over on Martha Stewart, we were hooked and knew that we need to incorporate the technique into a DIY invitation suite! – Bailey and Emma of Antiquaria

DIY Tutorial: Tropical Invitation Suite + Fabric Envelope by Antiquaria for Oh So Beautiful Paper

DIY Tutorial: Tropical Invitation Suite + Fabric Envelope by Antiquaria for Oh So Beautiful Paper

DIY Tutorial: Tropical Invitation Suite + Fabric Envelope by Antiquaria for Oh So Beautiful Paper

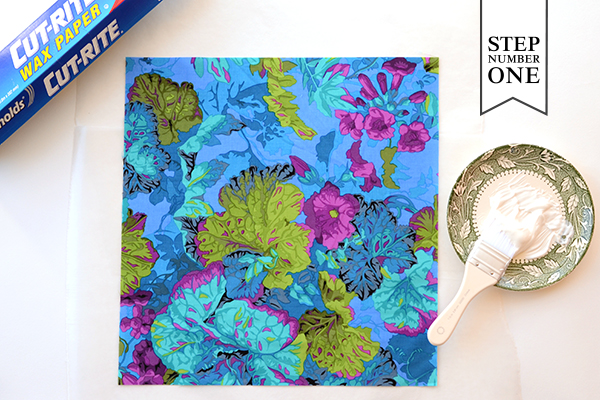
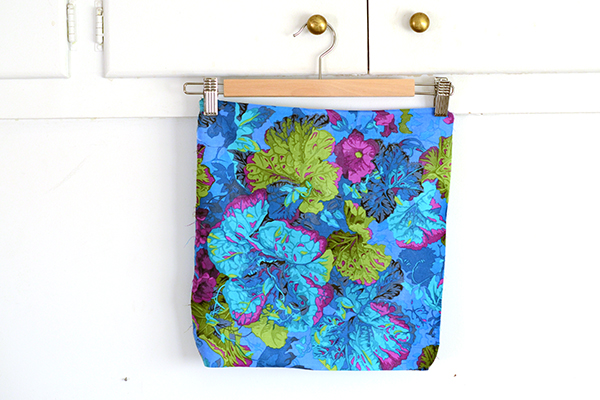
Step One: Over a piece of wax paper, thinly coat a piece of fabric measuring 13.5″ x 14″ with fabric decoupage on front and back. Once both sides are covered, hang the fabric from a pant hanger until dry (see below).
DIY Tutorial: Tropical Invitation Suite + Fabric Envelope by Antiquaria for Oh So Beautiful Paper

DIY Tutorial: Tropical Invitation Suite + Fabric Envelope by Antiquaria for Oh So Beautiful Paper

Step Two: Once the fabric is dry, trace an A7 envelope template on the “wrong” side of the fabric with a marker. Using a pair of very sharp fabric scissors, carefully cut out the envelope along the line.
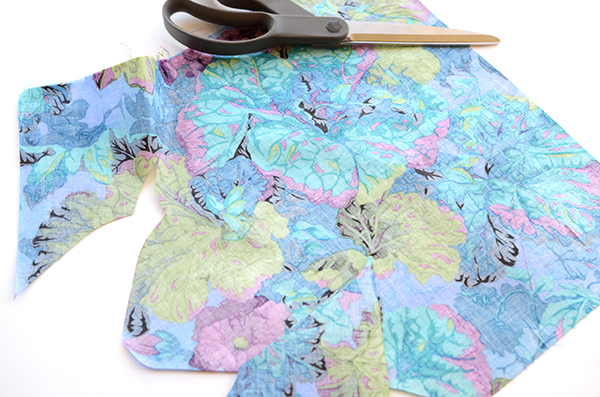
DIY Tutorial: Tropical Invitation Suite + Fabric Envelope by Antiquaria for Oh So Beautiful Paper

DIY Tutorial: Tropical Invitation Suite + Fabric Envelope by Antiquaria for Oh So Beautiful Paper

Step Three: Now you’ll assemble the envelope. Place a sheet of wax paper approximately 7″ wide in the middle and fold the side flaps over it. Apply decoupage to the lower portion of the side flaps as shown above. Fold up the bottom flap to adhere it to the sides. Paint a thin coat of decoupage along the seams to seal the envelope closed (shown below).

DIY Tutorial: Tropical Invitation Suite + Fabric Envelope by Antiquaria for Oh So Beautiful Paper

DIY Tutorial: Tropical Invitation Suite + Fabric Envelope by Antiquaria for Oh So Beautiful Paper

Step Four: Next, you’ll emboss the invitation piece. Place your fig A7 card on a stable and firm surface. Ink your invitation stamp (we used our Vintage Calligraphy Invitation stamp) and center it over the card. When ready, press the stamp down with moderate pressure to make the print. Lift the stamp off and quickly move on to adding your embossing powder.

Once you’ve made your print, immediately cover it with embossing powder by sprinkling it across the card. Shift the powder around until you have covered the entire image. Now, you will pour the excess powder off of the card onto a scrap piece of paper so that you can reuse it for future prints. Heat set the print, using an embossing heat tool. You will be able to see the powder melt into an opaque and solid color when it’s done. For more information about how to emboss using stamps, please watch this instructional video.

Note: One key thing about embossing is that it is wise to try to closely match your ink color with your powder color. By doing this, you will get much more crisp and opaque results. For example, we used a white pad with white embossing powder on this invitation.

DIY Tutorial: Tropical Invitation Suite + Fabric Envelope by Antiquaria for Oh So Beautiful Paper

Step Five: Next, you’ll stamp your reply postcard on a 4″ x 6″ cream card. We used our Calligraphy Accent Reply Postcard stamp with eggplant ink.

DIY Tutorial: Tropical Invitation Suite + Fabric Envelope by Antiquaria for Oh So Beautiful Paper

Step Six: There’s no reason to waste the scraps from cutting out the envelopes! We cut them into little 2.5″ squares to use with our monogram tags! The paper tag (in front) is a 2″ square. Once you have both squares cut, layer them on top of one another and punch a hole in the top center of the diamond. Insert a 1/8″ grommet into the hole so that the two pieces hold together.

Stamp your monogram stamp (we used our Antique Monogram stamp) on the tag with the same eggplant stamp pad as we used on the reply postcard.

DIY Tutorial: Tropical Invitation Suite + Fabric Envelope by Antiquaria for Oh So Beautiful Paper

Step Seven: Now all that’s left it to put it all together! We stamped the return address and addressed the outer envelope with turquoise ink for a tonal look. We also wrapped all of the pieces together with teal bakers twine to tie it all together!
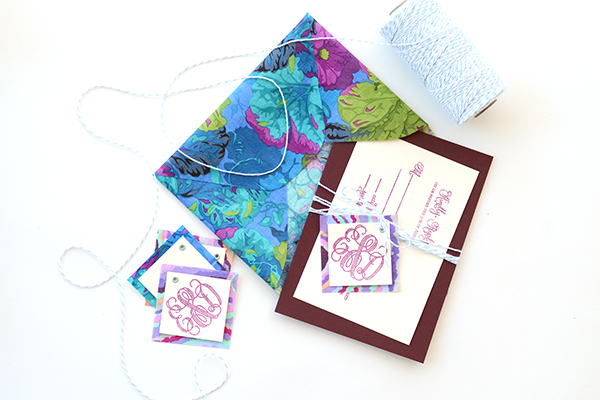
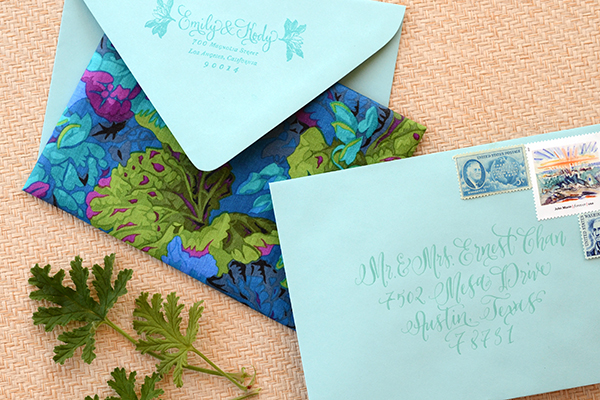
DIY Tutorial: Tropical Invitation Suite + Fabric Envelope by Antiquaria for Oh So Beautiful Paper
DIY Tutorial: Tropical Invitation Suite + Fabric Envelope by Antiquaria for Oh So Beautiful Paper
Materials

Vintage Calligraphy Invitation Stamp

Calligraphy Accent Reply Postcard Stamp

Antique Monogram Stamp

Fabric cut into 13.5″ x 14″ pieces

Rotary cutter, scissors, and self healing mat

Wax Paper
Decoupage, Paint Brushes, and Pant Hanger

Envelope Templates

A7 Cards in fig

A7.5 Envelopes in Pool

Cream Cardstock-cut into 4″ x 6″ and 2″ x 2″ pieces

Stamp pads in white, eggplant and turquoise

Embossing Powder, Embossing Heat Tool

1/8″ grommets

Crop-o-dile Tool for hole punching and grommet installation

Bakers Twine in Teal

Photography: Antiquaria for Oh So Beautiful Paper