Lisa + Paul’s Gold New Year’s Eve Wedding Invitations

With 2015 just a couple of weeks away (!!), I couldn’t resist sharing these sparkly gold New Year’s Eve wedding invitations from Courtney Callahan Paper. Courtney paired gold foil and calligraphy with clock and confetti-inspired details – the perfect mix for a New Year’s Eve wedding!

Gold-New-Years-Eve-Wedding-Invitations-Courtney-Callahan-Paper-OSBP2

From Courtney: Since Lisa and Paul’s New Year’s Eve wedding will take place at Trump International Hotel & Tower Chicago, their wedding invitation had to be equally luxurious. Each piece of the invitation is printed on Crane’s Pearl White Lettra stock and features gold foil and custom calligraphy.

Gold-New-Years-Eve-Wedding-Invitations-Courtney-Callahan-Paper-OSBP4

To tie in the “festive” part of their wedding, the inner envelope was lined in gold glitter and the entire suite was tied together with a gold glitter belly band and tag featuring the couple’s names, wedding date, and a clock at the stroke of midnight – which was also featured on a custom stamp. Guests also noted if they would be “ringing in the new year together” or “toasting from afar.” 

Gold-New-Years-Eve-Wedding-Invitations-Courtney-Callahan-Paper-OSBP3

Gold-New-Years-Eve-Wedding-Invitations-Courtney-Callahan-Paper-OSBP

Gold-New-Years-Eve-Wedding-Invitations-Courtney-Callahan-Paper-OSBP5Gold-New-Years-Eve-Wedding-Invitations-Courtney-Callahan-Paper-OSBP6

Gold-New-Years-Eve-Wedding-Invitations-Courtney-Callahan-Paper-OSBP8

Gold-New-Years-Eve-Wedding-Invitations-Courtney-Callahan-Paper-OSBP9

Thanks Courtney!

Design: Courtney Callahan Paper

Calligraphy: Calligraphy by Cristine

Foil Stamp Printing: Accucolor, Plus

Check out the Designer Rolodex for more tal­ented wed­ding invi­ta­tion design­ers and the real invi­ta­tions gallery for more wedding invitation ideas!

Photo Credits: Heather Roth Photography

Copper + Navy Holiday Table Inspiration

I’ve already professed my love for the combination of navy/indigo and copper. Michele from Meant to Be Calligraphy and I played around with lots of color combinations for the DIY leather napkin ring tutorial with Sakura of America (psssst! Don’t forget to enter the Pen-touch marker giveaway right here!) last week – but the combination of the copper Pen-touch with navy leather was hands down my favorite. So today I thought I’d share some navy and copper (along with a few other metallics) dinner party inspiration and a few more DIY ideas perfect for Christmas or New Year’s Eve!

Copper-Metallic-Navy-Holiday-Table-Inspiration-OSBP-12

Copper-Metallic-Navy-Holiday-Table-Inspiration-OSBP-33

Copper-Metallic-Navy-Holiday-Table-Inspiration-OSBP-41

I kept the table itself fairly simple, with one medium size floral centerpiece in a vintage copper compote, a couple of smaller arrangements in copper tumblers, taper candles in vintage brass candlesticks, and this gold foil and kraft paper table runner from Minted. Since we envisioned a fairly intimate table with 6-8 guests, we mixed up a large batch of a signature cocktail – a Persimmon Margarita (recipe coming up in just a bit!) – in our DIY color dipped swing bottles and put them on the table for people to enjoy as they please. For a larger gathering, you could have several drinks available – or mix up a bowl of punch!

Copper-Metallic-Navy-Holiday-Table-Inspiration-OSBP-229

Copper-Metallic-Navy-Holiday-Table-Inspiration-OSBP-127

You can find the copper and navy leather napkin ring tutorial right here. Michele and I also created cocktail menus with copper ink on navy leather – Michele did a large version that could be displayed next to a bar for a larger party, while I tried my hand at a smaller menu that could be placed between guests at the table.

Copper-Metallic-Navy-Holiday-Table-Inspiration-OSBP-85

Copper-Metallic-Navy-Holiday-Table-Inspiration-OSBP-137

For the flowers, I fell in love with pale lavender anemones at the flower market. I paired the anemones with white and blush ranunculus and seeded eucalyptus. I love the texture of seeded eucalyptus – and you can get a huge bunch without breaking the bank!

Copper-Metallic-Navy-Holiday-Table-Inspiration-OSBP-17

Copper-Metallic-Navy-Holiday-Table-Inspiration-OSBP-22

Copper-Metallic-Navy-Holiday-Table-Inspiration-OSBP-23

Copper-Metallic-Navy-Holiday-Table-Inspiration-OSBP-106

I wanted to see what other surfaces the Pen-touch paint markers could write on. I’m pretty sure I gave Michele her biggest challenge yet when I asked her to write on thin sheets of copper! We used these copper sheets with white Pen-touch markers to create two signs: one inviting guests to take a seat and another to display next to party favors.

Copper-Metallic-Navy-Holiday-Table-Inspiration-OSBP-171

Copper-Metallic-Navy-Holiday-Table-Inspiration-OSBP-238

Lauren and I are totally on the same page this week – I used the Pen-touch markers to customize our drinking glasses! I used gold and copper Pen-touch markers in fine weight to write out “cheers!” on some tumblers. It took a couple of coats to get a nice solid line – so if you try this at home just be sure to let each coat dry fully before putting on the second coat. You could use your handwriting (or calligraphy) but Michele was kind enough to offer a template that you can trace onto your glasses! You can download the “cheers!” template here – it comes in a couple of sizes for use on different sized glasses. Just cut out the words, tape to the inside of your glass, and trace over it with your Pen-touch markers!

Copper-Metallic-Navy-Holiday-Table-Inspiration-OSBP-214

Copper-Metallic-Navy-Holiday-Table-Inspiration-OSBP-218

Copper-Metallic-Navy-Holiday-Table-Inspiration-OSBP-117

Check back soon for the Persimmon Margarita recipe!

Calligraphy: Meant to Be Calligraphy

Leather: Matine

Paint Markers: Sakura Pen-touch Paint Markers

Photos by Nole Garey for Oh So Beautiful Paper

Our Minted Booklette Holiday Cards

OSBP-Booklette-Holiday-Cards-Minted-57

This is our second year sending out personalized photo holiday cards, and since most of our family (and some of our friends) live far away, they haven’t seen Sophie for a while – or even met Alice! We have a lot to catch our family and friends up on, and it seemed like it might be too big of a challenge for our annual holiday cards. But when I heard that Minted released a brand new holiday card format called the Booklette, I was dying to give them a try. Today I’m excited to share the cards that we chose!

OSBP-Booklette-Holiday-Cards-Minted-17

Minted currently offers 43 Booklette holiday card designs – ranging from clean and modern to playful hand lettering and everything in between. I’m a big fan of sending out New Year’s cards (gives us procrastinators a bit more time!), and I love that this particular card design uses one of my favorite calligraphy fonts – Asterism. With eight pages of photos and text, we were able to include a few sweet photos of the girls (taken by the fabulous Sweet Root Village) and an updated family photo, along with a brief text update about Sophie and Alice. It was the perfect fit for our growing family!

OSBP-Booklette-Holiday-Cards-Minted-34

OSBP-Booklette-Holiday-Cards-Minted-87

OSBP-Booklette-Holiday-Cards-Minted-62

I also love love love that Minted introduced coordinating envelopes with recipient address printing! Not only are the new envelope designs totally cute, but they’re such a lifesaver for those of us who struggle to find the time to sit down and address dozens of cards all at the same time. It took me weeks to address our cards last year – when we only had one child – and they were ridiculously late as a result. I’m so grateful to be getting them out on time this year!

OSBP-Booklette-Holiday-Cards-Minted-5

If you’re still in need of holiday cards – there’s still time to send them out! (Or just go with New Year’s cards like I do.) You can browse the Minted Booklette holiday card designs right here!

This post is sponsored by Minted. All content and opinions are my own. Thank you for supporting the sponsors that help make Oh So Beautiful Paper possible!

Photos by Nole Garey for Oh So Beautiful Paper

DIY Tutorial: Duck Tape Calligraphy Cocktail Glasses

The holidays are here which means, lots of parties to prepare for! One of my favorite ways to spruce up our bar for get togethers is grabbing a few new cocktail glasses to add to the collection. This year, I thought I would give a few DIYs a try and change up what we already had in our cabinets – starting by creating some custom calligraphy cocktail glasses. I used my calligraphy for this project and you can use your handwriting, or a font you already have on your computer! Here’s how to customize your cocktail glasses this holiday season. –Lauren

DIY Tutorial: Custom Duck Tape Calligraphy Cocktail Glasses by A Fabulous Fete for Oh So Beautiful Paper

DIY Tutorial: Custom Duck Tape Calligraphy Cocktail Glasses by A Fabulous Fete for Oh So Beautiful Paper

Supplies

Duck Tape sheets

Cutting machine like a Cricut or Silhouette

Plain glasses

DIY Tutorial: Custom Duck Tape Calligraphy Cocktail Glasses by A Fabulous Fete for Oh So Beautiful Paper

Step 1. Letter the words that you would like to cut for your glasses. The thicker the letters the easier you will be able to cut them out of the tape. You can also create files with your favorite fonts if you don’t want to use a hand lettered font.

DIY Tutorial: Custom Duck Tape Calligraphy Cocktail Glasses by A Fabulous Fete for Oh So Beautiful Paper

Step 2. Scan and upload your words to your program and cut per the directions on the machine you have.

Step 3. Carefully peel each word up and apply to the glasses. I found it was easiest to peel a few letters at a time and apply rather than trying to take the whole word off of the sheet.

DIY Tutorial: Custom Duck Tape Calligraphy Cocktail Glasses by A Fabulous Fete for Oh So Beautiful Paper

That’s it! Now you have new (or maybe just updated!), custom glasses for your party! You can stick with general exclamations or even cut out your guests’ names so everyone can keep tabs on their cocktails.

DIY Tutorial: Custom Duck Tape Calligraphy Cocktail Glasses by A Fabulous Fete for Oh So Beautiful Paper

Tips

– Buy extra duck tape! It will take a bit to get a hang of applying and removing so buy a practice sheet to get you started.

– White or light colors will look best as the back of the sheet is a white adhesive and it stuck out of bit on the black tape.

– Keep your font THICK if you can.

How do you guys customize your cocktail glasses for the holidays?

Photos by Lauren Saylor of A Fabulous Fete for Oh So Beautiful Paper

DIY Tutorial: Leather and Paint Pen Napkin Rings (and a Giveaway!)

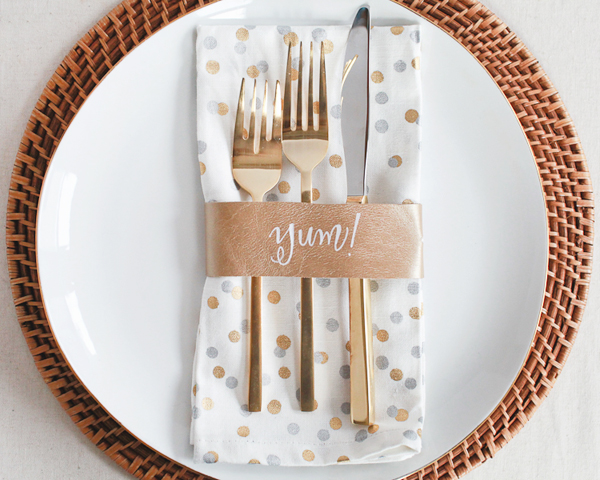
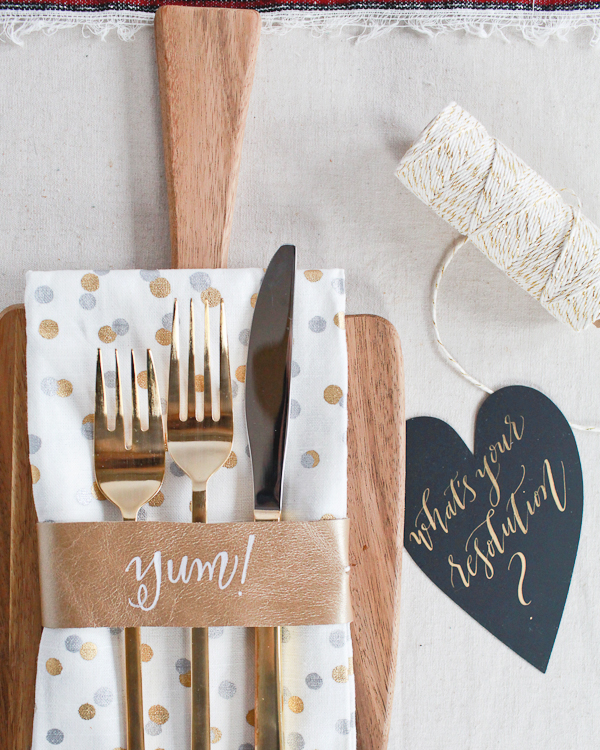
I love the idea of incorporating unusual materials into a party, from acrylic cocktail signs to clay save the dates and everything in between. I was super excited when Sakura of America asked me to come up with a fun project featuring their Pen-touch paint markers. I expect you’ll be seeing these markers in many future tutorials (they can seriously write on anything), but today I’m sharing the first project – DIY leather napkin rings perfect for a dinner party any time of year!

DIY-Leather-Napkin-Rings-Sakura-Pentouch-Paint-Pens-OSBP-60

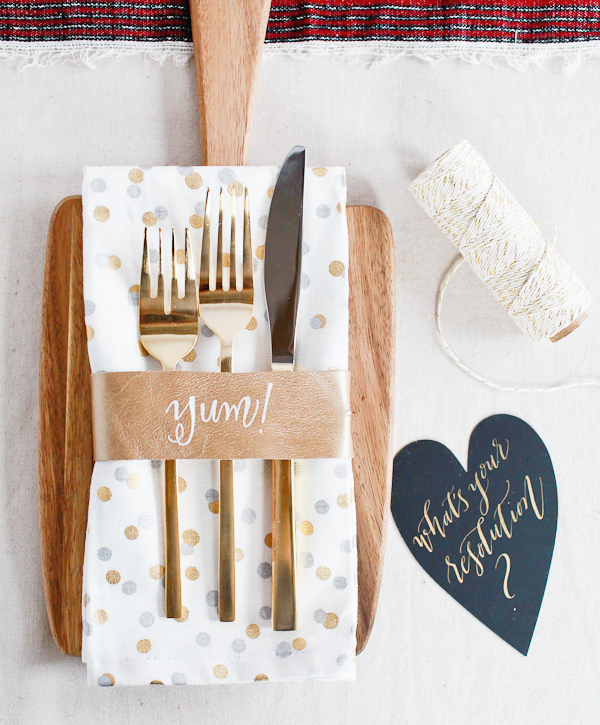
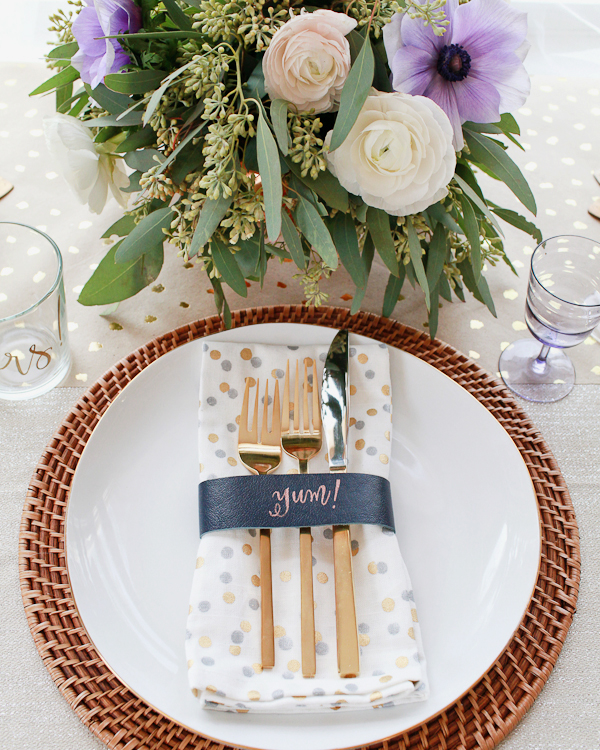
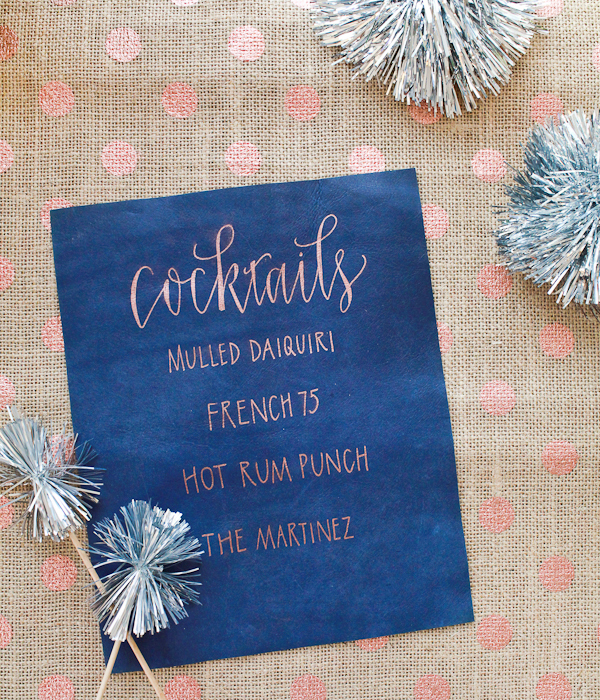
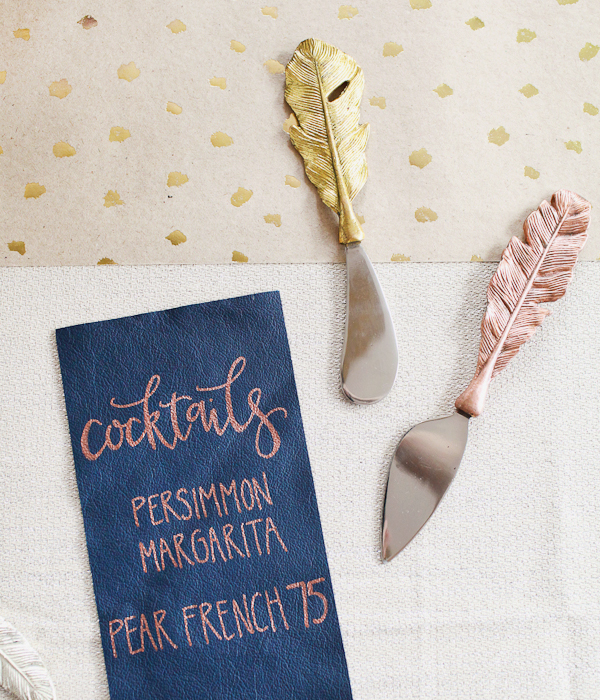
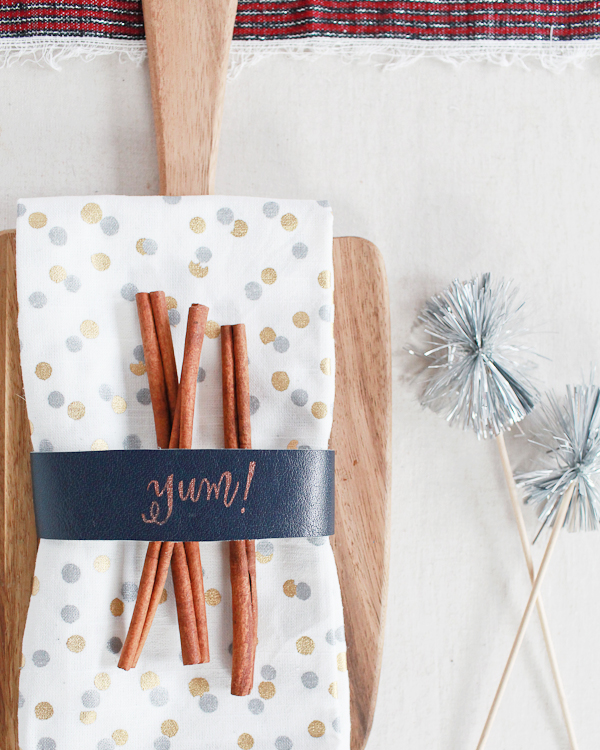
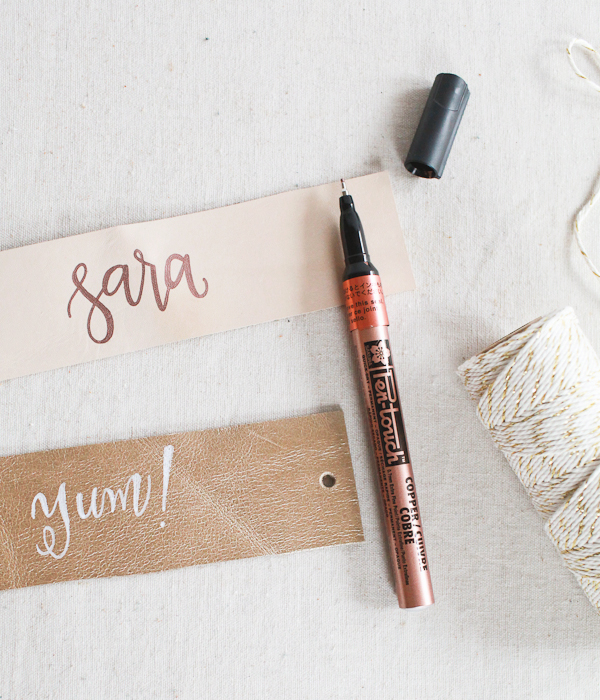
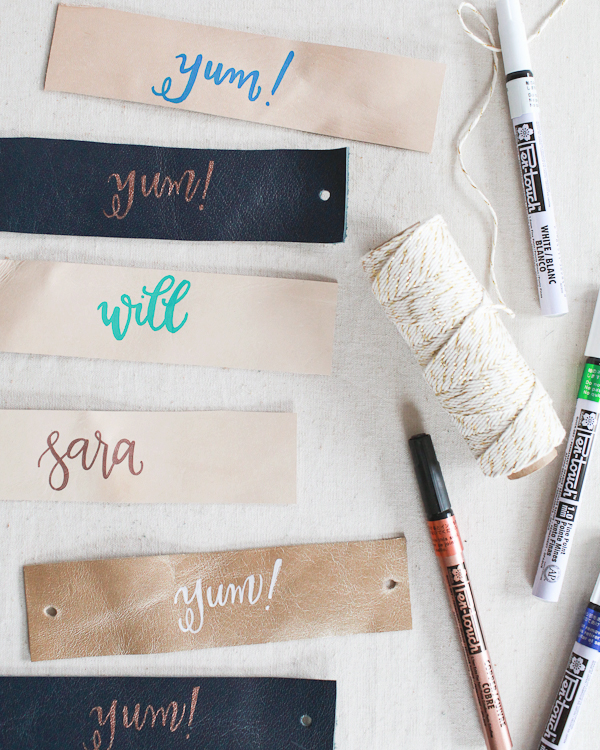
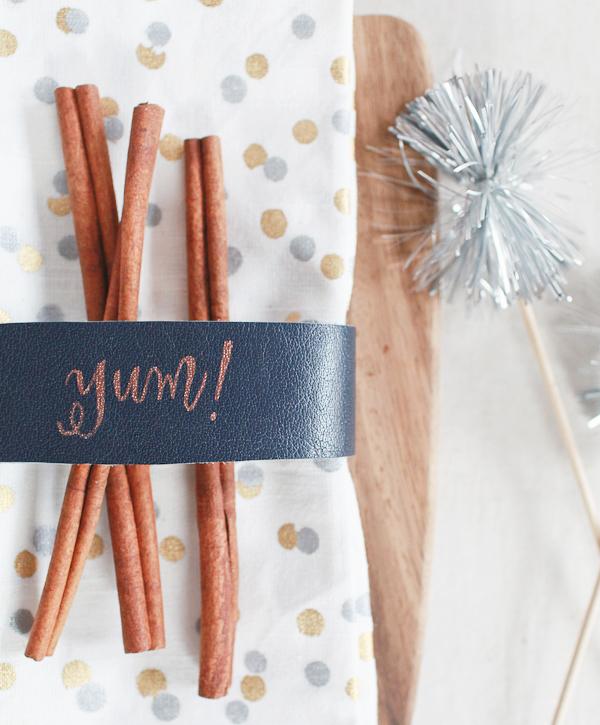
Sakura recently added a color line to the existing collection of white and metallic Pen-touch paint markers. We combined jewel tones – green and blue – with white and copper for a beautiful seasonal color palette. Carolyn from Matine kindly let me raid her leather scraps, including the most gorgeous navy and gold leather – but you can also find leather in your local craft store. I love love love the combination of the copper Pen-touch markers with the navy leather! Sakura’s Pen-touch markers are completely opaque, so you can write on dark surfaces (anything from paper to wood to leather) and the lettering will still be visible. We wanted a short, fun phrase to write on our napkin rings, so Michele from Meant to Be Calligraphy lettered the phrase “yum!” in our color palette.
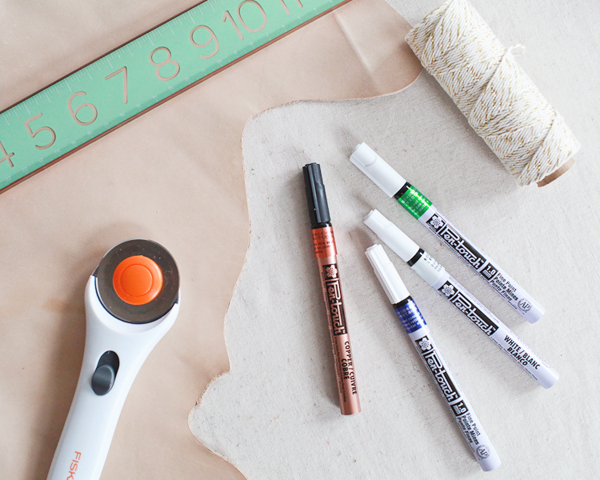
DIY-Leather-Napkin-Rings-Sakura-Pentouch-Paint-Pens-OSBP-62

DIY-Leather-Napkin-Rings-Sakura-Pentouch-Paint-Pens-OSBP-13

Supplies

Sakura Pen-touch Paint Markers

Leather

Ruler

Rotary Cutter + Cutting Mat

Awl (not shown)

Twine + Scissors

DIY-Leather-Napkin-Rings-Sakura-Pentouch-Paint-Pens-OSBP-1

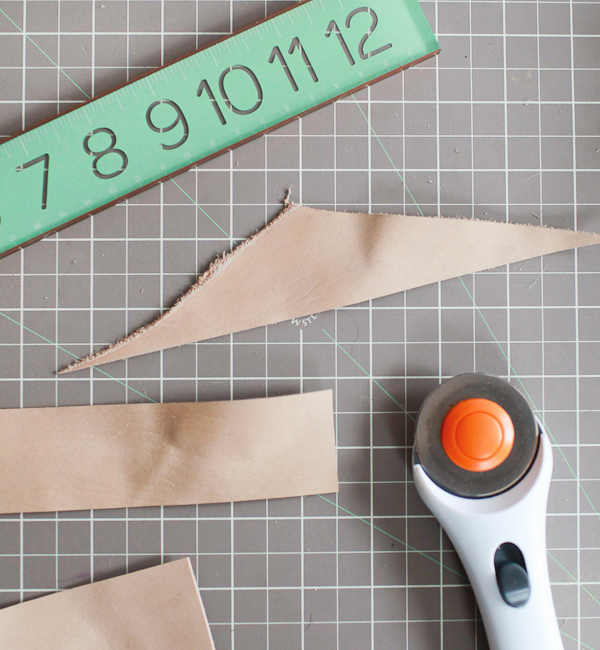
Step 1: First you’ll need to cut your leather into strips (mine were approximately 6″ wide and 1.5″ tall) using your rotary cutter, ruler, and cutting mat.

DIY-Leather-Napkin-Rings-Sakura-Pentouch-Paint-Pens-OSBP-34

DIY-Leather-Napkin-Rings-Sakura-Pentouch-Paint-Pens-OSBP-16

Step 2: Write your desired phrase in the middle of the strip. You could also write a name instead of a phrase to transform these napkin rings into place cards!

DIY-Leather-Paint-Pen-Napkin-Rings-Sakura-PenTouch-OSBP-29

Step 3: Using an awl, punch a hole on either end of the strip big enough to thread twine through (approximately 1/8″ in diameter).

DIY-Leather-Paint-Pen-Napkin-Rings-Sakura-PenTouch-OSBP-30

DIY-Leather-Paint-Pen-Napkin-Rings-Sakura-PenTouch-OSBP-37

Step 4: Thread twine along the back of the leather strip and through both holes. Tighten as desired and tie closed. Done!

DIY-Leather-Napkin-Rings-Sakura-Pentouch-Paint-Pens-OSBP-41

DIY-Leather-Napkin-Rings-Sakura-Pentouch-Paint-Pens-OSBP-49

DIY-Leather-Napkin-Rings-Sakura-Pentouch-Paint-Pens-OSBP-64

Michele and I had so much fun with this project! I’ve always struggled with using paint markers in the past – the paint wouldn’t flow evenly, causing the paint to pool or splatter in places – but Sakura’s Pen-touch markers write so smoothly! They didn’t ask me to say that, it’s just the truth. I’m also a big fan of the fact that Sakura offers their markers in different weights, from extra fine (great for hand lettering!) to medium (for large scale projects). I’m hoping Sakura develops a chalk marker next!

Sakura is also kindly offering a giveaway to one lucky OSBP reader! One lucky reader will win a Pen-touch package including a 3 pack of Metallic Markers in Extra Fine Point and a 7 pack of Color Markers in Fine Point. To enter, just leave a comment below letting us know what you’d do with your Pen-touch markers! You’ll have until midnight EST on Wednesday, December 17 to enter before we pick a winner at random!*

THIS GIVEAWAY IS NOW CLOSED – Congratulations to the winner, commenter #6: Tiffany!

Calligraphy: Meant to Be Calligraphy

Leather: Matine

Photo Credits: Nole Garey for Oh So Beautiful Paper

This post is sponsored by Sakura of America. Thank you for supporting the sponsors that help make Oh So Beautiful Paper possible!

*Limited to U.S. and Canadian readers only. Limit one entry per person. Please do not leave your email or web address in the body of the comment, only in the allotted boxes. $40 approximate total retail value. Winners will be contacted via email after comments close.