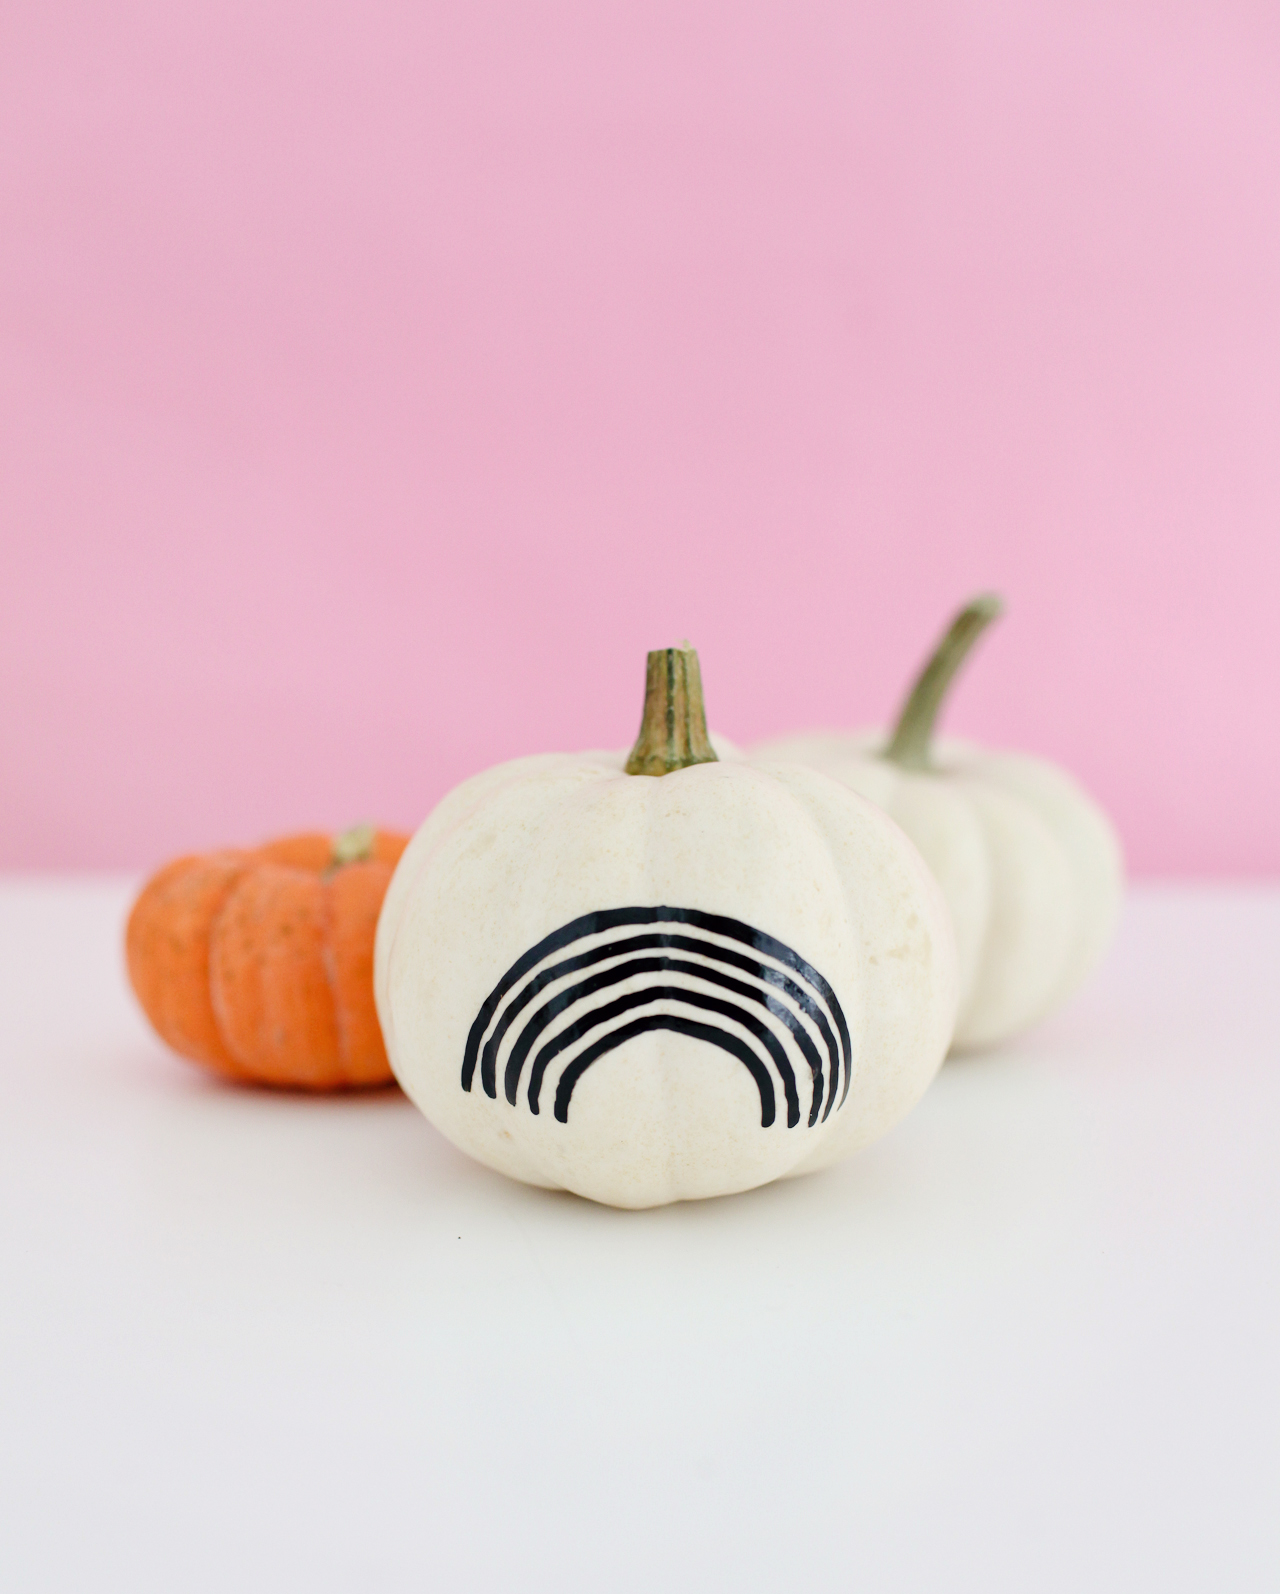
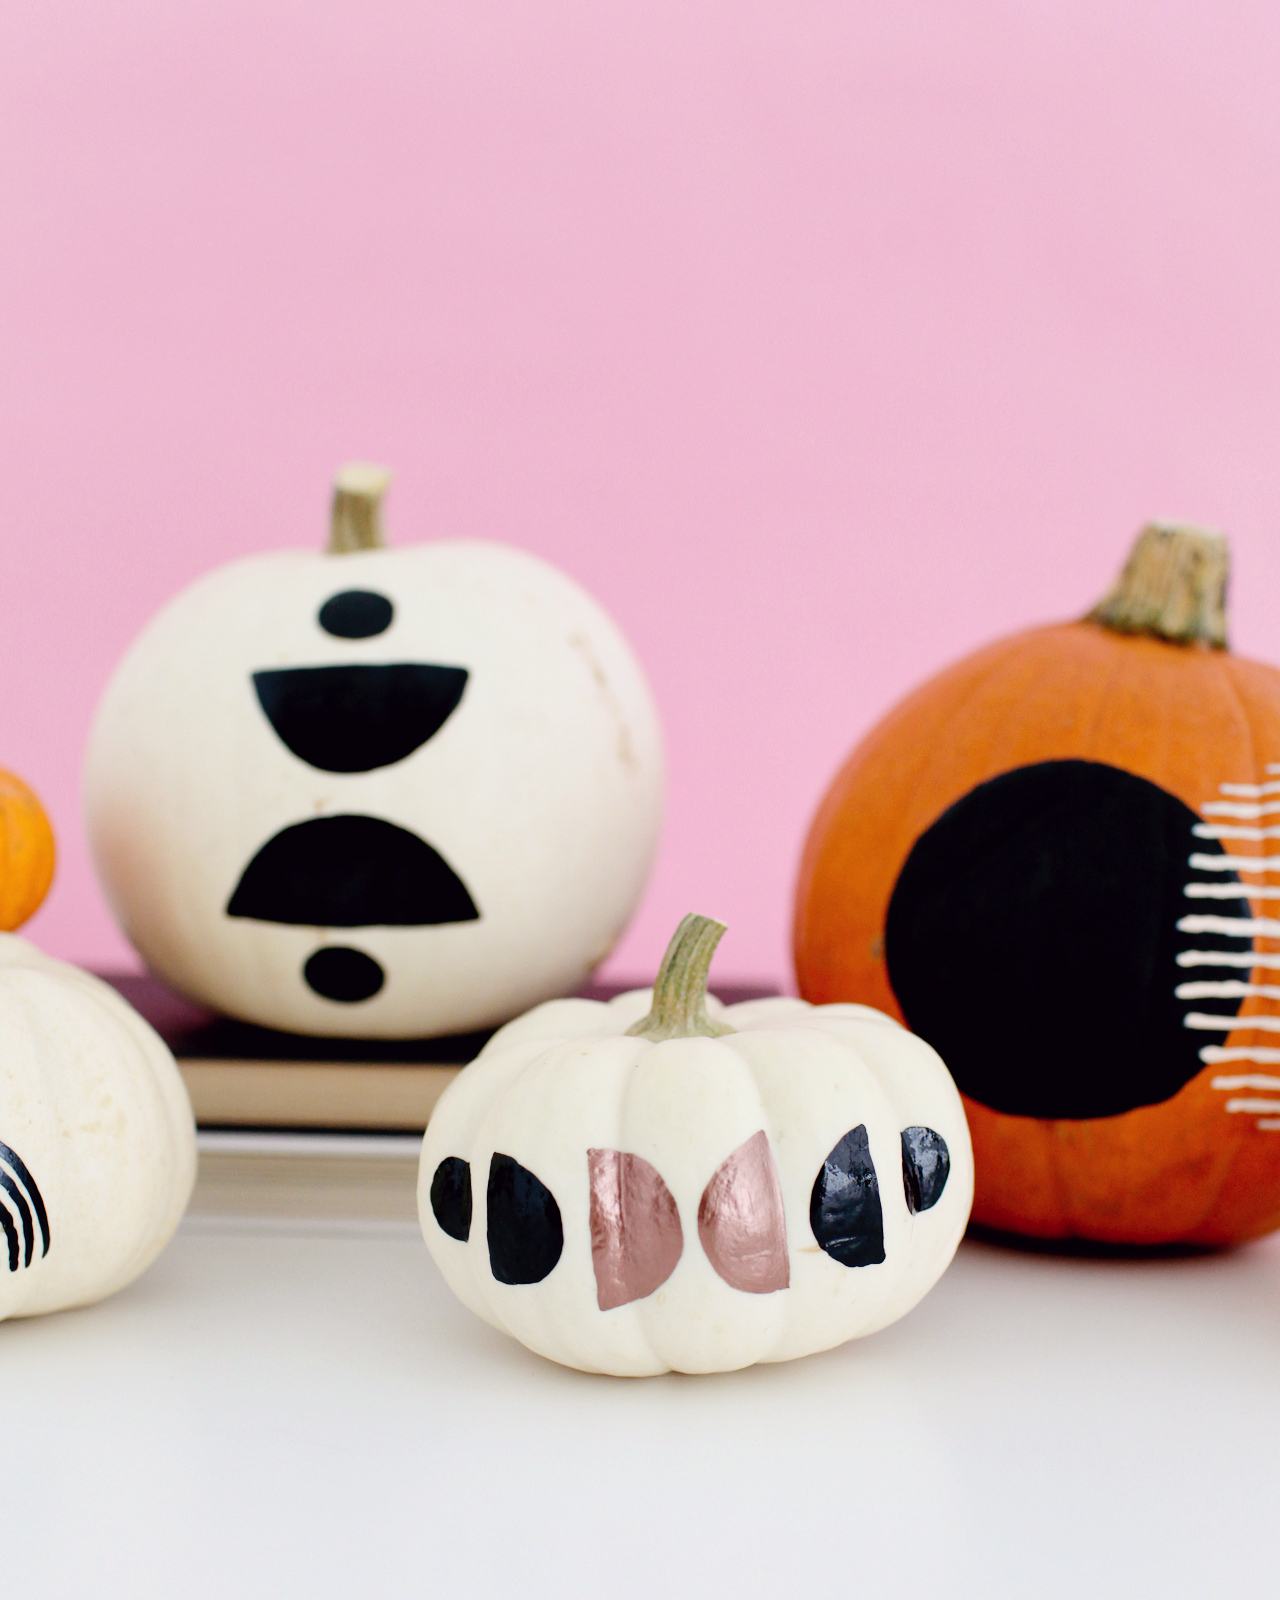
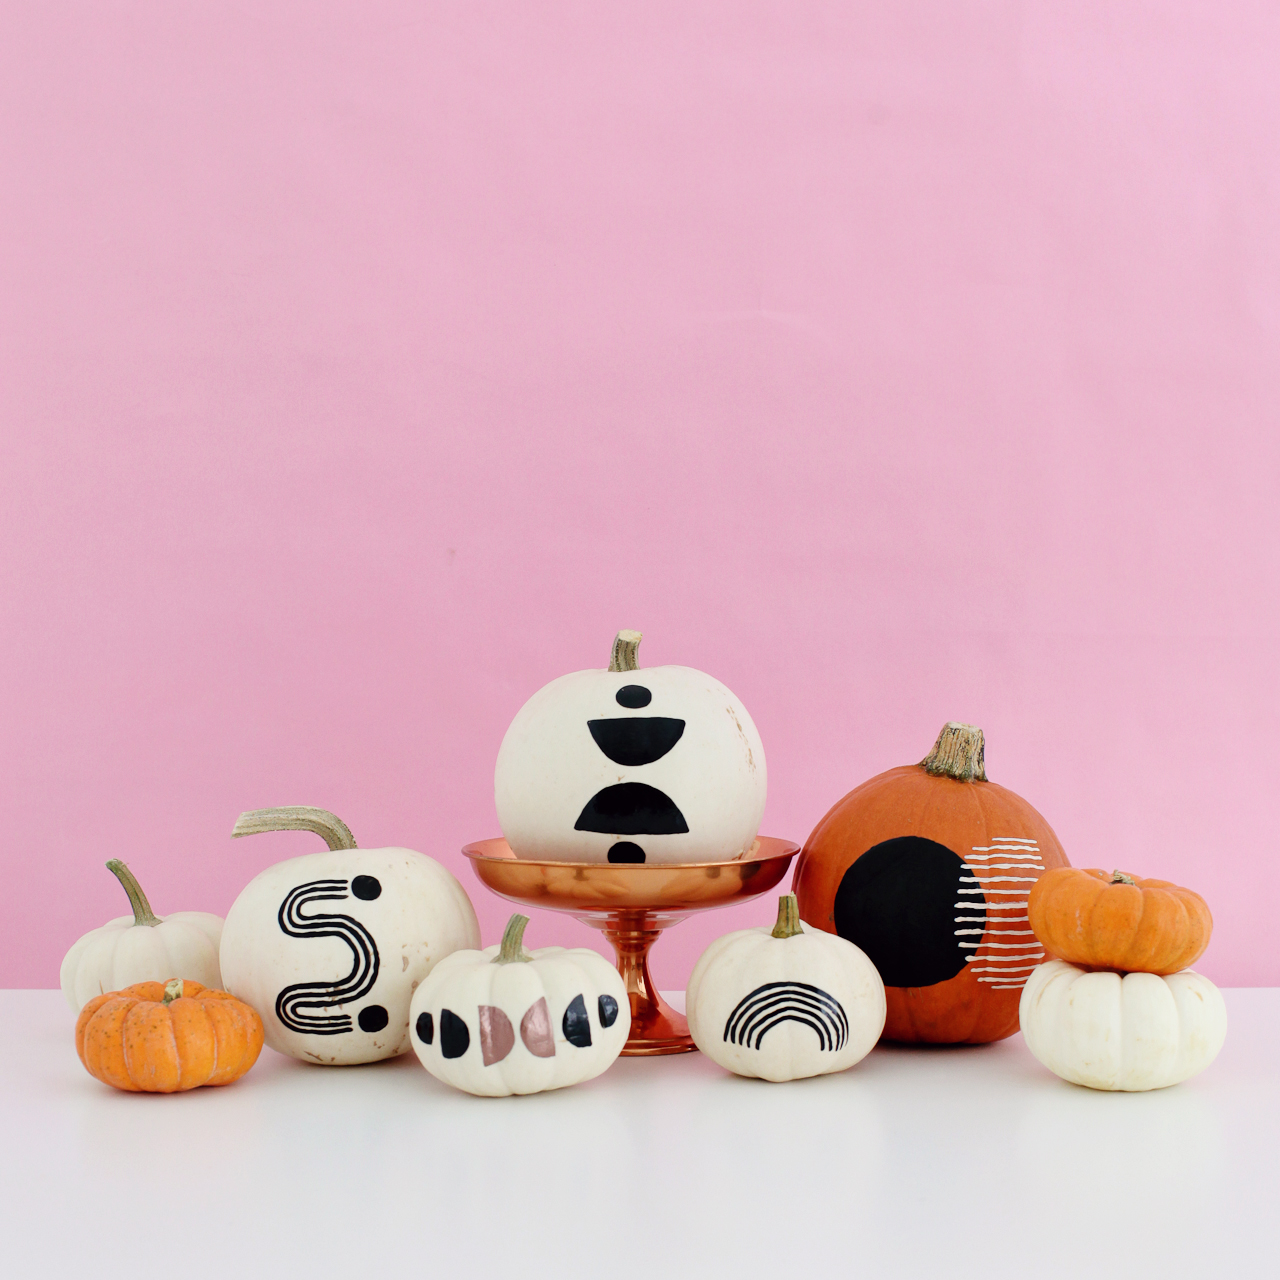
Last week’s DIY pumpkin tutorial was all about color – and this week we’re all about black and white! Well, and maybe a bit of copper for a small dose of sparkle. But for those of you who prefer to keep your pumpkin color palette on the neutral side, these DIY block printing inspired pumpkins are for you! I looooooove the black paint on white pumpkins, and I even added a couple of orange pumpkins (shocker!) for some visual interest!
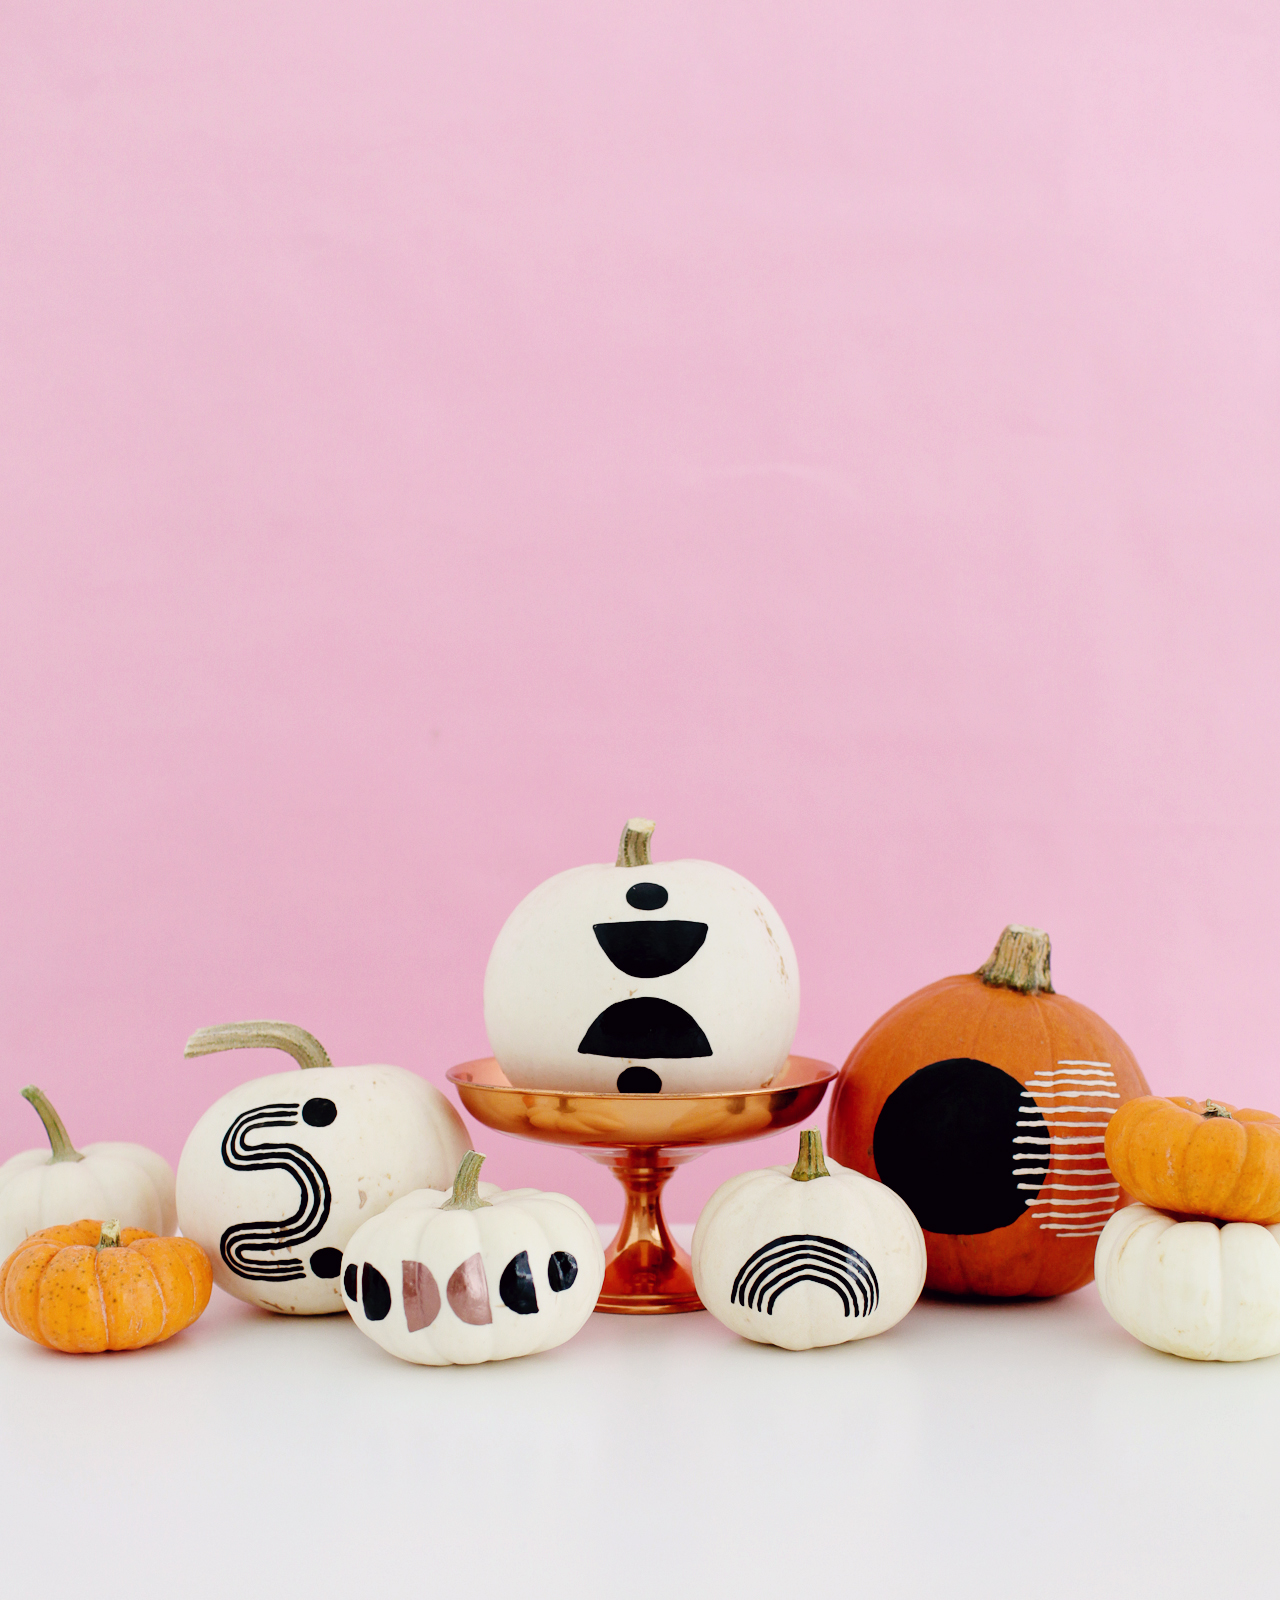
Sometimes the weirdest ideas jump into my head – and that’s kind of what happened here. The vision for these pumpkins just came to me while I was working on the terrazzo pumpkins last week. I’ve always loved traditional block printing, and I’ve been feeling especially inspired by geometric shapes and arches lately. I drew my inspiration for the shapes in these pumpkins from Block Shop Textiles, artist Sofia Shu, and Electric Sun Creatives. Fingers crossed you love these pumpkins as much as I do!
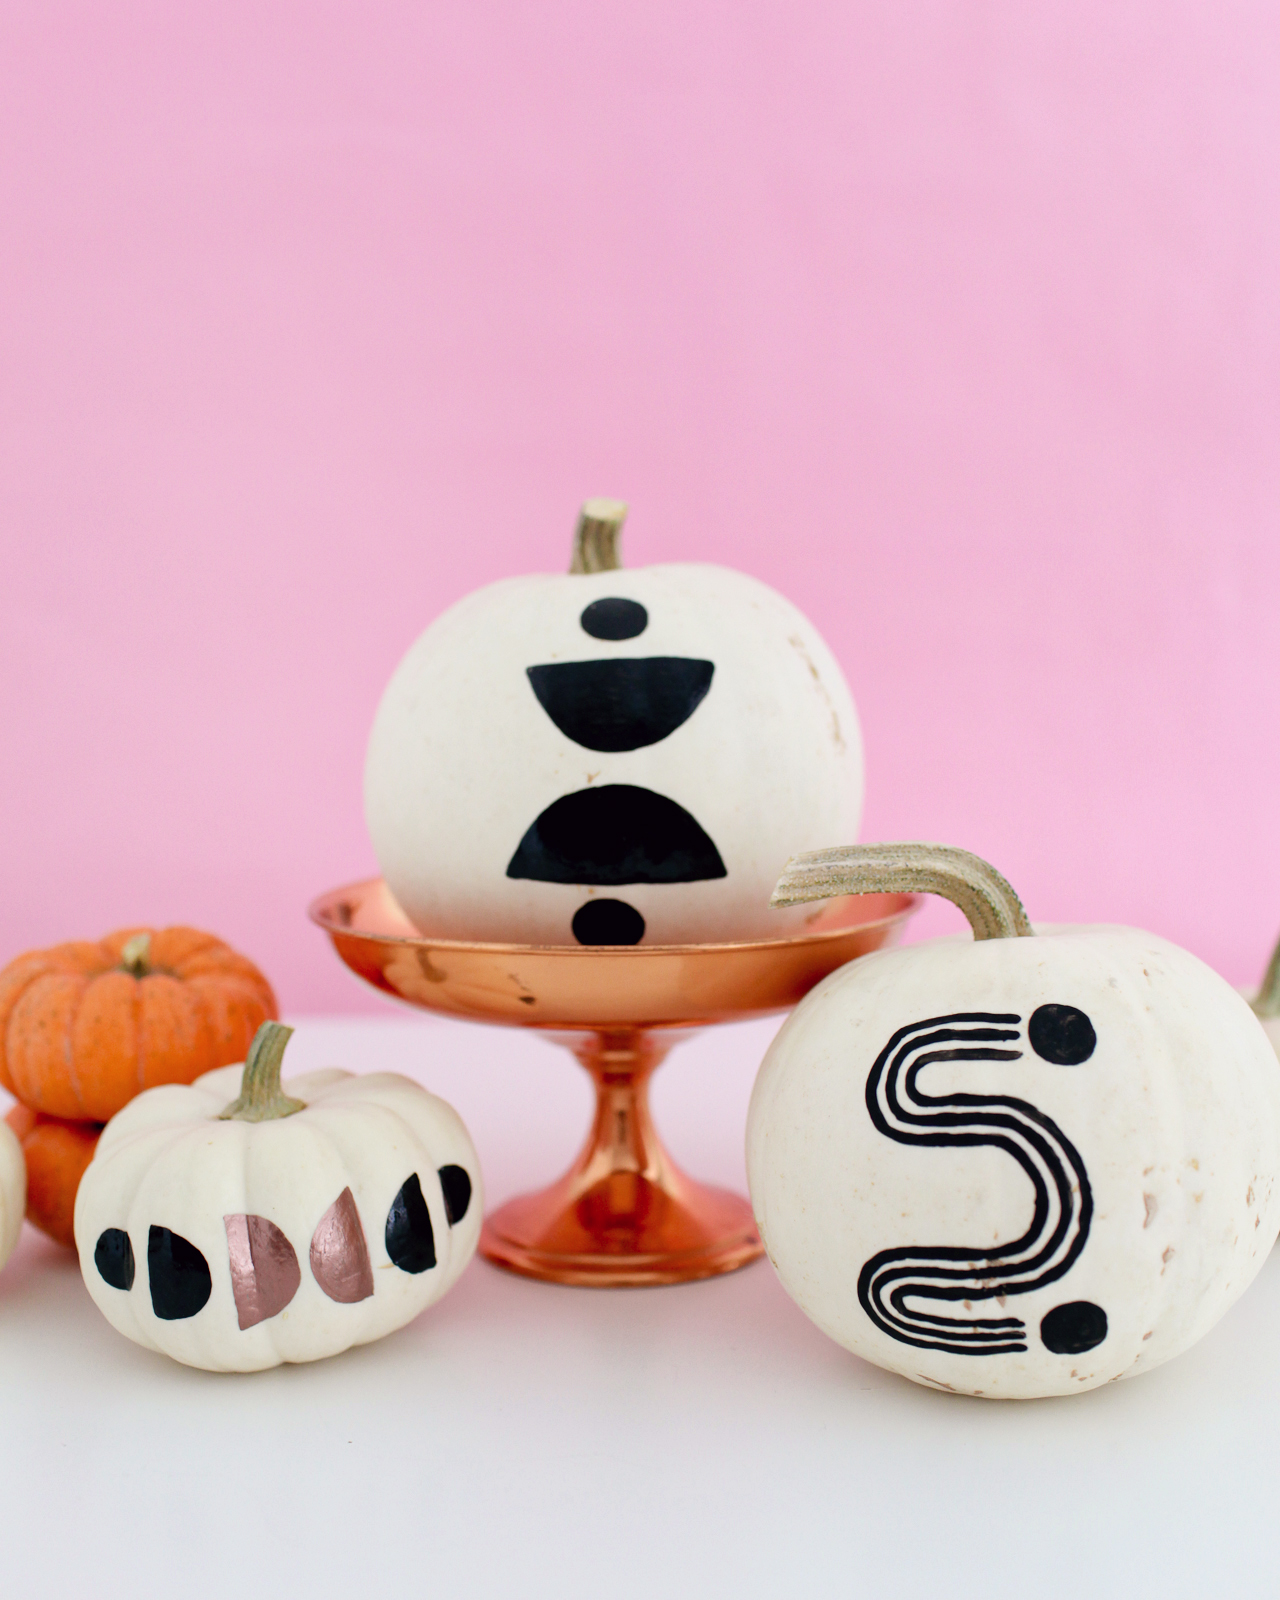
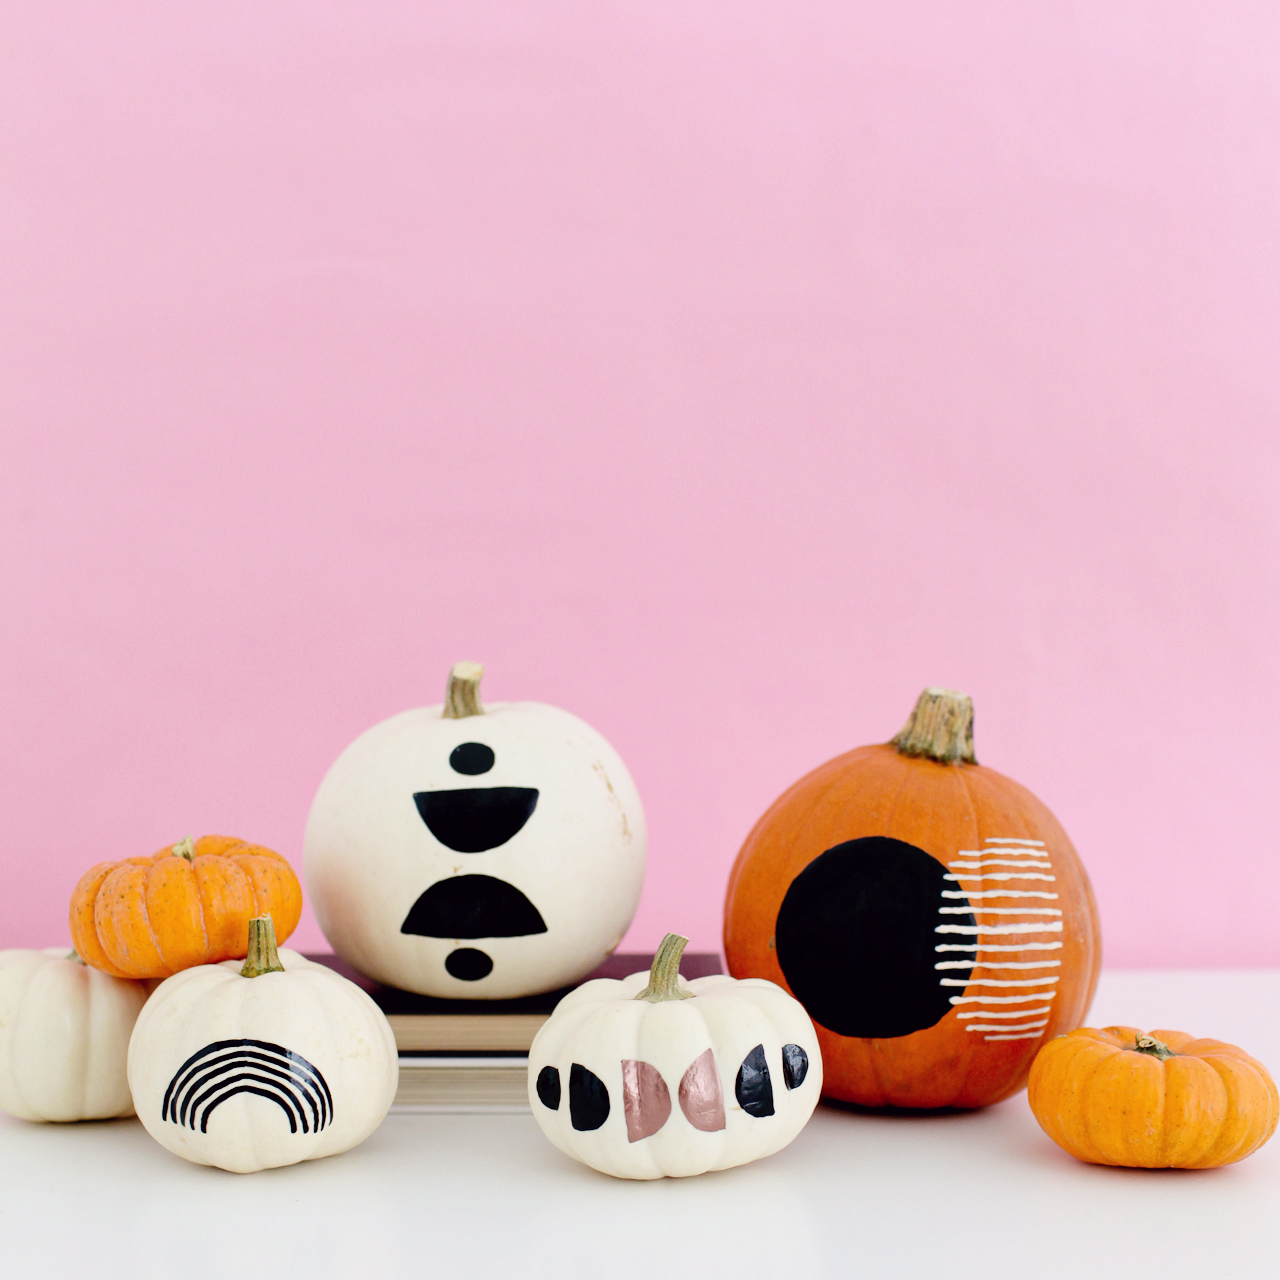

I kept the color palette mostly black and white, but then threw in a bit of copper on a whim! And the materials list for these pumpkins could not be more simple – just my all-time favorite paint pens, some matte craft paint, and brushes. That’s it! Are you ready to make some??


Materials
Sakura of America Pen-touch Paint Markers in Black, Copper, and White
Paint brushes (the smaller the better!)
Craft paint in matte black and opaque white
Paint palette or paper plate
Card stock (optional)
Scissors (optional)
Pumpkins in varying shapes and sizes

To make the DIY Block Printing Inspired Pumpkins:
Step 1. Start by coming up with a few shape combinations that you might want to use on your pumpkins. I sketched my ideas onto a sheet of paper – I didn’t necessarily stick to those exact combinations, but they helped me get a sense of what combinations I liked!
Step 2. Depending on your comfort level freehanding things, you might also want to trace a few round objects to use as guides for your pumpkins. I used a few random things to trace circles and half circles in various sizes onto thick card stock, then cut those shapes out to use them as guides when I was ready to decorate the pumpkins. If you don’t need shape guides, proceed to step 3!
Step 3. If you’re using guides, use your paint pens to trace your shapes onto your pumpkins, starting at the bottom of your pumpkin and working up towards the top. For larger shapes, fill the inside of the shape with craft paint and a small paint brush. Use a paint pen for line based shapes – although you can always go over the lines with a paint brush if needed (especially if using white paint over an orange pumpkin).
Step 4. Allow the paint to dry and apply a second coat, if necessary. Then enjoy your beautiful block printing inspired pumpkin!


If you make these pumpkins, you absolutely HAVE to tag me on Instagram so I can see photos! Promise me, ok?? Have fun decorating everyone!
p.s. DIY Terrazzo Pumpkins and DIY Matisse Pumpkins
Photo Credits: Nole Garey for Oh So Beautiful Paper