Courtney + Paul’s Brooklyn Wedding Invitations

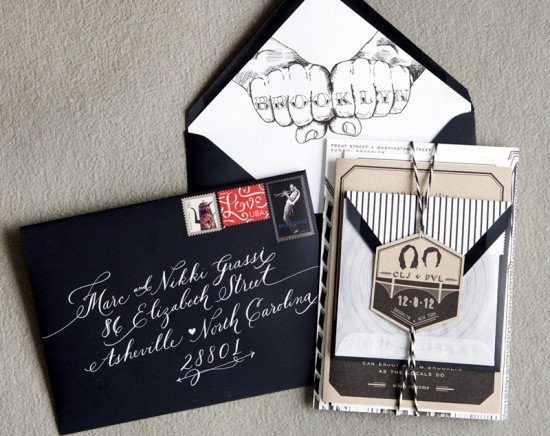
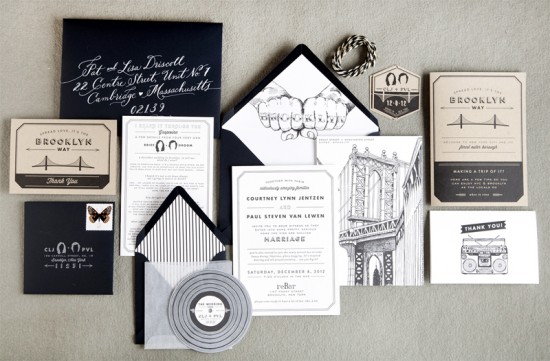
Happy Monday everyone! We’re kicking the week off with the totally awesome wedding invitations of Courtney from Swiss Cottage Designs! Courtney was inspired by her adopted home town of Brooklyn and her love of music to create a stunning black and white invitation suite with hand drawn illustrations, cute silhouettes, and even a miniature record rsvp card. So cool!

Brooklyn Wedding Invitations by Swiss Cottage Designs via Oh So Beautiful Paper (11)

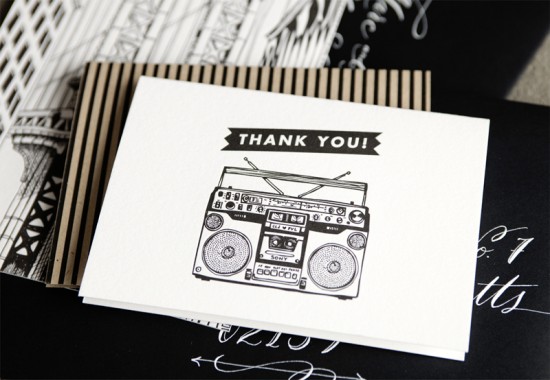
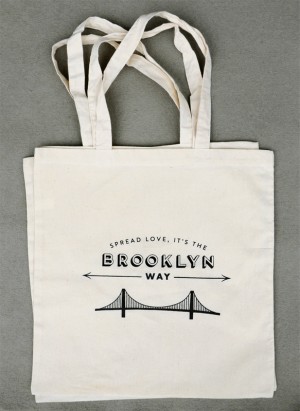
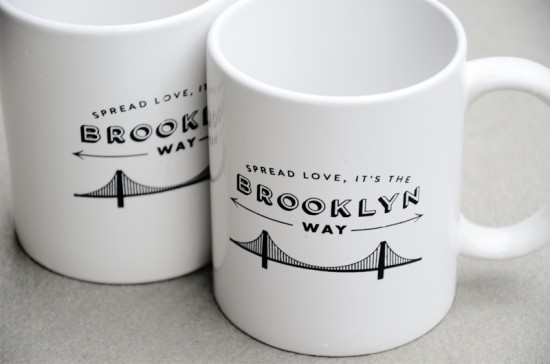
From Courtney: We didn’t really have a theme going into our wedding but one thing that kept coming up was music and the colors black and white. Our save the date was based on the Rob Base song “It Takes Two” so we weren’t afraid to get a little weird. For the actual wedding, I used a line from a Biggie song that ended up being a repeating theme throughout our invitations and day-of pieces.

Brooklyn Wedding Invitations by Swiss Cottage Designs via Oh So Beautiful Paper (12)

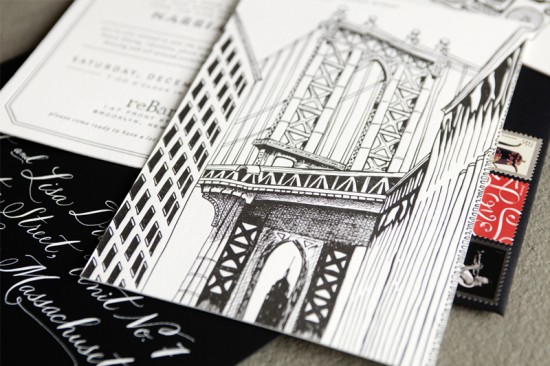
I knew I wanted the invitation to be focused around a hand drawn illustration since that is what I love to do. We got married in the DUBMO neighborhood of Brooklyn which has some pretty awesome views. There is one iconic street that showcases the Manhattan Bridge with the Empire State Building nestled below; I chose that as our main image.

Brooklyn Wedding Invitations by Swiss Cottage Designs via Oh So Beautiful Paper (10)

Brooklyn Wedding Invitations by Swiss Cottage Designs via Oh So Beautiful Paper (6)

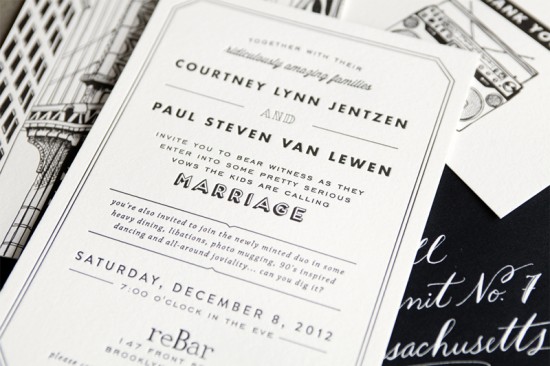
The invitation was printed in two parts then duplexed to #220 and printed on Crane Lettra. One of the important things for me was to have the invitation sound like the way we both actually speak. We have a very dry sense of humor and we really wanted that to come out in our invitation text. The ridiculously talented Jenna of Love, Jenna Calligraphy addressed our black envelopes in white ink.

Brooklyn Wedding Invitations by Swiss Cottage Designs via Oh So Beautiful Paper (8) Brooklyn Wedding Invitations by Swiss Cottage Designs via Oh So Beautiful Paper (7)

My personal favorite detail was the envelope liner! My friend is a photographer and when looking through her pictures, I saw one of a guy with knuckle tattoos. I knew I wanted to incorporate that same idea into our suite somehow. One I realized that “BROOKLYN” fit on the knuckles, it was a done deal!

Brooklyn Wedding Invitations by Swiss Cottage Designs via Oh So Beautiful Paper (9)

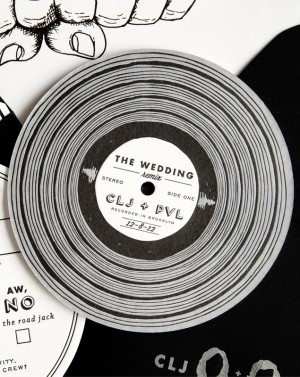
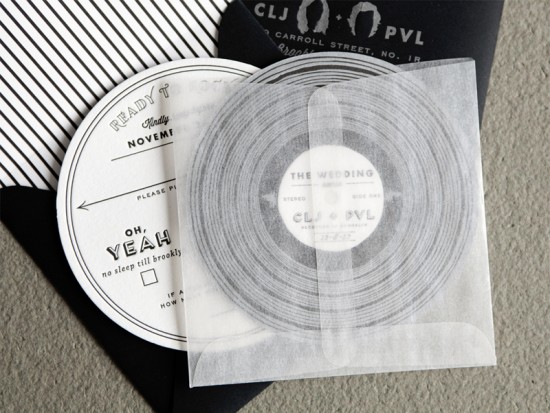
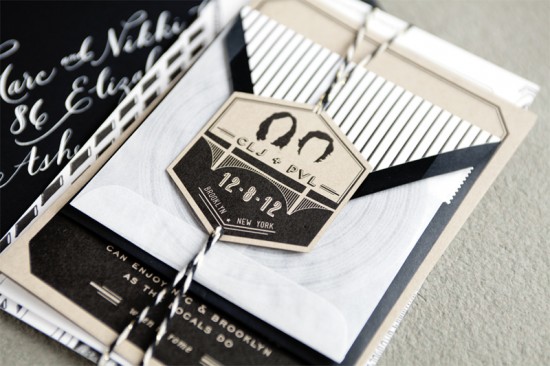
For the RSVP card, I created a letterpress printed mini-record complete with glassine sleeve. I paired this with a 4″ x 4″ square black envelope and had our return address letterpress printed in matte silver on the front. We also provided our guests with an insert with suggestions for spending a perfect winter weekend in NYC and Brooklyn. This was printed flat on kraft paper. I finished the suite with black + gold twine (from the awesome Knot & Bow) and had a die cut tag created to hold everything together.

Brooklyn Wedding Invitations by Swiss Cottage Designs via Oh So Beautiful Paper (5)

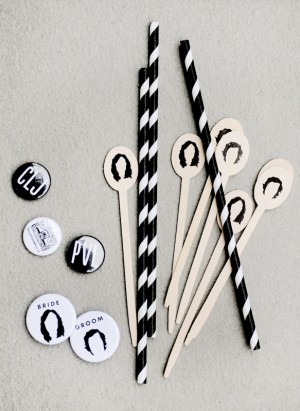
I love little silhouettes and created one of our hair to use throughout our suite as a continual theme. Overall, we wanted our invitations to feel classic, set the tone for our wedding, but most importantly to make our friends and family laugh.

Brooklyn Wedding Invitations by Swiss Cottage Designs via Oh So Beautiful Paper (4)

Brooklyn Wedding Invitations by Swiss Cottage Designs via Oh So Beautiful Paper (2) Brooklyn Wedding Invitations by Swiss Cottage Designs via Oh So Beautiful Paper (1)

Brooklyn Wedding Invitations by Swiss Cottage Designs via Oh So Beautiful Paper (3)

So awesome – thanks Courtney!

Invitation Design: Swiss Cottage Designs

Calligraphy: Love, Jenna Calligraphy

Twine: Knot & Bow

Swiss Cottage Designs is a member of the Designer Rolodex – you can see more of Courtney’s amazing work right here or visit the real invi­ta­tions gallery for more wedding invitation ideas!

Photo Credits: Courtney Jentzen | Swiss Cottage Designs

{happy weekend!}

Whew! From a less-than-24-hour trip to New York on Tuesday (more on that next week) to a photo shoot yesterday for a special upcoming project, not to mention preparing for our big move in less than two weeks, it’s been a whirlwind of a week! Also, Sophie turned SIX MONTHS OLD! I can’t believe how fast her first year is flying by, and right now we’re just trying to soak up every second. This weekend will be filled with packing, packing, and more packing, but we’re also hoping to enjoy some of the wonderful spring weather that has been peeking through lately. But in the meantime…

Oh So Beautiful Paper Instagram Photos (3) Oh So Beautiful Paper Instagram Photos (1)

Oh So Beautiful Paper Instagram Photos (2) Oh So Beautiful Paper Instagram Photos (4)

Photos by me via Instagram

…a few links for your weekend!

This week on Oh So Beautiful Paper:

We have a fun cocktail coming up for you this afternoon, so check back a bit later for the recipe!  I hope you all have a wonderful weekend, and I’ll see you back here on Monday!  xoxo

p.s. Stationer friends! Save the dates for this year’s Paper Party during the week of the National Stationery Show went out earlier this week. If you’ll be exhibiting at the Stationery Show, attending as a retailer, or will otherwise be in NYC that week and would like to attend the party, please email us to be added to the invitation list!

DIY Tutorial: Scalloped Wood Frame Save the Date

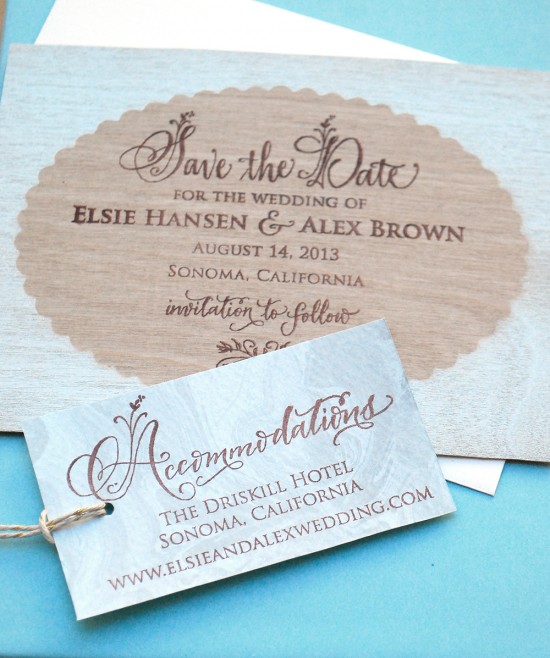
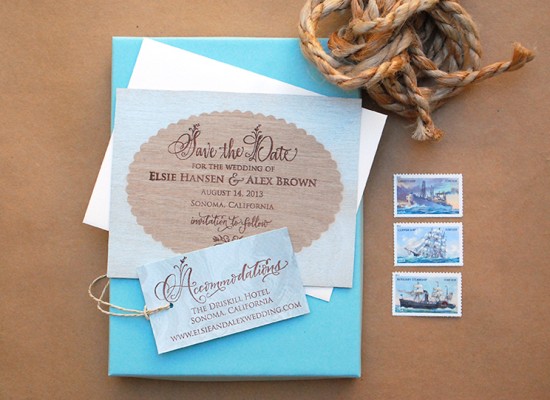
This save the date project has been brewing in our brains for a while now. After we found out how wonderful it was to stamp on wood in this tutorial, we’ve been biting at the bit to use it again. For this save the date, we used spray paint to create the “frame” effect on the wood piece before stamping the text. We couldn’t be happier with the finished project! –Bailey and Emma of Antiquaria

DIY Tutorial: Rubber Stamps on Wood Save the Date by Antiquaria via Oh So Beautiful Paper

DIY Tutorial: Rubber Stamps on Wood Save the Date by Antiquaria via Oh So Beautiful Paper

The subtle wood grain adds such a nice texture to the design.

DIY Tutorial: Rubber Stamps on Wood Save the Date by Antiquaria via Oh So Beautiful Paper

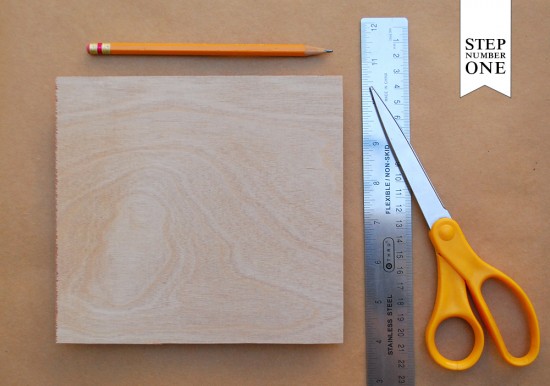
Step One: Since the wood veneer that we used in the project comes in large square sheets, we first had to cut out our A2 (5.5″ x 4.25″) cards from the sheet.

DIY Tutorial: Rubber Stamps on Wood Save the Date by Antiquaria via Oh So Beautiful Paper

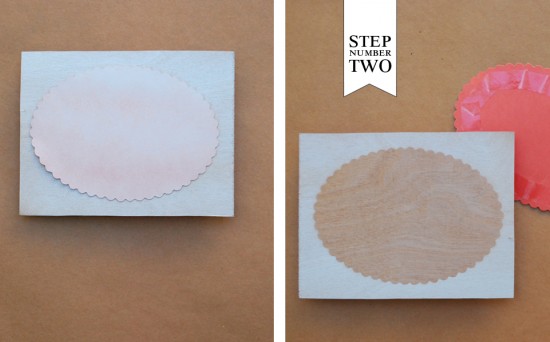
Step Two: Once you have all of your cards cut to size, you’ll now need to prep them for painting. To mask the center and make the frame shape in the wood, we double stick taped an oval scallop flat card to the center of each wood card. We then used acrylic spray paint over the entire card to complete the frame image. **You really only need one pack of oval scallop cards to complete the project. You can reuse them after the paint is completely dry.** Once everything is dry, peel off the oval scallop card and set aside. Repeat the process until all of your cards are complete.

DIY Tutorial: Rubber Stamps on Wood Save the Date by Antiquaria via Oh So Beautiful Paper

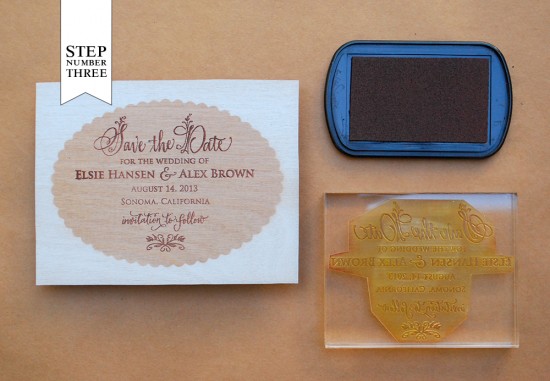
Step Three: You’ll now want to print your save the date. Place one of the cards on a hard surface. Ink your stamp (we used our Floral Calligraphy Save the Date stamp) and center it over the oval portion of the card. Once centered, press down firmly, using both hand to make the print. Please watch this video for more information on inking and stamping an oversized stamp.

DIY Tutorial: Rubber Stamps on Wood Save the Date by Antiquaria via Oh So Beautiful Paper

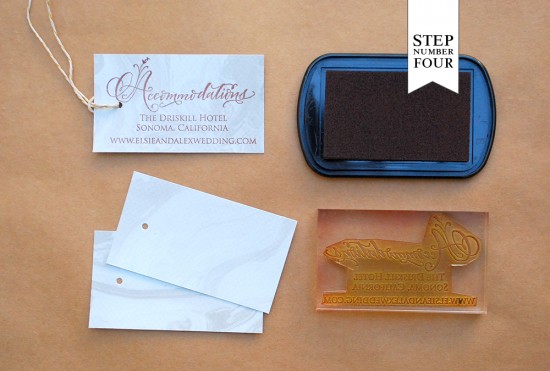
Step Four: Since many out of town guests need to make travel and accommodation arrangements prior to receiving your wedding invitation, it is wise to include an accommodations card or website card with your save the date. This way, they have all of the information they’ll need to make it to your wedding! Print this standard business sized card (2″ x 3.5″) using the stamp printing technique described in step three. To coordinate with our save the date, we used our (Floral Calligraphy Accommodations stamp).

DIY Tutorial: Rubber Stamps on Wood Save the Date by Antiquaria via Oh So Beautiful Paper

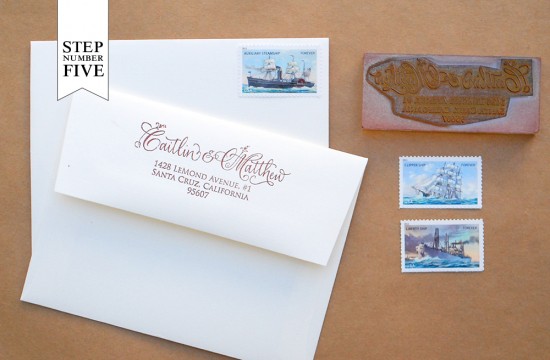
Step Five: Now all that’s left is to stamp your return address (we used our Floral Calligraphy Return Address stamp), address them, add postage and send them to all of your guests!

Materials

Floral Calligraphy Save the Date Stamp

Floral Calligraphy Accommodations Stamp-custom sized to fit tag

Floral Calligraphy Return Address Stamp

Stamp Pad in Chestnut

Wood Veneer cut down to A2 (5.5″ x 4.25″) cards, we bought ours locally at an art store

Oval Scallop Cards

A2 Envelopes

Double sided tape

Spray Paint in Liberty

Suminagashi Tags


Photo Credits: Antiquaria

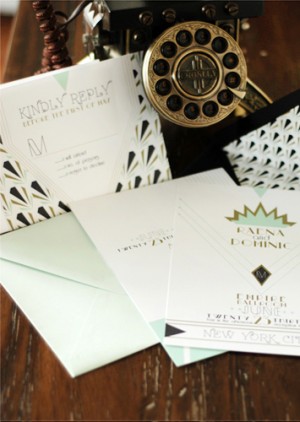
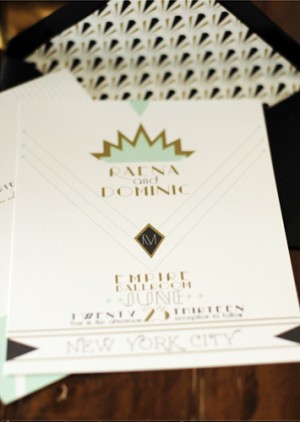
Raena + Dominic’s Art Deco Wedding Invitations

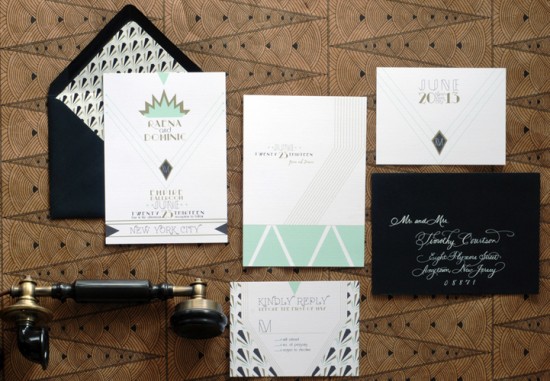
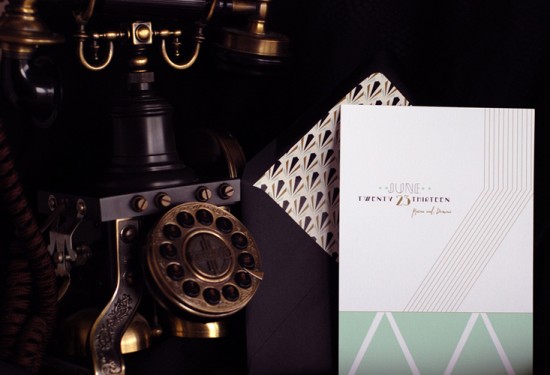
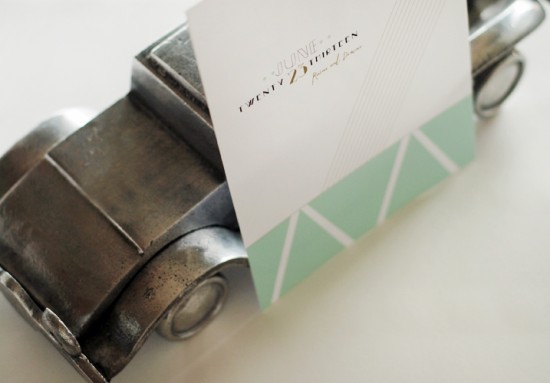
I love design inspired by the Art Deco era – particularly when paired with a modern color palette like these wedding invitations from Nicole at Umama! Nicole mixed Art Deco-inspired patterns and lines with a very now soft aqua and gold color palette mixed with classic black and white. So pretty!

Art Deco Wedding Invitations by Umama via Oh So Beautiful Paper (8)

From Nicole: For this suite, I was really inspired by so many beautiful art pieces I have seen from the art deco time period, from the clean lines of buildings, to the geometric jewelry, to the modern renditions of the time period. The design features clean lines, a geometric print, and a soft aqua infused throughout the suite.

Art Deco Wedding Invitations by Umama via Oh So Beautiful Paper (5)

Art Deco Wedding Invitations by Umama via Oh So Beautiful Paper (3) Art Deco Wedding Invitations by Umama via Oh So Beautiful Paper (4)

Art Deco Wedding Invitations by Umama via Oh So Beautiful Paper (1)

Thanks Nicole!

Check out the Designer Rolodex for more tal­ented wed­ding invi­ta­tion design­ers and the real invi­ta­tions gallery for more wedding invitation ideas!

Photo Credits: Umama