Happy Weekend!

Happy Friday everyone! I hope you’re somewhere warmer than DC – it’s only the end of January and this is the coldest winter I’ve experienced since moving here more than 10 years ago! We’re supposed to have a couple of nice days this weekend, which I’m looking forward to enjoying before I head up to New York for NYNOW on Monday. Next week: reports from NYNOW! But in the meantime…
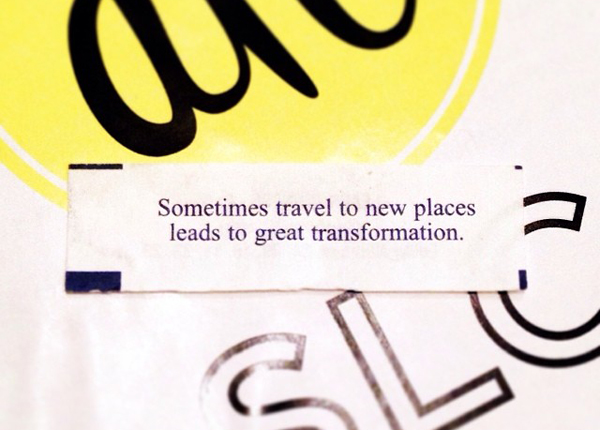
OSBP-Alt-Travel-and-Great-Transformations

Photo by me via Instagram

…a few links for your weekend!

This week on Oh So Beautiful Paper:

Check back soon for this week’s cocktail! I hope you all have a wonderful weekend, and I’ll see you back here next week! xoxo

DIY Tutorial: Modern Washi Tape Save the Dates

Who doesn’t love washi tape? Ever since this awesome product arrived state side, we’ve been on board. We typically use it to seal envelopes, paper or belly bands but lately, we’ve had a desire to make it the real star. In this DIY, we use different tapes to add a bit of graphic drama to our stamped save the date cards. The effect you get is so much fun, especially considering it’s humble beginnings as tape! – Bailey and Emma of Antiquaria

DIY Tutorial: Modern Washi Tape Save the Dates by Antiquaria for Oh So Beautiful Paper

Each save the date is its own, unique piece of art. The best part is that you can make it as simple or tricked out as you like!

DIY Tutorial: Modern Washi Tape Save the Dates by Antiquaria for Oh So Beautiful Paper

Step One: Before you decorate, you’ll need to stamp your save the date (we used our Art Deco Save the Date stamp) on the bottom of a blank, cream A7 card. Choose an ink color that will coordinate nicely with the tape that you’ve selected. For a step-by-step video tutorial about this printing process go here.

DIY Tutorial: Modern Washi Tape Save the Dates by Antiquaria for Oh So Beautiful Paper

Step Two: Let your creative flag fly! Adorn the top of the card with washi tape in any pattern you like. We used a simple design with straight line and pop of diagonal tape for this example.

DIY Tutorial: Modern Washi Tape Save the Dates by Antiquaria for Oh So Beautiful Paper

Step Three: Next, you’ll need to square up the tape so that you have a clean, professional look. Using a straight edge metal ruler and a craft knife, carefully cut the tape, making sure not to press so hard that it cuts the paper as well.

DIY Tutorial: Modern Washi Tape Save the Dates by Antiquaria for Oh So Beautiful Paper

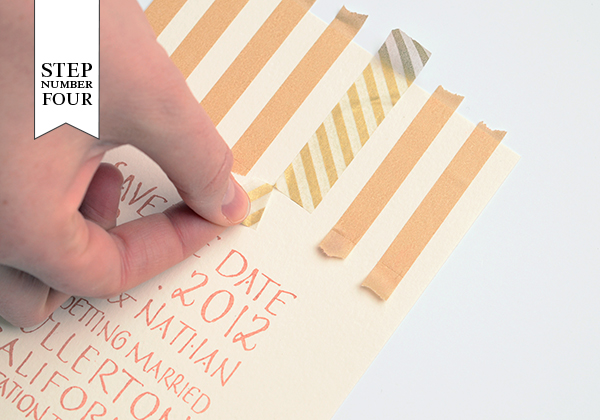
Step Four: Peel off the tape and press down the cut edge. Repeat the process on the top.

DIY Tutorial: Modern Washi Tape Save the Dates by Antiquaria for Oh So Beautiful Paper

There are an infinite amount of possibilities for the tape designs. Get creative and experiment with tape colors and patterns. We love the way that they all look together, so don’t feel limited to one design!

DIY Tutorial: Modern Washi Tape Save the Dates by Antiquaria for Oh So Beautiful Paper

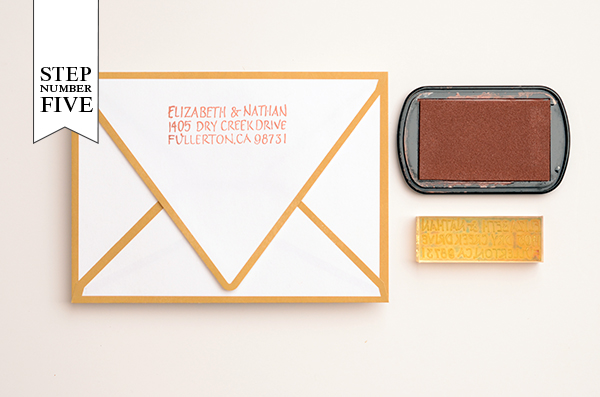
Step Five: Next, you’ll need to stamp your return address (we used our Art Deco Return Address stamp) on the back flap of your envelopes. Now all that’s left is to address them, add postage and send them on their merry way!

Materials:

Art Deco Save the Date Stamp

Art Deco Return Address Stamp

Stamp Pad in Cocoa

Washi Tape

A7 Cream Cards

A7 Envelopes

Metal Ruler and Craft Knife

Anti­quaria is a mem­ber of the Designer Rolodex – you can see more of their beau­ti­ful work right here or visit the real save the dates gallery for more save the date ideas!

Photography: Antiquaria for Oh So Beautiful Paper

Constance + Fahri’s Elegant Wedding Dinner Invitations

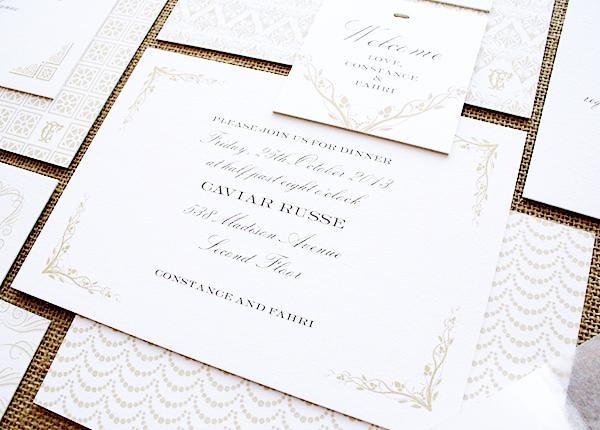
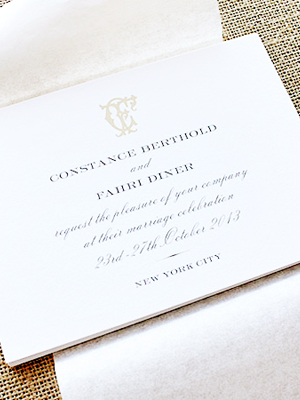
I love the idea of turning a small, intimate wedding into a multi-day extravaganza with your closest family and friends. And that’s exactly what this bride and groom did – in New York City! They turned to designer Sue Corral, known for her classic and minimalist style, to help with the invitations… but they didn’t stop with the wedding invitation. Sue also designed separate invitations for five dinner parties at a different NYC landmark restaurant. Quite the challenge for Sue, but such a fun idea!

Traditonal-Box-Wedding-Invitations-Sue-Corral-Design

From Sue: I designed this invitation for a 5-day wedding extravaganza in New York City. Each night, the bride and groom invited their guests (family and close friends) to an intimate dinner at a different New York City landmark restaurant topping it all off with a Saturday evening wedding at The St. Regis. The bride and groom requested a separate invitation for each dinner but still wanted everything to be cohesive and coordinated. Overall, they asked that the design be formal, traditional, luxurious, and elegant.

Traditonal-Box-Wedding-Invitations-Sue-Corral-Design2

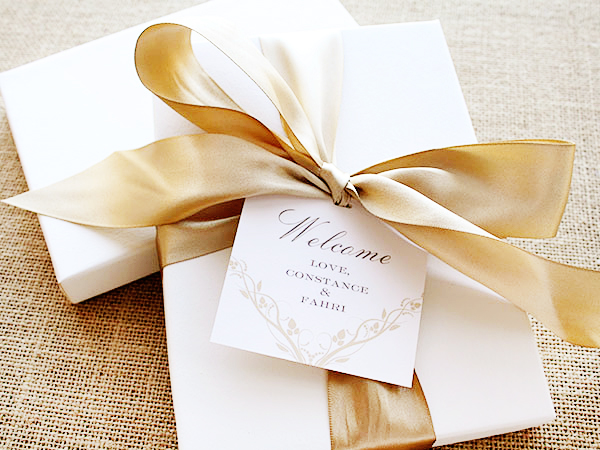
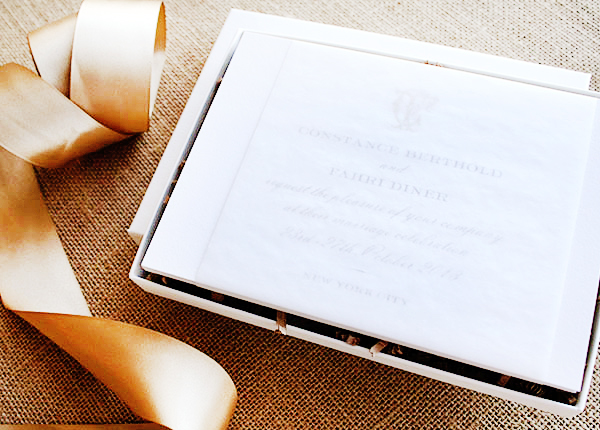
A box seemed like the perfect package to hold the invitations. The guests stayed at the St. Regis, so the invitation box was part of the welcome basket waiting for them when they arrived at their rooms. The invitations were stacked neatly inside the box and wrapped with an onion skin belly band. The box itself was tied with a gold satin ribbon.

Traditonal-Box-Wedding-Invitations-Sue-Corral-Design7

Traditonal-Box-Wedding-Invitations-Sue-Corral-Design6

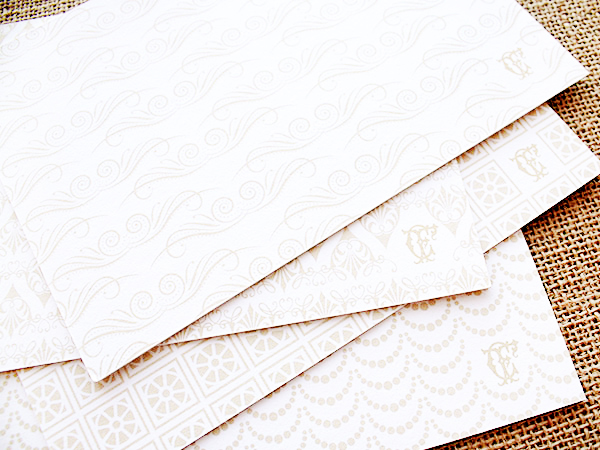
Each invitation used the same color palette and typography, but had a different decorative corner motif framing the text. The style of the corners and the full bleed back patterns on the back of each invitation matched the style and decor of the different restaurants. 

Traditonal-Box-Wedding-Invitations-Sue-Corral-Design3Traditonal-Box-Wedding-Invitations-Sue-Corral-Design4

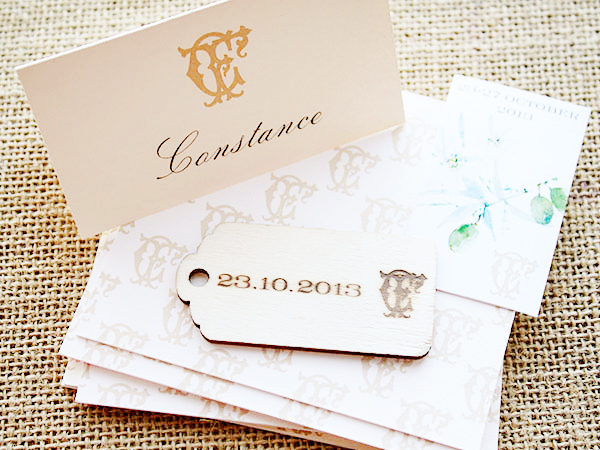
For the actual wedding invitation, we designed a monogram for the motif that we were able to used sprinkled throughout the 5 day event on all sorts of other items, like place cards, coasters and mini champagne labels – even fire branded wooden gift tags.

Traditonal-Box-Wedding-Invitations-Sue-Corral-Design5

Traditonal-Box-Wedding-Invitations-Sue-Corral-Design8

Thanks so much Sue!

Photo Credits: Design Corral

Jaclyn + Brent’s Tropical Destination Wedding Invitations

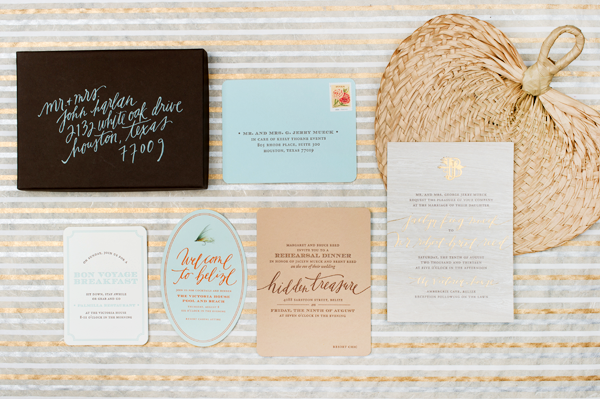
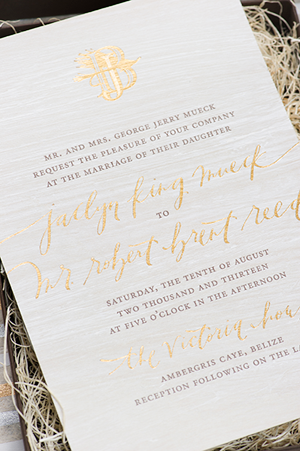
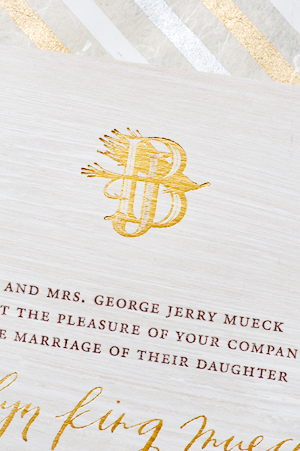
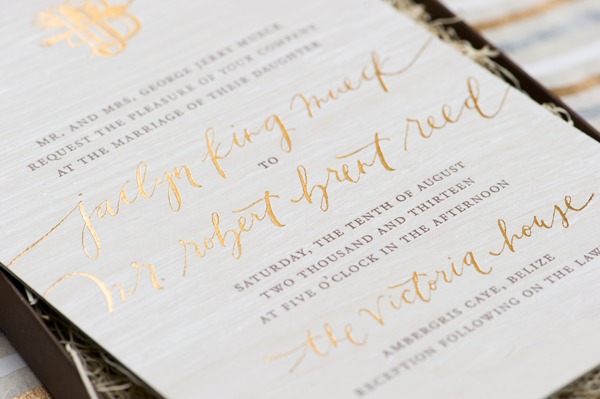
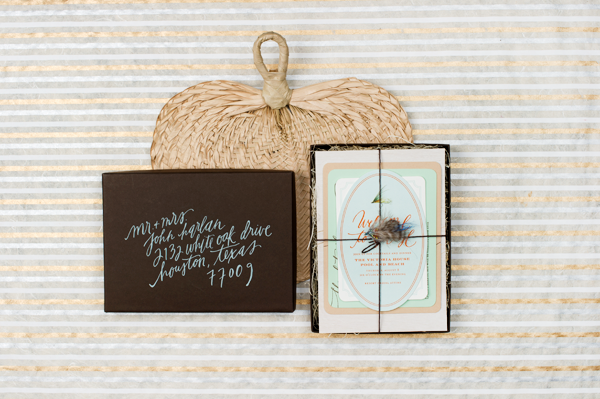
Aaaahhh… the ladies of Papellerie sent over this beautiful tropical destination wedding invitation and now I can practically smell the fresh ocean air! The invitation suite combines lots of texture – whitewashed wood veneer, letterpress printed text, and both matte and metallic foil – and stunning calligraphy from Brown Linen Design. Gorgeous!

Tropical-Destination-Wedding-Invitations-Papellerie2

From Papellerie: Jaclyn and Brent chose Belize for their destination wedding and we knew right away we wanted to do something tropical, fun, and that would portray the relaxed feeling of a tropical beach wedding. We started by designing their monogram: a custom J and B with a fishing fly illustration to represent their love of fly fishing.

Tropical-Destination-Wedding-Save-the-Date-Papellerie2Tropical-Destination-Wedding-Save-the-Date-Papellerie

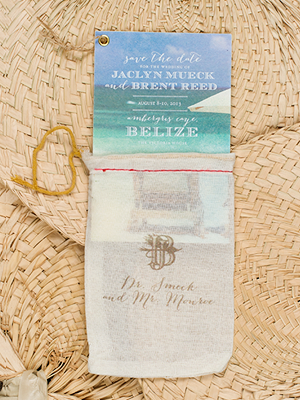
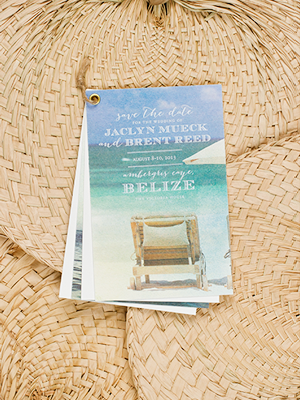
Their save the date was digitally printed photographs (taken by the couple!) with white foil on the cover and information on the accommodations in Belize. We assembled each save the date with a gold rivet and burlap tie and slipped them into customized muslin bags.

Tropical-Destination-Wedding-Invitations-Papellerie7Tropical-Destination-Wedding-Invitations-Papellerie6

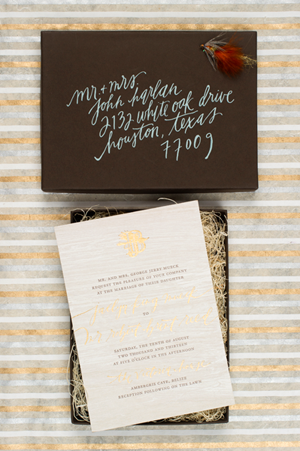
All of the calligraphy on the set was created by Abany Bauer of Brown Linen Design and fit so perfectly with our vision for this tropical invitation. The invitation itself was printed on hand painted white washed wood paper with gold foil and brown letterpress, the insert cards were all letterpress printed or foil stamped – the orange welcome card features a fun matte foil!

Tropical-Destination-Wedding-Invitations-Papellerie3

Tropical-Destination-Wedding-Invitations-Papellerie4Tropical-Destination-Wedding-Invitations-Papellerie5

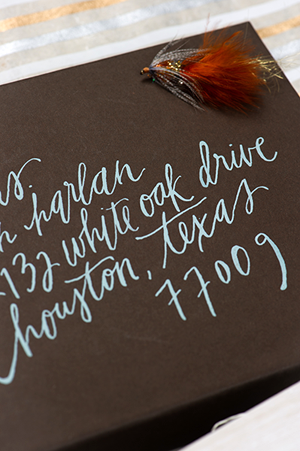
Their invitation suite was packaged together with brown baker’s twine and custom made fishing flies. Each set had a different and unique fly! The invitations were mailed in a box mailer with calligraphy from Abany Bauer of Brown Linen Design.

Tropical-Destination-Wedding-Invitations-Papellerie

Thanks ladies!

Design: Papellerie

Calligraphy: Abany Bauer of Brown Linen Design

Check out the Designer Rolodex for more tal­ented wed­ding invi­ta­tion design­ers and the real invi­ta­tions gallery for more wedding invitation ideas!

Photo Credits: Adam Nyholt

Beth + Tomu’s Woodsy Screen Printed Walnut Wedding Invitations

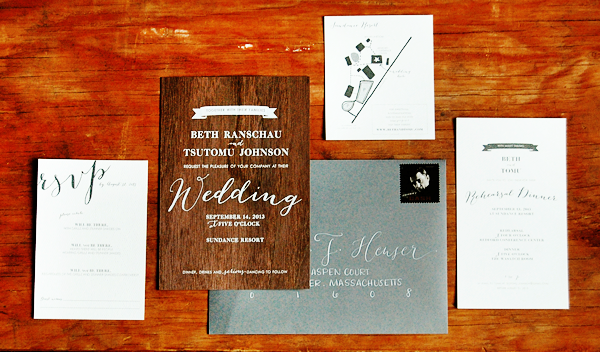
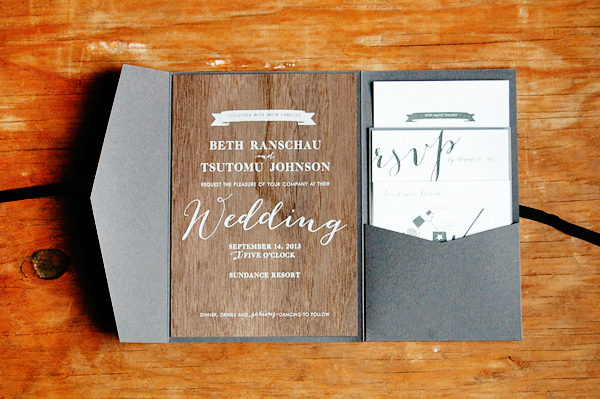
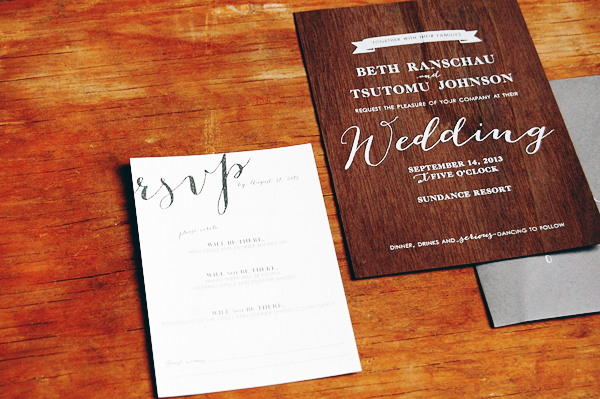
Nikkol from Peter Loves Jane sent over these lovely invitations for a wedding at the Sundance Resort! The bride and groom wanted to evoke the woodsy feeling of their wedding venue without being too rustic. Nikkol came up with the perfect solution: walnut wood veneer with white screen printed text! Nikkol paired the wood invitations with gray and white enclosures and gray envelopes to complete the suite.

Screen-Printed-Rustic-Walnut-Wedding-Invitations-Peter-Loves-Jane

From Nikkol: Beth and Tomu are both sophisticated successful attorneys that are socially aware but have a spontaneous and fun side. Beth and Tomu decided to get married at Sundance Resort, which is nestled in the mountains and surrounded by towering evergreens. Beth already knew she wanted a woodsy element in her invitations, but wanted to steer clear of any rustic intonations.

Screen-Printed-Rustic-Walnut-Wedding-Invitations-Peter-Loves-Jane3

White screen printing on a walnut veneer was the perfect choice.  I used a recycled paper for the additional items in the suite and tucked it all inside a grey pocket enclosure tied each with a black silk ribbon.

Screen-Printed-Rustic-Walnut-Wedding-Invitations-Peter-Loves-Jane2

Screen-Printed-Rustic-Walnut-Wedding-Invitations-Peter-Loves-Jane4

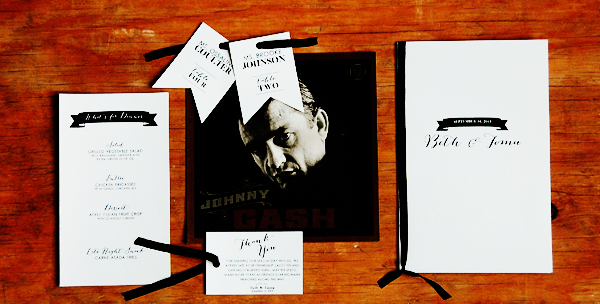
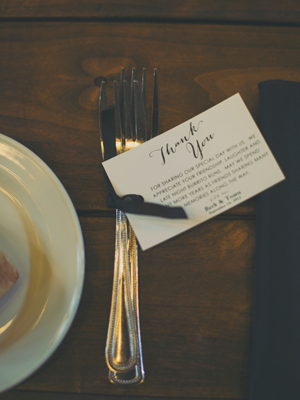
It was important to Beth and Tomu to thank each guest individually, so I designed playful thank you flags that we tied to the flatware at each place setting.  That way if a guest wanted to eat, they had to read the note!

Screen-Printed-Rustic-Walnut-Wedding-Invitations-Peter-Loves-Jane6Screen-Printed-Rustic-Walnut-Wedding-Invitations-Peter-Loves-Jane7

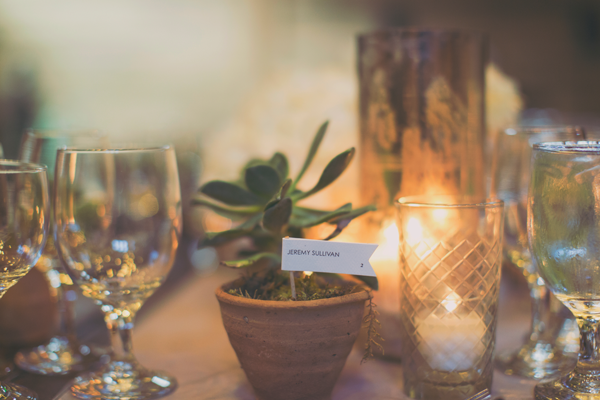
To add interest to the centerpieces and place settings, place card designs varied.  Some place cards were tented above their plates, while others were marked with flags in potted succulents.  The succulents were given to each guest as a favor at the end of the evening.

Screen-Printed-Rustic-Walnut-Wedding-Invitations-Peter-Loves-Jane8

Thanks Nikkol!

Design: Peter Loves Jane

Screen Printing: Cards of Wood

Calligraphy: BP Calligraphy

Wedding Photography: Alixann Loosle Photography

Event Planning: Attention 2 Detail

Photo Credits: Peter Loves Jane and Alixann Loosle Photography