DIY Tutorial: Rubber Stamp Kids Animal Stationery

Emma has been designing custom stationery for her nephews for years. She recently asked her sister if she used the stationery and her sister’s response was, “Yes! I love it but I only use it for very special occasions because it’s so precious and I don’t want to run out of it.” Since Emma’s nephews are constantly on the go, we came up with a simple DIY solution for adorable kids stationery to help her sister (and other moms) craft exactly what they need on the go! These customizable rubber stamps make kids stationery a breeze… and not so precious as they can be stamped on pretty much anything! – Bailey and Emma of Antiquaria
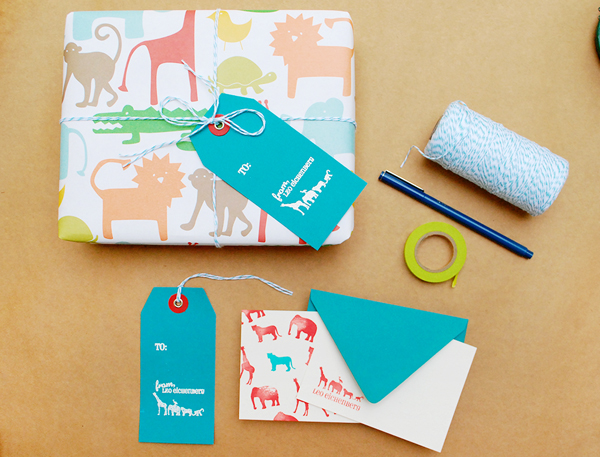
DIY Tutorial: Rubber Stamp Stationery for Kids by Antiquaria for Oh So Beautiful Paper (1)

DIY Tutorial: Rubber Stamp Stationery for Kids by Antiquaria for Oh So Beautiful Paper (5)

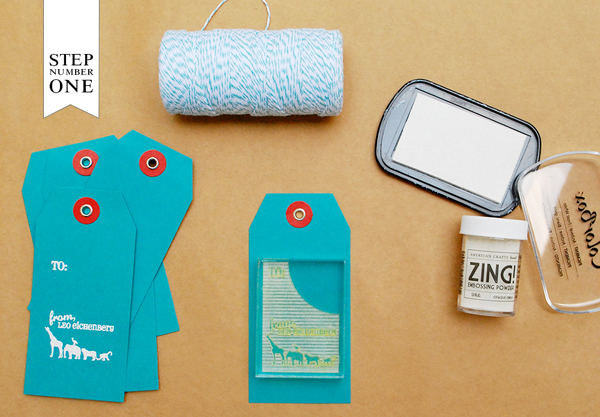
Step One: A stylish gift tag is a detail that gussies up any gift. For this one, we embossed our Animal Train Gift Tag stamp onto adorable peacock colored tags. For more information about how to emboss using stamps, please watch this instructional video. You could also simply ink and print your gift tag stamp in white or other color ink if your really short on time!
 DIY Tutorial: Rubber Stamp Stationery for Kids by Antiquaria for Oh So Beautiful Paper (4)

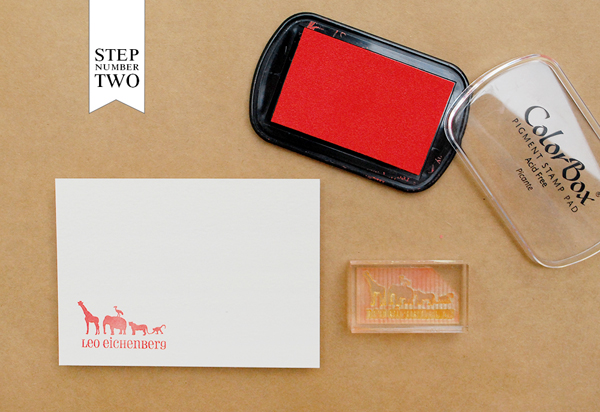
Step Two: Write thank you notes or enclose a birthday wish in style! To make your own notecard set, start my stamping your monogram (we used our Animal Train Monogram stamp) on the front of a plain A2 card.
 DIY Tutorial: Rubber Stamp Stationery for Kids by Antiquaria for Oh So Beautiful Paper (3)

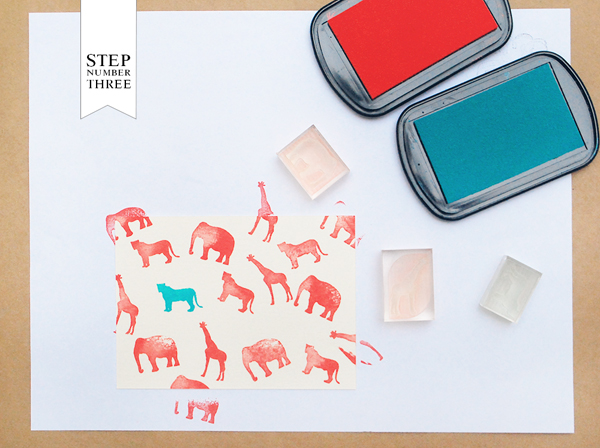
Step Three: If you have a little spare time…jazz up the back (and envelope in step four) with our Animal Pattern Stamps. Lay the A2 card monogram down on a scrap piece of paper. Randomly stamp the different animals in one color and accent with one design in a complementary second color (if you place this toward the center but not directly in it, you should get a balanced look).
 DIY Tutorial: Rubber Stamp Stationery for Kids by Antiquaria for Oh So Beautiful Paper (2)

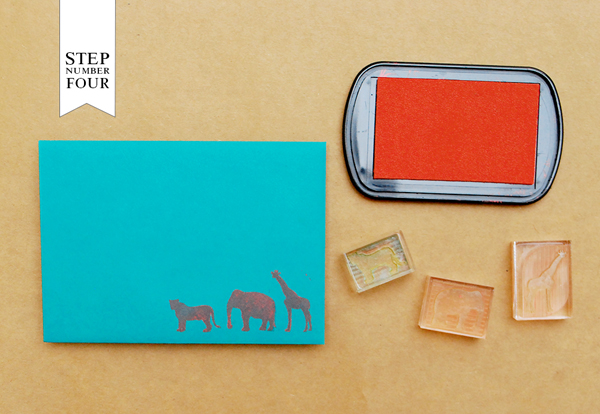
Step Four: We also dressed up our envelope with our Animal Pattern stamps, this time stamping them in a line!

Materials

Animal Train Gift Tag Stamp

Animal Train Monogram Stamp

Animal Train Pattern Stamps, set of 3

Stamp Pads in Picante and Surf

Embossing Powder

Embossing Heat Tool

Gift Tags

A2 Card in Eco White

A2 Envelope in Peacock

Photo Credits: Antiquaria


Colbi + Dan’s Rustic Idaho Mountain Wedding Invitations

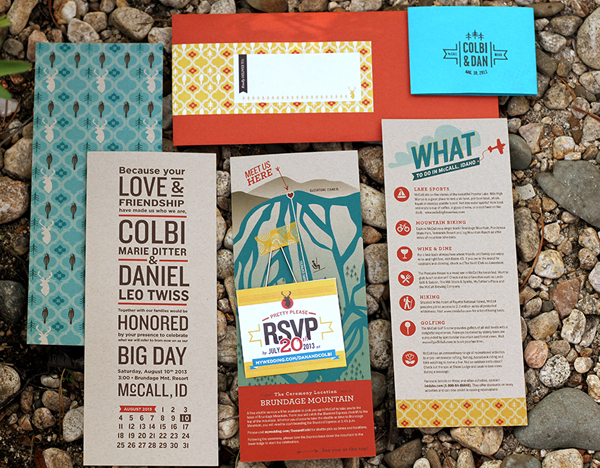
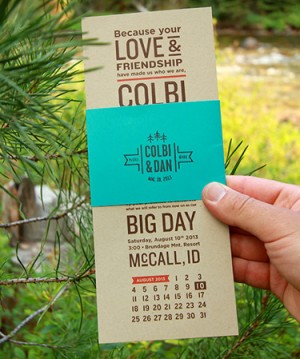
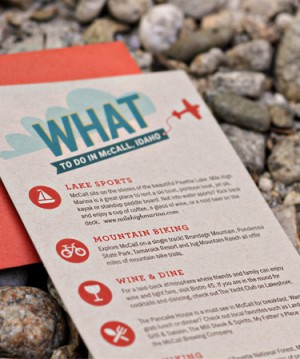
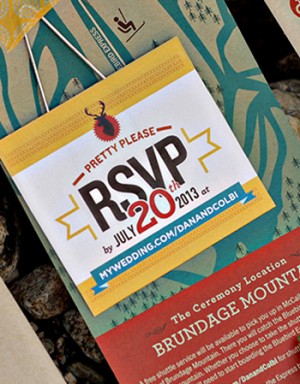
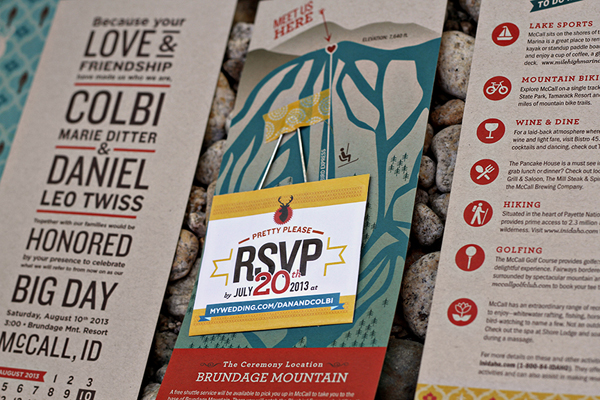
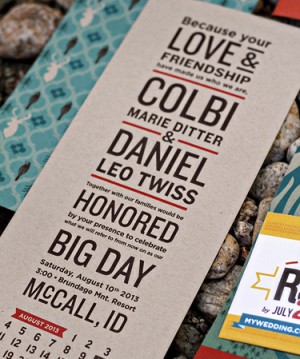
I’ve had the pleasure of featuring some beautiful invitations and baby announcements from designer Kate Holgate over the past couple of years – and these rustic yet modern wedding invitations are no exception! Kate designed these invitations for a friend’s mountain wedding in Idaho, with some fun ski lift details inspired by the wedding venue – even though the wedding takes place during the summer! The entire suite was digitally printed on kraft paper with turquoise and tangerine accents. So fun!

Rustic Mountain Wedding Invitations by Kate Holgate via Oh So Beautiful Paper (9)

From Kate: I recently designed an invitation suite for a good friend who is getting married this August. The ceremony is to take place at the top of Brundage Mountain, a ski resort in McCall, Idaho. Colbi and Dan were so easy to work with; they are such a fun, down-to-earth couple. They wanted an invitation design that was natural yet modern.

Rustic Mountain Wedding Invitations by Kate Holgate via Oh So Beautiful Paper (4) Rustic Mountain Wedding Invitations by Kate Holgate via Oh So Beautiful Paper (7)

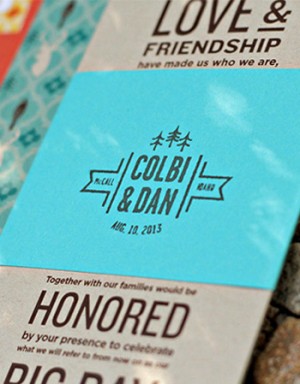
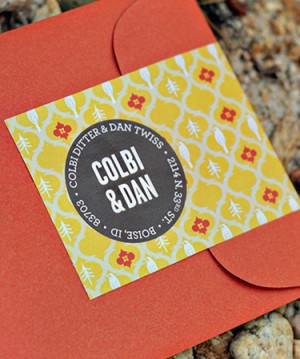
The entire suite was digitally printed on kraft paper, wrapped with stamped belly bands and contained in a bright tangerine envelope. The wedding guests will be riding a chairlift to the ceremony site so we thought that it would be fun to incorporate an old-school life ticket for the RSVP. Colbi and Dan deserve the most beautiful day ever and I was honored to be a part of it.

Rustic Mountain Wedding Invitations by Kate Holgate via Oh So Beautiful Paper (3) Rustic Mountain Wedding Invitations by Kate Holgate via Oh So Beautiful Paper (2)

Rustic Mountain Wedding Invitations by Kate Holgate via Oh So Beautiful Paper (8)

Rustic Mountain Wedding Invitations by Kate Holgate via Oh So Beautiful Paper (1) Rustic Mountain Wedding Invitations by Kate Holgate via Oh So Beautiful Paper (5)

Thanks so much Kate!

Check out the Designer Rolodex for more tal­ented wed­ding invi­ta­tion design­ers and the real invi­ta­tions gallery for more wedding invitation ideas!

Photo Credits: Kate Holgate

Peter + Kristy’s Rustic Letterpress Wedding Invitations

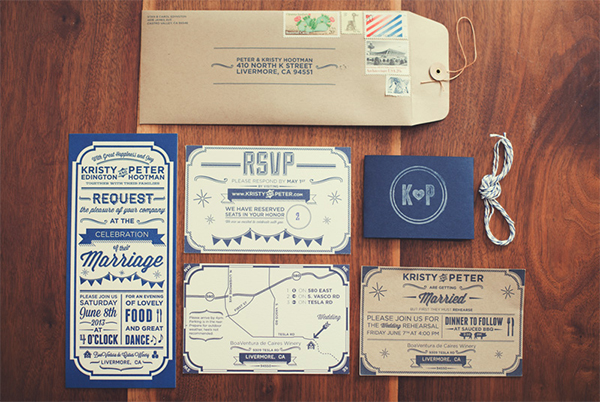
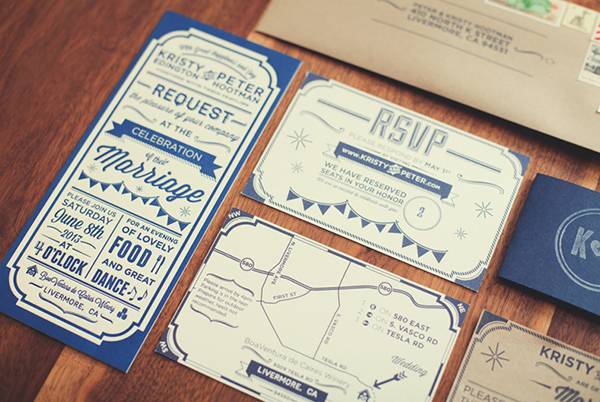
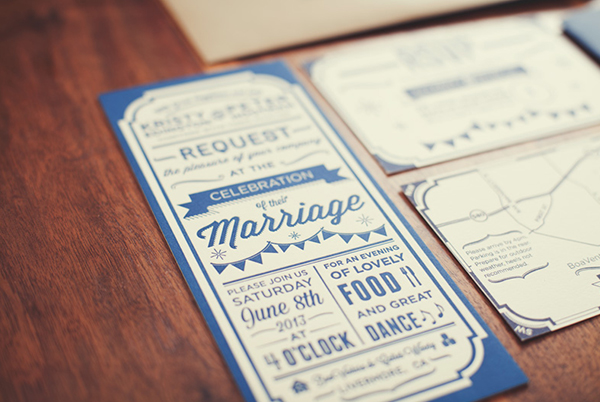
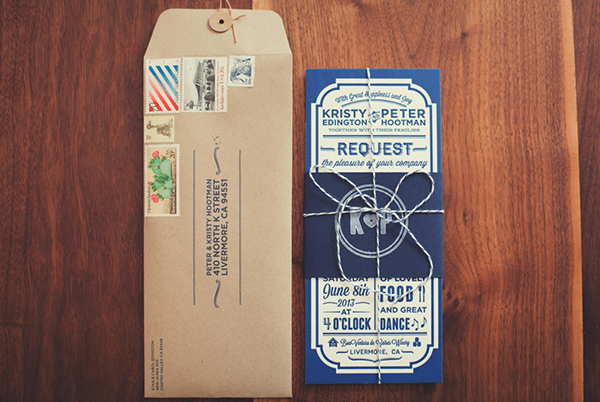
You may remember Peter and Kristy’s fantastic die cut save the dates from back in March – and today Peter is back to share the wedding invitations! Peter and Kristy wanted to honor the rustic and romantic feel of their barn wedding venue. They opted for blue and white wedding invitations letterpress printed by Twig & Fig, along with kraft paper and rubber stamp accents. I love the way the entire suite came together!

Rustic Letterpress Wedding Invitations by Peter Hootman via Oh So Beautiful Paper (7)

From Peter: We went for a rustic but fun look: the wedding was at a winery with a rustic red barn and we wanted to capture the old fashioned but romantic look. We had a lot of fun playing around with fonts and different ways to give the text depth. We’re just really happy with how they turned out and that we were able to do most of the work ourselves.

Rustic Letterpress Wedding Invitations by Peter Hootman via Oh So Beautiful Paper (1)

The main invitation was letterpress printed at Twig & Fig on 220lb letterpress paper. The RSVP, map, rehearsal dinner invitation, and envelopes were printed at home on kraft paper and 110lb letterpress paper.

Rustic Letterpress Wedding Invitations by Peter Hootman via Oh So Beautiful Paper (6)

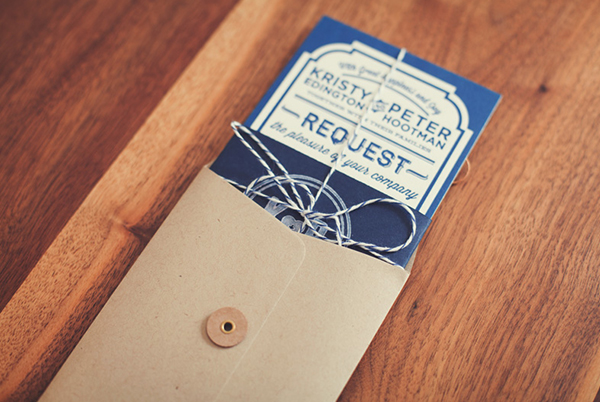
We made our own belly bands and stamped them with a custom stamp and then tied it all together with navy and white butchers twine.  My mother had a shoe box full of old unused postage so we got to be creative with stamps as well. We used rubber number stamps on the RSVP card to indicate how many seats we had reserved for each party.

Rustic Letterpress Wedding Invitations by Peter Hootman via Oh So Beautiful Paper (2)

Rustic Letterpress Wedding Invitations by Peter Hootman via Oh So Beautiful Paper (5)

Thanks Peter!

Design: Peter Hootman | Be Brave

Letterpress Printing: Twig & Fig

Check out the Designer Rolodex for more tal­ented wed­ding invi­ta­tion design­ers and the real invi­ta­tions gallery for more wedding invitation ideas!

Photo Credits: Peter Hootman | Be Brave

DIY Tutorial: Modern Banner Tri-Fold Save the Date

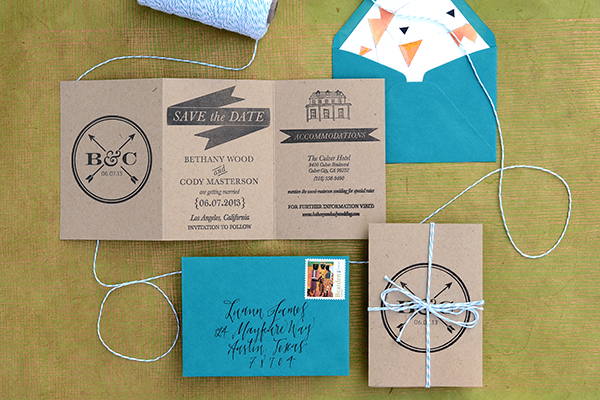
It can be a challenge to fit all of the necessary information into your save the date or wedding invitations. Hotels, directions, maps and websites can weigh down your envelope and easily distract guests from the main message. Today’s tutorial is the perfect solution to the headache… and couldn’t be simpler! Using one letter size piece of paper, we’ve created a tri-fold save the date that’s fun, modern and informational. – Bailey and Emma of Antiquaria

DIY Tutorial: Kraft Paper Trifold Save the Date by Antiquaria

DIY Tutorial: Kraft Paper Trifold Save the Date by Antiquaria

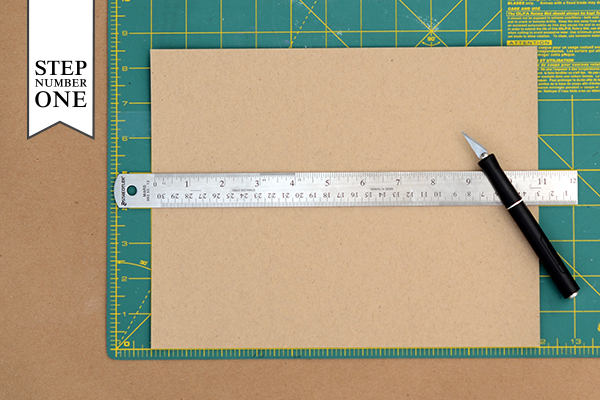
Step One: Cut your 8.5″ x 11″ piece of kraft card stock into cards sized at 5″ x 10.5″

DIY Tutorial: Kraft Paper Trifold Save the Date by Antiquaria

Step Two: Once cut, you will want to make score marks every 3.5 inches using a bone folder and scoreboard tool. Do not fold the card yet!

DIY Tutorial: Kraft Paper Trifold Save the Date by Antiquaria

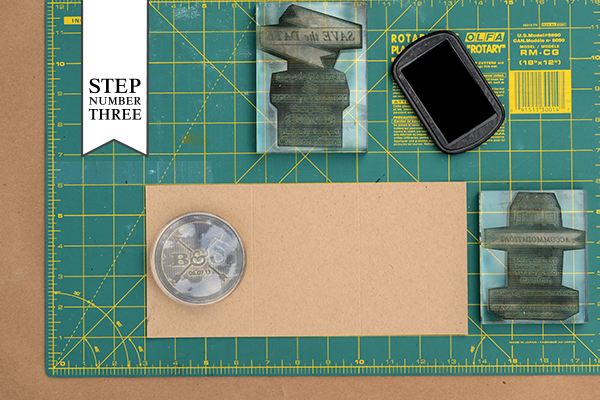
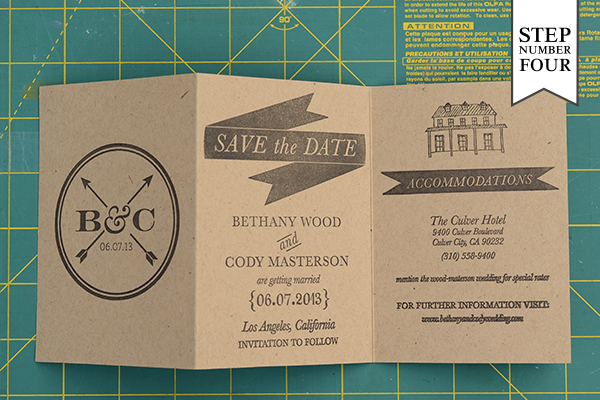
Step Three: While the card is scored but still flat, stamp your monogram (we used our Modern Arrow Monogram Stamp, No.2), centering on the first third (the one on the left). Repeat with your save the date stamp (we used our Modern Banner Save the Date Stamp) in the center and your accommodations stamp (we used our Modern Banner Accommodations Stamp, No.2) in on the right-hand side. To make a stamped print, ink your stamp thoroughly and center it over your card. Once it is positioned correctly, press down to make a print. Use both hands to ensure even pressure. Lift off and let the print dry. For a step-by-step video tutorial about this printing process go here.

DIY Tutorial: Kraft Paper Trifold Save the Date by Antiquaria

Step Four: Now you can fold your card! Carefully bend along score marks and use a bone folder to make certain the folds are crisp.

DIY Tutorial: Kraft Paper Trifold Save the Date by Antiquaria

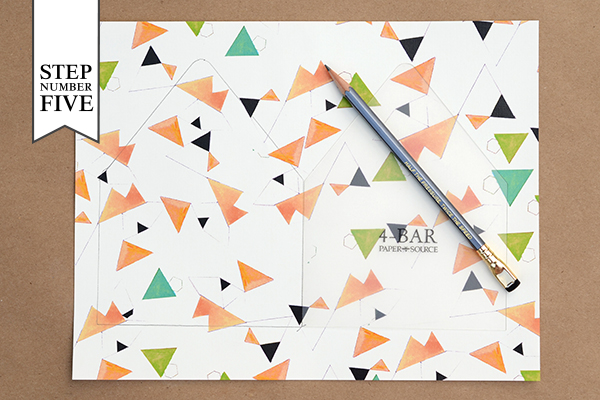
Step Five: Adding a printed liner is a great way to add color and pattern to your Save the Date design. To make the liner, trace the template onto your printed paper (we used our “Geo” Patterned Paper in text weight) and cut it out with scissors. To install, simply use stick glue or double sided tape to adhere them into your envelope.

DIY Tutorial: Kraft Paper Trifold Save the Date by Antiquaria

Step Six: Next, you will stamp your return address on the back flap of your 4bar envelope using the same technique for printing as in step three. We used our Scripted Return Address Stamp for this design.

DIY Tutorial: Kraft Paper Trifold Save the Date by Antiquaria

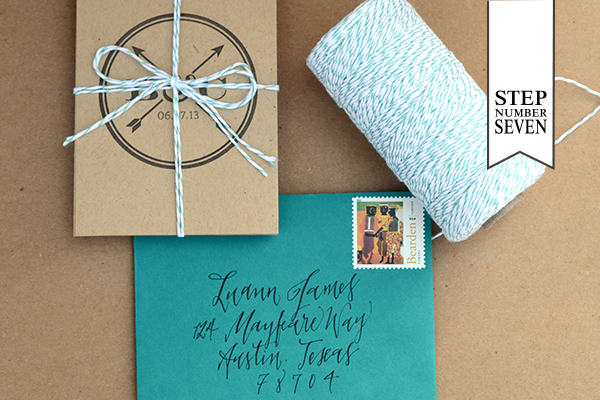
Step Seven: Now all that’s left is to tie the trifold design with twine, address the envelopes, add postage and send them on their way!

Materials:

Modern Arrow Monogram Stamp, No.2

Modern Banner Save the Date Stamp

Modern Banner Accommodations Stamp, No.2

Scripted Return Address Stamp

Stamp Pad in Black

Card stock 8.5″ x 11″ sheets in paper bag

Self Healing Mat and Craft Knife

Score Board

Bone Folder

4Bar Envelopes in Peacock

Liner Paper

Envelope Liner Templates

Pencil and Paper

Twine

Anti­quaria is a mem­ber of the Designer Rolodex – you can see more of their beau­ti­ful work right here or visit the real wedding invitations gallery for more wedding invitation ideas!

Photo Credits: Antiquaria

Stephanie + Jared’s Modern Art Deco Save the Dates

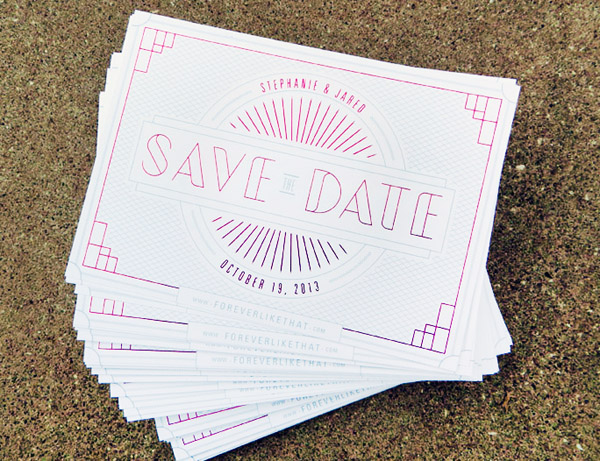
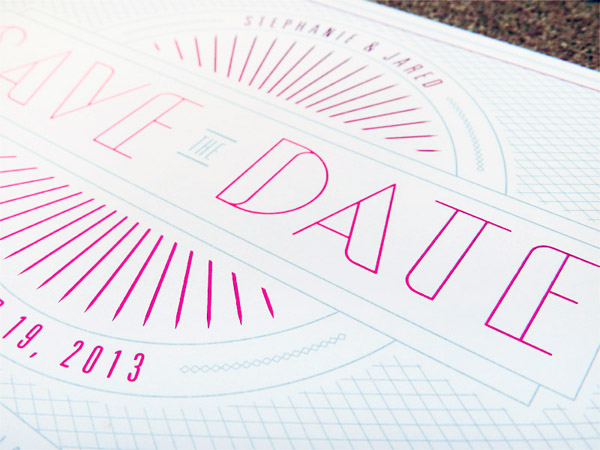
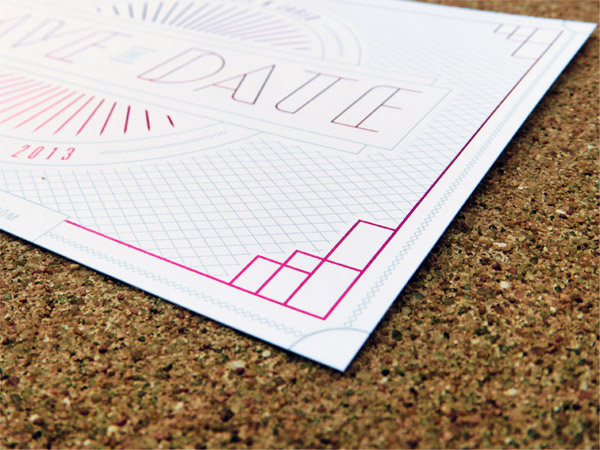
When it came time to design his own save the dates, designer Jared from TENNINETEEN combined inspiration from his 1920s wedding venue with his own modern style. The result is a combination of beautiful linear patterns with vintage-inspired text and a punch of red metallic foil. So fun!

Modern Art Deco Foil Stamped Save the Dates by TENNINETEEN via Oh So Beautiful Paper (7)

From Jared: While searching for our event space in the Kansas City area, Stephanie and I fell in love with a venue that had a 1920s feel. It has beautiful subway tile and an enormous 12-foot chandelier that centered the space. We wanted to touch on the Art Deco style in our Save the Dates, but give it a modern flair while maintaining our color palette.

Modern Art Deco Foil Stamped Save the Dates by TENNINETEEN via Oh So Beautiful Paper (2)

Traditionally, you see quite a bit of black and gold used for this era, but we wanted to mimic the style with our colors and see where it would take us. My design style is very modern and I wanted to be sure that was apparent in the design. Thus, we adopted the “Modern Art Deco” theme.

Modern Art Deco Foil Stamped Save the Dates by TENNINETEEN via Oh So Beautiful Paper (6)

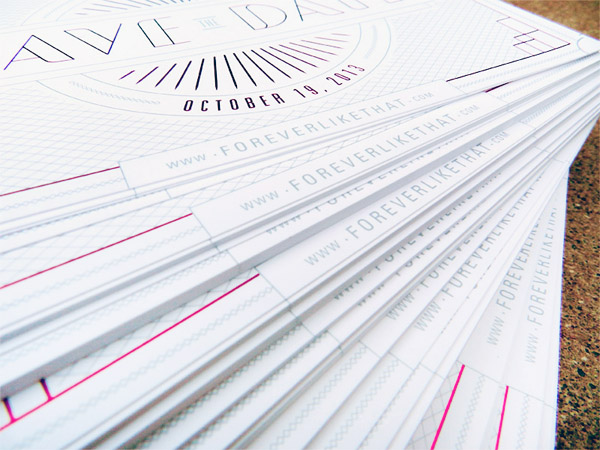
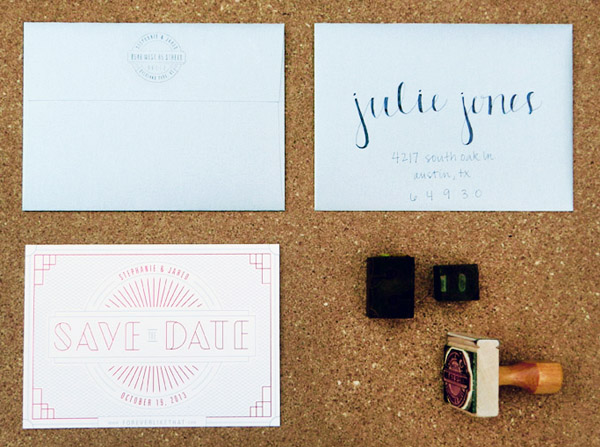
Printed on Avon Brilliant White 100C, we first ran a pass of silver metallic ink, then punched it with a Pomegranate red foil. We had a custom stamp made that fell in line with the look and my fiancée, Stephanie, took care of all the hand-lettering on the envelopes.

Modern Art Deco Foil Stamped Save the Dates by TENNINETEEN via Oh So Beautiful Paper (4)

I love the linear lines and geometric shapes of the Art Deco style and used that as my inspiration. There wasn’t any single piece that I drew inspiration from, but instead I dove head first into the era and soaked in all of the patterns, shapes, and lines. Since I love clean design, I made sure not to go crazy, but include just enough so you get a taste.

Modern Art Deco Foil Stamped Save the Dates by TENNINETEEN via Oh So Beautiful Paper (1)

Thanks Jared!

Design: TENINETEEN

Printing: Boelte-Hall

Calligraphy: Stephanie Morris

Check out the Designer Rolodex for more tal­ented wed­ding invi­ta­tion design­ers and the save the date gallery for more beau­ti­ful cus­tom save the dates!

Photo Credits: TENINETEEN