Hello Brick & Mortar: Real Customers, Merry & Bright

Ed Note: I can’t imagine a better way to sign off for the holidays than with this beautiful post from Emily – with real cards carefully picked out by very real people. I’ll be back next week with my annual “best of” round up and a couple of New Year’s posts, and with brand new content on January 5! I hope you all have a wonderful holiday! xoxo – Nole

It’s Christmas Eve! I love this day almost more than Christmas itself, all of the anticipation of tomorrow just bursts today. But I’ll be honest, this shop owner is also very, very ready to settle down for a long winter’s nap. I’ve had a wonderfully full and exciting year, due in large part to many of you who egg me on and share the best conversations and questions. This will my fifth holiday owning Clementine. I know that holiday magic waits behind so many tiny moments: sneaky emails, hiding presents, surreptitious returns to purchase that little gift a loved one adored.  I’m totally exhausted, but equally hooked on the bits of magic that flutter through this season, I hope wherever you are, a bit flutters to you. ~ Emily of Clementine.

OSBP-Hello-Brick-and-Mortar-Clementine-by-Emily-McDowell-IllustrationIllustration by Emily McDowell for Oh So Beautiful Paper

In the past, I have asked customers to hold their card up as they purchase it and tell me where the cards are headed. This year, we are all so rushed, I asked instead for a simple image of the card and story about it’s recipient.

From Nan: I used the box set of cards to send a little bit of Middlebury love to some of my best friends who go to other colleges who I haven’t seen in a while. It’s the perfect personalized note to let them know I’m thinking of them this Christmas season. 

OSBPNanPDSMerryChristmas

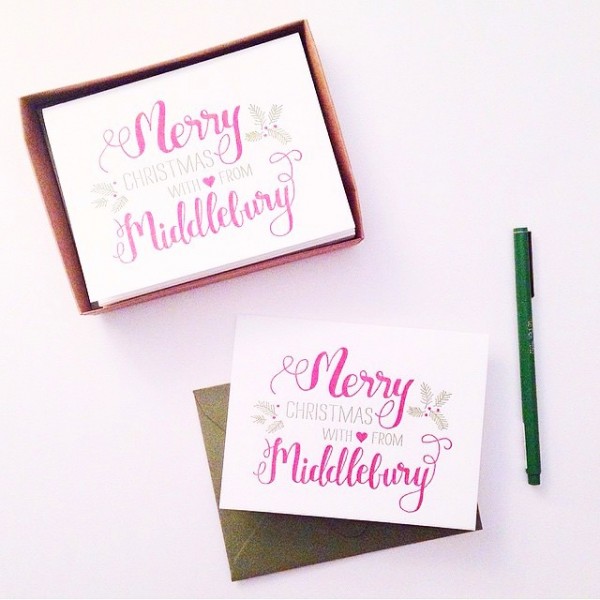
{Merry Christmas With Love from Middlebury ~ Custom Designed cards by Parrot Design Studio}

From Susan: I’m sending this to my Manhattan friend. We have sort of a tongue in cheek “city mouse/country mouse” joke so I love sending her cards that remind me of her hustle and bustle neighborhood. She, in return, sends me cards of farm animals and generally bucolic images…

OSBPSusanSwissCottage

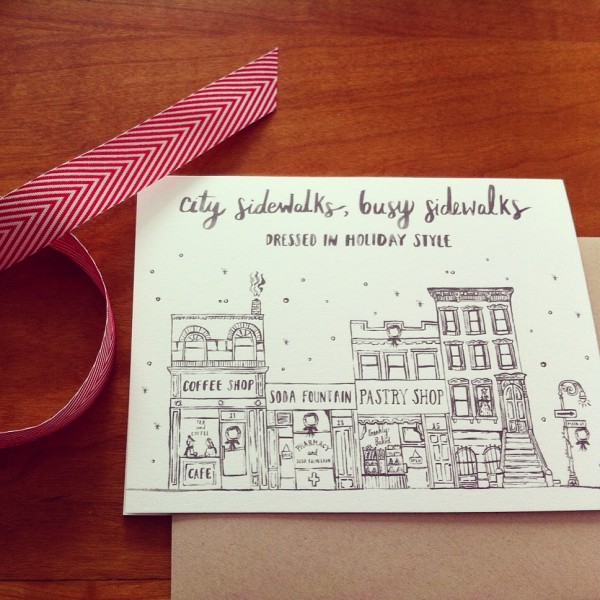
{Swiss Cottage Designs Christmas on Main Street}

From Chenoa: This card is going to one of our favorite people who cares for our daughter every day. We truly couldn’t live without her. 

OSBPChenoaRPCSnowglobe

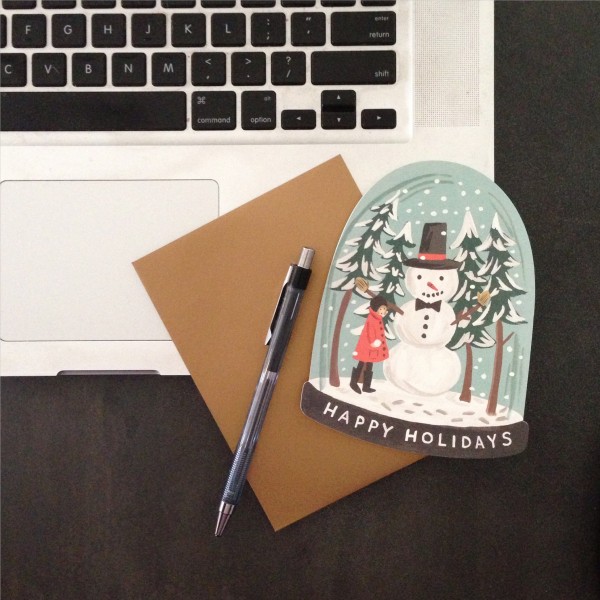
{Rifle Paper Co. Snow Globe}

From John: I’m putting together a collection of cards from your store for my wife. She’ll love them all, these are especially beautiful. 

OSBPJohnHartlandBrooklyn

{Peace Wreath and Succulent Wreath by Hartland Brooklyn.}

From Sas: I sent this postcard to my dear friend in Brooklyn; she’s the only person I know who gets into the holidays the way I do! I love that the scene on the card feels like a snapshot of rural Vermont!

SasRPCholidayscene

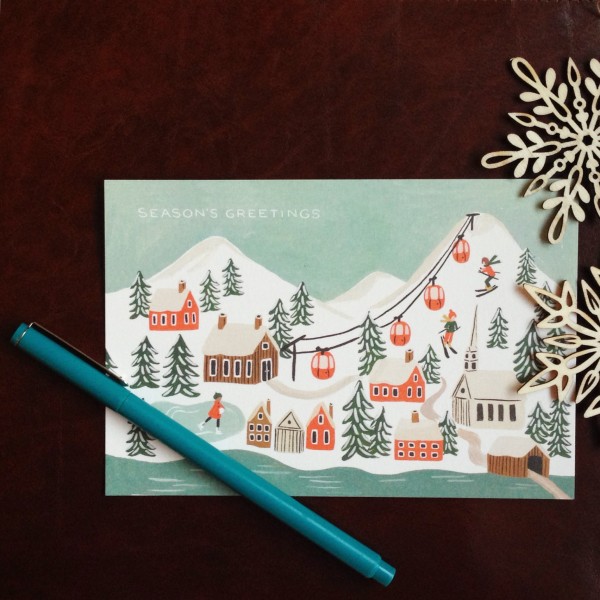
{Rifle Paper Co. Holiday Scene Post Card}

From Emily (that’s me!): I chose these diagramed snowmen for my son’s preschool teachers and friends because I love that they take the jolly holiday spirit of a snowman and break them down into their fun little bits. They remind me of all of the toddler activities his teachers so thoughtfully design – taking each craft piecemeal and creating something wonderful. OSBPEmilyGCT

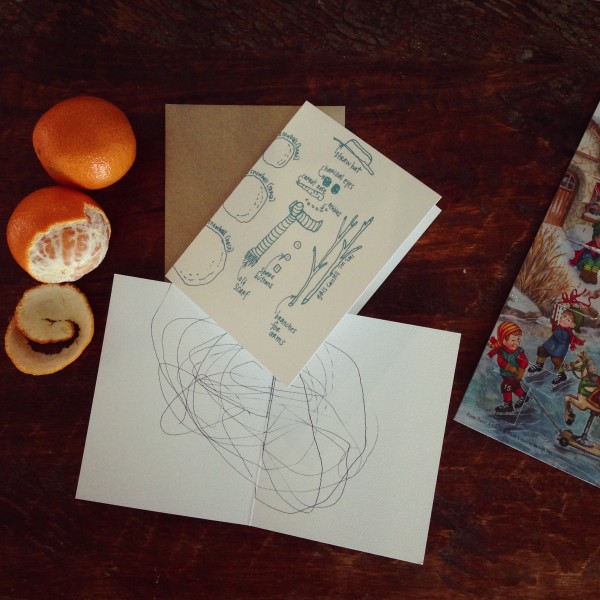
{Girls Can Tell Snowman}

From Meg: My husband and I don’t give each other gifts for the holidays. Instead, on Christmas Day we leave notes for each other and treat ourselves to a delicious homemade chili.

OSBPMegPearl

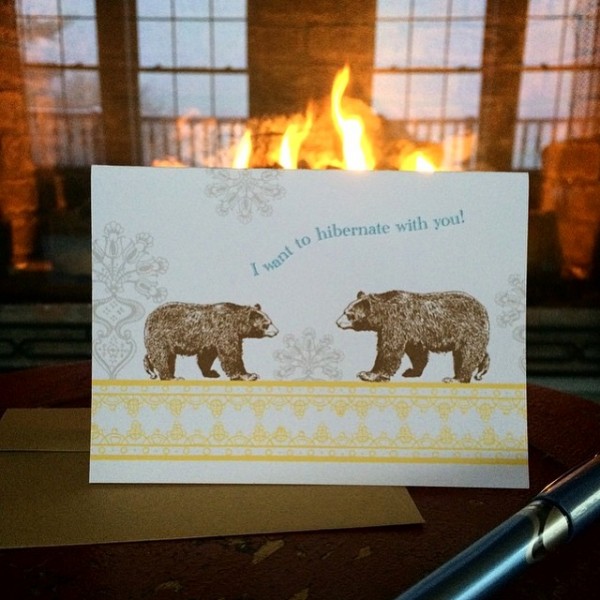
{Pearl & Marmalade’s I want to hibernate with you!}

Sarah purchased a little stack of cards for her employees, a mix of holiday and thank you cards. Like many of you, Sarah is running a small business and knows that the greatest holiday sentiment at this exhausted holiday moment is thanks! From Sarah: This card, among the others, is for the amazing hard work my employees did this year. We would have never gotten here without every one of them. 

OSBPSarahEmilyMc

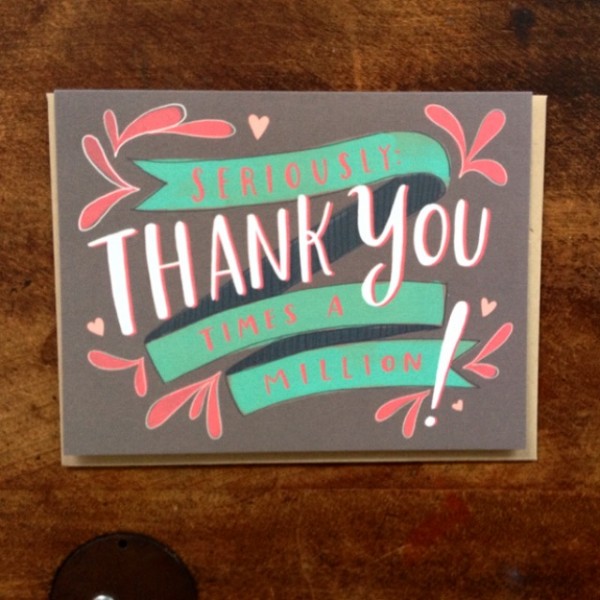
{Seriously Thank You Times a Million from Emily McDowell}

I’ll take a tiny breather here to say that this final story is a bit more tender. In other words, it makes me cry every time I read it. But in a good way, and I hope it hits you in a good way too. Stephanie and I have followed each others lives, without ever meeting, after becoming far-away friends on instagram almost three years ago. I tucked a card in to her order last year with no idea how it would follow their life story. This year has been momentous for Stephanie, I am lucky to be the tiniest snowflake in her story and to get to watch this family grow. From Stephanie: Last year I admired the Dear Santa stationary from afar. My husband and I didn’t have children, and at the time, weren’t planning to, but the idea of it was so sweet. I made an order from Emily’s shop and she slipped the Dear Santa card into my order. I squealed when I opened it. It was precious.

Screen Shot 2014-12-22 at 4.31.34 PM

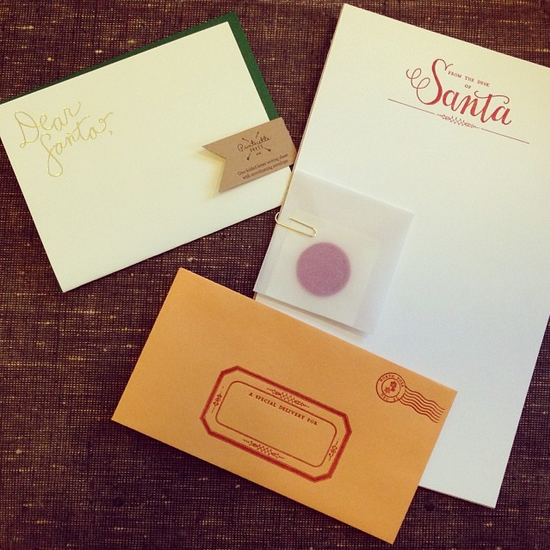
{Dear Santa by Printerette photographed here with another favorite, Parrot Design’s From the Desk of Santa}

When we unexpectedly found out in January that I was pregnant I pulled the Dear Santa Letter out of the Christmas stuff. I wanted to have it for our baby girl’s first Christmas. We named her Wright. At 18 weeks she was diagnosed with a chromosomal abnormality that was terminal. We spent the next 6 weeks waiting to go into labor though we knew she wouldn’t be born alive.  For many reasons I never got around to putting the Dear Santa letter away. In late summer we had another unexpected event; a distant family member called, asking us to adopt her 2 year old son. We said yes.

On September 14th, C landed at JFK to the waiting arms of my husband. As we began Advent, I found the Dear Santa letter among Wright’s things, and with profound awareness of how complex and fantastic the year had been my husband, C, and I sat down to write our first letter to Santa as a family. Far more tearfully and joyfully than I expected – we mailed it from Macy’s on 34th Street – with our deep grief in our hearts and our overwhelming miracle in our arms.

Screen Shot 2014-12-22 at 5.36.17 PM

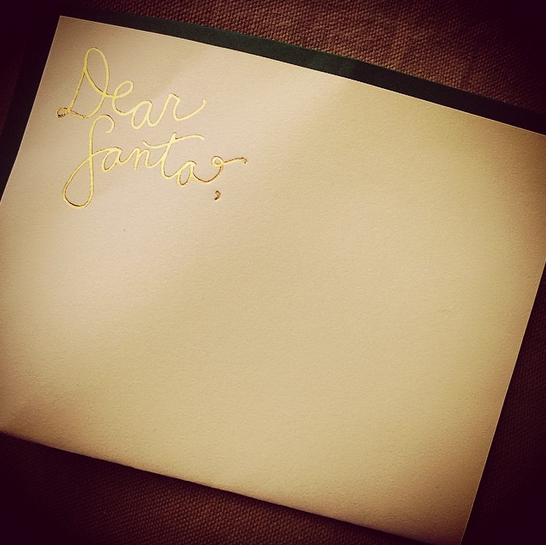
{Dear Santa, Printerette Press)

Wherever you are I hope your hearts are full and your holidays are bright. Even if you’re slogging through some of your days, I hope you catch a little bit of the magic too.  May you hug, laugh and create as much as possible. Merriest of holidays to you all and a Happy New Year! xoxo, Emily

2014 Gift Guide: For the Cocktail Enthusiast

Next up in our holiday gift guide – a few selections for your favorite cocktail enthusiast from our resident cocktail expert!

2014 Gift Guide: For the Cocktail Enthusiast

1. Make your bar cart beautiful with these copper bar tools: Koriko Copper-Plated Hawthorne Strainer, Copper Jigger, and Copper Shaker

2. Death & Co: Modern Classic Cocktails (with 500+ recipes)

3. Coco Strainer â€“ essential for making syrups, infusions, and liqueurs at home!

4. + 11. For an adventurous cocktail enthusiast, consider a make-your-own kit! We like this Hella Bitter Make Your Own Bitters Kit and this Homemade Gin Kit

5. + 6. Hard-to-find specialty mixers like Tomr’s Tonic and Gum Syrup make wonderful gifts. We also shared some of our favorite syrups in last year’s gift guide.

7. AHeirloom Wood Cocktail Muddler â€“ the perfect blend of modern design and functionality.

8. Scrappy’s Bitters Gift Set â€“ a great starter kit with some really fantastic flavors (I’m partial to the lavender bitters).

9. Slow and Low Rock & Rye

10. Vintage Glassware (Okay, so we’re a bit biased, but vintage glassware really is best! Read all about selecting the right cocktail glasses here.)

And of course if you’re looking to gift someone with a favorite bottle of something, check out our How to Stock a Home Bar post for spirit and liqueur recommendations right here!

DC Guide: Where to Shop for the Perfect Cocktail Party with car2go

 This post brought to you by  This post brought to you by car2go. Click here to join now!

One of our goals this winter is to have friends over to our house more frequently – it isn’t always easy to go out when you have small kids at home, especially when you just want to stay warm and cozy inside. Last year we were still unpacking and getting settled into the new house, and by the time spring rolled around we felt like we’d spent the entire winter hibernating. Plus, hosting friends is a great excuse to try out some of our new cocktail recipes!

Car2Go-Washington-DC-OSBP-SweetRootVillage-56

Whether we’re planning a larger event or a smaller gathering, we always want to have something tasty for our guests, but it isn’t always feasible to get around town using public transportation. I’m so glad that car sharing services have become more popular in DC over the last few years. I see car2go all over my Capitol Hill neighborhood, so I was really excited to team up with car2go to try one of their cars for myself. We had a few friends coming over to try some of our upcoming winter cocktails (the best kind of research!), so I jumped into a nearby car2go to gather provisions. Because this was a more intimate gathering of friends and the first time we’d had people over since Alice’s arrival in September, we decided to keep things really simple: two really good cocktails accompanied by a cheese plate and some seriously delicious doughnuts – all around our coffee table (an antique Egyptian brass tray that we found at a flea market!). I try to get as much preparation as possible done during nap time, and car2go made it so easy to pick up some special treats from some of my favorite DC spots in just a couple of hours!

Car2Go-Washington-DC-OSBP-SweetRootVillage-3

Car2Go-Washington-DC-OSBP-SweetRootVillage-4

In case you aren’t familiar with car2go, the entire fleet is made up of smart cars – so they can fit into really small parking spots – that you can access for short trips around town, even one way or by-the-minute trips! I was a bit worried about being able to find a car nearby when I needed it, especially on a weekend, but I just pulled the car2go app up on my phone when I was ready to walk out the door and there was a car just a couple of blocks away. I was in a car with a quick swipe of my member card and on my way in about 10 minutes total!

Car2Go-Washington-DC-OSBP-SweetRootVillage-11

Car2Go-Washington-DC-OSBP-SweetRootVillage-19

Car2Go-Washington-DC-OSBP-SweetRootVillage-21

My first stop was my favorite new addition to Capitol Hill: District Doughnut! I was so happy when they opened up shop on Barracks Row a few months ago – they seriously make the best doughnuts I’ve ever tasted! My personal favorites so far are Brown Butter and Maple Butter Pecan, but they’re always coming out with new seasonal flavors. Lines have been known to form down the block and parking can be really difficult on weekends, but I managed to find a tiny parking spot that was just the right size for car2go.

Car2Go-Washington-DC-OSBP-SweetRootVillage-16

Car2Go-Washington-DC-OSBP-SweetRootVillage-34

Next I headed up to Union Market, an artisanal food market in the NOMA area of DC. We love coming up to Union Market for casual meals or to shop at the many specialty stands – you can find everything from produce stands to a fishmonger to ice cream! I made a beeline to Righteous Cheese to pick up the ingredients for our cheese plate, then stopped by the produce stand to grab some fresh seasonal citrus in lieu of flowers. I couldn’t resist popping into Salt & Sundry to pick up a new candle from local candlemaker Sydney Hale Co. and the most gorgeous tiny dipping bowls from Redraven Ceramics.

Car2Go-Washington-DC-OSBP-SweetRootVillage-42

Car2Go-Washington-DC-OSBP-SweetRootVillage-45

Car2Go-Washington-DC-OSBP-SweetRootVillage-49

Car2Go-Washington-DC-OSBP-SweetRootVillage-51

Car2Go-Washington-DC-OSBP-SweetRootVillage-50

If you’re planning to host a cocktail party of any kind, you’ll definitely want to visit a well curated liquor store. My final stop was at our favorite liquor store in all of DC: Schneider’s of Capitol Hill. Schneider’s seriously has everything – from small batch distilleries to the more familiar brand names – and the staff is always available to help you find something, answer questions, or make recommendations if you need help navigating the sheer number of options. It’s overwhelming in the best possible way.

Car2Go-Washington-DC-OSBP-SweetRootVillage-55

My favorite part of running around DC with car2gocar2go? Once you’re done with the car you just park it anywhere and leave! You don’t have to return the car to a specific spot or worry about completing a return trip within a specified period of time. You just drive the car for the amount of time that you need it (even one-way trips) and then you’re done. I found a parking spot right around the corner from my house, so I didn’t have to worry about schlepping a bunch of things for a long walk home. My husband was taking Sophie and Alice for a walk when we pulled up – so Sophie even got a peek inside the car2go! She promptly proclaimed it her tiny car.

Car2Go-Washington-DC-OSBP-SweetRootVillage-57

I made it home with plenty of time to set everything out before our guests arrived. Andy made up a large batch of one of our favorite drinks – The Martinez – and a bowl of Hot Rum Punch â€“ you’ll have to check back on Friday for the Hot Rum Punch recipe!

Car2Go-Washington-DC-OSBP-SweetRootVillage-84

Car2Go-Washington-DC-OSBP-SweetRootVillage-106

Car2Go-Washington-DC-OSBP-SweetRootVillage-120

Car2Go-Washington-DC-OSBP-SweetRootVillage-107

Car2Go-Washington-DC-OSBP-SweetRootVillage-117

Photos by Sweet Root Village for Oh So Beautiful Paper

Happy Weekend!

Happy Friday everyone! Time seems to be moving faster and faster these days – I can’t believe Christmas is only three weeks away! This weekend we’re looking forward to catching up on some sleep (thanks again toddler and newborn). Next week I’m excited to share a few gift guide posts – although last year’s gift guides are still full of some great ideas and worth checking out – not to mention more holiday cards! But in the meantime…

Giant-Origami-Instagram

Photo by Giant Origami

…a few links for your weekend!

This week on Oh So Beautiful Paper:

Check back soon for this week’s cocktail! I hope you all have a wonderful weekend, and I’ll see you back here next week! xoxo

DIY Tutorial: Holiday Envelope Addressing Ideas

As you might be able to guess, we send quite a lot of snail mail in our line of work. Whether it’s thank you notes, catalogs, color samples, or a letter to our loved ones, we try to make all of our outgoing mail a treat for the recipient to receive. Since we have holiday cards on the brain, we decided to come up with some fun and easy addressing options suited to the season. They incorporate fun lettering styles as well as stamping and we just love them all! Want more DIY addressing styles? Check out our first envelope addressing post here. Have fun with the designs and happy addressing! –Bailey and Emma of Antiquaria

DIY Tutorial: Holiday Envelope Addressing Ideas by Antiquaria for Oh So Beautiful Paper

Option One: Do Not Bend Pennant Stamp + White DIY Pointed Pen Calligraphy Addressing. White stamping and white calligraphy ink really pop off of this gorgeous fig colored envelope. While it takes time to perfect using a pointed calligraphy pen, feel free to experiment also with white or silver gel pens for a similar (and easier) effect.

DIY Tutorial: Holiday Envelope Addressing Styles by Antiquaria for Oh So Beautiful Paper

Stamp your Please Do Not Bend Pennant Stamp on the lefthand side of your envelope, just a hair above the center. With your pen, draw a line to the bottom with white ink.
DIY Tutorial: Holiday Envelope Addressing Styles by Antiquaria for Oh So Beautiful Paper

Next, address the envelope to your loved one using a pointed calligraphy pen and white ink. Start your addressing right below the pennant stamp, as shown above.

DIY Tutorial: Holiday Envelope Addressing Styles by Antiquaria for Oh So Beautiful Paper

Let the addressing dry completely (with white calligraphy ink this can take a few hours). Once it’s dry, add your postage and then stamp our Long Live Snail Mail Stamp to the left. Feel free to play with the lettering style of addressing on this design! A simple hand-written block print with white or silver gel ink also looks lovely (see below)!
DIY Tutorial: Holiday Envelope Addressing Styles by Antiquaria for Oh So Beautiful Paper

Option Two: Zig-Zag Stamp + Bold Brush Block Lettering. Adding a line of pattern along the bottom of the envelope instantly adds an air of “fun” to the design. When paired with an easy brushed address, the effect is bold and will stand out instantly among the bills and junk mail!

Mint-AddressingDIY Tutorial: Holiday Envelope Addressing Styles by Antiquaria for Oh So Beautiful Paper

Print your zig-zag stamp in black ink along the bottom edge of the mint colored envelope. You’ll want to make sure that each printing is close together but not overlapping.
DIY Tutorial: Holiday Envelope Addressing Styles by Antiquaria for Oh So Beautiful Paper

With a black brush pen, write out your loved one’s name. We decided to make big block letters for their name (with the mint color showing in the center) and a simple italic print for the address. Once the address is done, add your postage and our Long Live Snail Mail Stamp to complete the look!
DIY Tutorial: Holiday Envelope Addressing Styles by Antiquaria for Oh So Beautiful Paper

Option Three: Deliver To Banner Stamp + Hand-lettered Script. Bailey actually designed this adorable “Please Deliver To” stamp to use on her save the date a while back and we think that it makes the perfect snail mail statement on this coral envelope when combined with red addressing. The fun part of this design is that you get the look of calligraphy but with simpler tools! A common felt tipped pen made this gorgeous script. Incredible, right?

DIY Tutorial: Holiday Envelope Addressing Styles by Antiquaria for Oh So Beautiful Paper

Start by stamping your Deliver To Banner Stamp on the left hand side of the envelope, a little above center. Angle it so that you can nestle the lettering in underneath it. To make the hand lettered script, use your prettiest cursive and write the name across your envelope. Then, draw a second line along each letter, creating the thick and thin look (as shown above). Refer to a favorite script font for letter shape and style, if needed.

DIY Tutorial: Holiday Envelope Addressing Styles by Antiquaria for Oh So Beautiful Paper

Once you’ve done that for the entire name, color in the letters so that they are solid red. Finish out the addressing with a simple italic print for the address. We also added a fun flourish underneath the last address line to gussy the envelope up even more! Draw it in pencil first or practice on a scrap piece of paper if you need to before executing it on your envelope.

DIY Tutorial: Holiday Envelope Addressing Styles by Antiquaria for Oh So Beautiful Paper

While we think all of these styles would be perfectly suited to holiday greetings, we also think that they could be adapted and used on save the dates and Invitations as well! Play around with the techniques and find out what you like best with the cards that you’re sending. We hope that you have just as much fun addressing your cards as you do selecting them!

Materials and Resources

Special Delivery Stamp Kit: Deliver To Banner, Long Live Snail Mail and Do Not Bend Pennant

Feathers & Arrows Stamp Kit: contains the zig-zag stamp

Calligraphy Starter Kit

White Calligraphy Ink

Calligraphy Resources: Setting up your Tools,  Lower Case Alphabet by Bailey Rivera, Calligraphy Supplies

Brush and Felt Tipped Pens

For envelopes, we discuss many different envelope resources and options in a previous post, found here.

Current USPS Postage

Vintage Postage

Photography by Antiquaria for Oh So Beautiful Paper