DIY Printed Fabric with Rubber Stamps

We had a ton of fun experimenting with today’s tutorial. After hearing feedback from clients over the years that have used screen printing ink and an ink brayer to print with their stamps vs. using a stamp pad, we figured that it was high time to try it for ourselves. The process and results are fun and the options for using the technique are endless. Today, we’re using three of our pattern stamps on linen fabric to make a gorgeous, custom floral print! –Bailey and Emma of Antiquaria

DIY Printed Fabric with Rubber Stamps / Antiquaria for Oh So Beautiful Paper

DIY Printed Fabric with Rubber Stamps / Antiquaria for Oh So Beautiful Paper

Materials

Fabric (we used linen – but cotton fabric would also work)

Camellia Pattern Stamp

Daisy Pattern Stamp

Small Leaves Pattern Stamp

Ink

Brayer

Disposable spoon (or one you don’t plan to eat with again)

Disposable Palette

Scrap Paper

Iron & Scrap of Cloth

DIY Printed Fabric with Rubber Stamps / Antiquaria for Oh So Beautiful Paper

Step 1. Spoon some of ink onto the disposable palette. With the back of the spoon, smear the ink in a rectangle, down the center. Using the brayer, roll the ink onto the palette until you get a thin film of ink in the center. Now you’re ready to start printing!

Step 2. First test your overall pattern on a small piece of fabric. Lay the fabric over a scrap piece of paper to protect the table from ink stains. Lightly use the brayer to roll ink onto your stamp. Start with the largest (most dominant) stamp, before using smaller stamps to fill in the pattern. Place the stamp down, and stamp it as if you were printing on a sheet of paper using moderate and even pressure. Lift the stamp and re-apply ink.

Step 3. Begin stamping on your fabric. Start with the largest stamp (we used our Camellia pattern stamp) until you’ve covered your entire piece of fabric. Use the next smallest stamp (we used our Daisy pattern stamp) to start filling in the negative spaces. The last stamp was our Small Leaves Pattern stamp. Because it’s small, it make a wonderful filler and allows you to really balance the overall design. We found that dipping into the thin layer of ink works best for the small stamps vs. using the brayer.

Step 4. Heat set the ink once you’ve finished printing all of your fabric according to the manufacturers instructions. In our case, we used a dry iron and a scrap piece of fabric.

DIY Printed Fabric with Rubber Stamps / Antiquaria for Oh So Beautiful Paper

DIY Printed Fabric with Rubber Stamps / Antiquaria for Oh So Beautiful Paper

DIY Printed Fabric with Rubber Stamps / Antiquaria for Oh So Beautiful Paper

DIY Printed Fabric with Rubber Stamps / Antiquaria for Oh So Beautiful Paper

DIY Printed Fabric with Rubber Stamps / Antiquaria for Oh So Beautiful Paper

DIY Printed Fabric with Rubber Stamps / Antiquaria for Oh So Beautiful Paper

DIY Printed Fabric with Rubber Stamps / Antiquaria for Oh So Beautiful Paper

DIY Printed Fabric with Rubber Stamps / Antiquaria for Oh So Beautiful Paper

DIY Printed Fabric with Rubber Stamps / Antiquaria for Oh So Beautiful Paper

DIY Printed Fabric with Rubber Stamps / Antiquaria for Oh So Beautiful Paper

This technique excites us so much and we can’t help thinking of all of the possible uses for our very own customized fabric! Imagine stamping your monogram onto linen napkins for your wedding, making tote bags for your bridesmaids, incorporating the print into your handmade wardrobe or even making custom print fabric envelopes for your invitation!

Photo Credits: Antiquaria for Oh So Beautiful Paper

Friday Happy Hour: The Mai Tai

Last week, we started our month of Tiki drinks with one of our own creations, but today we’re going back to basics: the Classic Mai Tai. The Mai Tai is the consummate Tiki drink: layers of different rums and citrus and nutty sweetness. It’s simpler to make at home than its reputation suggests. And it’s so, so good. – Andrew

Classic Mai Tai Cocktail Recipe / Liquorary for Oh So Beautiful Paper

The Mai Tai Cocktail Recipe Card / Illustration by Shauna Lynn for Oh So Beautiful Paper

Illustration by Shauna Lynn for Oh So Beautiful Paper

The Mai Tai

1 oz Dark Rum
1 oz Silver Rum
1/2 oz Rhum Agricole
1 oz Lime Juice
1/2 oz Dry Curaçao
1/2 oz Orgeat
2 dashes Angostura Bitters

Combine all the ingredients in a shaker with just a bit of ice. Shake lightly and strain into a lowball glass filled with crushed ice. Garnish with a bunch of mint, a lime wheel, and any tropical fruit that tickles your fancy. Enjoy!

Classic Mai Tai Cocktail Recipe / Liquorary for Oh So Beautiful Paper

Like so many drinks, the Mai Tai’s true origins are almost certainly lost to history. Two of the great fathers of Tiki laid claim to it, both Don the Beachcomber and Trader Vic, sometime in the 1930s or 1940s. Even worse, the original recipe is lost too. I tried to dig up the closest I could find to the original, classic recipe, to cut through all of the unnecessary innovations that Tiki recipes accumulated in the dark days of the 1970s through 1990s, but I came up empty. There are versions with pineapple juice and orange juice, versions with rock candy syrup and grenadine, all kinds of a mess.

Classic Mai Tai Cocktail Recipe / Liquorary for Oh So Beautiful Paper

But the oldest recipes were consistent in a few ways: they combined light and dark rums, lime, orange liqueur, and almond-flavored orgeat. So that’s what I went with. Three kinds of rum, lime, orgeat, and dry curaçao – a recently resurrected, archaic orange liqueur that’s perfect for Tiki. I also threw in some Angostura bitters which, made in Trinidad, have a tropical spiciness that’s also perfectly suited for Tiki drinks.

Classic Mai Tai Cocktail Recipe / Liquorary for Oh So Beautiful Paper

This Mai Tai is beautifully layered and complex, sweet and tart and rich. It’s smooth, but all that rum and citrus leaves a hint of a rough edge. A Mai Tai looks pretty complicated, with all those moving parts, but it’s basically a fancy Daiquiri: rum, lime, and sugar. Easier than it looks.

(Don’t forget to follow us on Instagram, where we’ve been posting our experiments before they make their way onto this column!)

Glassware by Liquorary 

Photo Credits: Nole Garey for Oh So Beautiful Paper

Copper Foil and Navy Iceland Wedding Invitations

There are so many places in the world that I want to visit someday – and Iceland is definitely in my Top 5! Lyndsey from The Hunter Press recently got married in Iceland, with an intimate ceremony attended by 10 family members. Lyndsey designed the most beautiful copper foil and navy invitations for her destination wedding – I’m so happy she’s sharing them here today!

Copper Foil and Navy Iceland Wedding Invitations  / The Hunter Press / Oh So Beautiful Paper

From Lyndsey: I run a letterpress printing and design studio in Scotland called The Hunter Press and recently had the pleasure of designing my own wedding invitations. My husband and I married in Iceland in an intimate ceremony, surrounded by just 10 of our family.

Copper Foil and Navy Iceland Wedding Invitations  / The Hunter Press / Oh So Beautiful Paper

When my now-husband Keith popped the question 18 months ago, I went straight to work collating ideas for our invitations. As a designer and printer, the chance to create your own wedding invitations is a big deal and seriously exciting, if a little overwhelming! The invitations were designed in the style of a map book and were printed using a combination of letterpress printing and hot foil.

Copper Foil and Navy Iceland Wedding Invitations  / The Hunter Press / Oh So Beautiful Paper

We were engaged in an lava tunnel in Iceland 18 months previous and instantly made the decision to return to Iceland for our wedding day. Our ceremony took place in a tiny black church on the Snaefellsnes peninsula in Western Iceland, surrounded by only the ocean and mountains. We chose to have an intimate ceremony with just our immediate family present and wanted our invitations to be an extra special keepsake for our guests.

Copper Foil and Navy Iceland Wedding Invitations  / The Hunter Press / Oh So Beautiful Paper

Copper Foil and Navy Iceland Wedding Invitations  / The Hunter Press / Oh So Beautiful Paper

The little black church and neighbouring Budir Hotel were both strong design influences. We wanted to keep the invitations as simple and romantic as possible while bringing in an element of Budir charm. The hotel itself was full of dark features, old maps and various wildlife specimens. Dark blues, rough cottons and suede cords seemed the perfect combination for our stationery.

Copper Foil and Navy Iceland Wedding Invitations  / The Hunter Press / Oh So Beautiful Paper

The invitation cover, centre page and back poem were foil printed in copper onto dark blue Colorplan stock. The foldout map insert was letterpress printed in a warm grey onto textured 100% Cotton Saunders Waterford Stock.  All items were drilled at the top and secured with a copper book screw, allowing each page to swivel open. The map books were then tied with a brown suede cord and packaged within a strong Kraft button and string envelope.

Copper Foil and Navy Iceland Wedding Invitations  / The Hunter Press / Oh So Beautiful Paper

Copper Foil and Navy Iceland Wedding Invitations  / The Hunter Press / Oh So Beautiful Paper

Thanks Lyndsey!

Design and Printing: The Hunter Press

Check out the Designer Rolodex for more tal­ented wed­ding invi­ta­tion design­ers and the real invi­ta­tions gallery for more wedding invitation ideas!

Photo Credits: The Hunter Press

Behind the Stationery: Hello!Lucky

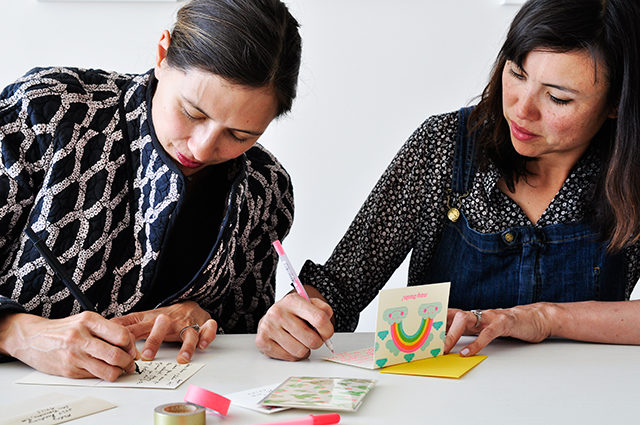
The ladies of Hello!Lucky are busy moms and stationers based in beautiful San Francisco. These savvy business women are here sharing their experiences in partnering with a printer and expert tips on hiring staff. As a former stationery studio manager myself, I think their advice is so crucial for small businesses looking to attract top talent amongst the big corporations.  â€“Megan

headshot

Eunice: I was a freelance illustrator and graphic designer. I was working retail in a boutique pet store on the weekends and designing the store’s windows. I offered to create a line of dog and pet-themed cards for the owners because the existing options were pretty skimpy, and it was from there that Hello!Lucky was born. Searching for a way to print my own work, which would allow for more ability to experiment and keep initial overhead low, I took a class at the San Francisco Center for the Book and was immediately hooked. Having some issues with restraint, I bought a press on eBay the next week and our letterpress card business was born.

Sabrina: I was working as an education strategy consultant having just gotten my MBA from Stanford Business School. I have a degree in Art History and had focused professionally on arts education and helping emerging artists access funding and build their careers. I offered to help Eunice, the most talented artist I knew at the time, start the card business and quickly fell in love with being an entrepreneur and returned to my passion for merging creativity and business.

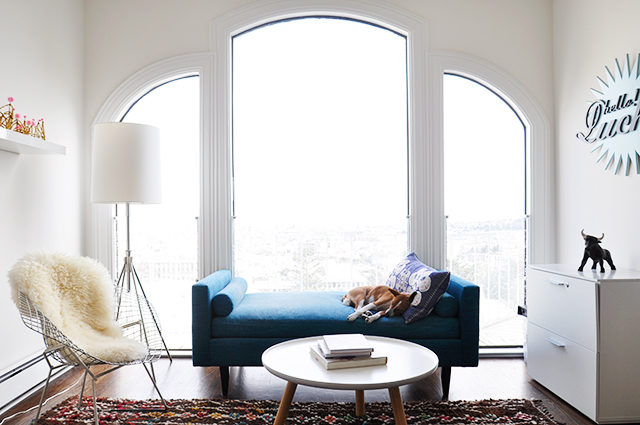
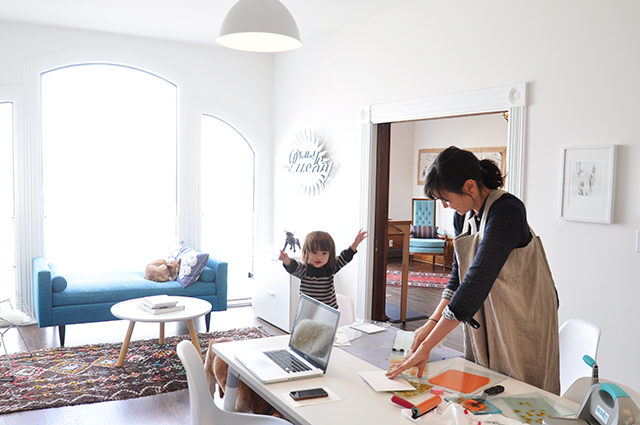
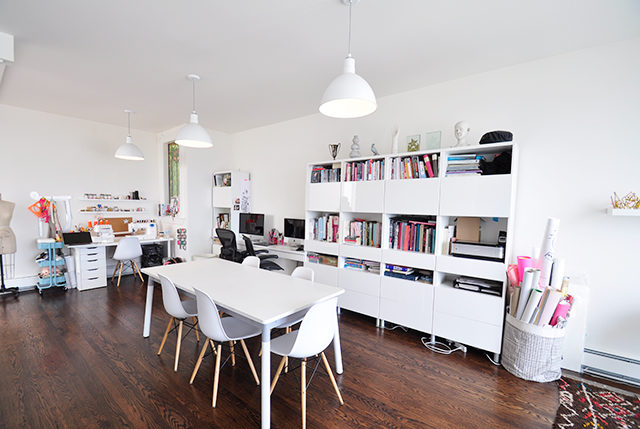
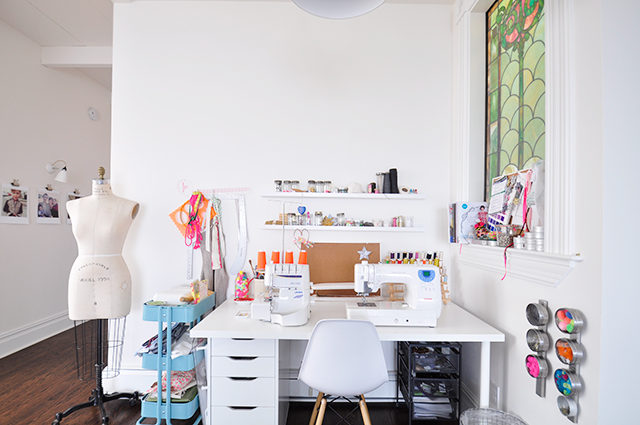
We’re based in San Francisco, in a studio space in Eunice’s home, a historic Edwardian in the Haight Ashbury district. We’re lucky to have sweeping views of the city, a couple friendly studio dogs, and a few studio babies to keep things entertaining!

OSBP_window

Eunice: I am constantly juggling work and kids and everything else. My day starts at 6:30 in the morning (yay, kids!) and ends around midnight. The first order of business is a giant mocha to get the gears turning! A double shot of espresso may be the most critical element in my creative workflow. Most of my time is spent designing new cards and working on other client projects. I’ve been slowly but surely moving beyond just cards, so as of late, there are always a new and exciting things in the works, like designing textiles for a swimwear line (I spent a whole day drawing bitchy looking persian cats on a background of diamonds – it really doesn’t get better than that!). My job is, at times, ridiculous in the best way possible. In between design projects, we are constantly working on bits and bobs for marketing and brainstorming the next batch of card ideas.

My biggest struggle is juggling my kids, life and work – luckily, I’m the queen of multi-tasking and Imogen is a reasonable studio baby (Alex is remarkably tolerant of the endless episodes of Elmo and constant and thorough destruction of the studio). I also have an awesome nanny a couple days a week and a great (and patient!) husband who, at the moment, is at home and spends a lot of time with Gigi so that I can beaver away in peace.

Sabrina: I work weekday mornings and all day on Thursdays; my day typically consists of checking email, brainstorming / reviewing card designs with Eunice and Alex, and then working on various marketing and advocacy campaigns such as Write_On and Share Trade, and the book I am writing. As a busy mom of three, I get a lot of my work done in the “spaces in between.” For example, I “write” via voice memo during my commute, and use any moments of downtime to cross things off my to-do list so that I can be fully engaged with work during work time and kids during kid time.

OSBP_letterpress

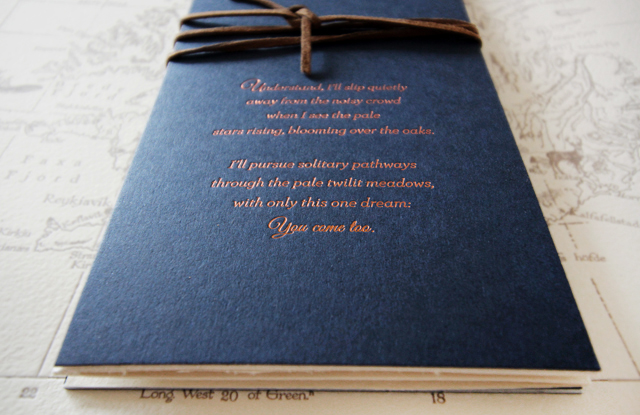
We work in collaboration with the fabulous Egg Press in Portland, Oregon. They do all our printing (letterpress) and distribution. We used to do all of our own letterpress printing in our San Francisco studio and we also offered custom digital printing through a trade printer in the Bay Area. Once we decided to stop doing custom printing (e.g. wedding invitations) and focus exclusively on our greeting card business and licensing our designs, we realized it made sense to partner. Egg Press is a company that we love and it’s been a great, mutually beneficial experience collaborating with them: they have a large studio, a wonderful production staff, and complementary products, customers, and distribution. We share similar values and vision and have found that, working together, we can grow both our businesses more effectively than they could have developed on their own.

OSBP_studio

We started hiring employees in 2003. Our first employees were friends, including Eunice’s roommate, Sabrina’s old room mate, Eunice’s cleaner, and Sabrina’s old friend who was living in London and offered to start our London office out of her apartment. We didn’t have a recognizable brand to attract employees, so we relied on hiring people who already knew us and had faith in what we were doing. Later on, we started hiring people for real by posting jobs on Craigslist and using our growing network of business acquaintances to get the word out (this was pre-Facebook and LinkedIn).

Over the years, we’ve hired dozens of people and been fortunate to get great employees across the board. The process typically has was handled by Sabrina and consisted of putting together a job description and posting it / sharing via email with friends and acquaintances.

Here are 5 things we’ve learned about hiring and attracting great employees:

1) Have a compelling vision for your business.
Communicate where your business is going and the values that you stand for.
2) Have confidence in yourself as a small business.
Small business owners often lack confidence because they can’t afford to pay big corporate salaries. The reality is that there are tons of people who *want* to work in a small business environment where they’re not just some replaceable cog in the wheel, and will have opportunities to see how running a business works up close and wear multiple hats.
3) Give your employees a lot of responsibility and treat them like co-owners of your business.
This is totally win-win – they get great leadership experience and a sense of ownership and engagement that leads to higher productivity, creativity, and commitment.
4) Make your small business a fantastic stepping stone to bigger / better opportunities by giving your employees lots of responsibility.
Many of our employees went on to great jobs at large companies like Paperless Post and Williams-Sonoma, started their own small businesses, or got admitted to top-tier business schools (Cornell and Kellogg).
5) Make up for what you can’t pay in salary with an awesome work environment.
Encourage people to have fun, be positive, and be a flexible and compassionate manager. Liking the people you work with and looking forward to going to work every day is harder to find than you think – that alone will attract great candidates and get them to stay.

In the interview process:

1) Pay attention to passion, intelligence, communication skills, desire to learn, and self-awareness.
If someone has these attributes, their past work experience becomes practically irrelevant since they can quickly learn what needs to be done on the job and will be a great team player and contributor.
2) Find out why the person made the key decisions in their life.
How they chose their college and major, or how and why they chose their past jobs and/or chose to leave them reveals a ton about whether their values and motivations are aligned with those of your business and the rest of your staff.
3) Get to know the candidate on a personal level as much as you can during the interview.
Their personal character traits will matter more in the long run than their most recent job experience. If the person is someone you’d want to be friends with, or who you might have a professional crush on, that’s a great sign.
4) Trust your intuition.
Don’t pay too much attention to surface level resume details like working at sexy or well-known large corporations, fancy-sounding job titles, etc. Hire the whole person, not the image they project on paper.

OSBP_writing

We count ourselves so lucky to get to spend every day doing what we do. Doing the creative work is definitely the most interesting part of the business! There has been more than one occasion when we’ve stopped to laugh at the fact that we spend a good part of each day trying to come up with butt and unicorn related puns and marveled at the ridiculousness that is our job. Working out new concepts and figuring out new collaborations keeps things interesting. We love exploring new outlets for our designs and collaborating with other cool and inspirational brands.

Eunice: We get inspiration everywhere! I love to travel and do as much traveling as two kids and our crazy busy lives allow. I’ve done some of my best work on the road. I’m a sponge for texture, pattern, color and trend inspiration. Valencia Street in San Francisco is one of my favorite places to pick up on visual inspiration; there’s so much creativity happening here right now. I’m also heavily influenced by French and Japanese style and culture.

That being said, I think our most creative space is really our studio – the three of us get together, bringing our individual influences to the table and the creative juices really get going. I do my best work when I have Alex and Sabrina around for feedback and brainstorming!

Sabrina: I get a lot of my inspiration from reading and writing. I read a new book every couple of days. I also do a lot of brainstorming while driving, and I keep my phone with a dark screen (so I don’t wake up my husband) by my bedside so I can capture ideas in the middle of the night in Evernote

OSBP_desk

We also love figuring out new ways to connect with and inspire our customers. The Write_On campaign is a great example: it’s a campaign to challenge our fans to write 30 letters in 30 days for National Letter Writing month in April. The campaign has inspired our customers and fans to connect with friends and family and to give thought to people that they might not normally stop to thank. It’s also great for our brand and greeting card sales – this year we brought on Paper Source and a handful of our independent boutique customers on board, and it’s been great for their businesses as well.

All photos by Hello!Lucky

Interested in participating in the Behind the Stationery column? Reach out to Megan at [email protected].

DIY Let’s Party Tropical Palm Frond Ice Bucket

Happy Monday everyone! It’s getting super hot out there, and a cute ice bucket is an absolute necessity for any summer parties. So here’s a fun (and totally easy) tutorial for making an awesome “Let’s Party” tropical palm frond ice bucket using vinyl decals made with the Silhouette CAMEO®!

DIY Let's Party Tropical Palm Frond Ice Bucket / Oh So Beautiful Paper

This tropical ice bucket was inspired by a sign that I made for the bar at Paper Party 2015 using a vinyl decal made with my Silhouette CAMEO® on painted acrylic. The sign featured gorgeous “Let’s Party” lettering from Jenna of Mon Voir Calligraphy surrounded by amazing palm frond illustrations by Courtney of Swiss Cottage Designs. This tropical motif is absolutely perfect for summer! And it turns out that a pretty vinyl decal is an awesome way to take your ice bucket game to the next level.

Oh So Beautiful Paper / Paper Party 2015 / Photo by Charlie Juliet Photography

Photo by Charlie-Juliet Photography

DIY Let's Party Tropical Palm Frond Ice Bucket / Oh So Beautiful Paper

DIY Let's Party Tropical Palm Frond Ice Bucket / Oh So Beautiful Paper

DIY Let's Party Tropical Palm Frond Ice Bucket / Oh So Beautiful Paper

Okay, now onto the fun part – making the decal!

DIY Let's Party Tropical Palm Frond Ice Bucket / Oh So Beautiful Paper

The original ice bucket. Totally fine, but just begging for an upgrade.

Supplies

Silhouette CAMEO®

12″ Matte Dark Green Vinyl (or another color of your choice)

12″ Transfer Paper

Vinyl Ice Bucket (mine was vintage via eBay – but you can find new versions here!)

Scissors

Exacto knife (optional)

DIY Let's Party Tropical Palm Frond Ice Bucket / Oh So Beautiful Paper

Instructions

1. Download the decal file right here and open the file in Silhouette Studio – it’s all traced and ready to go! My ice bucket measures around 7.5″ tall and 24″ around, but I made the file a full 12″ tall with some extra tropical leaves along the bottom so you can fill in as needed if your ice bucket has different dimensions.

2. Cut a piece of vinyl 24″ in length. Load your vinyl into the machine, adjust the page size to 24″ wide by 12″ high with no cutting mat, set the cut settings to vinyl, then click Send to Silhouette and watch the machine do its thing!

3. Carefully remove excess vinyl from the liner, leaving just your words and tropical leaves. Use the exacto knife to hold down thin parts of the decal while removing the excess vinyl and to pick out the tiny bits inside the lettering and leaves. If needed, trim the decal to the height of your ice bucket and cut away any unnecessary leaves.

4. Place a piece of transfer tape over the entire decal, remove the liner backing, and transfer to your ice bucket as desired, making sure to press down firmly and smoothly along the entire decal.

DIY Let's Party Tropical Palm Frond Ice Bucket / Oh So Beautiful Paper

DIY Let's Party Tropical Palm Frond Ice Bucket / Oh So Beautiful Paper

DIY Let's Party Tropical Palm Frond Ice Bucket / Oh So Beautiful Paper

DIY Let's Party Tropical Palm Frond Ice Bucket / Oh So Beautiful Paper

Such a fun way to upgrade your ice bucket! Stay cool out there this summer!

Note: Let’s Party calligraphy by Mon Voir and palm frond illustrations by Swiss Cottage Designs. This artwork is made available for personal use only and may not be copied, altered, or distributed in any way.

This post is brought to you in collaboration with Silhouette. Thank you for supporting the sponsors that make Oh So Beautiful Paper possible!