Fall Cocktails: The Stone Fence

It’s Halloween! But the adults deserve treats, too. If you just spent the last few nights in a row working into the wee hours of the morning making your kids their perfect costumes, of if you just spent all night escorting your kids on a sugar rampage through the neighborhood, then treat yourself to a favorite fall cocktail: the Stone Fence. – Andrew
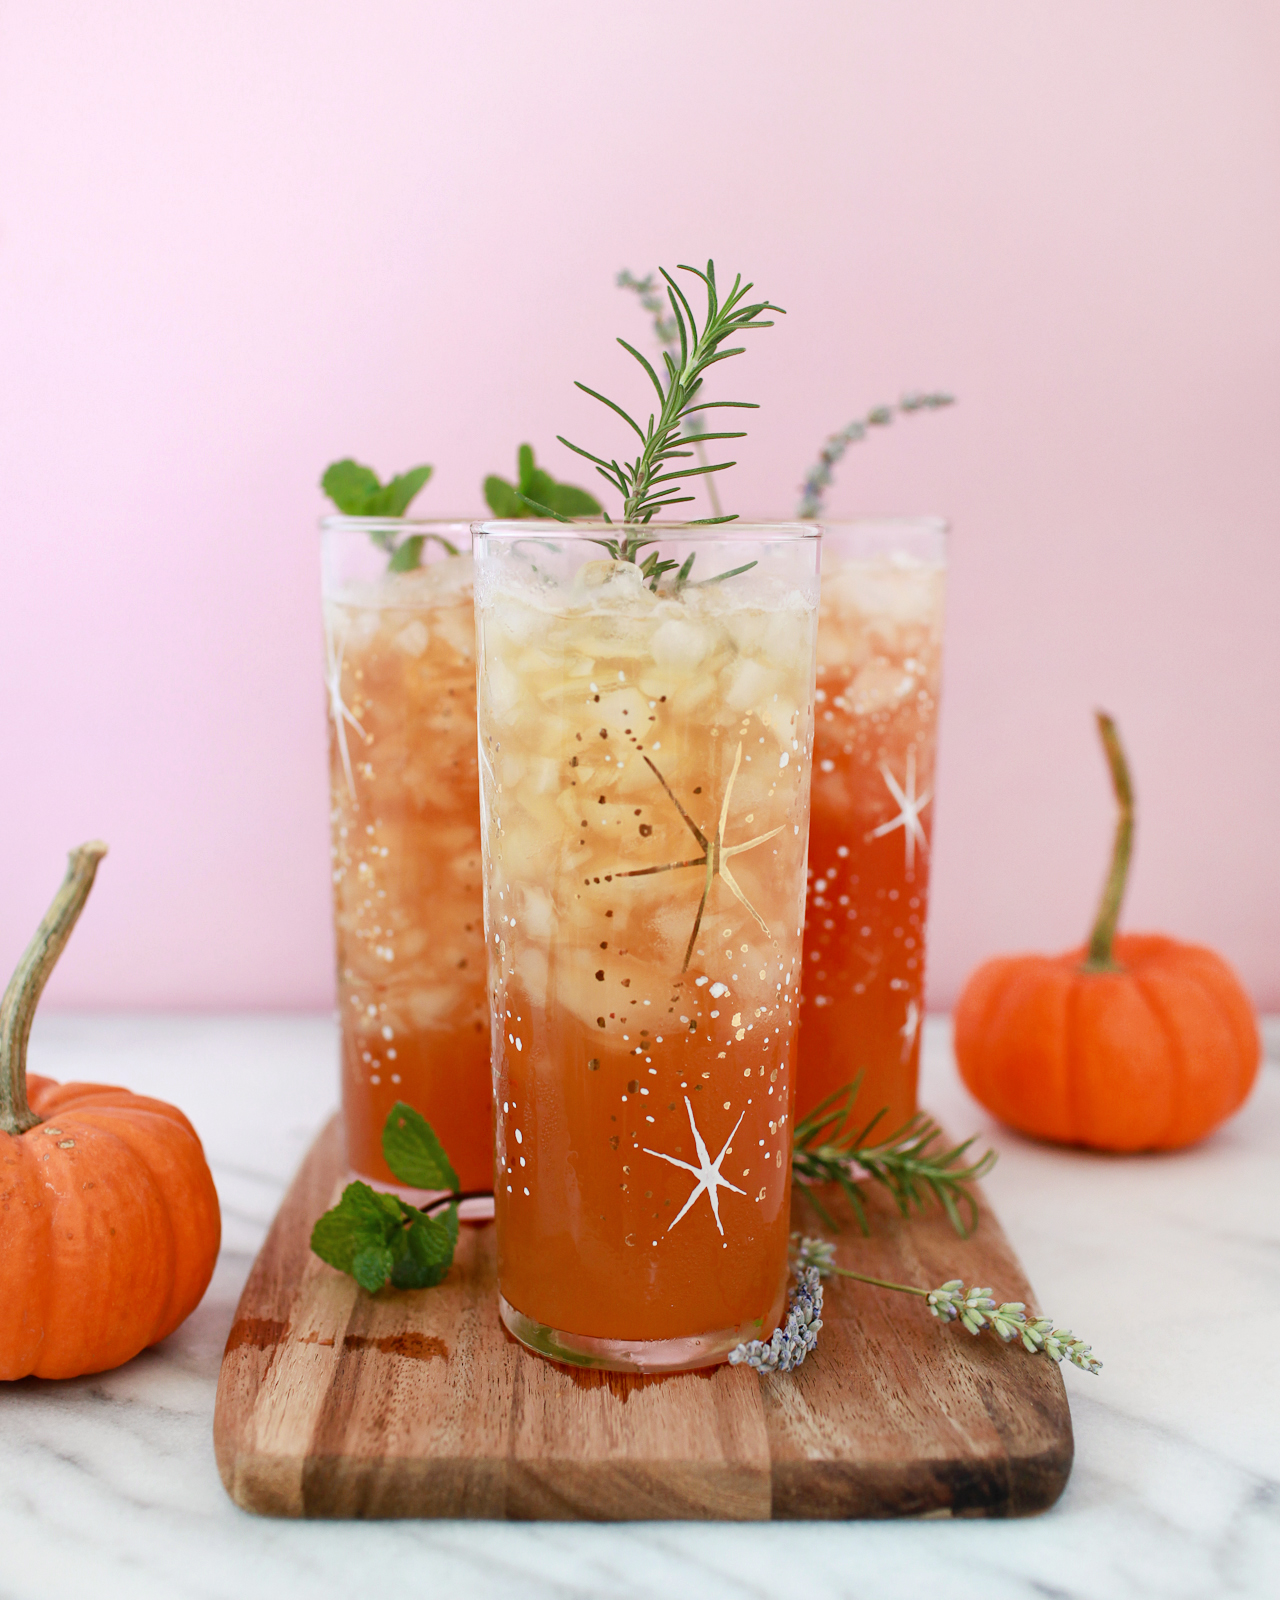
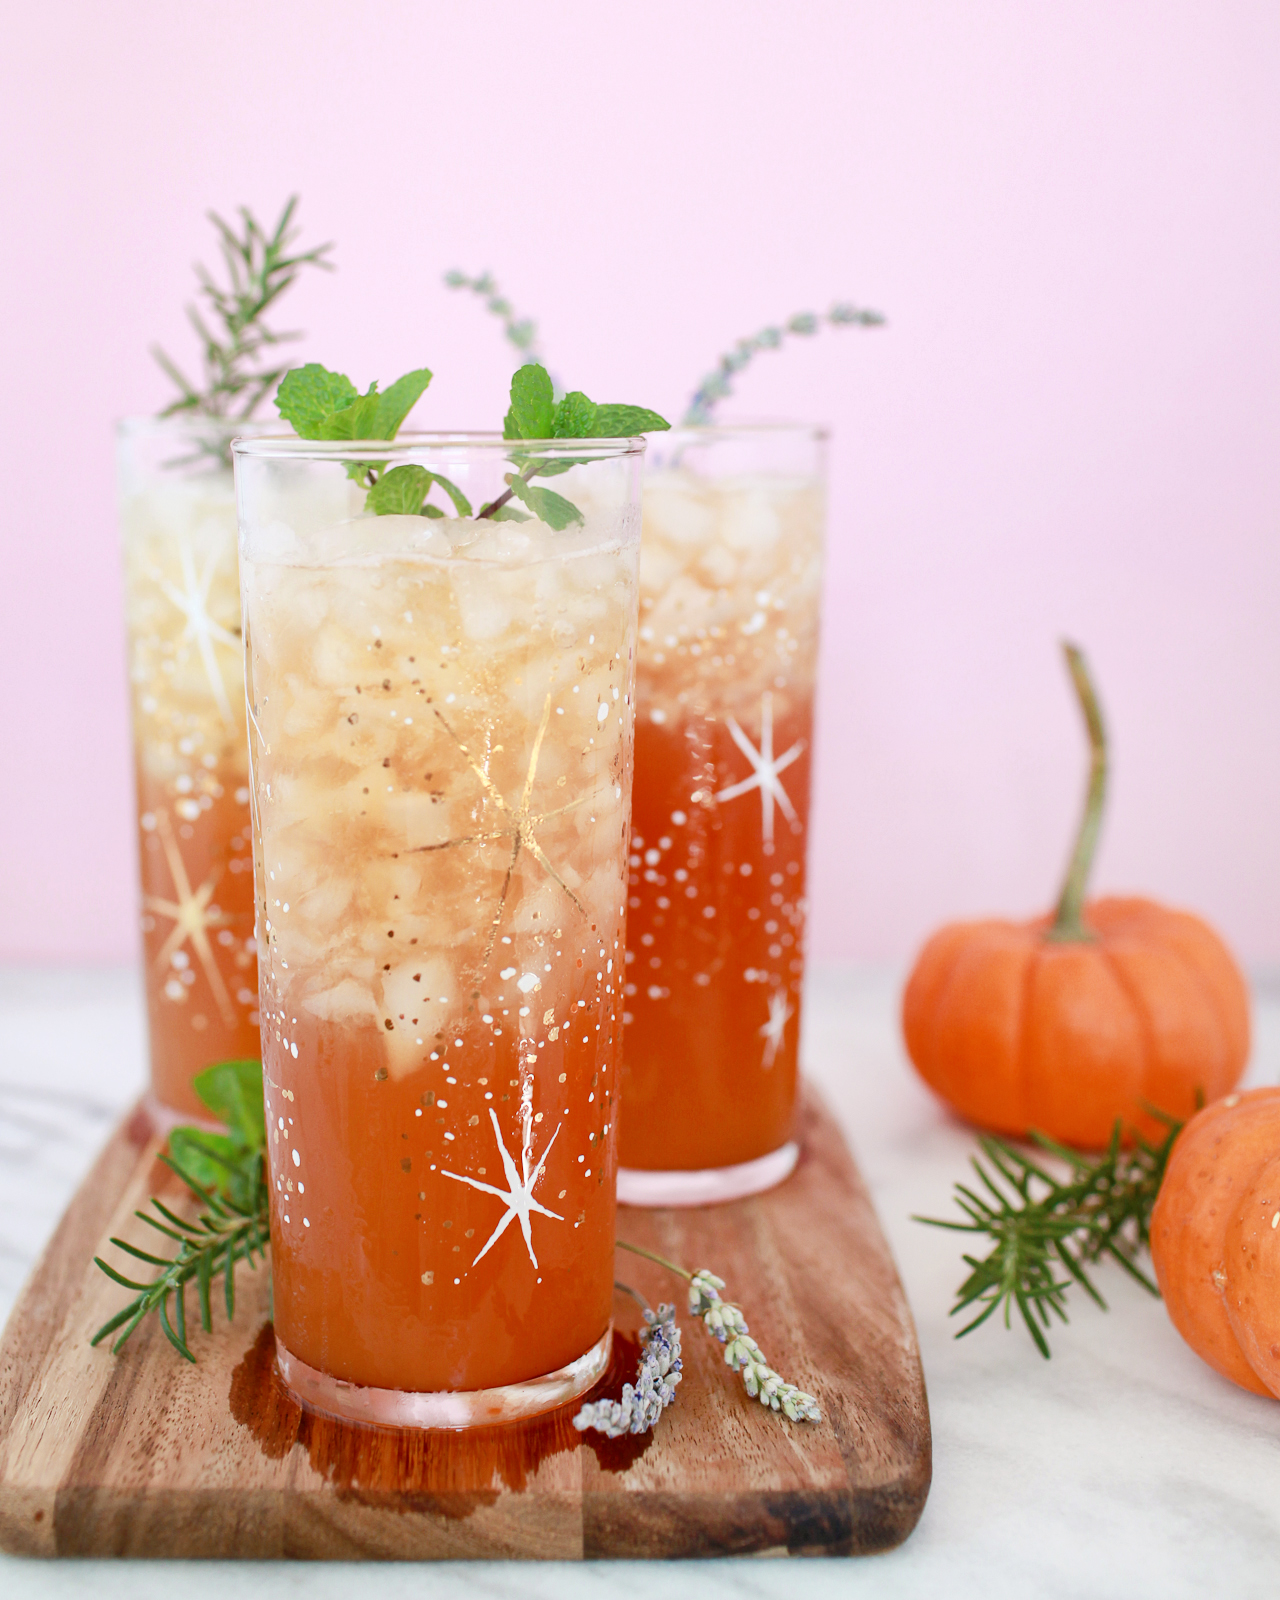
The Stone Fence Cocktail Recipe

The Stone Fence

2 oz Rye Whiskey
2 oz Sweet Apple Cider
2 dashes Boker’s Bitters
Dry Hard Cider

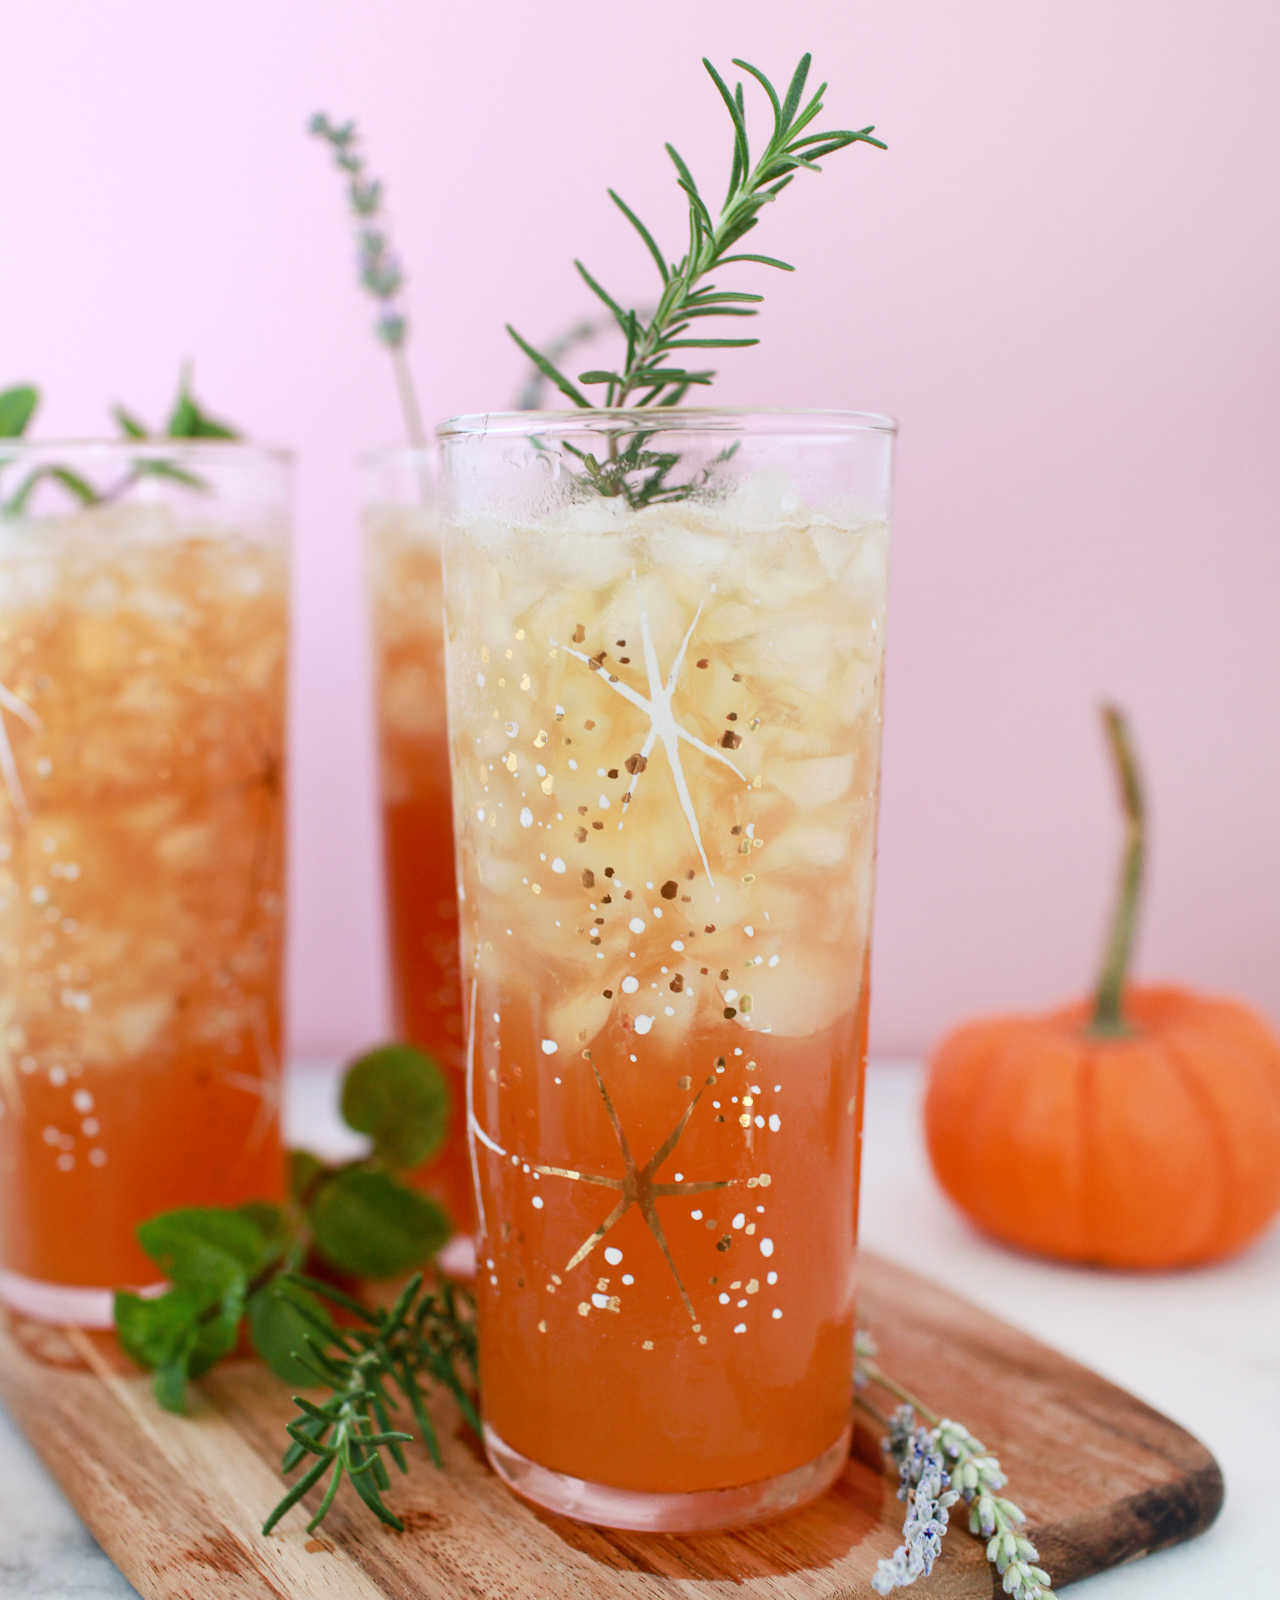
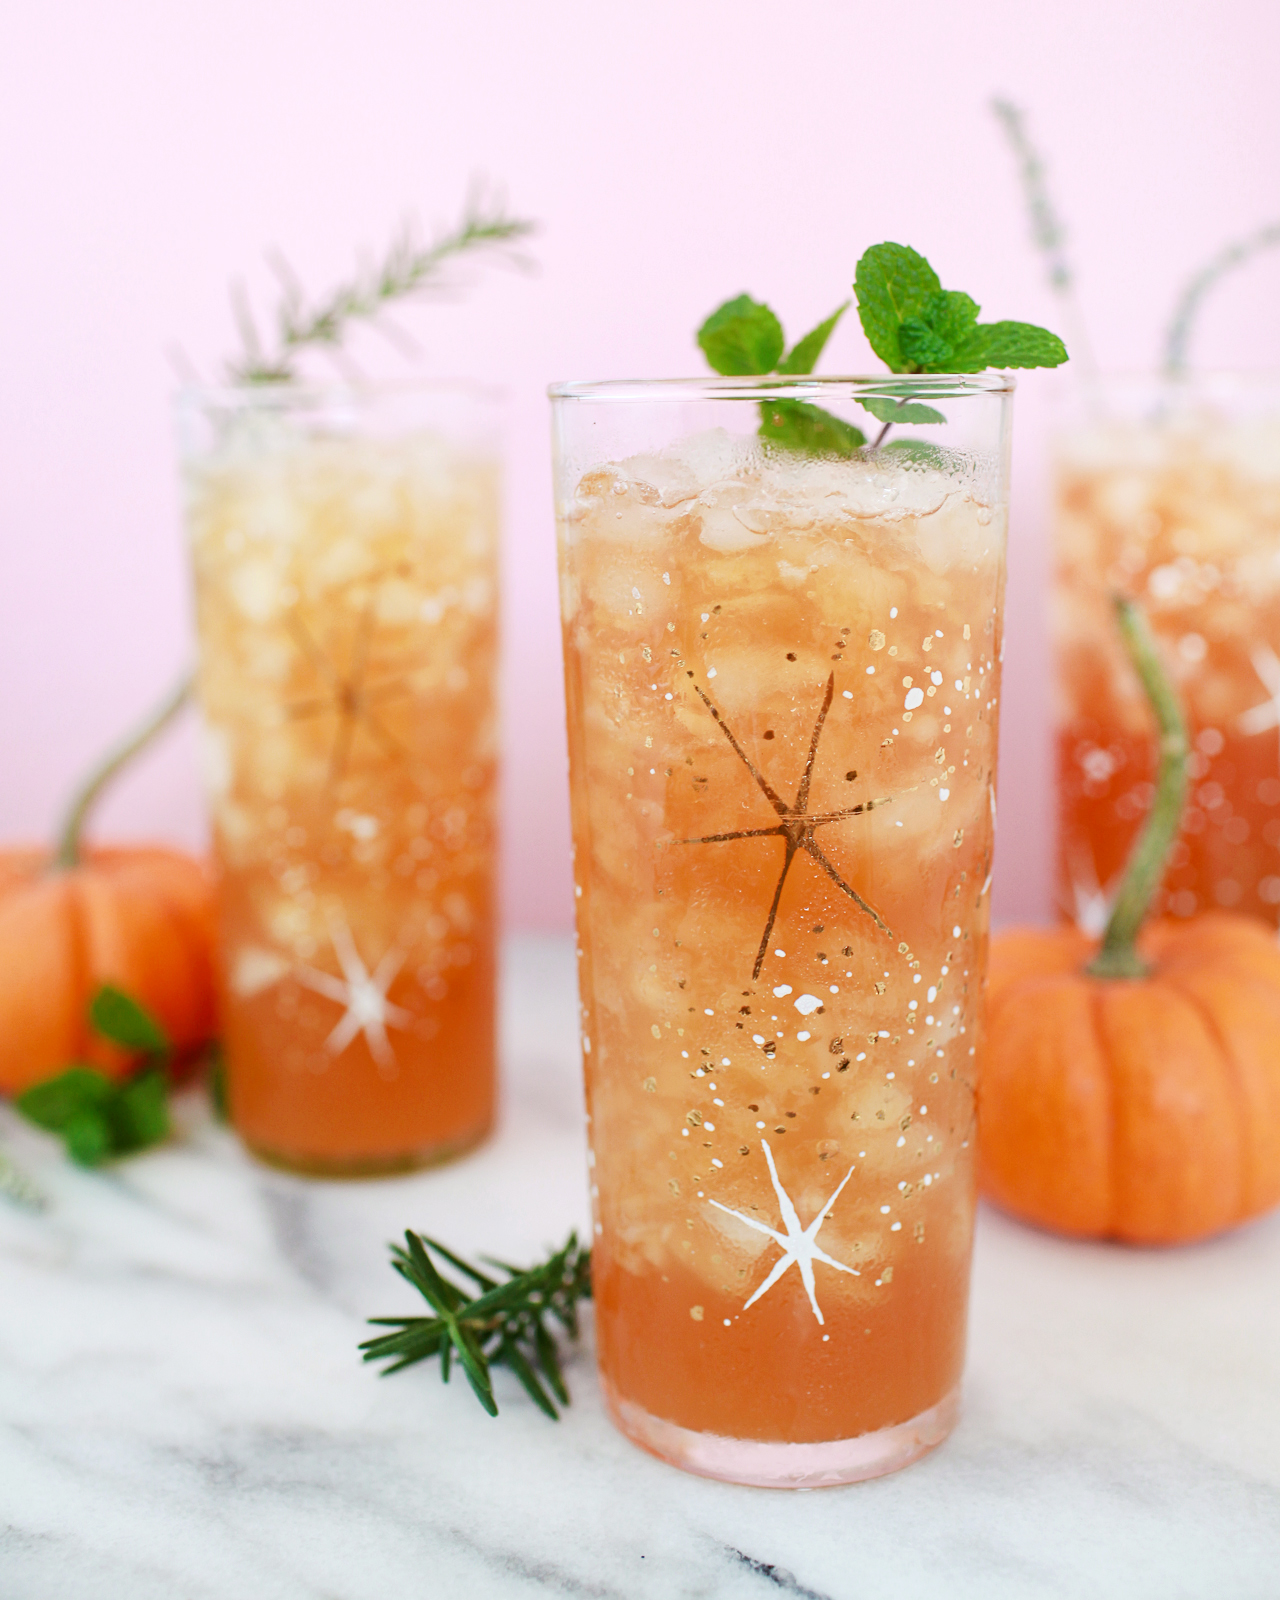
Combine the rye whiskey, sweet apple cider, and bitters in a highball glass filled with crushed ice. Top with the hard cider and give it a stir. Garnish with fresh mint or another handy herb and enjoy!

The Stone Fence Cocktail Recipe

We first featured the Stone Fence all the way back in 2012 and have revisited periodically since then, both because it’s an awesome drink with an awesome history* and because it’s a very versatile recipe that can be endlessly tweaked.

*Seriously, it’s an awesome history, playing a big role in Ethan Allen’s capture of Fort Ticonderoga in 1775. This is the drink that gave a bunch of backwoods militiamen the courage to drunkenly stumble into a military outpost of a global super power and successfully demand its surrender through sheer drunken outrageousness.

The Stone Fence Cocktail Recipe

The original recipe called for rye whiskey – America’s first love, before the Age of Bourbon – and hard apple cider. I’ve tried this version, and it’s ok, but a little bland; the cider and rye play up each other’s dryness and bitterness in a way that I don’t really love. I’ve also tried an updated version that pairs rye with sweet apple cider, the non-alcoholic stuff that most Yankee kids know just as plain “cider.” This version is pretty good, tart sweet and spicy, but it can feel a little…childish.

So I made the best of both worlds and added both sweet, non-alcoholic cider and a dry, sparkling hard cider. The result is sweet and tart and spicy, but the hard cider dries it out a bit and lightens the drink with effervescence. The hard cider also kicks up the proof just a bit, which helps balance out the sweet cider.

The Stone Fence Cocktail Recipe

We went with Boker’s bitters – a long-lost bitters recipe heavy on the cardamom that used to be ubiquitous in drinks, then vanished from the record, and was recently resurrected. This adds some warm baking spice notes, always welcome in a fall drink featuring apple. If you don’t have Boker’s bitters on hand, you could always try making your own cardamom bitters – or there’s always the old standby, Angostura bitters, that will add some complex spices to your Stone Fence.

The Stone Fence Cocktail Recipe

Recipe, glassware, and Boker’s Bitters: Liquorary – you can also follow along on Instagram for more cocktail recipes!

Photo Credits: Nole Garey for Oh So Beautiful Paper

This post contains affiliate links. By clicking on these links, you’ll help support Oh So Beautiful Paper while also purchasing some fantastic products. We only recommend products that we truly love and trust that you’ll love, too. Our full disclosure policy can be found here.

Behind the Stationery: Blackbird Letterpress

Kathryn from Blackbird Letterpress is a seasoned printmaker, stationer, and former teacher! Based in Baton Rouge, Kathryn has grown and built her business in Louisiana since her MFA days and has become known especially for her die cut greeting cards. Today Kathryn is taking us through how she’s grown and transitioned her business throughout the years. Welcome Kathryn! —Megan Soh

Behind the Stationery: Blackbird Letterpress

From Kathryn: When I finished my MFA in printmaking at LSU in 2003, I bought my first letterpress, a Chandler and Price 8×12. I moved the press into a friend’s house who had a large back room and started printing custom work — business cards, wedding invitations, etc. Before making Blackbird a full-time job, I taught adjunct at the University of Louisiana at Lafayette teaching drawing, 2D & 3D Design, and Art Appreciation. I moved back to Baton Rouge in 2007 with the press and type. In 2009, while keeping overhead low (my printshop moved into my husband’s metal fabrication shop) I decided to put all my energy into Blackbird. This meant expanding from custom and retail online & local markets to the wholesale market and exhibiting at trade shows.

Behind the Stationery: Blackbird Letterpress

Our printshop is located in mid-city Baton Rouge in what I like to call the “cemetery district” (we are next door to a 19th century cemetery). We moved into a new studio in 2016 and this expanded our space, almost tripling it in size. My husband and I renovated an old office building for about 4 years where we live upstairs and the printshop is downstairs.

Behind the Stationery: Blackbird Letterpress

We focus mostly on letterpress greeting cards, handmade notebooks, calendars, while also continuing to provide custom letterpress printing from business cards to fine wedding invitations. We print, die cut, bind notebooks, and assemble our products in house.

Behind the Stationery: Blackbird Letterpress

Many of our cards are die cut shaped cards (like the folded hand-shaped and skull-shaped cards). Our biggest sellers are the animal cards in which most are die cut to hold a gift card, money, note, or photo. We love to design things that move, like our perpetual calendars and volvelle info spinners (National Parks, Brilliant Women).

Behind the Stationery: Blackbird Letterpress

Most days are full of nonstop packaging, binding notebooks, and printing, with some design or drawing thrown in somewhere. We have a board that keeps track of the list of card reprinting to do, as well as lists of orders to fill. Personally, as the owner/printer/designer/bookkeeper, my biggest struggle is getting it all done. I do all of our accounting, plus much of the printing and designing, so it can be difficult to fit it all in a day. I’m lucky to have a great team that focuses on printing, scoring, order filling, cutting paper, and custom printing and designing.

Behind the Stationery: Blackbird Letterpress

Most card designs start with pencil and paper, from sketches to the final drawing finished in black ink. The drawing gets scanned into the computer where it is formatted and then compositionally laid out in order for plates to be ordered for printing. As a team we discuss color options, as well as envelope color and packaging options. Plates arrive, paper gets cut, and then the card is on to print.

Behind the Stationery: Blackbird Letterpress

We have 5 presses in the studio, 8×12 C&P platen press, 10×15 C&P platen press, Vandercook SP15, and 2 10×15 Heidelberg Windmills. Each job or card is printed on the press that will print the design the best. Each press has it’s strengths and we use them accordingly. For example, the Windmills do the die cutting and quantity production printing and the Vandercook will print notebook covers and wedding invitations.

Behind the Stationery: Blackbird Letterpress

Behind the Stationery: Blackbird Letterpress

The printed pieces get die cut or trimmed and scored if needed and then move to their inventory place on the shelf until they are packaged and shipped to one of our retailers!

All photos courtesy of Blackbird Letterpress.

Want to be featured in the Behind the Stationery column? Reach out to Megan at megan [at] ohsobeautifulpaper [dot] com for more details.

Southwestern Mixed Media Wedding Invitations

You guys, today is going to be a GREAT day: we have an invitation from Arley-Rose and Morgan of Ladyfingers Letterpress to share with you! If you’ve been reading OSBP for the last five or so years, you know that these ladies produce some of the most imaginative and beautiful custom stationery (including my first daughter’s baby announcement!). These stunning southwestern mixed media wedding invitations are no exception. Arley and Morgan incorporated non-traditional materials like mica, leather, sage, and wood to create a complete invitation experience. Amazing!

Southwestern Mixed Media Wedding Invitations by Ladyfingers Letterpress

From Arley-RoseIt’s safe to say that most of our clients these days have already experienced firsthand the quality and creativity of our work before they hire us. They likely have received an invitation of ours from a family or friend and intimately know the thrill of receiving a commissioned Ladyfingers Letterpress invitation in the mail and want their guests to feel the same way.

Southwestern Mixed Media Wedding Invitations by Ladyfingers Letterpress

A few years back, we had created pretty insane baby shower invitations for some close friends who are in the film industry in New York. A guest of that shower, Alex Bolotow, was dating the iconic fashion photographer Terry Richardson at the time, and when they became engaged, she called us up right away with tons of enthusiasm and ideas.

Southwestern Mixed Media Wedding Invitations by Ladyfingers Letterpress

Alex and Terry were planning an intimate gathering at a remote and serene southwestern desert location outside of Taos, New Mexico and wanted to give their guests a preview of the warmth, love, and realness that they would soon be experiencing on their wedding day. A gift of excitement, a collection of beautiful things both close to their hearts and to the heart of the place they wed.

Southwestern Mixed Media Wedding Invitations by Ladyfingers Letterpress

We worked together for ten months to create something that could hardly be deemed an invitation. A gift, maybe. More like a finely curated assemblage of meaningful things, like opening the lid of a close friend’s favorite collection of personal objects. Alex and Terry wanted the suite to be as personal, tactile and location-centric as possible. The concept took on a three-dimensional form, and the invitations were shipped in large hand-lettered kraft boxes that were carefully opened to uncover a sun-kissed wooden box overflowing with the invitation and supporting objects.

Southwestern Mixed Media Wedding Invitations by Ladyfingers Letterpress

Southwestern Mixed Media Wedding Invitations by Ladyfingers Letterpress

We hand lettered the invitation and foil printed it in gold foil onto sturdy and semi-translucent pieces of mica. Additional pieces such as their RSVP and Smudge Blessing Card were letterpress printed on thick cotton paper. We worked with local artist Pipilo Road to design and manufacture handmade wooden boxes out of reclaimed materials. The lids were hand painted and screen printed. We went through several iterations where we sent videos of different prototypes back and forth before a design was settled and the boxes were fabricated.

Southwestern Mixed Media Wedding Invitations by Ladyfingers Letterpress

Soft, tobacco deerskin leather pouches were carefully designed, stitched and hand burned by Three Arrows Leather out of Taos. Alex helped us source sage bundles, quartz rocks, vintage matches from New Mexican locations and palo santo sticks to complete the suite and allow their guests to conduct a Smudge Blessing of their own. All of these items, plus a hand-drawn map of Taos and a celestial map of the night sky on the date of their wedding, were carefully tucked into the handmade wooden box which was designed to fit perfectly within an outer shipping box.

Southwestern Mixed Media Wedding Invitations by Ladyfingers LetterpressSouthwestern Mixed Media Wedding Invitations by Ladyfingers Letterpress

We got to know Alex over the time we spent working together, and now consider her a close friend. In fact, she and Terry surprised us with an invitation to their wedding, which we happily accepted. We’re still reeling from our time spent in Taos with this lovely couple and are happy to finally share these photos taken by Lauren Memarian with you! For more gorgeous photos of this suite, check out the Gallery of Commissioned Works at ladyfingersletterpress.com.

Southwestern Mixed Media Wedding Invitations by Ladyfingers Letterpress

Thanks Arley-Rose and Morgan!

Design: Ladyfingers Letterpress
Wooden Boxes: Pipilo Road
Leather Pouches: Three Arrows Leather

Ladyfingers Letterpress is a member of the Designer Rolodex â€“ check out more of their beautiful work right here or visit the real invi­ta­tions gallery for more wedding invitation ideas!

Photo Credits: Lauren Memarian

DIY Moon and Stars Pumpkins

Last year, I made these really fun swirly galaxy-inspired iridescent pumpkins. This year, I wanted to do another spin on a celestial-inspired pumpkin using my new favorite material: hologram vinyl! So today I’m teaming up with one of my favorite crafting partners, Fiskars, to make these beautiful DIY moon and stars pumpkins. This DIY couldn’t be easier – all you need are some scissors, a few craft punches, and vinyl! Oh, and pumpkins of course. And since the vinyl essentially functions like a sticker, it’s also a super fun activity for kids. Are you ready? Let’s go!

DIY Moon and Stars Pumpkins

I always like to incorporate hand drawn shapes into my projects, so these pumpkins feature a quirky crescent moon and cute little stars that I cut by hand using my favorite Orange-handled Scissors – which just celebrated their 50th anniversary! (Did you catch the Matisse-inspired garland that I made to celebrate??) For those of you with little helpers at home that are anxious to help out, they can cut a few hand drawn stars using Fiskars Kids Scissors! I made the rest of the stars using the Fiskars Star Thick Materials Shape Punches and mixed them with the hand cut shapes. I love the idea of having one big pumpkin with the crescent moon surrounded by lots of little pumpkins with tiny hologram foil stars!

DIY Moon and Stars Pumpkins

I’m always drawn to black and white pumpkins for Halloween, but for these moon and star pumpkins I added dark navy blue and charcoal gray to the mix. I’m all about those non-traditional holiday color palettes! You can use faux pumpkins and/or real pumpkins for this tutorial (I used both), but the hologram foil is particularly striking against dark colors, so I’d recommend painting any real pumpkins with navy blue or black matte craft paint before applying the hologram foil stars.

DIY Moon and Stars Pumpkins

Supplies

Fiskars Original Orange-handled Scissors

Fiskars Kids Scissors (for those of you with little helpers!)

Fiskars Star Thick Materials Shape Punch in small, medium, and large

Hologram vinyl, hologram glitter self-adhesive sheets, and matte white vinyl

Pencil

Real or faux pumpkins

Matte craft paint and paintbrush

DIY Moon and Stars Pumpkins

DIY Moon and Stars Pumpkins

To make the DIY Moon and Stars Pumpkins:

Step 1. Paint your pumpkins using a matte craft paint in a dark color (like navy blue, charcoal gray, or black) and allow them to dry completely. If you like, you can also use faux black pumpkins and skip this step!

Step 2. Use a pencil to lightly sketch the shape of a crescent moon on the back of the white vinyl. The size of the crescent moon will vary depending on the size of your pumpkin, but my crescent moon was just over 5″ tall on an 8″ tall faux pumpkin. Use the Orange-handled Scissors to cut the crescent moon shape from the white vinyl.

Step 3. Use the Star Thick Materials Shape Punches to make lots of stars in varying sizes from the hologram vinyl and hologram glitter self-adhesive sheets. You can also punch some stars out of the matte white vinyl and add those to the mix!

A couple quick tips for punching the star shapes from the vinyl: I found it easiest to cut 3″ strips of vinyl from the roll using my Orange-handled Scissors, then punch the star shapes from those strips. When operating the punch, I had the best luck when the vinyl was facing up and I moved the blades really quickly. If you try to punch the vinyl too slowly, the vinyl can get stuck in the blades and create rough edges. Punching quickly creates nice clean edge lines!

Step 4. Use a pencil to draw some stars on the back of the hologram vinyl and glitter sheets, then cut those by hand using the Orange-handled Scissors. If you have little helpers, they can also cut out a few hand drawn stars using Fiskars Kids Scissors!

Step 5. Peel the protective backing off the white crescent moon and apply the vinyl shape to your largest pumpkin. Then peel the protective backing off the star shapes and apply them to your pumpkins one by one. Try to cluster a bunch of the smallest stars together and incorporate the larger stars in random patterns, just like you’d see in the night sky. For the smallest pumpkins, use only the smallest star shape and place them in a staggered line around the pumpkin. Continue placing stars (and punching new stars as needed) until you’ve covered all of your pumpkins!

DIY Moon and Stars Pumpkins

DIY Moon and Stars Pumpkins

DIY Moon and Stars Pumpkins

DIY Moon and Stars Pumpkins

Aaaaaah! These are so cute I can barely stand it! And so pretty when mixed with a few undecorated white (or even orange!) pumpkins. Add in some colorful fall flowers and you’re pretty much guaranteed to have the prettiest front porch on the block. Happy Halloween crafting!

p.s. Printable Halloween favor bags and a fun DIY eyeball Halloween door cover!

This post was created in partnership with Fiskars. All content and opinions are my own. Thank you for supporting the sponsors that make Oh So Beautiful Paper possible!

Photos by Nole Garey for Oh So Beautiful Paper

Colorful and Creative Business Cards with MOO

This post is sponsored by MOO. I’ve partnered with them to share some colorful and creative business card ideas. All content and opinions are my own. MOO 100% recycled Cotton Business Cards are completely tree free and print vivid, saturated color – all on archival quality paper. Thank you for supporting the sponsors that make Oh So Beautiful Paper possible!

I absolutely LOVE business cards. I think of them as mini works of art, and I keep a bowl full of all the beautiful, inspiring business cards that I’ve received over the years. I was VERY intrigued when I heard about MOO’s new 100% recycled Cotton Business Cards – I wanted to see how the new paper could handle bright colors and delicate illustrations! I teamed up with a few illustrators, stationers, and graphic designers to showcase some of their business card designs printed on MOO’s cotton paper, and share some tips for colorful and creative business cards. And if you’re a new MOO customer and you’d like to check out the cotton business cards yourself, MOO is offering Oh So Beautiful Paper readers 15% off Cotton Business Cards with the promo code OHSOMOO!

Colorful and Creative Business Cards with MOO Recycled Cotton Business Cards

First, a bit more about the paper! MOO teamed up with one of the best paper mills in the country, Mohawk Fine Papers, to create a modern twist on a traditional cotton rag paper. Made from t-shirt offcuts, the paper is completely tree-free and reuses waste material from the fashion industry to create an archival quality paper at an affordable price point. The 100% recycled cotton paper is bright white, with a subtle texture that looks and feels great in person. And it prints vivid, saturated colors like a dream!

Colorful and Creative Business Cards with MOO Recycled Cotton Paper

Business card design: Juliet Meeks

Nothing bums me out quite like a cheap, low quality business card, so I love that MOO makes quality paper available at an affordable price! And if you work in a design-related field, it’s especially important to have great business cards. Here are some tips for creating colorful and creative business cards.

1. Stay true to your personal style.

Business cards make a lasting impression and can tell the person on the other end a ton about you. Is your style bright and colorful? Minimalist? Romantic? What colors do you love? Are you playful or serious? Bright white recycled cotton paper allows for really bright, saturated color, which is perfect for colorful styles! Your business cards should reflect your style and personality. I love the way illustrator Juliet Meeks showcased her floral illustration work around her logo!

Colorful and Creative Business Cards with MOO Recycled Cotton Business Cards

2. Show your work

If your work is visual, show it on your business cards! This is a thousand times true for illustrators, calligraphers, photographers, and other artists, but I think it’s equally true for everyone from woodworkers to contractors to make up artists.

Colorful and Creative Business Cards with MOO Recycled Cotton Business Cards

Business card design: Fiber & Dye

With double-sided printing, business cards are the perfect opportunity to show examples of your work! Lisa of Fiber & Dye used MOO’s Printfinity feature to print different examples of her illustration and hand lettering work on the back of each business card. You can also print professional photos instead of illustrations – just make sure the photos are properly edited and formatted to showcase your work in the best possible way.

3. Think outside the box

I’ve seen business cards of all shapes and sizes: rectangles, large squares, small squares, rounded corners, even circles and unique die cut shapes! The shape of your business card speaks to your personal style, and there’s no need to stick to a traditional rectangular format! Choose the shape that best shows your style and your work.

Colorful and Creative Business Cards with MOO Recycled Cotton Business Cards

4. Consider Both Sides

No one-sided business cards here! I’m personally a fan of putting contact info on one side and logo/artwork on the other side, but there are so many options for making that happen. Bright and colorful on one side, white minimalist on the other side? Artwork on both sides? Should the front and back designs mirror each other? MOO’s design guidelines allow for a full bleed on both sides of the card, so your design can go across the whole card without worrying about white edges. I’m loving these full bleed business card designs from Meeschmosh and Heidi Gruner Design.

Colorful and Creative Business Cards with MOO Recycled Cotton Business Cards

Business card design: Meeschmosh

Colorful and Creative Business Cards with MOO Recycled Cotton Business Cards

Business card design: Heidi Gruner Design

Colorful and Creative Business Cards with MOO Recycled Cotton Business Cards

Colorful and Creative Business Cards with MOO Recycled Cotton Business Cards

Colorful and Creative Business Cards with MOO Recycled Cotton Business Cards

Colorful and Creative Business Cards with MOO Recycled Cotton Business Cards

I’d love to hear your tips for creative and colorful business cards! Feel free to share a link to your business cards in the comments. And for new MOO customers out there – don’t forget that you can get 15% off Cotton Business Cards with the promo code OHSOMOO!

Photo Credits: Nole Garey for Oh So Beautiful Paper

This post is sponsored by MOO. All content and opinions are my own. Thank you for supporting the sponsors that make Oh So Beautiful Paper possible!