DIY Embossed Custom Stationery

It’s the ladies of Anti­quaria, back with another fab­u­lous and cre­ative DIY project for you all!  This week they show us how to use rubber stamps to create beautiful custom stationery!

How on Earth can you achieve the high end look of engraving on a shoestring budget??  Answer: Embossing!

When we first launched our rubber stamp collection, we tried everything we could think of to achieve a legible white ink on dark (or kraft) paper and we quickly found out that regular inks don’t do a very good job.  We were thrilled when one of our clever customers used this technique on the cover of her wedding programs, embossing white on navy paper.  From there we started experimenting and found it looked awesome on all sorts of colorful paper!

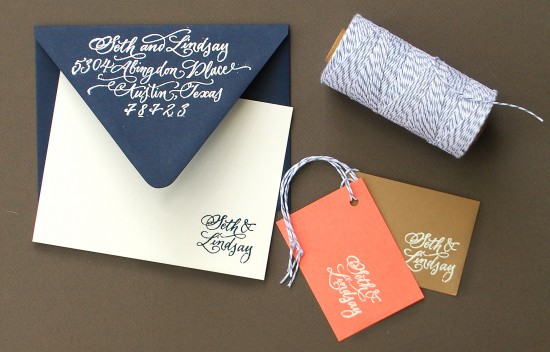
Rubber Stamp Embossed Custom Stationery

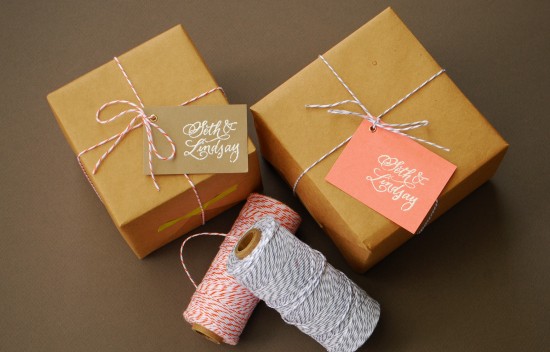
Rubber Stamp Embossed Custom Stationery

You can use this embossing technique on lots of different projects, such as these fabulous and simple gift tags.  We also used it to create a set of custom stationery, perfect for thank you notes!!  For the gift tags, we used our Calligraphy Names Stamp.

Rubber Stamp Embossed Custom Stationery

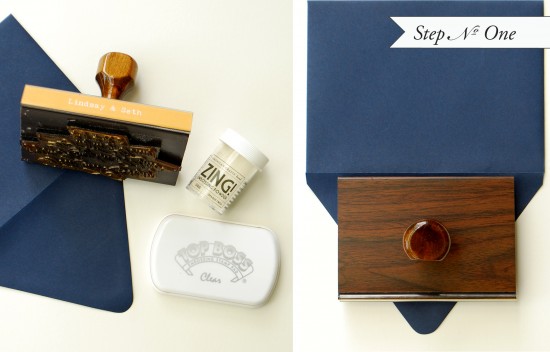
Step One: Get your supplies ready.  Unscrew the top to the embossing powder and uncover the stamp pad.  Make sure your envelope is set on a (really) hard surface, with a piece of scrap paper set underneath (to catch excess powder).  Using the embossing (clear) stamp pad, ink the stamp thoroughly.  Center the stamp and press down with even pressure.  We used our Calligraphy Return Address Stamp on this envelope.

Rubber Stamp Embossed Custom Stationery

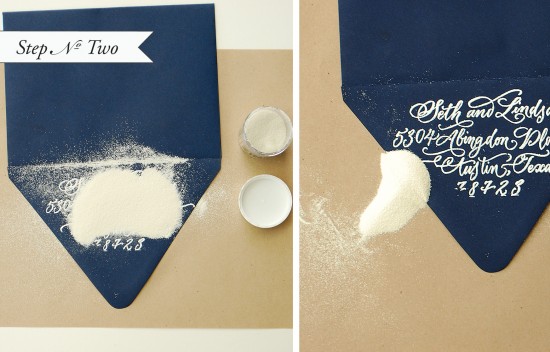
Step Two: Immediately following stamping the image, pour on a healthy amount of embossing powder.  Shift powder around a bit to ensure your image is completely covered.  When you are satisfied, pour the excess onto the piece of paper underneath and lightly tap off any excess (not too hard or the powder will loose hold of the sticky ink).  Pour the powder back into the jar.

Rubber Stamp Embossed Custom Stationery

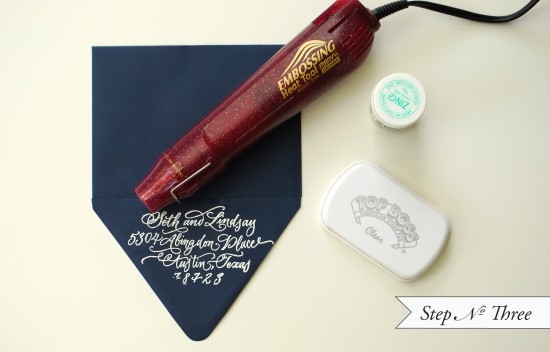
Step Three:  Using your embossing heat tool, heat image (holding the gun 3-5 inches from the surface) until the powder has melted into a solid, approximately 30 seconds.  Let cool.

*Be careful not to burn yourself on this very hot tool.  Also, if you hold the embossing heat tool too close to the paper, it could scorch or warp.


Materials:

Rubber Stamps: We used Calligraphy Names Stamp and Calligraphy Return Address to create the personal stationery and gift tags.

Clear Embossing Stamp Pad

Embossing Powders

Embossing Heat Tool

A2 Envelopes in Navy

Assorted Paper

For Gift Tags:

Small hole punch

Bakers twine

Photo Credits: Antiquaria
DIY Hand Watercolored Save the Dates + Thank You Cards

It’s the ladies of Anti­quaria, back with another fab­u­lous and cre­ative DIY project for you all!  This project is for wed­ding save the dates, but you can eas­ily apply this tuto­r­ial to any party invi­ta­tions or announcements!

These Save the Dates and matching Thank You Cards combine the use of our custom rubber stamps with hand painted watercolor accents.  This DIY project is inspired by Emma’s reception invitations that we did a while back, after her wedding.  The calligraphy ended up having variegated shades, giving the illusion that it was watercolored.  We ended up loving the way that the calligraphy looked and Emma embellished the invitations with a bit of color on one side, changing the look of the whole thing!

Using beautiful turquoise and blue shades of watercolor and our custom rubber stamps, this DIY save the date looks modern and organic at the same time.  The best part of this is just how easy it is to do!!  You don’t have to be an artist to master these painting techniques.  Also, we love how using different color combinations or shapes yield different results – making each card totally unique and its own little work of art.

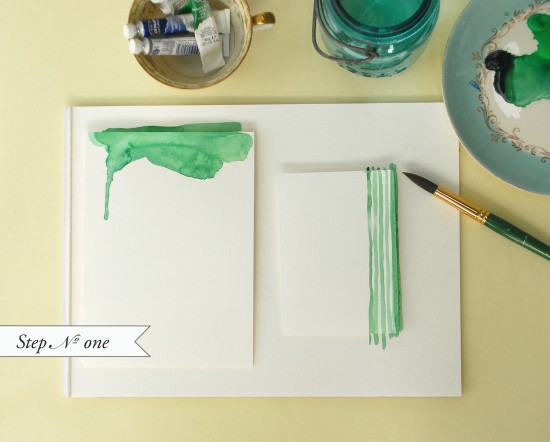
Step One: On pre-cut pieces of watercolor paper, get creative with painting.  We played with uneven painted stripes for the thank you cards and organic watery shapes for the save the dates.

Painting Tip: Go easy on the water to achieve a nice flat card.  Too much water will make your paper buckle or ripple when drying.

Watercolor Save the Dates: Step 1

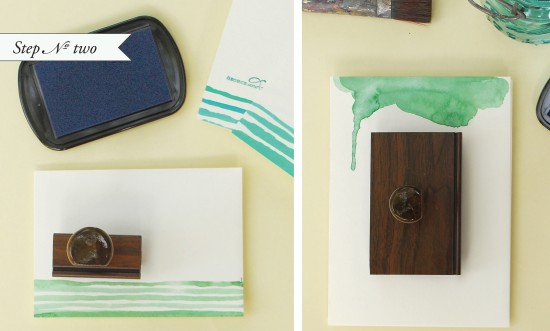
Step Two: Once your paint has dried, on a hard surface, ink your stamp and place it in the center of the card.  Apply even pressure and remove the stamp from the card.

For the Save the Date, we used the “Vintage Label” custom save the date stamp.  For the thank you notes, we used the “Simple but Sophisticated” monogram stamp – using a monogram stamp for your thank you notes can be a fun way to personalize them without breaking the bank after the wedding!

Watercolor Save the Dates: Step 2

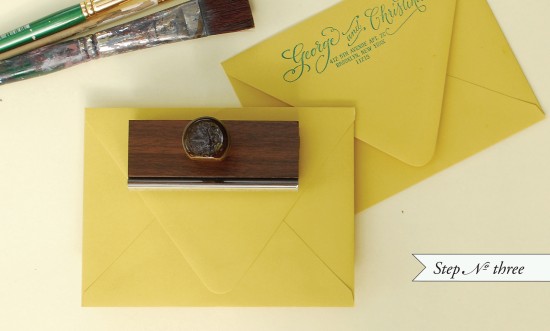
Step Three: We used the “Calligraphy Accent” return address stamp to finish everything off.

Now all that’s left is stuffing and addressing your envelopes!

Watercolor Save the Dates: Step 3

Materials List:

Custom Save the Date & Monogram rubber stamps.  The ones used in this tutorial are:

“Vintage Label” Save the Date Stamp,  “Simple but Sophisticated” Monogram Stamp,  “Calligraphy Accent” Return Address Stamp

Color Box Stamp Pad (we used a variety of teals and blues for this project)

Watercolors and brushes (you can purchase at any craft or art store)

A small dish and a jar of water (used to mix paint and wash brushes)

A6 Envelopes (shown above in Curry)

B4 Thank You Card Envelopes (shown above in Peacock)

Paper Options:

You can have large watercolor sheets or pads – the thicker the better, (purchased from your local art store) cut to size at your local print shop.

Just tell them the dimensions you need based on your envelope choice, the cut cards should be at least 1/4″ smaller than the envelope measurement.

If you are using the Paper Source A6 and B4 sizes that are shown above, ask for your pieces to be cut to

6 1/4″ x 4 1/2″ (A6) and 3 1/2″ x 5″ (B4).

If getting paper cut is too much of a hassle, you can use the luxe papers from Paper Source and buy them pre-cut.

Just be careful with how much water you use with your paints.  If you are using lightweight (90 lb) watercolor paper or the luxe papers from Paper Source, these papers will tend to buckle if you use too much water.

Photo Credits: Antiquaria
DIY Geek Chic Graph Paper Save the Dates

It’s the ladies of Antiquaria, back with another fabulous and creative DIY project for you all!  This project is for wedding save the dates, but you can easily apply this tutorial to any party invitations or announcements!

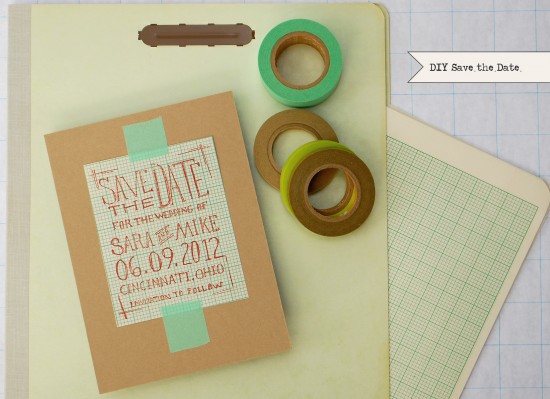
Inspired by some awesome vintage graph paper we found while rummaging through an estate sale, we crafted up this super easy (only 3 steps!) and affordable DIY save the date perfect for a casual and cheeky affair!!  This project requires just a few materials and most that are extremely easy to find – you might even have them hanging around your office at this very moment.

DIY Geek Chic Rubber Stamp Wedding Save the Date Tutorial

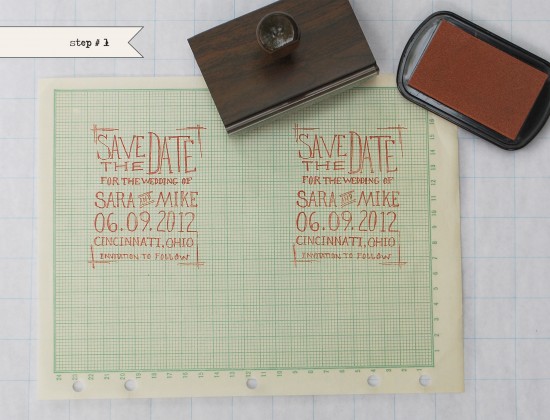
Step One: Choose the paper you wish to stamp on (a list of options follows below) and lay it on a flat surface.  Ink the stamp; we used the “Sketchbook” save the date stamp for this design.

Hand Stamped Save the Dates: Step 1

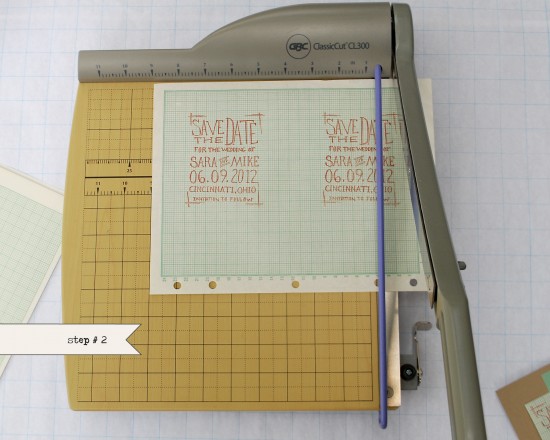
Step Two:  Once you have all of your images stamped, use a paper cutter or a cutting mat, x-acto knife and ruler to cut them to the correct size.  Our suggestion is to give 1/8″ to 1/4″ of border on each side of your image.

Hand Stamped Save the Dates: Step 2

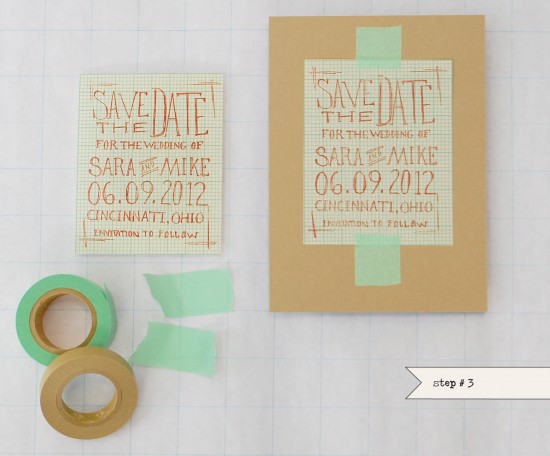
Step Three: Tear pieces of decorative washi tape to secure the stamped image in place on the backer (size A6).  If you want the stamped image to be more securely affixed to the backing, use spray adhesive to adhere them together.

Hand Stamped Save the Dates: Step 3

Materials List:

Custom rubber stamp: “Sketchbook” Save the Date

Washi tape

Spray adhesive

Decorative Paper: (this can be found at your local office supply store, thrift stores, estate or garage sales or in your own office!)  Or, if you want, go here to print your own customizable graph paper for free!!

Paper cutter or self healing matt, X-acto and ruler

Color Box Stamp Pad: We chose a rust/brown color for this tutorial

Backing Paper: We used pre-cut Kraft card stock, size A6

Photo Credits: Antiquaria
DIY Vintage Handkerchief Save the Dates

Hi Everyone!  Today I’m super excited to introduce a new DIY series from the ladies of Antiquaria, an online shop curated by designer Emma James (you might remember her awesome wedding invitations) and calligrapher Bailey Amon.  In addition to their shop, Emma and Bailey offer custom rubber stamps featuring Bailey’s calligraphy and they’ll be joining us here every couple of weeks with a fun DIY project to inspire all of you at home.  Let’s get started!

Hello!  We’re Bailey and Emma from Antiquaria, and we love vintage handkerchiefs!!  This tutorial uses custom rubber stamps to create elegant and original save the dates.  These offer your guests a true keepsake and help set the tone for your vintage wedding!

Vintage Handkerchief Save the Dates

DIY Hand Stamped Handkerchief Save the Dates : Step 1

Step One:

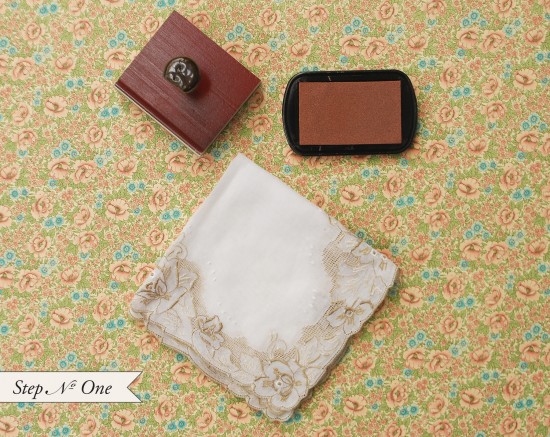
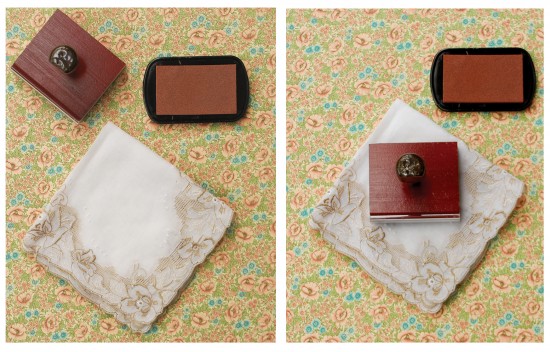
After washing and ironing the handkerchiefs to the desired size, choose stamp pad and ink up the custom  Save the Date stamp.  We used our  “Art Nouveau” Save the Date Stamp.  On a hard and sturdy work surface, place the inked stamp on the handkerchief and apply even pressure.  Then gently lift the stamp off the handkerchief.

Step 1: DIY Handkerchief Save the Dates

Step Two:

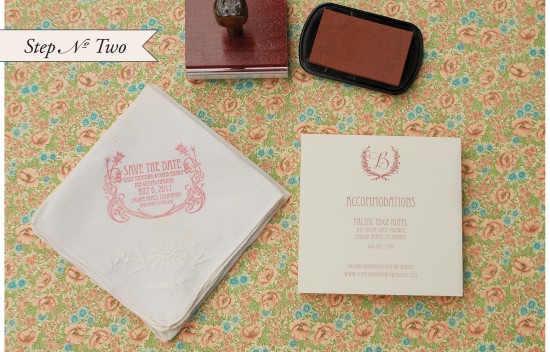
Most couples will find it necessary to include accommodation options with their Save the Date – including them in the invitation is often too late to capture discounted rates, etc.  For this Save the Date, we printed out an accommodations card with a compatible font, we then used Antiquaria’s  Wreath Monogram stamp to accent the enclosure.

Antiquaria DIY Hand Stamped Handkerchief Save the Dates: Step 2

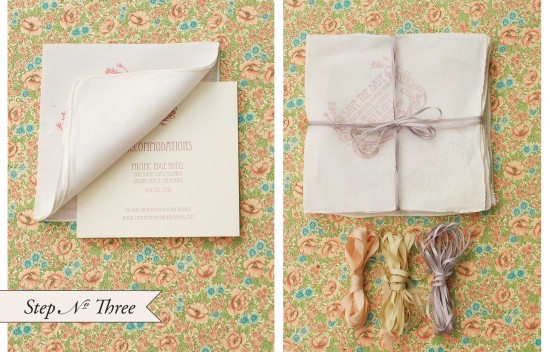
Step Three:

Slide the accommodations card into the handkerchief and using your desired ribbon, tie them together, like a present.

DIY Hand Stamped Handkerchief Save the Dates : Step 3

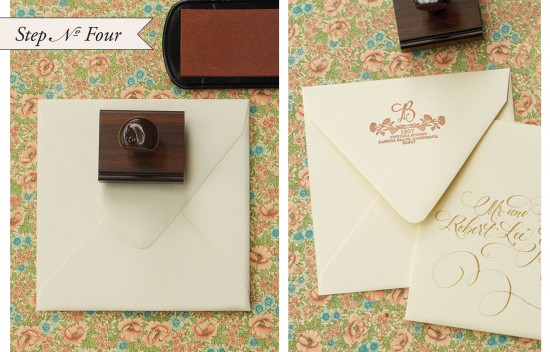
Step Four:

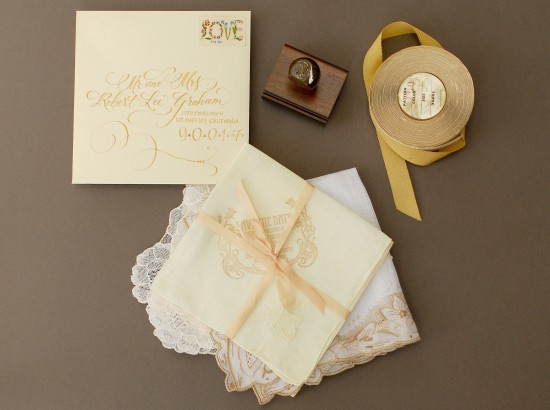
Using a coordinating return address stamp {we used our Wildflowers Return Address Stamp}, ink the stamp and place it in the center of your square envelope.

**Remember to do this before you or a calligrapher addresses the envelopes so that you don’t have to redo any if you get a bad inking.**

DIY Hand Stamped Handkerchief Save the Dates: Step 4

Materials List

Custom Rubber Stamps like these:  “Art Nouveau” Custom Save the Date Stamp, “Wreath Monogram” Stamp, “Wildflowers” Return Address Stamp

Vintage Handkerchieves – Iron to 5.5 x 5.5 squares with starch and a hot iron.  Check Ebay for lots of handkerchieves.  It is more affordable to buy them in bulk than one at a time.  Expect to pay $1-3 per handkerchief for vintage handkerchieves for this project.  Etsy and local thrifts are other good places to look for them.

Colorbox Stamp Pad – we used a variety of pinks and neutrals for this project.

5.5″ x 5.5″ Flat Card – for the accommodations card

5.75 x 5.75 Square Envelope

Hand Painted Silk Ribbon

Photo Credits: Antiquaria
Paige + Adam’s Vintage Equestrian Wedding Invitations

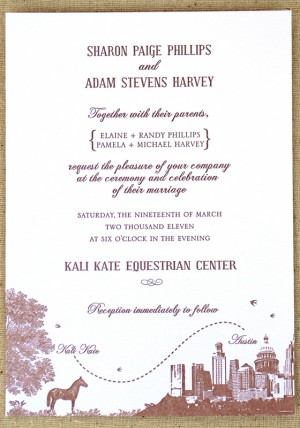
Last year, I featured the cutest Texas cactus wedding invitations for then-bride Emma James.  Well, I wasn’t the only one that admired Emma’s handiwork with her wedding invitations, because Emma sent over a new set of wedding invitations that she designed for a fellow Texas bride!  Paige and Adam’s wedding will take place later this spring at a horse farm, and Paige knew that she wanted an equestrian theme wedding invitation that reflected her lifelong love for horses.

Vintage-Equestrian-Wedding-Invitations

From the bride, Paige:  Our wedding is taking place at a horse farm just outside of Austin.  Having ridden horses my whole life, I wanted an equestrian theme throughout the wedding.   Having seen Emma’s vintage cactus wedding invitations on Oh So Beautiful Paper, I knew I wanted to collaborate with her for my invitations.

Vintage-Equestrian-Wedding-Invitations-Suite

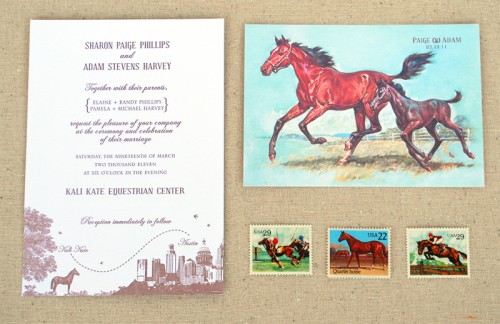
Vintage-Equestrian-Wedding-Invitation Vintage-Equestrian-Wedding-Invitations-RSVP

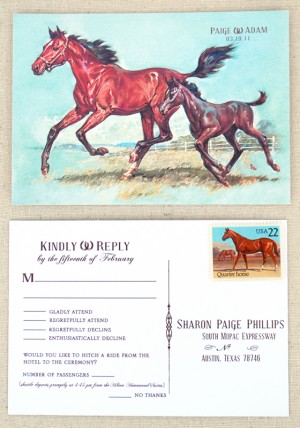
The invitation itself was letterpress printed with a quirky map motif that led from downtown Austin to the horse farm, Kali Kate.  I loved adding the vintage postcard as a reply card.  It added a beautiful splash of color and helped keep cost down.

Vintage-Equestrian-Wedding-Invitations-Package

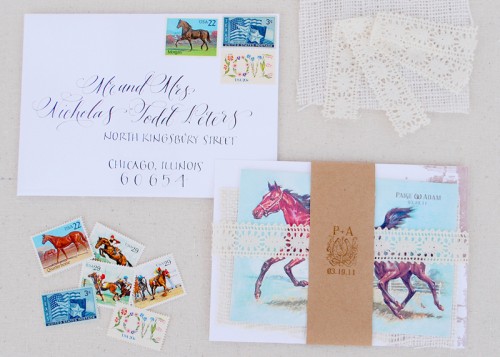
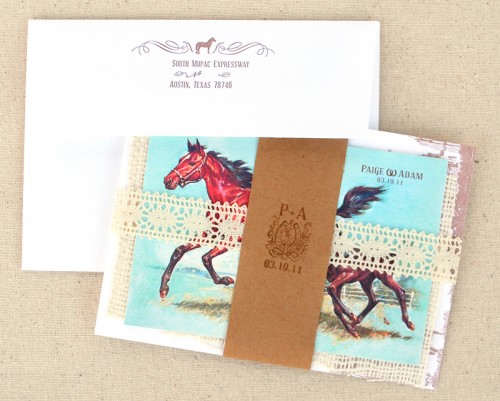
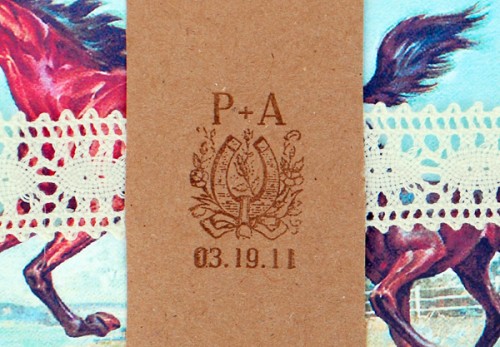
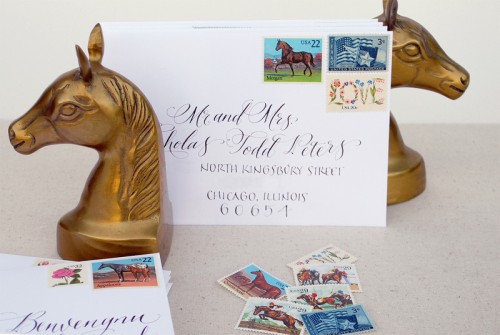
The calligraphy, vintage postage, and DIY packaging tied everything together.  For the packaging, I cut and assembled the kraft paper, ribbon, and burlap insert.  The kraft paper was stamped with a monogram logo that Emma designed for us and made into a rubber stamp.

Vintage-Equestrian-Wedding-Invitations-Monogram

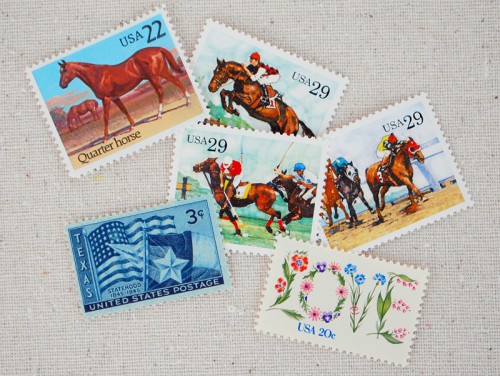
Vintage-Equestrian-Wedding-Invitations-Postage-Stamps

Overall, I love the way our invitations came out!  The invitations are informal, but also pretty, and embody the rustic vintage feel I had envisioned for our outdoor hill country wedding.

Vintage-Equestrian-Wedding-Invitations-Envelopes

So beautiful!  And the calligraphy by Bailey Amon is the perfect complement for the rustic equestrian wedding invitation design.  Thanks Emma and Paige!

{image credits: Emma James for Inviting Affairs}