Printable Watercolor Paper for Envelope Liners and Place Cards

This week we’re sharing this patterned paper download with you. What we love about this simple watercolor pattern is how versatile it is. The uses for it are virtually endless. We are sure you’ll find many to use this lovely artwork and hope that you enjoy it as much as we do! –Bailey and Emma of Antiquaria

Printable Watercolor Envelope Liner by Antiquaria for Oh So Beautiful Paper

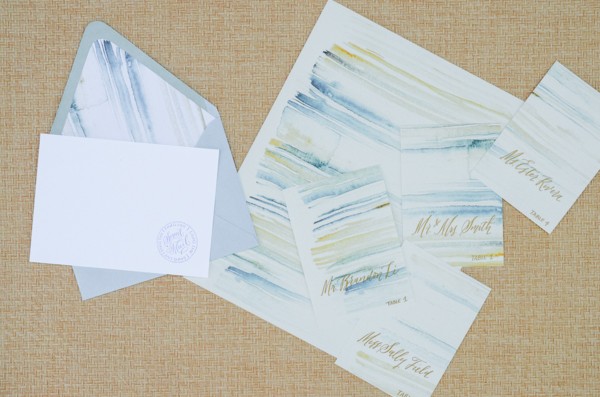
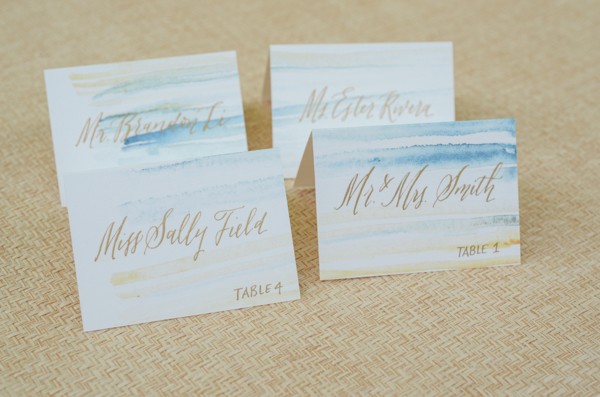
We’ve chosen to utilize this watercolor two ways: as a background for handwritten place cards and as an envelope liner. When we work with wedding clients we always try to help establish a theme that is carried throughout their wedding stationery. We love all the potential uses for this pattern!

Printable Watercolor Envelope Liner by Antiquaria for Oh So Beautiful Paper

To make your own place cards, print the pattern on 8.5″ x 11″ card stock and cut it into 3.5″ x 4″ pieces and then score them in half. We used a calligraphy pen and gold ink to customize the cards.

Printable Watercolor Envelope Liner by Antiquaria for Oh So Beautiful Paper

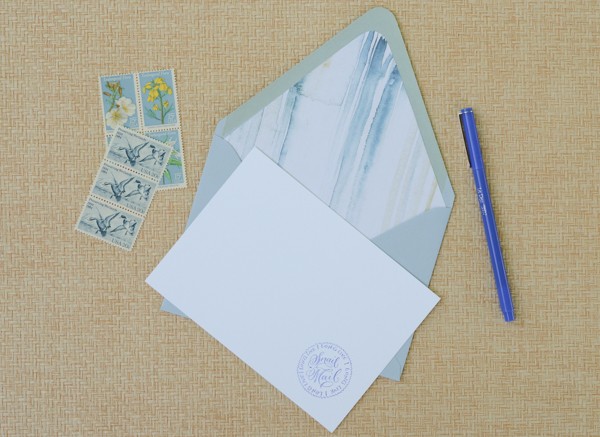
We continued the watercolor theme with these personal notes. Print the pattern on text weight paper and use an envelope liner template to cut them out. Adding an envelope liner is always a nice touch when sending a thoughtful personal note (or thank you note).

All artwork © 2015 Antiquaria, with DIY tutorials created exclusively for Oh So Beautiful Paper. All artwork is made available for personal use only. Anti­quaria is a mem­ber of the Designer Rolodex – you can see more of their beau­ti­ful work right here!

Photo Credits: Antiquaria for Oh So Beautiful Paper

DIY Tutorial: Neon Floral Save the Dates

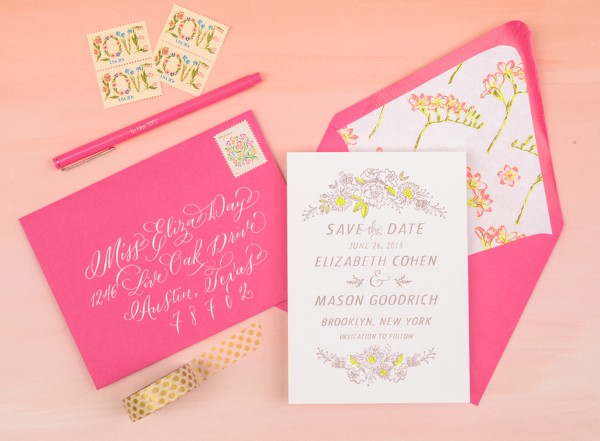
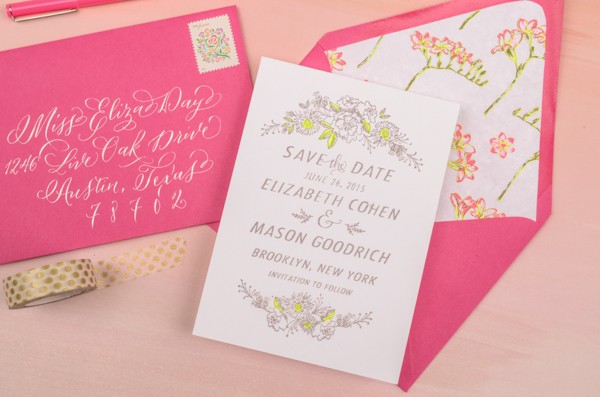
After the dreary days of winter, we are in serious need of bright colors and cheerful designs. This save the date was inspired by an eye grabbing neon floral paper that we recently found. We used a standard highlighter to create the awesome pop of color on the save the date card. Who knew that it would make such a fun addition to the design? –Bailey and Emma of Antiquaria

DIY Neon Floral Save the Date Tutorial by Antiquaria for Oh So Beautiful Paper

Materials

Camellia Floral Save the Date Stamp

Laurel Wreath Return Address Stamp

Stamp Pad

Embossing Stamp Pad

Embossing Heat Tool

Embossing Powder

A6 Notecard (we used Pure White)

A6 Envelope (we used Fuchsia)

Highlighters

Decorative Paper

Envelope Liner Templates

Double Sided Tape

Calligraphy Pen

Finetec metallic watercolor set

DIY Neon Floral Save the Date Tutorial by Antiquaria for Oh So Beautiful Paper

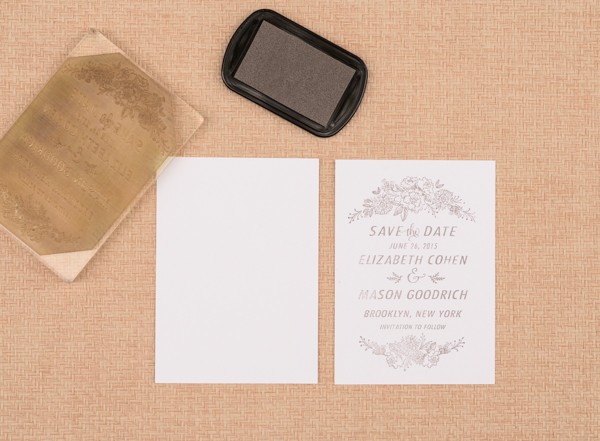
Step One: First, you will want to stamp your save the date (we used our Camellia Save the Date design) on an A6 card. When stamping your card, ink the stamp with the stamp facing you. Center the stamp over your card and press firmly and moderately (not too hard or the image will smudge) and gently lift the stamp off of the paper. Set aside to dry. Please watch this video for more information on inking and stamping an oversized stamp.

DIY Neon Floral Save the Date Tutorial by Antiquaria for Oh So Beautiful Paper

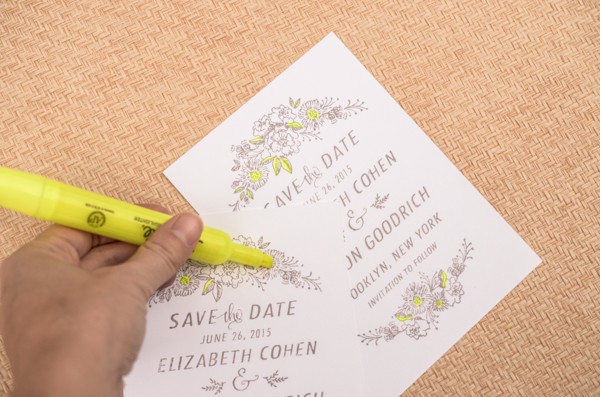
Step Two: To add a fun pop of color, we used a highlighter to color in the leaves and the center of the stamped flowers. This simple touch really makes the design come alive!

DIY Neon Floral Save the Date Tutorial by Antiquaria for Oh So Beautiful Paper

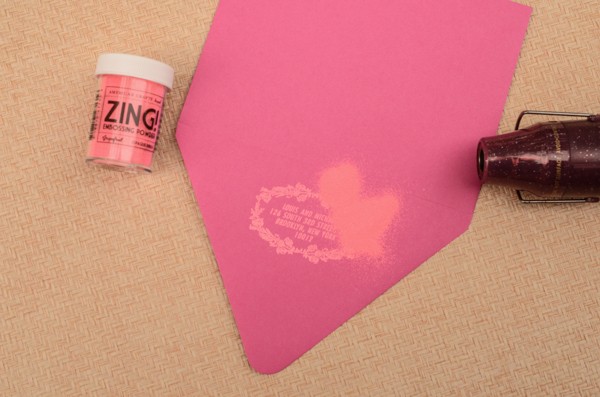
Step Three: Wanting to bring in some of the awesome neon pink from the patterned paper, we decided to use fuchsia envelopes and a tonal, neon grapefruit embossing powder to pull everything together. To emboss, simply stamp your desired return address stamp on the back flap (either in matching ink or with Versamark glue ink, as pictured) dust the powder over it, tap off the excess and heat set the print. For more information about how to emboss using stamps, please watch this instructional video.

DIY Neon Floral Save the Date Tutorial by Antiquaria for Oh So Beautiful Paper

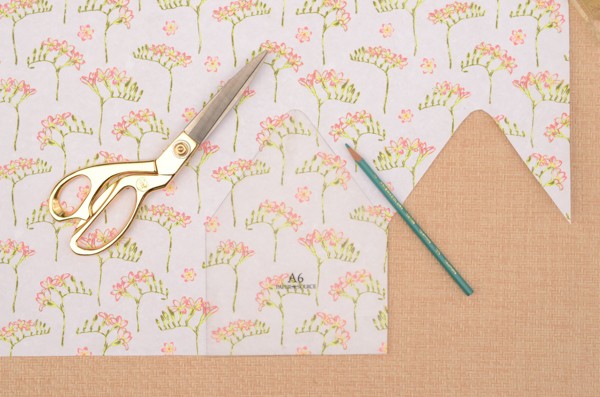
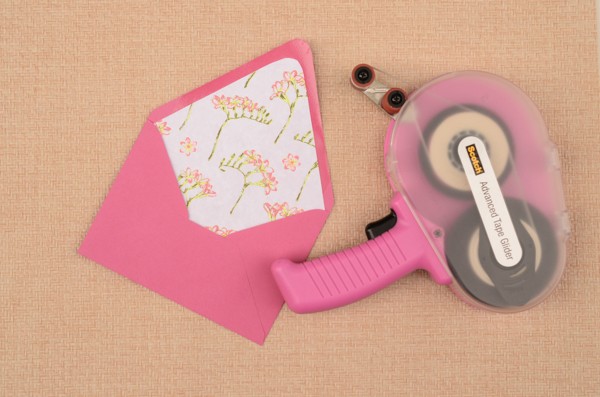
Step Four: Since this suite was directly based off of this amazing paper, it was an easy decision to incorporate it into the design as an envelope liner. We traced the liner template and cut out each liner by hand. Then, we used double sided tape (alternatively, you could use stick glue) to install the liners into the envelopes (adhere around the top triangle).

DIY Neon Floral Save the Date Tutorial by Antiquaria for Oh So Beautiful Paper

DIY Neon Floral Save the Date Tutorial by Antiquaria for Oh So Beautiful Paper

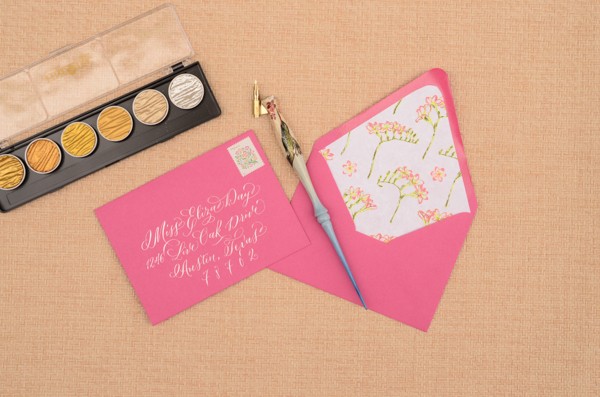
Step Five: It’s time to address your save the dates! We used a beautiful finetec metallic paint palette (the silver one) with a calligraphy pen for this design. Experiment with styles until something feels natural to you! You could also use a silver gel pen and your fanciest handwriting to achieve a similar look.

DIY Neon Floral Save the Date Tutorial by Antiquaria for Oh So Beautiful Paper

Anti­quaria is a mem­ber of the Designer Rolodex – you can see more of their beau­ti­ful work right here!

Photography by Antiquaria for Oh So Beautiful Paper

DIY Tutorial: Copper and Gold Gilded Wedding Invitations

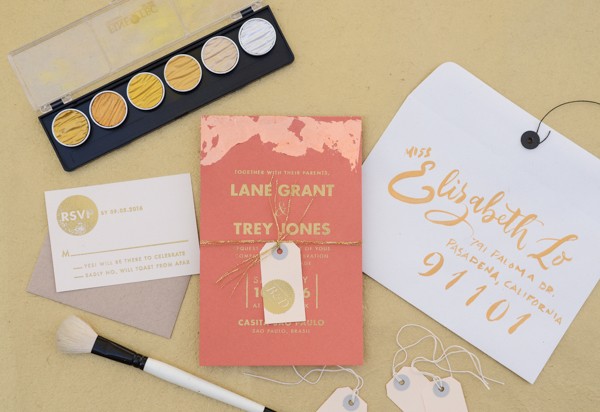
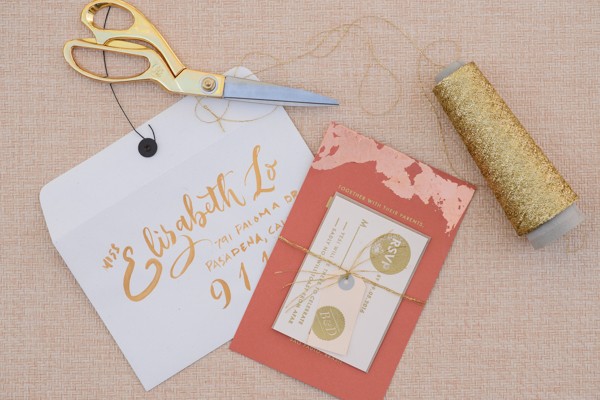
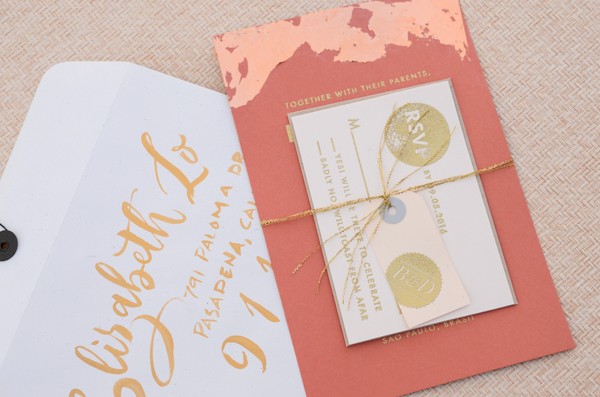
Gold has been a very popular accent in wedding stationery for some time now (and we couldn’t be happier about it!). In today’s DIY tutorial, we created a high end wedding invitation suite that incorporates mixed metallics and a gilding technique that you can absolutely do yourself! When you use multiple metallic shades, you are able to get a wonderful textural dimension that using only one tone just cannot give. We hope these copper and gold gilded wedding invitations inspire you to incorporate some shine into your own invitations! –Bailey and Emma of Antiquaria

DIY Gold and Copper Gilded Wedding Invitations by Antiquaria via Oh So Beautiful Paper

Materials

Modern Type Invitation Stamp

Modern Type Reply Card Stamp

Art Deco Return Address Stamp

Seal Initial Monogram Stamp

A9 Cards (we used Papaya)

6×9 String tie envelopes (we used Milkweed)

4bar Cards (we used Old Lace)

4bar envelopes (we used Paper Bag)

Small Paper Tags (we found ours locally – but these kraft paper tags are similar)

Embossing Stamp Pad

Embossing Heat Tool

Embossing Powder in Gold

Glue Stick or PVA glue

Copper Sheets

Soft brush for gilding

Finetec metallic watercolor set

Fine pointed brush

DIY Gold and Copper Gilded Wedding Invitations by Antiquaria via Oh So Beautiful Paper

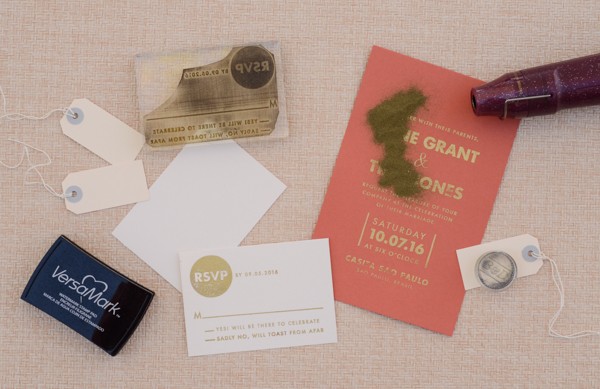
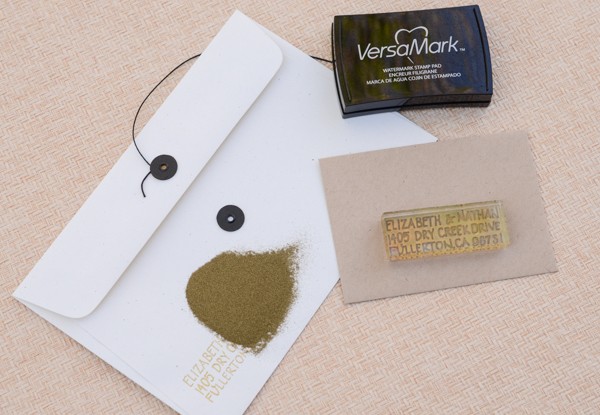
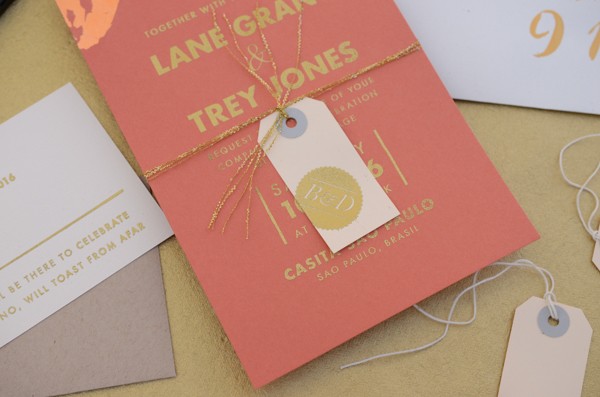
Step One: First, you’ll want to rubber stamp and emboss all of your cards. We used our Modern Type Invitation Stamp and Modern Type Reply Card Stamp for this design. On the cute little tag, we embossed our Seal Monogram Stamp. All of the pieces were embossed with our favorite gold embossing powder which gives lovely, fine results. Simply stamp your designs on each card (either in matching ink or with Versamark glue ink, as pictured), dust the powder over it, tap off the excess, and heat set the print. For more information about how to emboss using stamps, please watch this instructional video.

DIY Gold and Copper Gilded Wedding Invitations by Antiquaria via Oh So Beautiful Paper

mixed media invite-1 DIY Gold and Copper Gilded Wedding Invitations by Antiquaria via Oh So Beautiful Paper

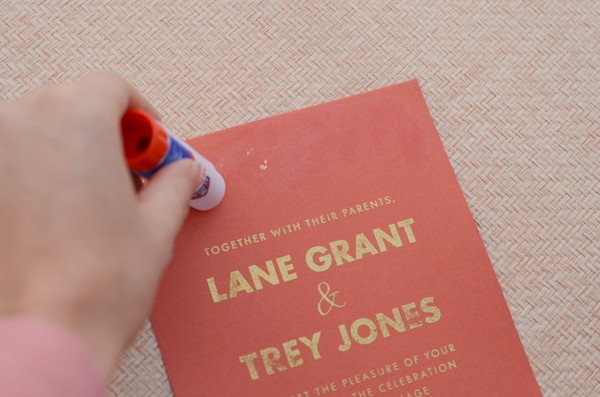
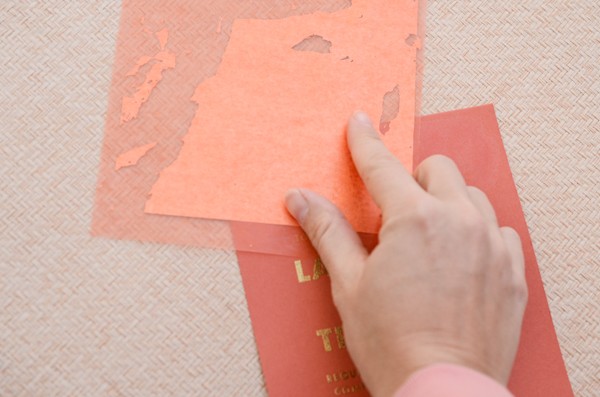
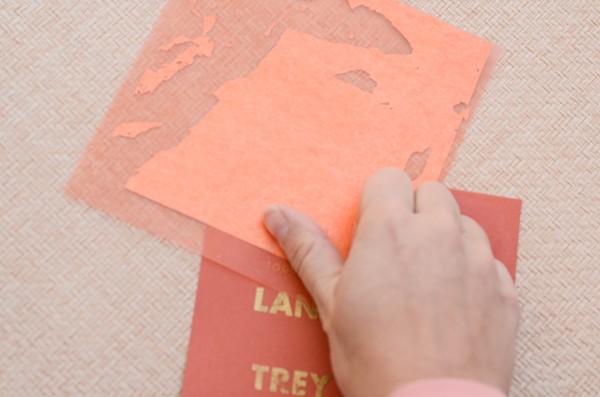
Step Two: Now for the fun part…gilding! We used copper (yes COPPER!) sheets to gild the top of our invitation design to lend an organic, worn, metallic look. With a glue stick smear the adhesive at the top of the invitation and quickly, very quickly put the copper sheet face down on top of the adhesive. Rub the paper backing on the copper sheet with your fingers to make sure that it sticks. Peel off the backing and rub the foil gently with your fingers to smooth any edges.

DIY Gold and Copper Gilded Wedding Invitations by Antiquaria via Oh So Beautiful Paper

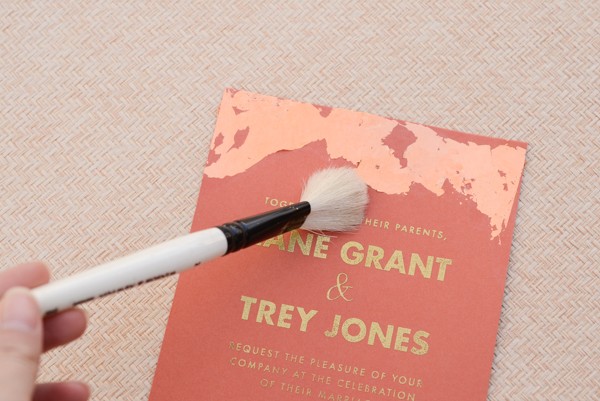
Step Three: Lightly brush off excess with your soft brush. Repeat steps 2 and 3 with more adhesive if needed.

DIY Gold and Copper Gilded Wedding Invitations by Antiquaria via Oh So Beautiful Paper

Step Four: Emboss your return address using the same technique as used in step one. We used our Art Deco Return Address Stamp for this design on both our reply envelope and outer envelope.

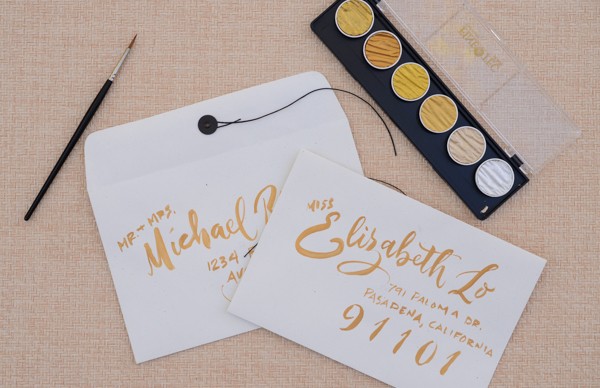
DIY Gold and Copper Gilded Wedding Invitations by Antiquaria via Oh So Beautiful PaperStep Five: Address your invitations! We used a beautiful finetec metallic paint palette with a pointed brush for this design. Experiment with styles until something feels natural to you! There’s a bit of a learning curve when lettering with a brush, just be patient with yourself and remember to have a light touch.

DIY Gold and Copper Gilded Wedding Invitations by Antiquaria via Oh So Beautiful Paper

Step Six: Now all that’s left is to put the suite together! We tied ours together with golden thread (wrapped around 4-5 times) and tied it with our tag. Add your postage and send your metallic creations to your lovely guests!

DIY Gold and Copper Gilded Wedding Invitations by Antiquaria via Oh So Beautiful Paper

DIY Gold and Copper Gilded Wedding Invitations by Antiquaria via Oh So Beautiful Paper

Photography by Antiquaria for Oh So Beautiful Paper

DIY Tutorial: Red and Gold Heart Save the Dates

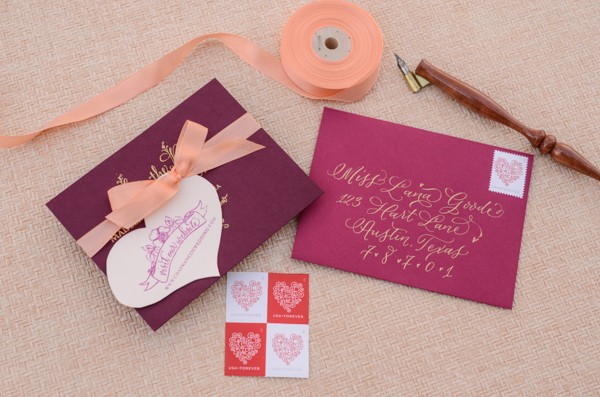
We’ve definitely been in the Valentine’s Day spirit over the past few weeks! We’ve been busy sending out cards and decorating our studios with hearts and shades of pink and red. We just love the way that all of the shades of red, magenta, and purple played together and thought that they would make a stunning save the date design. Our tutorial today incorporates tonal papers, a touch of gold and a love theme for a beautiful but not over the top cutesy design – perfect for any time of year! –Bailey and Emma of Antiquaria

DIY Tutorial: Red and Gold Heart Save the Dates by Antiquaria for Oh So Beautiful Paper

Materials

Floral Calligraphy Save the Date Stamp

Floral Banner Website Card Stamp

A2 Cards in Eggplant

A2 Envelopes in Pomegranate

8.5″ x 11″ Cardstock (for web cards) in Old Lace

Embossing Stamp Pad

Embossing Heat Tool

Embossing Powder in Gold

Stamp Pad in Magenta

Tailors Ribbon in Peach

Pencil & Eraser

Scissors

Hole Punch

DIY Tutorial: Red and Gold Heart Save the Dates by Antiquaria for Oh So Beautiful Paper

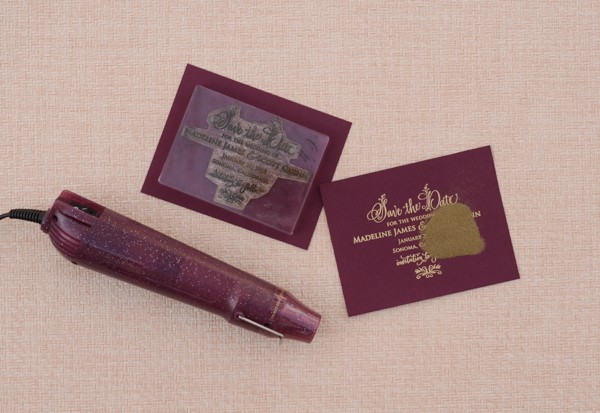
Step One: To start, you will emboss the save the date card (we used our Floral Calligraphy Save the Date stamp) in gold.  Simply stamp your save the date design in the center of your A2 card (either in matching ink or with Versamark glue ink, as pictured), dust the powder over it, tap off the excess, and heat set the print. For more information about how to emboss using stamps, please watch this instructional video.

DIY Tutorial: Red and Gold Heart Save the Dates by Antiquaria for Oh So Beautiful Paper

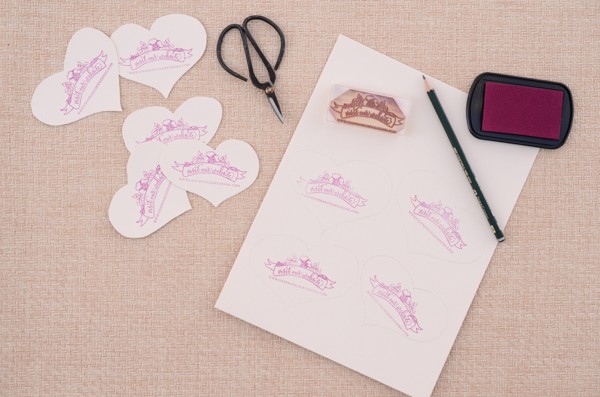
Step Two: These days, wedding websites are almost a requirement to manage wedding logistics and pass along event information. More often than not, our clients ask to include their web address on their save the dates or invitations. For this save the date, we decided that instead of having a standard rectangular tag, we’d mix it up and cut out cute heart shaped tags! It really is super simple! Just stamp your web card stamp (we used our Floral Banner Web-card stamp) on a sheet of 8.5″ x 11″ card stock, spacing each printing out so that there is room around each design (we got 6 out of one sheet). With a pencil, freehand heart shapes around the design and cut out the cards. Erase any stray pencils lines that remain after cutting. Questions about using stamps? Please watch this video for more information.

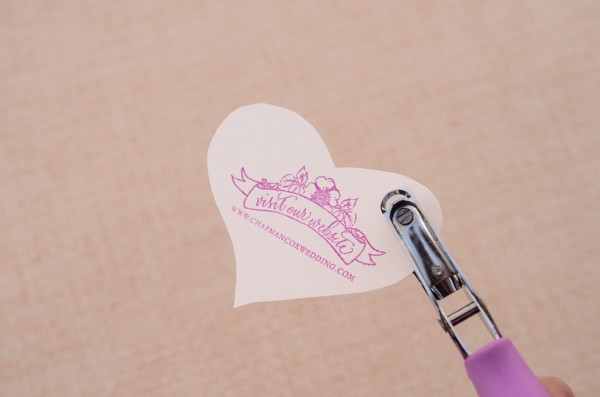
DIY Tutorial: Red and Gold Heart Save the Dates by Antiquaria for Oh So Beautiful PaperStep Three: Punch a hole in the right-hand corner of each heart tag.

DIY Tutorial: Red and Gold Heart Save the Dates by Antiquaria for Oh So Beautiful Paper

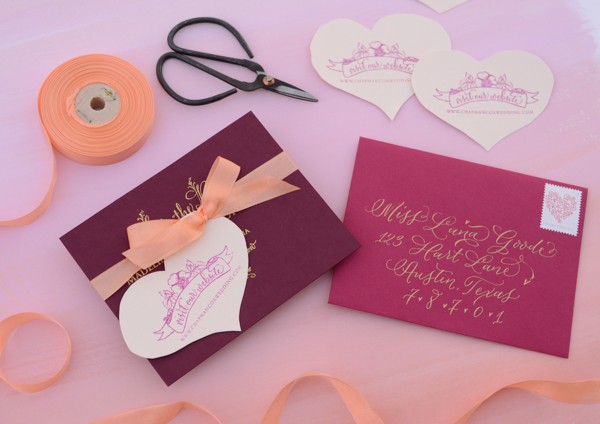
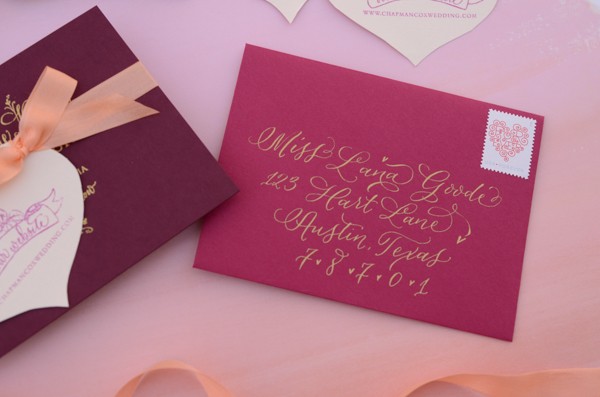
Step Four: Now that all of your individual pieces are complete, you’re ready for the final touches. Tie your heart tag onto the save the date with peach tailors ribbon or another tonal shade. Address your your save the dates in a matching gold ink (either calligraphy ink or gold gel pen) and apply postage to them. We LOVE the new forever heart postage from USPS and think it ties in beautifully with the tonal heart design!
DIY Tutorial: Red and Gold Heart Save the Dates by Antiquaria for Oh So Beautiful Paper

Photography by Antiquaria for Oh So Beautiful Paper

DIY Tutorial: Floral and Lace Wedding Invitations

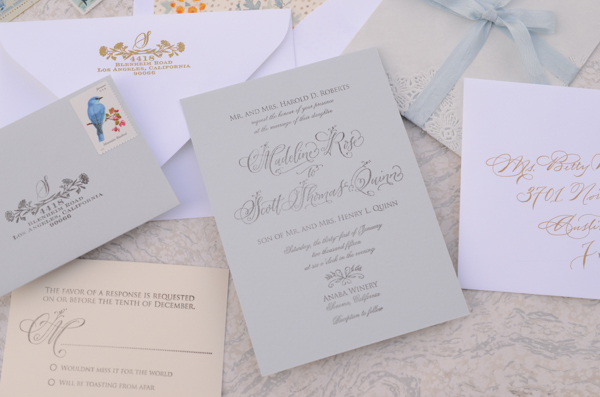
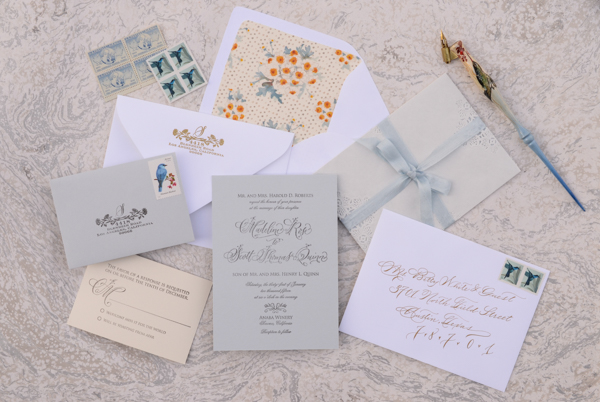
Today, we’re back with our first DIY of the new year! Hooray! This delicate floral and lace wedding invitation suite has been bouncing around in our brains for a while now – and the results exceeded even our expectations. Don’t you love it when that happens? We used a soft palette of misty blue, white, cream, and gold and incorporated some really fancy lace inner envelopes to bring it all together. With these fresh colors, it feels like spring is right around the corner! –Bailey and Emma of Antiquaria
DIY Floral and Lace Wedding Invitations by Antiquaria for Oh So Beautiful Paper

DIY Floral and Lace Wedding Invitations by Antiquaria for Oh So Beautiful Paper

Materials

Floral Calligraphy Invitation Stamp

Floral Calligraphy Reply Card Stamp

Wildflowers Return Address Stamp

Lace Inner Envelopes

A7 Cards

A7 Envelopes, in Pure White

Chamomile Patterned Paper (for liner) and Liner Templates

4bar Card, (3.5″x5″ cut from our Chamomile Patterned Paper, Card Weight)

4bar Envelopes

Stamp Pad, black

Embossing Stamp Pad

Embossing Powder

Embossing Heat Tool

Tailors Ribbon
DIY Floral and Lace Wedding Invitations by Antiquaria for Oh So Beautiful Paper

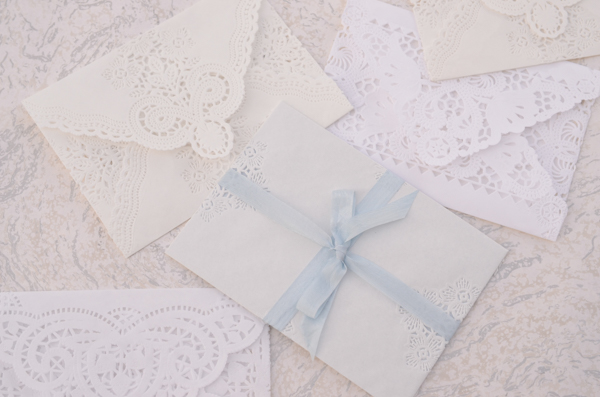
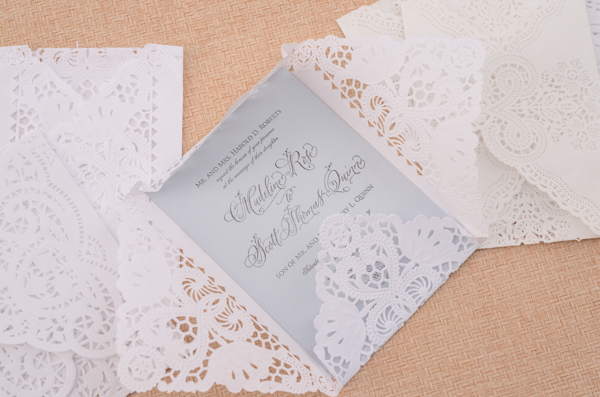
This stunning mix of lace paper inner envelopes from Modern Vintage Paperie really adds a touch of luxury to the suite and brings the whole look together!
DIY Floral and Lace Wedding Invitations by Antiquaria for Oh So Beautiful Paper

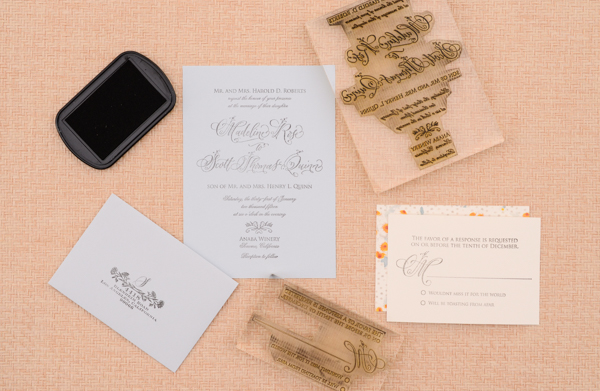
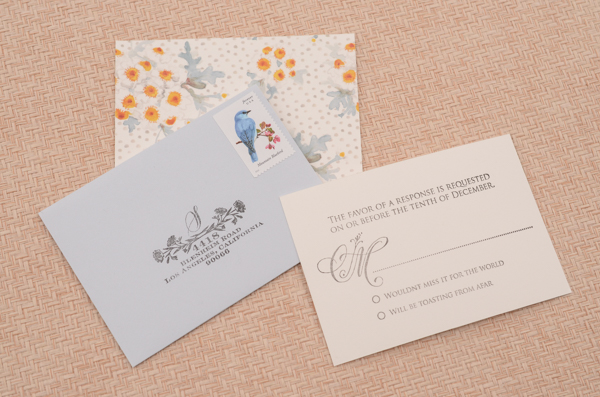
Step 1: First, stamp all of your invitation suite pieces. We used our Floral Calligraphy Invitation stamp, Floral Calligraphy Reply Card stamp and our Wildflowers Return Address stamp for these items. When stamping your cards, ink the stamp with the stamp facing you. Center the stamp over your card/envelope and press firmly and moderately (not too hard or the image will smudge) and gently lift the stamp off of the paper. Set aside to dry. Please watch this video for more information on inking and stamping an oversized stamp.
DIY Floral and Lace Wedding Invitations by Antiquaria for Oh So Beautiful Paper

DIY Floral and Lace Wedding Invitations by Antiquaria for Oh So Beautiful Paper

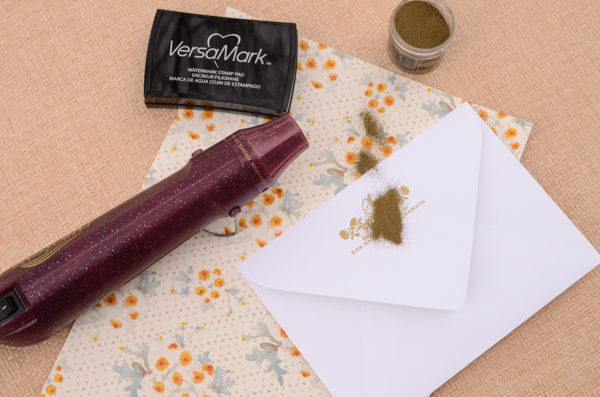
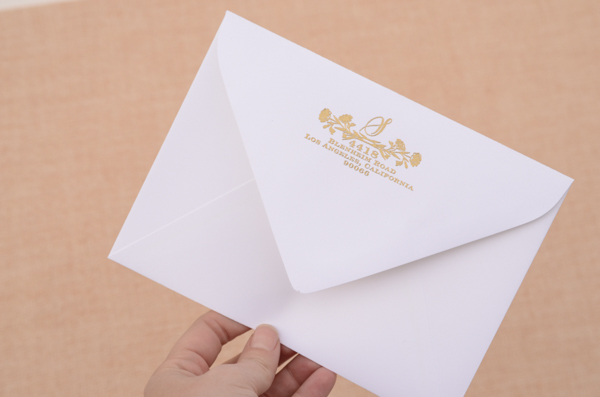
Step 2: Gold makes everything better, right? We decided to emboss our return address in gold to coordinate with the suite design and our addressing. Simply stamp your desired return address stamp on the back flap (either in matching ink or with Versamark glue ink, as pictured) dust the powder over it, tap off the excess and heat set the print. For more information about how to emboss using stamps, please watch this instructional video.
DIY Floral and Lace Wedding Invitations by Antiquaria for Oh So Beautiful Paper

DSC_5721

Step 3: Once all of your pieces are printed and dry, assemble them inside your lace paper inner envelope. We used assorted varieties of envelopes because we couldn’t decide on one, but you could select your favorite as well!
DIY Floral and Lace Wedding Invitations by Antiquaria for Oh So Beautiful Paper

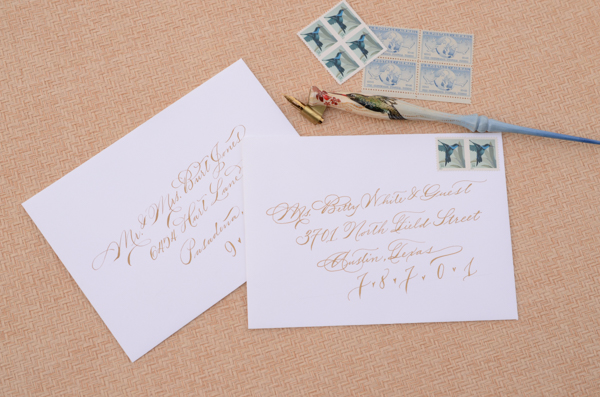
Step 4: Address the envelopes to your guests and add postage (we love those little hummingbird stamps). We used our favorite gold calligraphy ink, but to achieve a similar effect you could also use a gold gel pen and your prettiest handwriting!
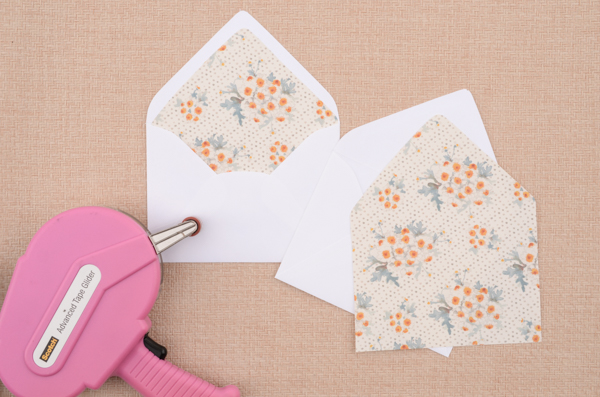
DIY Floral and Lace Wedding Invitations by Antiquaria for Oh So Beautiful PaperStep 5: Over time, we’ve learned that lining your envelopes after they’re addressed saves time and money! That way, if you mess up on an address, a liner isn’t wasted! Cut out your liner with a template or purchase pre-cut liners for your selected envelope if they’re available. To install the liner (we used our Chamomile Patterned Paper to make them), simply put a line of double sided tape or stick glue along the top edge (the triangle part) and slide it into the envelope. Once it’s positioned correctly, press to adhere the liner to the envelope.
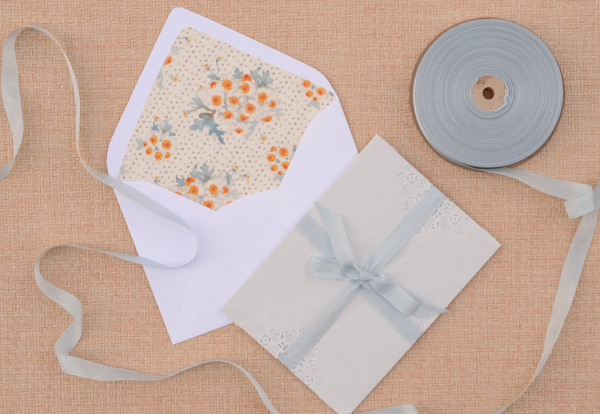
DSC_5726All that’s left  now is to tie up your invitation suite, put them into the envelope and send them along via snail mail!

Photography by Antiquaria for Oh So Beautiful Paper