Seasonal Stationery: 2012 Holiday Cards, Part 4

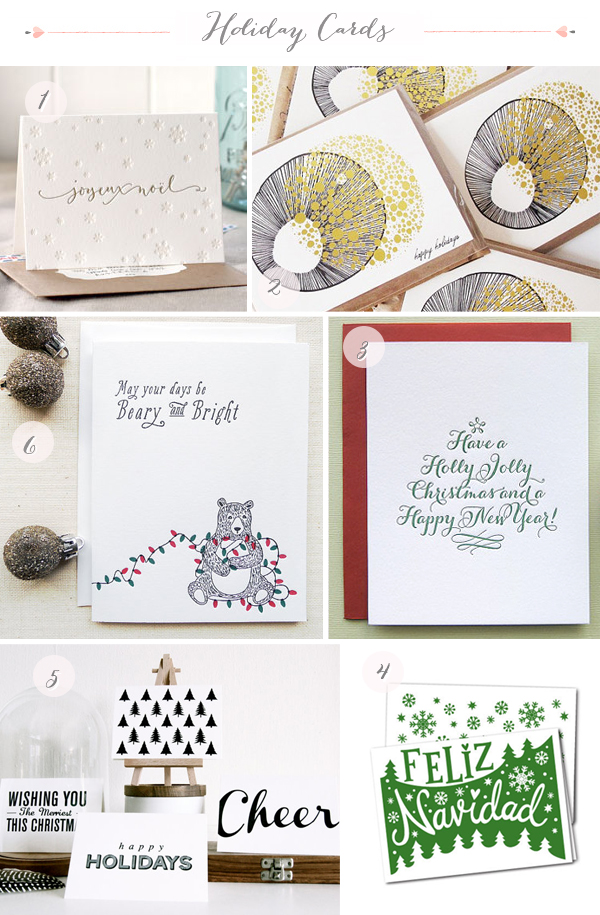
Thanksgiving is behind us and December is just around the corner, which means holiday decorations are starting to go up and it’s definitely time to pick out your holiday cards if you haven’t already! Here are a few more cards from the 2012 holiday card round up, in case you’re still searching for a bit of inspiration…

2012 Holiday Card Round Up via Oh So Beautiful Paper

1. Bespoke Letterpress; 2. Bailey Doesn’t Bark; 3. Duet Letterpress; 4. Beau Ideal; 5. In Haus Press; 6. Bears Eat Berries

2012 Holiday Card Round Up via Oh So Beautiful Paper

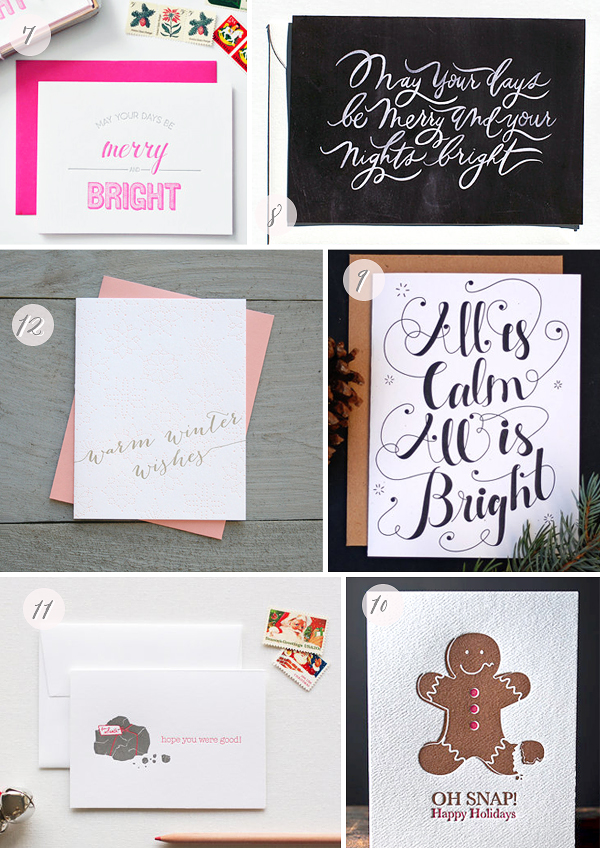
7. Flutter Letterpress; 8. Oh My Deer; 9. Print Print Press; 10. Pike Street Press; 11. Fat Bunny Press; 12. Letter + Lark

Check out the full holiday card round up right here!

{images via their respective sources}

p.s. For those of you in the DC area, the National Postal Museum is hosting its annual holiday card workshop this Saturday! The workshop is a wonderful event for families and kids – they’ll have the opportunity to create handmade holiday cards with a heartfelt message! The event is completely free and you can check out details right here.

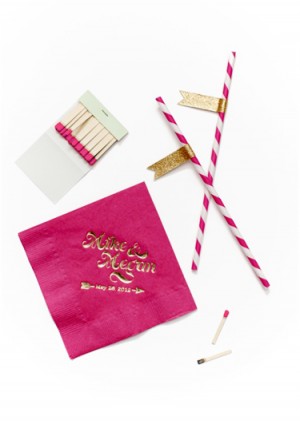
Megan + Mike’s Whimsical Pink and Gold Confetti Wedding Invitations

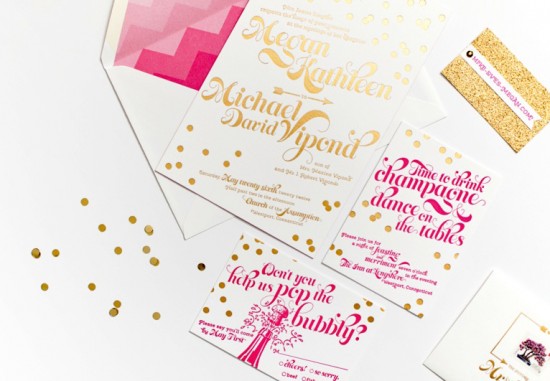
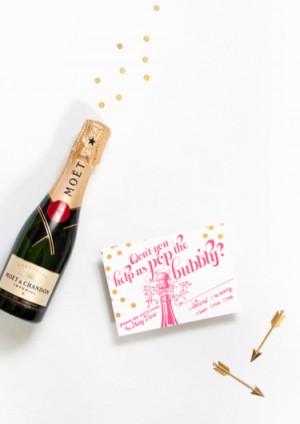
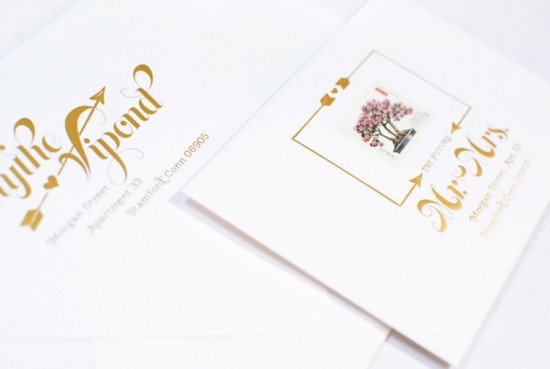
After sending out their seaside save the dates, Megan and Mike decided to go in a more celebratory direction for their wedding invitations. Nichole from Coral Pheasant created a vibrant design inspired by Kate Spade, champagne, and confetti. The invitation suite was letterpress printed in bright pink and gold foil – these invitations practically sparkle!

Pink and Gold Foil Wedding Invitations by Coral Pheasant via Oh So Beautiful Paper (7)

From Nichole: Megan loves Kate Spade and all things paper – a girl after my own heart! She knew right away that she wanted her wedding invitations to reflect the playful aesthetic of Kate Spade. The result was the epitome of all things fun and celebratory: champagne, chevron pattern, and confetti in shades of punchy pink and gold.

Pink and Gold Foil Wedding Invitations by Coral Pheasant via Oh So Beautiful Paper (9)

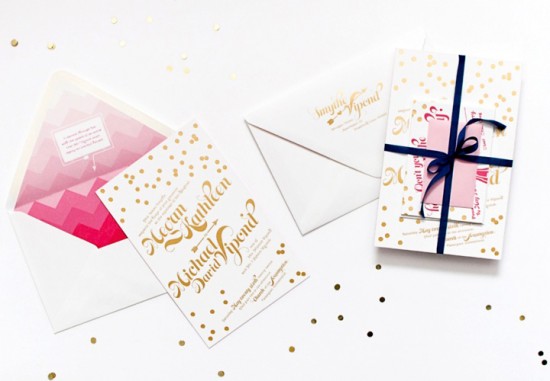
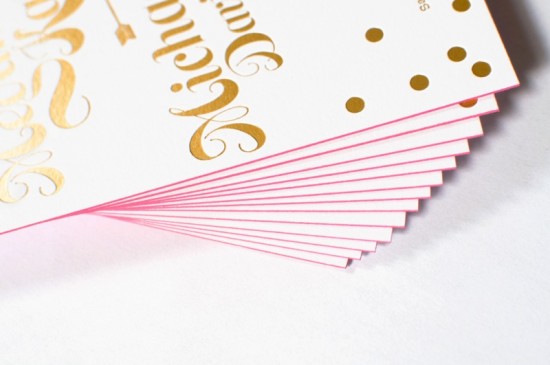
The invitation combines a playful script font with a quirky serif and gold confetti. The individual pieces are a mix of letterpress and gold foil on heavy weight cotton Lettra paper, with the main invitation edge tinted in bright pink for an extra pop of color.

Pink and Gold Foil Wedding Invitations by Coral Pheasant via Oh So Beautiful Paper (4)

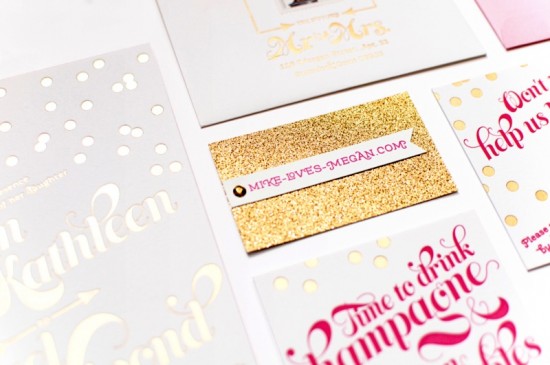
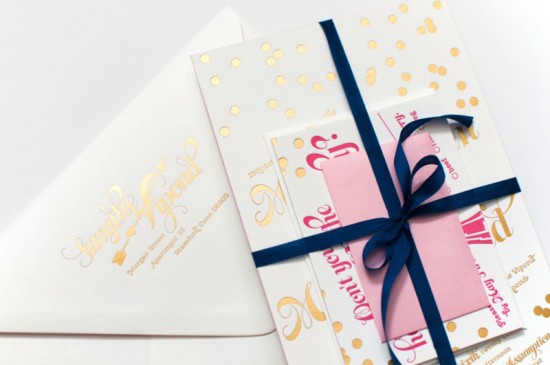
The individual pieces were stacked according to size and tied with a navy silk ribbon. The topmost item was a pink coin envelope with a gold glitter wedding website card – a simple piece that delighted everyone when they opened the envelope!

Pink and Gold Foil Wedding Invitations by Coral Pheasant via Oh So Beautiful Paper (5)

Pink and Gold Foil Wedding Invitations by Coral Pheasant via Oh So Beautiful Paper (3)

In researching ideas for Megan and Mike’s invitation, I came upon a quote from Jane Austen’s Emma. It reads: “It darted through her with the speed of an arrow that Mr. Knightly must marry no one but herself!” I had already incorporated the arrow as a graphic element and the quote paired beautifully with the design with one slight modification: Mr. Knighly was replaced with the groom’s last name. It was a perfect fit! We incorporated the quote into the chevron pattern envelope liner.

Pink and Gold Foil Wedding Invitations by Coral Pheasant via Oh So Beautiful Paper (1) Pink and Gold Foil Wedding Invitations by Coral Pheasant via Oh So Beautiful Paper (2)

Pink and Gold Foil Wedding Invitations by Coral Pheasant via Oh So Beautiful Paper (6)

Thanks Nichole!

Check out the Designer Rolodex for more tal­ented wed­ding invi­ta­tion design­ers and the real invi­ta­tions gallery for more wedding invitation ideas!

Photo Credits: Coral Pheasant

DIY Tutorial: Gold Embossed Save the Dates

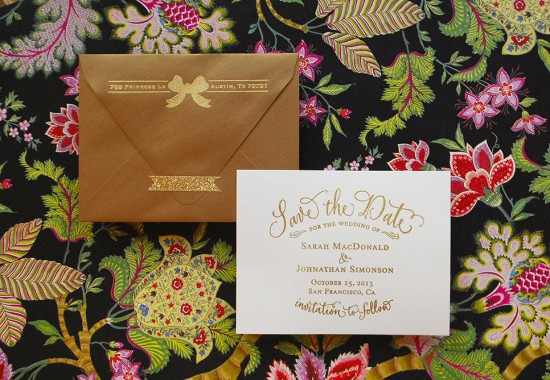
We’re huge fans of gold in pretty much all arenas: housewares, fashion, jewelry, and stationery just to name a few! That’s why this week’s gold on gold embossed save the date tutorial is so awesome. Plus, with this simple and affordable technique, you can create a custom invitation with a high end look on a budget. – Bailey and Emma of Antiquaria
DIY Tutorial: Gold Rubber Stamp Save the Dates by Antiquaria via Oh So Beautiful Paper

DIY Tutorial: Gold Rubber Stamp Save the Dates by Antiquaria via Oh So Beautiful Paper

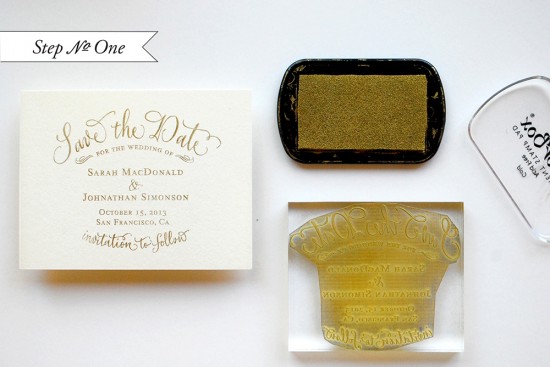
Step One: Unlike most of our stamping tutorials, this week’s embossing technique  is done one piece at a time. Start by inking your stamp (we used our Vintage Calligraphy Save the Date) with a gold metallic stamp pad. For specifics on how to ink your oversized stamp check out step one of this tutorial. Next, you’ll center the stamp over your A6 (4 1/2″ x 6 1/4″) card. Press down firmly to make the print. Lift the stamp off of the card and move quickly to step two.
DIY Tutorial: Gold Rubber Stamp Save the Dates by Antiquaria via Oh So Beautiful Paper

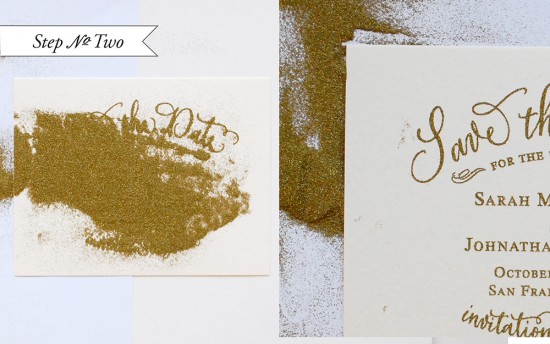
Step Two: While the ink is still wet (using pigment ink such as Colorbox is going to be your best bet for this project), sprinkle embossing powder over the print. Shift powder around the card until it is solidly covering all of the text and graphics. Gently tap the excess off onto a piece of loose leaf computer paper for reuse. If there are still specs of powder on the card, remove them very carefully with a small paint brush. Any powder left will solidify if exposed to the heat.
DIY Tutorial: Gold Rubber Stamp Save the Dates by Antiquaria via Oh So Beautiful Paper

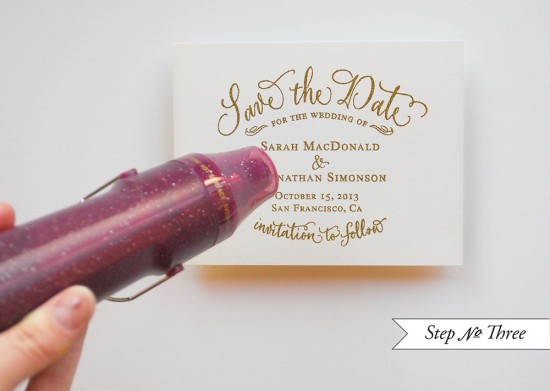
Step Three: Using an embossing heat tool, set the powder by heating it (not too close or you’ll burn the paper) until the powder has solidified. You will want to do a small area at a time to ensure proper solidification. When you’re done, double check you handiwork to make sure all of the areas have been set.
DIY Tutorial: Gold Rubber Stamp Save the Dates by Antiquaria via Oh So Beautiful Paper

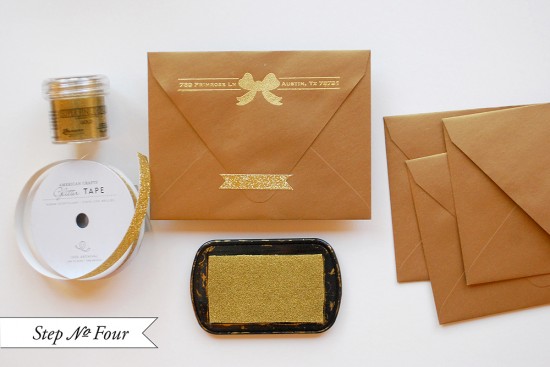
Step Four: You’ll want to repeat steps 1 – 3 for your return address (we used our Bow Return Address stamp). How amazing is the gold embossing on the gold envelope?! Swoon. We’re in love.

Finish them off with more gold – a fabulous piece of gold glitter washi tape on the back flap of the envelope!

Materials

Stamps:

“Vintage Calligraphy” Save the Date

Bow Return Address

Paper and Tools:

A6 Cards in Luxe White

A6 Envelopes in Stardream Antique Gold

Stamp Pad in Gold

Embossing Powder in Superfine Gold

Heat Tool

Washi Tape Gold Glitter

Anti­quaria is a mem­ber of the Designer Rolodex – you can see more of their beau­ti­ful work right here or visit the real wedding invitations gallery for more wedding invitation ideas!

Photo Credits: Antiquaria

Amy + Kenn’s Ombre and Gold Foil Nautical Wedding Invitations

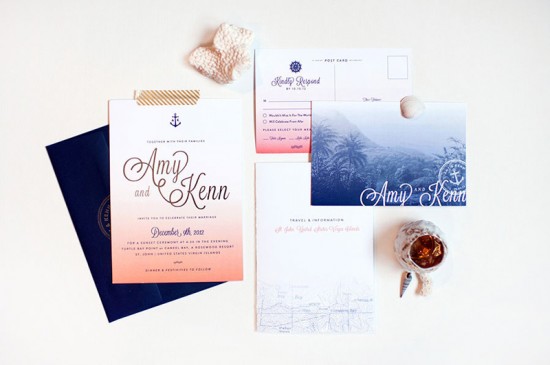
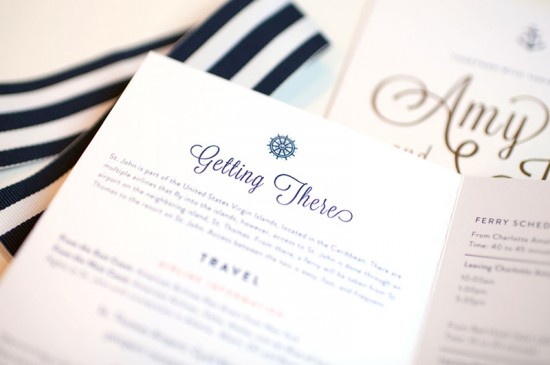
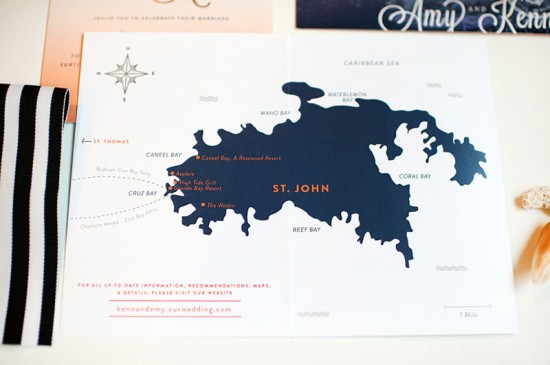
Happy Monday!  I hope all my East Coast friends are safe and sound as Hurricane Sandy passes through.  We’re having a quiet day at home here in DC – not that we have any other option since the government and all public transportation is closed due to the storm!  So today I’m envisioning a warm and rain-free beach vacation with these wedding invitations from designer Carina Skrobecki.  Created for a destination wedding in the U.S. Virgin Islands, Carina incorporated an ombre effect in tropical colors along with travel-inspired and nautical design elements – a fantastic combination!

Ombre and Gold Foil Nautical Wedding Invitations by Carina Skrobeck Design via Oh So Beautiful Paper (2)

From Carina: Amy and Kenn are getting married in the U.S. Virgin Islands in December. So when they came to me to design their St. John-inspired wedding invitations, I knew I had an opportunity to incorporate the rich and exotic colors naturally found on the island and have some fun bringing in an ocean/travel theme.

Ombre and Gold Foil Nautical Wedding Invitations by Carina Skrobeck Design via Oh So Beautiful Paper (1)

Ombre and Gold Foil Nautical Wedding Invitations by Carina Skrobeck Design via Oh So Beautiful Paper (4)

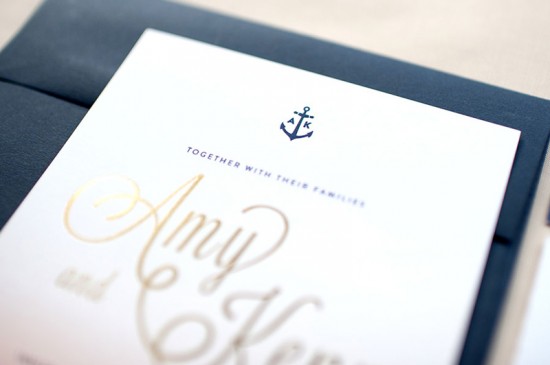
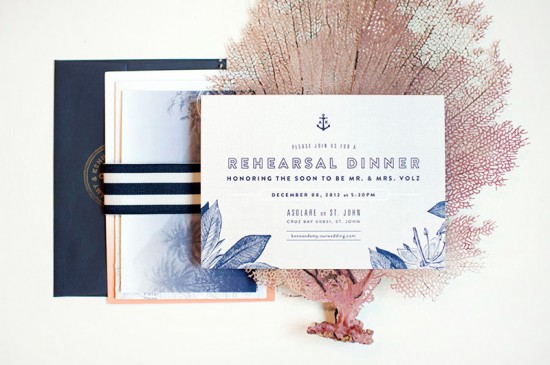
The suite came together with lush orange and coral tones, along with deep blue.  We created an ombre effect, which was digitally printed on all the pieces to tie everything together. The main invitations were then kissed with gold foil, which brought out the names of the bride and groom.

Ombre and Gold Foil Nautical Wedding Invitations by Carina Skrobeck Design via Oh So Beautiful Paper (3)

Amy and Kenn wanted a monogram with an anchor to use on other printed materials, so we created a small design that was then used on a custom stamp to seal the envelopes.

Ombre and Gold Foil Nautical Wedding Invitations by Carina Skrobeck Design via Oh So Beautiful Paper (10)

Ombre and Gold Foil Nautical Wedding Invitations by Carina Skrobeck Design via Oh So Beautiful Paper (11)

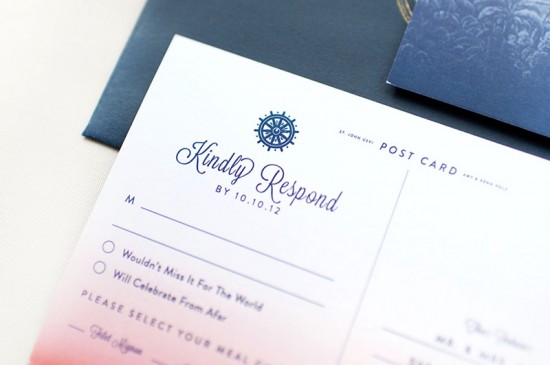
We drew inspiration from the beautiful St. John sunsets, natural materials such as rope and linen, and travel postcards. When doing research, I found an old lithograph of St. John created in the late 1800s by a Danish artist, and that became the inspiration for the postcard RSVP.

Ombre and Gold Foil Nautical Wedding Invitations by Carina Skrobeck Design via Oh So Beautiful Paper (5)

Ombre and Gold Foil Nautical Wedding Invitations by Carina Skrobeck Design via Oh So Beautiful Paper (6)

Ombre and Gold Foil Nautical Wedding Invitations by Carina Skrobeck Design via Oh So Beautiful Paper (8)

Thanks so much Carina!

Design: Carina Skrobecki Design

Printing and Gold Foil: Nikko Media

Custom Stamp: RubberStamps.net

Striped Ribbon: TeaParty Ribbons

Check out the Designer Rolodex for more tal­ented wed­ding invi­ta­tion design­ers and the real invi­ta­tions gallery for more wedding invitation ideas!

Photo Credits: Carina Skrobecki Design

Behind the Scenes: Shanna Murray

Hello there. It’s Shauna from Forage Haberdashery and I’ll be sharing a little post with you each day this week. Before I get started, I wanted to say congratulations to Nole (and thanks for inviting me).

I love paper (Ed Note: I’m a huge fan of Shauna’s stationery company – Seed House Stationers – here’s a quick peek from the National Stationery Show in May), but even more than paper goods, I adore the people who make them. For my posts this week, I scoured the Instagram feeds of my favorite designers, searching for a little behind the scenes and can’t wait to share what I found…

shanna murray behind the scenes

shanna murray behind the scenes

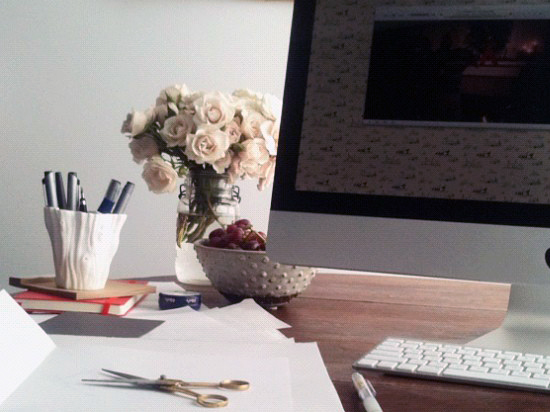
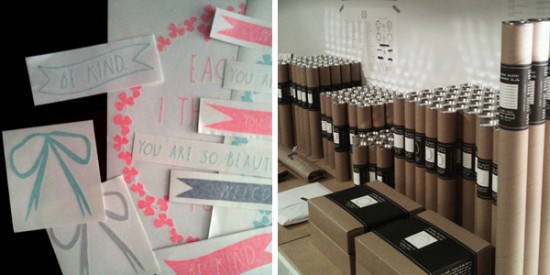
First up, is Shanna Murray. I love her illustrated decals and dream of covering an entire room with her bows, wreaths and sweet sentiments. Getting a glimpse into her world is such a treat from her effortlessly styled desk, to piles of colorful decals and all that beautiful packaging. Her attention to detail is something I absolutely adore.

A few of my favorite things in Shanna Murray’s shop (shown above):
darling bow
be kind
ring of clover & lucky stars tiding

Photo Credits: Shanna Murray {via Instagram @heidibraids}