DIY Tutorial: Love Letter Dinner Party Placecards

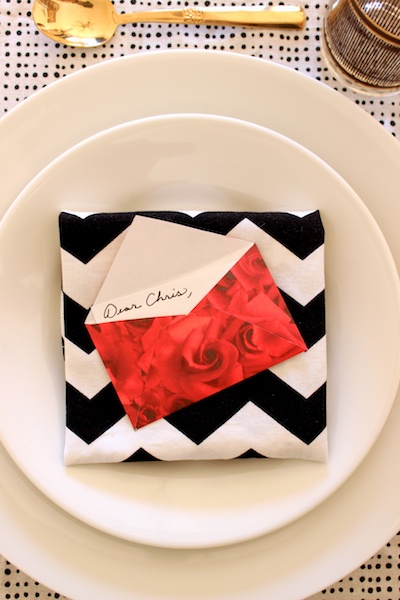
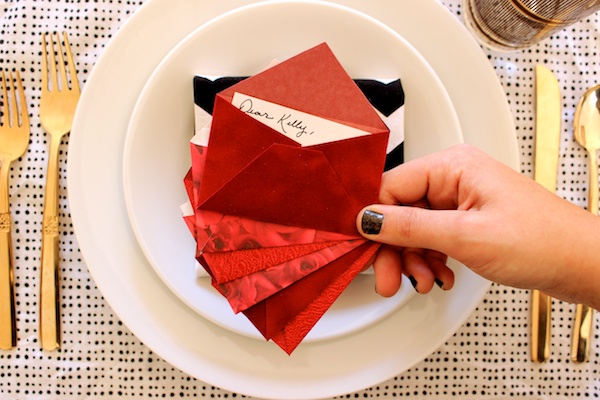
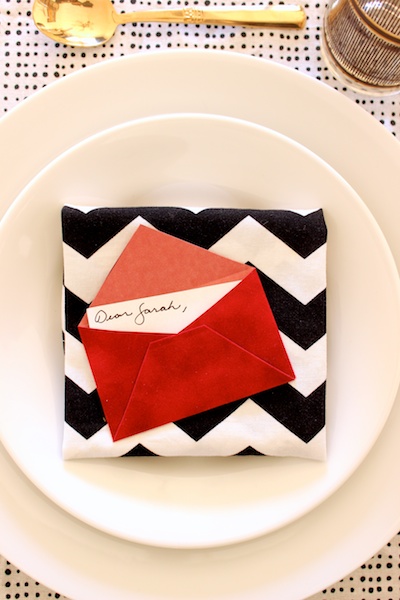
If you’re anything like I am, you enjoy an excuse to throw a party with a theme. So I say embrace Valentine’s Day for what it is… a reason to get your friends together for good food and drinks, a great time, and a little awesome decor thrown in. Of course, if a heart explosion isn’t your thing, today’s tutorial is perfect. These little mini love letter place cards read Valentine’s Day without throwing it in your face. And you’re going to die over these scrapbook papers – velvet and ostrich and roses, oh my!  —Mandy of Fabric Paper Glue

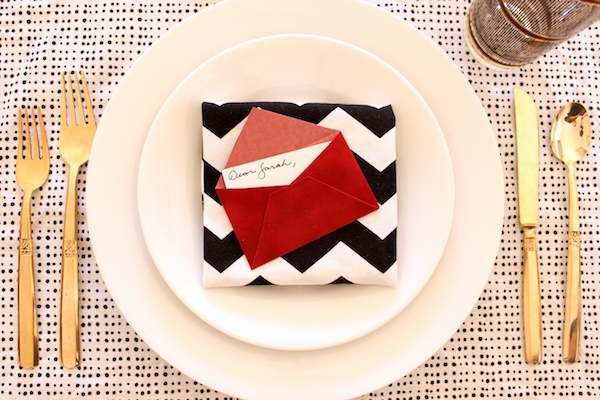
DIY Mini Love Letter Placecards OSBP 11

DIY Mini Love Letter Placecards OSBP 13DIY Mini Love Letter Placecards OSBP 14

DIY Mini Love Letter Placecards OSBP 1

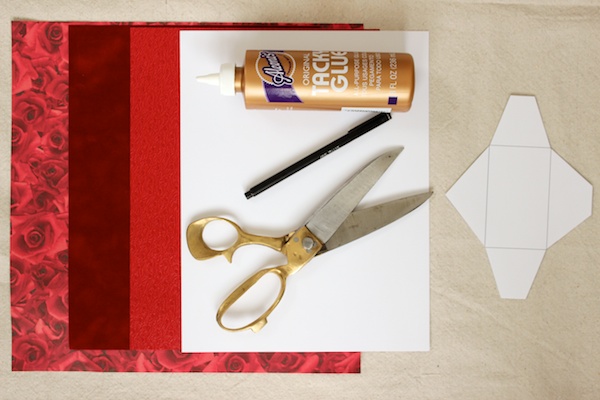
Materials

Pretty Paper*
Mini Envelope Template
Pen/Pencil
Scissors
Craft Glue
Cardstock

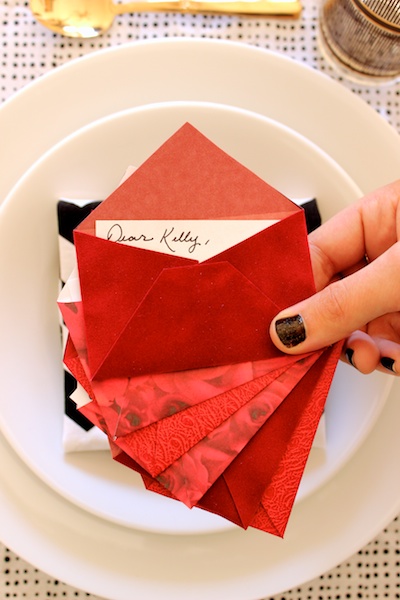
*Confession: I don’t venture down the scrapbook supply aisles very often, so I was surprised to find such luxe textures on a recent perusal of the paper section at my local big box craft store. Check them out.  You’ll want to make mini envelopes until you’re blue in the face.

DIY Mini Love Letter Placecards OSBP 2

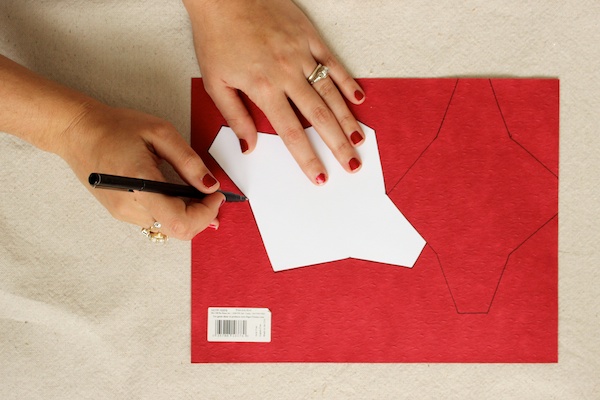
Step One: Trace the mini envelope template onto the back of the pretty paper.

DIY Mini Love Letter Placecards OSBP 3

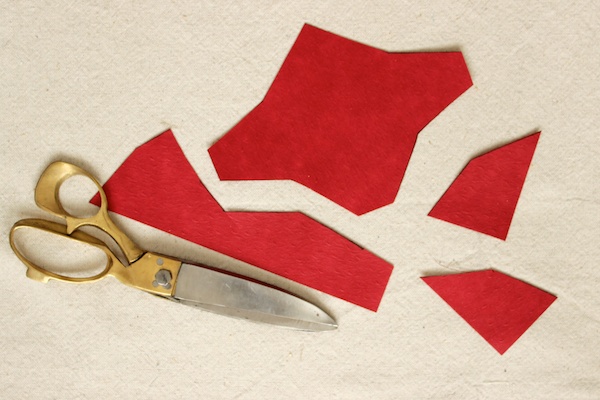
Step Two: Cut out each mini envelope.

DIY Mini Love Letter Placecards OSBP 4

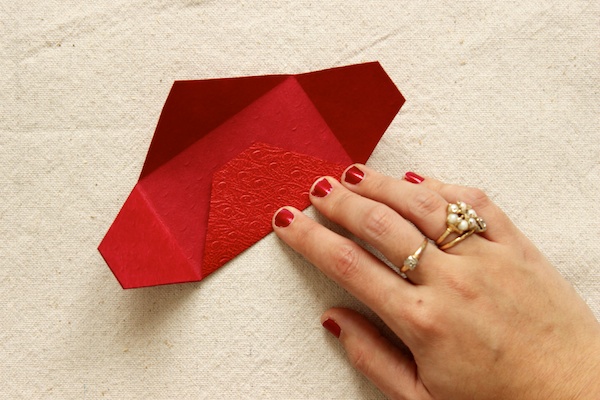
Step Three: Fold each of the envelopes’ flaps in. To get a crisp fold, gently score the fold lines with the back of a craft knife first.

DIY Mini Love Letter Placecards OSBP 5

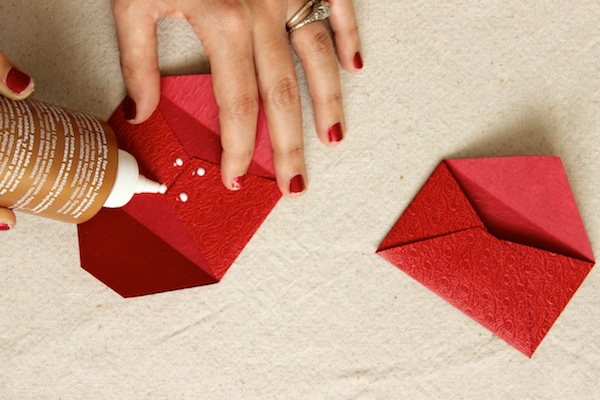
Step Four: Add a few small beads of craft glue to secure each envelope.

DIY Mini Love Letter Placecards OSBP 7

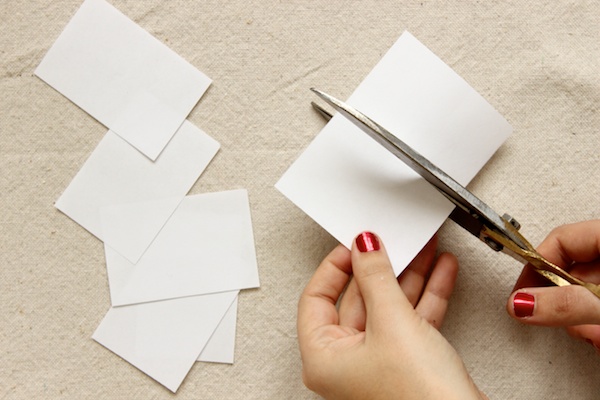
Step Five: Cut pieces of cardstock to just smaller than each of the envelopes.

DIY Mini Love Letter Placecards OSBP 8

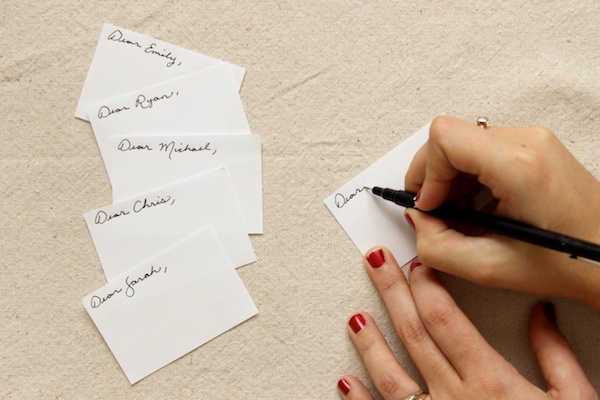
Step Six:  Write your guests’ names at the top of each of the pieces of cardstock. I added “Dear” to the beginning just to drive the idea home. You could even leave each guest a little note if you’re feeling particularly ambitious.

DIY Mini Love Letter Placecards OSBP 9

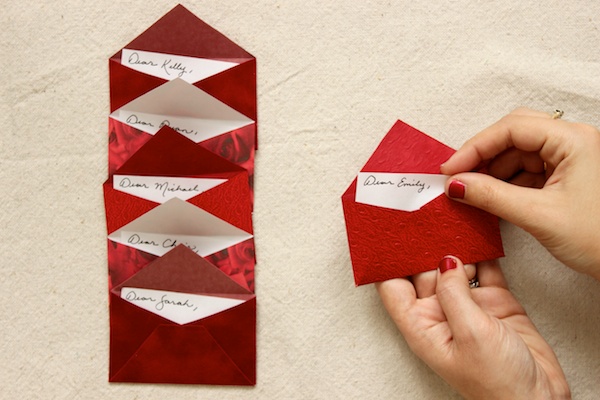
Step Seven: Tuck each note into an envelope just far enough so that the names are still visible.

DIY Mini Love Letter Placecards OSBP 10

DIY Mini Love Letter Placecards OSBP 15DIY Mini Love Letter Placecards OSBP 12

Photo Credits: Mandy Pellegrin for Oh So Beautiful Paper

DIY Tutorial: Tropical Invitation Suite + Fabric Envelope

This week we’re fighting off winter blues with a fun and colorful tropical inspired invitation suite! The best part of this design? The awesome fabric inner envelope. As soon as we stumbled on this adorable tutorial on over on Martha Stewart, we were hooked and knew that we need to incorporate the technique into a DIY invitation suite! – Bailey and Emma of Antiquaria

DIY Tutorial: Tropical Invitation Suite + Fabric Envelope by Antiquaria for Oh So Beautiful Paper

DIY Tutorial: Tropical Invitation Suite + Fabric Envelope by Antiquaria for Oh So Beautiful Paper

DIY Tutorial: Tropical Invitation Suite + Fabric Envelope by Antiquaria for Oh So Beautiful Paper

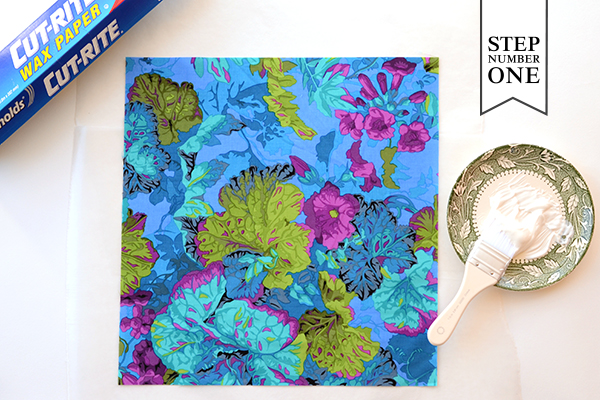
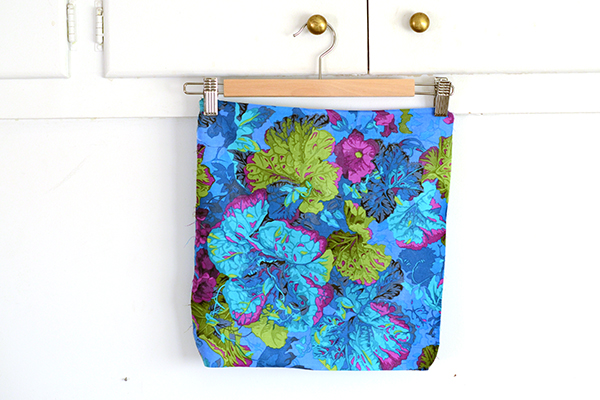
Step One: Over a piece of wax paper, thinly coat a piece of fabric measuring 13.5″ x 14″ with fabric decoupage on front and back. Once both sides are covered, hang the fabric from a pant hanger until dry (see below).
DIY Tutorial: Tropical Invitation Suite + Fabric Envelope by Antiquaria for Oh So Beautiful Paper

DIY Tutorial: Tropical Invitation Suite + Fabric Envelope by Antiquaria for Oh So Beautiful Paper

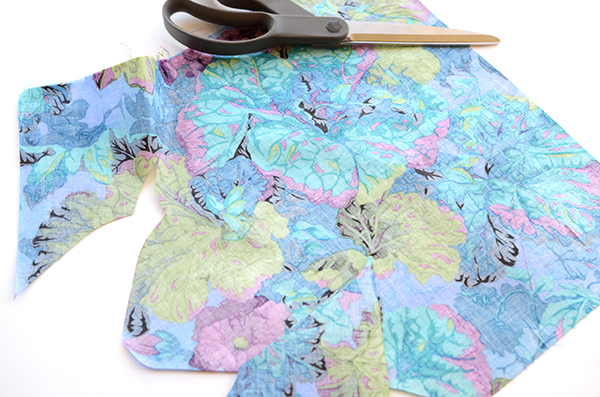
Step Two: Once the fabric is dry, trace an A7 envelope template on the “wrong” side of the fabric with a marker. Using a pair of very sharp fabric scissors, carefully cut out the envelope along the line.
DIY Tutorial: Tropical Invitation Suite + Fabric Envelope by Antiquaria for Oh So Beautiful Paper

DIY Tutorial: Tropical Invitation Suite + Fabric Envelope by Antiquaria for Oh So Beautiful Paper

Step Three: Now you’ll assemble the envelope. Place a sheet of wax paper approximately 7″ wide in the middle and fold the side flaps over it. Apply decoupage to the lower portion of the side flaps as shown above. Fold up the bottom flap to adhere it to the sides. Paint a thin coat of decoupage along the seams to seal the envelope closed (shown below).

DIY Tutorial: Tropical Invitation Suite + Fabric Envelope by Antiquaria for Oh So Beautiful Paper

DIY Tutorial: Tropical Invitation Suite + Fabric Envelope by Antiquaria for Oh So Beautiful Paper

Step Four: Next, you’ll emboss the invitation piece. Place your fig A7 card on a stable and firm surface. Ink your invitation stamp (we used our Vintage Calligraphy Invitation stamp) and center it over the card. When ready, press the stamp down with moderate pressure to make the print. Lift the stamp off and quickly move on to adding your embossing powder.

Once you’ve made your print, immediately cover it with embossing powder by sprinkling it across the card. Shift the powder around until you have covered the entire image. Now, you will pour the excess powder off of the card onto a scrap piece of paper so that you can reuse it for future prints. Heat set the print, using an embossing heat tool. You will be able to see the powder melt into an opaque and solid color when it’s done. For more information about how to emboss using stamps, please watch this instructional video.

Note: One key thing about embossing is that it is wise to try to closely match your ink color with your powder color. By doing this, you will get much more crisp and opaque results. For example, we used a white pad with white embossing powder on this invitation.

DIY Tutorial: Tropical Invitation Suite + Fabric Envelope by Antiquaria for Oh So Beautiful Paper

Step Five: Next, you’ll stamp your reply postcard on a 4″ x 6″ cream card. We used our Calligraphy Accent Reply Postcard stamp with eggplant ink.

DIY Tutorial: Tropical Invitation Suite + Fabric Envelope by Antiquaria for Oh So Beautiful Paper

Step Six: There’s no reason to waste the scraps from cutting out the envelopes! We cut them into little 2.5″ squares to use with our monogram tags! The paper tag (in front) is a 2″ square. Once you have both squares cut, layer them on top of one another and punch a hole in the top center of the diamond. Insert a 1/8″ grommet into the hole so that the two pieces hold together.

Stamp your monogram stamp (we used our Antique Monogram stamp) on the tag with the same eggplant stamp pad as we used on the reply postcard.

DIY Tutorial: Tropical Invitation Suite + Fabric Envelope by Antiquaria for Oh So Beautiful Paper

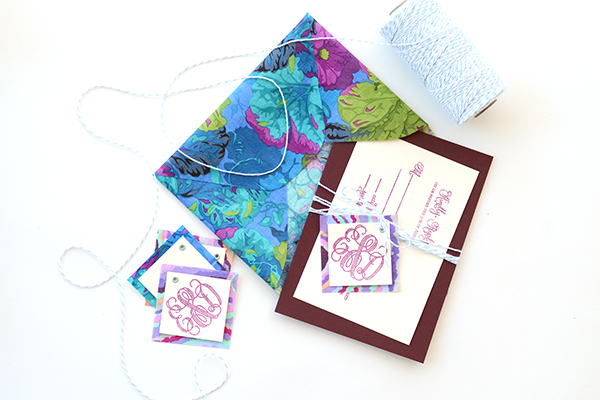
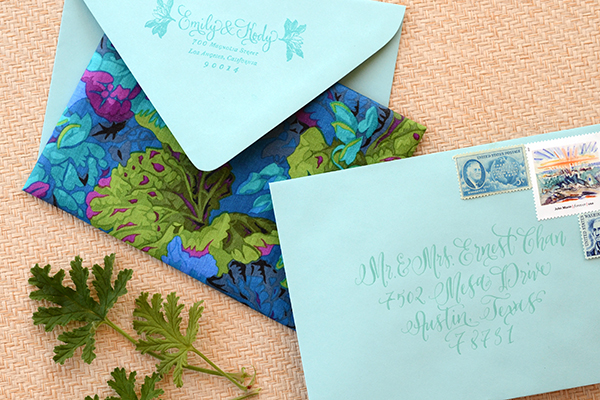
Step Seven: Now all that’s left it to put it all together! We stamped the return address and addressed the outer envelope with turquoise ink for a tonal look. We also wrapped all of the pieces together with teal bakers twine to tie it all together!
DIY Tutorial: Tropical Invitation Suite + Fabric Envelope by Antiquaria for Oh So Beautiful Paper

DIY Tutorial: Tropical Invitation Suite + Fabric Envelope by Antiquaria for Oh So Beautiful Paper

Materials

Vintage Calligraphy Invitation Stamp

Calligraphy Accent Reply Postcard Stamp

Antique Monogram Stamp

Fabric cut into 13.5″ x 14″ pieces

Rotary cutter, scissors, and self healing mat

Wax Paper

Decoupage, Paint Brushes, and Pant Hanger

Envelope Templates

A7 Cards in fig

A7.5 Envelopes in Pool

Cream Cardstock-cut into 4″ x 6″ and 2″ x 2″ pieces

Stamp pads in white, eggplant and turquoise

Embossing Powder, Embossing Heat Tool

1/8″ grommets

Crop-o-dile Tool for hole punching and grommet installation

Bakers Twine in Teal

Photography: Antiquaria for Oh So Beautiful Paper
Sophie Style: Shoes!

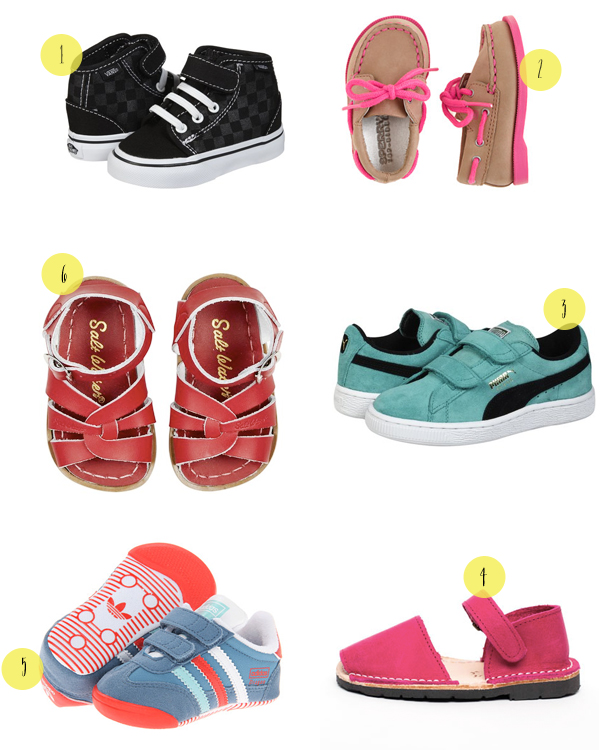
Sophie’s daycare requires that she wear hard sole shoes, relegating our favorite pair of moccasins to weekend-only use. Which means I’ve spent a fair amount of time looking for cute infant sneakers that aren’t covered in butterflies or doomed by gaudy color combinations. Sophie is starting to outgrow her first pair of sneakers, so I’m on the hunt for a couple of new pairs along with some sandals to use when the weather warms up in a few months. Here are a few of my favorites!
OSBP-Baby-Essentials-Sophie-Style-Shoes

1. Vans Hi-Tops; 2. Sperry Top Sider for J.Crew Baby (and pretty much the cutest thing ever); 3. Puma (we do have these, and the color is so great in person!); 4. Pons Avarcas; 5. Adidas; 6. Saltwater Sandals

p.s. More of my favorite things for babies and toddlers here!

New Giveaway! Laurel Denise 2014 Planner

THIS GIVEAWAY IS NOW CLOSED

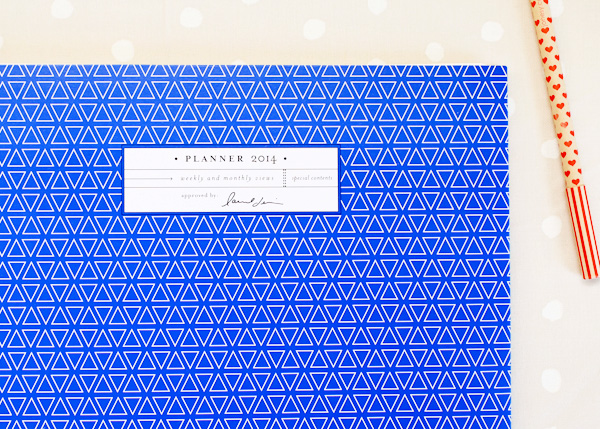
It’s January, and I’m sure most of you are trying to get organized and start the new year on the right foot! So for our first giveaway of 2014, we’re going to help you do just that – with a lovely 2014 planner from Laurel Denise!

OSBP-Giveaway-Laurel-Denise-2014-Planner-1

OSBP-Giveaway-Laurel-Denise-2014-Planner-10

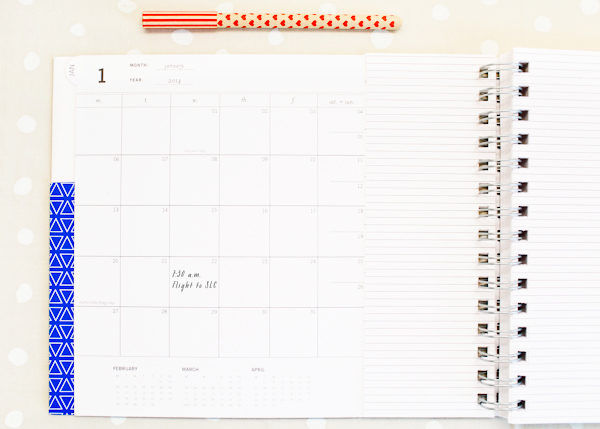
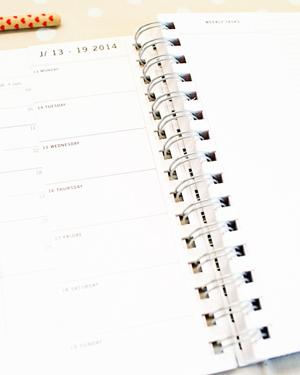
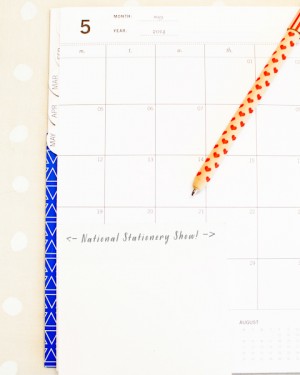
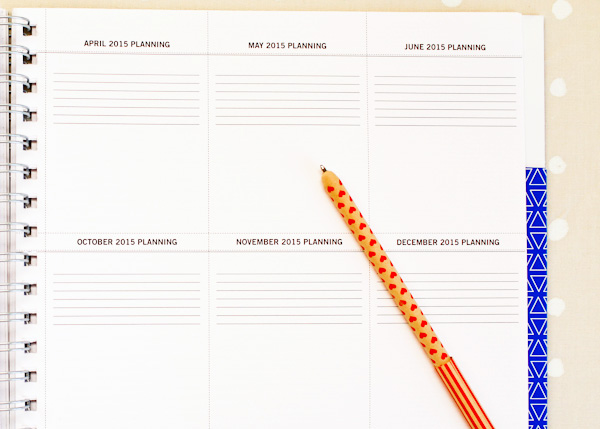
The Laurel Denise planner has been one of my very favorites for the last few years – and it’s perfect for folks (like us) who appreciate good design and want something pretty to help stay organized. This innovative planner lets you view both monthly and weekly pages at the same time, with plenty of space on each page to jot down items on your to do list, notes, phone numbers, and anything else life throws your way.

OSBP-Giveaway-Laurel-Denise-2014-Planner-13

OSBP-Giveaway-Laurel-Denise-2014-Planner-19OSBP-Giveaway-Laurel-Denise-2014-Planner-20

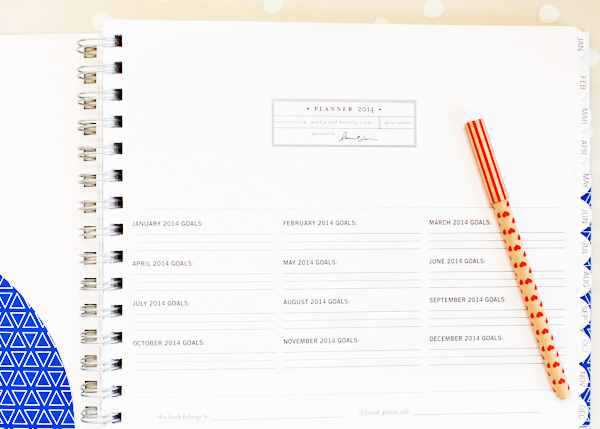
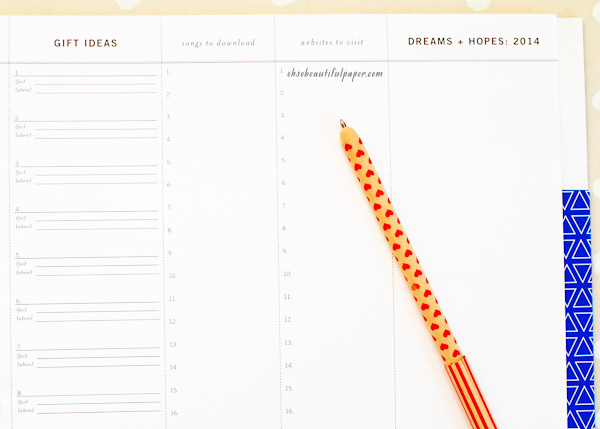
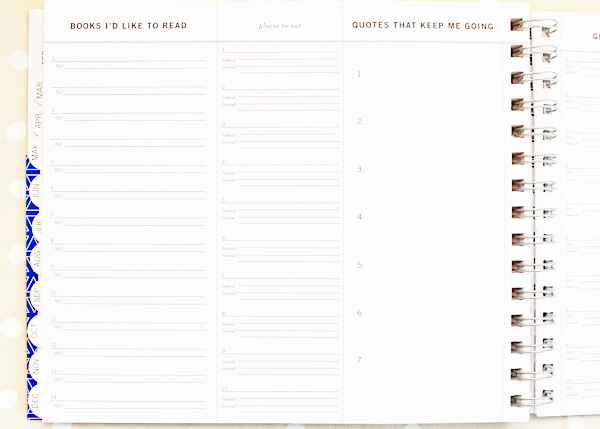
In addition to individually tabbed months and weekly lists, the planner includes plenty of room for goal planning (for both 2014 and into 2015!), gift ideas, book and restaurant lists, and more. The winner will receive one planner in the cover color of their choice – navy blue (pictured here), gray, or metallic gold!

OSBP-Giveaway-Laurel-Denise-2014-Planner-31

OSBP-Giveaway-Laurel-Denise-2014-Planner-24

To enter, leave a comment below telling us something fun that you’re looking forward to in 2014! You’ll have until 11:59 p.m. on Friday, January 17 to enter the giveaway. One winner will be selected randomly and notified via email. Bonne chance!

OSBP-Giveaway-Laurel-Denise-2014-Planner-33

OSBP-Giveaway-Laurel-Denise-2014-Planner-6

*This giveaway is courtesy of Laurel Denise.  Official sweepstakes rules here.

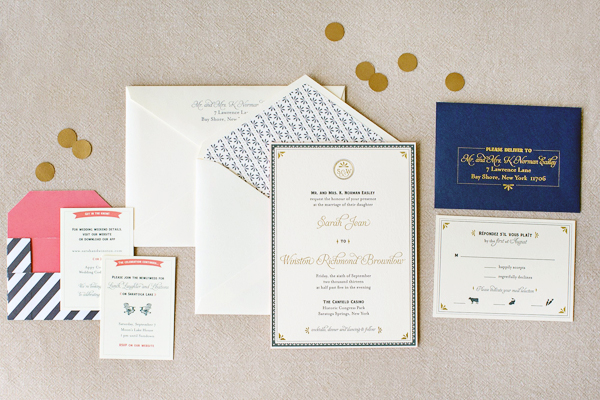
Sarah + Winston’s Navy, Gold, and Coral Letterpress Wedding Invitations

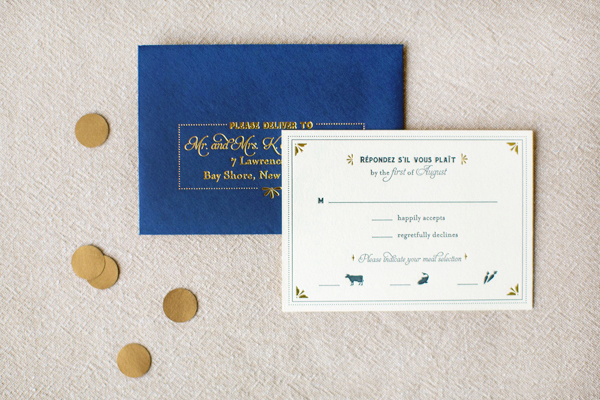
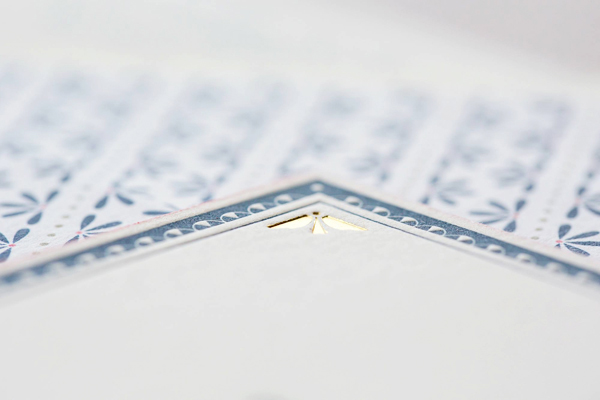
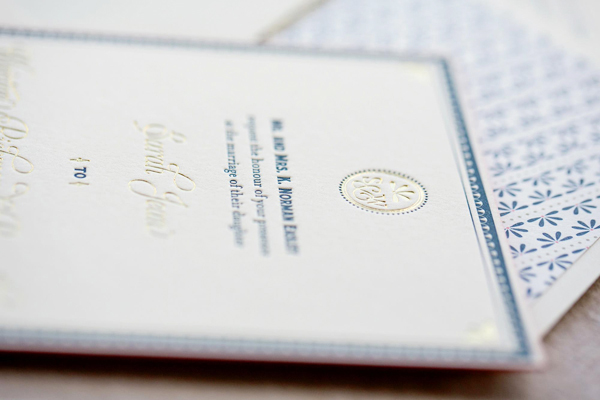
Navy and gold is such a classic color combination – but add coral and it instantly becomes modern! Jenny C Design created these invitations for a wedding at an historic casino-turned-museum in upstate New York. The invitations feature details inspired by the museum’s architecture along with bright pops of coral. Jenny even incorporated some sophisticated casino-inspired details into the day-of wedding stationery!

Blue-Gold-Letterpress-Wedding-Invitations-JennyC-Design

From Jenny: Sarah and Winston’s wedding took place in Saratoga Springs, New York. They both lived in NYC, and about 95% of their guests would be from out of town. They really wanted their wedding invitations to evoke the feeling of their venue – the Historic Canfield Casino – and what fun the entire wedding weekend would be for everyone!

Blue-Gold-Letterpress-Wedding-Invitations-JennyC-Design2bBlue-Gold-Letterpress-Wedding-Invitations-JennyC-Design2a

Blue-Gold-Letterpress-Wedding-Invitations-JennyC-Design3

Blue-Gold-Letterpress-Wedding-Invitations-JennyC-Design6

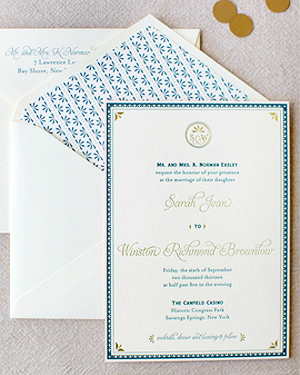
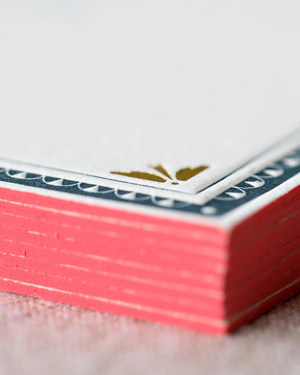
Sarah and Winston were inspired by the history and architecture of the Canfield Casino (once a casino, now the city’s preeminent event space and historical museum). The border on the letterpress invitation and certain design elements throughout the suite are reminiscent of the those architectural details.

Blue-Gold-Letterpress-Wedding-Invitations-JennyC-Design5

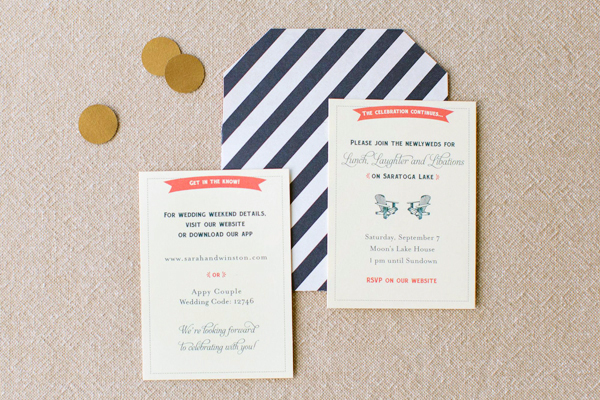
The envelope liner and coral edging adds a perfect pop of color! Mini information cards about the rest of the weekend were placed in a fun navy stripe and coral envelope.

Blue-Gold-Letterpress-Wedding-Invitations-JennyC-Design4

Blue-Gold-Letterpress-Wedding-Invitations-JennyC-Design7

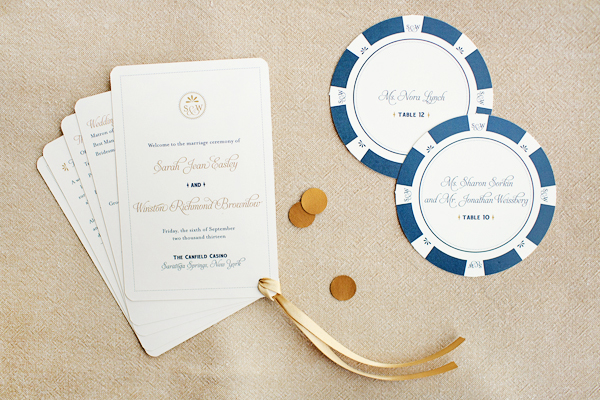
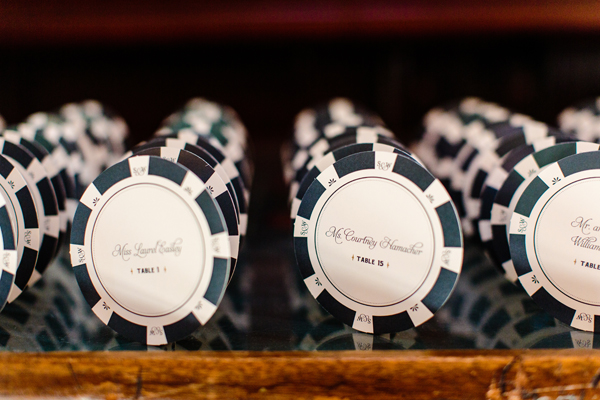
We continued the casino inspired theme, in an elegant way, into their day-of stationery items. Sarah and Winston’s ceremony program was shaped liked a deck of cards. On the back was a custom playing card design, with their monogram and design elements from the invitation incorporated into it. Their escort cards were shaped and designed to look like poker chips, displayed with dice glued on the back of each card so they would stand.

Blue-Gold-Letterpress-Wedding-Invitations-JennyC-Design8

Photo Credit: Tracey Buyce Photography

Thanks Jenny!

Check out the Designer Rolodex for more tal­ented wed­ding invi­ta­tion design­ers and the real invi­ta­tions gallery for more wedding invitation ideas!

Photo Credits: Elario Photography, except where noted