{happy weekend!}

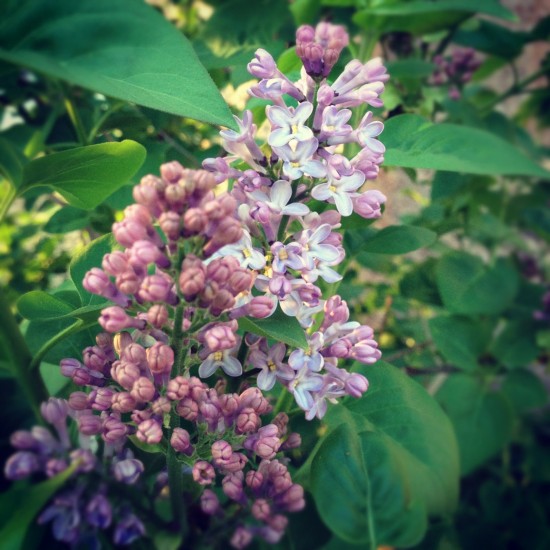
I apologize to those of you who might be tired of hearing me blather on about spring in DC, but it really is just so beautiful this time of year I can’t help it!  My husband and I went for a walk in our neighborhood yesterday evening and I spotted some lilacs just starting to bloom, and earlier in the day I spotted some wisteria!  It’s early in the season for a lot of these flowers, but apparently everything is going to be early this year due to the relatively mild winter and I’m not exactly complaining.  I’m just trying to soak as much of it in while it lasts.  One of my favorite things to do during lilac season is to visit the Mount Vernon estate; it’s covered in the gorgeous (and fragrant) blossoms!  I’ll have to plan a trip soon, but in the meantime…

…a few links for your weekend!

This week on Oh So Beautiful Paper:

A big welcome to the newest Designer Rolodex members!

As usual, we have a fun cocktail coming up for you this afternoon, so check back a bit later for the recipe!  Oh, and speaking of cocktails – one of our recipes, the Oaxacan Sunrise, is a competition finalist!  If you’re over 21 and have a moment, we’d love it if you could vote for us!  Voting ends later today, but you can vote right here.  Thank you so much!

I hope you all have a wonderful weekend, and I’ll see you back here on Monday!  xoxo

Photo by me (via Instagram), taken at the Congressional Cemetery yesterday evening

DIY Rubber Stamp Pattern Envelope Liners

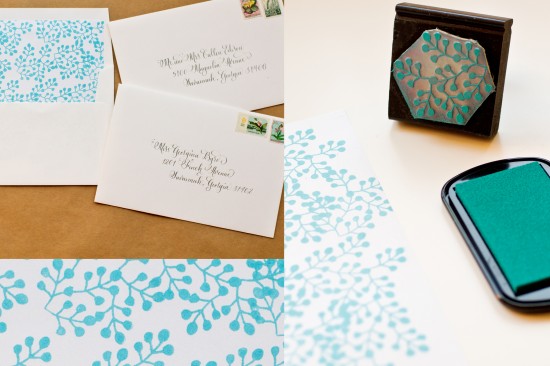
It’s the ladies of Anti­quaria, back with another cre­ative DIY project for you!  Today they’re sharing a fun tutorial on how to make DIY envelope liners using rubber stamps!

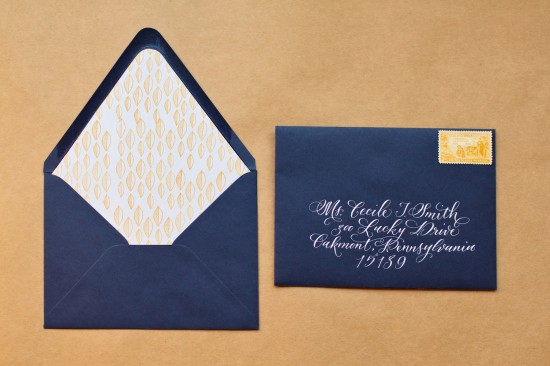
The finishing touches make your stationery special and unique.  It’s the little things – like vintage postage, twine, washi tape, calligraphy and envelope liners – that can turn a basic invitation, card or letter into a show stopper.  At Antiquaria, we love envelope liners… but they can be mighty expensive, so we figured out a way to get the look of decorative paper on a shoestring budget.  Plus it’s super easy!

DIY Tutorial: Rubber Stamp Envelope Liners

DIY Tutorial: Rubber Stamp Envelope Liners

DIY Tutorial: Rubber Stamp Envelope Liners

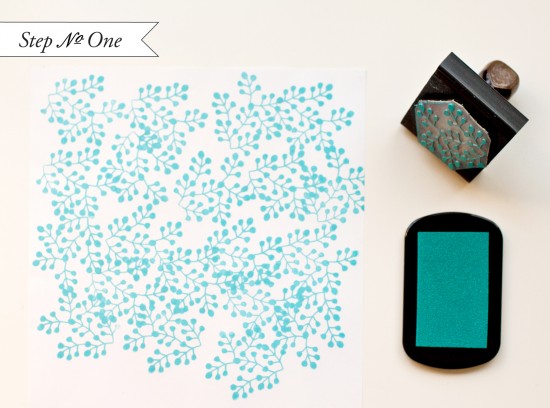
Step 1: Lay your sheet of text weight paper out on a hard surface.  Choose your stamp (we used our Mod Fern Pattern stamp), and ink it well.  Print your pattern stamp in an orderly fashion on the paper, making sure you stamp enough area so that the images will bleed off once the liner is cut.  In general, you will not want to overlap the stamped images (but don’t worry if they do).

DIY Tutorial: Rubber Stamp Envelope Liners

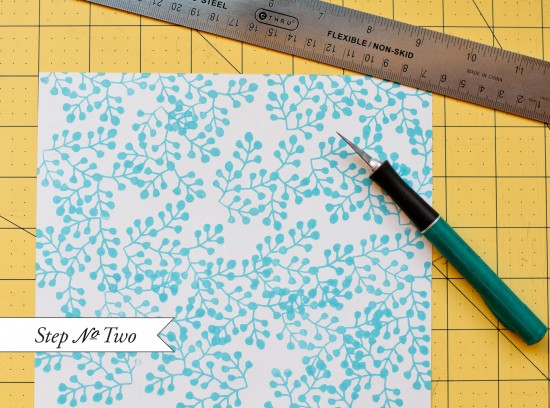
Step 2: Cutting your liner… the technique will all depend on what style of envelope you choose.  You can find envelope liner template kits at Paper Source to fit their envelopes.  To use these, trace the template and cut along the line.  If you’re using square envelopes, you can have your local print shop cut paper down to your envelope specifications or draw out the dimensions and cut your own!

DIY Tutorial: Rubber Stamp Envelope Liners

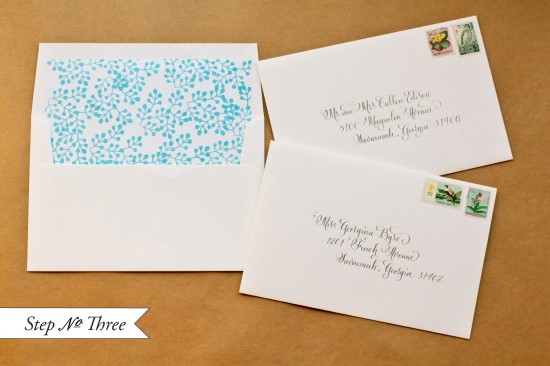
Step 3:  To insert your liner,  place a line of double stick tape or stick glue across the top (or around the top triangle), slide them into position and press to secure.  Fold at the crease with a bone folder to get a nice, crisp edge.

DIY Tutorial: Rubber Stamp Envelope Liners

Materials

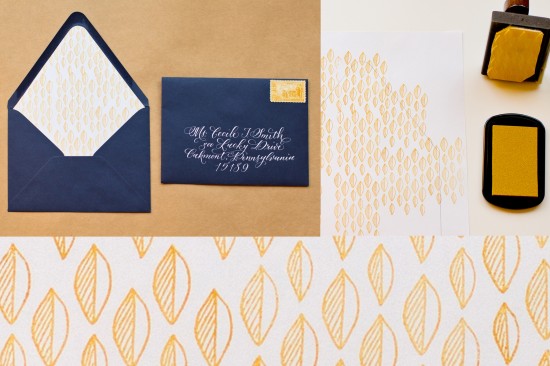
Pattern Stamps – we used Mod Fern Pattern stamp (in turquoise), Repeat Leave Pattern Stamp (in ochre)

Stamp Pad

Envelopes

Double Stick Tape or Stick Glue

Bone Folder

Anti­quaria is a mem­ber of the Designer Rolodex – you can see more of their beau­ti­ful work right here!

Photo Credits: Intertwyned for Antiquaria

Calligraphy Inspiration: Neither Snow

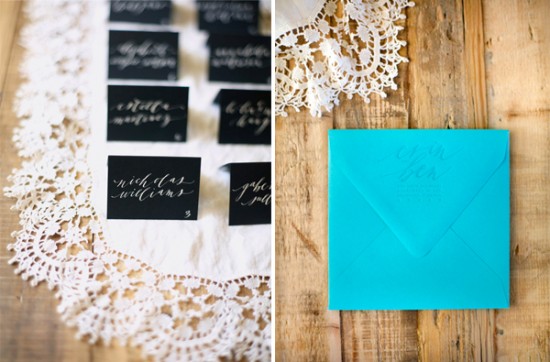
I have been eagerly awaiting to share some new work of this month’s calligrapher with you.  As one of my top calligraphy crushes, I love to check out Mara Zepeda’s blog and swoon over her client work.  Mara started Neither Snow, a calligraphy studio, in 2009.  Over the last three years she’s had the pleasure of working on tattoos and commercial identities, along with collaborators, designers and countless couples.  In September 2012, Mara will be moving to Florence, Italy, where she’ll spend the year exploring how her calligraphy can be translated onto different surfaces for weddings, events, installations, displays and custom projects. Julie

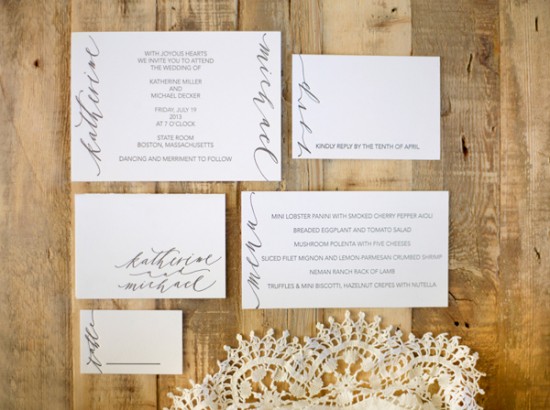
Neither Snow invitation suite

Neither Snow Calligraphy

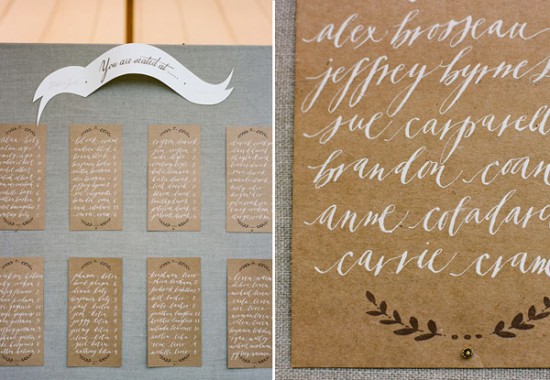
Clean and simple yet highly expressive, Mara’s calligraphy is often all that’s required to create beautiful details for your wedding and evoke a sense of whimsy.

Neither Snow seating chart

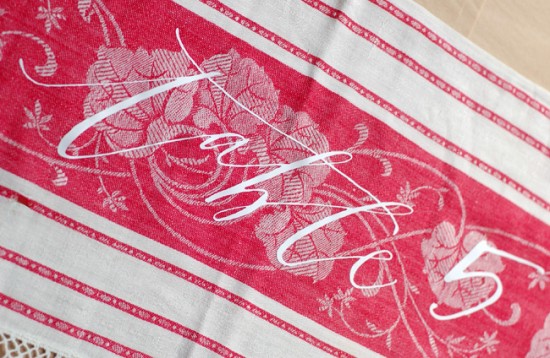
Neither Snow detail - decal on fabric

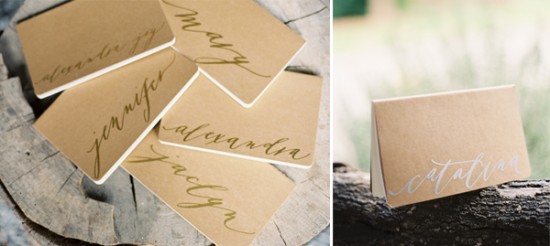
Neither Snow decal notebooks

A glimpse into Neither Snow’s future; decals, fabric, laser cut, glass etching, ceramic, screenprinting, embossing and foil are just some of the materials and processes Mara will be experimenting with during her time in Florence.

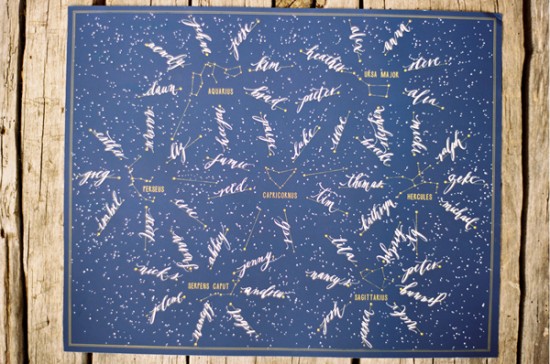
Neither Snow constellations

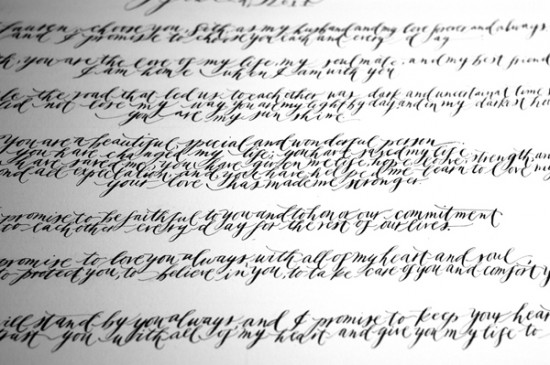
Mara creates some truly gorgeous pieces, like this custom seating “star” chart.  For this wedding, she worked with the couple, Mr. Boddington’s Studio and the wedding designer/stylist Jolene Sullivan for nearly a year.  Below is a wonderful detail of her work and a couple’s wedding vows.

Neither Snow detail - vows

I can’t wait to see what’s in store for Neither Snow with a year abroad and medium explorations. You’ll be pleased to know Mara will still be doing client work, and looks forward to hearing from those with wildly creative and grand visions of how to employ the written word on just about any surface they can dream up (in addition to paper, of course!).

Photo and Printer Credits: image no. 1 printer: Paisley Tree Press and no. 2 (right) printer: Evince Design, both shot by Jose Villa; image no. 3 shot by  A. Bryan Johnson Photo; image no. 4 & 6 shot by Neither Snow; image no. 5 by Rylee Hitchner Photography and  Joy Thigpen; image no. 7 shot by Tec Petaja

Gray + Yellow Folk Art Baby Shower Invitations

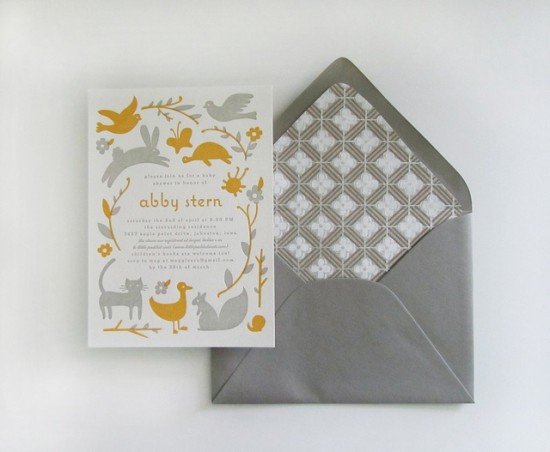
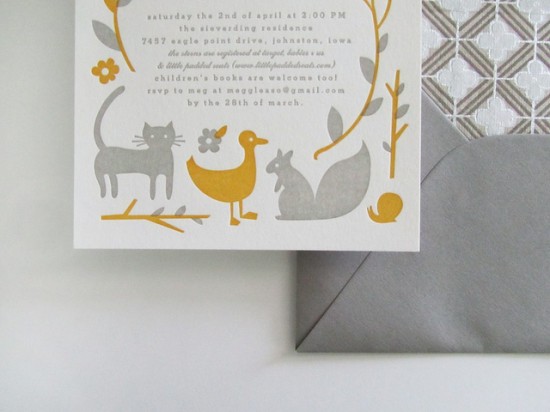
I recently stumbled across these adorable letterpress baby shower invitations from Moglea and couldn’t resist sharing them here on OSBP.  Meg from Moglea created and letterpress printed the two-color design, pairing the invitations with gray envelopes and patterned envelope liners.  I love the folk art vibe of the animal and floral illustrations, not to mention the yellow and gray color palette (still one of my favorites).

Folk-Art-Animal-Baby-Shower-Invitations-Moglea

Folk-Art-Animal-Baby-Shower-Invitations-Moglea

So cute!  You can check out more from Moglea right here!

Photo Credits: Moglea, found via Melanie

Stephanie + Trey’s Tropical Passport Save the Dates

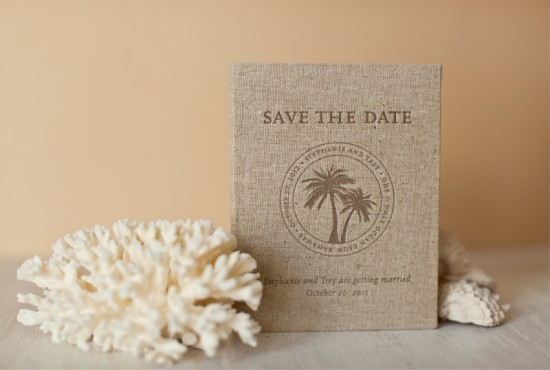
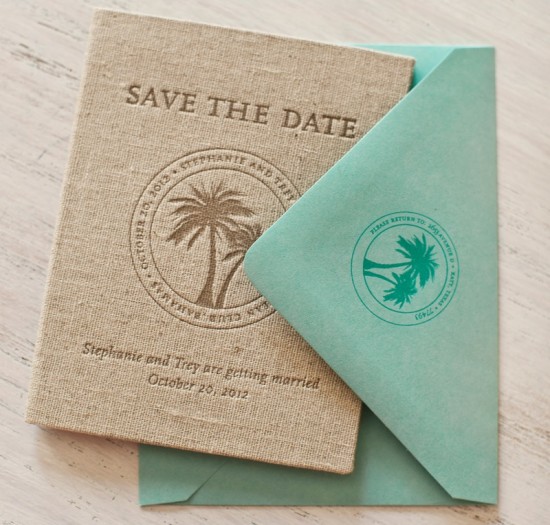
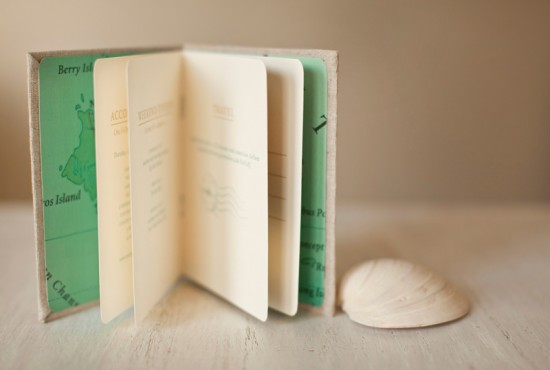
I’ve been dreaming of a tropical beach vacation for months, and these save the dates from Melissa and Amy of Atheneum Creative for a wedding in the Bahamas are only making me even more anxious to get myself to a warm and sunny beach asap.  Melissa and Amy were inspired by the destination wedding to create a passport-style save the date with a unique linen cover letterpress printed by the ladies of Sideshow Press.  So pretty!

From Melissa + Amy: Stephanie and Trey are getting married in the Bahamas and wanted to play to the travel theme as much as possible… so what better way than to start with a passport save the date! 

We are seen so many passport designs and really wanted to give Stephanie and Trey something a little more unique.  We letterpress printed on linen for the cover and digitally printed the inside text on a soft textured paper.  We incorporated a map of the Bahamas along with travel and weekend information.

Thanks Melissa + Amy!

Design: Atheneum Creative

Letterpress Printing: Sideshow Press

Check out the Designer Rolodex for more tal­ented wed­ding invi­ta­tion design­ers and the real invi­ta­tions gallery for more beau­ti­ful cus­tom invitations!

Photo Credits: Chelsea Davis Photography