Julie + Bo’s Hand Painted Wedding Invitations

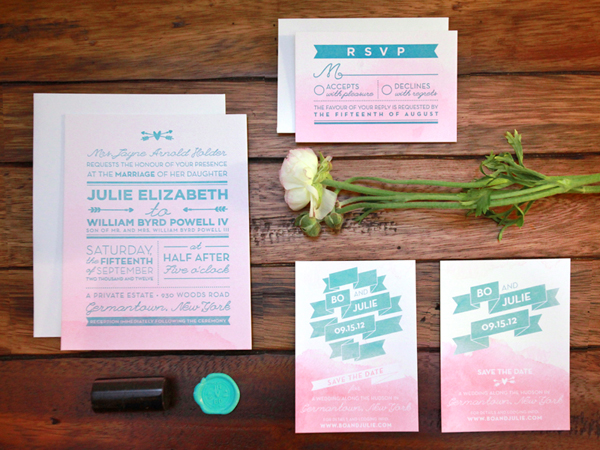
Happy Monday everyone! We’re starting the week with some beautiful wedding invitations from Meghan of And Here We Are! Inspired by the bride’s love of all things ombré, Meghan combined watercolor (hand painted on more than 200 sheets of paper!) and letterpress printing into a seriously gorgeous wedding invitation.

Pink-Aqua-Ombre-Wedding-Invitations-And-Here-We-Are2

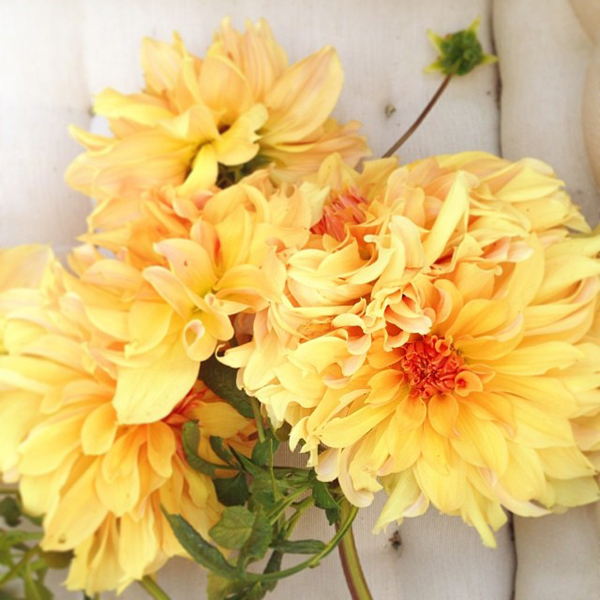
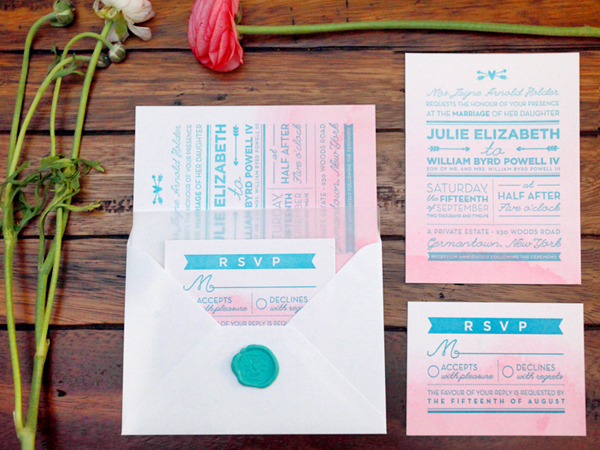
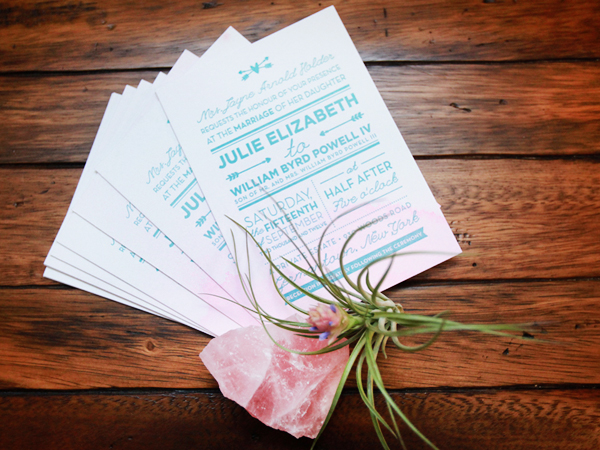
From Meghan: Julie and Bo’s upstate New York wedding had a bohemian, outdoorsy, and slightly vintage vibe with a color scheme of peach and robin’s egg blue. It was really important that their invitations felt unique and hand made, so when Julie showed me her Pinterest board full of ombrés, I knew I just had to try a hand-painted watercolor ombre paper with blue letterpress printed elements.

Pink-Aqua-Ombre-Wedding-Invitations-And-Here-We-Are

I painted over 200 individual pages of extra-thick cotton paper, then letterpress printed and trimmed them to size. The invitation was inspired by a mix of vintage and modern design, with some hand drawn components. Elements like the ribbon motif, the crossed-arrow heart, and 1920s-inspired double lines and angles, along with a mix of script and sans-serif typefaces came together to form the final design.

Pink-Aqua-Ombre-Wedding-Invitations-And-Here-We-Are4

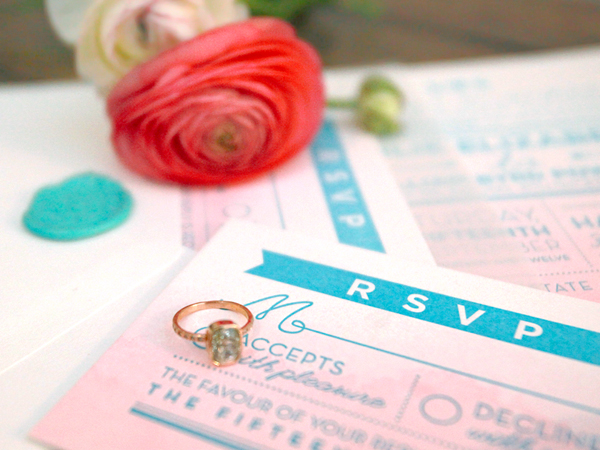
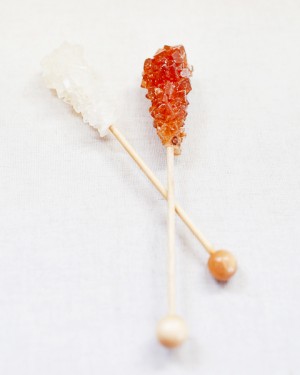
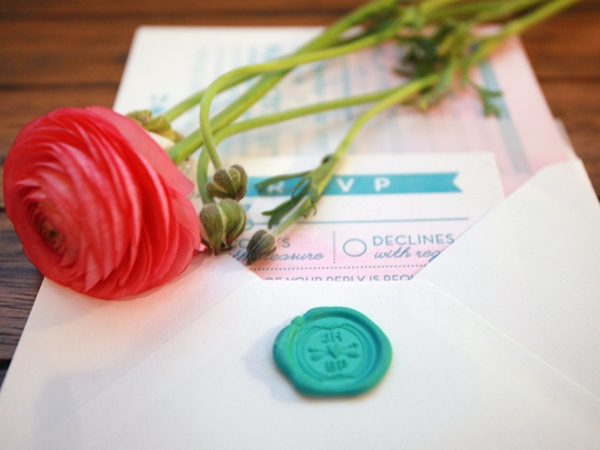
I also created a Julie and Bo ‘logomark,’ which we used on the save the dates, programs and wedding website, and also translated into a rubber stamp and wax seal. That artwork was later used on matchbooks, favors and cups at the wedding.

Pink-Aqua-Ombre-Wedding-Invitations-And-Here-We-Are3

Pink-Aqua-Ombre-Wedding-Invitations-And-Here-We-Are6

Thanks Meghan!

Check out the Designer Rolodex for more tal­ented wed­ding invi­ta­tion design­ers and the real invi­ta­tions gallery for more wedding invitation ideas!

Photo Credits: Julie Holder

Friday Happy Hour: The Brandy Crusta

It has been quite a long while since we featured a truly classic cocktail. Not a new creation of ours, not a modern cocktail, not our own take on something older. Something genuinely old, and genuinely good, to have stood the test of time. So here’s the Brandy Crusta, just that sort of drink. – Andrew

OSBP-Signature-Cocktail-Recipe-The-Brandy-Crusta-41

OSBP-Signature-Cocktail-Recipe-Card-The-Brandy-Crusta-Shauna-Lynn-Illustration

Illustration by Shauna Lynn for Oh So Beautiful Paper

The Brandy Crusta

2 oz Brandy
1/2 oz Orange Liqueur
1/2 oz Lemon Juice
1 Dash Simple Syrup
2 Dashes Aromatic Bitters
Lemon Peel and Sugar to Garnish

Cut a lemon in half lengthwise and remove the ends. Carefully remove the peel from one half (more on this later). Rub the rim of the glass with the lemon, then roll the glass in sugar to frost the rim. Curl the lemon peel in the glass and set aside.

Combine the brandy, orange liqueur, a squeeze of fresh lemon juice, simple syrup, and bitters, then shake well with ice. Strain into the glass and enjoy!

OSBP-Signature-Cocktail-Recipe-The-Brandy-Crusta-38

The Brandy Crusta is rich and oaky from the brandy, a bit sweet from the orange liqueur, and richly citrusy. Not just from the fresh lemon juice, which adds a tart accent, but also from all that lemon peel in the glass, which lends the drink a delicious scent of lemon oil. Plus just a bit of bitterness from the pith. It’s complex but smooth.

OSBP-Signature-Cocktail-Recipe-The-Brandy-Crusta-35 OSBP-Signature-Cocktail-Recipe-The-Brandy-Crusta-43

So, about that peel. There are two ways you can go about this. The easier, saner way is to take a sharp vegetable peeler to a whole lemon. Turning the lemon as you go, cut a long, spiraling piece of peel that you can curl in the glass. The much harder, and much less sane, method is this: take a sharp knife to one half of the lemon and carefully, painstakingly remove the peel from the lemon, taking care not to cut yourself as your hands get slippery from lemon juice. Then, once you have a single piece of peel, scrape off as much of the bitter white pith as you can. The advantage of this latter method is the beautiful, solid peel that you can curl around your glass. The disadvantage is that it is a pain in the ass. So go with the first, easier method unless you’re really trying to impress someone. This is not, in other words, a drink to serve to a bunch of party guests.

OSBP-Signature-Cocktail-Recipe-The-Brandy-Crusta-24

Like I said, this is an old drink. It dates back to the 1850s, invented by Joseph Santini at his City Exchange bar in New Orleans. (He also made Whiskey and Gin Crustas, but the Brandy Crusta is the version that has survived through time.) This must have been a productive time for New Orleans bartenders, because this was around the same time they invented such other amazing cocktails as the Sazerac. I’m guessing a good time was had by all.

Photo Credits: Nole Garey for Oh So Beautiful Paper

Happy Weekend!

Happy Friday everyone! Do you all have fun plans for this beautiful fall weekend? We’re heading to upstate New York to visit my husband’s family for a few pre-Halloween festivities. It’s a long drive, but I know Sophie will be happy to see her grandparents and cousins! I’m heading out to make our final preparations for the trip, but in the meantime…

OSBP-Fall-Dahlias

Photo by me via Instagram

…a few links for your weekend!

This week on Oh So Beautiful Paper:

Finally, I made a little announcement on Instagram last week that I thought I’d share here as well. I’m looking to add some DIY contributors to the OSBP team! If you’re interested in contributing, click here for more details on how to apply!

Check back soon for this week’s cocktail! I hope you all have a wonderful weekend, and I’ll see you back here next week! xoxo

Calligraphy Inspiration: Crystal Kluge

This month’s calligraphy inspiration comes from the talented Crystal Kluge. With a client list that includes Nordstrom, Target, and Google, Crystal has a wonderful portfolio of work that’s sure to please. Never stuffy or dull, her fanciful and dynamic style is perfect for those who have a little skip in their step. – Julie

Calligraphy Inspiration: Crystal Kluge via Oh So Beautiful Paper

Calligraphy Inspiration: Crystal Kluge via Oh So Beautiful Paper

I really enjoy the added flourishes in Crystal’s calligraphy; a great use of space and it transforms letters into art.

Calligraphy Inspiration: Crystal Kluge via Oh So Beautiful Paper

Calligraphy Inspiration: Crystal Kluge via Oh So Beautiful Paper

As whimsical and playful as it may seem, there’s also a sense of ease in the flow of her styles. They’re fun but not frilly.

Calligraphy Inspiration: Crystal Kluge via Oh So Beautiful Paper

Calligraphy Inspiration: Crystal Kluge via Oh So Beautiful Paper

For more peeks at Crystal’s projects, be sure to stop by her blog. You can also find her writing in jewelry form at Brevity. as well as in font form over at tart workshop!

Photo Credits: 3 l+r via Hello!Lucky, 6 left Larry Callahan, all others via Crystal Kluge

DIY Tutorial: Rubber Stamp Mountain-Inspired Save the Dates

Fall is officially here and we couldn’t be more thrilled! Today’s gorgeous save the date tutorial is perfect for the season with its shades of brown and mountain scenery. We can’t seem to get enough of folded cards lately (see our previous designs here and here). They’re perfect for destination weddings since they allow you to incorporate more information without having to have additional cards. – Bailey and Emma of Antiquaria

DIY Tutorial: Rubber Stamp Mountain-Inspired Save the Dates

Step One: Download the mountain folded card design (see bottom of post for download link) and print it out on a 11″ x 17″ piece of card stock. Next, trim the card down at the crop marks to reach the final size (16″ x 5 1/4″). We used a self healing mat, metal ruler and craft knife for this step, but if  you plan on cutting many cards, we recommend taking them to a local printer to have them cut them all at once with an industrial cutter.

DIY Tutorial: Rubber Stamp Mountain-Inspired Save the Dates

Step Two: Score your 16″ x 5 1/4″ every four inches (three scores total, at the 4″, 8″ and 12″ mark). Don’t fold it yet!

DIY Tutorial: Rubber Stamp Mountain-Inspired Save the Dates

Step Three: Gather all of your stamps and make certain that you have a stamping plan before you dive in. The stamps we used for this design, from left to right are our “Banner” Names Monogram, Vintage Label Save the Date, Calligraphy Accent Accommodations Card and our Calligraphy Accent Website Card. Once you have your plan, you will ink each stamp and align it into its appropriate space. For a step-by-step video tutorial about the stamp printing process go here. Once they’re dry, fold your cards at each score mark. Using a bone folder can help you get lovely, crisp, folds!

DIY Tutorial: Rubber Stamp Mountain-Inspired Save the Dates

Step Four: Next, you will stamp your return address on the back flap of your A2 kraft envelope. We used our Calligraphy Ampersand Return Address Stamp with chestnut  ink for this design. Once you have the return address stamped on your envelopes, all that’s left is addressing and adding postage!

Materials

Mountain Scene Illustration: Download available here **Note: digital download is for personal use only**

11″ x 17″ Card Stock

Self Healing Mat, Craft Knife and Metal Ruler (or you can take your prints to a professional printer to have cut)

Scoreboard

“Banners” Name Monogram Stamp

Vintage Label Save the Date Stamp

Calligraphy Accent Accommodations Card Stamp

Calligraphy Accent Website Card Stamp

Calligraphy Ampersand Return Address Stamp

Stamp Pad in Chestnut

Bone Folder

A2 Envelopes in Paper Bag

Anti­quaria is a mem­ber of the Designer Rolodex – you can see more of their beau­ti­ful work right here or visit the real save the dates gallery for more save the date ideas!

Photo Credits: Antiquaria for Oh So Beautiful Paper