Nole has been working with the fine folks at Red Barn Mercantile to help curate their holiday card collection this season. Along the way, someone suggested a signature cocktail for their holiday unveiling party (more on that soon!). So here it is: the Raised in a Red Barn, and we’re pretty proud of this recipe. Give it a try and enjoy fall in a glass. – Andrew
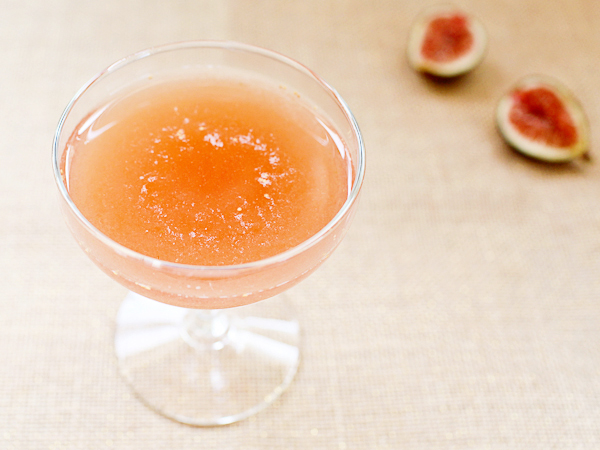
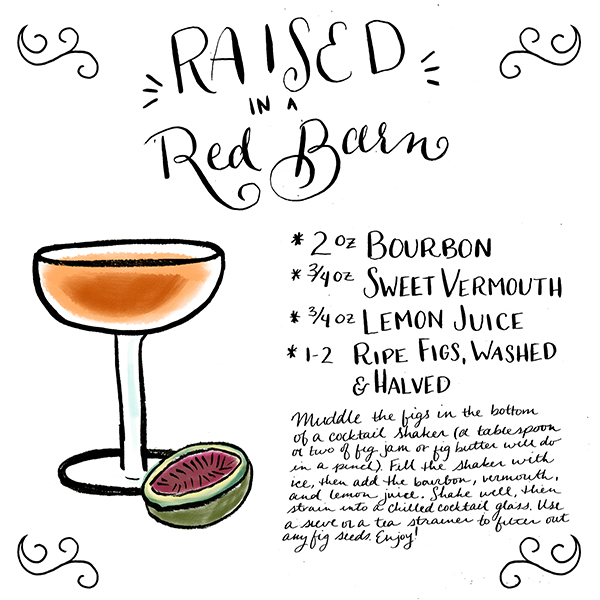
Illustration by Shauna Lynn for Oh So Beautiful Paper
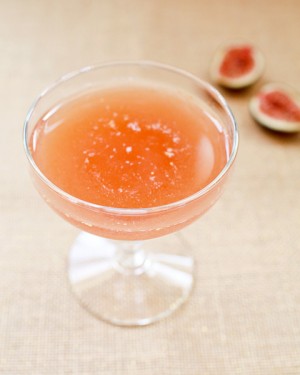
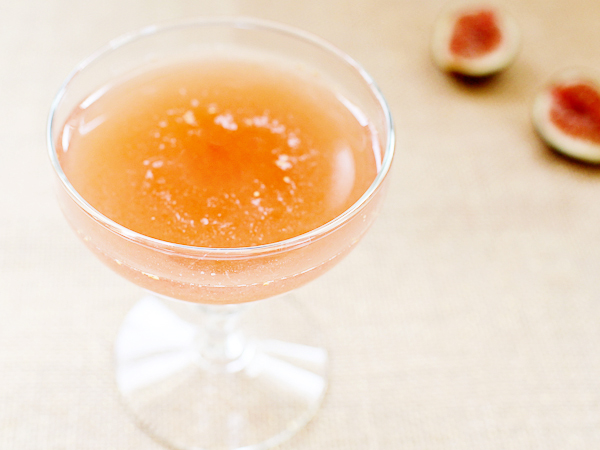
Raised in a Red Barn
2 oz Bourbon
3/4 oz Sweet Vermouth
3/4 oz Lemon Juice
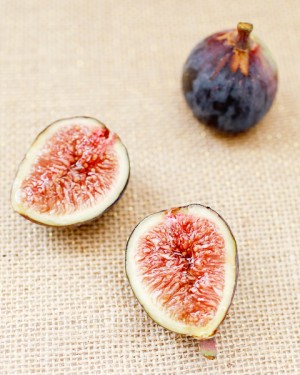
1-2 Ripe Figs, Washed and Halved
Muddle the figs in the bottom of a cocktail shaker (a tablespoon or two of fig jam or fig butter will do in a pinch). Fill the shaker with ice, then add the bourbon, vermouth, and lemon juice. Shake well, then strain into a chilled cocktail glass – use a sieve or a tea strainer to filter out any fig seeds or bits – and enjoy!
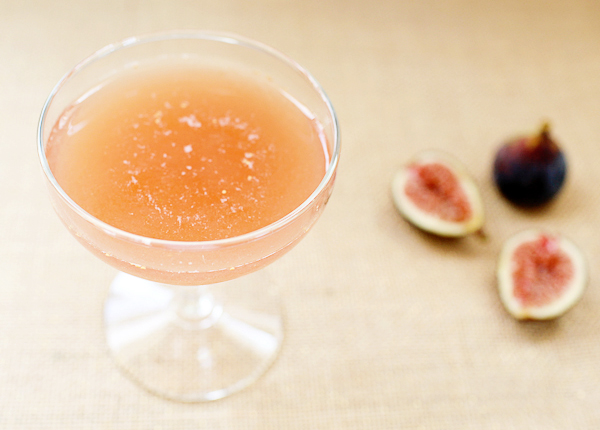
This was one of the first (and one of the best!) recipes I came up with entirely on my own. It’s something like the love child of a Manhattan and a Sour, but the figs…the figs!  Those figs add a unique sweet fruitiness that rounds out the sharpness of the spirits and the tartness of the lemon juice. Plus, the whole drinks ends up with a tawny color that reminds me of nothing more than the leaves changing all around us during this glorious fall. Just make sure your figs are ripe and juicy; I recommend erring on the side of more fig to make sure the drink isn’t too tart from the lemon.
I love this drink, but it teaches me something of a humbling lesson about cocktails. When I first made it, I didn’t have fresh figs. I had Trader Joe’s Fig Butter sitting in the fridge, unused and unloved and looking for a purpose. So, in a wild experiment, I threw it into a cocktail and… it worked. It worked! Â It was great! Lesson learned: sometimes, picking random ingredients from the back of a refrigerator shelf is the best way to make an amazing drink.
The flip side is: I have made many, many terrible drinks by experimenting this way, and have had to dump plenty of good booze down the drain because I made wildly bad calls about ingredients and flavors and ended up with completely undrinkable drinks. But the only way you’ll know what works is if you try. Happy experimenting!
Speaking of trying: have you ever tried one of our cocktail recipes? If so, tell us about it in the comments! Or Instagram it, and share it with us with via #osbpcocktails! (We’re @liquorary and @beautifulpaper)
Photo Credits: Nole Garey for Oh So Beautiful Paper
 Â


 Â
 Â