Wedding Invitation 101, Part 5: Invitation Addressing & Mailing

Wedding Invitation 101: Invitation Addressing and Mailing / Fine Day Press for Oh So Beautiful Paper

Hi guys, Ashley from Fine Day Press here. We’ve finally come to the last post in our Invitation 101 series. Thank you for reading and learning along with me! Today’s post covers the last steps in getting your invitations out the door: invitation addressing and mailing.

Be sure to check out our previous posts:
• Where to Start
• When to Send
• Printing Methods
• Wording & Etiquette

Addressing and Mailing

You’ve spent countless hours picking out just the right invitation suite, and possibly months agonizing over every little detail from the wording to the printing. Take a few moments to plan using our invitation addressing and mailing tips below; I promise it will be well worth the effort!

Plan Ahead

First, leave some time to gather and organize your address list. You’ll want to provide your stationer (or calligrapher, or printer) with a clear, detailed list of names and addresses that includes appropriate titles like “Mr. & Mrs.” or “Dr.”  It’s commonplace to spell out in full the address line and state, for example, “123 Smith Street; New York, New York 10010”.  Additionally, if children under 18 are invited to the wedding, list their names individually on the line following the parents’ names — unless you are using inner envelopes (increasingly rare these days), in which case the names of any children should be listed here and not on the outside. Adult children should receive their own invitation.

Secondly, make sure you have extra envelopes in case of any addressing errors. About 10% over is a good rule of thumb, and many stationers (including Fine Day Press) will automatically include some extras with your order. If using a calligrapher, be sure to ask if more than that are needed. You’ll also want a few extra invitations on hand for last-minute guests, and just in case one gets lost in the mail (it happens).

Methods of Addressing

Traditionally, invitations are hand-addressed, usually by a professional calligrapher. There’s nothing quite like receiving a calligraphed envelope in your mailbox, and it’s most definitely high up on my happy list. And if it‘s in your budget, go for it! Check with your calligrapher to confirm how much time they’ll need to address your envelopes, but at minimum you’ll want to factor around 2-3 weeks for envelope calligraphy into your invitation mailing timeline.

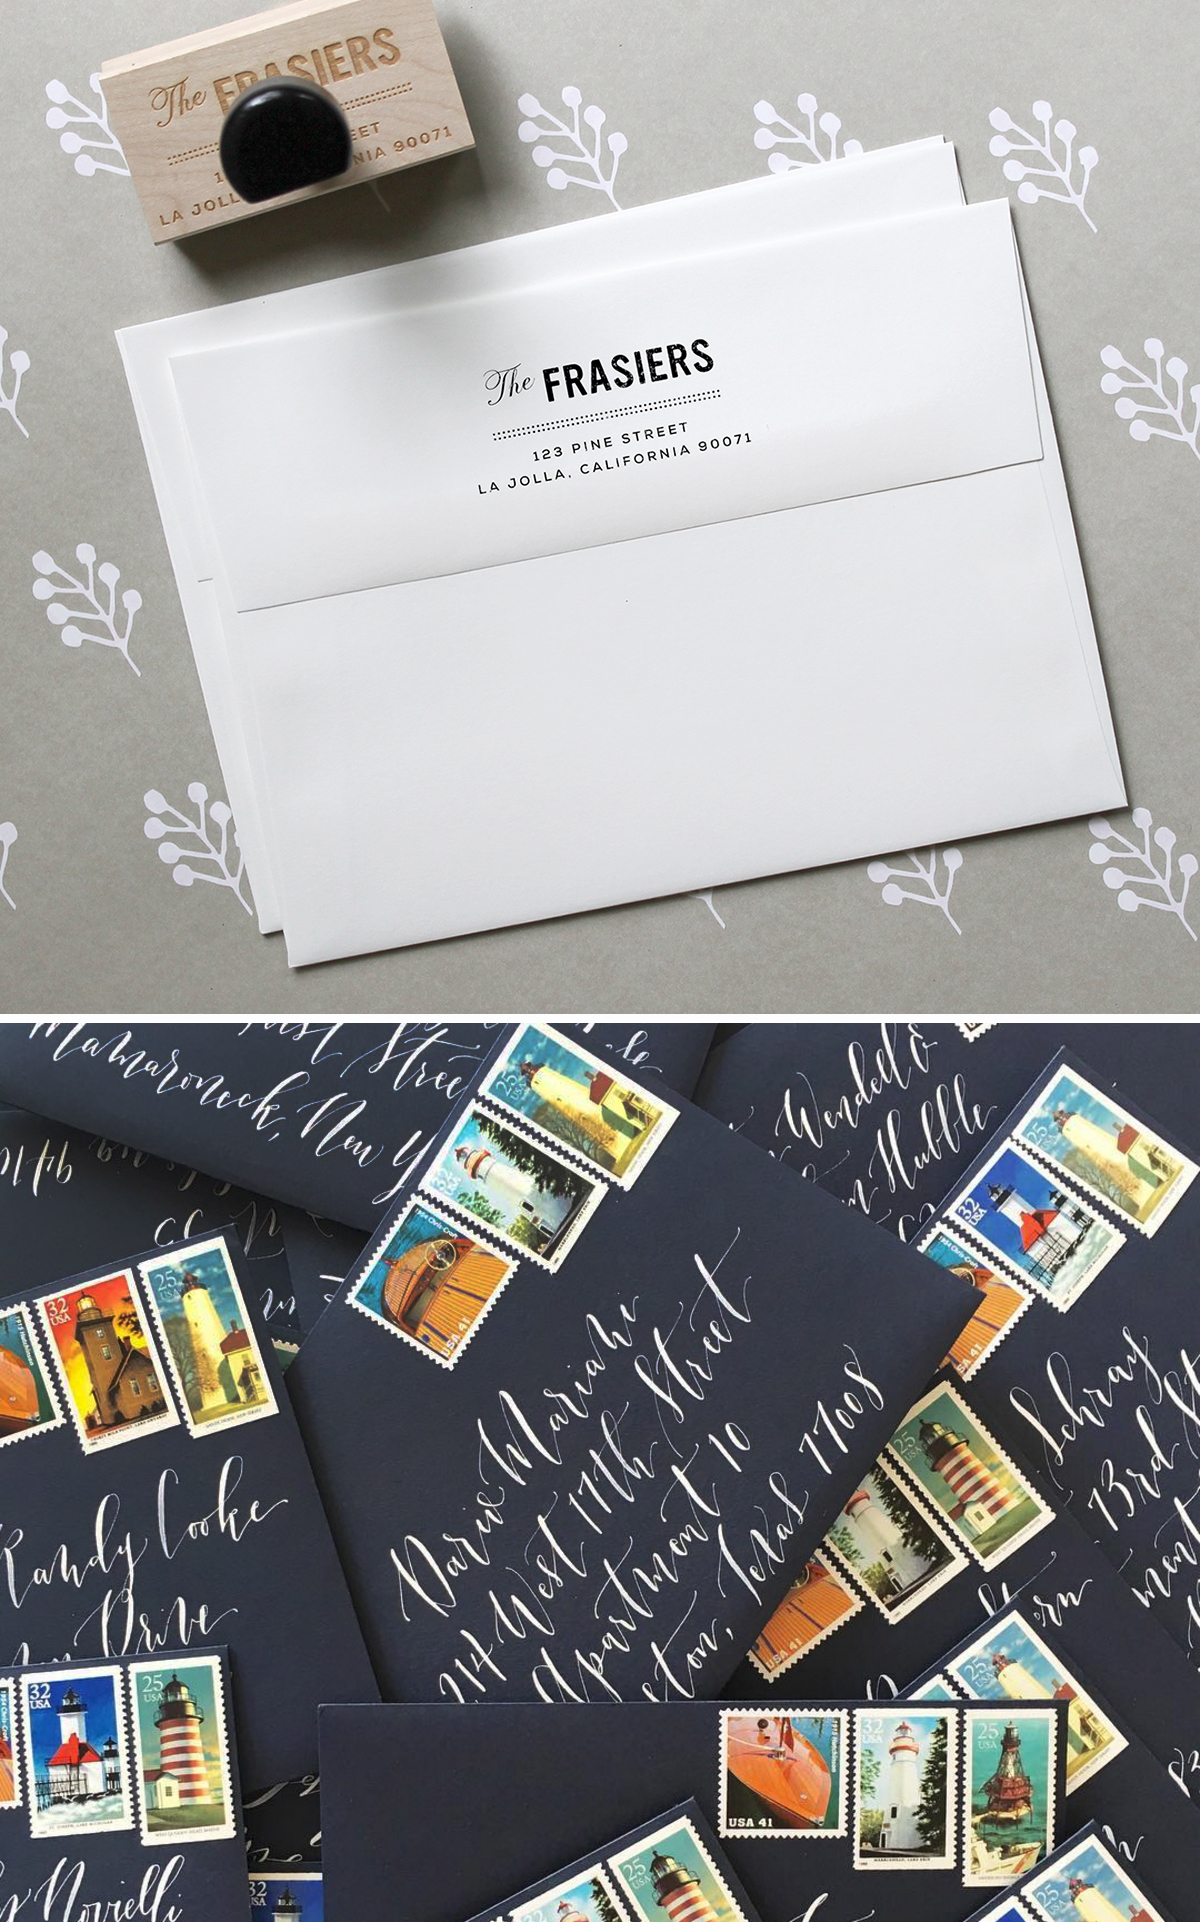
If you are hand-addressing the envelopes yourself, a great option for the return address is to have a custom stamp created. We‘ve created many of these for our clients over the years. Provided you aren’t moving right after the wedding, the stamp can be used again on thank you notes, holiday cards, and other future mailings. Alternately, with the convenience and quality of digital printing, many stationers will print guest addresses directly onto the envelopes. You can even choose a calligraphy-style font.
Wedding Invitation 101: Invitation Addressing and Mailing / Fine Day Press for Oh So Beautiful Paper

Above: Custom return address stamp by Fine Day Press; calligraphed envelopes by Blue Eye Brown Eye

Adding Postage

Note the size of your invitation and compare it to the post office standard sizes. Square invitations require extra postage; the same goes for double-thick stock. If you’ve got extras like a reception card, list of wedding events, map and directions card, ribbons, bows, bells or whistles, that can push your overall weight up beyond the first class stamp zone. You’ll want to take a complete envelope suite to the post office for weighing. They can tell you the exact postage amount you’ll need, and help you find a stamp (or stamps) to match. Don’t forget to take into account any international guests. When addressing, put these in a separate pile and have the post office determine the correct postage for each.

Beautiful postage is the last thoughtful touch to complete your invitation. USPS has definitely stepped up their stamp design game in the last few years, so you can easily achieve a beautiful envelope just by browsing the available stamp selections online. The post office also usually has a few different love-themed options, like these Louise Fili stunners. Custom stamps can be created to match your invitation design (for example, via zazzle.com), from personalized stamps with a custom monogram to vintage-inspired designs. Vintage postage is a beautiful detail for wedding invitation envelopes, but can be difficult to find and sometimes costs more than the face value of the stamp – you can read all about finding vintage postage here. And remember that your reply envelopes will also need a first class stamp – don’t leave your guests hunting for postage to send their reply.

Let ‘em fly

You’ve done your homework. Time to send those beautiful babies out into the world, and wait for the excitement that follows!

One last pro tip: Request hand-canceling. There can be an extra charge for this beyond 50 pieces, but it’s worth it to not have that bummer of a barcode printed along the bottom of all of your gorgeous envelopes.

Happy Mailing!

Wedding Invitation 101, Part 2: Timing is Everything (aka When to Send Wedding Invitations)

Invitation-101-Timing-Is-Everything-Title

Hi guys, Ashley from Fine Day Press here! Welcome back to our Invitation 101 series, all about wedding invitations. Today’s post is all about timing: when to gather inspiration, when to order your wedding invitations and save the dates, when to send wedding invitations, and more!

Wedding planning the one time in life where we combine an incredibly joyful event with the complicated logistics of running a small army! I recommend keeping the invitation process stress-free by allowing yourself lots of time. This is also super helpful for your guests so they can make travel plans and other necessary arrangements to be there on your big day.


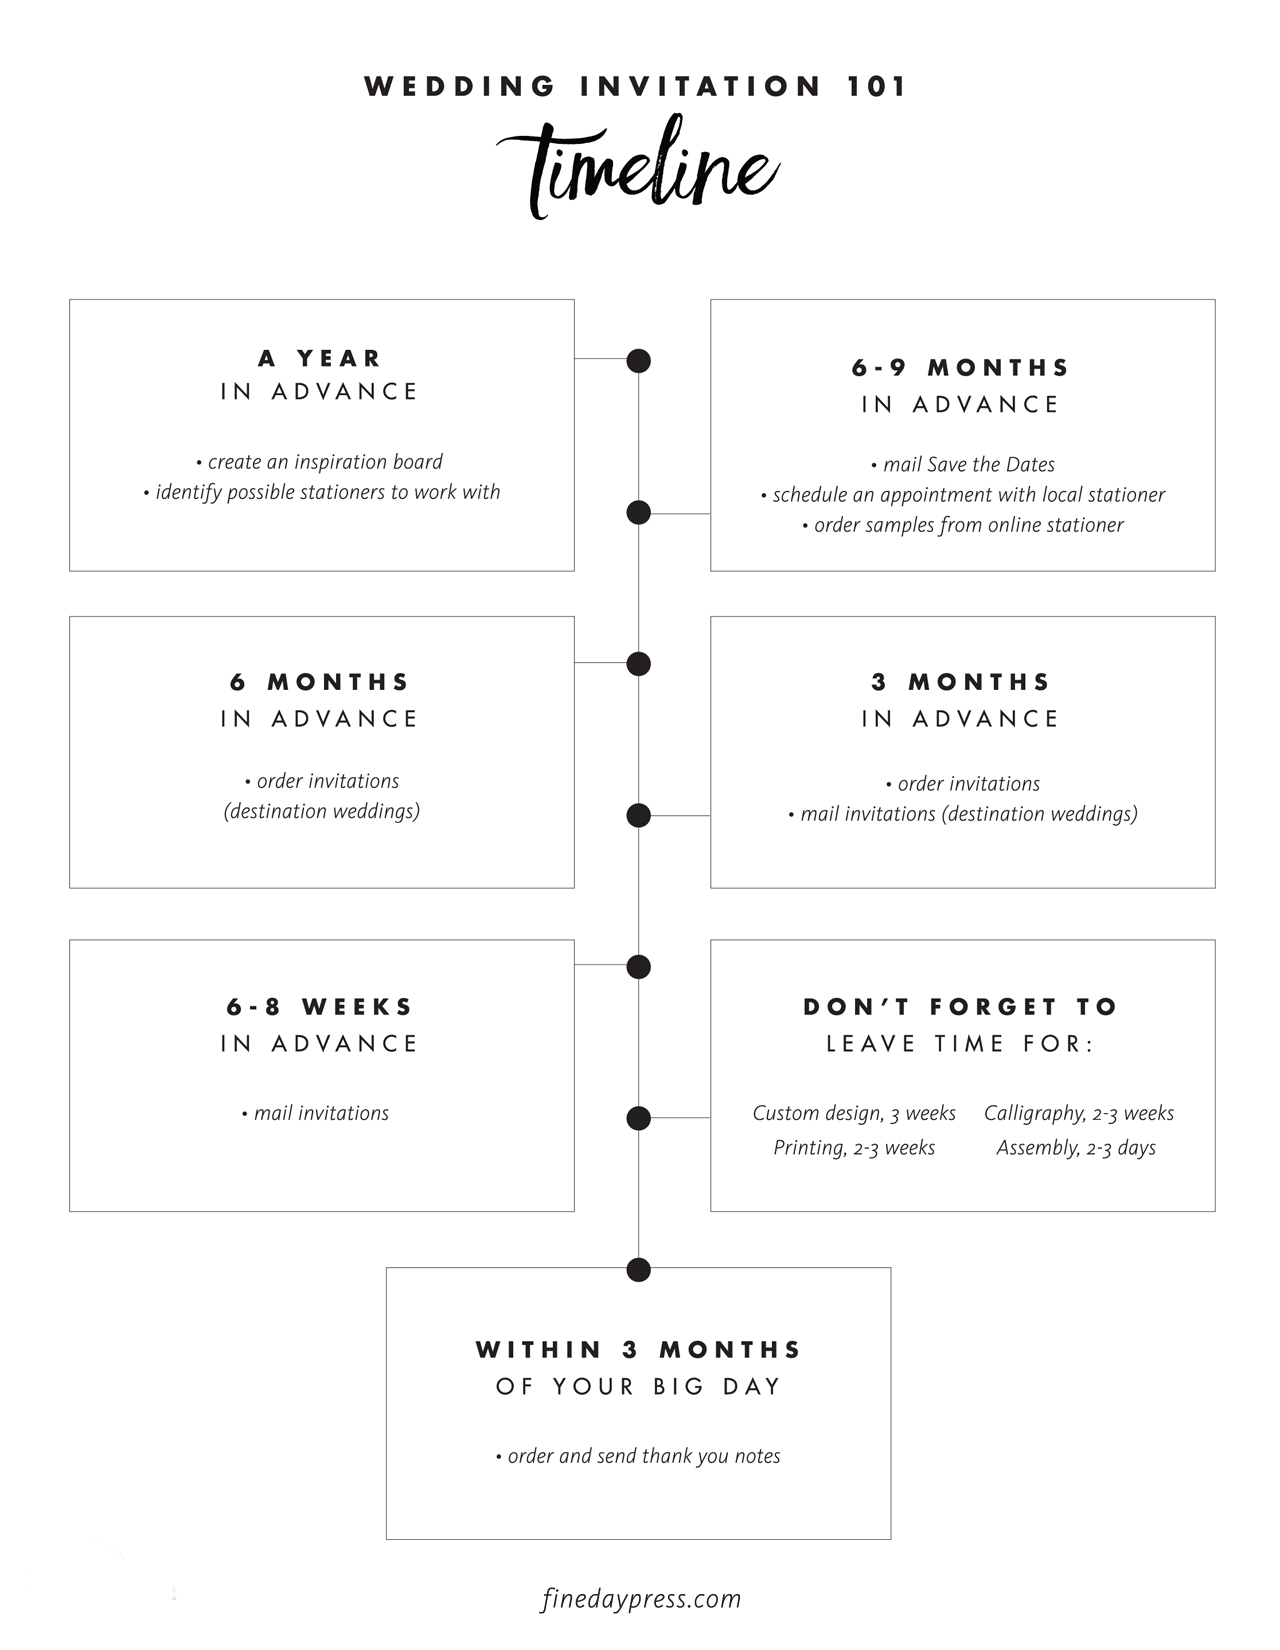
A YEAR IN ADVANCE

Start thinking about your invitations as early as possible in your wedding planning process. This could be a year or more in advance. Last-minute invitations would not be fun, not to mention the rush charges alone could blow your budget.

You can begin by envisioning your dream invitations with an inspiration board and identifying a few possible stationers to work with – see my first post for more details on getting started.


6-9 MONTHS IN ADVANCE

If you’re mailing a Save the Date, especially for a destination wedding, this is the time to get those in the mail. Our previous post covered Save the Dates in more detail.

If you’re working with a local paper shop, this is a great time to schedule an appointment to review the ins and outs of their ordering process and timeline. If you’re working with an online stationer, go ahead and order a few samples to get an idea of the products and papers you might like to use.


WHEN TO ORDER

For ready-made invitations, I recommend ordering your invitations 3 months in advance for local weddings or 6 months in advance for destination weddings. This will allow time for design, proofing, production, assembly, and mailing your invitations, while providing ample notice for your guests.

If you’ve decided to go the custom invitation route, this will usually add anywhere from 3 to 6 weeks on to your invitation process, so it’s important to consider this from the get-go and factor this in to your timeframe.

We’ve created a handy cheat sheet of important dates! Click here to download a printable PDF.


PRINTING & PRODUCTION

For digital printing, also known as flat printing, you can expect a production time of up to 2 weeks. Letterpress or specialty printing typically takes 3 weeks. Production can usually be expedited, but there is usually a charge associated with this. We’ll cover print and production methods in more detail in the next installment of this series.


CALLIGRAPHY

Planning to have beautiful calligraphy on your envelopes? Calligraphers generally require 2 to 3 weeks for addressing envelopes. Your stationer may be able to provide blank envelopes in advance so that this can get started while the invitations are printing.


WHEN TO SEND

A general rule is to send out invitations 6 to 8 weeks before the wedding. If it’s a destination wedding, at least 3 months ahead is the standard to allow time for travel plans.

Don’t forget to save a few days (or at least a weekend afternoon) for assembly. This could be as simple as putting the invitations in the envelopes and adding postage to the envelopes. but may require additional steps if such as assembling liners into envelopes (note: many stationers can assemble liners for you and may offer invitation assembly as well) or stamping a return address if you chose an address stamp instead of a printed return address.

This is the time to call in your troops. Grab your besties and ‘maids to lend  a hand; bribe them with pizza and wine post-project. Or this is could be a for you and your fiancé/ée to tackle together – put on some Netflix and make it a date night. Finally, tack on a few more days for mailing. International invitations can take anywhere from 6-10 days to arrive. We’ll cover mailing and postage in a later post.


AFTER THE BIG DAY

Once your wedding is over and you’ve had a blissful, relaxing honeymoon, it’s time to send out thank you notes to guests and loved ones! If you like, you can keep your thank you notes in the same design theme as your invitations and usually get them printed at a lower cost than your invitations – At Fine Day Press, we offer returning clients a 10% discount on day-of and thank you note orders – I’m willing to bet other stationers might do the same.

Stay tuned for our next Invitation 101 post; it will cover one of my favorite topics – printing methods.

DIY Colorful Envelope Address Ideas

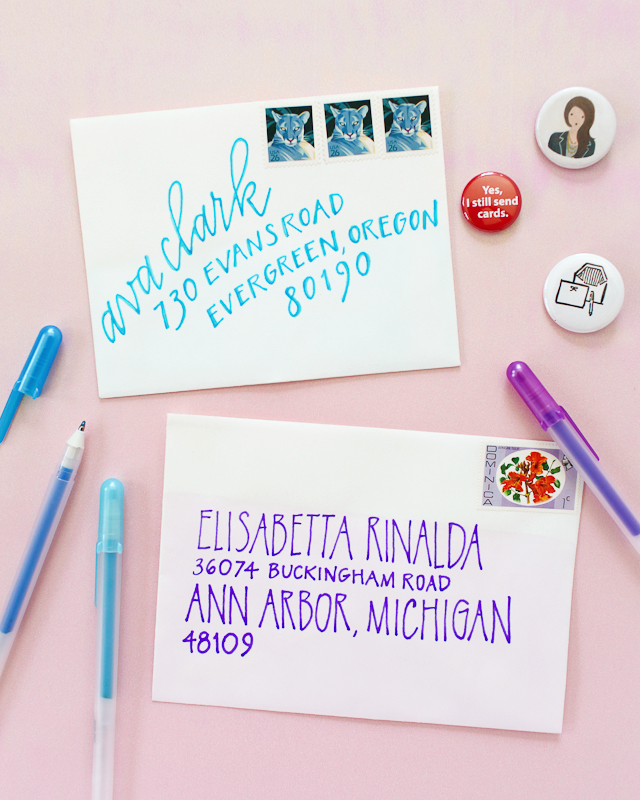
I’ve been obsessed with bright and colorful envelope addresses lately, especially envelopes that use white or light ink over bold and saturated watercolor paint! These invitations from Kim at Bright Room Studio and these save the dates by Gina at Eleven and West are recent favorites. So when Sakura of America got in touch about their new opaque Soufflé pens and vibrant Glaze pens, I knew EXACTLY what I wanted to do with them! I enlisted my talented friend Michele of Meant to Be Calligraphy to help write out the addresses on some (well, a lot) of envelopes, and today we’re sharing the results with you – along with the how-to so you can recreate these DIY colorful envelope address ideas at home!

DIY Colorful Envelope Address Ideas with Sakura of America Glaze and Soufflé Pens / Oh So Beautiful Paper

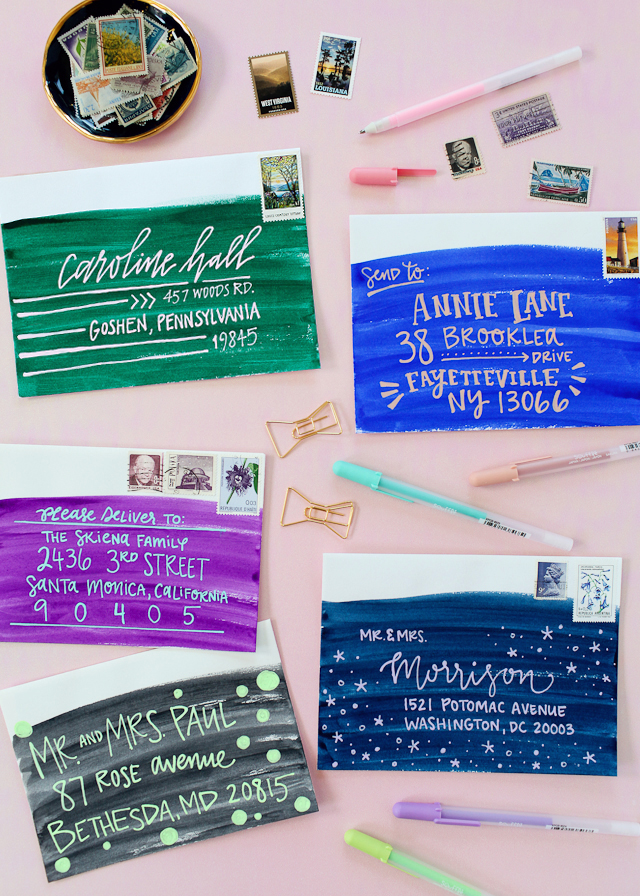
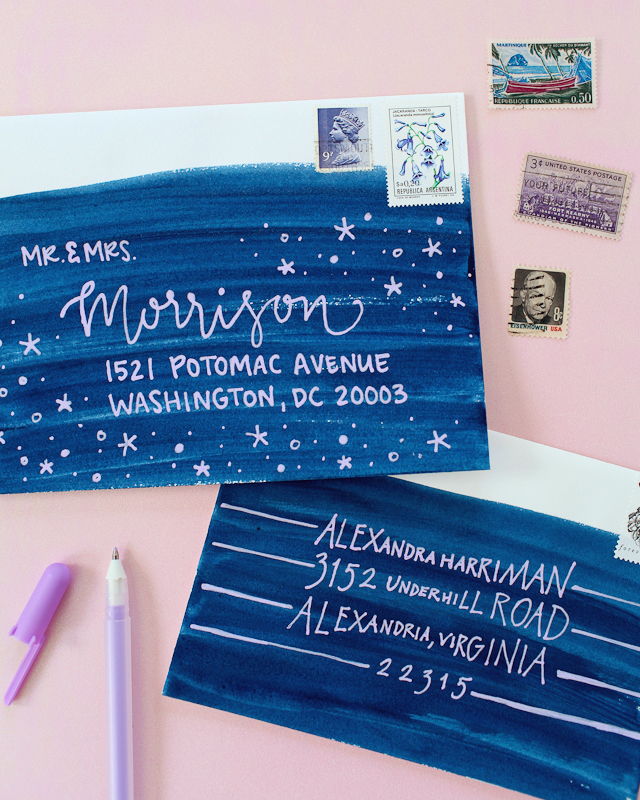
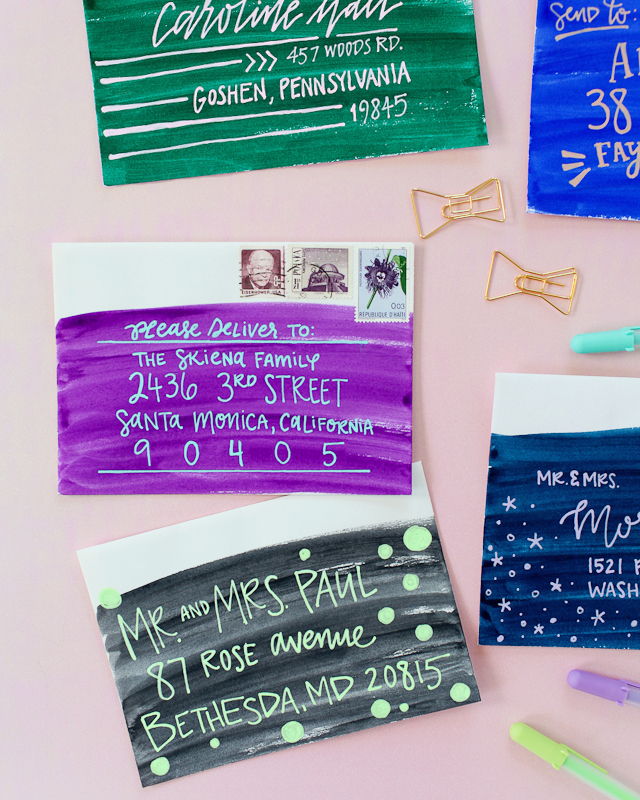
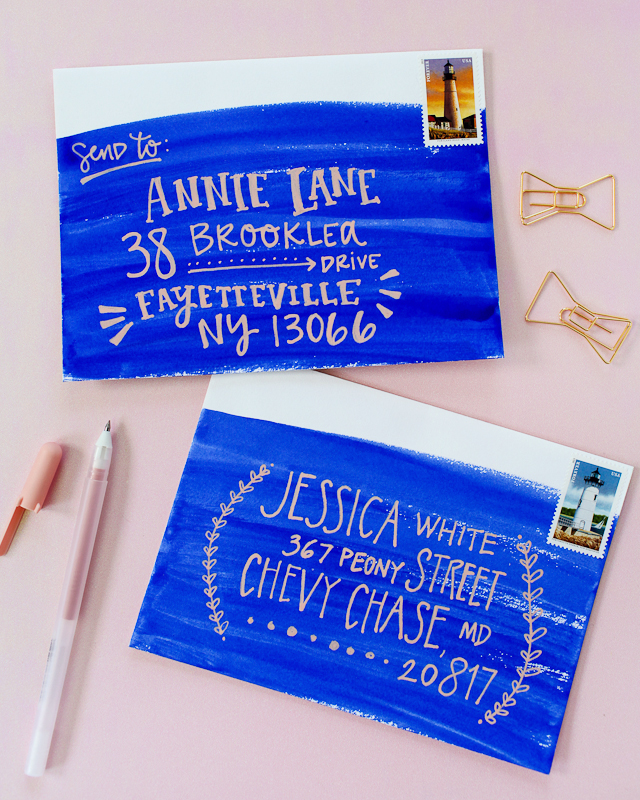
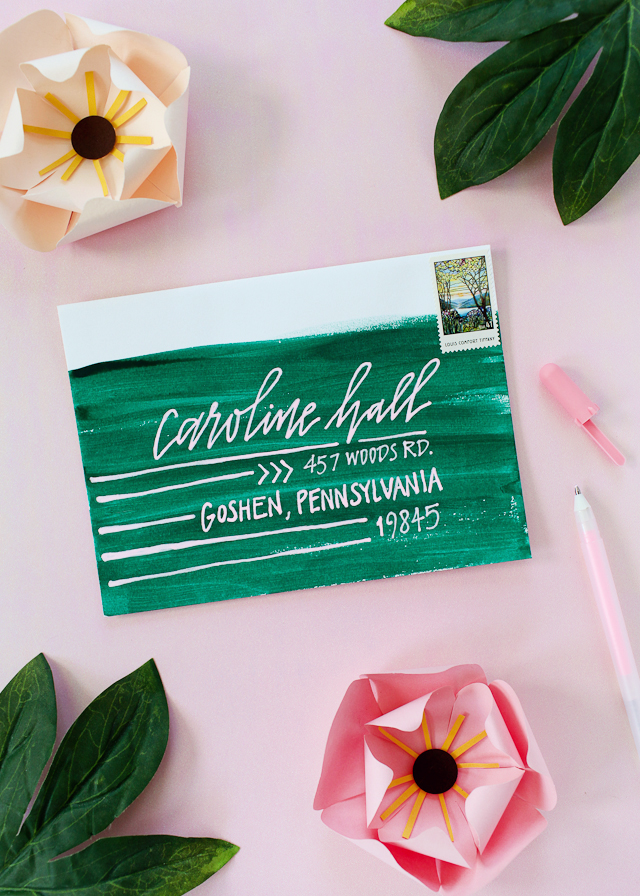
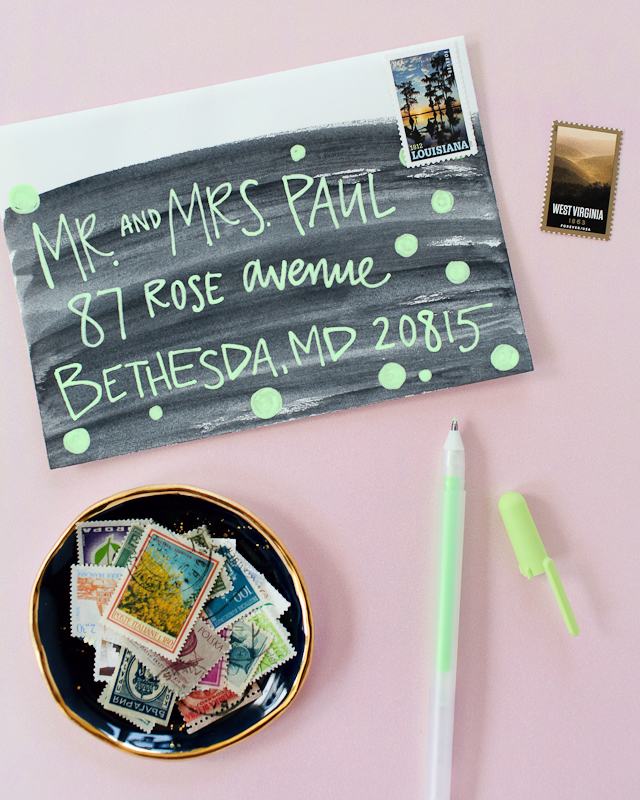
Let’s start with the Soufflé pens, which come in some really gorgeous pastel tones and white ink! Since the ink is opaque you can use the pens on dark paper or layer them over dark paint colors! I had the BEST time coming up with color combinations for these envelopes: pale pink over dark green watercolor paint, peach over cobalt blue watercolor, lavender over indigo watercolor, citron/mint over black watercolor, and aqua over violet watercolor. I can’t pick a favorite color combination!

DIY Colorful Envelope Address Ideas with Sakura of America Glaze and Soufflé Pens / Oh So Beautiful Paper

To create the watercolor envelopes, we used Sakura’s Koi Watercolor Field Sketch Travel Kit to paint really vibrant colors on white cotton envelopes. We started painting right below the point where a stamp would be placed and painted horizontal strokes from left to right, working our way down the front of the envelope. The trick is to use high quality cotton or bamboo envelopes, which will absorb the watercolor without too much warping, and to use very little water and a ton of pigment when painting. We used only enough water to spread the paint over the envelope, rather than adding pigment to a cup or bowl full of water. Practice on a test sheet of watercolor paper until you achieve your desired hue, and be sure to place a clean sheet of paper under your envelopes while painting.

DIY Colorful Envelope Address Ideas with Sakura of America Glaze and Soufflé Pens / Oh So Beautiful Paper

Once the envelopes are fully dry, start writing the addresses! The Soufflé pens go on dark but lighten considerably as they dry, which can make them a bit tricky in the beginning – but you’ll quickly get the hang of it. Mix different lettering styles, from script to serif to all caps, and have fun with embellishments like dots, lines, arrows, and ornamental frames!

DIY Colorful Envelope Address Ideas with Sakura of America Glaze and Soufflé Pens / Oh So Beautiful Paper

DIY Colorful Envelope Address Ideas with Sakura of America Glaze and Soufflé Pens / Oh So Beautiful Paper

DIY Colorful Envelope Address Ideas with Sakura of America Glaze and Soufflé Pens / Oh So Beautiful Paper

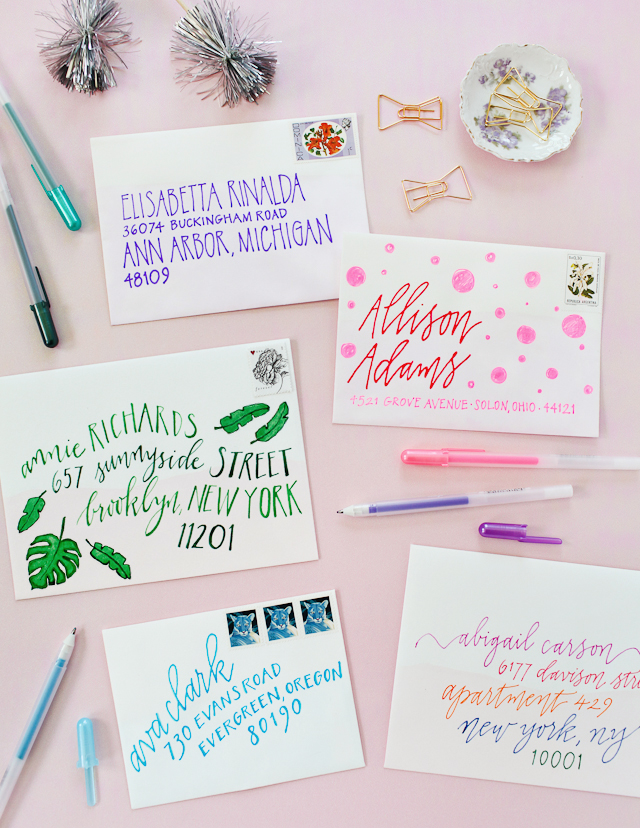
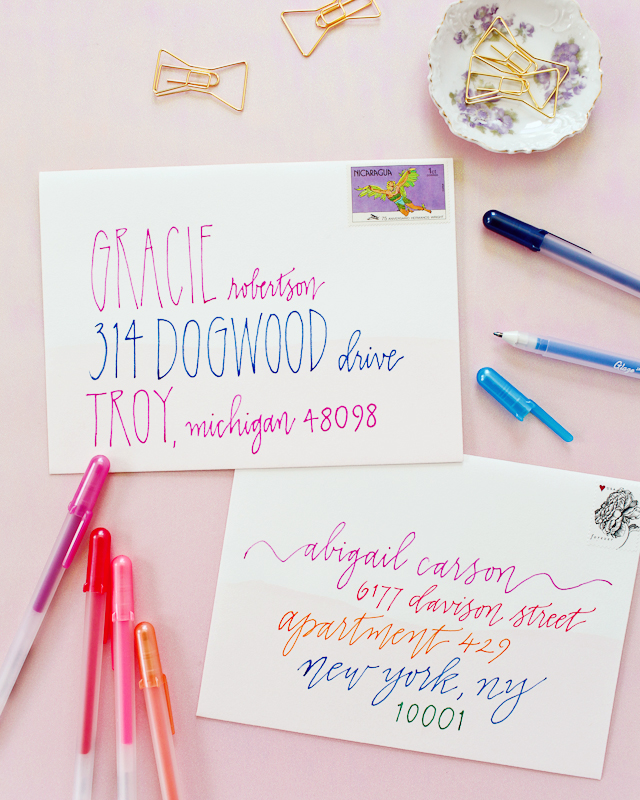
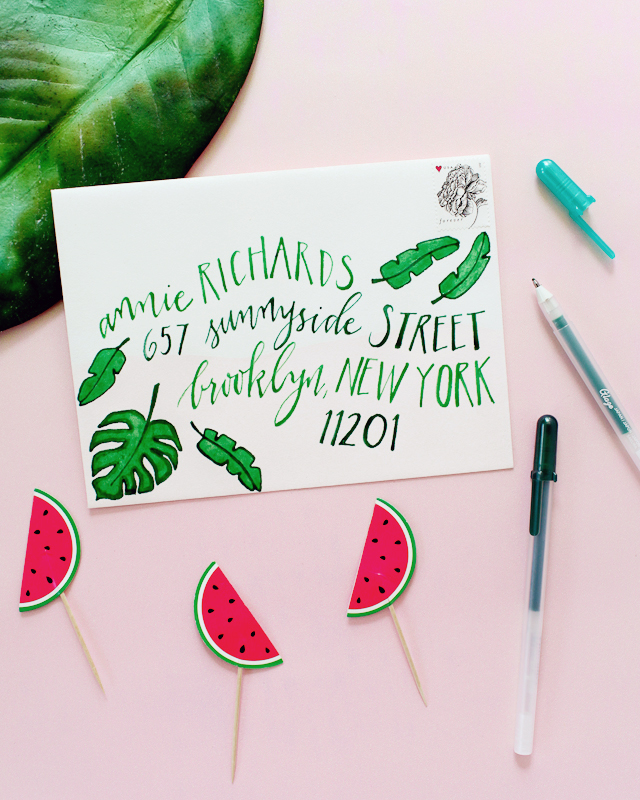
Now for the Glaze pens, which offer a really unique 3D ink and glossy, vibrant colors that remind me of watercolors! The Glaze pens are translucent, so we paired them with subtle dip dye envelopes. I really love the tone-on-tone look of blue, pink, and purple Glaze pens against blue, pink, and lavender dip dyed envelopes, but we also created some fun contrasting envelope addresses with tropical green against pale pink – even a rainbow envelope address!

DIY Colorful Envelope Address Ideas with Sakura of America Glaze and Soufflé Pens / Oh So Beautiful Paper

As with the watercolor envelopes, the key to successful dip dyed envelopes is to use high quality cotton or bamboo envelopes. They absorb the dye and Glaze pen ink so well! To dip dye envelopes, mix food coloring with warm water in a vessel that is at least half an inch wider than your largest envelope and around three inches deep. I like using foil square cake pans to dip dye, and you can dip the envelopes at an angle to achieve more color coverage. When you’ve achieved your desired shade, dip (and quickly remove) the envelope in the dye bath, then blot dry with a paper towel and set aside to dry.

DIY Colorful Envelope Address Ideas with Sakura of America Glaze and Soufflé Pens / Oh So Beautiful Paper

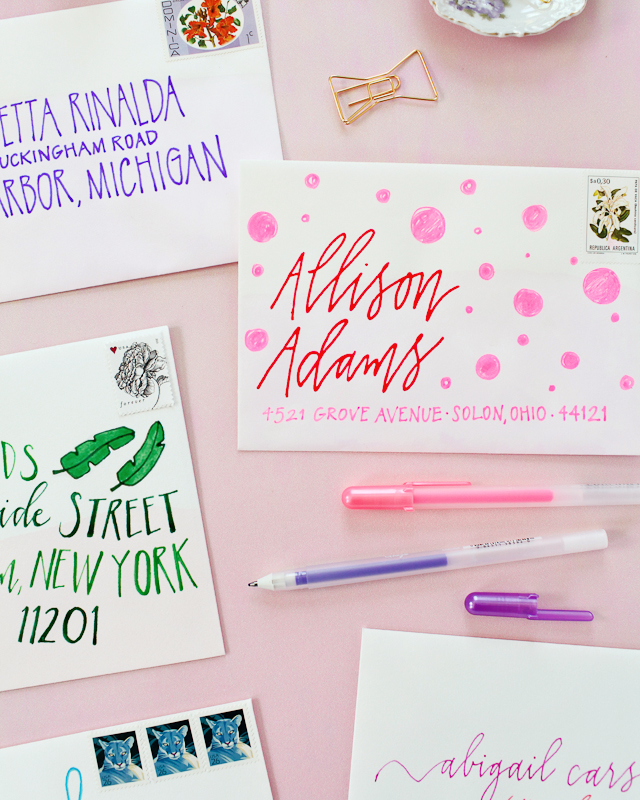
When addressing your envelopes, have fun mixing script lettering with lowercase and all caps, and play around with proportions! I also added a second layer of ink to some of the addresses (after waiting for the first layer to dry completely) for a more whimsical look. The best part is that you don’t have to be a lettering genius to create these envelopes – the colorful ink alone adds a major dose of whimsy to the envelope, and the combination of colorful ink with playful, imperfect lettering just makes my heart happy.

DIY Colorful Envelope Address Ideas with Sakura of America Glaze and Soufflé Pens / Oh So Beautiful Paper

To create the little palm frond illustrations, I sketched them out very lightly with pencil first, then went over the pencil sketch with the Glaze pens. I also want to add whimsical polka dots to ALL of my envelopes from now on! Wouldn’t it make you so happy to receive that neon pink and coral envelope in the mail??

DIY Colorful Envelope Address Ideas with Sakura of America Glaze and Soufflé Pens / Oh So Beautiful Paper

DIY Colorful Envelope Address Ideas with Sakura of America Glaze and Soufflé Pens / Oh So Beautiful Paper

So fun, right??? You can pick up your own set of Soufflé pens here and Glaze pens here – you’ll have so much fun creating bright and beautiful envelope addresses with them!

Photos by Nole Garey for Oh So Beautiful Paper

This post is sponsored by Sakura of America. All content and opinions are my own. Thank you for supporting the sponsors that make Oh So Beautiful Paper possible!

“Baby Bean” Brunch Baby Shower Invitations

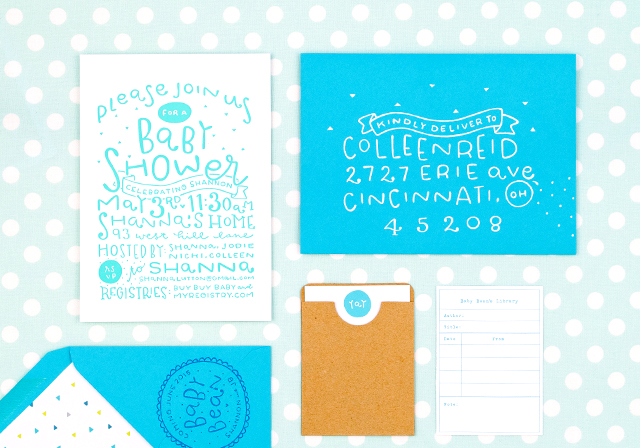
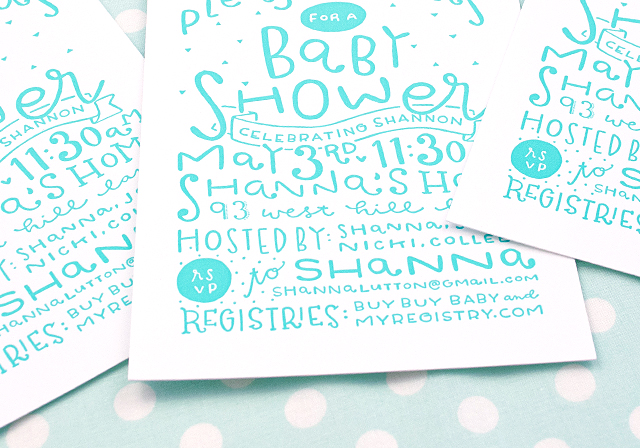
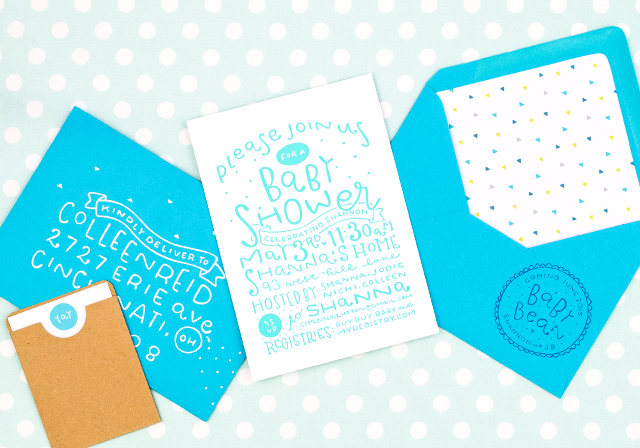
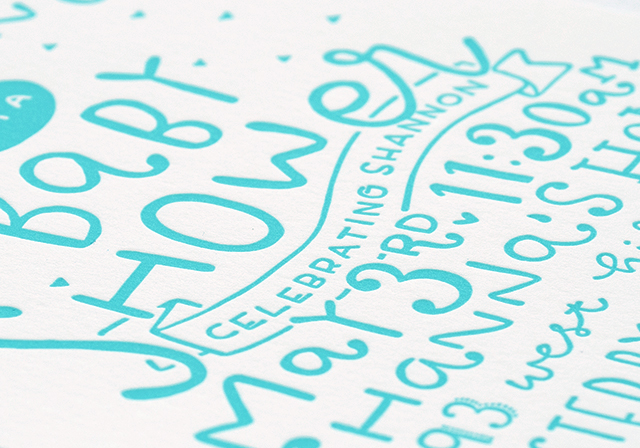
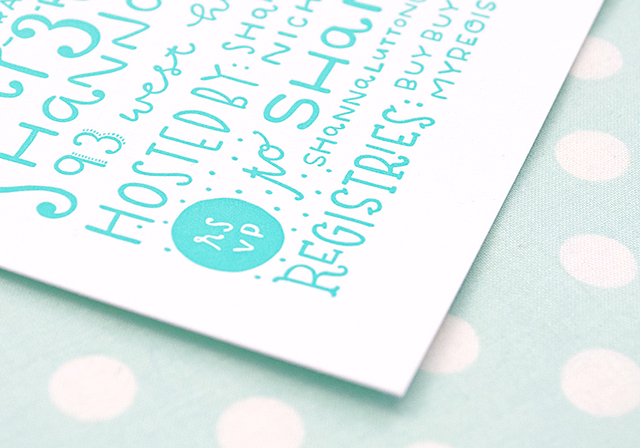
Colleen from Printwheel Printshop sent over these adorable invitations for a brunch baby shower that she co-hosted for her sister! The invitations (and envelopes) feature Colleen’s whimsical hand lettering that perfectly set the tone for a laid back brunch, along with patterns and details inspired by her sister’s favorite fabrics. So cute!

Brunch Baby Shower Invitations by Pinwheel Printshop / Oh So Beautiful Paper

From Colleen: “Baby Bean” was on the way, and it was time to celebrate! I was so excited to design these invitations for my sister and “Baby Bean” (our nickname for her little bundle of joy). A baby shower brunch is a simple and sweet event, so I wanted these invitations set the tone for this beautiful and fun day.

Brunch Baby Shower Invitations by Pinwheel Printshop / Oh So Beautiful Paper

My sister owns her own sewing business, Little Luvins. So I pulled inspiration for the style and color of the shower invitations from her favorite fabrics. I also decided to use hand lettering on each piece to create a whimsical, playful look.

Brunch Baby Shower Invitations by Pinwheel Printshop / Oh So Beautiful Paper

Along with the invitation, we included a tiny pocket, containing instructions and a blank library card. The instructions asked each guest to bring a children’s book to help fill Baby Bean’s future library. Guests could fill out the library card and add a special note. It would then double as a gift tag and keepsake for the mom-to-be.

Brunch Baby Shower Invitations by Pinwheel Printshop / Oh So Beautiful Paper

Brunch Baby Shower Invitations by Pinwheel Printshop / Oh So Beautiful Paper

The invitations were printed on Crane’s Lettra paper by Rise and Shine Letterpress. Their team was fantastic to work with, and the letterpress truly brought the design to life.

Brunch Baby Shower Invitations by Pinwheel Printshop / Oh So Beautiful Paper

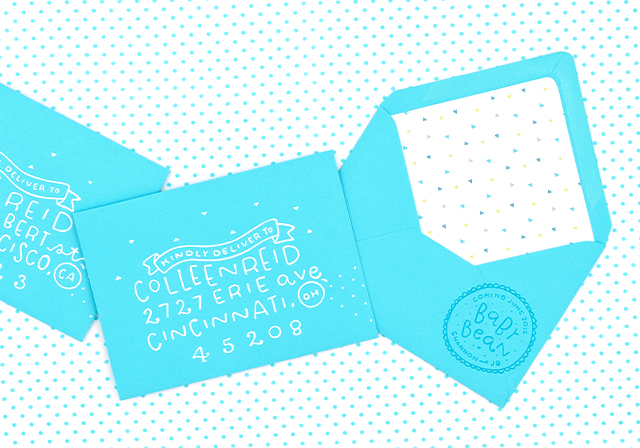
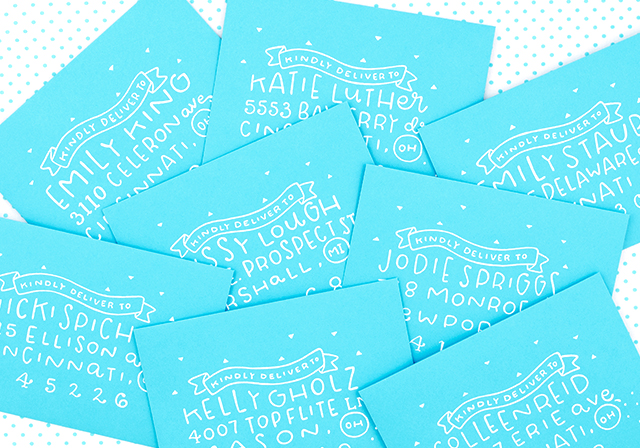
I ordered envelopes from Paper Presentation and created my own envelope liners to complement the triangles on the invitations. Each envelope was addressed in similar lettering to match the invitations. I ordered a custom “Baby Bean” stamp from Simon’s Stamps for the envelopes, and it was the perfect finishing touch. My sister was thrilled with the result! As for the shower, it was a success, and “Baby Bean” (Samantha) arrived this past June.

Brunch Baby Shower Invitations by Pinwheel Printshop / Oh So Beautiful Paper

Thanks Colleen!

Design and Envelope Addressing: Pinwheel Printshop

Letterpress Printing: Rise and Shine Letterpress

Photo Credits: Printwheel Printshop

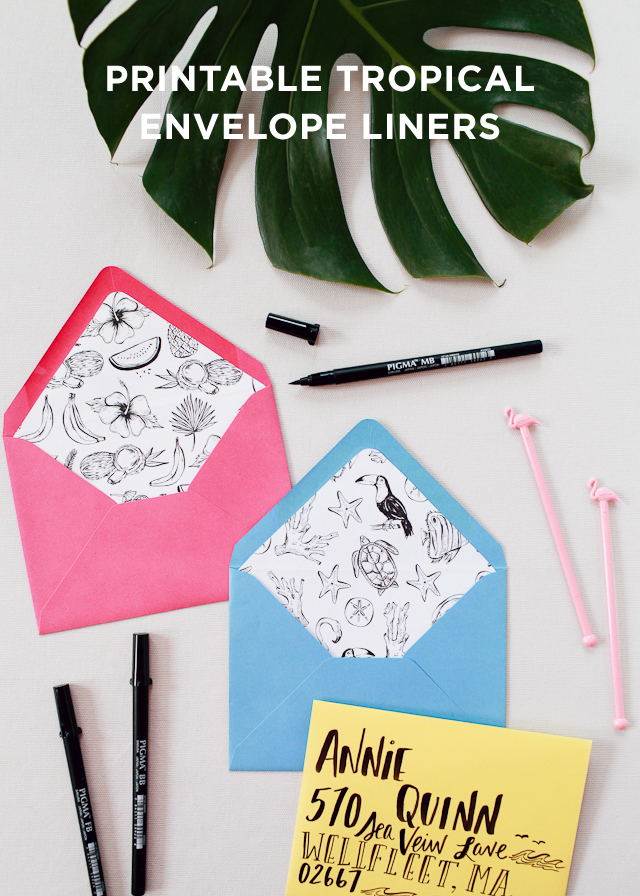
Printable Tropical Envelope Liners

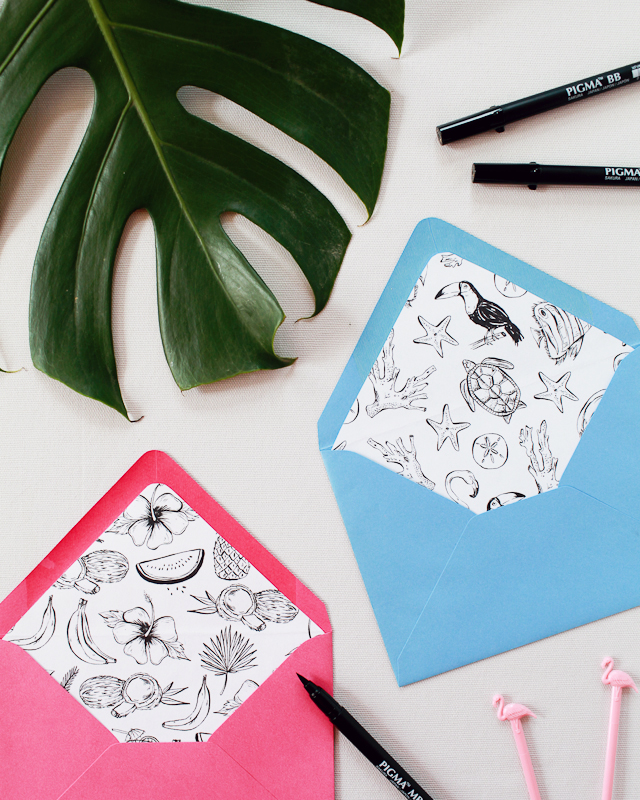
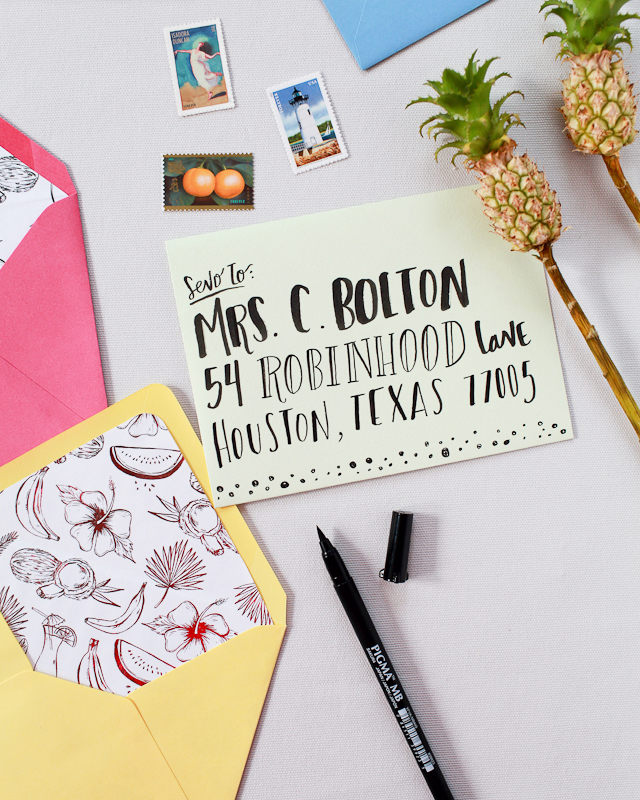
Are you ready for something SUPER fun?!? Sakura of America recently released a set of amazing new brush pens called the Pigma Professional Brush, and we wanted to do something really awesome to show you what these babies can do! Nothing makes me smile more than a colorful envelope and patterned envelope liner – and today we have printable tropical envelope liners in TWO gorgeous patterns for you to enjoy!

Printable Tropical Envelope Liners / Illustrated by Swiss Cottage Designs with Sakura Pigma Professional Brush Pens / Oh So Beautiful Paper

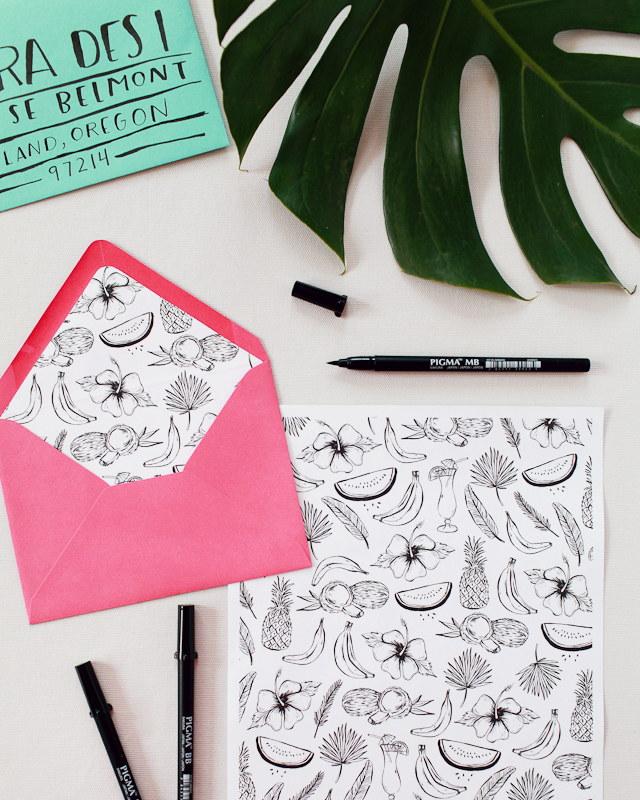
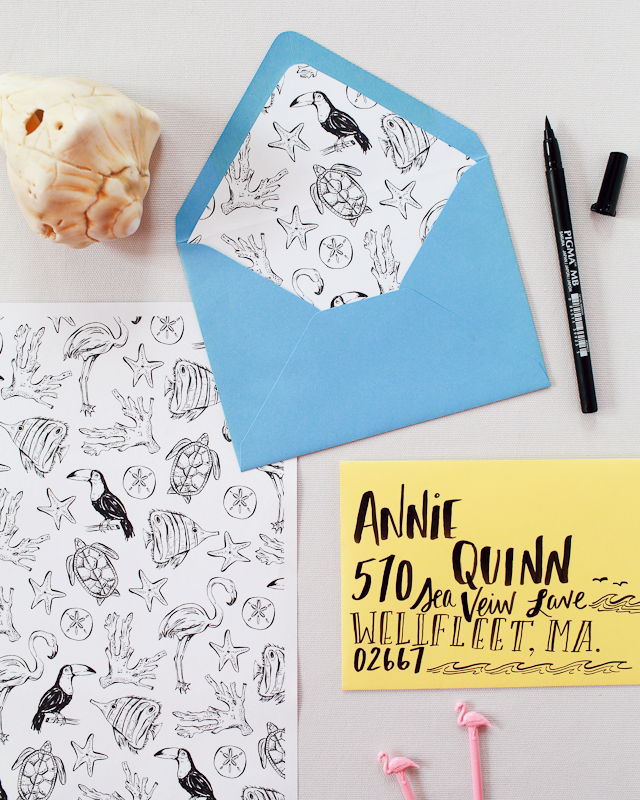
Courtney from Swiss Cottage Designs illustrated the tropical patterns using all three Pigma Professional Brush pen weights – fine, medium, and bold. Courtney and I are still feeling the tropical vibe from the Paper Party so we decided to keep on running with a tropical theme. One pattern features illustrations of watermelons, pineapples, and palm fronds, and the other has flamingos, toucans, coral, and fish! Both patterns make me wish I was somewhere on a beach with a tropical drink in hand!

Printable Tropical Envelope Liners / Illustrated by Swiss Cottage Designs with Sakura Pigma Professional Brush Pens / Oh So Beautiful Paper

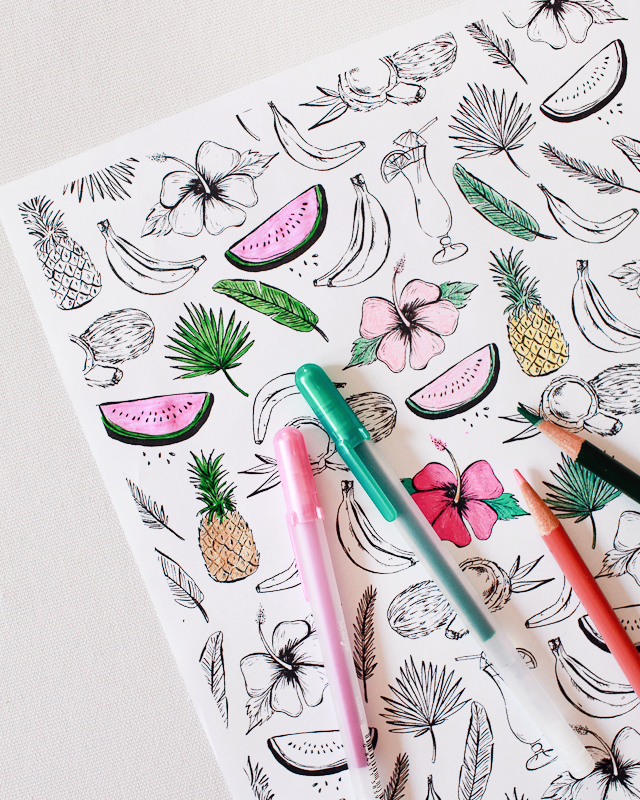
You can print the envelope liner patterns on text weight letter size paper. You can leave the patterns black and white – or add a dose of color using colored pencils or your favorite Gelly Roll pen! The Glaze pens almost look like watercolor and are great for coloring in those fine details! You can even use the patterns as coloring sheets just for fun!

Printable Tropical Envelope Liners / Illustrated by Swiss Cottage Designs with Sakura Pigma Professional Brush Pens / Oh So Beautiful Paper

Here are the instructions for making the envelope liners:

Step 1. Lightly trace an outline of the envelope on the back of the liner page. If you’re using Paper Source envelopes, you can use one of these handy envelope liner template kits. Cut out the liner, being careful to cut on the inside of the lines. Trim an additional 1/16″ off each side and 3/4″ off the bottom of the liner.

Step 2. Place the liner in the envelope. Use a glue stick or double sided tape on the back of the liner (along the top triangle and just above the crease) to adhere the liner to the envelope.

Printable Tropical Envelope Liners / Illustrated by Swiss Cottage Designs with Sakura Pigma Professional Brush Pens / Oh So Beautiful Paper

Printable Tropical Envelope Liners / Illustrated by Swiss Cottage Designs with Sakura Pigma Professional Brush Pens / Oh So Beautiful Paper

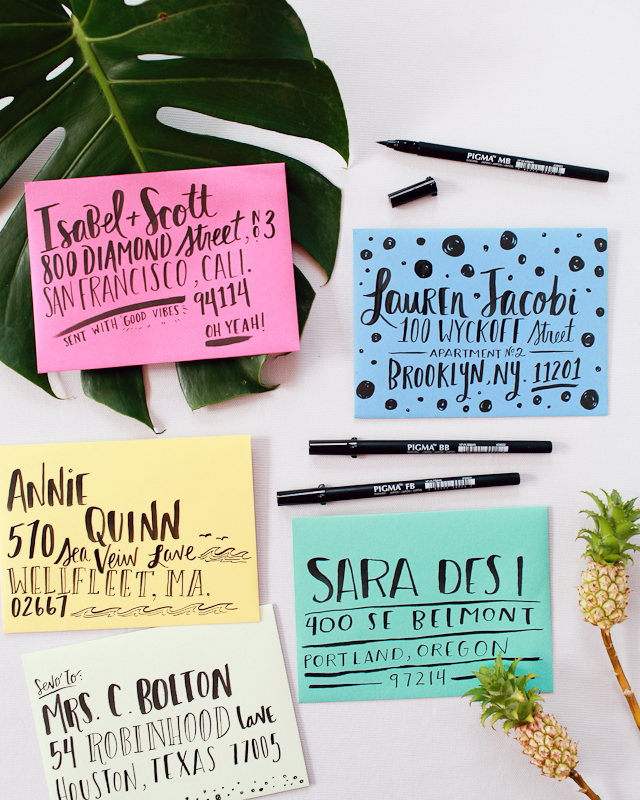
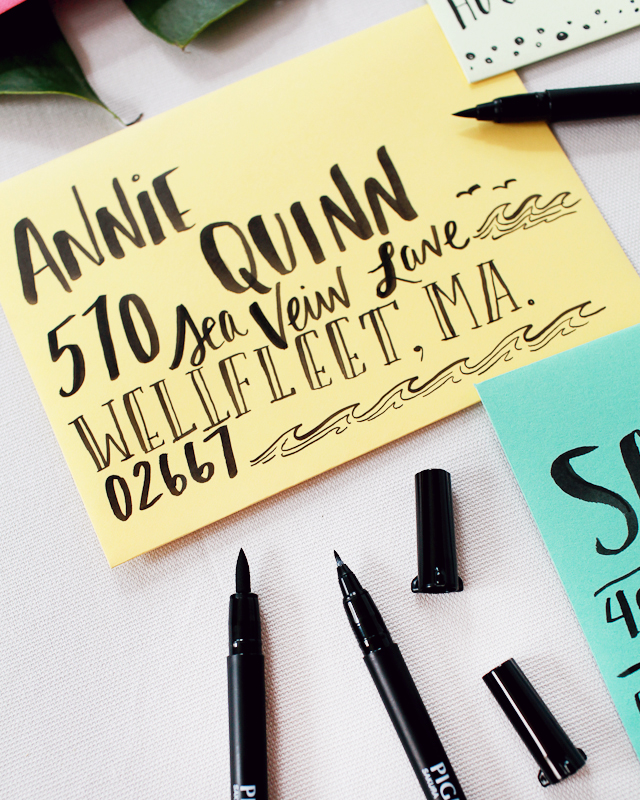
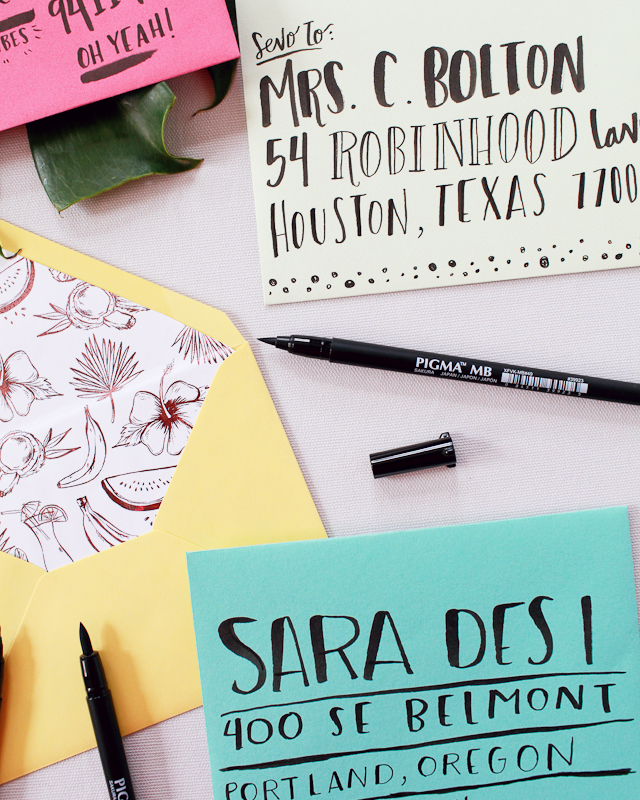
The Pigma Professional Brush pens use archival waterproof ink, which also makes them my new favorite pen for addressing envelopes. The brush nibs respond to changes in pressure or direction while maintaining smooth and consistent ink flow, so they’re super easy to use! The flexible brush nibs offer both thin and thick brush strokes and they won’t smear, feather, or bleed through on most paper. Courtney addressed a few envelopes using the different pen weights – I love the subtle gradient in the bold brush!

Printable Tropical Envelope Liners / Illustrated by Swiss Cottage Designs with Sakura Pigma Professional Brush Pens / Oh So Beautiful Paper

Printable Tropical Envelope Liners / Illustrated by Swiss Cottage Designs with Sakura Pigma Professional Brush Pens / Oh So Beautiful Paper

Printable Tropical Envelope Liners / Illustrated by Swiss Cottage Designs with Sakura Pigma Professional Brush Pens / Oh So Beautiful Paper

And yes, I may have foiled an envelope liner or two (in light pink metallic foil) using my Minc foil applicator. The Minc works with toner ink, so just print the liner patterns on a laser printer, or use a copying machine to make as many copies of the liner as you’ll need, and foil away!

Printable Tropical Envelope Liners / Illustrated by Swiss Cottage Designs with Sakura Pigma Professional Brush Pens / Oh So Beautiful Paper

Download the envelope liner patterns from Swiss Cottage Designs right here! And you can pick up a set of the Pigma Professional Brush pens right here!

All artwork © 2015 Swiss Cottage Designs created exclusively for Oh So Beautiful Paper. All artwork is made available for personal use only. By downloading the patterns you agree to the terms of use.

Swiss Cottage Designs is a mem­ber of the Designer Rolodex â€“ you can see more of Courtney’s beau­ti­ful work right here!

Photos by Nole Garey for Oh So Beautiful Paper

This post is sponsored by Sakura of America. All content and opinions are my own. Thank you for supporting the sponsors that make Oh So Beautiful Paper possible!