Party Paper: Dinner Party

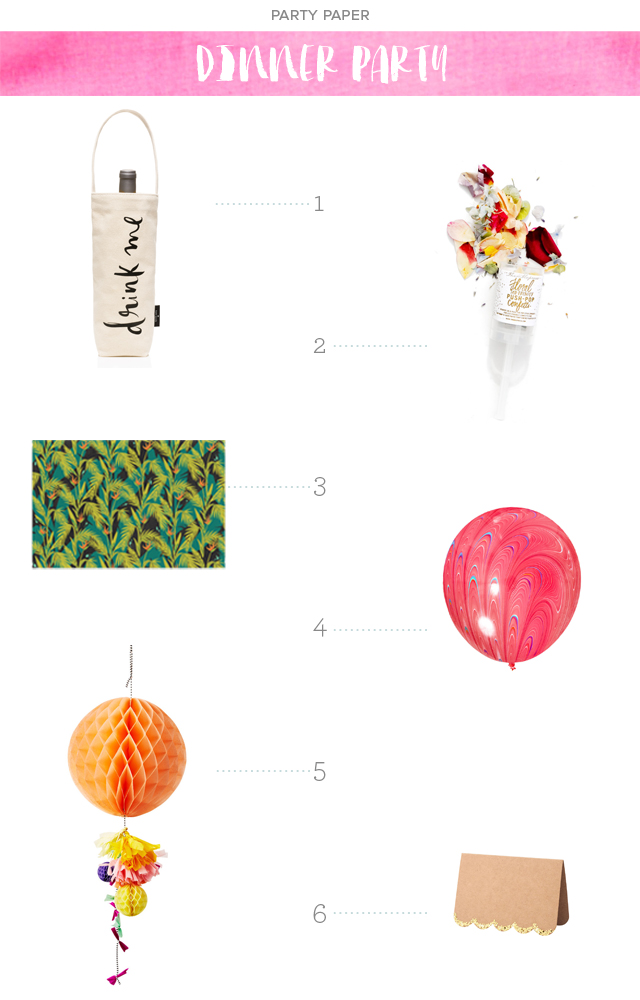
One of my New Year’s resolutions is to host more dinner parties, which also happens to be the perfect excuse to buy all the party supplies I’ve been eyeing! Here are a few favorite party supplies for hosting the perfect dinner party! – Annie

Party Paper: Dinner Party

  1. Drink Me Wine Tote from Kate Spade
  2. Floral Confetti Push Pop from LEIF
  3. Jungle Placemat Pad from Idlewild Co.
  4. Marble Balloons from Oh Happy Day
  5. Honeycomb Fancy from Oh Happy Day
  6. Kraft Glitter Placecards from Paper Source

DIY Black and White Pop Art Paper Flowers

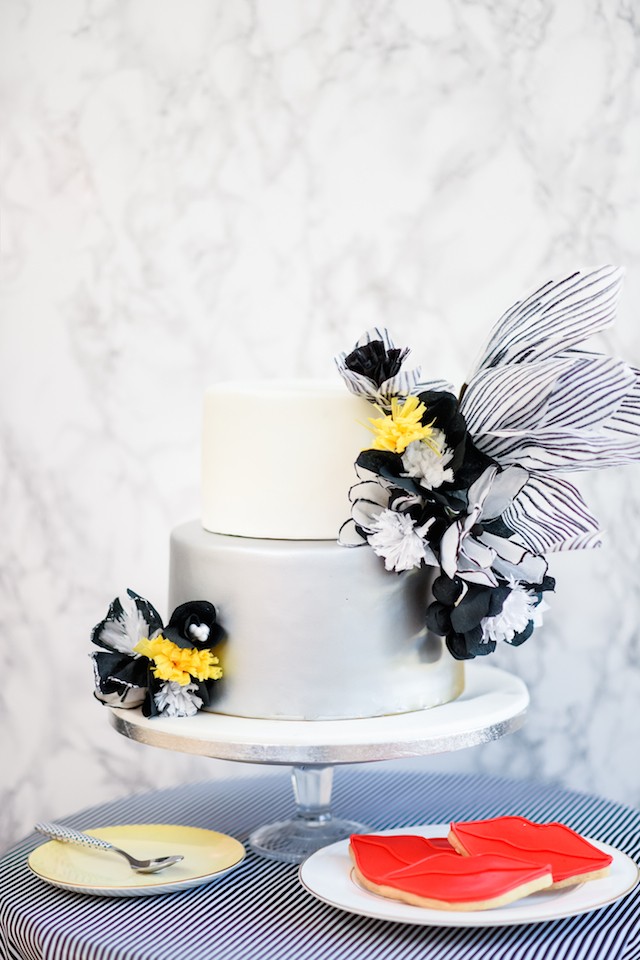
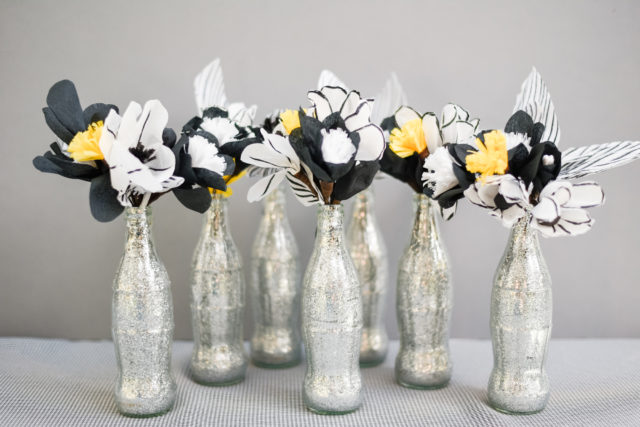
Monochrome is a really big trend for 2016, and I just absolutely love this striking black and white look! I decided to try my hand at updating the look of feminine and soft paper flowers to a bolder, more dramatic aesthetic as a nod to this trend. With the help of my genius stylist friend Laura, we came up with these paper flowers inspired by the iconic genre of Pop Art. We used black and white flowers (and some silver glitter) along with a couple pops of color. This tutorial will teach you how to make three types of paper flowers that you can bundle together in a beautiful floral arrangement. They are not only easy or cheap to make, but they add a bold and chic style to your home decor, wedding cake or table decor!– Erin from BerinMade Paper Goods

DIY Black and White Pop Art Paper Flowers / Erin Hung of BerinMade London for Oh So Beautiful Paper

DIY Black and White Pop Art Paper Flowers / Erin Hung of BerinMade London for Oh So Beautiful Paper

Materials and Tools

Black Crepe Paper

White Crepe Paper

Floral Wire (cut to 4″ lengths)

Cotton Balls

Cotton Swabs

Scissors

Floral Tape

Rubber Bands

Black Marker

Making the Flower Centers:

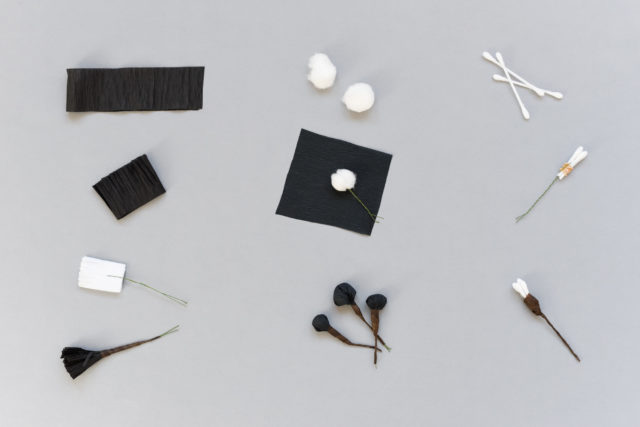
For the first part of the tutorial, we will show you how to make three types of flower centers:

  • Pom-Pom Center: Use scissors to “fringe” a 2″ x 4″ strip of black crepe paper, then fold the stripe into quarters. Fold and twist a 4″ length of floral wire so that it doubles in strength. Place in the center of the folded crepe paper about half an inch down. Wrap the crepe paper around the wire and secure with floral tape around the stem.
  • Balled Center: Roll a cotton ball between fingers to compress slightly. Wrap floral wire in half around the cotton ball and twist to make a strong stem. Place the cotton ball in the center of a 2.75″ square of black crepe paper. Wrap the crepe paper square around cotton ball and secure with floral tape.
  • Little Bud Center: Cut one cotton swab in half and tie the two halves together with a rubber band around a 4″ length of floral wire, folded in half and twisted to create a strong stem. Hide the joint with floral tape.

DIY Black and White Pop Art Paper Flowers / Erin Hung of BerinMade London for Oh So Beautiful Paper

Making the Petals and Leaves:

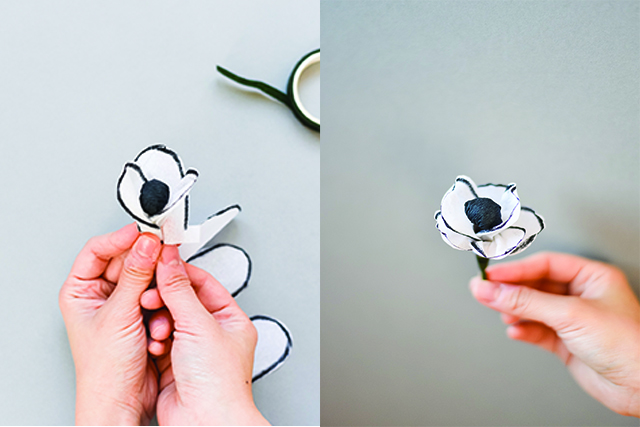
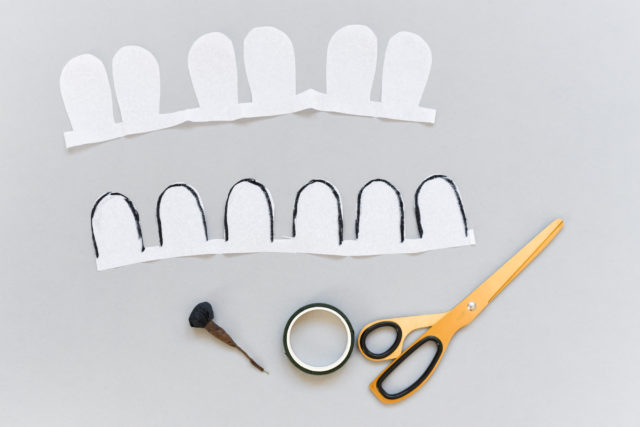
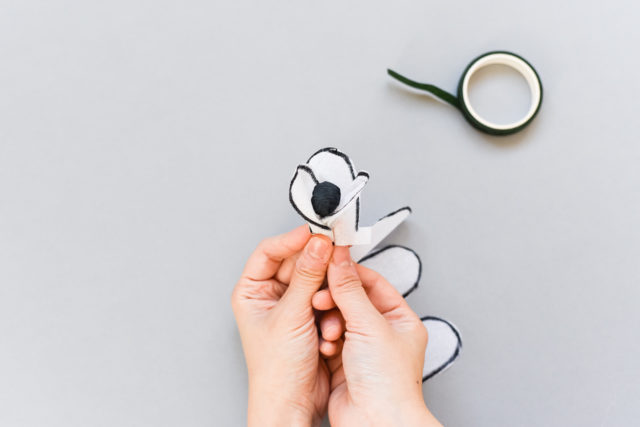
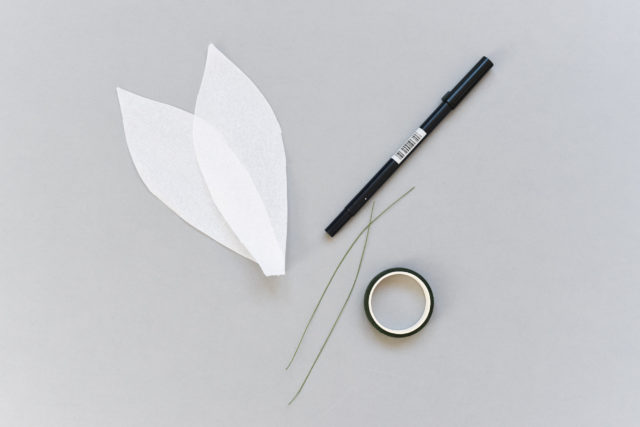
Step 1. To make the petals, fold a 12″ strip of crepe paper into sixths. Use the template to cut out the petal shape. Unfold the paper petal strip, wrap the petals around your chosen flower center and secure with floral tape.

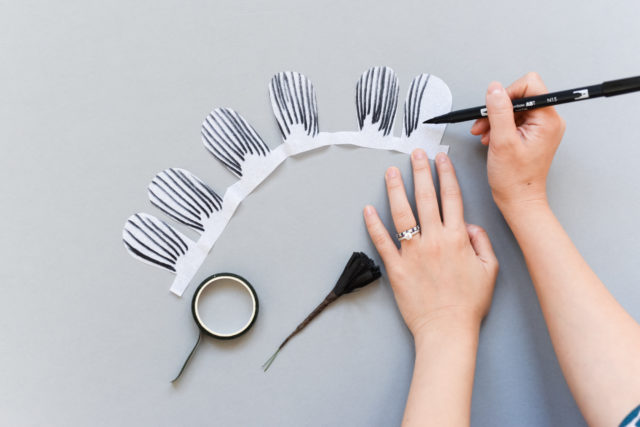
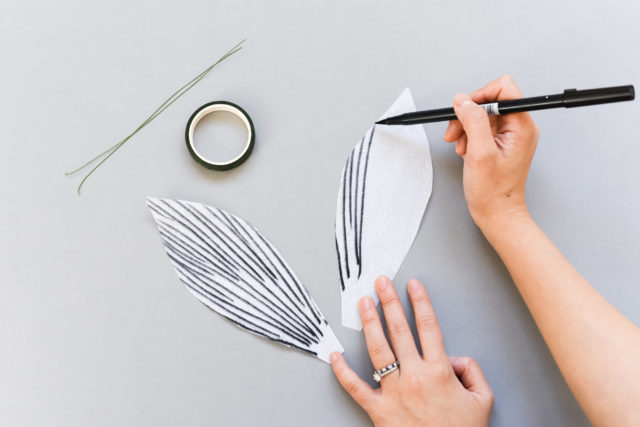
Step 2. For petals made from white crepe paper, line the outside of the petal with a black marker. You can also add stripes to the flower petals using the black marker. Wait until the marker ink is dry before wrapping the petals around a flower center.

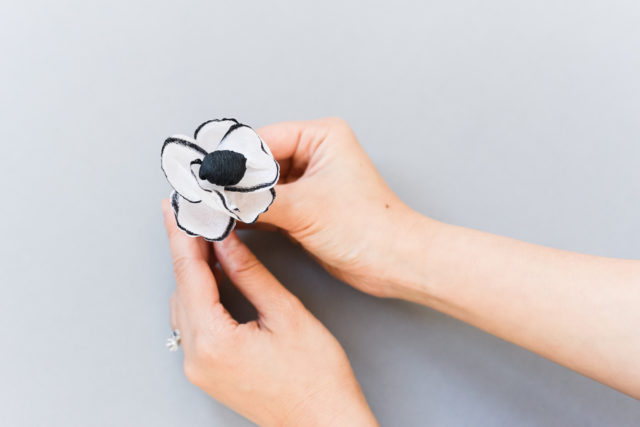
Step 3. Gently sculpt each petal with thumb and index finger to shape. Arrange petals by gently pulling so that they are evenly distributed.

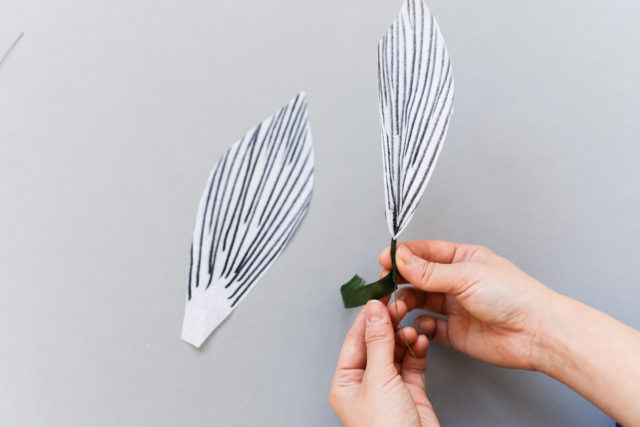
Step 4. To make the leaves, cut leaf shapes from the crepe paper ranging from 2.5″ – 3.5″ in length. Wrap the leaves around the floral wire by pinching the bottom of the leaf and securing with floral tape.

DIY Black and White Pop Art Paper Flowers / Erin Hung of BerinMade London for Oh So Beautiful Paper

DIY Black and White Pop Art Paper Flowers / Erin Hung of BerinMade London for Oh So Beautiful Paper

DIY Black and White Pop Art Paper Flowers / Erin Hung of BerinMade London for Oh So Beautiful Paper

DIY Black and White Pop Art Paper Flowers / Erin Hung of BerinMade London for Oh So Beautiful Paper

DIY Black and White Pop Art Paper Flowers / Erin Hung of BerinMade London for Oh So Beautiful Paper

DIY Black and White Pop Art Paper Flowers / Erin Hung of BerinMade London for Oh So Beautiful Paper

DIY Black and White Pop Art Paper Flowers / Erin Hung of BerinMade London for Oh So Beautiful Paper

DIY Black and White Pop Art Paper Flowers / Erin Hung of BerinMade London for Oh So Beautiful Paper

Now you’re ready to use these beautiful blooms! Group them into lovely floral arrangements for parties, or even use them as cake toppers or on favor bags and boxes!

Cake & Cookies: Cakes by Robin

Photo Credit: Jeremy Tan

Industrial Glam Wedding Invitations

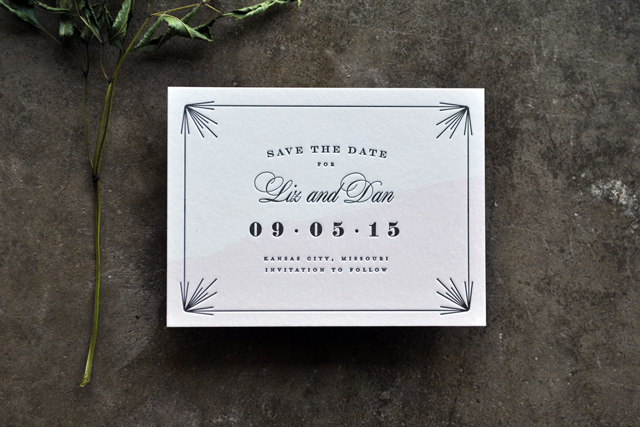
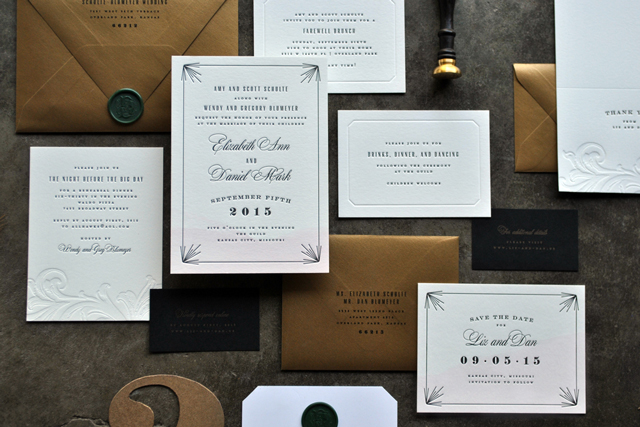
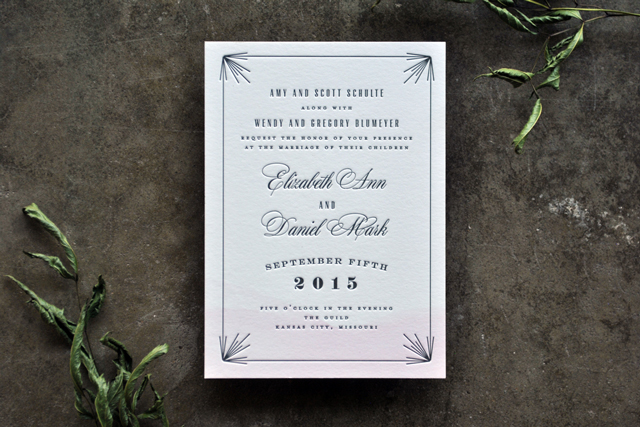
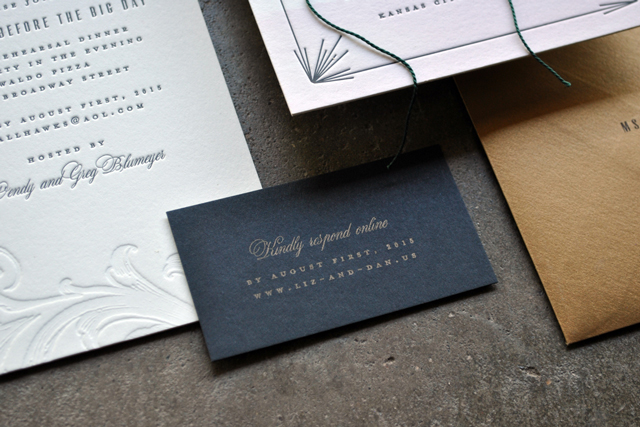
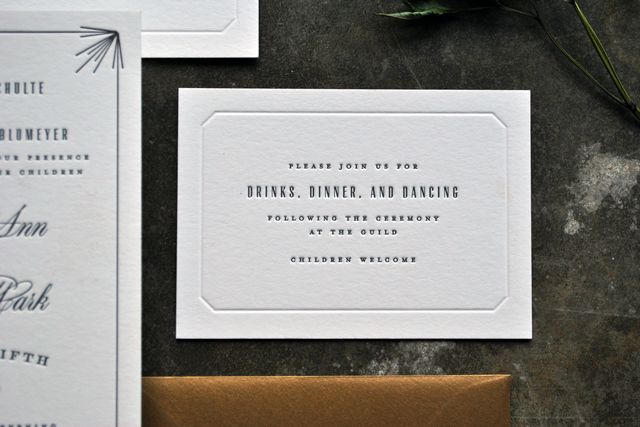
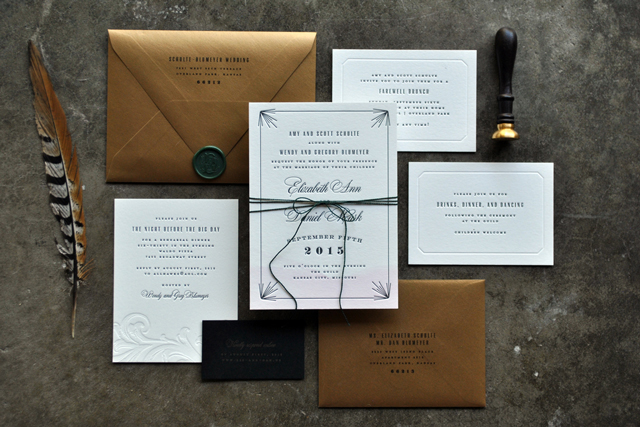
These gorgeous industrial glam wedding invitations from designer Liz Blumeyer combine beautiful vintage-inspired flourishes with modern details. The overall design was inspired by her wedding venue and her grandmother’s wedding dress from the 1950s (which Liz wore down the aisle!), with a classic ivory and black color palette and antique gold envelopes. I’m also loving the hand painted pink watercolor wash on the save the dates and invitation card. Such a subtle and beautiful detail!

Industrial Glam Wedding Invitations / Design: Liz Blumeyer / Oh So Beautiful Paper

From Liz: Our wedding stationery suite was inspired by our venue, The Guild KC – an industrial glam space featuring an enormous 1930s chandelier. Like the venue, the suite evokes a dramatic, moody feeling with a hint of vintage charm. The border on the invitation card was a nod to the ’30s, but since my dress was my grandmother’s from the 1950s we didn’t want an overwhelming Art Deco style in any of our printed pieces. We opted for a classic look without a defining influence from any particular era.

Industrial Glam Wedding Invitations / Design: Liz Blumeyer / Oh So Beautiful Paper

Industrial Glam Wedding Invitations / Design: Liz Blumeyer / Oh So Beautiful Paper

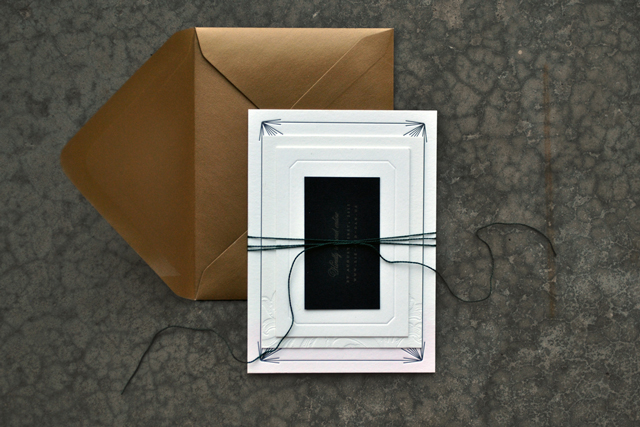
Our color palette was primarily black, ivory, and antique gold with small touches of orchid pink and emerald. The majority of the suite was letterpress printed on ivory paper in black ink. The response and website enclosures were letterpress printed on black paper in metallic gold ink. I was wary of adding too much color, so I opted for blind printed embellishments on the enclosure pieces to add a subtle texture without adding too much visual weight. I wanted an organic detail to balance the largely structured look of the suite, so I hand painted a soft pink watercolor wash on each invitation and save the date card before printing.

Industrial Glam Wedding Invitations / Design: Liz Blumeyer / Oh So Beautiful Paper

Industrial Glam Wedding Invitations / Design: Liz Blumeyer / Oh So Beautiful Paper

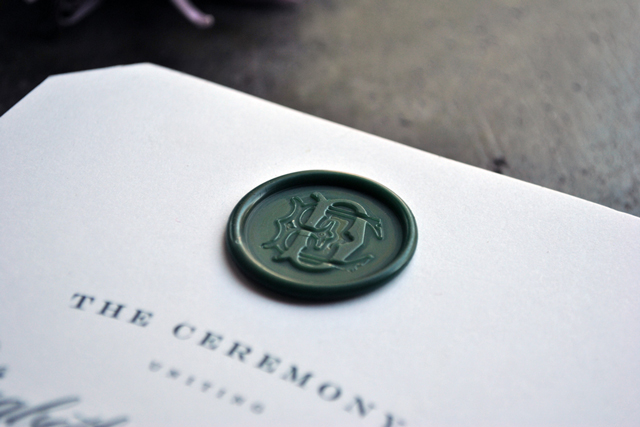
The pieces were tied together with a length of emerald embroidery floss before being inserted into the envelopes. We had a custom wax seal stamp made with our monogram, which we used as an embellishment on the envelopes as well as the ceremony programs.

Industrial Glam Wedding Invitations / Design: Liz Blumeyer / Oh So Beautiful Paper

Industrial Glam Wedding Invitations / Design: Liz Blumeyer / Oh So Beautiful Paper

Industrial Glam Wedding Invitations / Design: Liz Blumeyer / Oh So Beautiful Paper

Thanks Liz!

Design: Liz Blumeyer

Letterpress Printing: PaperSnaps

Check out the Designer Rolodex for more tal­ented wed­ding invi­ta­tion design­ers and the real invi­ta­tions gallery for more wedding invitation ideas!

Photo Credits: Liz Blumeyer

A Mock Tai

So, last month’s exploration of classic cocktails was cut a little short. We decided, with very little notice, to undertake a major house renovation project, the complete redo of our only full bathroom. Over the holidays. Yeah, we’re smart people. Anyway, we’re back this month to do something we’ve never done before: spend some time trying out mocktail recipes. Yup. This January is now Dry-uary. Let’s start with a mocktail version of one of our favorite Tiki drinks: A Mock Tai – Andrew
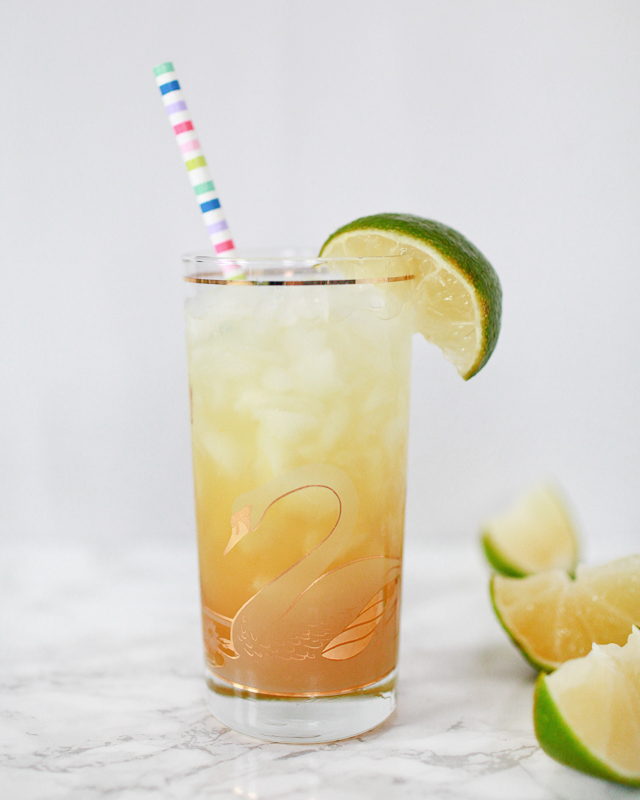
Mocktail Recipe Ideas: The Mock Tai / Liquorary for Oh So Beautiful Paper

A Mock Tai

1 oz Pineapple Shrub
1/2 oz Orgeat
1/2 oz Lime Juice
1/2 oz Pineapple Juice
1/4 Rose Cordial
Ginger Beer

Fill a highball glass with crushed ice and add the shrub, orgeat, juices, and cordial. Top with ginger beer. Gently slide a barspoon into the glass, then twirl it between your hands while moving the spoon up and down to swizzle the drink. Garnish with a lime wheel and enjoy!
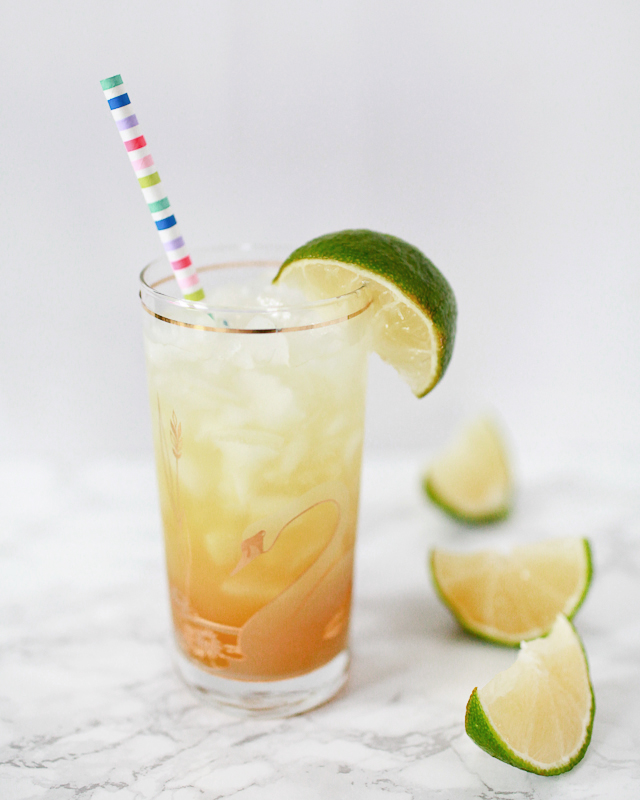
Mocktail Recipe Ideas: The Mock Tai / Liquorary for Oh So Beautiful Paper

Dryuary is a real thing, sort of, a semi-serious annual tradition of taking a month off from drinking in order to reset your relationship with alcohol. Or something along those lines. I decided to give it a try this year, to start the year refreshed and to have some time to thing about which cocktails I’d like to write about for the rest of the year and to finally give myself some time to seriously try out some mocktail recipes.

I’ve given mocktails short shrift, and I wish I hadn’t. Some people don’t drink, and sometimes people who drink don’t want to drink or can’t drink, and they still deserve well-crafted mocktails with the same depth of flavor and texture as a cocktail, just without the booze. So: Dryuary.
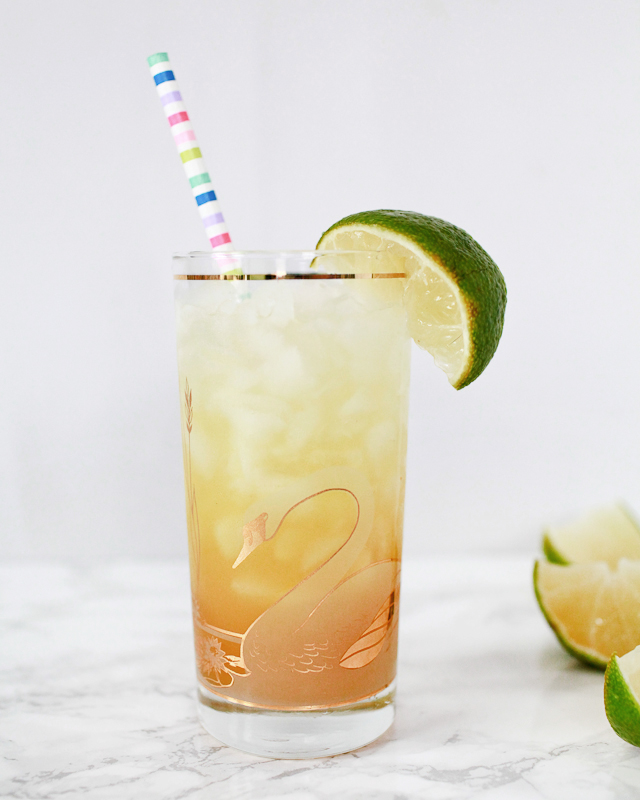
Mocktail Recipe Ideas: The Mock Tai / Liquorary for Oh So Beautiful Paper

This Mock Tai is inspired, of course, by the tropical flavors of a Mai Tai. It doesn’t seek to mimic or emulate a Mai Tai; there’s no way you can really do that without rum. It combines a brightly tart, fruity shrub (a vinegar-based syrup) with creamy, rich orgeat – the quintessential Mai Tai ingredient (after that rum). Throw in some sweet and tart citrus, a bit of floral sweetness, and ginger beer’s peppy zip, and you have something that has a Tiki drink’s depth of layered flavors without parodying them

And it’s pretty tasty, too.

(Don’t forget to follow us on Instagram, where we’ve been posting our experiments before they make their way onto this column!)

Glassware by Liquorary

Photo Credits: Nole Garey for Oh So Beautiful Paper 

Best of 2015: My Favorites

Oh So Beautiful Paper: The Best of 2015 / Calligraphy by Cast Calligraphy

Image by Cast Calligraphy

Today I’m wrapping up my 2015 recap posts with some of my personal favorite posts from the year! 2015 was, for me, kind of a chaotic year. I feel like I spent most of the year chasing deadlines and constantly running around in an effort to just keep up, which didn’t leave much time to think about the future or how I want to grow my business. So while I’m still trying to wrap my head around my thoughts and goals for 2016, I know that at least part of what I want for the new year is to slow down, simplify, and focus on doing things intentionally rather than constantly reacting to everything around me. In the meantime, I’ve been looking back at 2015 to figure out what worked, what brought me joy (like the posts below), what I want to change, and what I want to do MORE of in 2016.

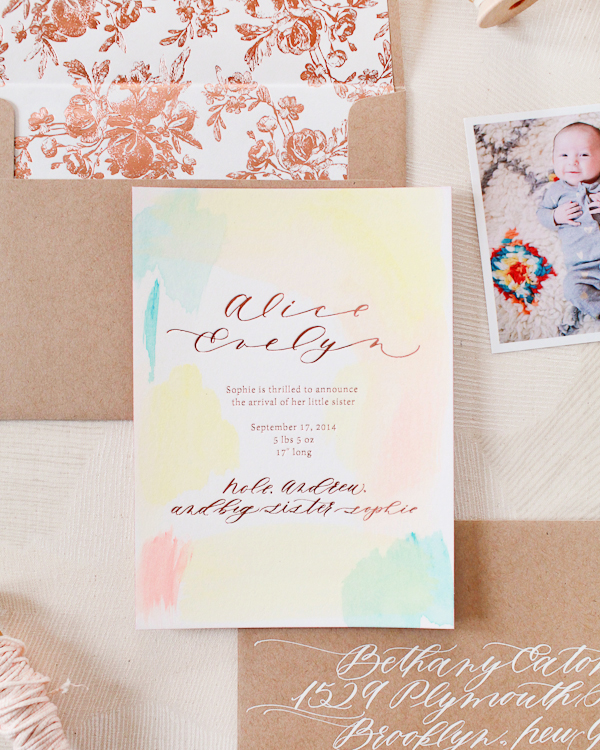
Hand Painted Rose Gold Foil Baby Announcements / Oh So Beautiful Paper

Alice’s Hand Painted Rose Gold Foil Baby Announcements

Okay, so I’m obviously totally biased, but I’m still completely nuts for Alice’s birth announcements! Each individual announcement was hand painted by Jenna of Mon Voir, meaning no two announcements are the same, and feature Jenna’s calligraphy and text printed in rose gold foil by Bella Figura on their gorgeous smooth cotton paper.

Brick + Mortar: All About NSS Mailers / Oh So Beautiful Paper

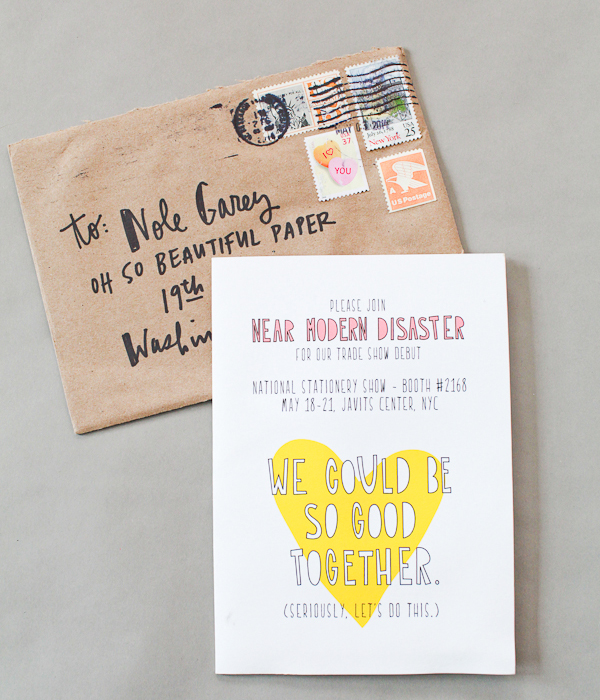
Brick + Mortar: All About NSS Mailers

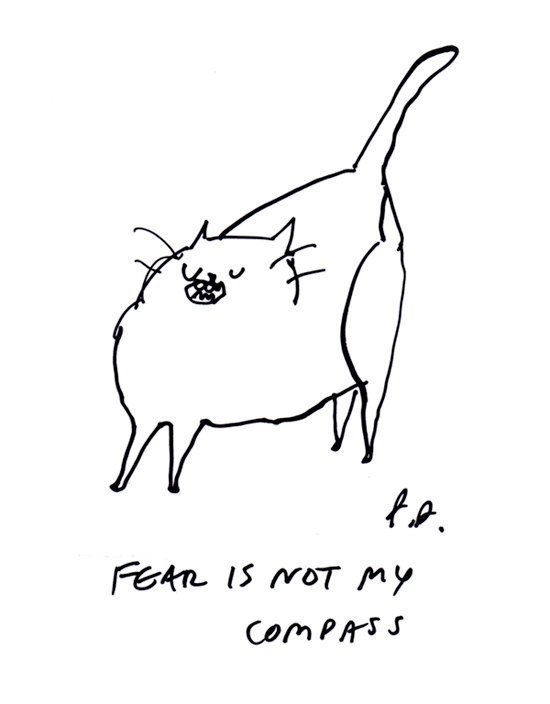
Emily‘s Brick + Mortar column continues to be one of my favorite bright spots on OSBP! Two of my favorite installments from 2015 are the post that Emily and I co-wrote in March about NSS mailers and Emily’s post in September about the importance of the word “no” in growing your business.

Brick + Mortar: How Saying No Can Help You Grow Your Business / Art by the Dancing Cat / Oh So Beautiful Paper

Brick + Mortar: How “No” Can Help You Grow Your Business / Artwork by The Dancing Cat

Paper Party 2015! / Oh So Beautiful Paper / Photo by Charlie-Juliet Photography

Paper Party 2015!

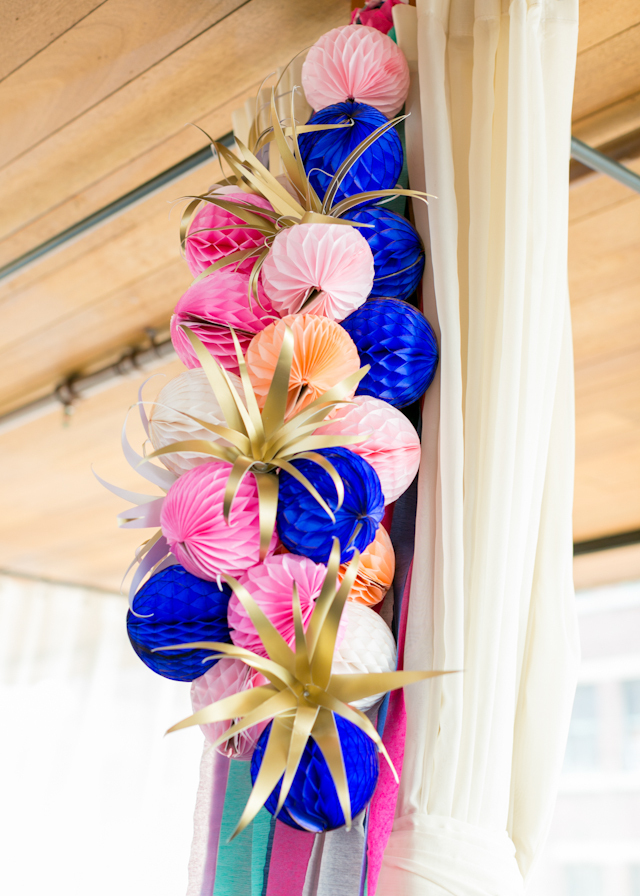
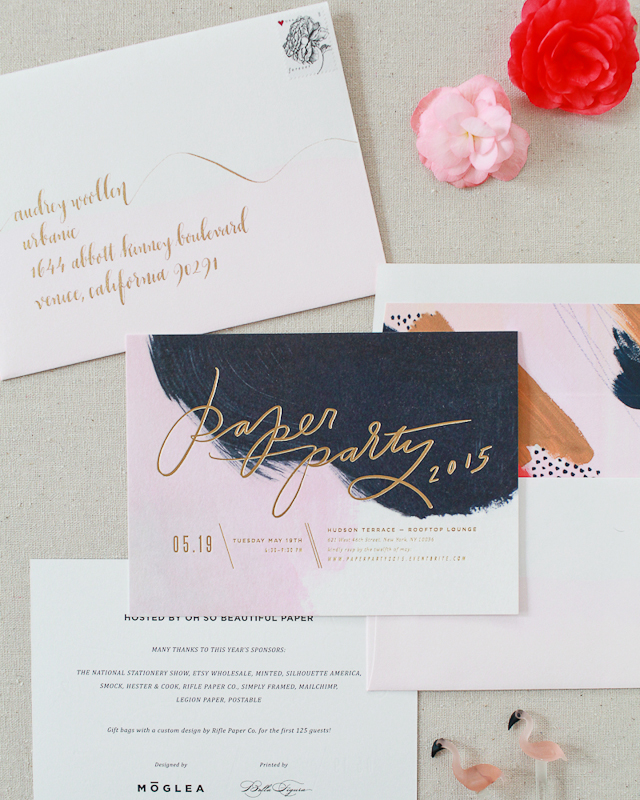
This year’s Paper Party was a huge undertaking and SO much fun! We went with a subtle tropical theme with a color palette of cobalt blue, gold, and shades of pink, and plenty of tropical details like palm fronds, flamingos, and tropical fruit. The invitations were designed by Moglea with a hand painted background, hand painted envelope liner pattern, and text printed in matte gold foil by Bella Figura. Michele of Meant to Be Calligraphy addressed the envelopes in gold ink, and I dip dyed them in pink Kool-Aid!

Hand Painted and Matte Gold Foil Invitations for Paper Party 2015 / Oh So Beautiful Paper

Paper Party 2015 Invitations!

Tips for Working from Home / Bright Room Studio for Oh So Beautiful Paper

Tips for Working from Home from Bright Room Studio

Love these tips from Kim of Bright Room Studio for anyone working from home!

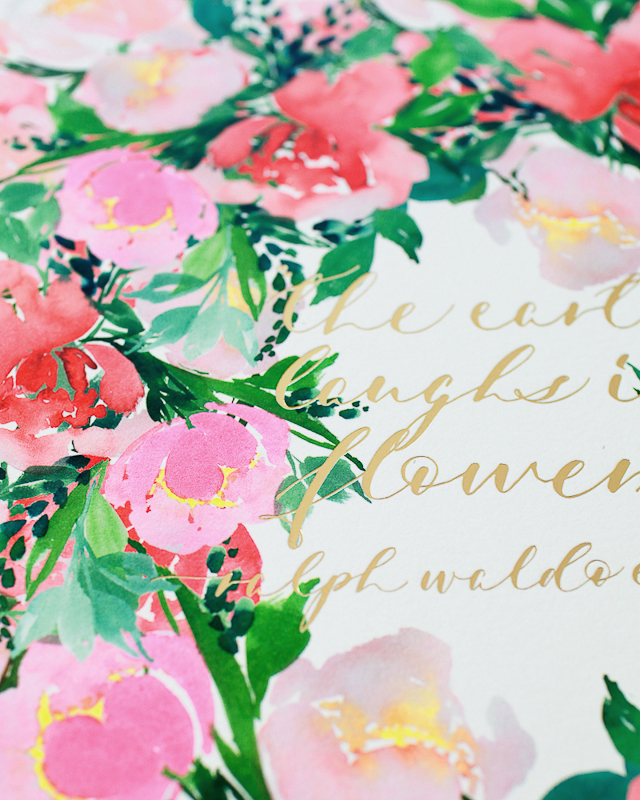
The Earth Laughs in Flowers / Oh So Beautiful Paper + Mon Voir Calligraphy Collaboration

The Earth Laughs in Flowers Art Print

Our very first limited edition art print! I collaborated with Jenna of Mon Voir on these gorgeous art prints featuring her floral watercolor artwork and calligraphy printed in matte gold foil. I can’t wait to do more of these collaborations in 2016, and in the meantime you can pick up your very own print right here!