DIY Tutorial: Fig & Gold Calligraphy Save the Date

A few years ago, we participated in a gorgeous vintage plum & gold inspiration shoot. Besides contributing our Gold Leaf Collection place settings to the shoot, we were also asked to provide a calligraphy menu and all of the place cards for the table. To this day, we still inquiries for save the dates or invitations that reference the menu from that shoot because the combination of the fig paper with gold calligraphy is so incredibly striking. – Bailey and Emma of Antiquaria

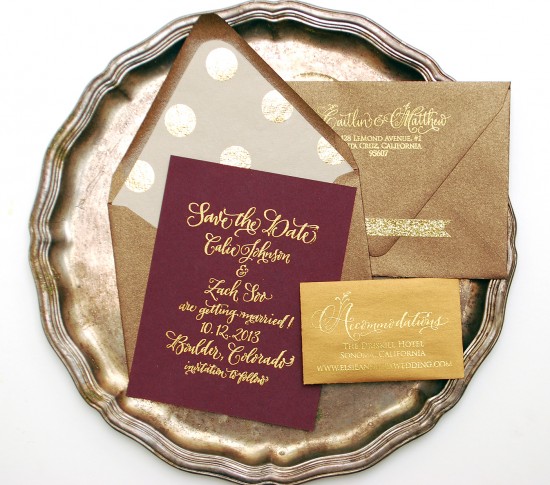
DIY Tutorial: Fig + Gold Calligraphy Save the Dates by Antiquaria via Oh So Beautiful Paper

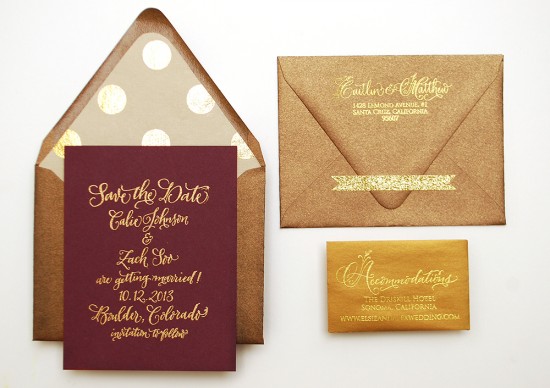
By embossing these stamps with gold powder it really creates a high end, custom looking save the date!

DIY Tutorial: Fig + Gold Calligraphy Save the Dates by Antiquaria via Oh So Beautiful Paper

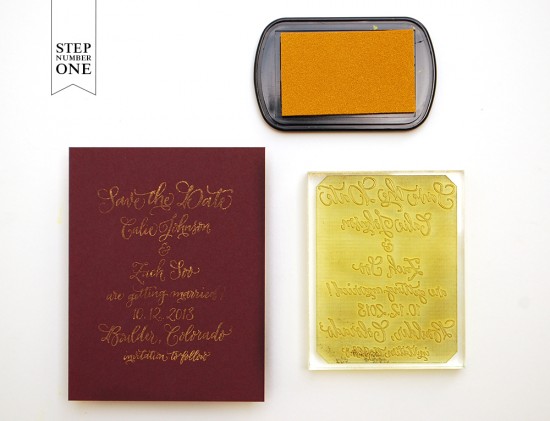
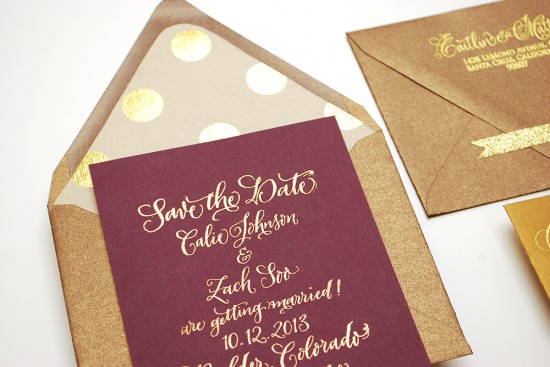
Step One: Place your A2 card on a stable and firm surface. Ink your save the date stamp (we used our Calligraphy Save the Date, No.2 stamp) and center the stamp over your card. When ready, press the stamp down with moderate pressure to make the print. Lift the stamp off and quickly move on to step number two. For more information about inking your stamp or making prints, please watch this video that shows the process in more detail.

DIY Tutorial: Fig + Gold Calligraphy Save the Dates by Antiquaria via Oh So Beautiful Paper

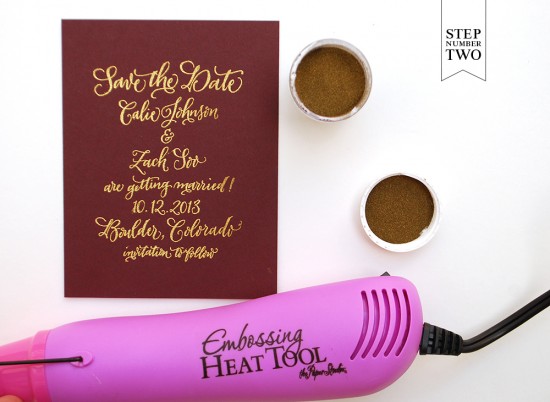
Step Two: Once you’ve made your print, immediately cover it with embossing powder by sprinkling it across the paper. Shift the powder around until you have covered the entire image. Now, you will pour the excess powder off of the card onto a scrap piece of paper so that you can reuse it for future prints. Heat set the print, using an Embossing Heat Tool. You will be able to see the powder melt into a smooth and shiny gold when it’s done.

Note: One key thing about embossing is that it is wise to try to closely match your ink color with your powder color. By doing this, you will get much more crisp and opaque results. Since we are wanting a lovely and shiny gold print, we used both a gold stamp pad and gold embossing powder.

DIY Tutorial: Fig + Gold Calligraphy Save the Dates by Antiquaria via Oh So Beautiful Paper

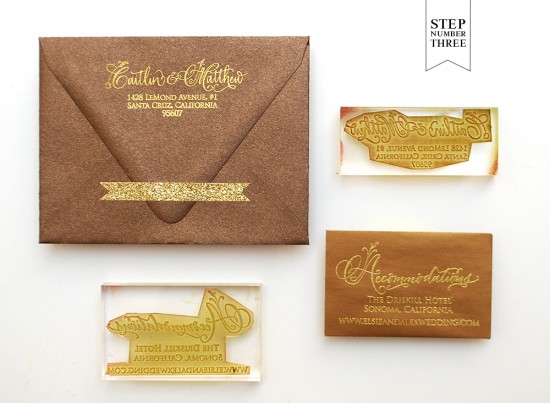
Step Three: You will now just repeat this inking and embossing process for your remaining pieces (we used our Floral Calligraphy Return Address stamp and our Floral Calligraphy Accommodations stamp) that will coordinate with your save the date. For the accommodations card, you will use a standard business sized card.

DIY Tutorial: Fig + Gold Calligraphy Save the Dates by Antiquaria via Oh So Beautiful Paper

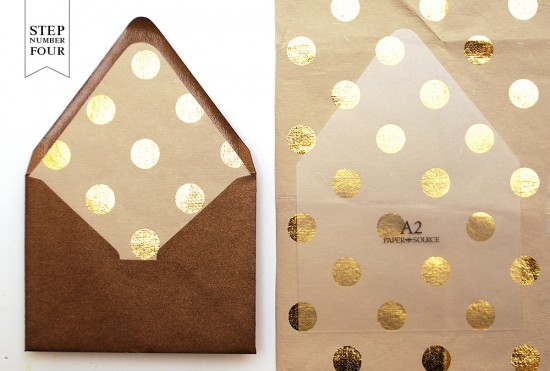
Step Four: To add a little extra personality to the suite, we added an envelope liner made from some awesome kraft and gold polka dot gift wrapping paper. It really helps tie the whole thing together! Trace the template onto your paper and cut it out with scissors. To install, simply use stick glue or double sided tape to adhere them into your envelope.

DIY Tutorial: Fig + Gold Calligraphy Save the Dates by Antiquaria via Oh So Beautiful Paper

DIY Tutorial: Fig + Gold Calligraphy Save the Dates by Antiquaria via Oh So Beautiful Paper

Finally, address the invitations, add postage, and send them off to delight your guests! You can also accent the suite with sparkly gold washi tape if you like!

Materials:

Calligraphy Save the Date Stamp, No.2

Floral Calligraphy Return Address Stamp

Floral Calligraphy Accommodations Card

Stamp Pad

Embossing Powder

Heat Gun

A2 Cards in Fig

A2 Envelopes in Antique Gold

Business Cards for the Accommodations piece, in Antique Gold

Gift Wrap to be used as an envelope liner, ours was purchased locally from Urbanic

Envelope liner templates

Pencil

Scissors

Glitter Washi Tape

Photo Credits: Antiquaria
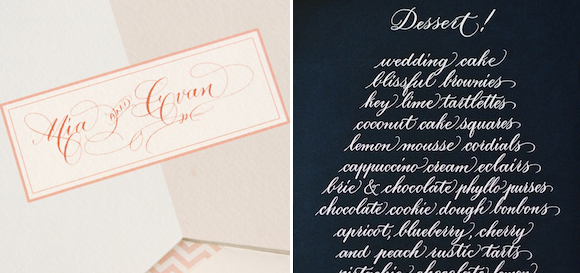
Calligraphy Inspiration: MM Ink

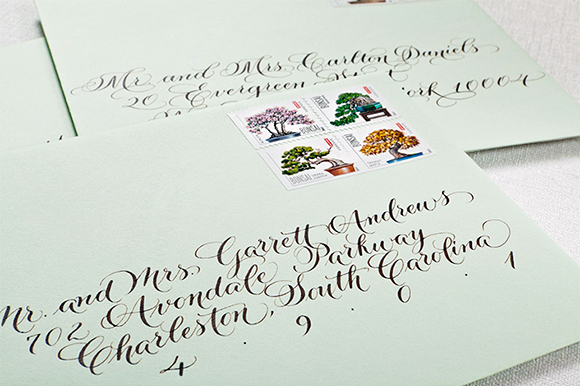
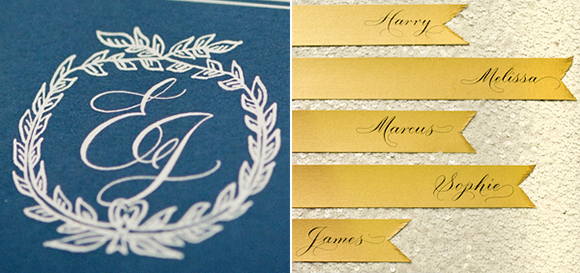
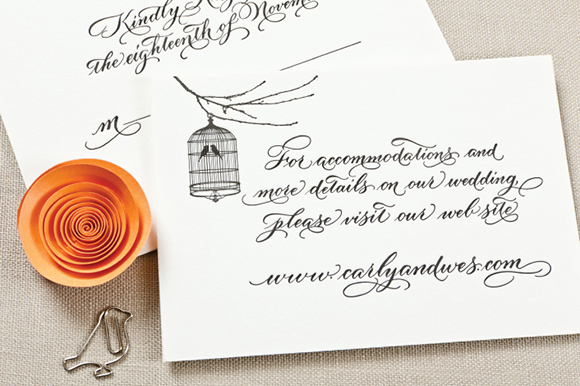
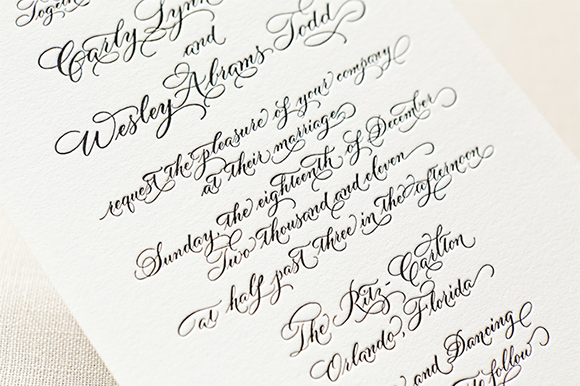
I am constantly amazed by how many talented calligraphers I come across. Especially when it comes to more traditional, intricate lettering. Take the work of Moya Minns of MM Ink for example. She studied under Chief White House Calligrapher and Master Penman, Pat Blair (Ooh!); as well as with the legendary Sheila Waters. (Ahh!) Moya is also a member of IAMPETH, and has had her work featured in Martha Stewart Weddings and Southern Weddings Magazine. I am now aspiring to write just one word as beautifully as Moya does one day. – Julie

Calligraphy Inspiration: MM Ink

Calligraphy Inspiration: MM Ink

Calligraphy Inspiration: MM Ink

Romantic and lively, wouldn’t you agree? Moya’s calligraphy is class all the way; the perfect finishing touch to your invitation suite.

Calligraphy Inspiration: MM Ink

MM Ink wedding invitation calligraphy

After looking through Moya’s work, you’ll no doubt have to pick your jaw off the floor. Who needs additional ornamentation with calligraphy this stunning?

Calligraphy Inspiration: MM Ink

You’ll be happy to hear that MM Ink provides many calligraphy styles to choose from. With so many options, I’m sure you can find something that will perfectly compliment your event. Don’t forget to keep up with Moya on her blog! It’s filled with some lovely sneak peeks at her work.

Photo credits: 1, 3 left: Tanja Lippert Photography, right: Sanderson Images; 2, 4-5 Claudia Lopez Photography; 6 left: Amelia Johnson Photography, right: A Bryan Photo

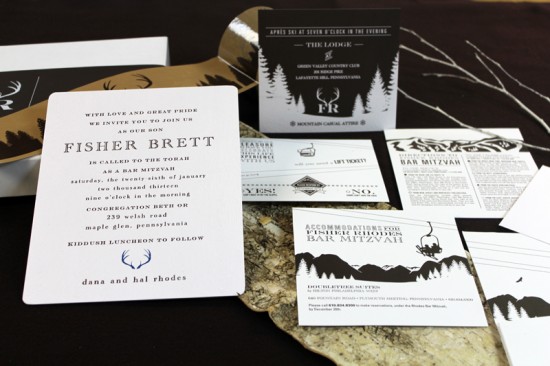
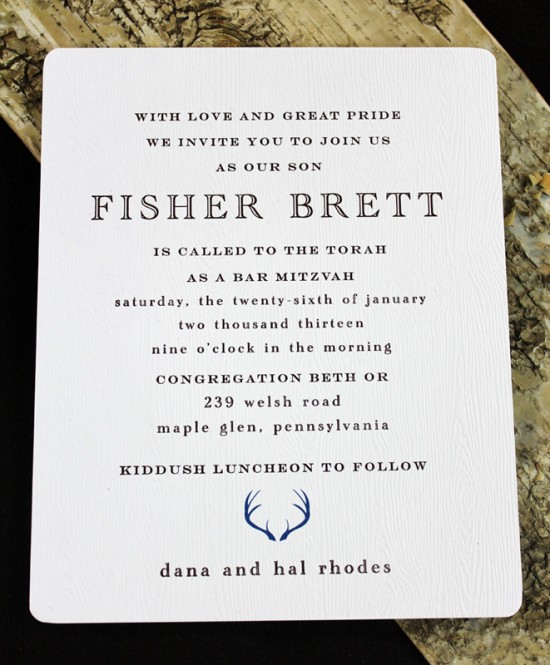
Fisher’s Mountain Ski Theme Bar Mitzvah Invitations

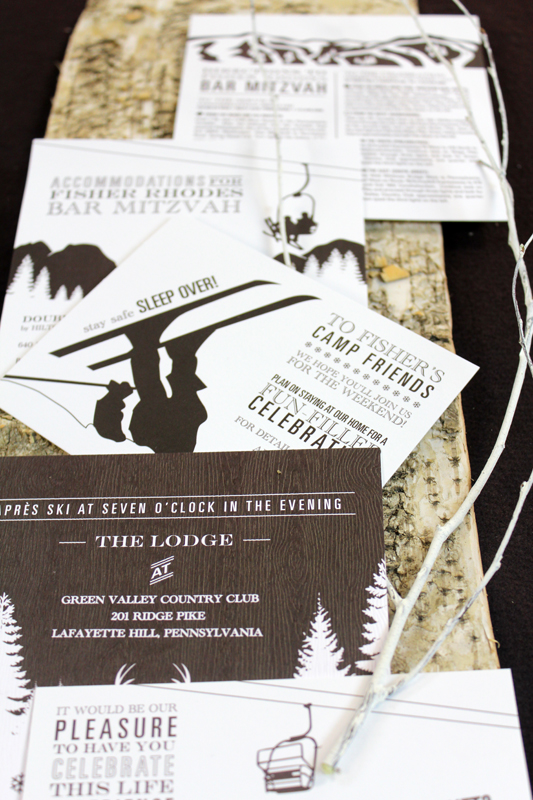
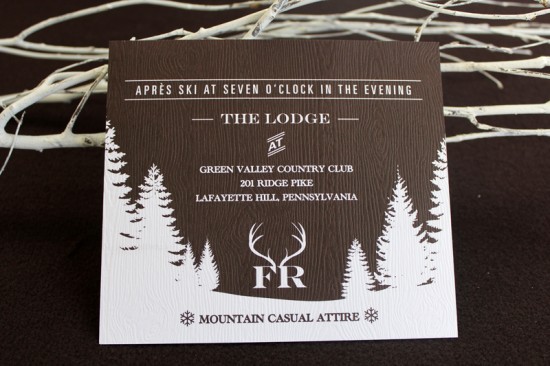
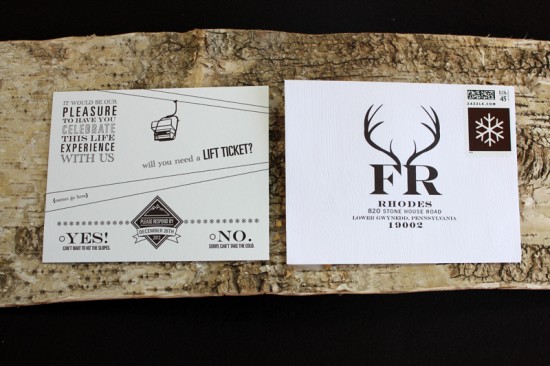
Bar and Bat Mitzvah invitations are serious business. I love seeing all the creative themes for the receptions after the ceremony! These particular invitations come to us from La Petite Fleur and were created with a snow lodge and ski theme in mind, and actually incorporate custom made scarves! There are lots of other wonderful details in this suite, but I think my favorite is perhaps the most simple – the beautiful antler monogram created using Fisher’s initials.

Ski Themed Bar Mitzvah Invitations by La Petite Fleur via Oh So Beautiful Paper (3)

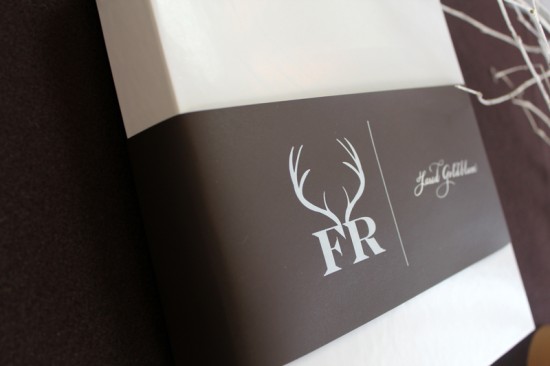
From Leigh: Our clients, leaders in the garment industry, came to us for a custom invitation suite for their son Fisher’s Bar Mitzvah. They asked for a unique suite that incorporated a piece of clothing and that was expertly handcrafted. Along with the event’s “snow lodge/après ski” theme in mind, we designed a monogram with Fisher’s initials – FR – and a “North Fisher” logo, both of which were used throughout the invitation suite.

Ski Themed Bar Mitzvah Invitations by La Petite Fleur via Oh So Beautiful Paper (2)

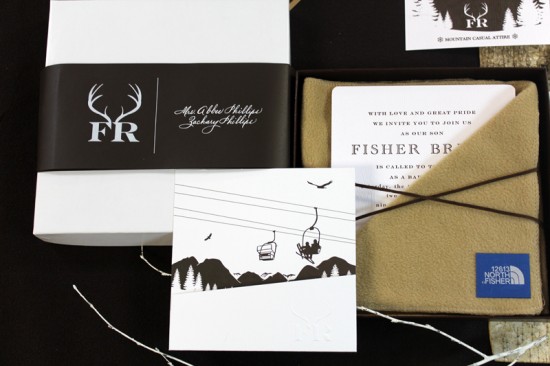
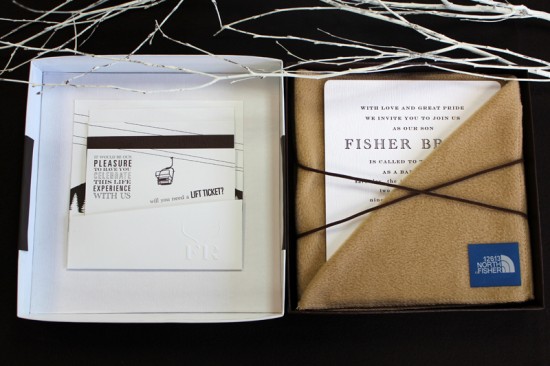
The North Fisher icon was applied to a custom made camel scarf, which would serve as a “pocket” for the suite’s letterpress printed, foil-stamped, die cut, two color invitation card, which was printed on embossed Barque paper.

Ski Themed Bar Mitzvah Invitations by La Petite Fleur via Oh So Beautiful Paper (6)

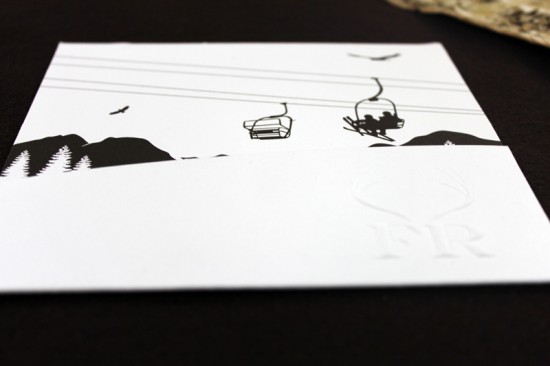
To house the various custom-designed inserts within this Mitzvah suite, we created a die cut pocket that featured an angled front with a blind embossed logo. On the inside back of the pocket was an illustrated ski scene, which was revealed once all the inserts were stacked inside, like pieces of a puzzle. Each of the insert cards was custom illustrated to feature a portion of the overall ski and snow graphics scene.

Ski Themed Bar Mitzvah Invitations by La Petite Fleur via Oh So Beautiful Paper (9)

Ski Themed Bar Mitzvah Invitations by La Petite Fleur via Oh So Beautiful Paper (7)

Ski Themed Bar Mitzvah Invitations by La Petite Fleur via Oh So Beautiful Paper (8)

Ski Themed Bar Mitzvah Invitations by La Petite Fleur via Oh So Beautiful Paper (1)

Ski Themed Bar Mitzvah Invitations by La Petite Fleur via Oh So Beautiful Paper (10)

Ski Themed Bar Mitzvah Invitations by La Petite Fleur via Oh So Beautiful Paper (5)

The scarf, with its tucked-in invitation, was nestled in the bottom of the custom box. The accompanying graduated inserts and pocket were adhered to the inside lid. The custom box was then wrapped and tied with a brown suede belly band that featured the FR monogram in a white foil stamp, and secured with brown suede ribbon. Guest names and addresses were written in white calligraphy.

Ski Themed Bar Mitzvah Invitations by La Petite Fleur via Oh So Beautiful Paper (4)

Thanks Leigh!

Photo Credits: La Petite Fleur

Jes + Ivan’s Pink and Gray Chevron Stripe Save the Dates

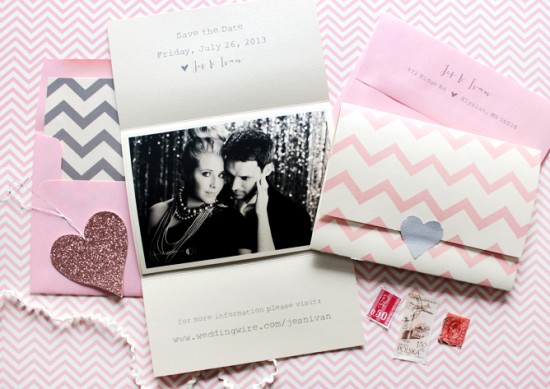
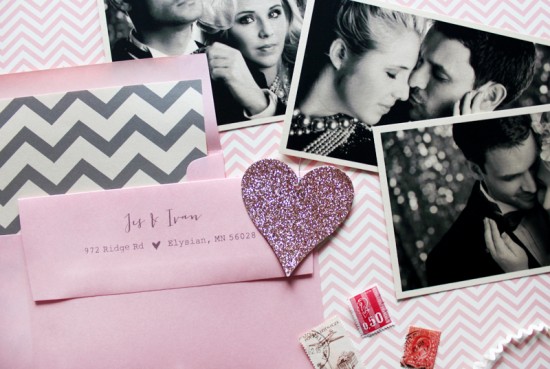
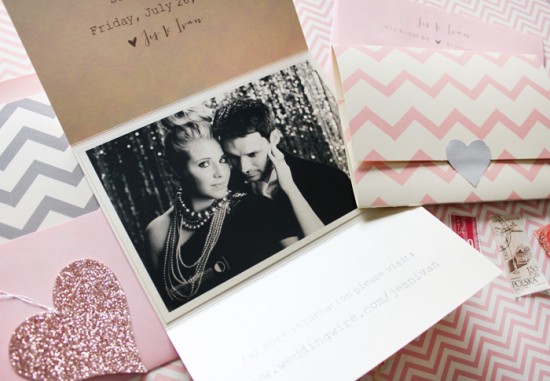
These save the dates from Gina at Ginger P Designs are so sweet, from the pink and gray color palette to the gorgeous engagement photos of the couple. The pink and gray chevron stripes and state illustrations are the perfect complement to the black and white photos!

Pink + Gray Chevron Stripe Save the Dates by Ginger P Design via Oh So Beautiful Paper (3)

From Gina: Jes knew she wanted to send out something that would tie in the ivory, pink, and gray color scheme of her wedding. She wanted a patterned “fold-open” piece that would highlight their picture with simple text, and of course with lots of pink!

Pink + Gray Chevron Stripe Save the Dates by Ginger P Design via Oh So Beautiful Paper (2)

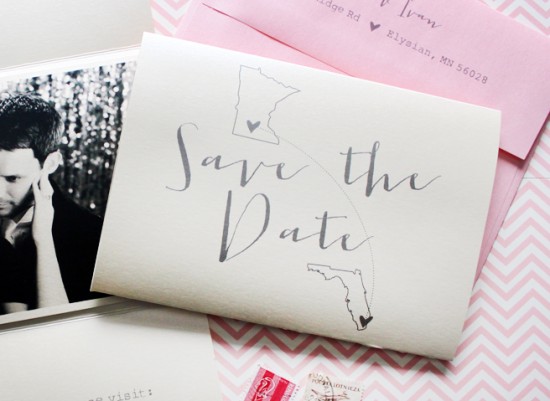
My favorite part is the little heart map on the back of the folded piece that highlights where both Jes and Ivan are from. They actually met in Miami when Jes was attending school and Ivan was living there, they will be having many guests flying in from all over the country and world for their Minnesota wedding in July!

Pink + Gray Chevron Stripe Save the Dates by Ginger P Design via Oh So Beautiful Paper (1)

I printed the chevron pattern and inside text on ivory shimmer stock, then hand-folded the save the dates using my boning tool. The only thing Jes had to do was paste in her beautiful photo! We then matched a pink shimmer envelope with a chevron patterned liner and gray calligraphy font for the guest and return addresses.

Pink + Gray Chevron Stripe Save the Dates by Ginger P Design via Oh So Beautiful Paper (4)

Thanks Gina!

Check out the Designer Rolodex for more tal­ented wed­ding invi­ta­tion design­ers and the save the date gallery for more beau­ti­ful cus­tom save the dates!

Photo Credits: Ginger P Designs, Engagement photo by Daniel Dinsmore Photography

{happy weekend!}

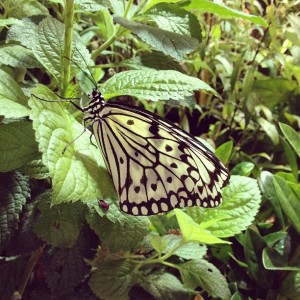
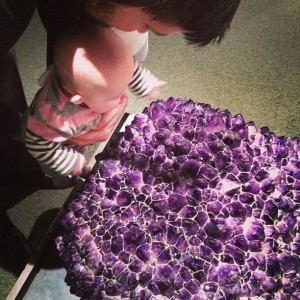
As much as I grumble about housing prices and other various DC-related headaches, this week reminded me of how much I really do love my city. We took Sophie to the Natural History Museum for the first time, mostly on a whim and only about an hour before it closed, but the museum was practically empty and it was so perfect. We enjoyed the live butterfly pavilion, but she really loved the gemstone exhibit – and who can blame her? Sparkly things in bright colors? Perfect for babies! Our afternoon at the museum made me even more excited for spring and summer, when we can do more outdoor things with Sophie. But in the meantime…


All photos by me via Instagram

…a few links for your weekend!

This week on Oh So Beautiful Paper:

We’ve got a little pre-Valentine’s Day treat coming up for you this afternoon… I don’t want to spoil the surprise, so check back a bit later this afternoon! I hope you all have a wonderful weekend, and I’ll see you back here on Monday! xoxo