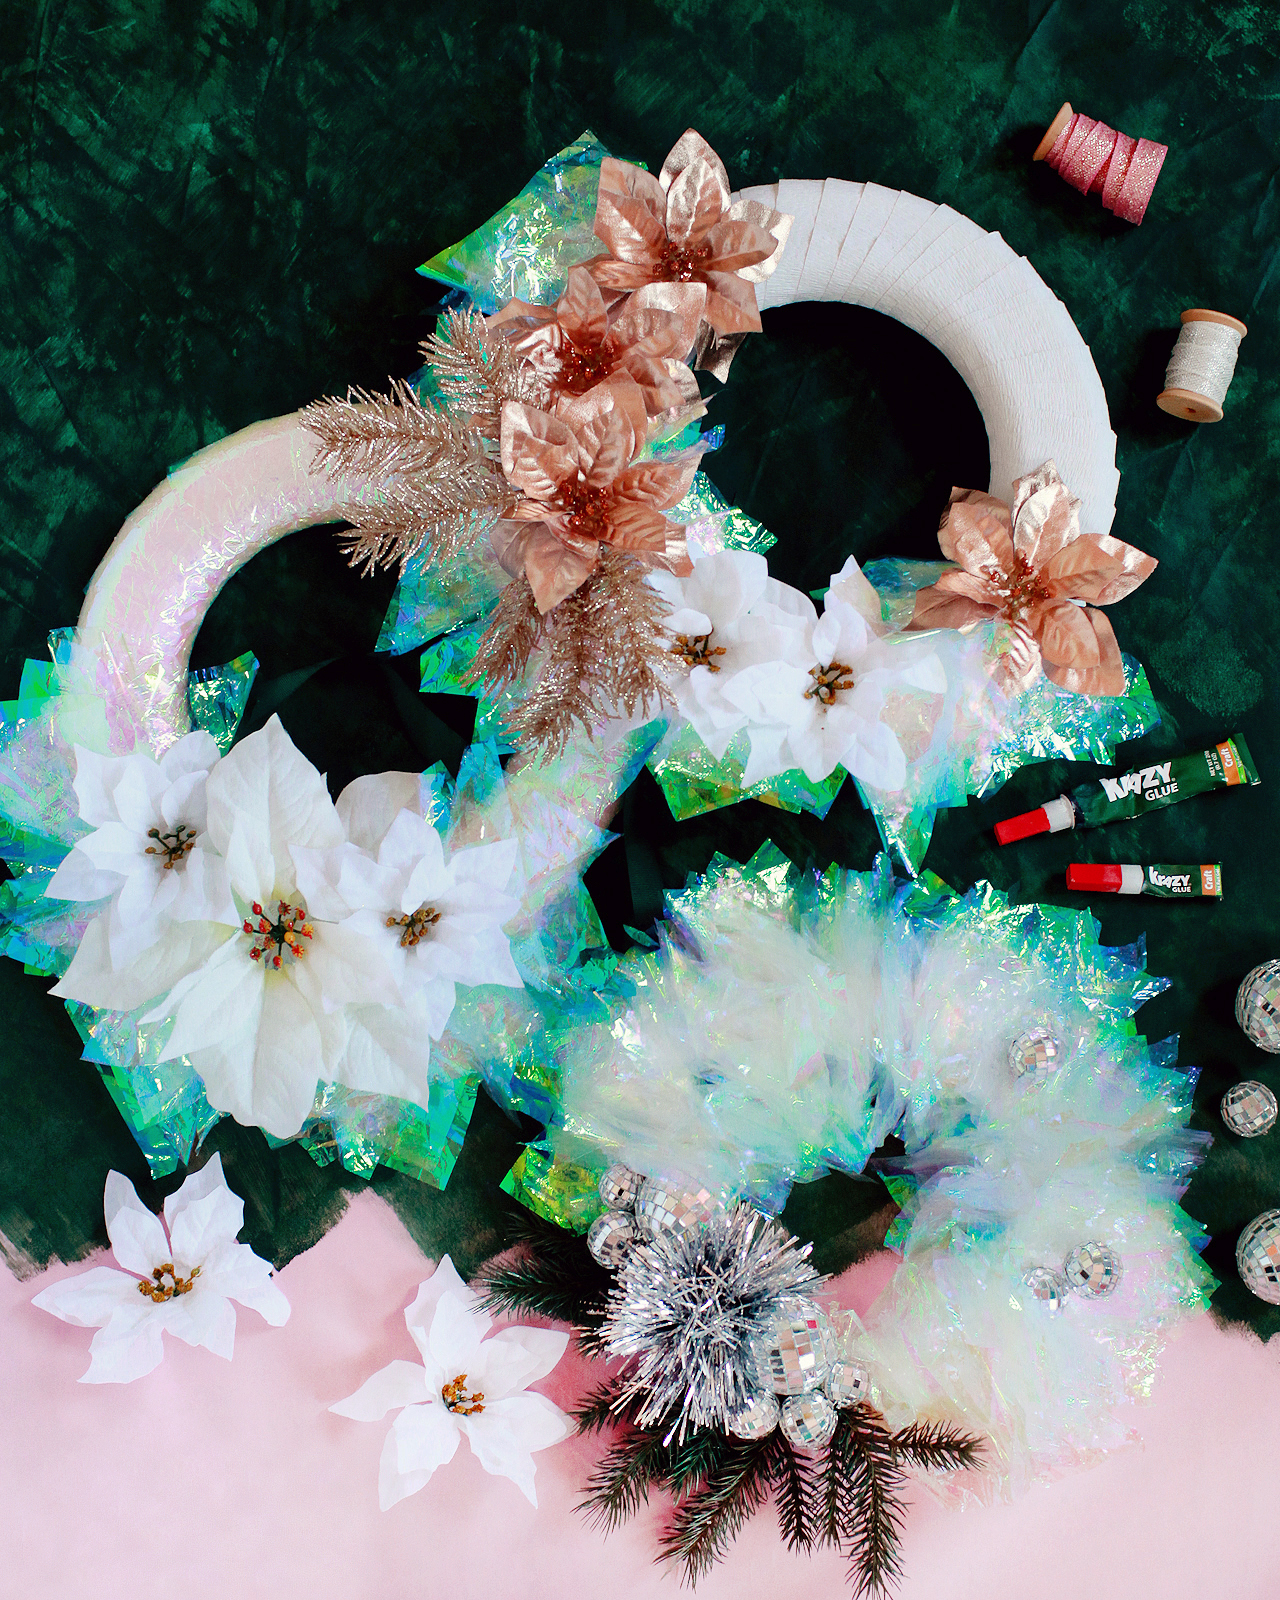
I kind of missed out on holiday decorating last year. We were in the middle of renovating our bathroom for most of December and were living at a rental apartment for Christmas and New Year’s. So I’m making up for it this year by decorating ALL of the rooms in our house. Wreaths are such an easy way to decorate for the holidays, especially when there are little kids running around! Today I’m super excited to team up with Krazy Glue to share a trio of DIY iridescent winter wreaths that you can make for the holidays! I’m always looking for more ways to bring iridescent shimmer into my life, especially during the holidays. And these wreaths look so cute hanging on doors from a colorful ribbon, they’d be the perfect way to decorate a kids bedroom for the winter season!

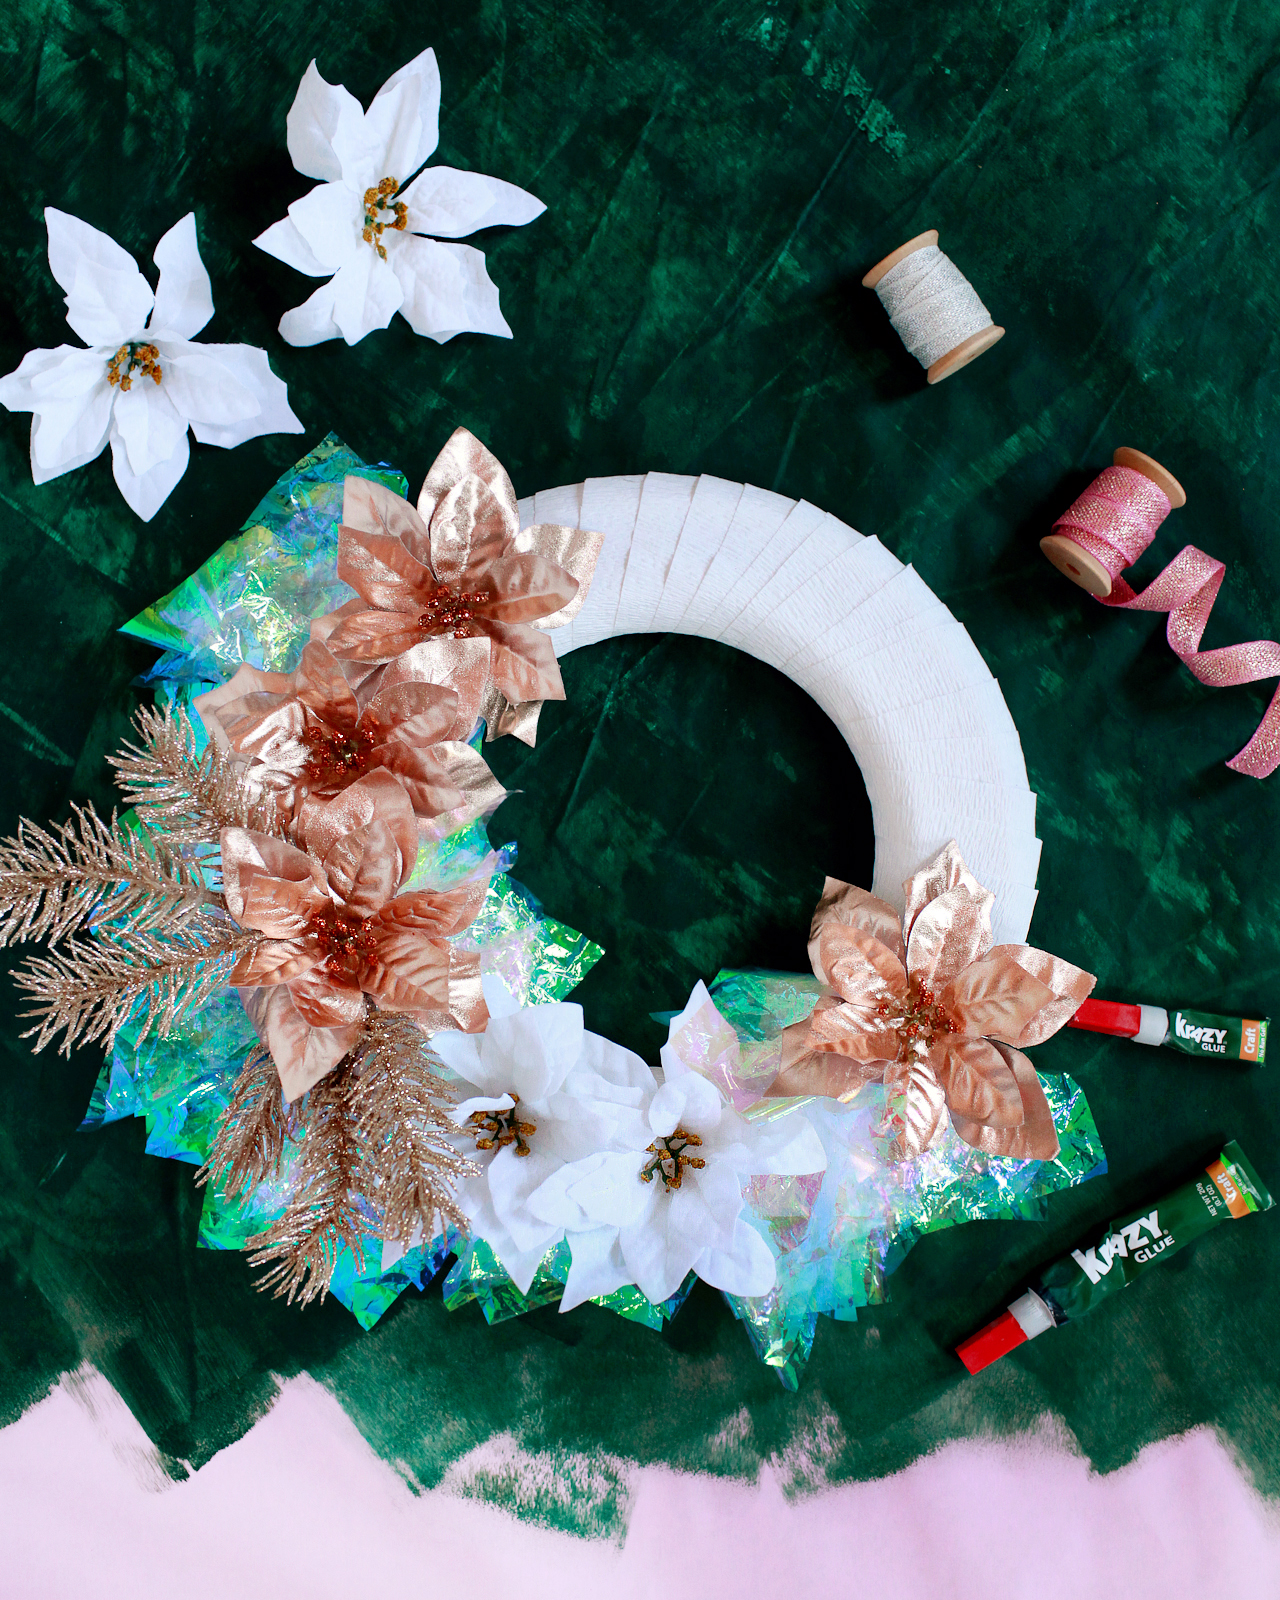
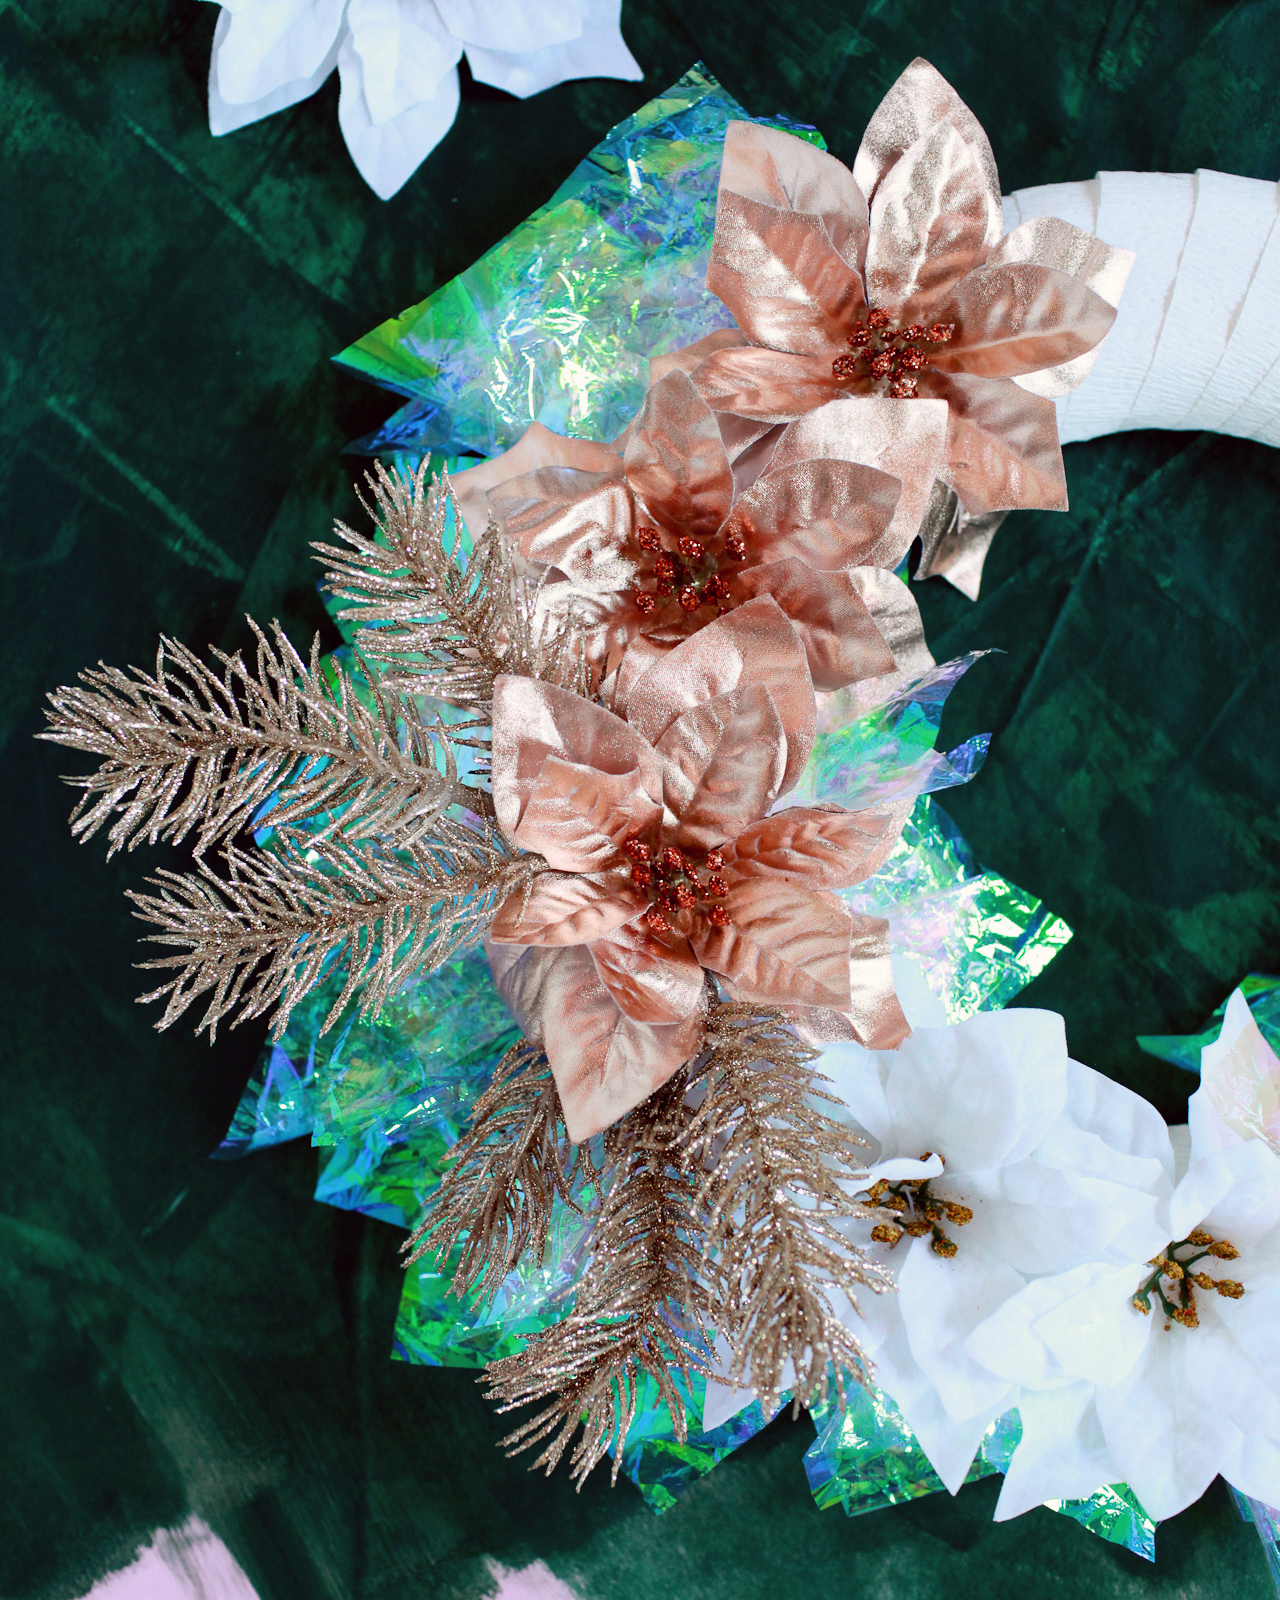
When it comes to the holidays and winter months, I like to use decorations that can stay up even after the Christmas tree comes down. I mean, January and February are rather dark and dreary – and DEFINITELY in need of some extra sparkle, don’t you think? I always buy a few potted poinsettias and grow paperwhites during the winter, and I’ll probably leave some of our twinkle lights on the mantel for a few weeks. I took the same approach with this trio of winter wreaths, bringing in seasonal faux foliage like poinsettias and pine sprigs and mixing winter whites and metallics with shimmery iridescent tissue. Make a few wreaths for Christmas and then keep them up through the end of January!
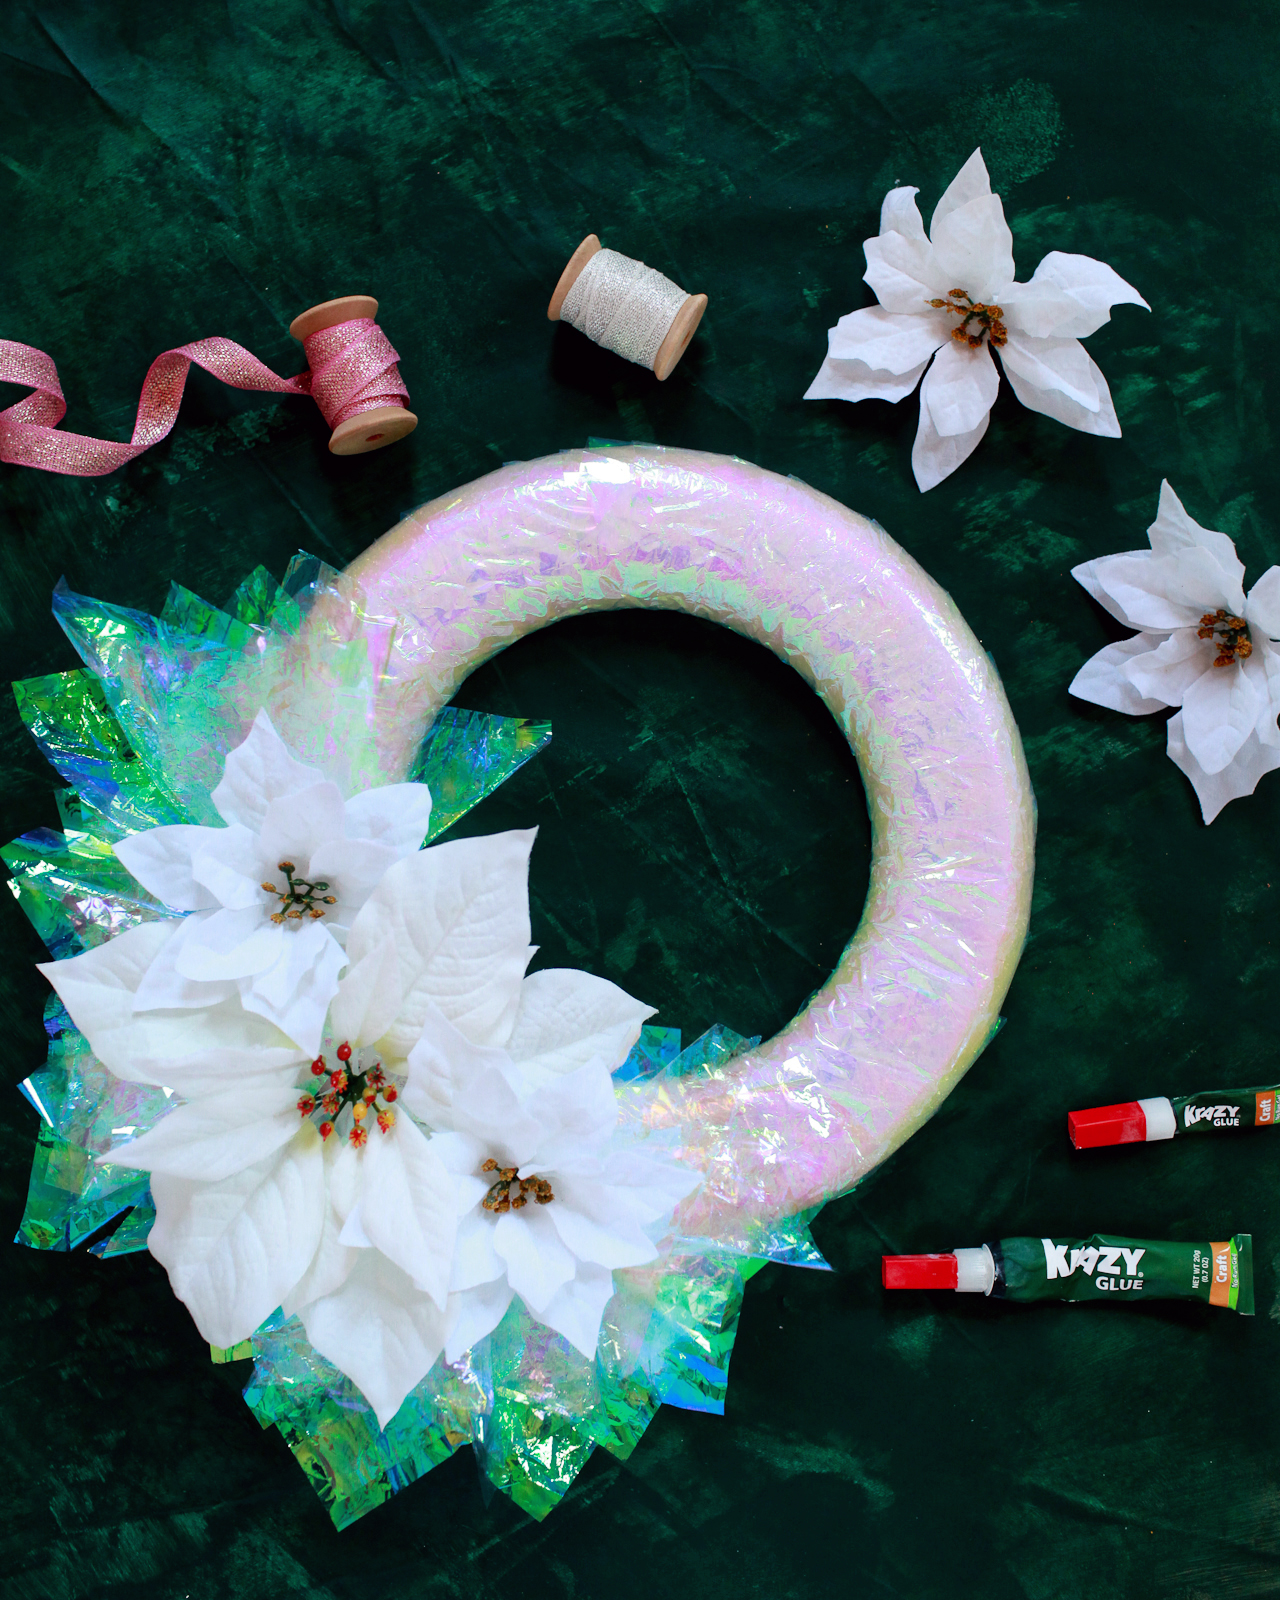
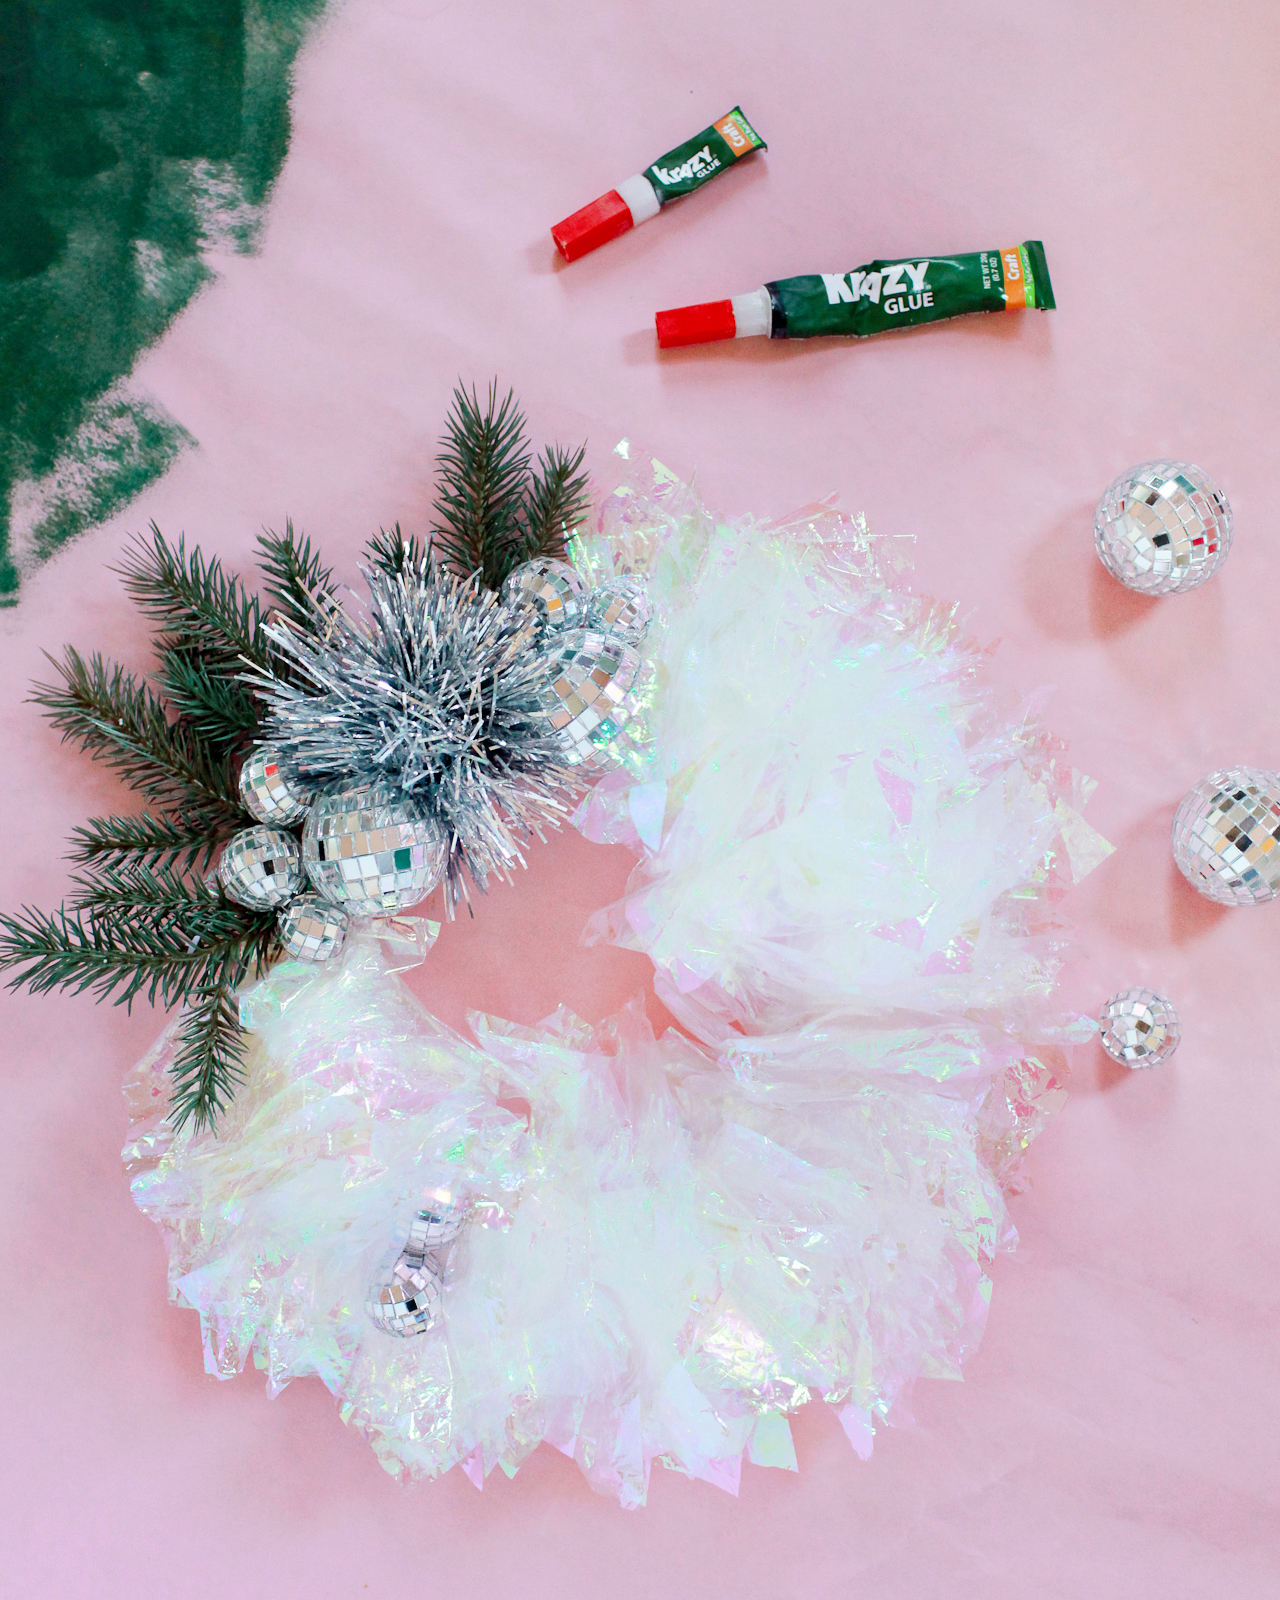
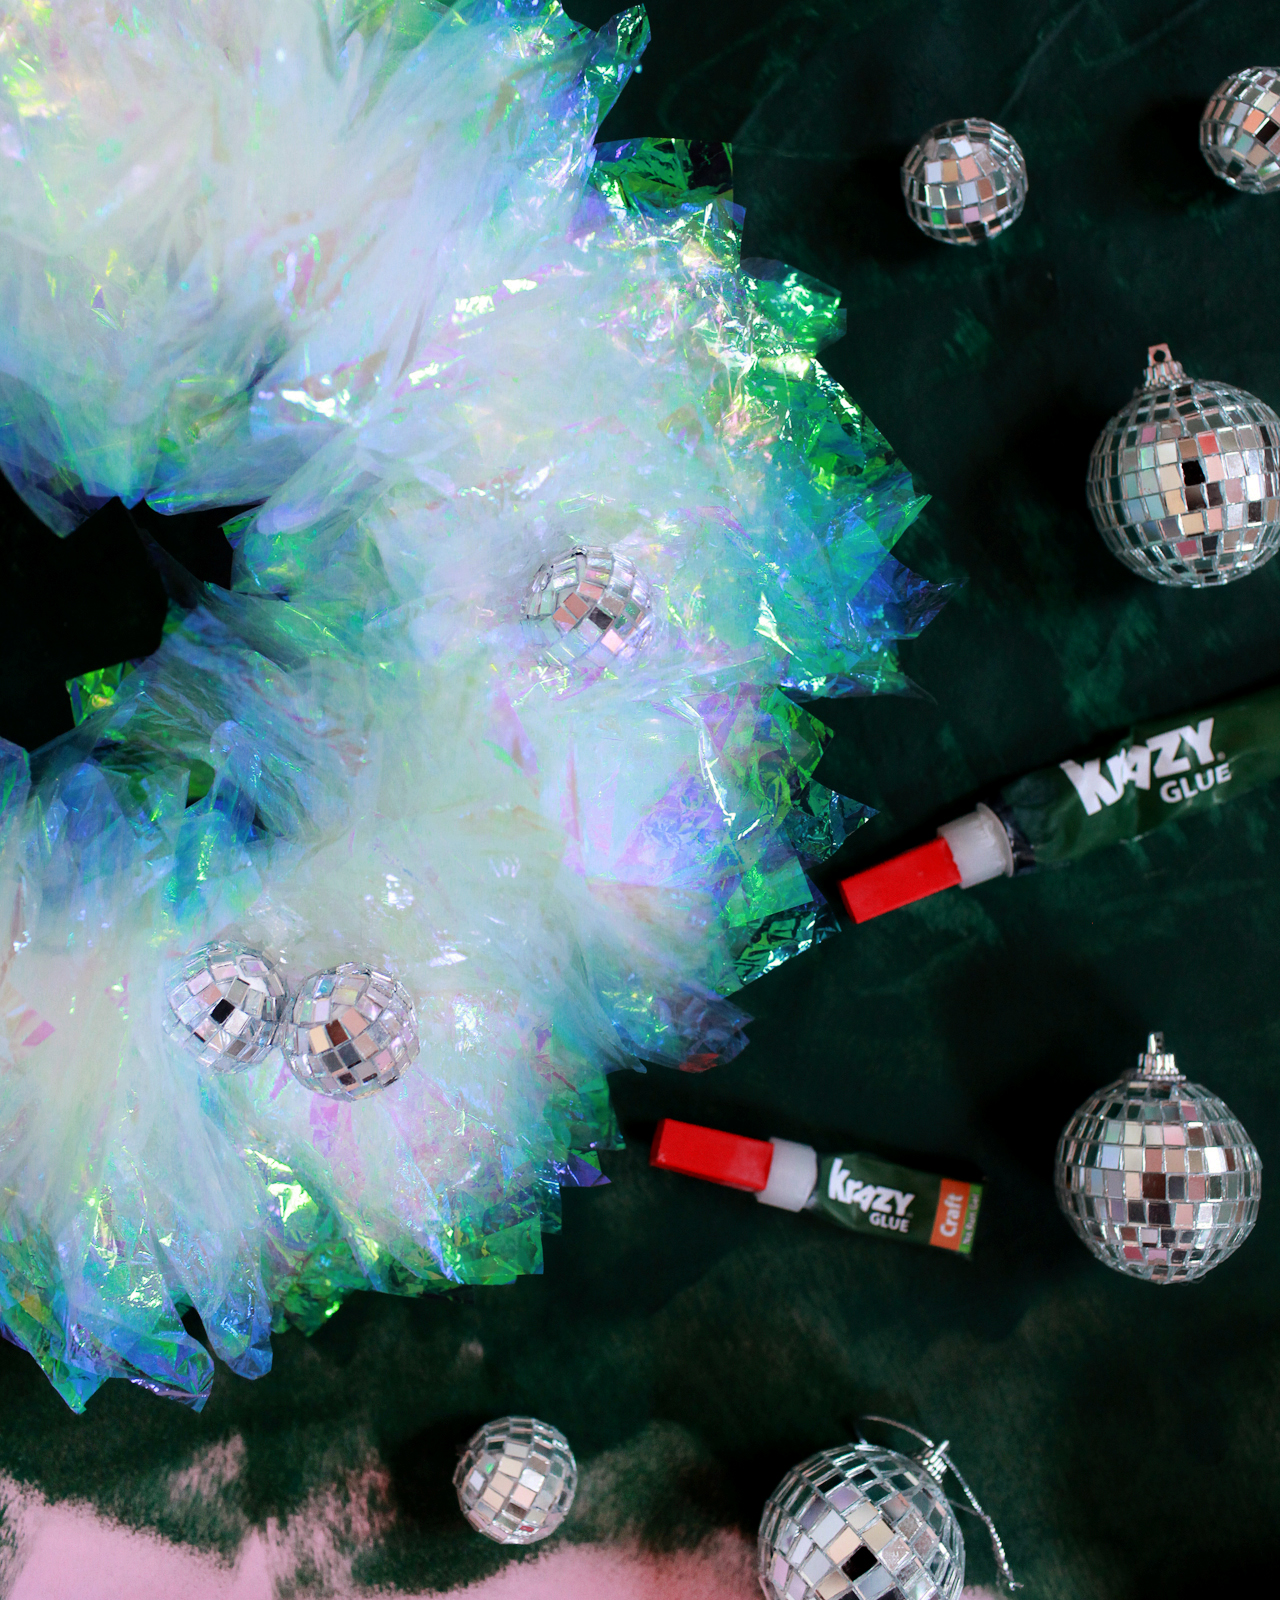
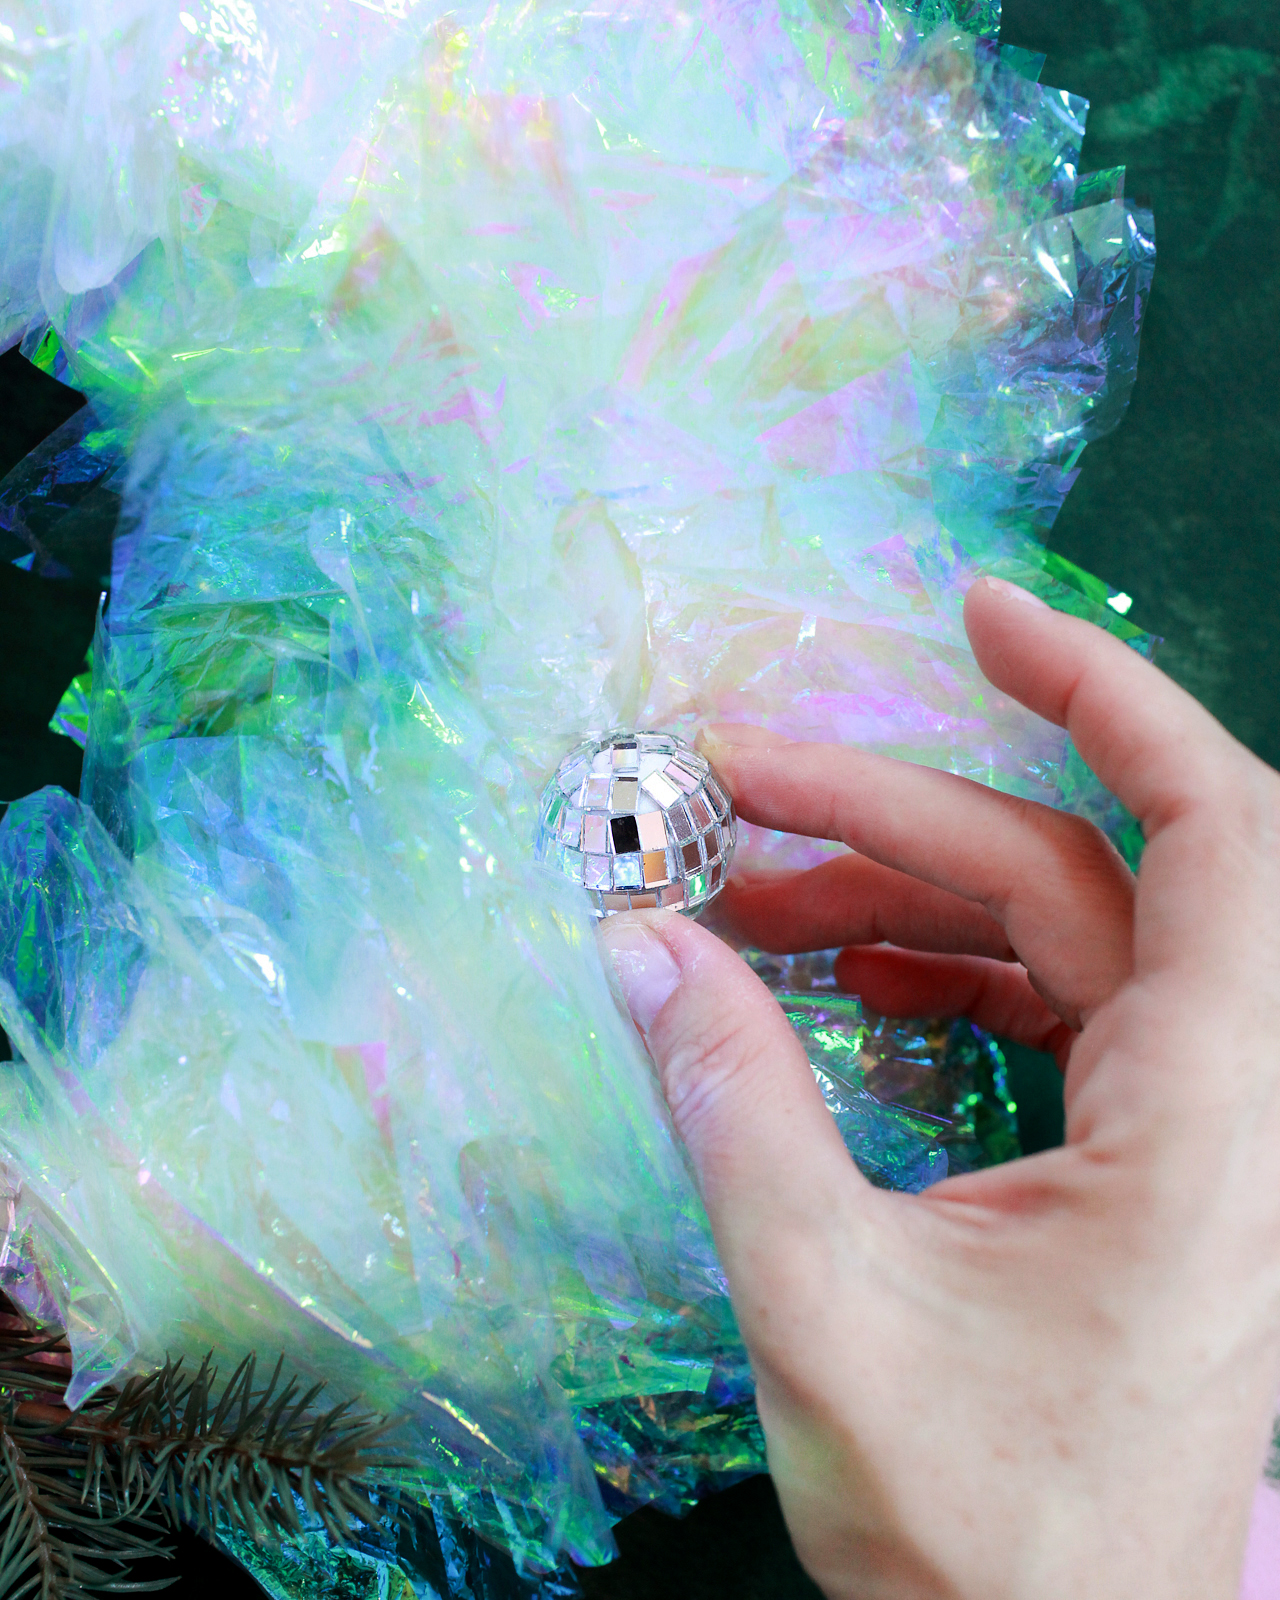
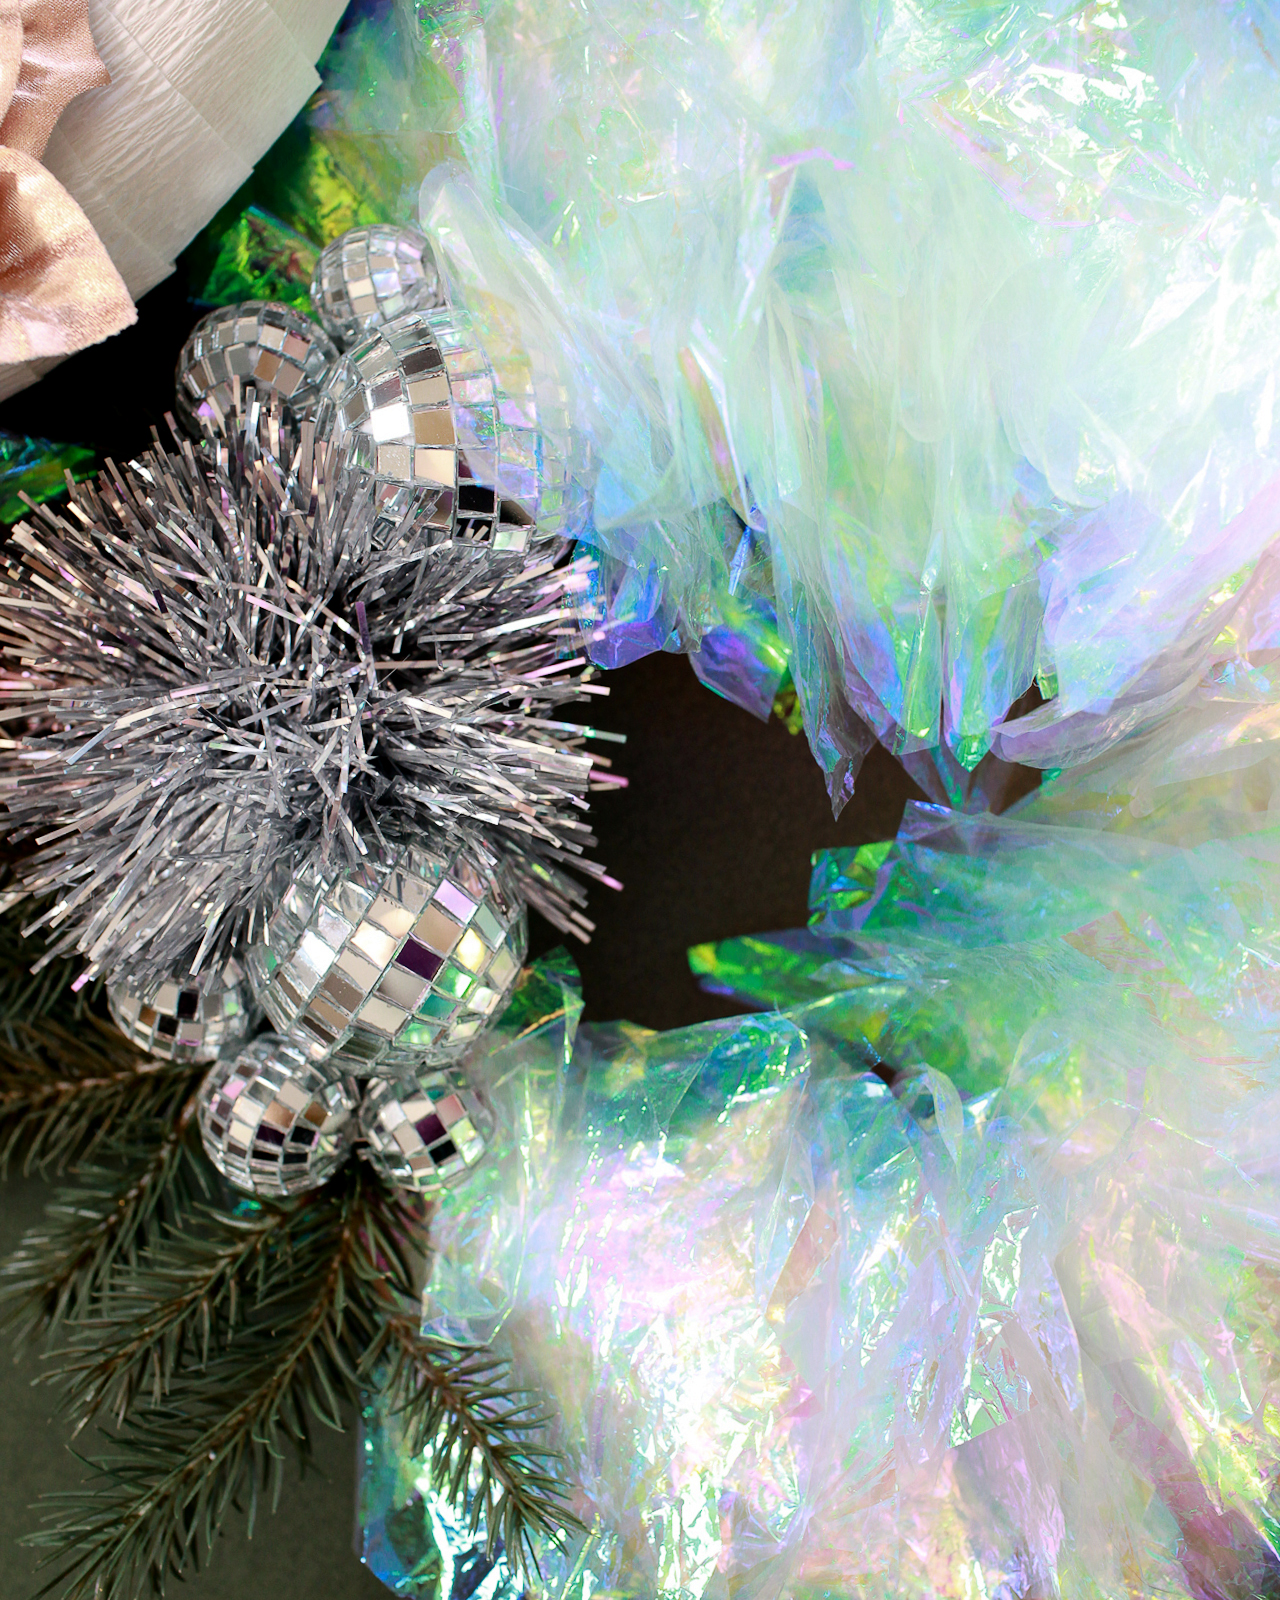
And since my love for all things iridescent goes hand in hand with my disco obsession, I couldn’t resist incorporating some disco ball ornaments into at least one of the wreaths. Just a single drop of Krazy Glue can hold up to 2,000 pounds and takes just 30 seconds to dry. I wanted to put the power of Krazy Glue to the test – and it totally worked! I used Krazy Glue Craft No Run Gel with Skin Guard to make all of my wreaths, but Krazy Glue is available in a wide assortment of instant adhesives for multiple applications, along with an all-purpose formula that bonds to a variety of surfaces, so you can find the right adhesive for your crafting project. I recommend hanging the disco ball wreath near a window so that it catches morning or afternoon light and fills the room with sparkles!
Supplies
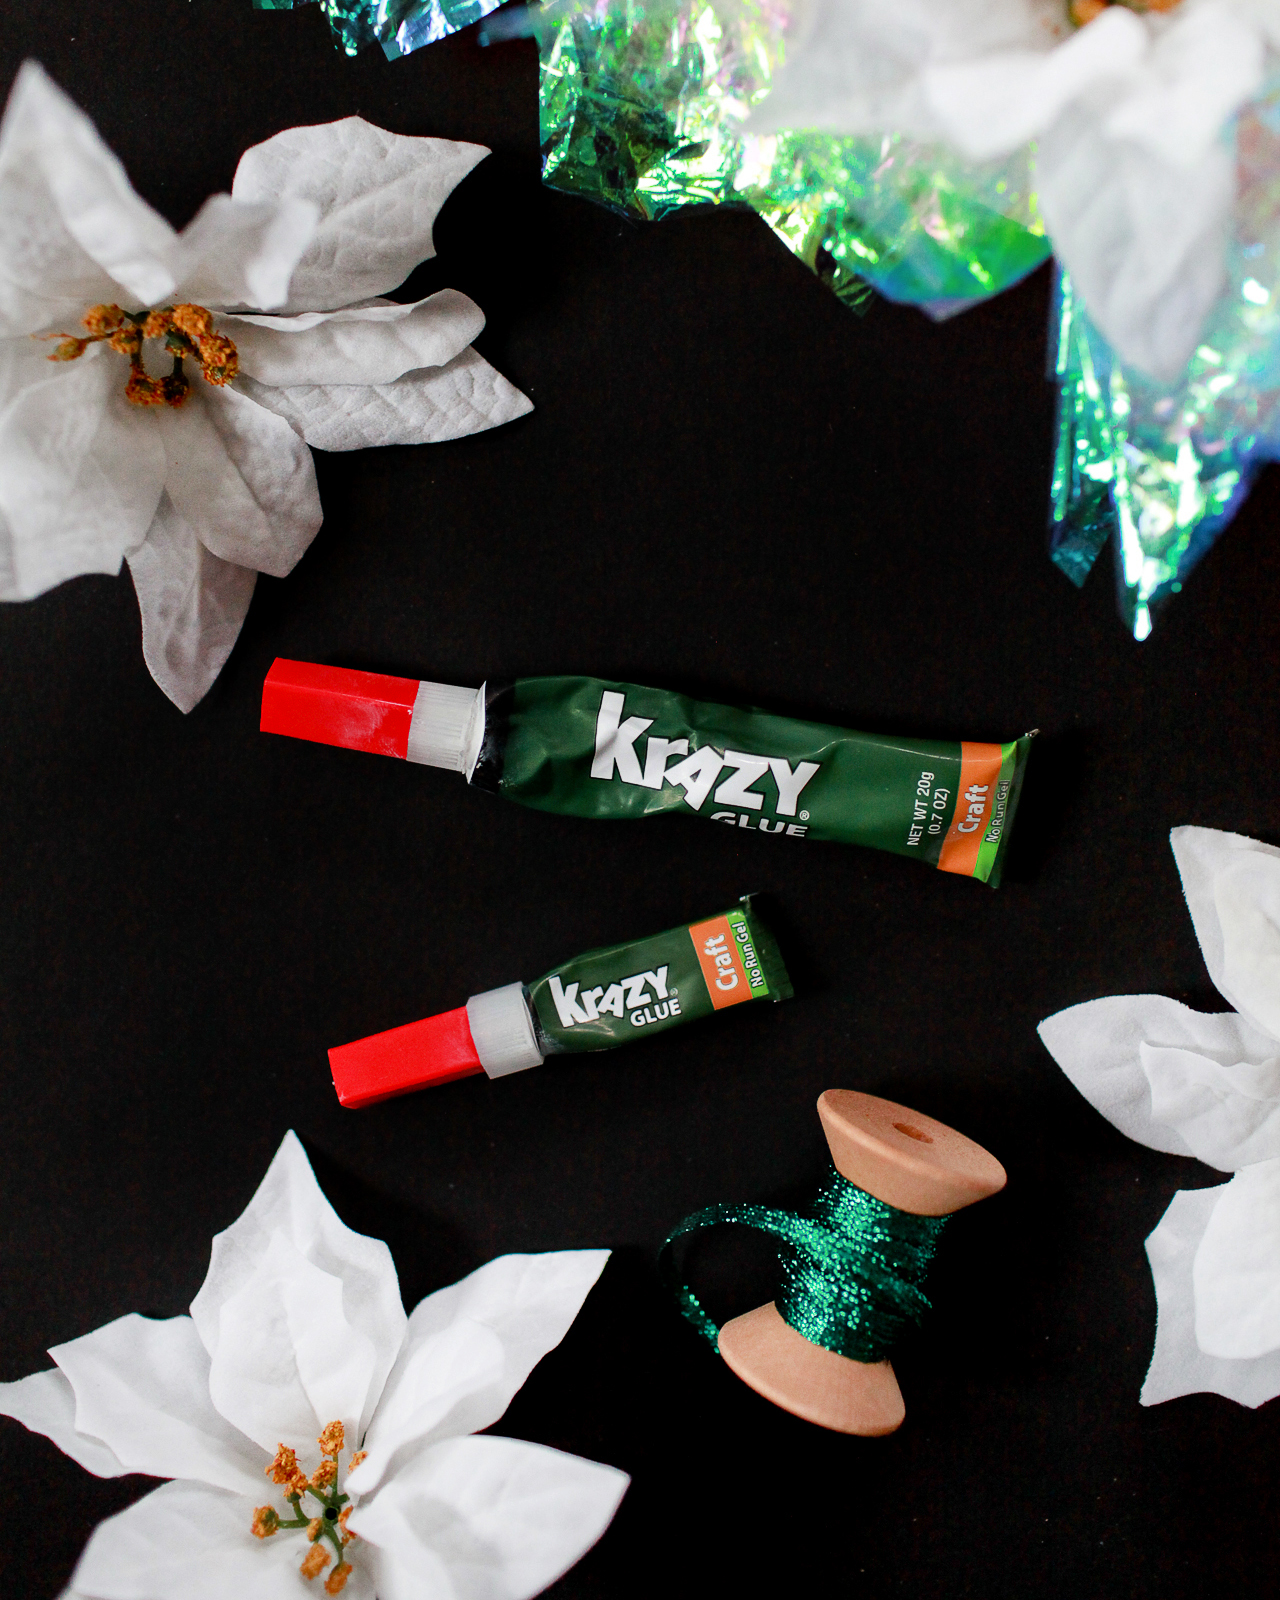
Krazy Glue Craft No Run Gel with Skin Guard
White Wreath Form
Faux foliage (I used gold and white Poinsettia and gold and green faux pine sprigs)
White Crepe Paper Streamer
Iridescent Tissue Sheets
2″ Disco Ball Ornaments
7/8″ Mini Disco Ball Ornaments
Scissors
Stapler
To make the wreaths:
Step 1. Start by placing any faux foliage on your wreath form, either in an asymmetrical arrangement or with foliage continuing all around the wreath form. Cut stems down to about 1″ long and use the stem to make a small hole in the wreath form. Add a drop of Krazy Glue Craft No Run Gel to the bottom of the stem and insert the stem into the hole.
Step 2. Once you’ve placed your foliage, wrap the entire wreath form with the white crepe paper streamers or 2″ strips of iridescent tissue, making sure to weave the material between the previously placed foliage. Use a small drop of Krazy Glue Craft No Run Gel to secure the ends of the crepe paper or tissue, and hold the end down until dry, approximately 30 seconds.
Step 3. Cut the iridescent tissue sheets into 4″ squares. Fold 2-3 squares together and pinch them at the bottom, forming a bouquet-like shape. Staple the tissue paper squares together, then secure the iridescent tissue bundle to the wreath form with Krazy Glue. Hold each bundle in place until the glue is completely dry. Continue around the entire wreath, filling any gaps between foliage with iridescent tissue bundles.
Step 4. (Optional) For the disco ball wreath, start by wrapping the entire wreath form in 2″ strips of iridescent tissue. Next, place faux pine sprigs on the wreath form using the method above. In lieu of foliage, I used a silver tinsel gift topper, but a faux Poinsettia would be great here, too! Glue the largest disco ball ornament to the pine foliage first, followed by a few smaller disco ball ornaments. The Krazy Glue Craft No Run Gel is perfect for gluing mismatched surfaces and works great on the iridescent tissue, just be sure to use plenty of the Krazy Glue to make sure the glue gets a good enough hold to secure the disco balls to each other. Let the glue dry between applying each disco ball. Cover the entire wreath form in bundles of iridescent tissue, working clockwise around the wreath form and making sure to tuck the end of each bundle under the previous bundle so there were no visible gaps. Glue additional mini disco ball ornaments around the wreath form as desired.

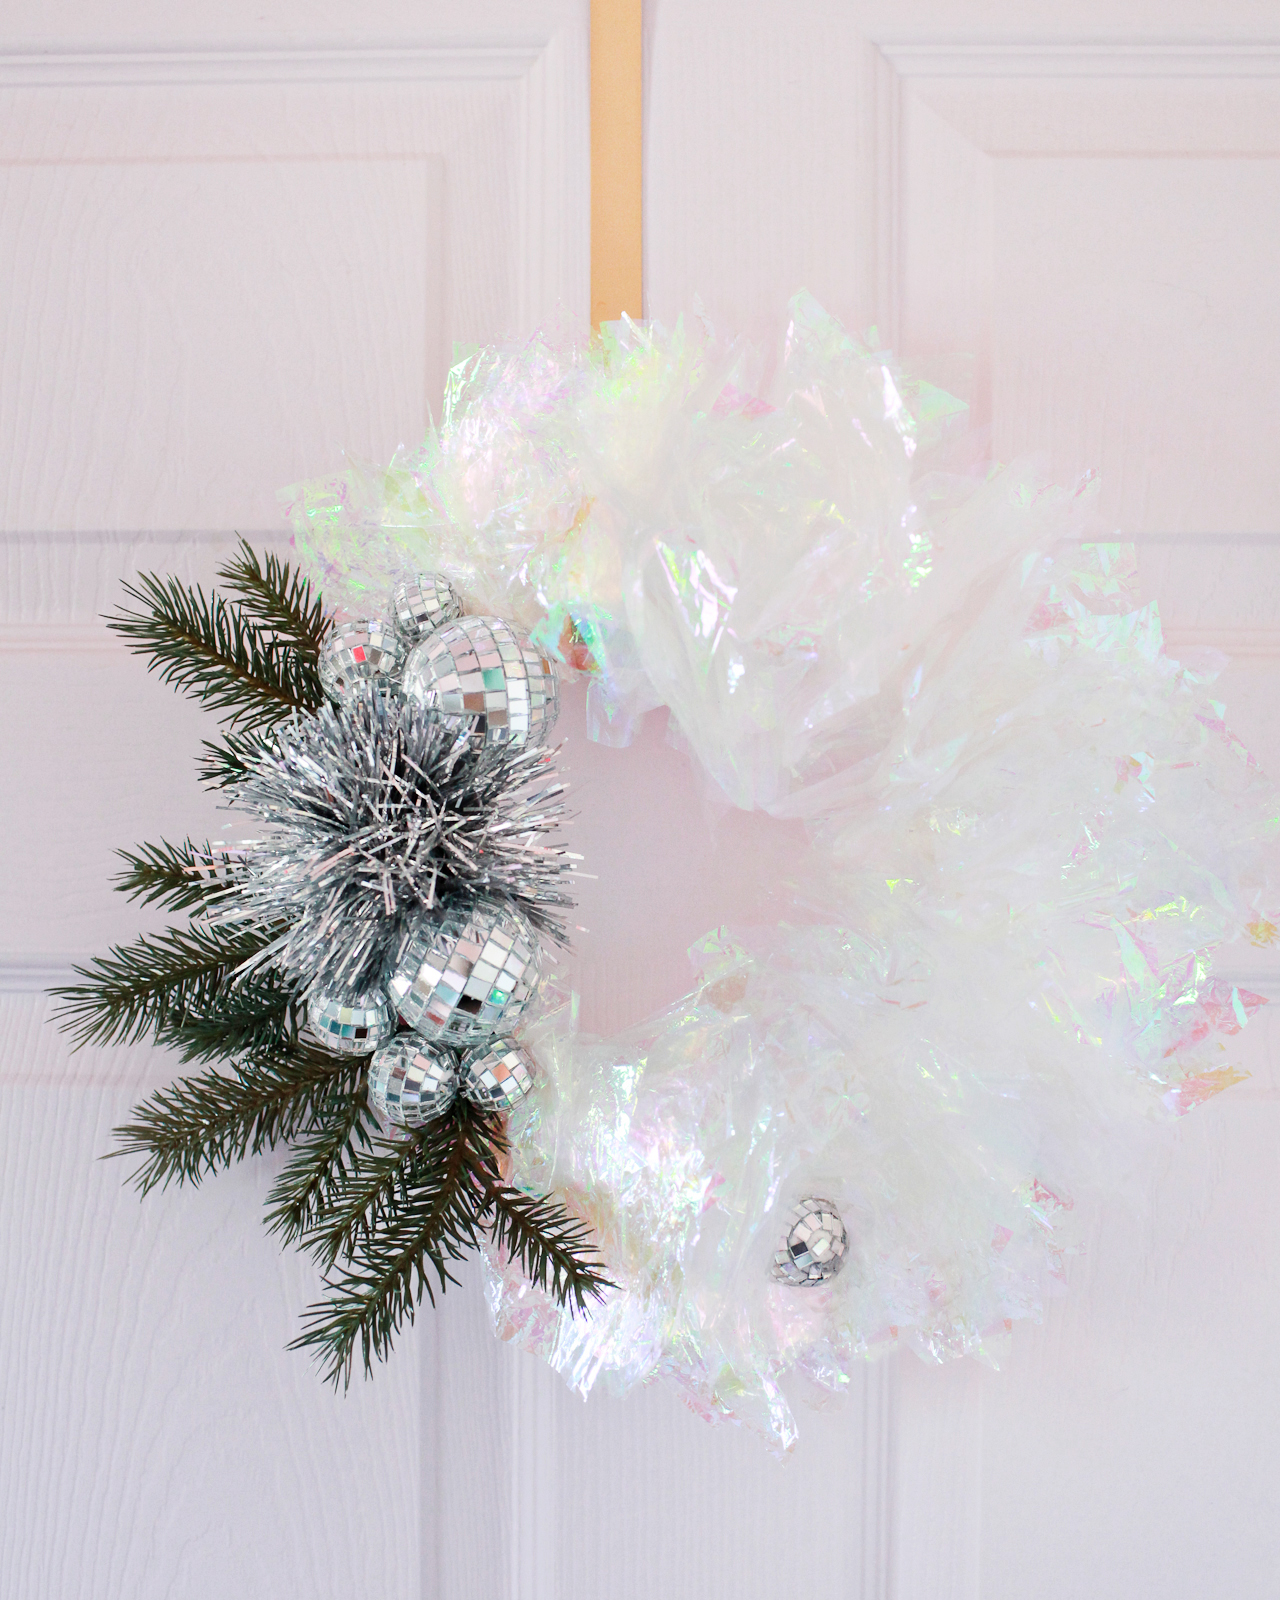
These wreaths are such a fun way to add some iridescent shimmer to your holiday décor – and I love that you can keep them up until well into the New Year! Yay for all the sparkly things!
This post was created in partnership with Krazy Glue. All content and opinions are my own. Thank you for supporting the sponsors that make Oh So Beautiful Paper possible!