Printable 4th of July Calligraphy Art Print

With the 4th of July just a few days away, you could be like me and scrambling for all of the red, white, and blue things you can find, eat, or wear… or, you could actually be prepared and ready to go for your festive celebration. Either way, we have one little extra that you absolutely must download and print this year: a printable 4th of July calligraphy art print to celebrate the land of the free and the home of the brave. It’s the perfect finishing touch for your BBQs, picnics, and other celebrations this holiday weekend! –Lauren

Land of the Free and Home of the Brave Printable 4th of July Calligraphy Art Print / A Fabulous Fete for Oh So Beautiful Paper

I created this printable with multiple uses in mind – but the top of my list would be for decorating your table or bart cart with a framed version! Add in a colorful red, white, and blue garland, a delicious cocktail or two, and maybe even some fresh white flowers and you have yourself a good looking 4th of July display. But don’t feel like you’re limited to just the 4th of July holiday weekend – this print can be displayed all summer or even all year long. There are even two colors to choose from: a traditional blue or a softer coral. Land of the Free and Home of the Brave Printable 4th of July Calligraphy Art Print / A Fabulous Fete for Oh So Beautiful Paper

Choose and download your favorite from the two files below, then print on a letter size sheet of white paper or card stock. To display, either pop the print into an 8″ x 10″ frame or simply hang on the wall with a few strips of washi tape. Easy!

Land of the Free and Home of the Brave Printable 4th of July Calligraphy Art Print / A Fabulous Fete for Oh So Beautiful Paper

Land of the Free and Home of the Brave Printable 4th of July Calligraphy Art Print / A Fabulous Fete for Oh So Beautiful Paper

DOWNLOAD THE BLUE PRINTABLE | DOWNLOAD THE CORAL PRINTABLE

Printable artwork © Lauren Saylor of A Fabulous Fete and created exclusively for Oh So Beautiful Paper. All artwork is created for personal use only and may not be altered, reproduced, or sold in any way without prior written consent.

Photo Credits: Lauren Saylor of A Fabulous Fete for Oh So Beautiful Paper

Brick + Mortar: How to Submit Your Line to Retailers by Mail

“How should I reach out to retailers?” is a question that looms large in both casual conversations and my professional consulting with product based designers. As a retailer, it seems obvious which approaches will work and which won’t, but through conversations with you, I realize it’s not so clear. With that in mind, I began breaking this topic down to give you real examples. My first post here discussed how to get a shop owner’s attention. More recently, I wrote about How to Submit Your Line to Retailers by Email. Today’s post will talk about when and how to submit your line to retailers by mail. Email is great, but sometimes there’s just no substitution for presenting your products by good-old-fashioned snail mail. –Emily of Clementine

OSBP-Hello-Brick-and-Mortar-Clementine-by-Emily-McDowell-Illustration

Illustration by Emily McDowell for Oh So Beautiful Paper


Ok, let’s dive in to reach out:

  • WHAT does it mean to submit your line via mail? Submitting your line via mail means that you send a small selection of your physical products via USPS/UPS/FEDEX to a new retail shop with the hopes that they will pick up your line. It does not mean you hand-deliver your products to a shop. It does not mean you send your catalog in the mail. It does not mean you e-mail a link to your catalog. (And yes, you should put that phone down.)
  • WHY should you send physical products and not just a catalog? Crafting emails to a large group of potential retailers is a great way to cast a broad net. But emails get lost in the shuffle and simply don’t have the same effect as seeing work in person. You should consider sending an introduction by mail if:
    • You want to pick up new wholesale accounts.
    • You want to capture a retailer’s attention/get on their radar, even if they don’t pick up your line immediately.
    • You want to gain social (or traditional) media attention.
    • You didn’t have a great response to an email mailing.
    • Your products don’t translate in 2D/online nearly as well as in person.
  • WHEN should you submit by mail? Submitting your line by mail is vulnerable and time consuming. I recommend making a plan and a timeline to hold yourself accountable. Consider timing it as part of a marketing plan or other external event to create a reference point for your work.  When is the perfect time? When some combination of the following happen:
    • You’re launching a wholesale line and want to reach out to potential retailers.
    • You are launching a new collection in your wholesale line and want to reach out to potential retailers and treat existing retailers.
    • You’ve done your homework on which retail shops would be a good fit for your line.
    • You’re skipping a trade show.
    • You have the money to invest.
    • You have a wholesale line that you are confident has depth, variety and something new to add to the wholesale marketplace.
    • You have the inventory to fulfill potential orders.
  • WHEN shouldn’t you submit by mail? Retailers all have slightly different schedules for when they’re not looking to pick up new lines, but I would generally avoid:
    • The winter holiday season (Thanksgiving - New Years), because we’re just incredibly busy.
    • Directly after a big national show, because we may have spent too much money.
    • When you don’t have the inventory in place to fulfill an order, because there’s nothing that will turn a retailer off faster than getting in touch for an order and being told many items are out of stock or it will be several weeks before the order can ship.
  • WHO should you reach out to by mail?
    • Retailers who you feel confident would carry your line at their store.
    • Retailers who have reached out to you, who you met at a creaft/gift show, or have expressed an interest in another venue (maybe even social media).
    • Retailers whose aesthetic you are so smitten with, you want to gift them with samples from your line even if you aren’t confident they’ll pick you up.

Hello Brick + Mortar: How to Submit Your Line to Retailers by Mail / Emily Blistein for Oh So Beautiful Paper

The Hive Studio submission: product samples, wrapped in fabric gift wrap, catalog and note: submission perfection!

  • WHAT should you send? Introducing a wholesale line by mail can look very different from line to line. I recommend creating a budget for this mailer and a goal for the impact you want to have. Then, divide your budget by the number of stores you want to mail to and sketch out what to include. Consider including:
    • A selection of products that highlight your line, especially those that don’t translate well in photographs/online.
    • Products that are tailored to a retail shop owner’s interests, geographic area and/or other insights you have gleaned about their shop.
    • A physical catalog.
    • A handwritten note. What should you say? Something similar to what you say in your email, but in your own handwriting!
    • Details that reinforce your brand: Ribbon, wrapping, swag, and extra touches enhance the experience of meeting your line and may be the reason you are picked up.
    • Clear, easy contact information via every social and traditional channel.
    • A promise to follow up.
  • HOW should you follow up?
    • By email, one to two weeks later

I hope that’s enough to get you started. Remember: Reaching out by mail takes effort, so make it count. Please ask any follow up questions in the comment section! xo Emily

p.s. Want more on this topic?

DIY Watercolor Wall Art

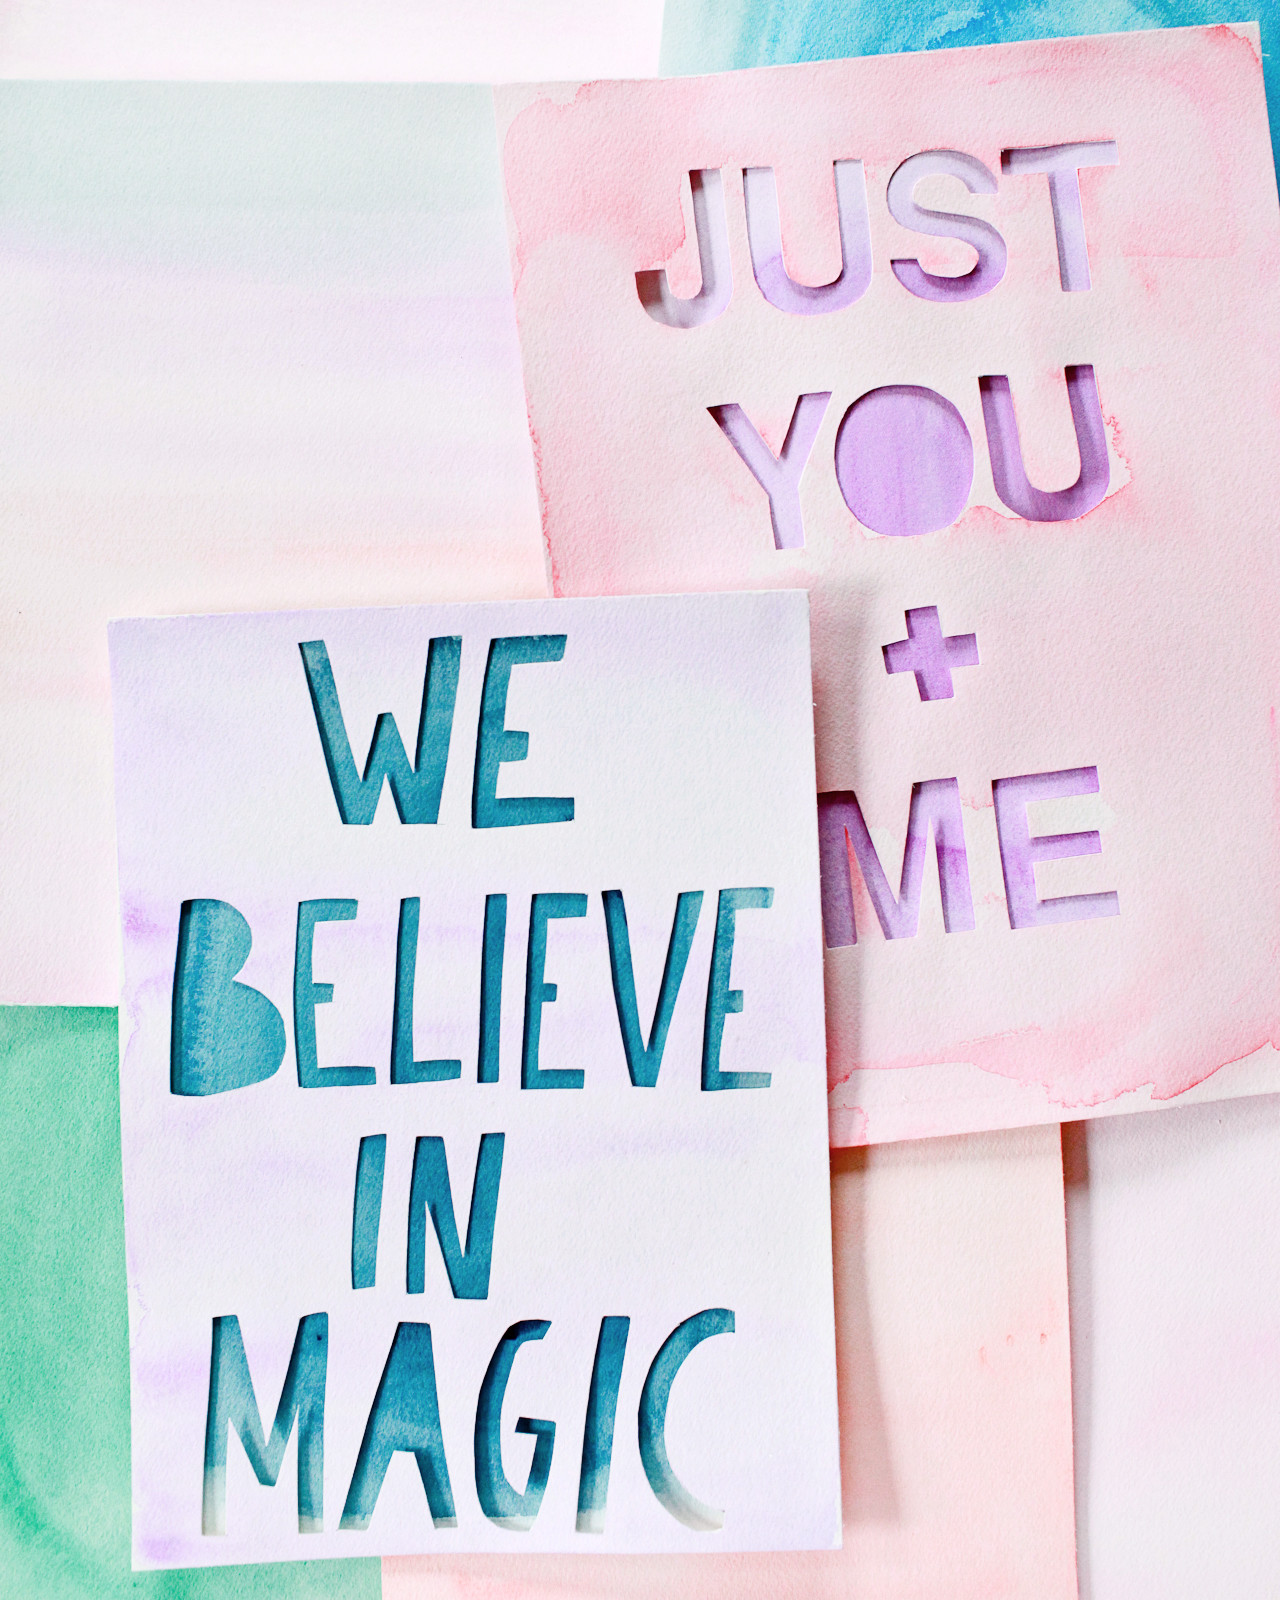
Do you remember these fun and colorful envelopes that we made back in April, using saturated watercolors and Sakura of America‘s gorgeous Soufflé and Glaze pens? I still LOVE how that project turned out, and today I’m so excited to share another project featuring those awesome watercolors! This time we’re using the 30-color Koi Water Color Field Sketch Travel Kit to create watercolor wall art with fun phrases of cut out letters! These pieces are so easy to make (no advanced painting skills required!) and are such a great way to add a dose of color – and an inspiring sentiment – to your walls!

DIY Graphic Watercolor Wall Art with Sakura of America Koi Water Color Field Sketch Travel Kit / Oh So Beautiful Paper

DIY Graphic Watercolor Wall Art with Sakura of America Koi Water Color Field Sketch Travel Kit / Oh So Beautiful Paper

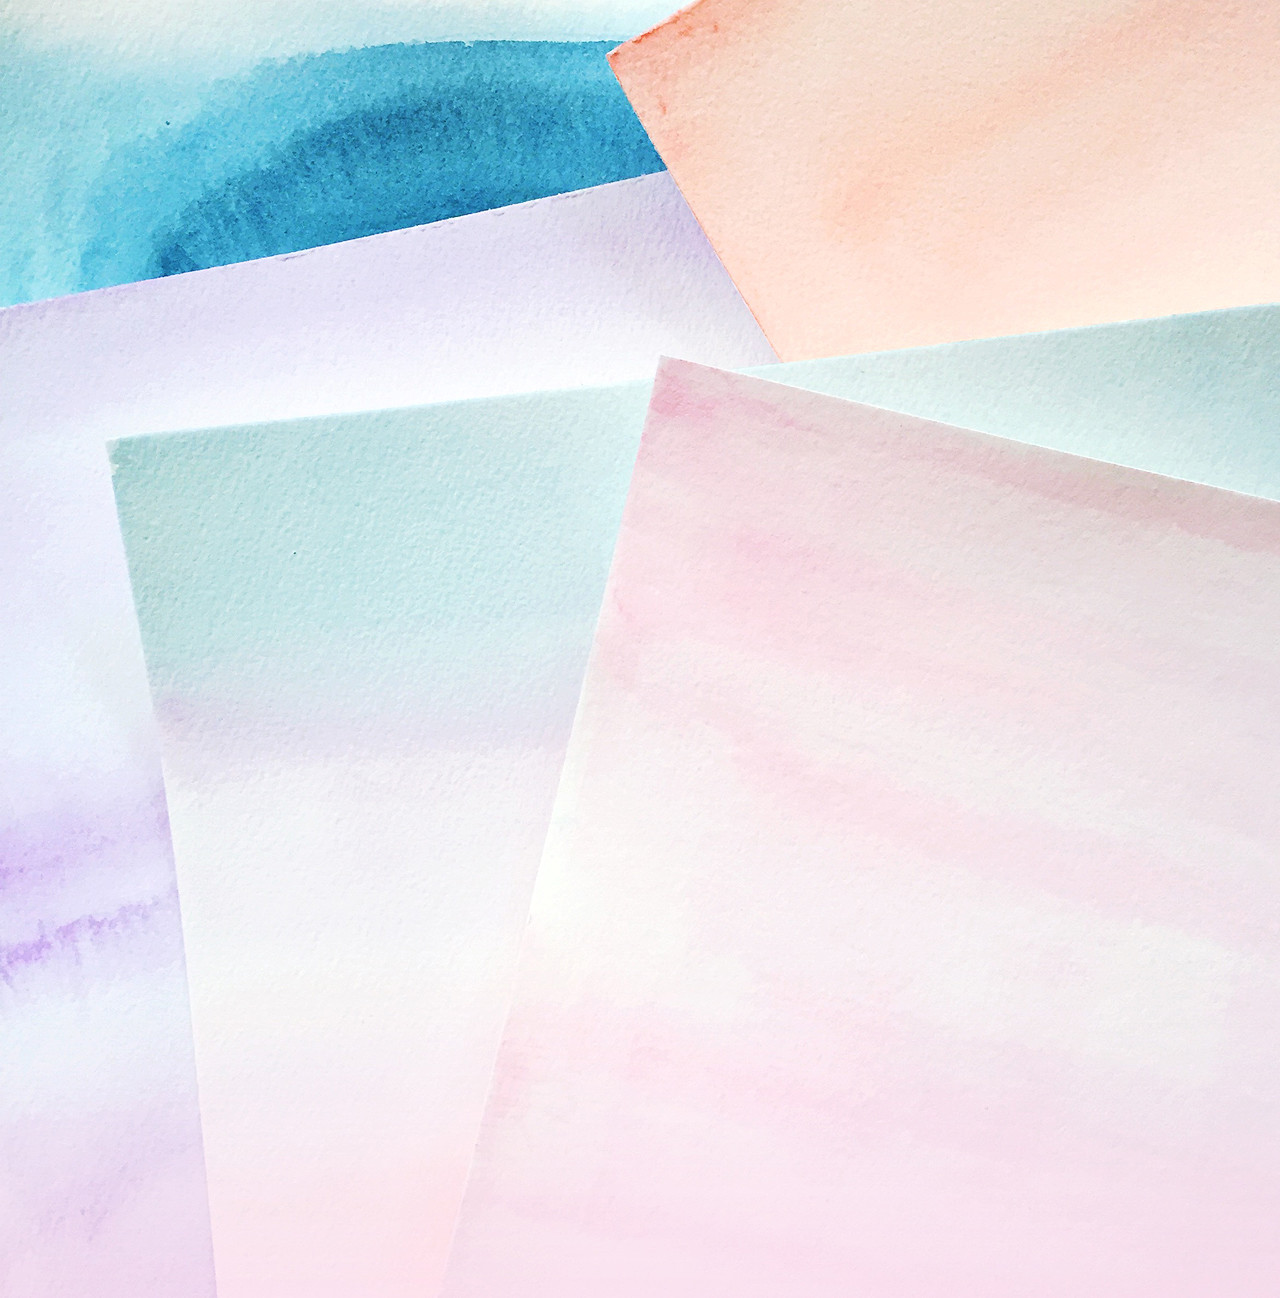
My color inspiration for these watercolor art pieces was to layer a light pastel color over a dark tone, but once I got painting I quickly discovered that two pastel tones in complementary colors look really amazing together. I ended up mixing mostly warm pastel watercolor tones in peach, coral, pink, and lavender with a bit of deep indigo and Prussian blue. The Koi Water Color Field Sketch Travel Kit comes with 30 gorgeous colors that all look amazing together, so you really can’t go wrong when choosing your color story. The kit also comes with a refillable waterbrush for spontaneous painting and a detachable painting palette for mixing colors – and the whole entire kit can easily fit into a small bag or a jacket pocket in case inspiration strikes while you’re out and about!

DIY Watercolor Wall Art with Sakura of America Koi Water Color Field Sketch Travel Kit / Oh So Beautiful Paper

I also envisioned writing each phrase by hand in tall and skinny block letters, but I realized that might feel out of reach for some of you. Not to worry – there’s a Plan B! I did a bit of testing and figured out that we can use removable letter stickers to create the letter outlines. I provided instructions for both methods in the tutorial below, so feel free to do whatever feels best for you!

DIY Watercolor Wall Art with Sakura of America Koi Water Color Field Sketch Travel Kit / Oh So Beautiful Paper

DIY Watercolor Wall Art with Sakura of America Koi Water Color Field Sketch Travel Kit / Oh So Beautiful Paper

Okay, let’s get started!

DIY Watercolor Wall Art with Sakura of America Koi Water Color Field Sketch Travel Kit / Oh So Beautiful Paper

Supplies

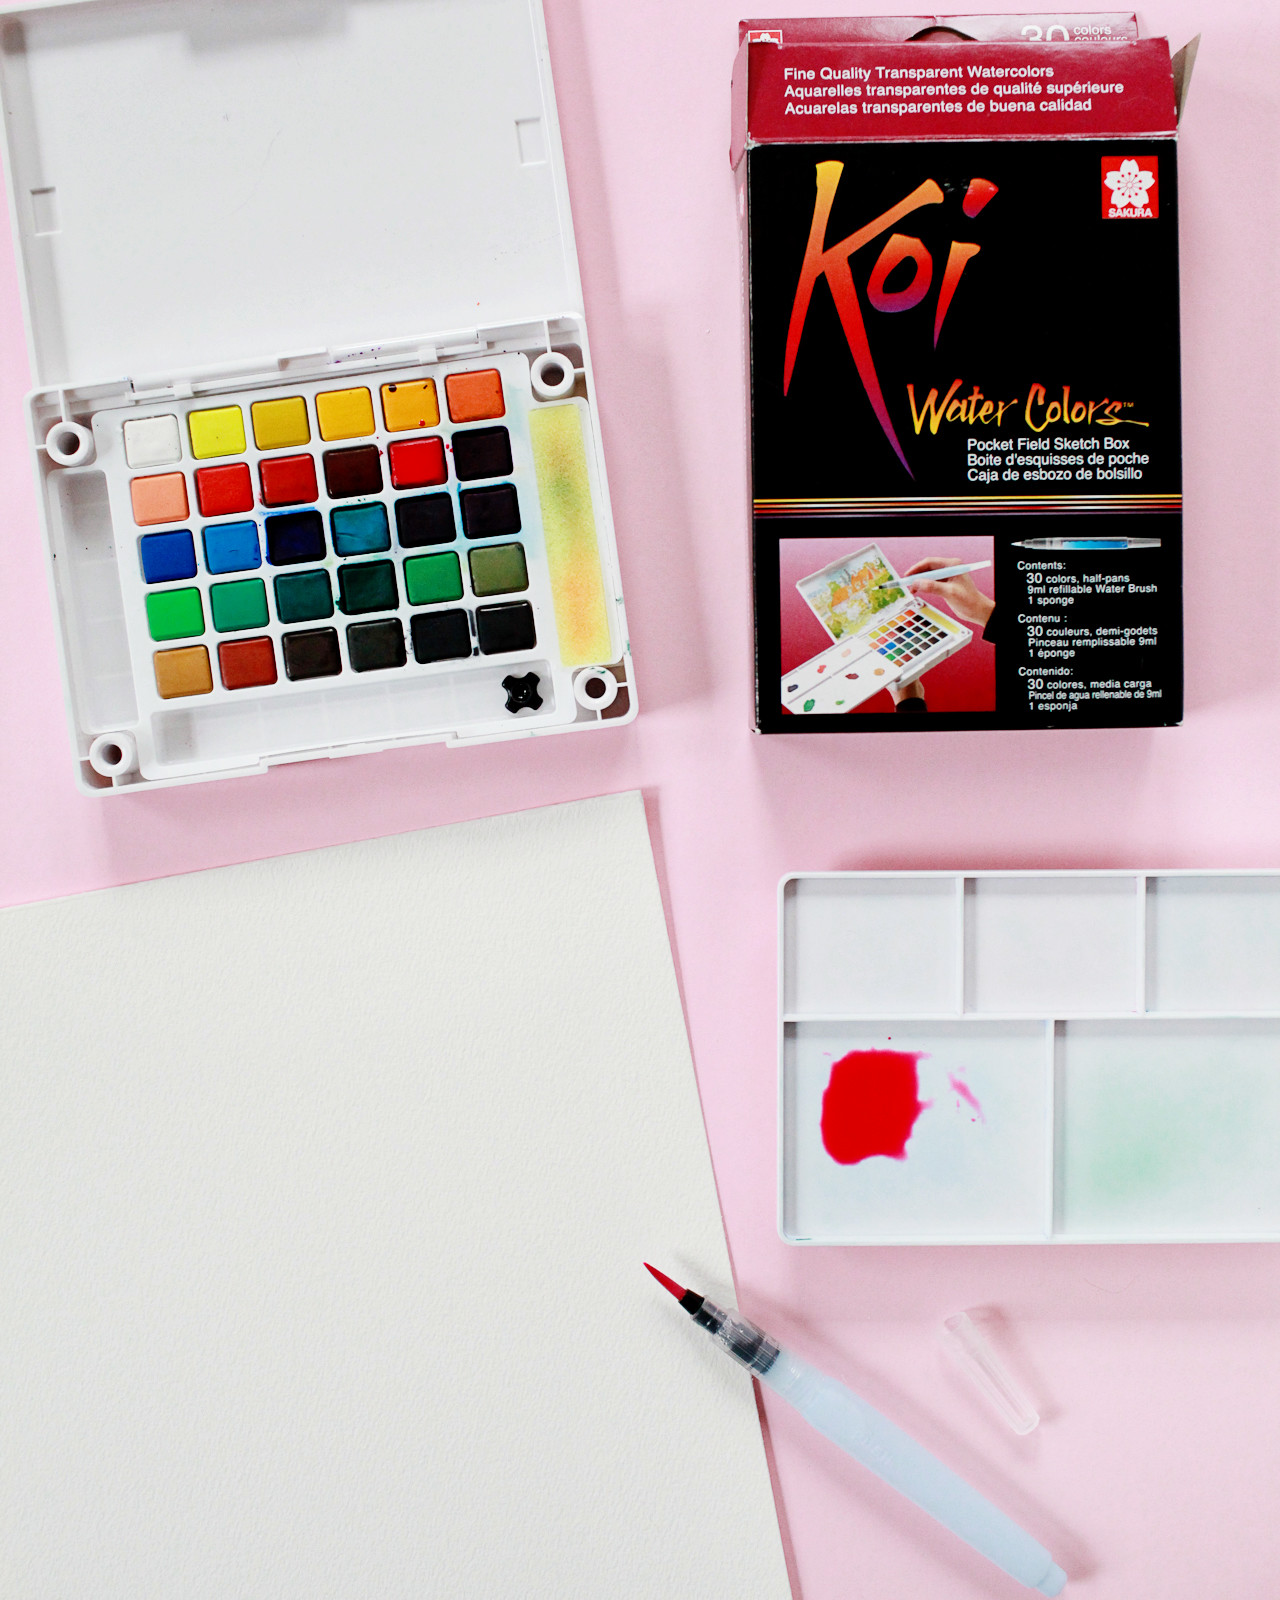
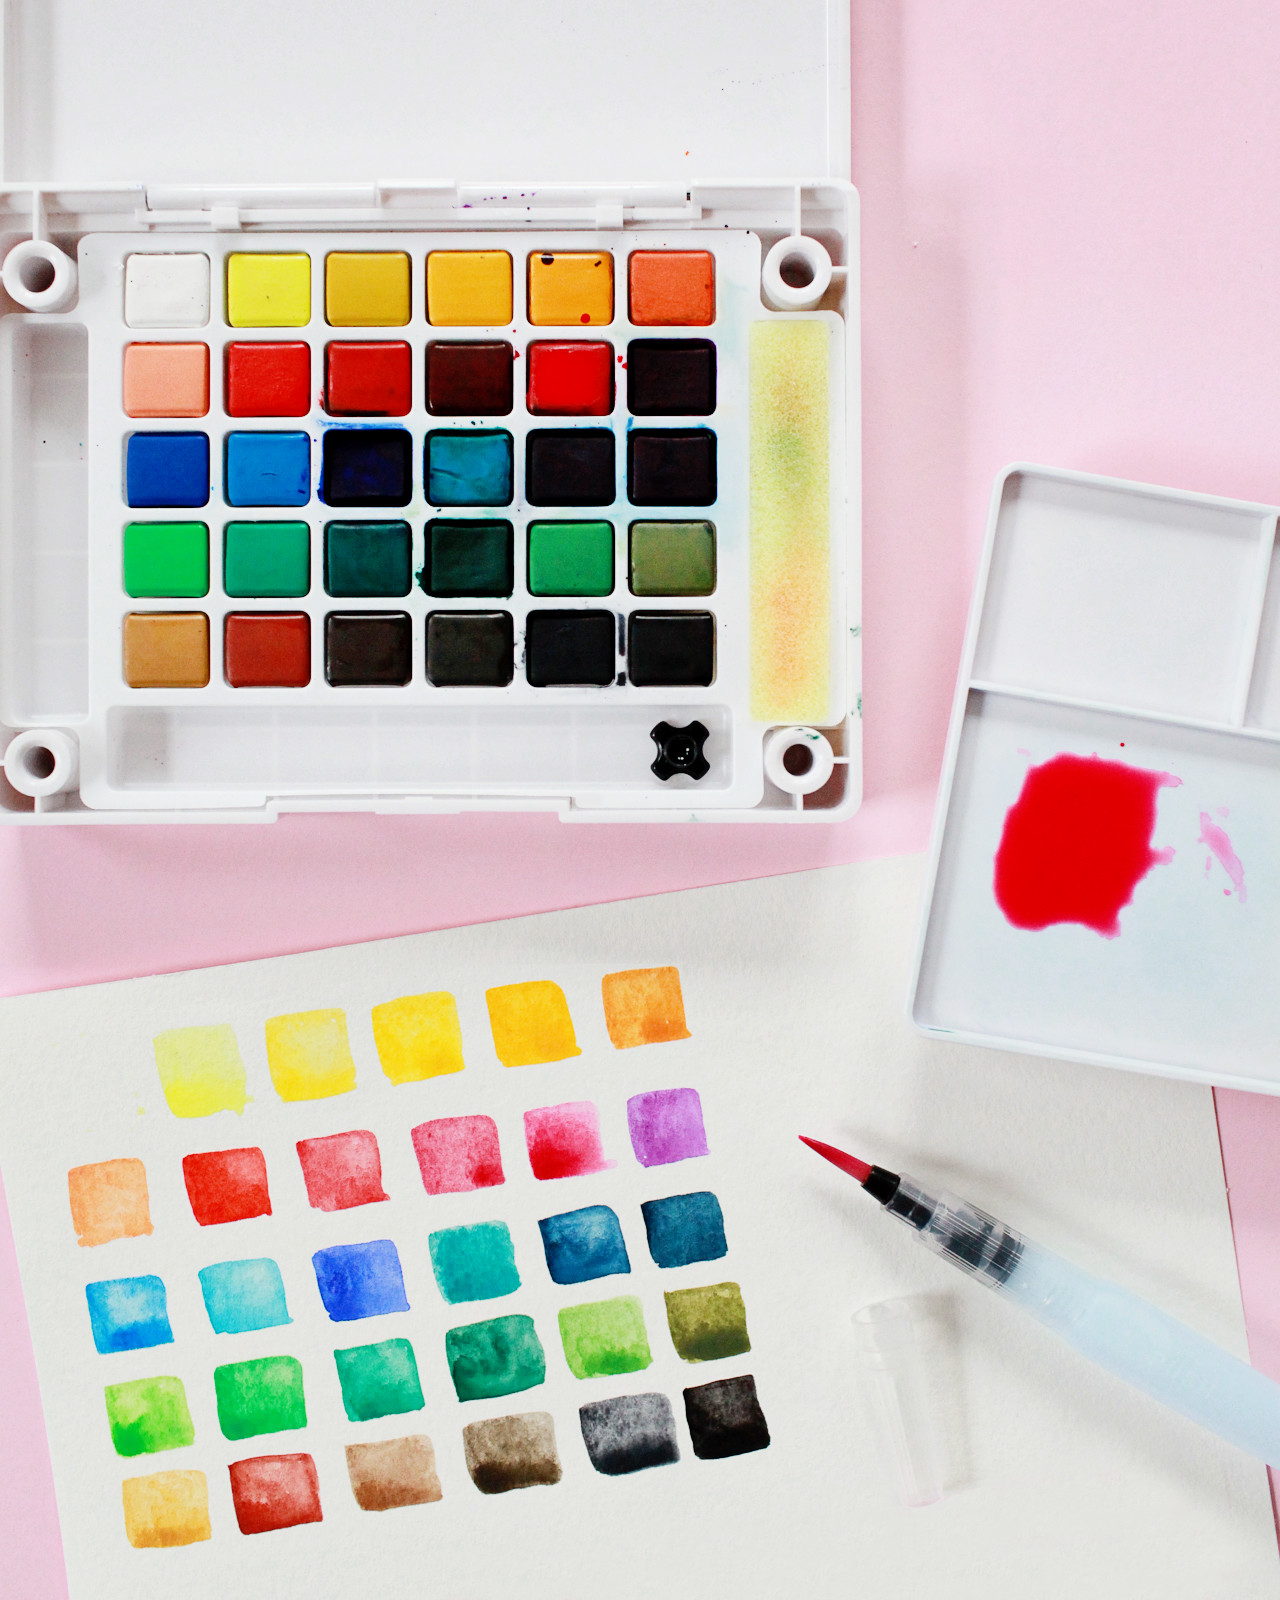
Sakura of America 30-color Koi Water Color Field Sketch Travel Kit

High Quality Watercolor Paper

2″ removable letter stickers

Craft Knife

Cutting Mat

Ruler

Pencil

High Quality Artist Eraser

Foam Mounting Squares

Small bowls for water

Paper Towels

DIY Watercolor Wall Art with Sakura of America Koi Water Color Field Sketch Travel Kit / Oh So Beautiful Paper

DIY Watercolor Wall Art with Sakura of America Koi Water Color Field Sketch Travel Kit / Oh So Beautiful Paper

Instructions

Step 1. Open your 30-color Koi Water Color Field Sketch Travel Kit, remove the palette, and fill the brush with water. Then paint all of the watercolor paint pans in the kit on a pice of watercolor paper. The colors look very different when painted, so this quick exercise will help you choose your color pairings – or even how to combine two different colors into a custom watercolor!

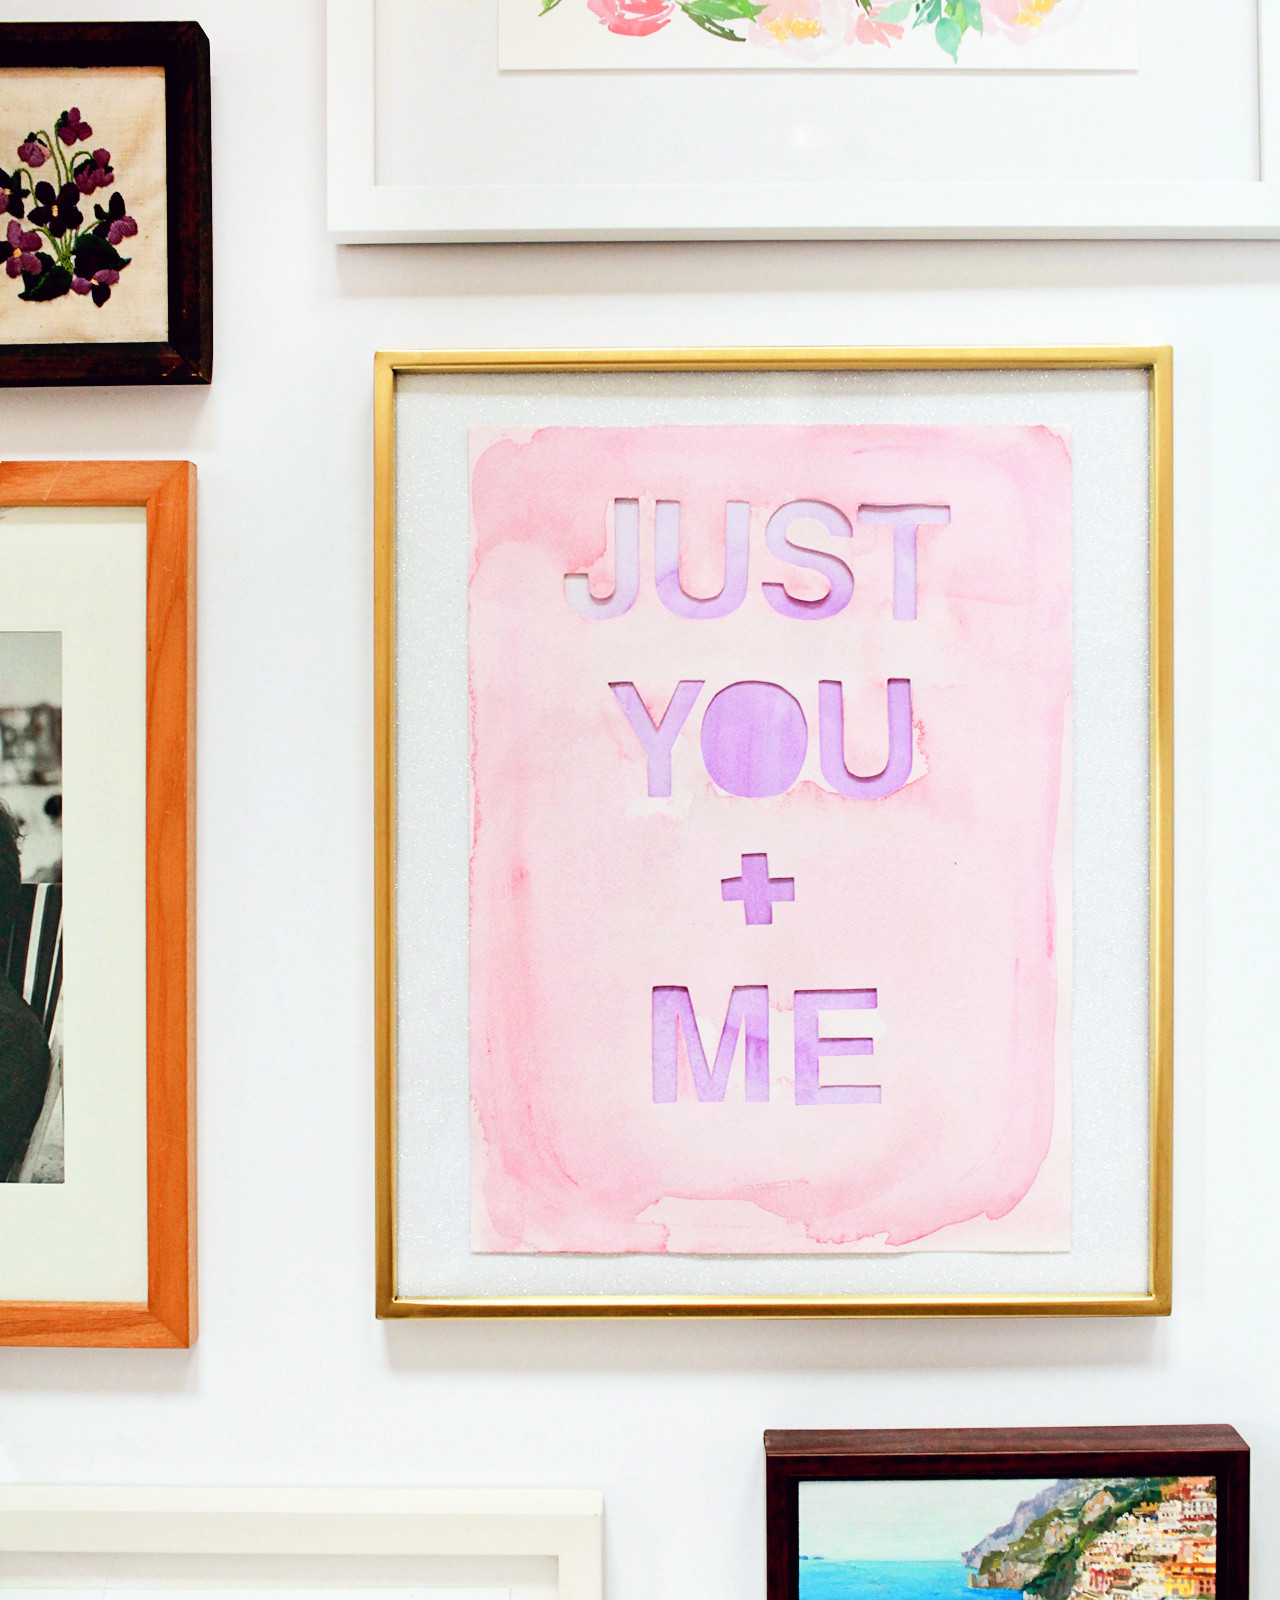
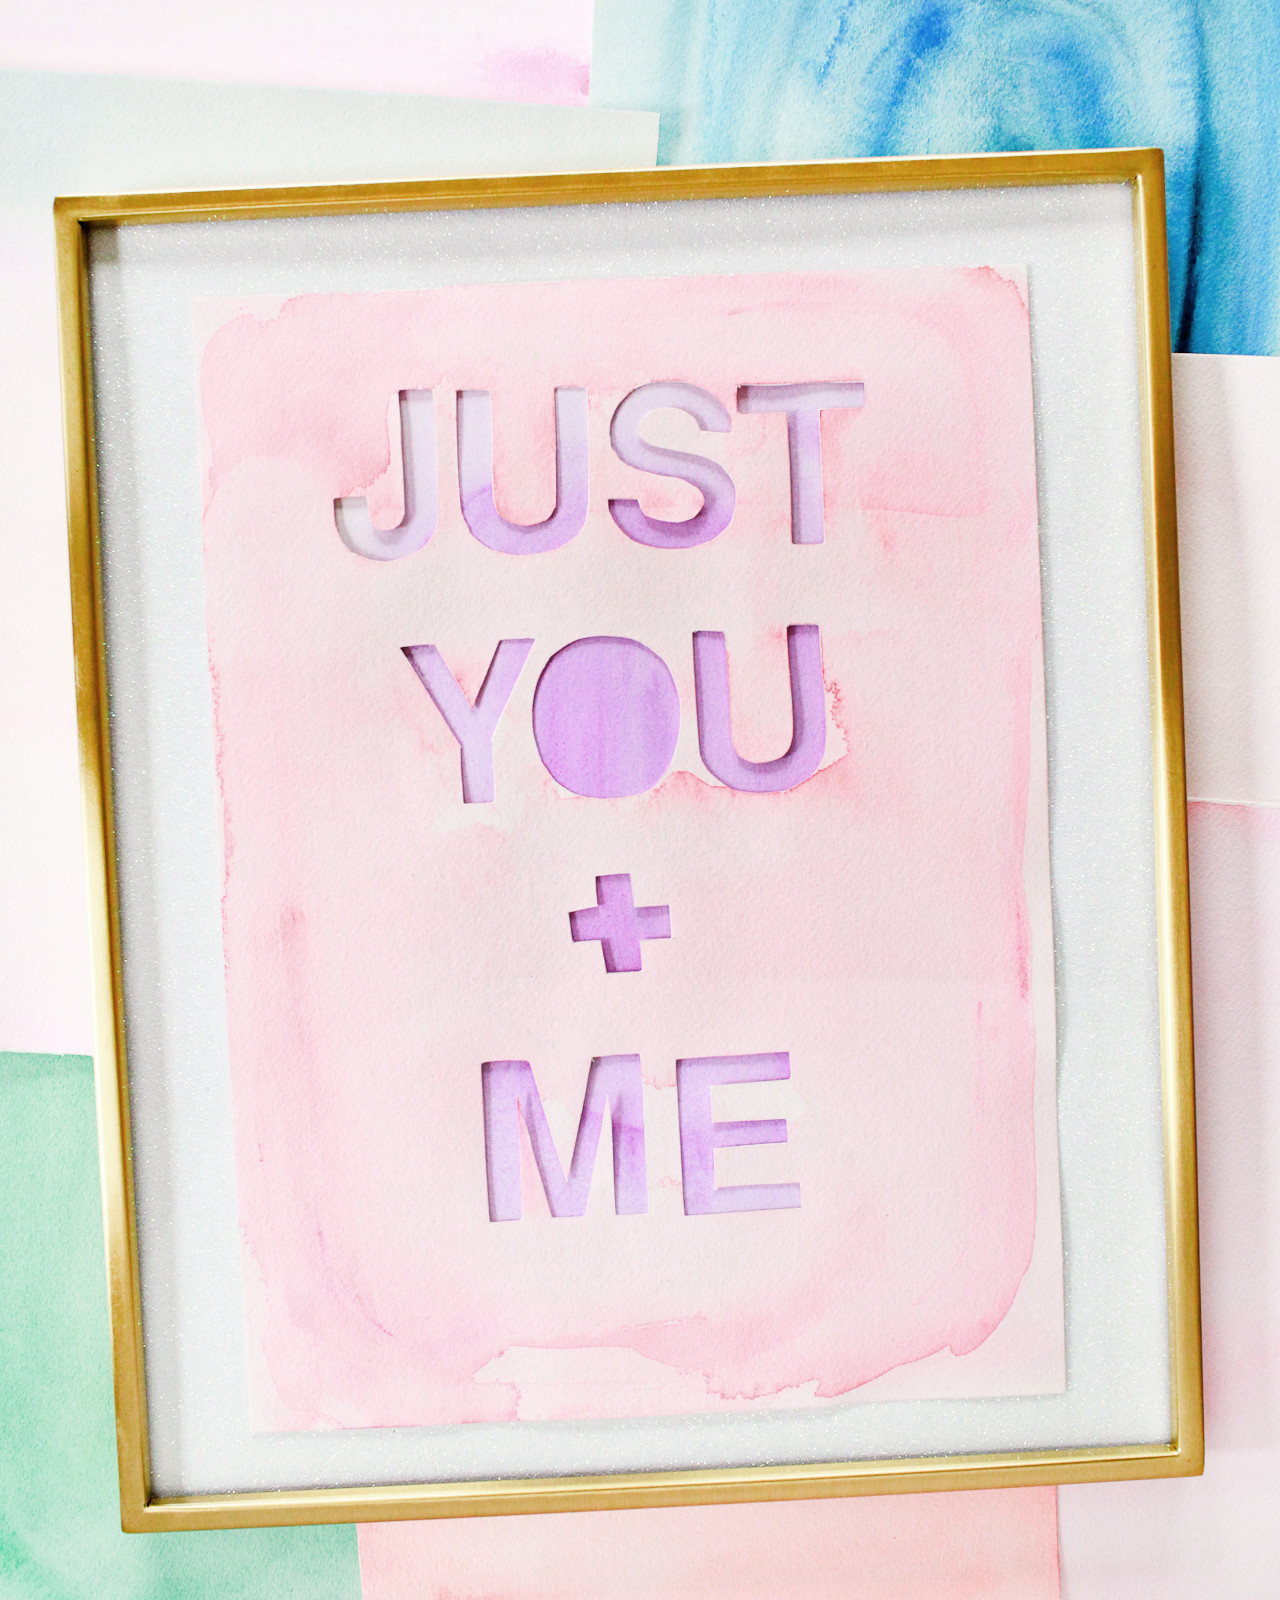
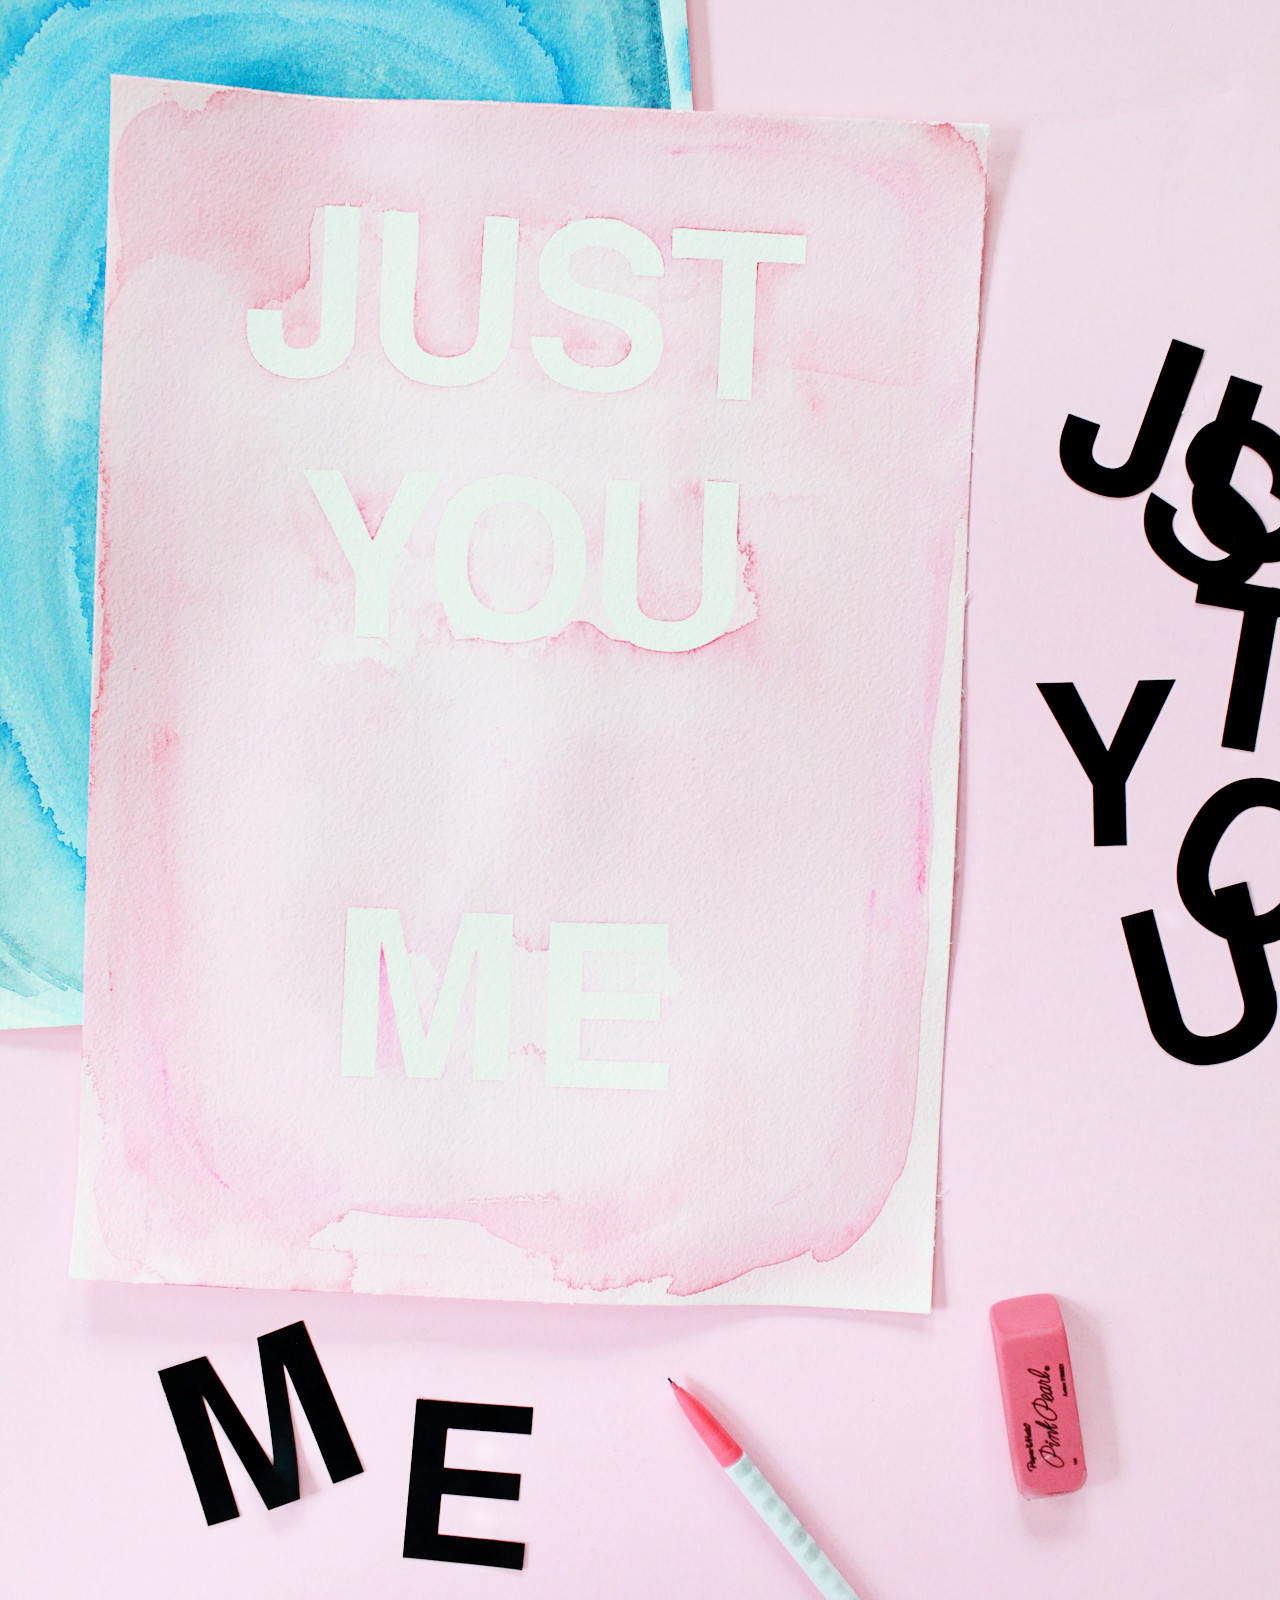
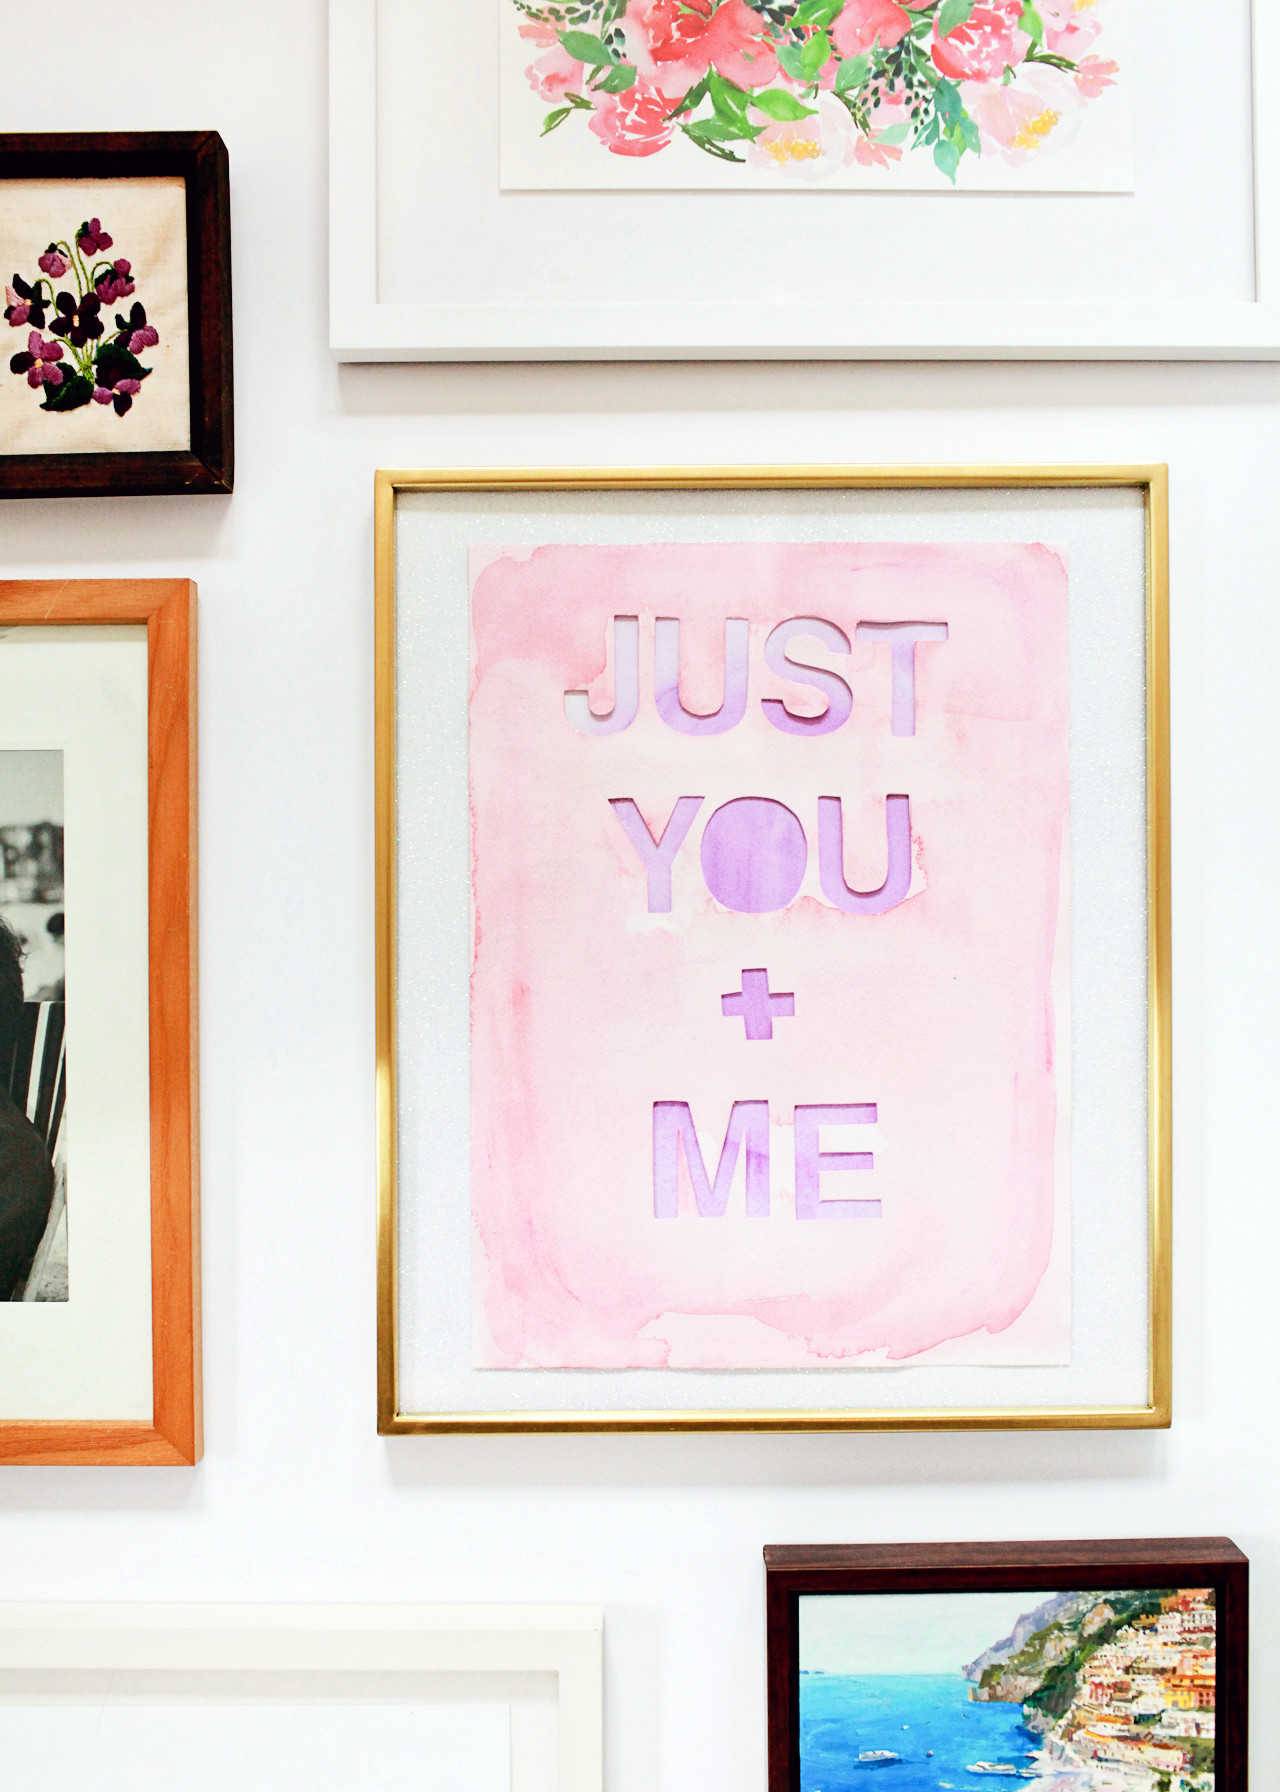
Step 2. Decide what phrase you want to use for your art print. Lay the 2″ letter stickers on a sheet of watercolor paper, using a ruler to make sure that your lines are fairly even. If you’re planning to write your phrase out by hand, skip this step and go straight to Step 3. If you’d like your final art to fit within a readymade frame, trim your paper down to 8″ x 10″ before painting or applying letter stickers. I didn’t trim my paper (I used 9×12 and 10×14 size sheets), so I just float mounted my art within the frame using foam mounting squares.

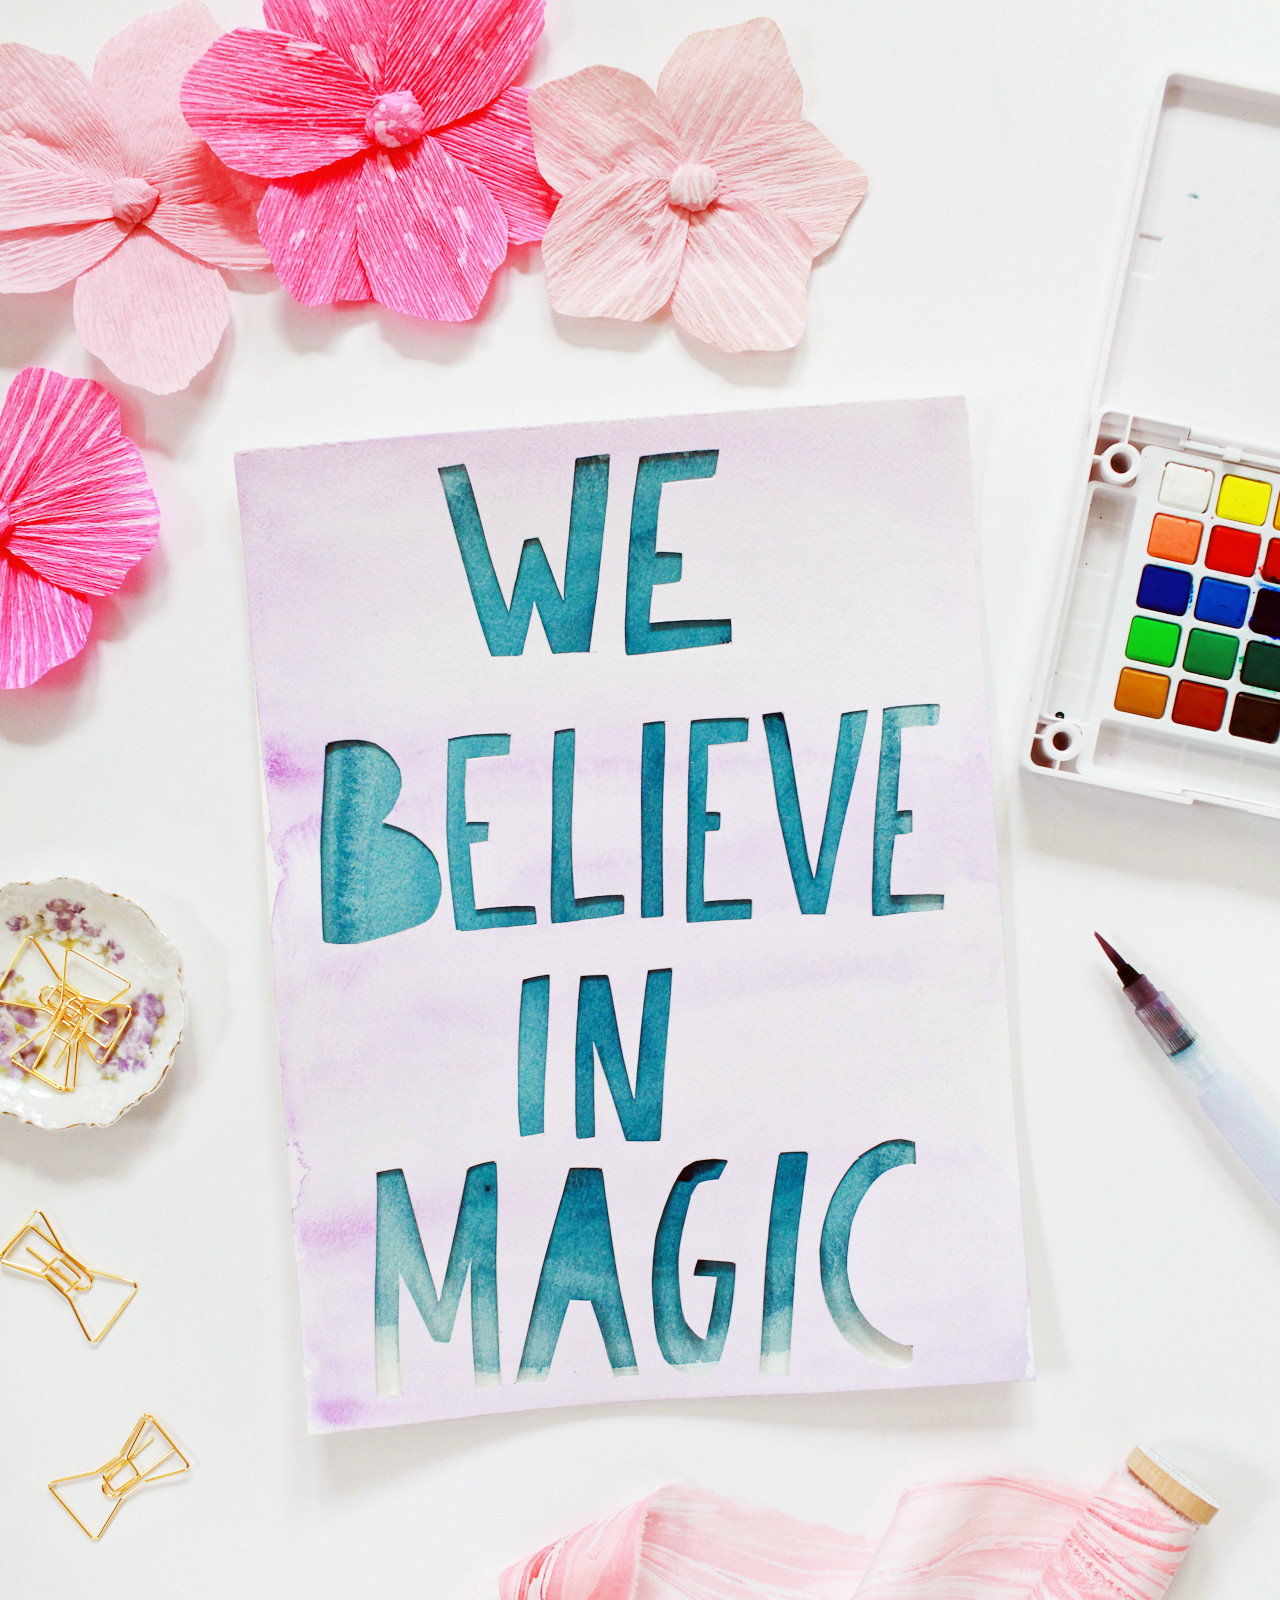
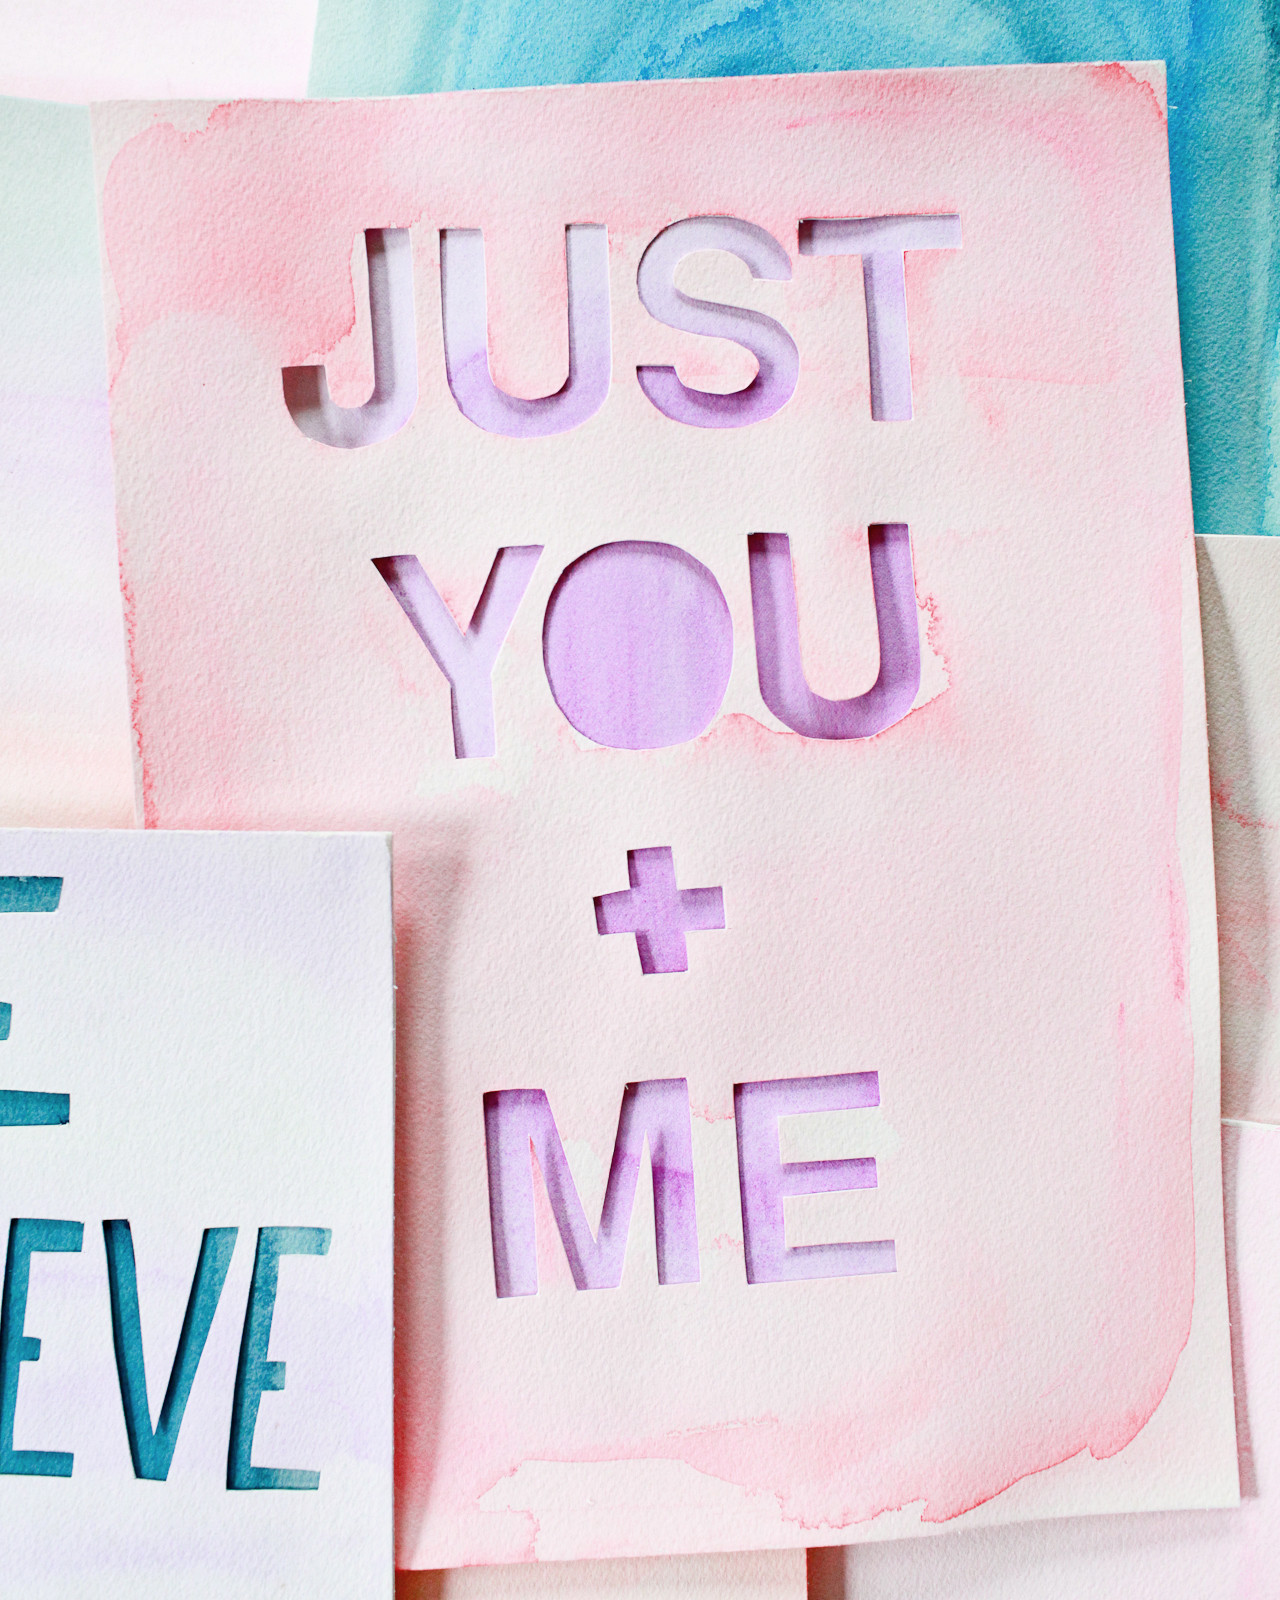
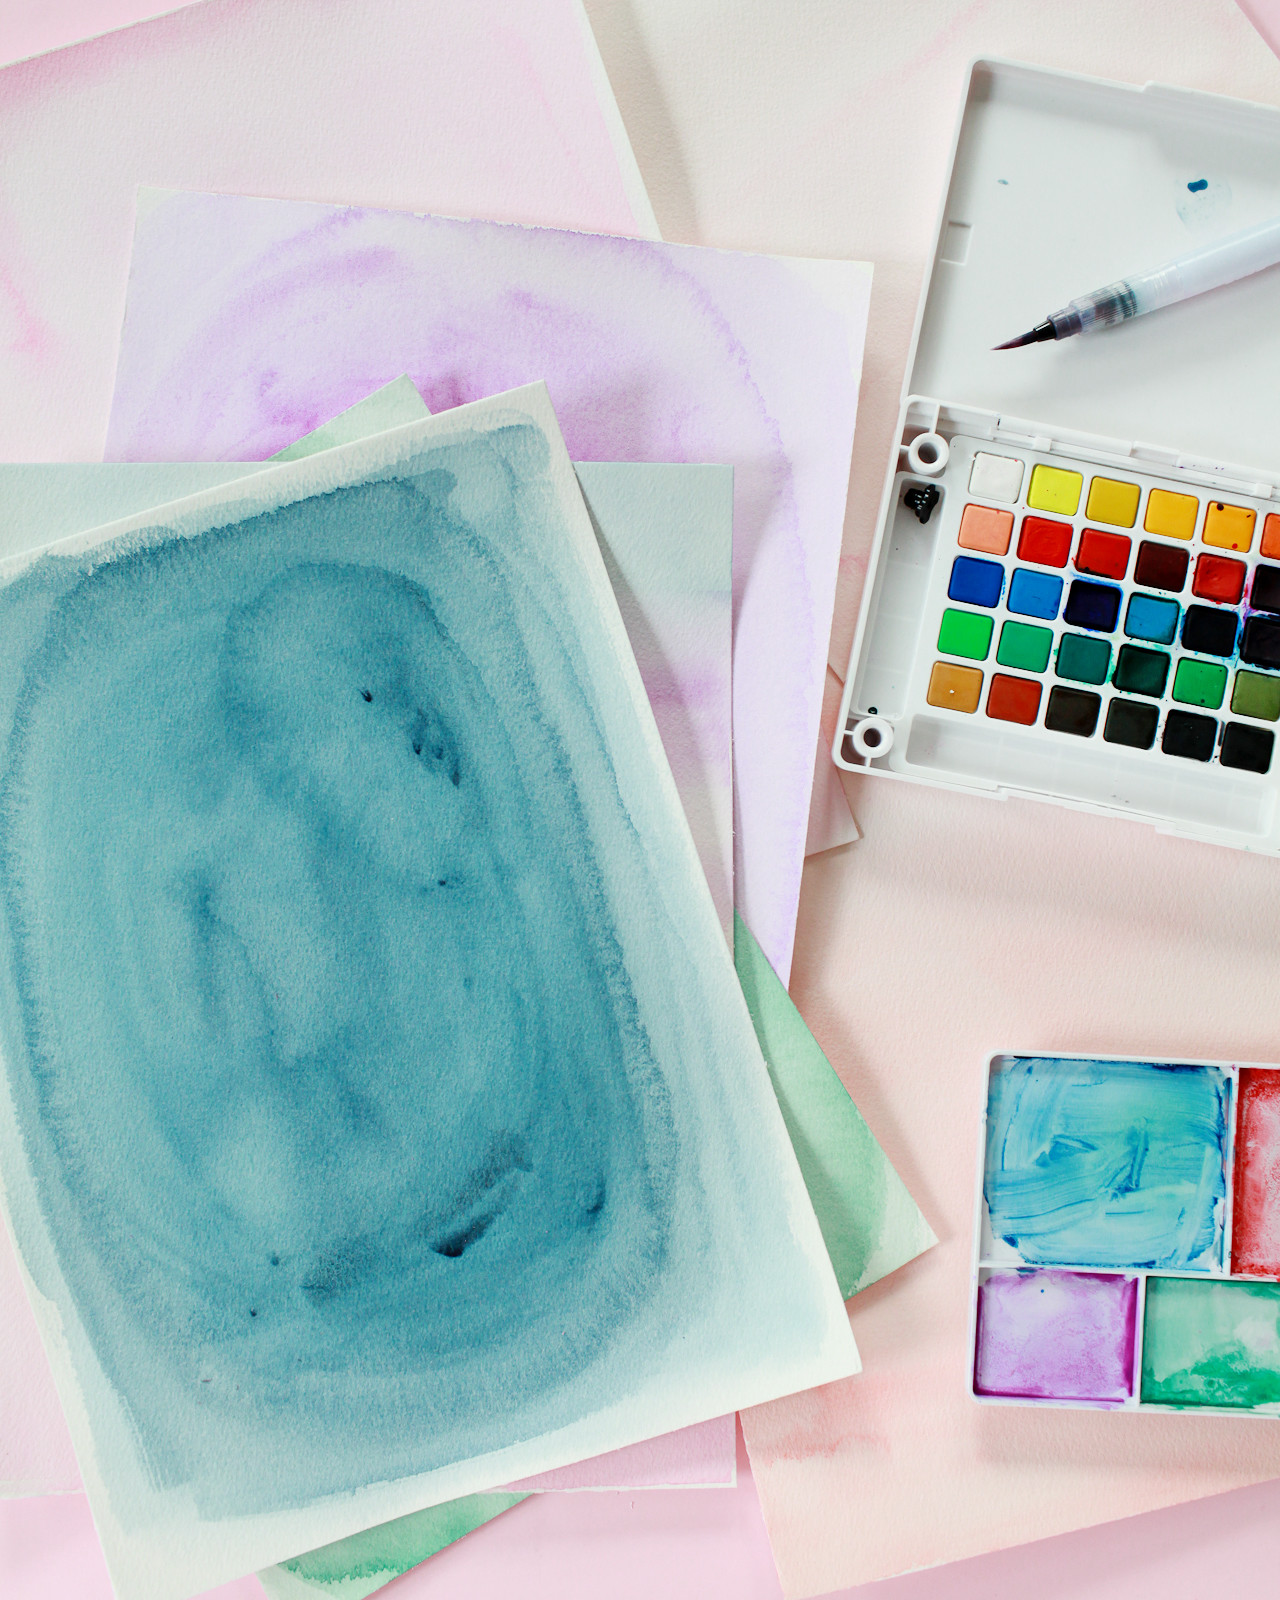
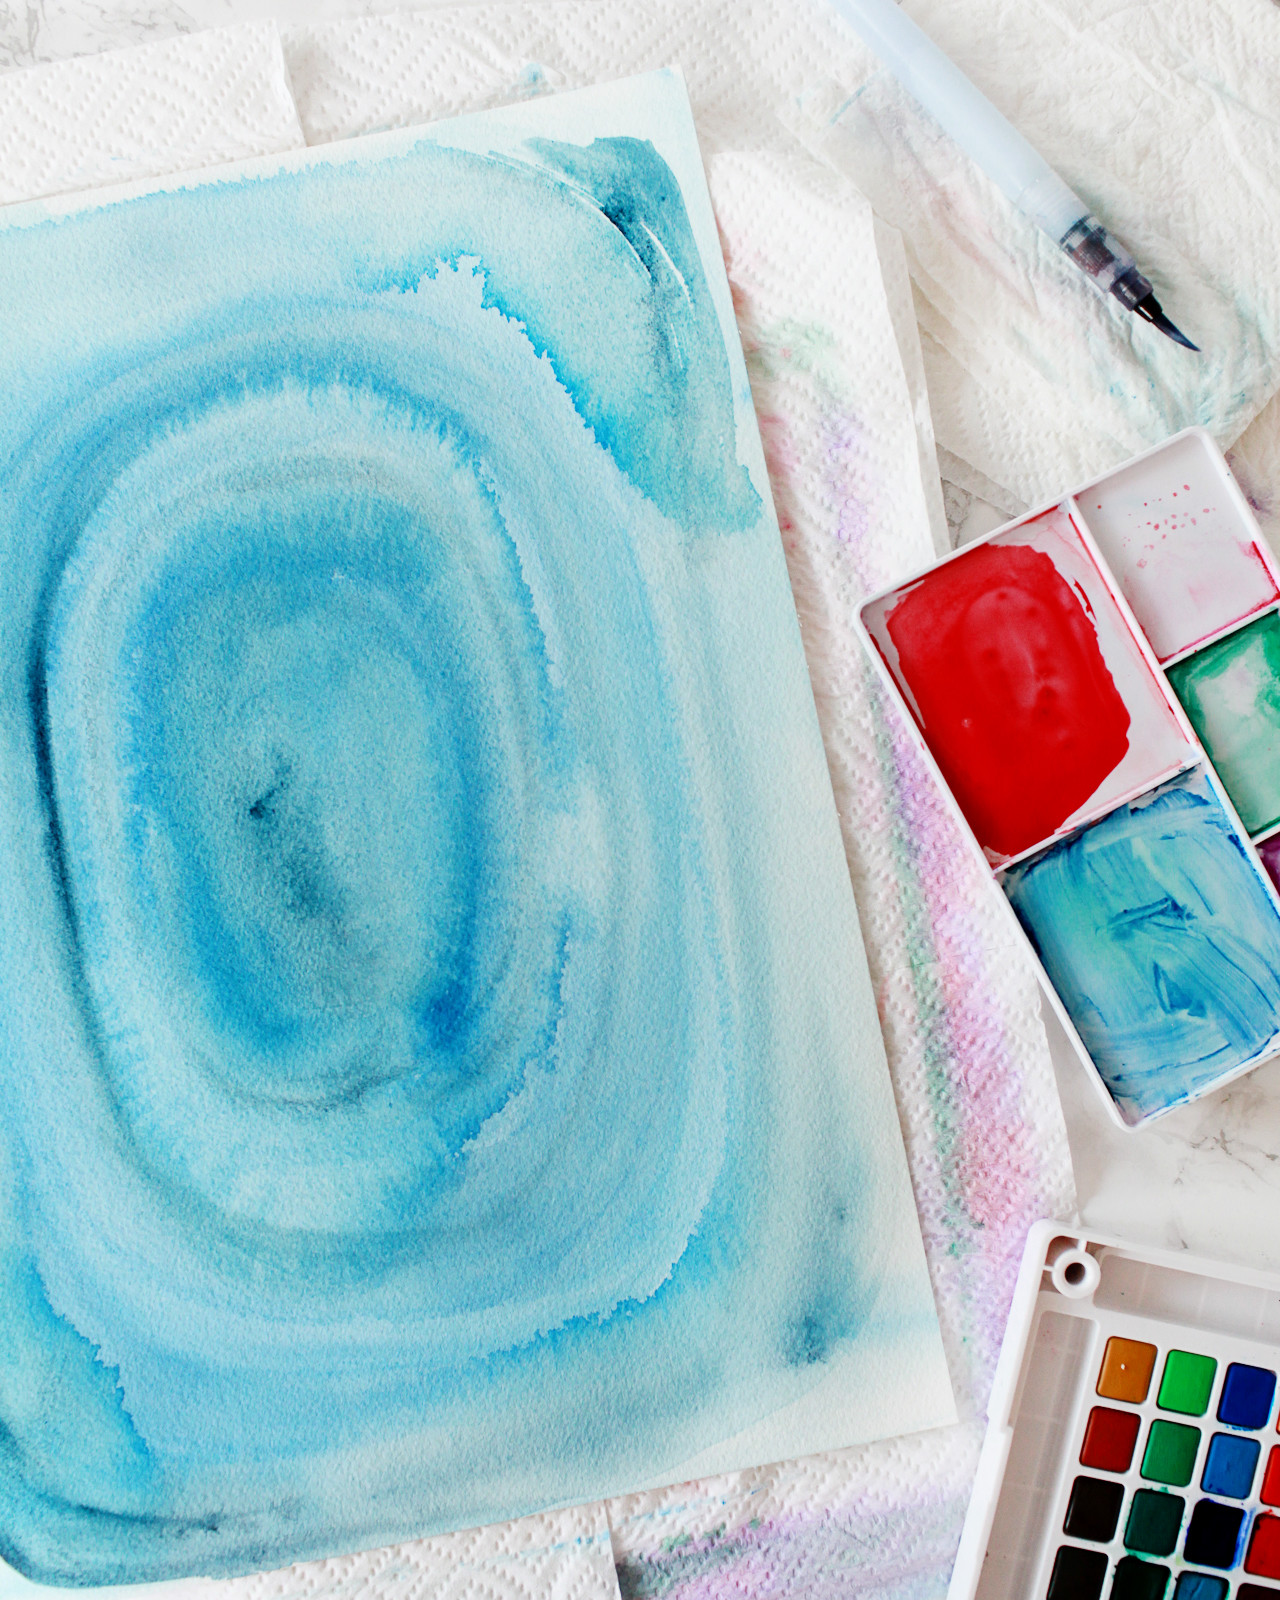
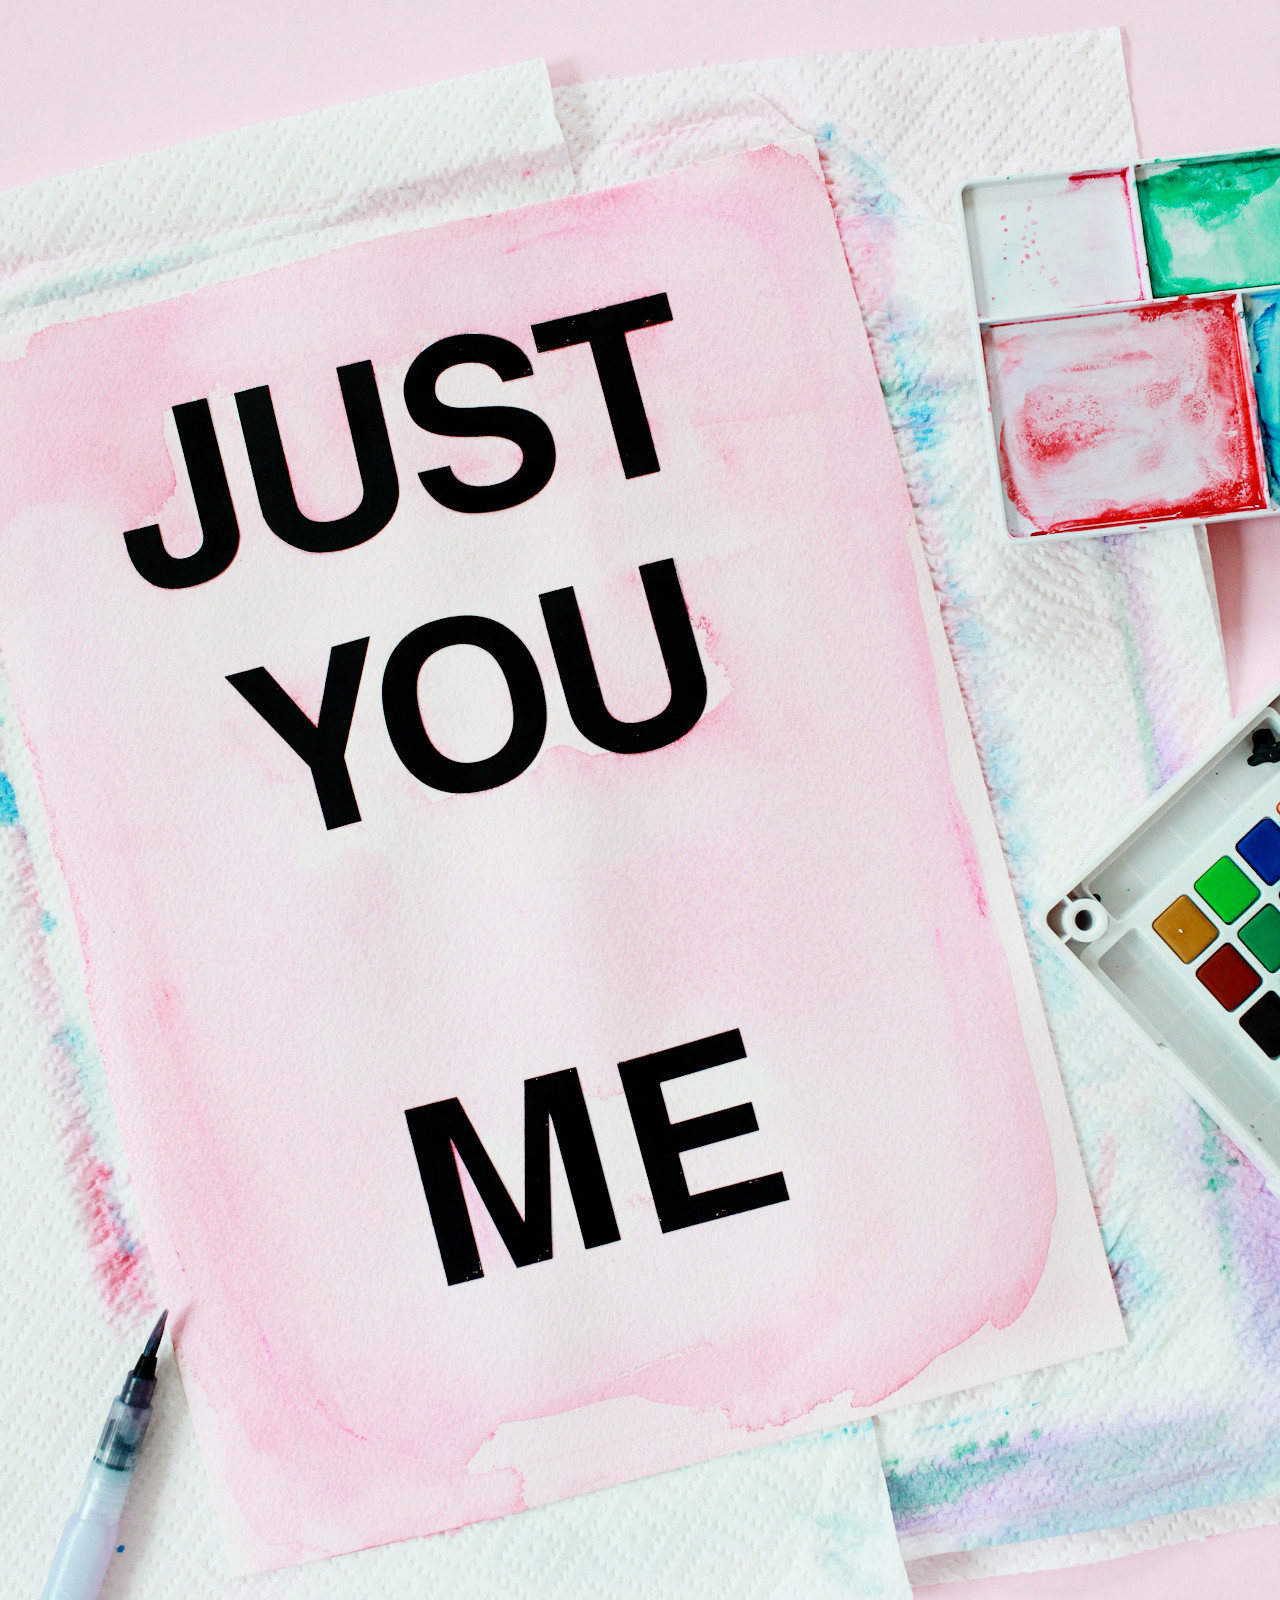
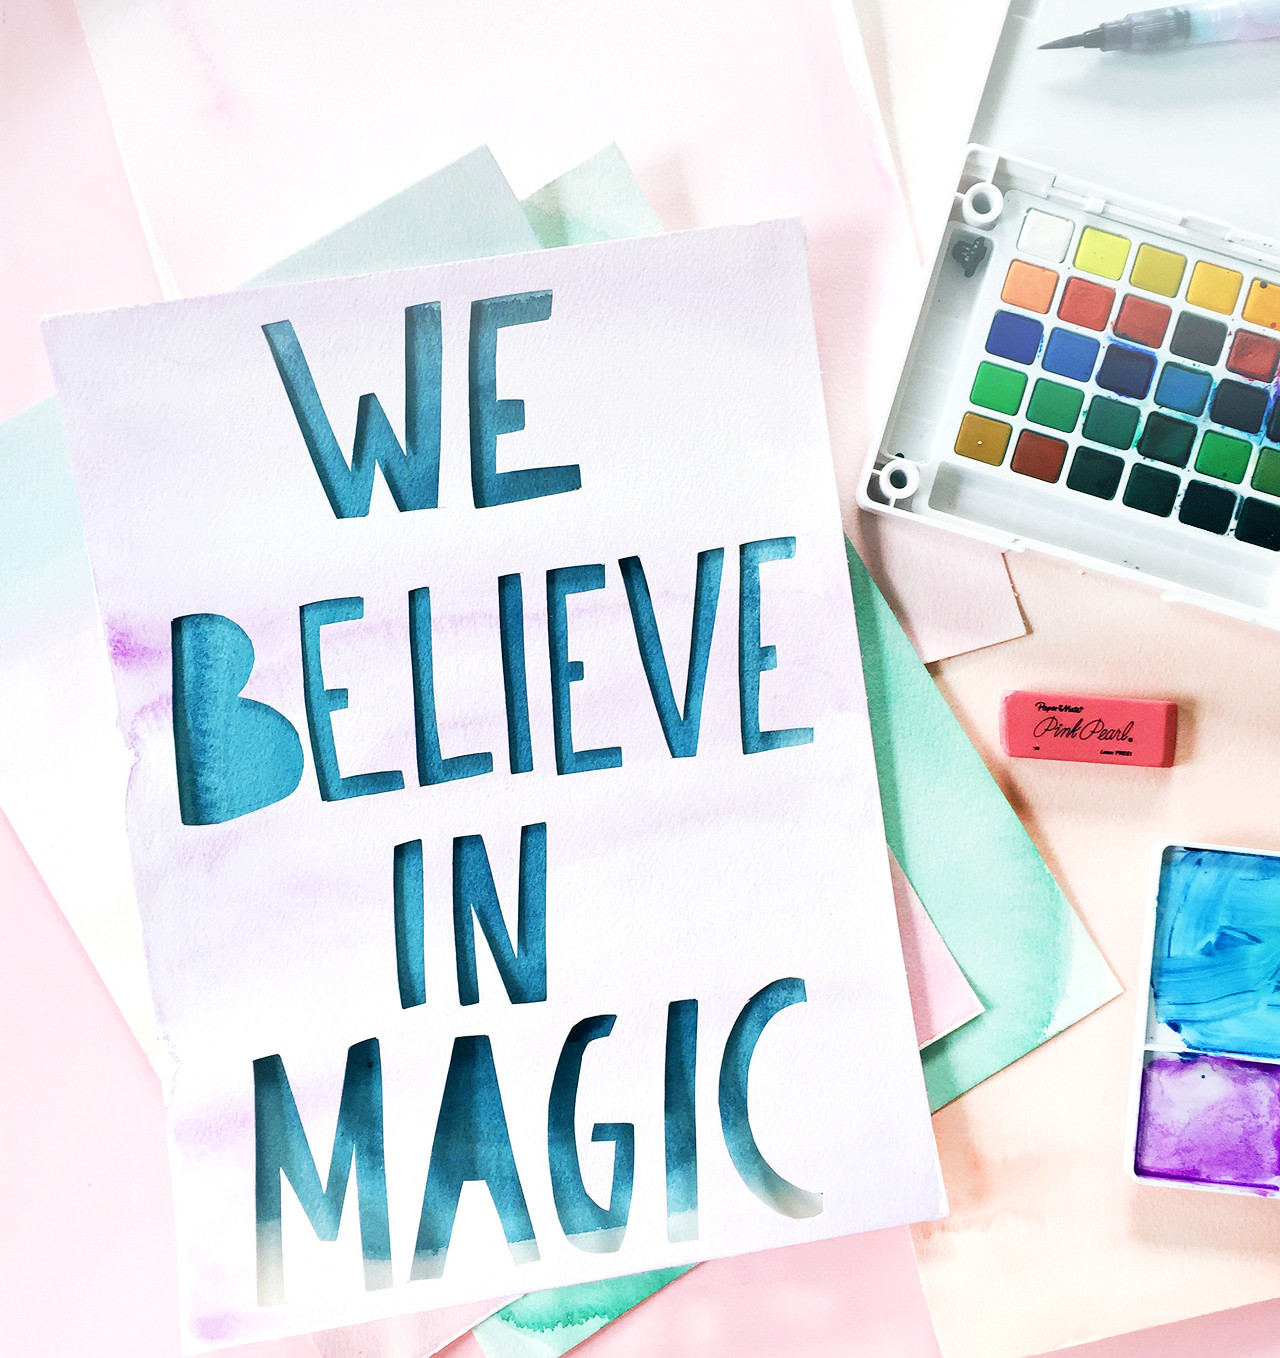
Step 3. Choose 2-5 colors from the 30-color Koi Water Color Field Sketch Travel Kit and add them to the detachable palette. Lay a sheet of water color paper on a flat work surface protected with paper towels or newspaper. Paint one sheet of watercolor paper in each color. My favorite color combinations ended up being purple paired with a coral-peach tone and Prussian blue paired with rose pink – but pick any color combination that speaks to you. You could even do a rainbow-inspired ombré! If you’re using the letter stickers to create your phrase, paint over the stickers your desired color. Let dry. If necessary, add a second coat to create a more saturated hue. Let dry.

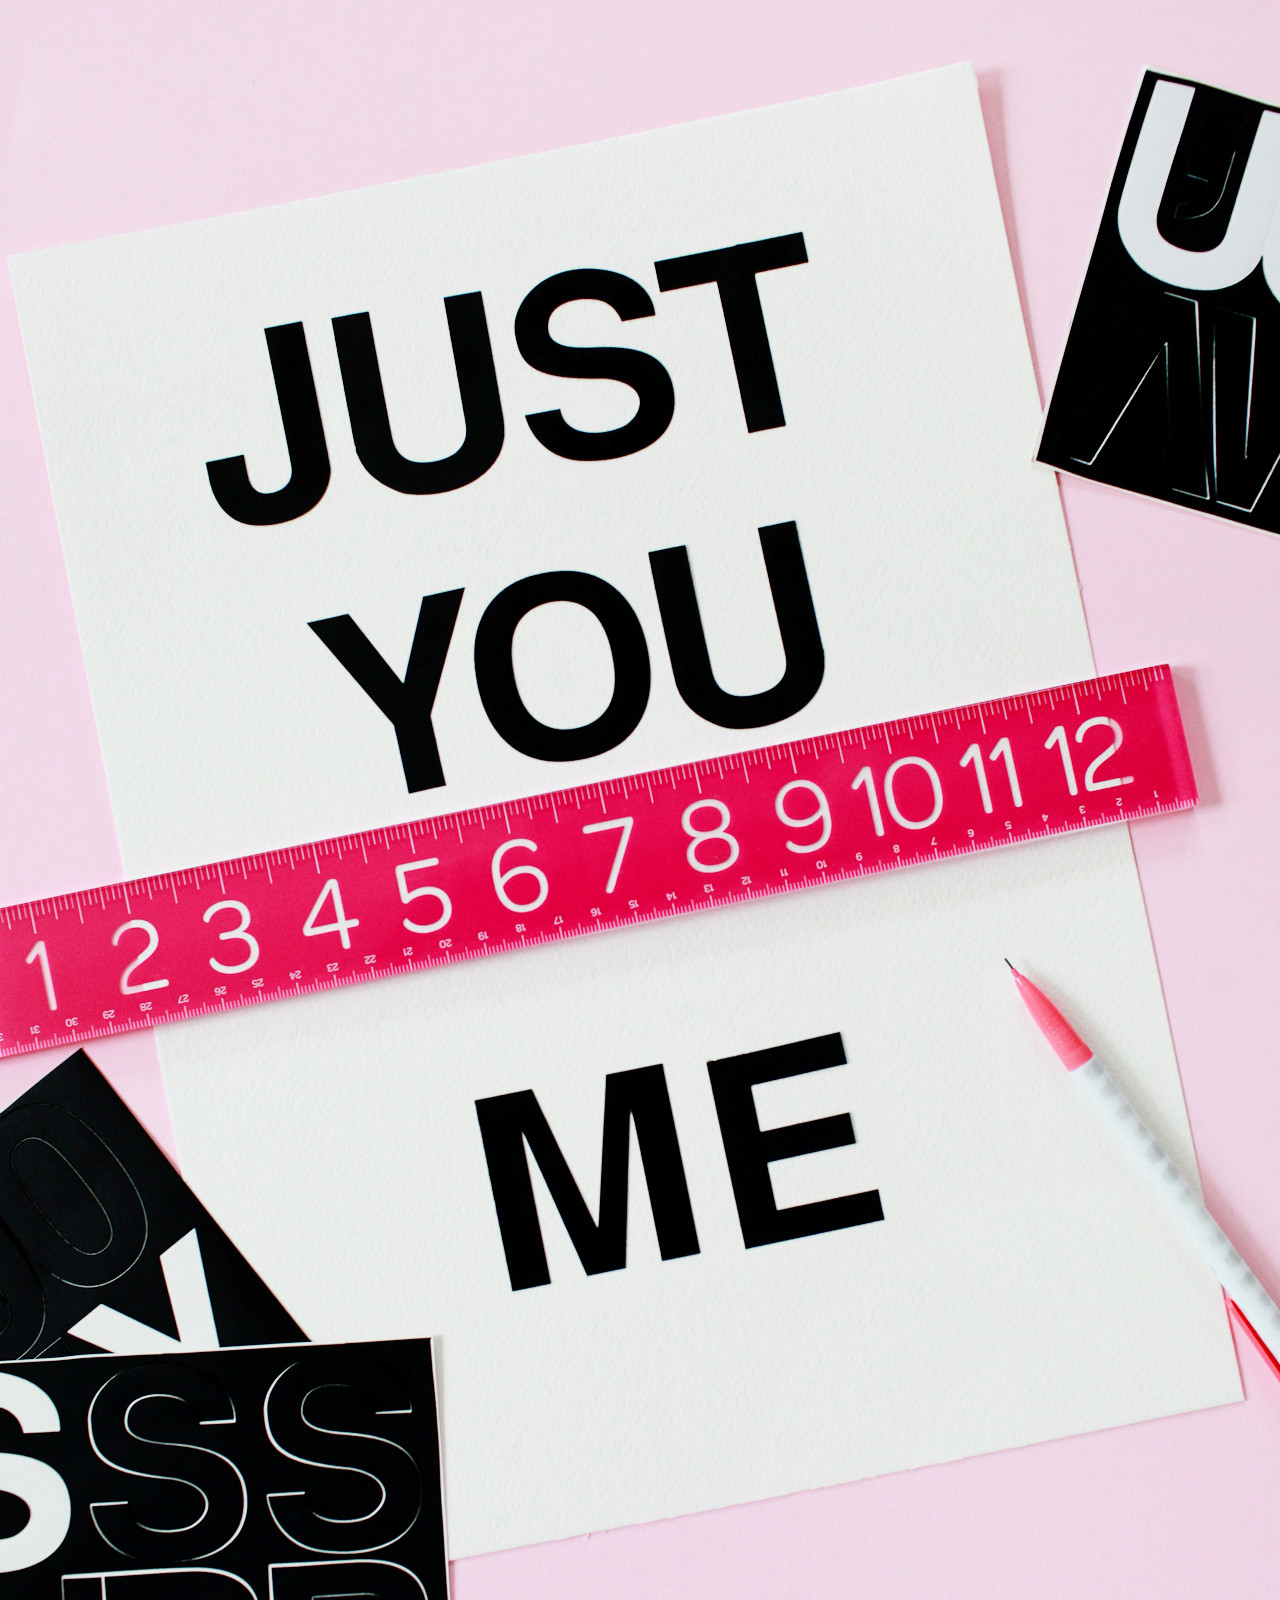
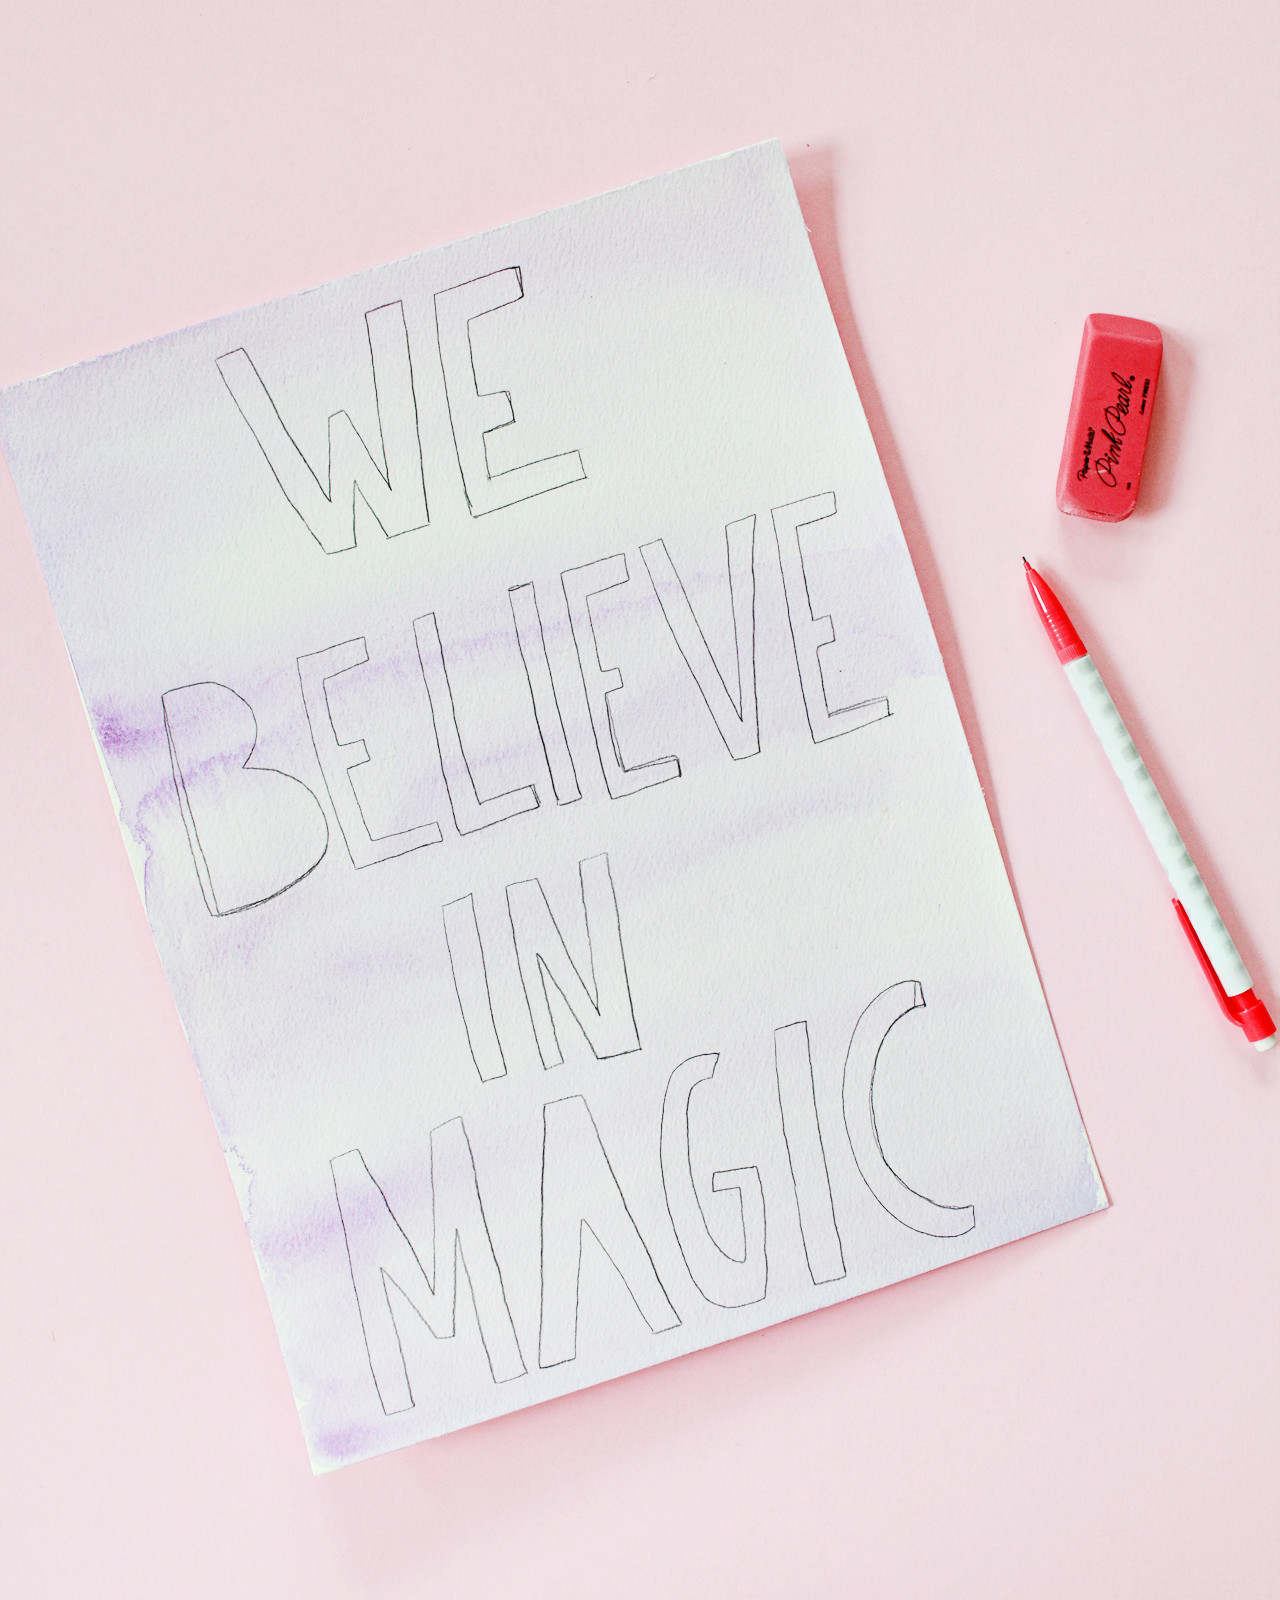
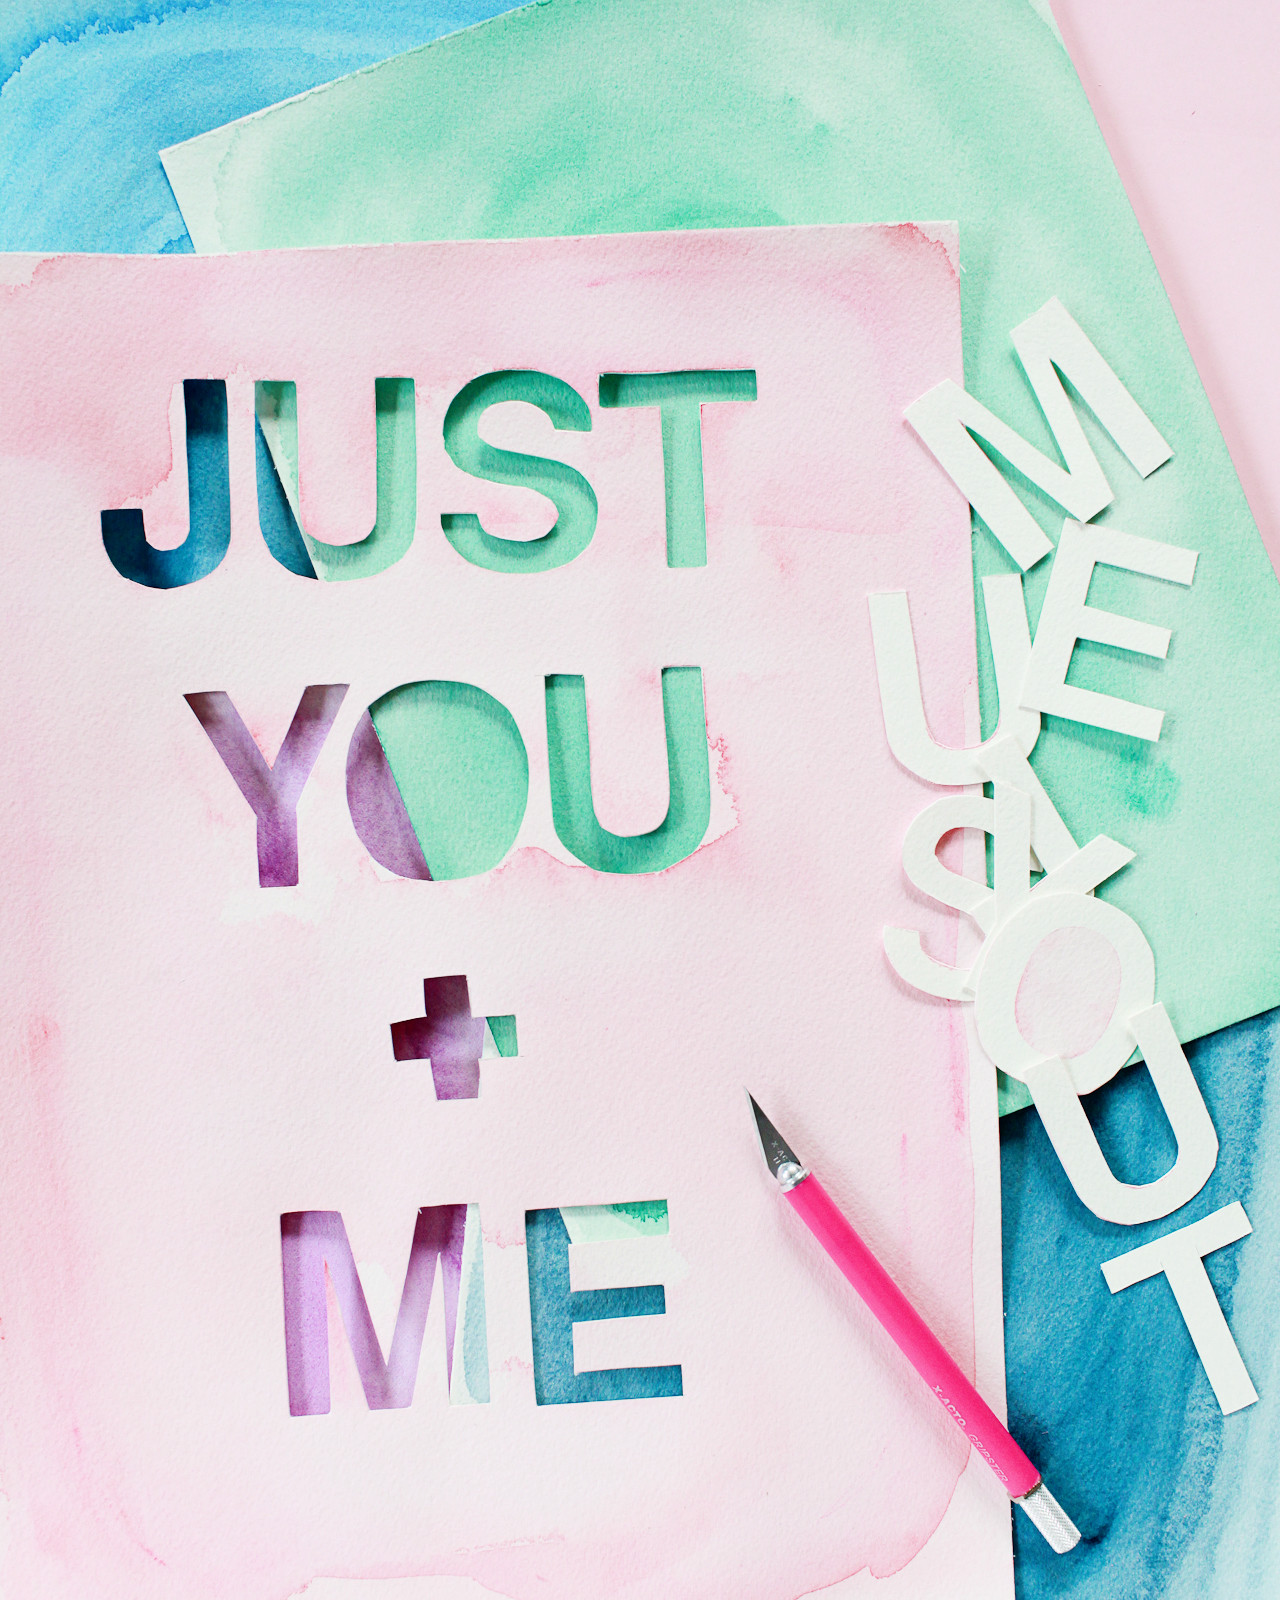
Step 4. Once the paint is completely dry, you can either remove the 2″ letter stickers to reveal the letter outline underneath (ta da!) – or use a pencil to write your phrase over the dry watercolor in tall and skinny block letters. If you’re going the second route, try to use the lightest possible pencil lines. I made mine a little darker so you would be able to see them, but the pencil lines should be as light as possible so that you can easily erase them later, if needed.

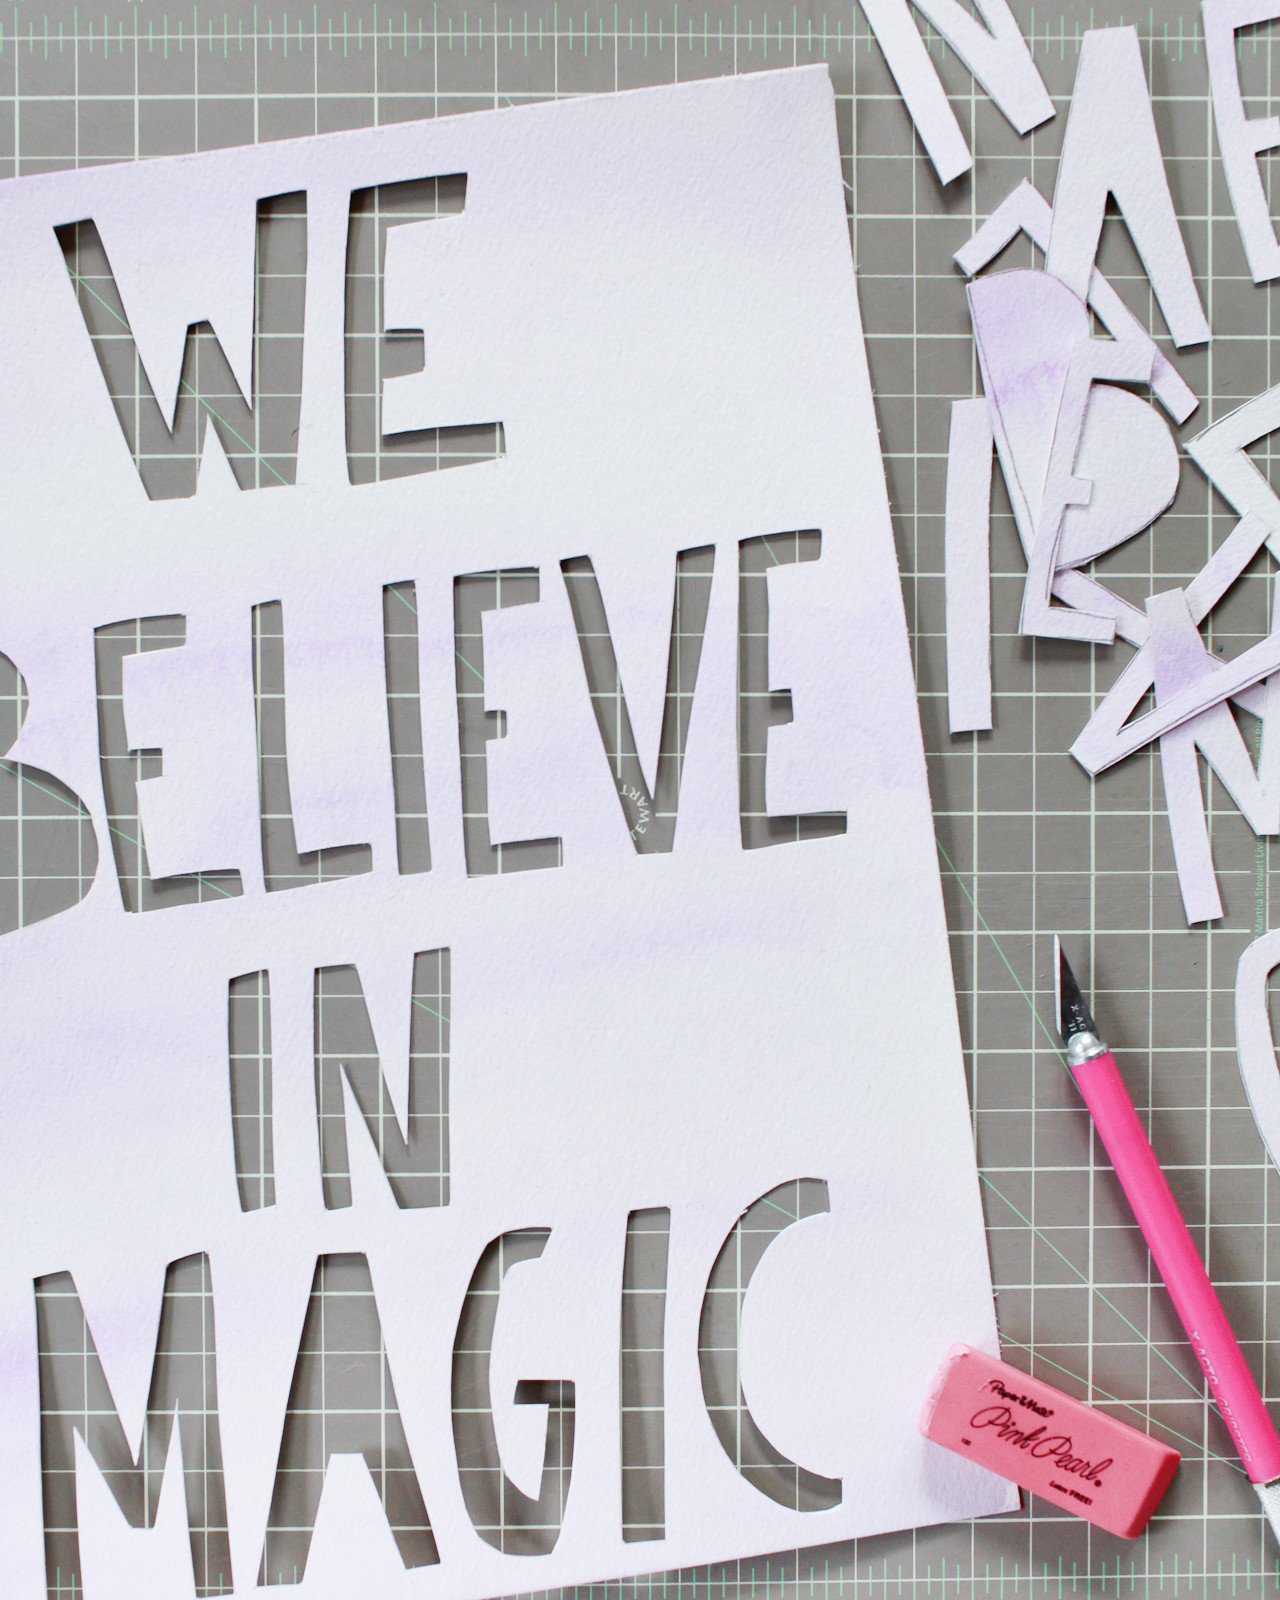
Step 5. Lay the watercolor paper on a cutting mat, and carefully cut out the individual letters using a craft knife. If necessary, use an artist eraser to erase any remaining pencil lines around the cut out letters.

Step 6. Layer the other sheet of watercolor paper under the sheet with the phrase cut out. Use foam mounting squares or glue to secure the two pieces of paper together. Then pop into a frame and enjoy!

DIY Watercolor Wall Art with Sakura of America Koi Water Color Field Sketch Travel Kit / Oh So Beautiful Paper

DIY Watercolor Wall Art with Sakura of America Koi Water Color Field Sketch Travel Kit / Oh So Beautiful Paper

DIY Watercolor Wall Art with Sakura of America Koi Water Color Field Sketch Travel Kit / Oh So Beautiful Paper

DIY Watercolor Wall Art with Sakura of America Koi Water Color Field Sketch Travel Kit / Oh So Beautiful Paper

DIY Watercolor Wall Art with Sakura of America Koi Water Color Field Sketch Travel Kit / Oh So Beautiful Paper

DIY Watercolor Wall Art with Sakura of America Koi Water Color Field Sketch Travel Kit / Oh So Beautiful Paper

DIY Watercolor Wall Art with Sakura of America Koi Water Color Field Sketch Travel Kit / Oh So Beautiful Paper

DIY Watercolor Wall Art with Sakura of America Koi Water Color Field Sketch Travel Kit / Oh So Beautiful Paper

DIY Watercolor Wall Art with Sakura of America Koi Water Color Field Sketch Travel Kit / Oh So Beautiful Paper

DIY Watercolor Wall Art with Sakura of America Koi Water Color Field Sketch Travel Kit / Oh So Beautiful Paper

DIY Watercolor Wall Art with Sakura of America Koi Water Color Field Sketch Travel Kit / Oh So Beautiful Paper

DIY Graphic Watercolor Wall Art with Sakura of America Koi Water Color Field Sketch Travel Kit / Oh So Beautiful Paper

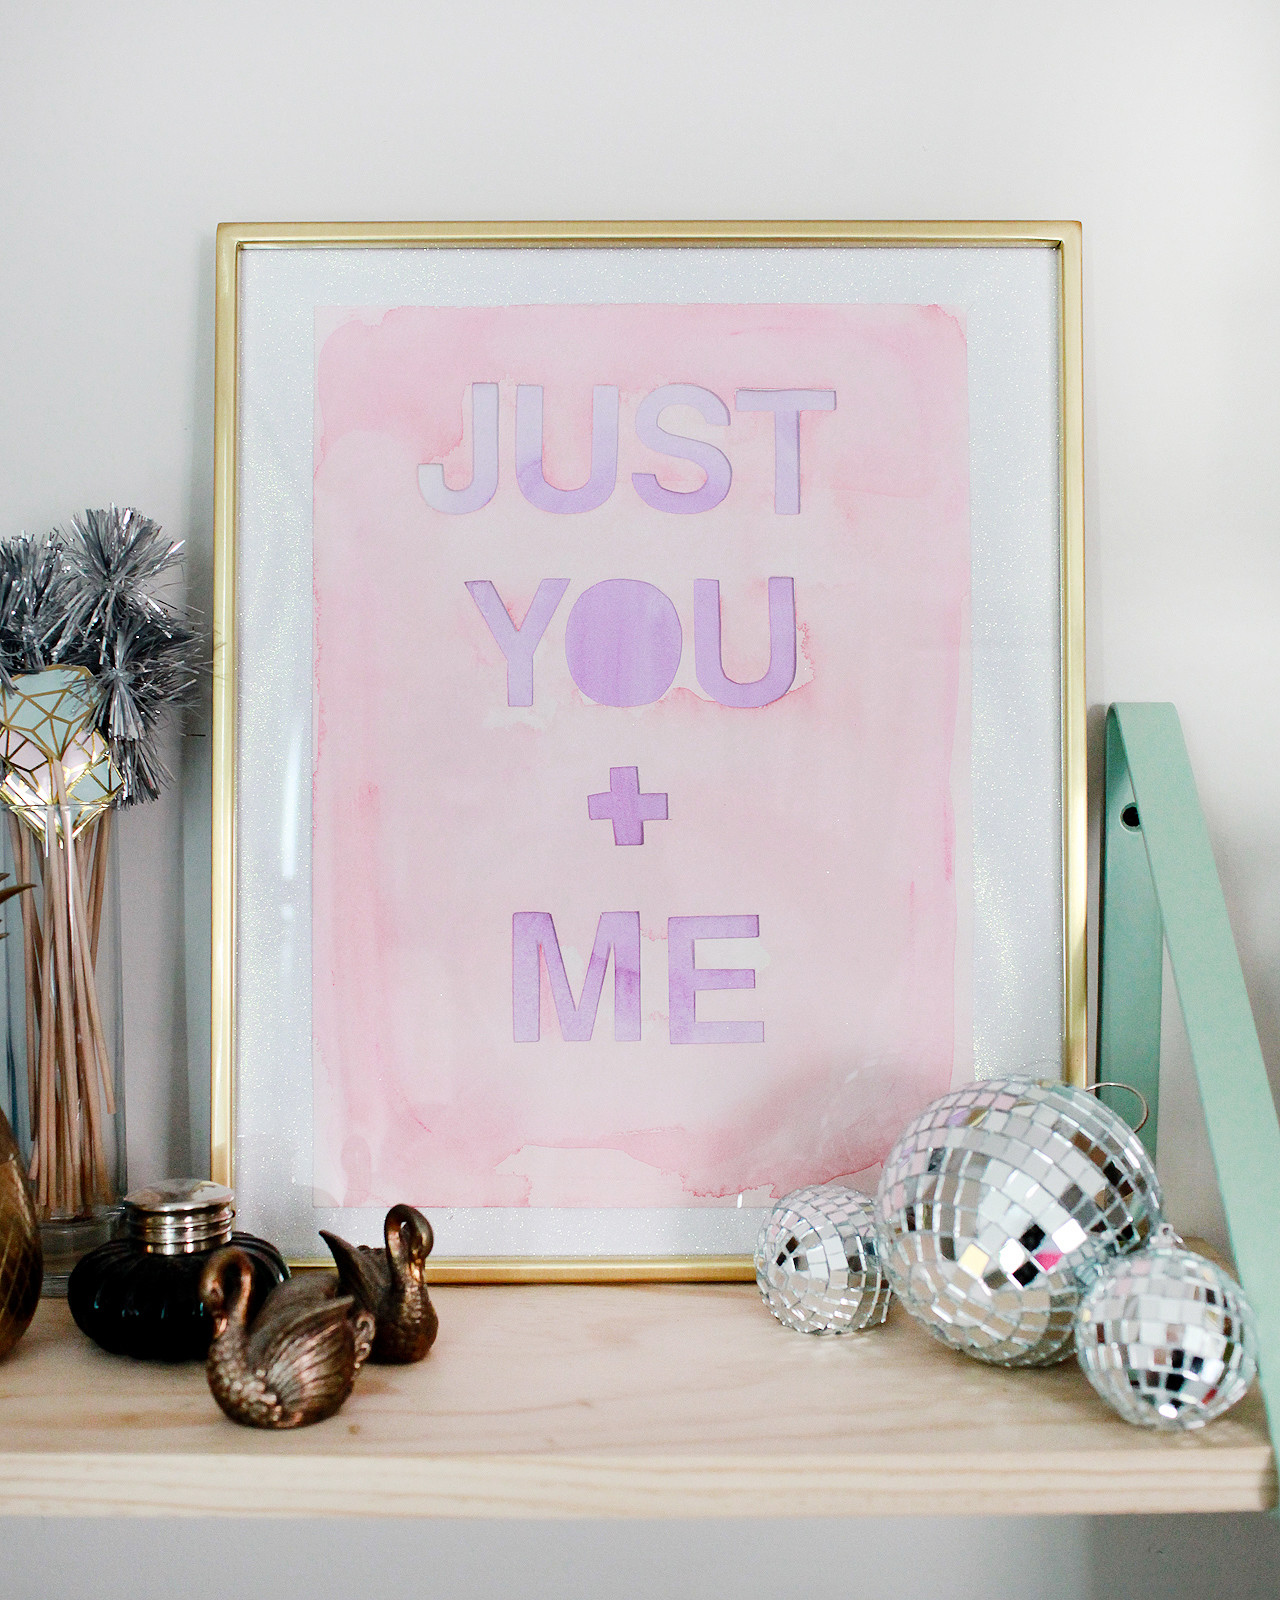
I had SO much fun creating these watercolor pieces! The watercolor painting actually turned out to be a super zen activity for me, and I love the ability to create your own custom art pieces with a meaningful phrase or inside joke!

You can pick up your own 30-color Koi Water Color Field Sketch Travel Kit here – you’ll have so much fun painting beautiful watercolor masterpieces with it!

Photos by Nole Garey for Oh So Beautiful Paper

This post is sponsored by Sakura of America. All content and opinions are my own. Thank you for supporting the sponsors that make Oh So Beautiful Paper possible!

Summer DIY Projects!

I have a REALLY fun DIY tutorial coming up in just a bit – but I was looking around our DIY project archives and realized that there were a lot of projects hidden in there that are just perfect for summer! So before we jump into this brand new project, here are a few DIYs that you might want to try on one of these long and warm summer days!

Summer DIY Projects / Oh So Beautiful Paper

1. Color-Dipped Picnic Bottles: Still one of our most popular DIY posts, and one of my personal favorites! We STILL have these bottles and use them all the time to bring pre-mixed drinks to summer BBQs and picnics.

2. Tropical Palm Frond Ice Bucket: Ice buckets are a MUST for summer entertaining! Why not jazz yours up with some DIY vinyl decals in the shape of palm fronds??

3. Watermelon Serving Tray: Watermelon will forever epitomize summer for me. This watermelon tray is the perfect entertaining accessory for summer parties!

4. Printable Hologram Foil Ice Cream Cone Wrappers: Hologram foil that you can DIY at home! And ice cream! Need I say more??

5. Hand Lettered Dinner Plates: These plates couldn’t be easier to make (seriously), using either your own phrase in a favorite font or our free printables!

6. Summer Air Plant Wreath: How cute are these little air plant wreaths?? Love these for summer parties – or even a summer wedding!

7. Black and White Napkin Rings: All you need is a bit of embroidery floss and some beads and you’re good to go!

8. Printable Tropical Envelope Liners: Okay, so technically you can use these printable liners all year long, but summer is really just the perfect season for these beautiful illustrated envelope liners with tropical and ocean-inspired motifs!