Happy Weekend + August Break!

Happy Friday everyone! Summer is starting to wind down and, between the Congressional recess and absence of a billion college kids, DC is feeling sooooo quiet these days – which I love! Next week, we’ll be taking our own little recess in the form of our annual August break to recharge and enjoy these last few days of summer. We’ll be back with new posts on Tuesday, September 2 after the Labor Day weekend! But in the meantime…

OSBP-Dahlia-Instagram

Photo by me via Instagram (dahlias from my garden!)

…a few links for your weekend:

This week on Oh So Beautiful Paper:

Check back soon for this week’s cocktail! I hope you all have a wonderful weekend, and I’ll see you back here in September! xoxo

Quick Pick: Antiquaria

Today I’m practically bursting with joy – our friends and longtime DIY contributors Bailey and Emma of Antiquaria just launched their brand new collection of greeting cards and notebooks! And if that wasn’t enough, they’re also making the jump into wholesale with a collection that includes both the new greeting cards and their beautiful patterned paper! The new collection is absolutely stunning, with beautiful illustrations, whimsical lettering and calligraphy, and lots of metallic foil. Today I’d love to share a few favorites from the new collection!

Antiquaria-Greeting-Cards-and-Stationery-OSBP

Antiquaria-Greeting-Cards-and-Stationery-OSBP3

Antiquaria-Greeting-Cards-and-Stationery-OSBP17

I’m loving these tropical and vintage-inspired designs!

Antiquaria-Greeting-Cards-and-Stationery-OSBP4

Antiquaria-Greeting-Cards-and-Stationery-OSBP18

Antiquaria-Greeting-Cards-and-Stationery-OSBP7

Antiquaria-Greeting-Cards-and-Stationery-OSBP13

These cards are inspired by vintage handkerchiefs!

Antiquaria-Greeting-Cards-and-Stationery-OSBP14

Antiquaria-Greeting-Cards-and-Stationery-OSBP22

Antiquaria-Greeting-Cards-and-Stationery-OSBP23Antiquaria-Greeting-Cards-and-Stationery-OSBP26

Antiquaria-Greeting-Cards-and-Stationery-OSBP27

Antiquaria-Greeting-Cards-and-Stationery-OSBP15

Antiquaria-Greeting-Cards-and-Stationery-OSBP24Antiquaria-Greeting-Cards-and-Stationery-OSBP28

Antiquaria-Greeting-Cards-and-Stationery-OSBP30

You can check out the full collection over at Antiquaria right here! Congrats Bailey and Emma!

DIY Patterned Wedding and Party Favor Bags

We have a confession: we’re crazy about details… and we can’t get enough pattern in our lives. A few weeks ago, we were on the hunt for the perfect favor bags and just couldn’t find exactly what we were looking for. A light bulb went off and Emma dreamed up these custom DIY wedding and party favor bags that can be made from any patterned sheet of paper! And thus a new obsession was born. – Bailey and Emma of Antiquaria

DIY Wedding and Party Favor Bag Tutorial by Antiquaria for Oh So Beautiful Paper

These favor bags are best made in an assembly line fashion, completing each step for all of your bags at once. Doing it this way will save you tons of time!

Materials

Coco and Paloma Green Floral Patterned Paper in text weight

Scoreboard

T-square Ruler

Pencil

Scissors

Double Sided Tape (a tape gun is faster but optional)

DIY Wedding and Party Favor Bag Tutorial by Antiquaria for Oh So Beautiful Paper

Step 1: Using a scoreboard, score your sheet of paper on the back (we used 8.5 x 11″ patterned paper) half an inch above the bottom (the 11″ side) and half an inch from right hand side. Lastly, score down the new center, at the 5.25″ mark. You can adapt this technique to any size paper by using this formula, simply adjust the center score accordingly.

DIY Wedding and Party Favor Bag Tutorial by Antiquaria for Oh So Beautiful Paper

Step 2: With a t-square ruler, draw a light pencil line across the lefthand side and righthand half inch portion of the paper that you just scored, about an inch down from the top.

DIY Wedding and Party Favor Bag Tutorial by Antiquaria for Oh So Beautiful Paper

Step 3: Next, you will center a plate on the right-hand side, in between your straight pencil lines. This is how to create the top arch on your bag. Trace the top of the plate light with a pencil. You should now have a cutting guide that runs all the way across your paper.

DIY Wedding and Party Favor Bag Tutorial by Antiquaria for Oh So Beautiful Paper

Step 4: With scissors, carefully cut along the line that you just made. You will also need to cut half an inch at the center score line along the bottom to where the score marks meet.

DIY Wedding and Party Favor Bag Tutorial by Antiquaria for Oh So Beautiful Paper

Step 5: Next, fold down the righthand half inch score mark. Apply double sided tape along the length of the right side as well as across the bottom right side (from cut to edge). Carefully fold the left side to meet the right and adhere them together.

DIY Wedding and Party Favor Bag Tutorial by Antiquaria for Oh So Beautiful Paper

Step 6: Flip your bag over and finish it off by folding up the bottom half inch and tape it to the back using double sided tape.

DIY Wedding and Party Favor Bag Tutorial by Antiquaria for Oh So Beautiful Paper

Et voila! Favor bags sure to impress at any wedding or party. Now… what to put in them?

Photo Credits: Antiquaria for Oh So Beautiful Paper

Where To Find Vintage Stamps

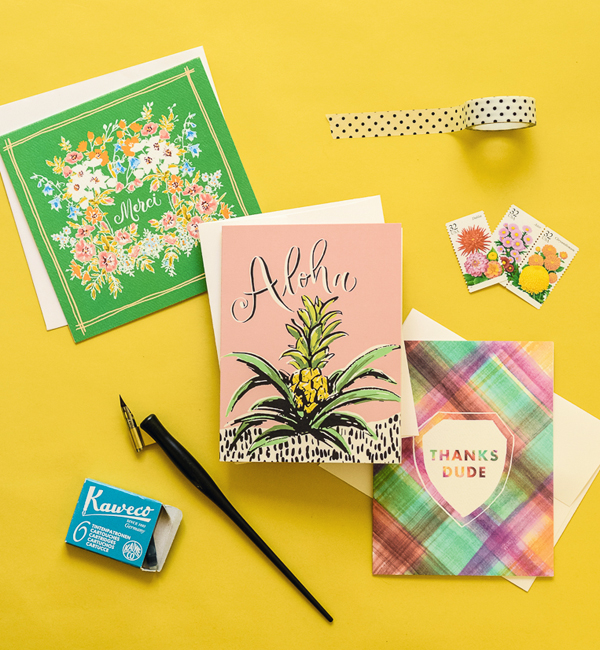
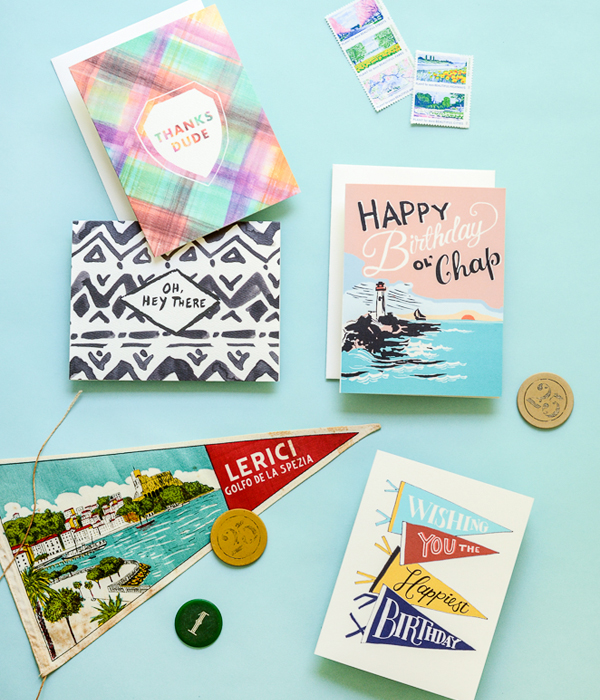
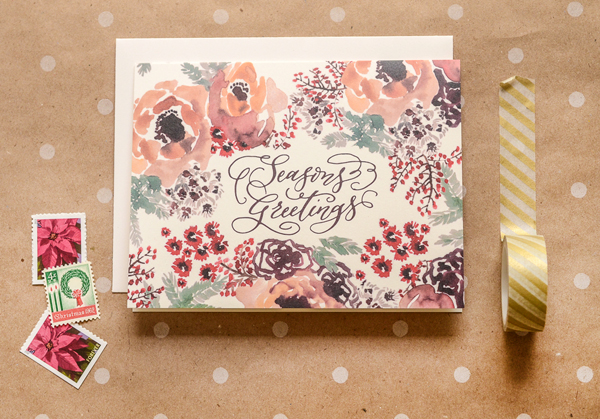
As you probably know by now, I’m a big fan of using vintage stamps on milestone stationery like wedding invitations and baby announcements. I used vintage stamps for my own wedding invitations, moving announcements, and for Sophie’s birth announcements almost two (!!) years ago – and I’ve featured countless wedding invitations with beautiful vintage stamps over the years. Vintage stamps offer a wonderful opportunity to represent your personal style, whether chosen thematically or by color palette. And since unused postage never expires, there are endless options to suit everything from a formal black tie wedding to a casual backyard gathering. Some readers have asked for tips on where to find vintage stamps over the last few weeks, so today I thought I’d share my go-to sources!

Where to Find Vintage Stamps by Oh So Beautiful Paper

Photo by Union Photography from Allison and Mark’s wedding invitations

eBay

If you have the time to search for stamps yourself, eBay is a wonderful resource for finding vintage stamps! This is my personal go-to source, and I like to search for entire sheets of vintage stamps. You can start here, and you’ll find sheets of everything from 3¢ stamps to recently issued stamps. You can refine the results by adding keywords – like science, love, birds, etc. – but leave out the word “stamp” since you’re already searching by stamp sheets. This method can be super effective if you’re searching for thematic stamps, but you may run into a bit of trouble if you’re trying to group stamps based on a particular color palette.

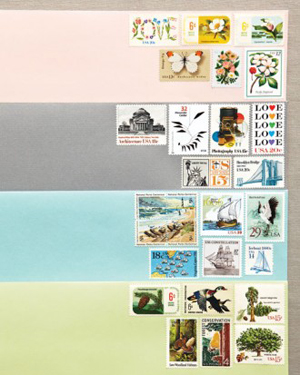
The best way to search for vintage stamps on eBay is by identifying the Scott number of a particular stamp that you love, since many eBay stamp dealers will use only the Scott number in their listing. For example, a really pretty flower “Love” stamp is #1951, my favorite constellation stamp is #3945, and another favorite stamp with state birds and flowers is #1953.

Where to Find Vintage Stamps by Oh So Beautiful Paper

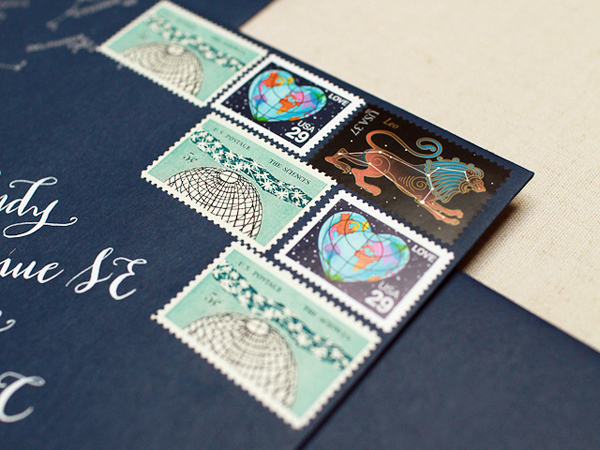
Photo by me from Sophie’s Constellation-Inspired Birth Announcements

Online Shops

There are a bunch of online vintage stamp shops that will curate a collection of stamps for you based on your theme or color palette – such a great option for busy couples or anyone feeling super overwhelmed by the whole process. There are probably a million more that I don’t know about, but here are a few of the shops on my radar:

Underwood Letterpress

Verde Studio

Pack and Post

TreasureFox

Vintage Postage Shop

Darling One

Love the Postage

A couple more online stamp shop options: Champion Stamps and US Mint Sheets. They don’t offer stamp curation, at least that I know of, but you can buy tons of vintage stamps here. Just browse by Scott number through pages and pages of vintage stamps to find what you like – just pay attention to the pricing, which may not be face value.

Where to Find Vintage Stamps by Oh So Beautiful Paper

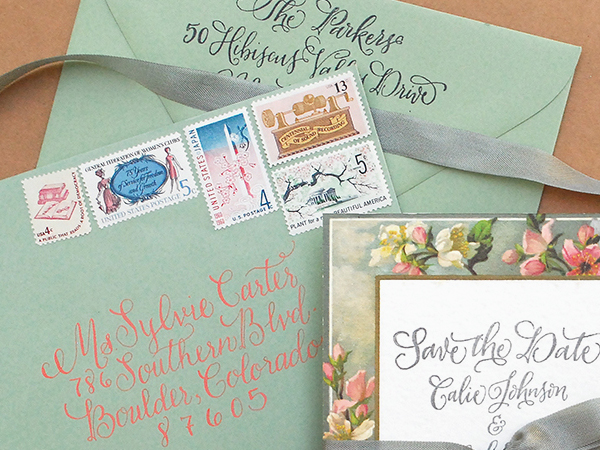
Photo by Antiquaria from this Vintage-Inspired DIY Save the Date Tutorial

Local stamp dealers, stamp club members, and stamp shows

If you can track down a local stamp dealer or stamp club, they will often have vintage postage that they are willing to part with for face value. I’m told they come by large piles of vintage stamps when they buy stamp collections – but many are considered “worthless” from a stamp collecting point of view. Seriously: just Google your city/area and “stamp club” and see what comes up. You can try emailing the club or see if they list upcoming stamp show dates and go talk to them in person.

Where to Find Vintage Stamps by Oh So Beautiful Paper

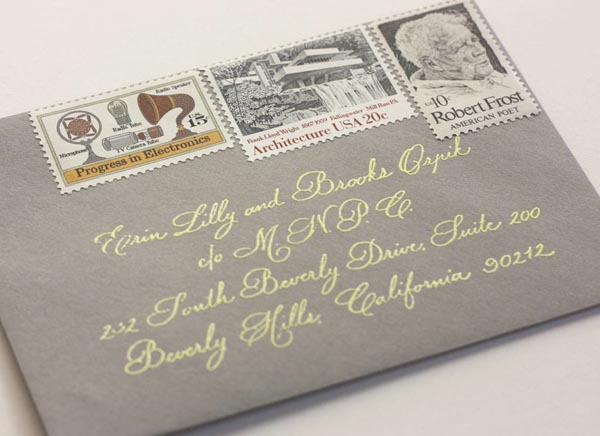
Photo by Paisley Quill from Brooks and Erin’s wedding invitations

Local stamp shops and antique stores

If there is a stamp and coin shop in your area, you’re in luck! Stop by and ask to see their face value stamps. Stamp museums also often sell vintage stamps; a fun detail I discovered during a visit to the National Postal Museum earlier this year. You can also try local antique shops – if they don’t have any in the shop they may still be able to connect you with a local dealer with an extra supply of face value stamps. I’ve also heard of some people stumbling onto affordable stamp collections at flea markets – just be sure that you’re buying unused/uncanceled stamps!

Where to Find Vintage Stamps by Oh So Beautiful PaperWhere to Find Vintage Stamps by Oh So Beautiful Paper

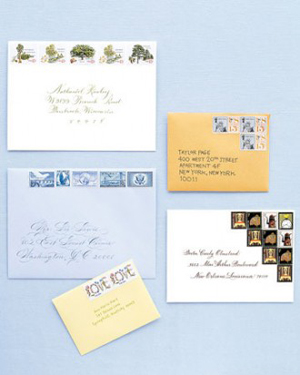
Photos via Martha Stewart Weddings

A few tips for using vintage stamps:

While you’re searching and shopping for stamps, make sure that you have one stamp worth at least 15¢ (or more!). Most wedding invitations require a minimum of 70¢ postage at the current rate. The 3¢ and 8¢ stamps are beautiful, but you’ll need a 29¢ or 33¢ stamp somewhere in the mix to make up the difference.

Consider planning out your stamp arrangement ahead of time to make sure you leave room for an address – and to maximize visual impact. Some stamps look best in a straight row across the top of an envelope, while others look best in a puzzle piece arrangement in the corner. It all depends on the group of stamps you select!

Tell your stationer and/or calligrapher as soon as possible if you plan to incorporate vintage stamps into your wedding stationery. A calligrapher will definitely need to know so he or she can leave enough room at the top of the envelope for your stamps, and a large number of vintage stamps might affect a stationer’s idea to use a non-traditional envelope shape or layout.

If a particular stamp design is in high demand, some dealers will list the stamp at a price greater than face value. I’ve seen this happen to some of the pretty “Love” stamps frequently used on wedding invitations, so if you have your heart set on a particular stamp you might need to factor that cost into your stationery budget. I personally think it’s worth it to find the perfect stamp for the occasion, but the trick is to find stamps that collectors don’t care about yet make a visual impact when assembled as a small group on your envelope.

Those are my tips! Are any of you planning to use vintage stamps soon?

DIY Modern Color Splash Save the Dates

We’ve been up to our ears with floral patterns and soft pastels all summer. Don’t get us wrong, we love it – but we were craving something fresh! We dreamt up this new stamp collection and DIY project with a modern edge and bold, classic type, and we’re in love. The palette of black, white, and kraft was craving a pop of color so we added in a fun swash of turquoise as icing on the cake. – Bailey and Emma of Antiquaria
DIY Tutorial: Modern Save the Date with a Splash of Color by Antiquaria for Oh So Beautiful Paper

DIY Tutorial: Modern Save the Date with a Splash of Color by Antiquaria for Oh So Beautiful Paper

Step One: Stamp your save the date (we used our Modern Type Save the Date stamp) on an A6 kraft card. You’ll want to use a permanent ink, such as Color Box archival, so that it doesn’t bleed when the second color is added. Press firmly but moderately when printing on a flat surface, using your hands to make sure that the entire stamp has been printed. Let dry.

DIY Tutorial: Modern Save the Date with a Splash of Color by Antiquaria for Oh So Beautiful Paper

Step Two: To add our pop of turquoise color, we “splashed” a small cat eye stamp pad down the design, ending slightly below the wording. If you don’t get the coverage you’re looking for, you can touch it up as after your first pass. The benefit to using a small stamp pad vs. paint is that the water content in paint tends to warp the paper as it dries.

DIY Tutorial: Modern Save the Date with a Splash of Color by Antiquaria for Oh So Beautiful Paper

Step Three: Stamp your return address (we used our Modern Type Return Address stamp) with turquoise ink on a cream A6 envelope. We stamped the return address on the back in the lower left hand corner.

DIY Tutorial: Modern Save the Date with a Splash of Color by Antiquaria for Oh So Beautiful Paper

Step Four: For a bold graphic element, we added an envelope liner made with our Brushed Geo, No.2 Patterned paper cut to a 5.75″ x 6.25″ rectangle. Install the liner by taping it in right below the gum line using double sided tape.

Materials

Modern Type Save the Date Stamp

Modern Type Return Address Stamp

Brushed Geo, No.2 patterned paper, in text weight

A6 Notecards in Paper Bag (or other kraft paper A6 flat cards)

A6 Envelopes in Natural

Stamp Pads (full size) in archival black and pigment turquoise

Stamp Pad (small cat eye) in Aqua

Scissors

Double Sided Tape

Anti­quaria is a mem­ber of the Designer Rolodex – you can see more of their beau­ti­ful work right here!

Photo Credits: Antiquaria for Oh So Beautiful Paper