Behind the Stationery: Richie Designs

California is full of wonderful stationery designers, and Richele of Richie Designs is no exception. Here to share about custom wedding invitations and her story of moving into greeting cards after 20 years in advertising and design – here’s Richele! —Megan

Behind the Stationery: Richie Designs / Oh So Beautiful Paper

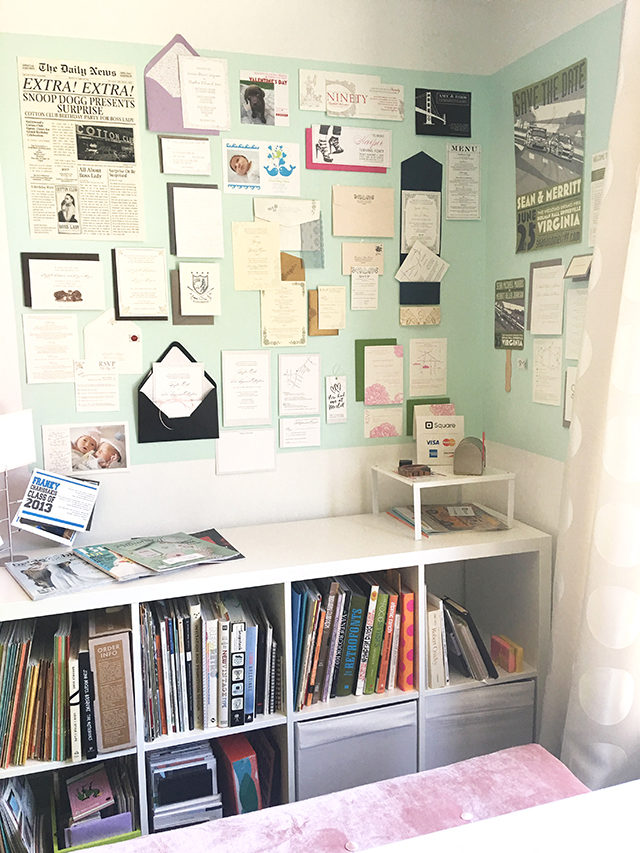
Hi, I’m Richele Silva, owner of Richie Designs. Richie Designs is a design studio located in Long Beach, California. We’re the little city jammed between the Housewives of Beverly Hills and Orange County. I have a small office here in Long Beach where I meet with clients, pack orders, and get to leave my house once in a while. This space is new for me this year; previously, I had been running my business from home. It seems ideal that you could work from home, but I really missed “going to the office” and having a routine around that. I split my time now between the office and my press, which is still in le garage.

Behind the Stationery: Richie Designs / Oh So Beautiful PaperPhoto by Eric Hameister

I’ve worked in design and advertising for nearly 20 years, mostly in the power sports / automotive sector. I began at the bottom in a small design firm and worked my way up and essentially learned on the job. Since we were small, I had the amazing opportunity to sit in all of the jobs of the studio — from going to a meeting in place of the creative director to styling a photo shoot. It was a great situation for me, and I feel like it has given me the perfect education to run my business. Two years ago, I left that work to pursue my line. I had just turned 45, and I really didn’t want to get to 70 wondering “What if?” My husband and I made a plan so that I could go out on my own.

Behind the Stationery: Richie Designs / Oh So Beautiful Paper

I’ve done some version of greeting card design for 20+ years on the side, the last 10 being more serious as Richie Designs and letterpress printing. I happened onto printing when I began taking some classes for fun on the weekends. I purchased my own press when my instructor said, “you’re here again?” after I had taken so many consecutive classes for press time.

richie designs - wedding.wall.sized

My business has really evolved over the past 10 years, from custom weddings to a fuller greeting card line and then this year, with the addition of gift items, such as mugs, pencils, and notepads. My day-to-day is focused on my greeting line, but I have a great love for custom wedding and stationery clients.

Behind the Stationery: Richie Designs / Oh So Beautiful Paper

I work with wedding clients the same way that I worked with my Fortune 100 clients: consulting, conceptualizing, collaborating, and executing. I want them to be a part of each step. I find it’s rewarding for them as well as for myself. Sadly, I only take on a few wedding projects a year now because of time constraints from the other parts of my business, but it’s something that I really enjoy.

Behind the Stationery: Richie Designs / Oh So Beautiful Paper

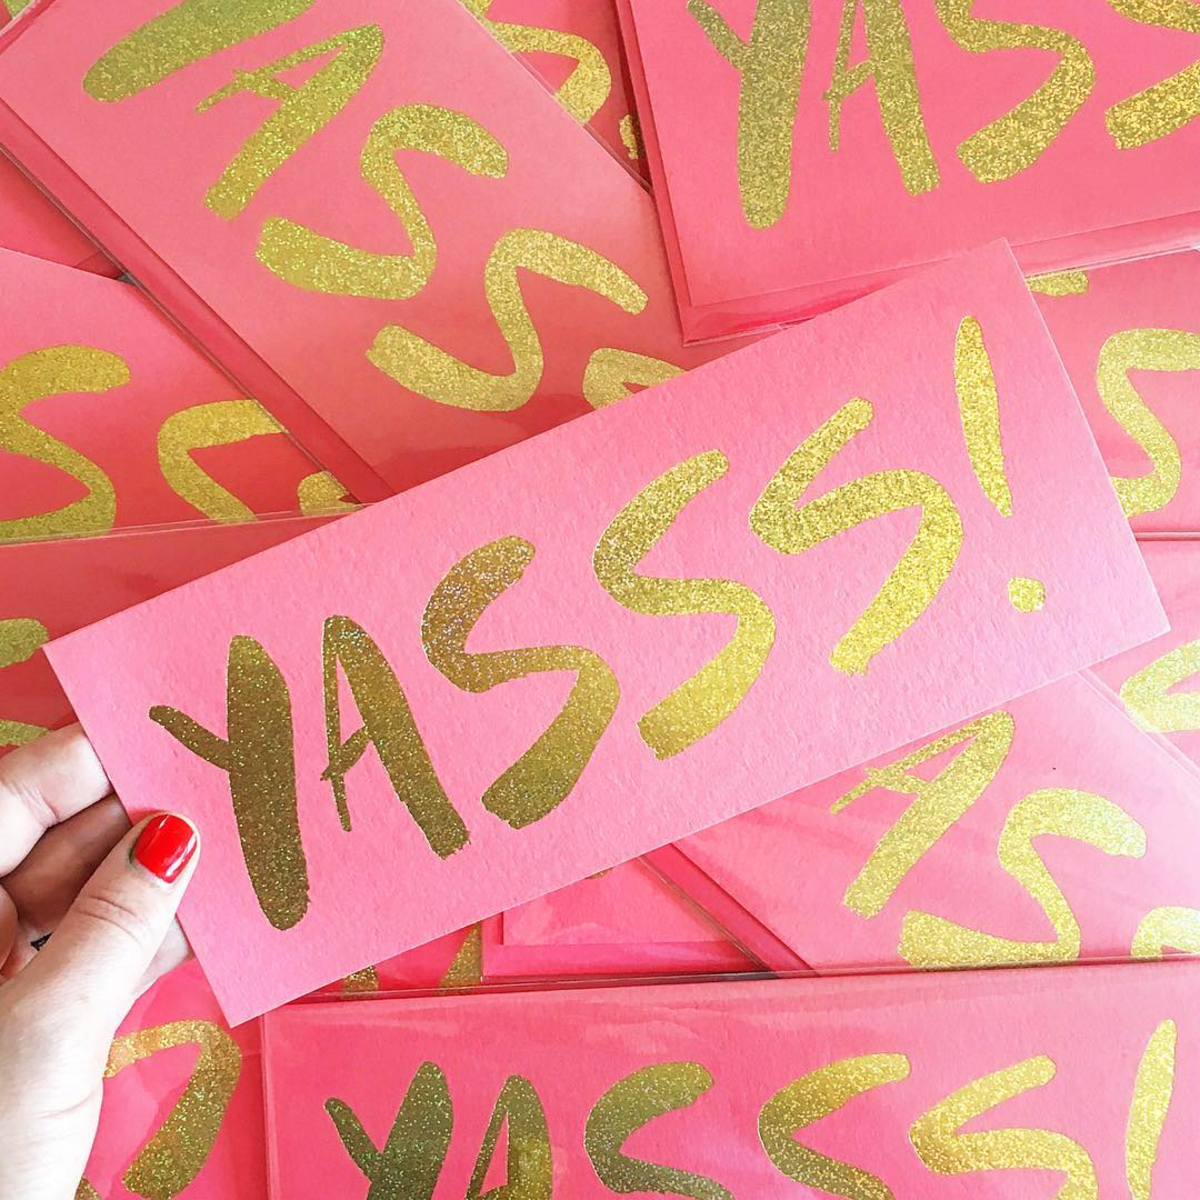
My approach to greeting design is a little selfish, in that I design the greetings that I want to give. I love type, quirky observations from daily life, and conversations with my friends, so I work to blend those things together. I also have the mindset that I want as many of my cards as possible to have dual purposes. As an example, you could use my Snuggle Card for a sweetheart, friend, or child. I’m someone who buys three or four cards to keep in a drawer so that I’m covered, and I want buyers of my line to be able to do the same.

Behind the Stationery: Richie Designs / Oh So Beautiful Paper

My design process begins with sticky notes and doodles, which are usually all over my computer or inspiration boards. I jot quick things down as they come up, and then when I sit down to design I look back at those stickies and work on icons or type treatments to go with them. I might try out two or three designs per concept and then edit down from there. Once I have a collection of cards or a style that I know I’m on, I’ll order my plates and begin printing. Generally, I have colors somewhat worked out ahead of printing, but on occasion I’ll choose colors on the fly.

Behind the Stationery: Richie Designs / Oh So Beautiful Paper

I used to be very regimented about designing to the very nth degree before I got on press, but I’ve learned over the years that being a little bit loose helps my design process and also being open to the creative accidents that lead you to something new and exciting. It’s something that I want to take advantage of since I print my own work; most designers don’t get that opportunity. Art accidents are unexpected gifts — they don’t happen often, but when they do they’re magic.

Behind the Stationery: Richie Designs / Oh So Beautiful Paper

I have a small team: myself, Lis, who is my studio manager, my rep Sasha, and my husband Chris. On a typical day, Lis will print while I design, or she might be packing orders while I work on business stuff. As a business owner, I would say that the worst part of being a creative person and owning a business is that a good 80% of my day ends up being business-related vs. creating art now. I’m an artist first and an accidental businesswoman second, but in reality I have to switch that around to make this all work. With both Lis and Sasha, I feel really grateful that I have really talented and hard-working women next to me whom I also consider dear friends and great associates. My husband’s role is official cheerleader. I tried to teach him to print, but let’s just say keeping that part of our lives separate works out better for everyone involved!

Behind the Stationery: Richie Designs / Oh So Beautiful Paper

Right now, it’s midsummer, and we’re working on new designs, taking care of orders and some custom projects that we’re still discussing. My husband and I are looking forward to our first full week of vacation EVER. We’ve been together for 12 years now, but he went back to school for medicine during that time and then just when he was settled, I started my business. We’re long overdue and really looking forward to it. Thanks for stopping by the studio!

All photos by Richie Designs except where noted.

Interested in being featured in Behind the Stationery? Email megan [at] ohsobeautifulpaper [dot] com.

DIY Iridescent Favor Bags

Yesterday I shared a few DIY party favor ideas, all with iridescent and pastel elements. Glassine bags are a quick and easy way to package party favors, and I originally searched for some readymade iridescent glassine bags to use in the post – but I couldn’t find any! So I decided to take matters into my own hands and make some DIY iridescent favor bags. It was so simple, and I absolutely loved how they turned out, so I thought I’d share the steps with you along with a quick and easy idea for personalizing your party favor bags!

DIY Iridescent Favor Bags / Oh So Beautiful Paper

DIY Iridescent Favor Bags / Oh So Beautiful Paper

I absolutely loved the iridescent favor bags paired with prism twine from Knot & Bow and vellum party favor tags from Swiss Cottage Designs (which you can download here), but I wanted to add even more personalization to the favor bags. So I turned to my favorite DYMO label maker! I use the classic black embossing tape to label and organize just about everything at home, and it seemed like a fun and modern way of adding a personalized message to the bags. I had my daughter’s upcoming 4th birthday party in mind when creating these favor bags, so I was thrilled to discover the neon pink label tape! Neon pink and iridescent party favors? Done and done. Here’s how to make your own!

DIY Iridescent Favor Bags / Oh So Beautiful Paper


Supplies

DIY Iridescent Favor Bags / Oh So Beautiful Paper

To make the iridescent favor bags:

Step 1. Cut a piece of iridescent cellophane or tissue that is twice as wide as the glassine bag and comes about 3/4 of the way up the glassine bag, plus another inch. My glassine bags were 3″ wide by 5.5″ tall, so my pieces were approximately 6″ wide and 4.5″ tall. You’ll need one piece of iridescent cellophane per glassine bag. I made each of my cellophane pieces super crinkly by crumpling several pieces together in my hand, then once again laying them out flat.

Step 2. Use your paintbrush to apply a thick coat of Mod Podge to the front of the glassine bag. Place the piece of iridescent cellophane (roughly centered) over the glassine bag and press down. Flip the glassine bag and iridescent cellophane over and apply another strip of Mod Podge to the bottom of the glassine bag and iridescent cellophane, then fold the iridescent cellophane over the bottom of the glassine bag and press down. Repeat on both sides until the entire bag is covered in iridescent cellophane. Allow everything to dry completely, ideally overnight.

Step 3. Use your label maker to create a few fun and personalized party messages, and apply the phrases directly to the favor bag. For a kids birthday party I think it would be super cute to have the child’s name, age, and the party date on each bag! For a wedding, the names of the couple and the wedding date. Or keep it simple with a short thank you message – whatever works for your event!

Step 4. Fill each bag with a sweet treat and seal them in the back with a piece of washi tape. Place them in a tray or basket so party guests can grab a bag on their way home!

DIY Iridescent Favor Bags / Oh So Beautiful PaperDIY Iridescent Favor Bags / Oh So Beautiful Paper

DIY Iridescent Favor Bags / Oh So Beautiful PaperDIY Iridescent Favor Bags / Oh So Beautiful Paper

DIY Iridescent Favor Bags / Oh So Beautiful PaperDIY Iridescent Favor Bags / Oh So Beautiful Paper

DIY Iridescent Favor Bags / Oh So Beautiful Paper

The black label tape is still totally cute, BTW! I love the neon pink for a kids birthday party, but black and iridescent would be a fun combination for a modern wedding, don’t you think??

DIY Iridescent Favor Bags / Oh So Beautiful Paper

DIY Iridescent Favor Bags / Oh So Beautiful Paper

Aaaaaannnd….. now I kind of want to add an iridescent layer to ALL THE THINGS. It’s so fun and sparkly! What should we iridescent-ify next??

p.s. Iridescent and pastel party favor ideas with printable favor tags!

Photos by Nole Garey for Oh So Beautiful Paper

Printable Vellum Favor Tags

This post is brought to you by CJ Affiliate’s VIP Content Service. Thank you My M&M’S for sponsoring this post! All content and opinions are my own. Thank you for supporting the sponsors that make Oh So Beautiful Paper possible!

My girls have birthdays coming up in September, and I have party planning on the brain! And when it comes to party favors, I’m always in favor of something edible – ideally chocolate. So today I’m partnering with My M&M’S to create three DIY party favors with their adorable personalized M&M’s, complete with printable party favor tags from Courtney of Swiss Cottage Designs! For the packaging, I combined two of my favorite things â€“ anything iridescent and colorful vellum – to create three packaging options perfect for any occasion! So whether you’re planning a wedding or a bridal shower, baby shower or a birthday party, just pick your favorite printable tag and add some colorful M&M’s and you’ll be good to go! Oh, and keep reading below for a special discount from My M&M’S just for Oh So Beautiful Paper readers!

Printable Party Favor Tags with My M&Ms / Design by Swiss Cottage Designs / Oh So Beautiful Paper

My M&M’S are the ideal personalized party favor. As a party guest, I always hope for something edible rather than a random personalized trinket, and who doesn’t like chocolate?? My M&M’S are completely customizable with photos or text, which means you can make them totally unique to your event. You don’t need graphic design skills to create the personalized M&M’s – just upload a photo or type in your selected text and My M&M’S will take care of the rest! I kept mine simple with short messages of “yay!” and “xoxo,” but I think it would be so sweet to include names for a wedding or bridal shower – or even a name and birthday for a kids birthday party!

Printable Party Favor Tags with My M&Ms / Design by Swiss Cottage Designs / Oh So Beautiful Paper

I used three different size party favors, each with different printable party favor tags: a long and skinny rectangular candy box, a square favor box, and glassine envelopes. Courtney and I kept the favor tag designs fairly simple with cute hand lettered messages and sweet little illustrations that could work for a variety of occasions. The favor boxes are both clear so you can see a little glimpse of the My M&M’S inside, while the color of the My M&M’S peeks through the glassine envelopes to give a hint of what’s inside. My M&M’S are the perfect solution for DIY party favors and candy buffets, especially since you can choose your own colors! I used a color palette of pastels – pink, lavender, cream, and light blue – with a bit of aqua and dark green. With 25 colors to mix and match, you can find the right color combination for any event!

Printable Party Favor Tags with My M&Ms / Design by Swiss Cottage Designs / Oh So Beautiful Paper

For the long rectangle favor boxes, I used strips of transparent vellum in our color palette of pink, purple, and aqua – they look so great against the My M&M’S! I also found positively DREAMY opalescent vellum and a white vellum with iridescent dots for just a little extra sparkle. I printed Courtney’s designs directly on the opalescent and iridescent vellum, cut the printed vellum into 2″ strips, and layered that over another 3″ strip of vellum in a complementary color.

Printable Party Favor Tags with My M&Ms / Design by Swiss Cottage Designs / Oh So Beautiful Paper

Printable Party Favor Tags with My M&Ms / Design by Swiss Cottage Designs / Oh So Beautiful Paper

I paired the square favor boxes with circle favor tags. For some favor boxes, I wrapped the boxes in 1″ strips of colorful vellum and sparkly iridescent twine. For other favor boxes, I wrapped the entire box in squares of iridescent cellophane and tied it up with sparkly twine. To turn the circle tags into gift tags, just print onto vellum and punch them out using a 1.5″ circle punch, then punch a 1/8″ hole for the twine. Or print the circle tags onto these labels and stick two labels together to create a tag!

Printable Party Favor Tags with My M&Ms / Design by Swiss Cottage Designs / Oh So Beautiful Paper

Printable Party Favor Tags with My M&Ms / Design by Swiss Cottage Designs / Oh So Beautiful Paper

Printable Party Favor Tags with My M&Ms / Design by Swiss Cottage Designs / Oh So Beautiful Paper

The glassine bags feature a layer of iridescent cellophane (DIY tutorial coming tomorrow!) with a colorful vellum tag and sparkly twine.

Printable Party Favor Tags with My M&Ms / Design by Swiss Cottage Designs / Oh So Beautiful Paper

Printable Party Favor Tags with My M&Ms / Design by Swiss Cottage Designs / Oh So Beautiful Paper

I printed mostly black and white versions of the printable party favor tags, but I included some color versions in case you want to print them onto labels or white printer paper. Use full sheet labels for Little Wishes and cut down to 2″ wide, use these square labels for the Love is Sweet tags, and use these circle labels for the Best Day Ever tags. They’re all formatted in the appropriate templates for each label and ready to print! The color versions also look AMAZING printed onto the opalescent and iridescent vellum, I’m just saying.

Printable Party Favor Tags with My M&Ms / Design by Swiss Cottage Designs / Oh So Beautiful Paper

Here’s everything that you’ll need to make your own!

My M&M’S in your chosen colors – and My M&M’S is graciously offering Oh So Beautiful Paper readers a 25% discount through September 1, 2016 with the code OHSO!

Clear Rectangular Candy Boxes

Square Acrylic Favor Boxes

Glassine Bags

Colorful Vellum (I used blush, pink, purple, and aqua)

Iridescent Vellum

Opalescent Vellum

Prism Twine

Paper Trimmer

1.5″ Circle Punch

2″ Square Punch

1/8″ Hole Punch

Printable Party Favor Tags with My M&Ms / Design by Swiss Cottage Designs / Oh So Beautiful Paper

The favor boxes would look so cute stacked in rows on a table, while the glassine envelopes could be placed in a cute basket or pinned on a board for guests to take! I’m just completely obsessed with the combination of iridescent and pastels. These glassine favor bags, printable party favor tags, and colorful M&M’s will definitely be making an appearance at my girls’ birthday party in just a few weeks!

Printable Party Favor Tags with My M&Ms / Design by Swiss Cottage Designs / Oh So Beautiful Paper

Printable Party Favor Tags with My M&Ms / Design by Swiss Cottage Designs / Oh So Beautiful Paper

Printable Party Favor Tags with My M&Ms / Design by Swiss Cottage Designs / Oh So Beautiful Paper

Printable Party Favor Tags with My M&Ms / Design by Swiss Cottage Designs / Oh So Beautiful Paper

Save 25% at My M&M’S through September 1, 2016 with the code OHSO!

Download all of the printable party favor tags below!

LITTLE WISHES: COLOR | BLACK + WHITE

BEST DAY EVER: COLOR | BLACK + WHITE

LOVE IS SWEET: COLOR | BLACK + WHITE

All printable artwork © 2016 Swiss Cottage Designs created exclusively for Oh So Beautiful Paper. All artwork is made available for personal use only and may not be altered, reproduced, or sold in any way. By downloading the patterns you agree to the terms of use.

Photos by Nole Garey for Oh So Beautiful Paper

This post is brought to you by CJ Affiliate’s VIP Content Service. Thank you My M&M’S for sponsoring this post. While this was a sponsored opportunity from My M&M’S, all content and opinions expressed here are my own. Thank you for supporting the sponsors that make Oh So Beautiful Paper possible!

Blackberry Whiskey Smash

Smashes are really summer drinks, because they demand fresh produce and pay you back by being cold, intensely refreshing, and bursting with bright summer flavors. This one is one of the best: a Blackberry Whiskey Smash that even Nole liked (and she usually hates whiskey). –Andrew

Blackberry Whiskey Smash Cocktail Recipe / Liquorary for Oh So Beautiful Paper

Blackberry Whiskey Smash

2 oz Whiskey
1 oz Lemon Oleo Saccharum (you can substitute with simple syrup if needed)
Half a Lemon, Quartered
5-7 Blackberries

To make the oleo saccharum: peel four lemons with a sharp knife or peeler, avoiding the bitter white pith as much as possible. Combine the peels with a cup of raw sugar in a nonreactive bowl and muddle the sugar into the peels. Let the mix sit until the lemon peels’ oils have dissolved the sugar into a syrup. You may need to muddle again to help the process along or stir in a few ounces of hot water to help fully dissolve the sugar. Remove the peels and bottle the resulting syrup. Makes about a cup. This should keep, refrigerated, for a month.

To make the Smash: combine the whiskey, oleo saccharum, lemon, and blackberries in a cocktail shaker. Muddle the lemons and blackberries, then fill the shaker two-thirds with ice. Shake well and then finely strain the Smash into a tumbler glass filled with fresh crushed ice. Garnish with more blackberries and enjoy!

Blackberry Whiskey Smash Cocktail Recipe / Liquorary for Oh So Beautiful Paper

In addition to being gorgeously purple, this drink is bright with fruit and citrus flavors. It’s rounded out by deep, rich, and mellow whiskey.

You might remember oleo saccharum from when we made traditional punch a while back. It’s a key ingredient of punches, but it hadn’t occurred to us to use this intensely fragrant, flavorful syrup in other drinks until recently. It’s citrusy but not tart, relying on the fragrant lemon peel oil for all its power. Those lemon oils help bind the flavors of this Smash together, but also intensify them – making this drink pop with blackberry flavor.

Blackberry Whiskey Smash Cocktail Recipe / Liquorary for Oh So Beautiful Paper

Oleo Saccharum is a bit of work to make, and your Smash won’t be terrible if you make it with regular simple syrup. But if you feel like going the extra step, you’ll be happy with the results.

(Don’t forget to follow us on Instagram!)

Glassware by Liquorary

Photo Credits: Nole Garey for Oh So Beautiful Paper

Happy Weekend!

Happy Friday everyone! We have family coming into town this weekend, so I’ll have to make this short and sweet so I can go tidy up! But first, big news: Oh So Beautiful Paper is hiring!! I’m looking to hire two (maybe three) Contributing Editors to join the team. Is it you? You can check out all the details right here! But in the meantime…

YASSSS gold foil card by Lauren Essl via Instagram / Oh So Beautiful Paper

Gold foil YASSS card by Lauren Essl (and available in her shop!) via the #dailydoesofpaper feed on Instagram!

…a few links for your weekend:

This week on Oh So Beautiful Paper:

That’s it for me this week! We’ll be back later today with this week’s cocktail recipe (another Smash!), and I have something ridiculously fun to share with all of you on Monday! Have a fantastic weekend, and I’ll see you back here next week! xoxo