A handmade gift (or wedding favor) is always such a special way to show someone how much you care. With the holiday season in full swing, we’ve been brainstorming what handmade gifts to make this year for family and friends (an Antiquaria tradition!). This year, one gift that will be under the tree of all of our loved ones are a set of these patterned journals. They’re small enough to be carried around in a handbag which is ideal so that they’ll always be there to capture a great idea or quick thought. – Bailey and Emma of Antiquaria
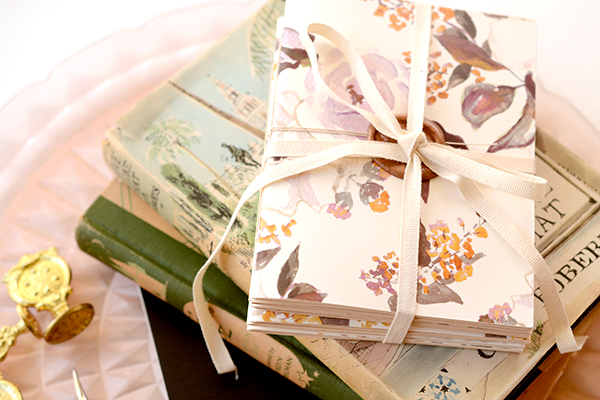
We will be bundling them into sets of three but any quantity would be lovely! Six would be so luxurious for a friend who loves to write or sketch! While the process of making these journals has quite a few steps, they are fast and easy…we promise. You can easily knock out making them for all of your loved ones in a day if you work in an assembly line process!
Step 1: First, you will need to cut your cover sheets (we used our “Annabelle Violet” Floral Patterned Paper) and your text interior sheets (we used 4 sheets) to size. For ease, we just cut the 8.5″x11″ into 2 pieces (final measurement 8.5″x5.5″) using a metal ruler, craft knife and self healing mat. This way, there is not any paper waste! This also makes a wonderfully small pocket notebook size.
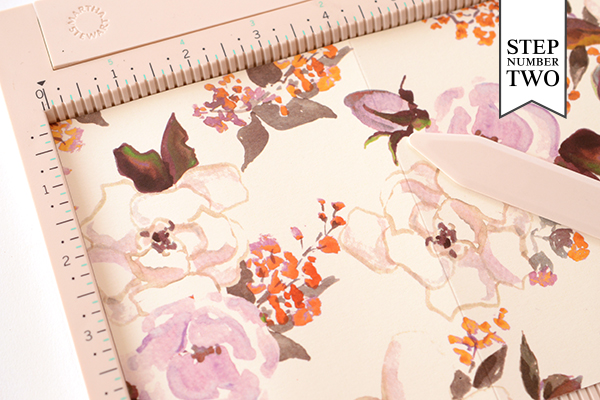
Step 2: Next, you’ll fold both the cover and interior pages in half. In order to make a clean fold on our cover paper we scored it down the center (at the 4.25″ mark). The interior sheets (8 in total) we just folded in half and used a bone folder to make the fold crisp.
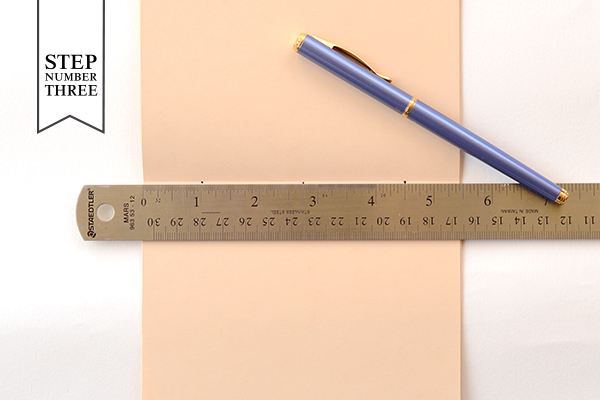
Step 3: We will be stitching these notebooks together, so we’ve got make holes to thread our needle through. Position your ruler over the center fold in the text paper stack. Make marks at 1 inch, 2.75 inches and 4.5inches. We’ve used a dark pen here so that you can see the dots…but feel free to use a pencil or whatever you have on hand.
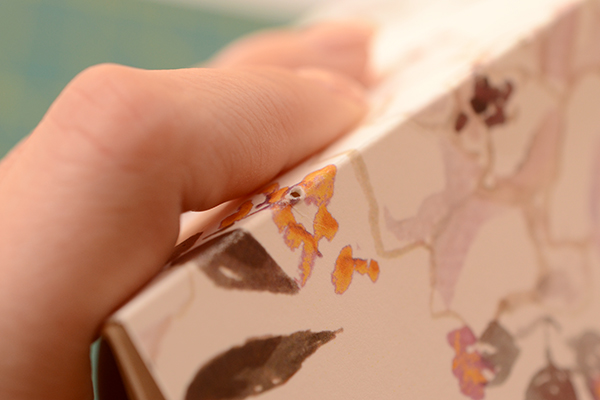
Step 4: After you’ve marked your holes, you will need to punch through them with an awl. Stack your cover and interior pages together before making clean puncher marks though ALL of the sheets. This doesn’t take much force. If it helps, you can use binder clips to hold the pages and cover together and keep it straight.
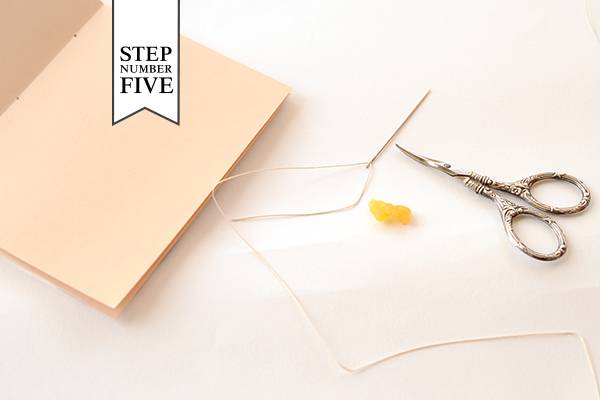
Step 5: Now you’re ready to sew! This step contains many sub-steps that go quickly once you get the hang of it. Thread your needle with bookbinding thread. We used approx. 18 inches for each book because it’s better to cut off extra than to come up short! If you’re having a hard time threading your needle, you can run a little beeswax on the tip to make it stiff and easier to thread through.
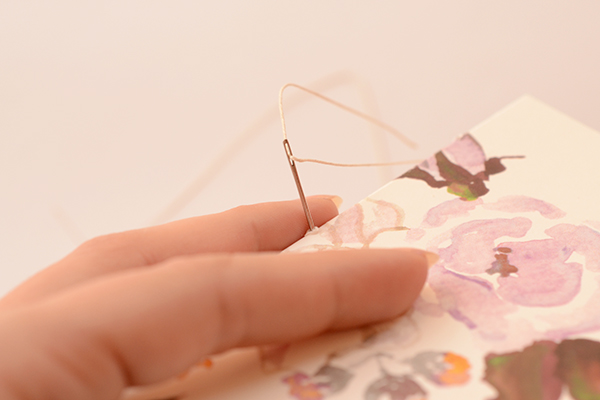
Step 5a: Thread your needle through the center hole on the outside of your journal as shown above. Pull through, leaving a tail that is approximately 6 inches long.
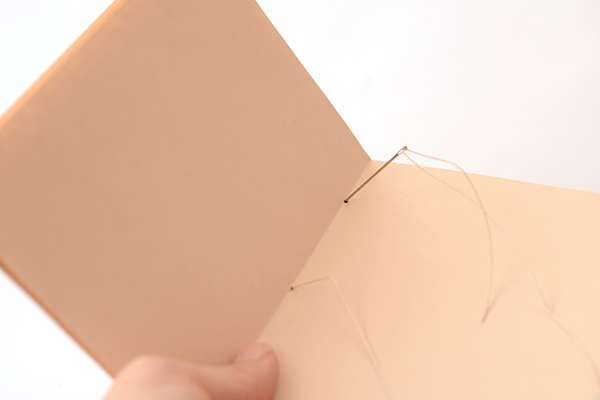
Step 5b: Now sew through the top hole in the inside of the journal as shown above. Make sure you still have your 6″ tail on the outside and you don’t pull it through!
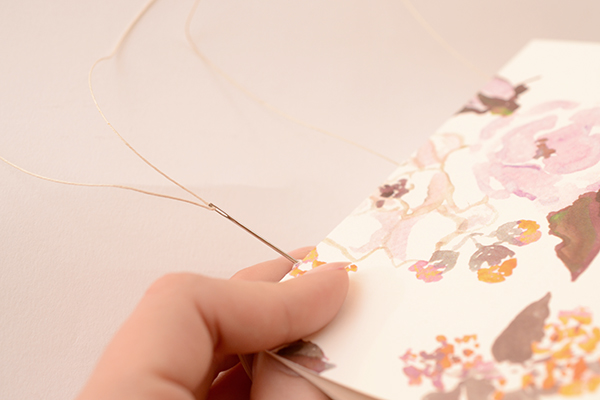
Step 5c: Next, you’ll bring your needle down and sew through the bottom hole on the outside of your journal.
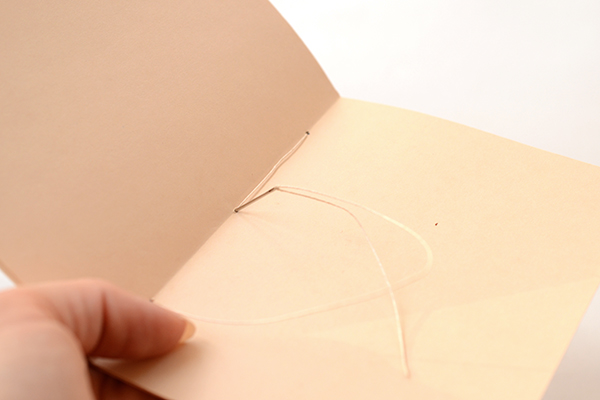
Step 5d: Now, you’ll sew through the center hole once more, ending up on the outside cover.
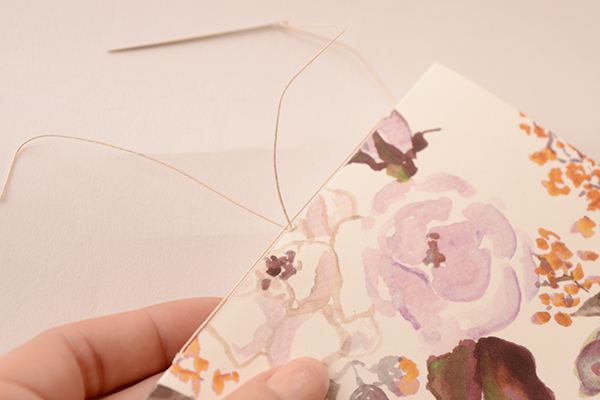
Step 5e: Once you’ve pulled your thread through the center a second time, you can take your needle off of the thread. Make sure that there is one thread end on either side of the spine thread (the one that’s down the center).
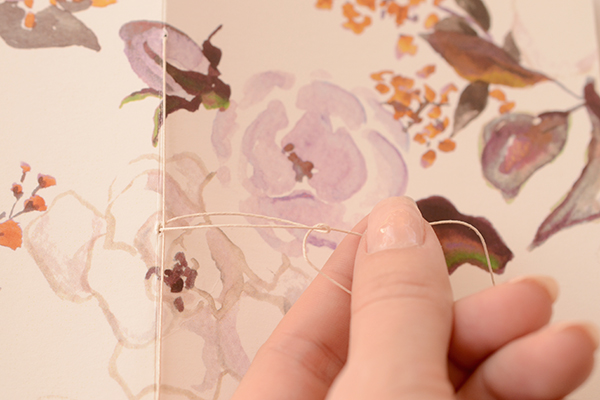
Step 5f: Pull your thread taught (not too hard or you’ll rip the paper) making sure that there is no slack on the outside or inside of the journal. Loop one thread under the other into a knot to tie off the binding.
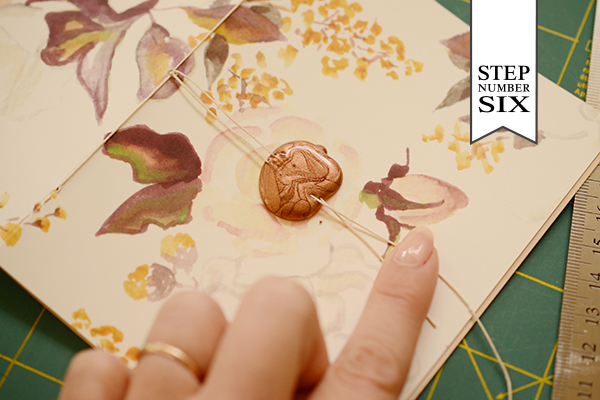
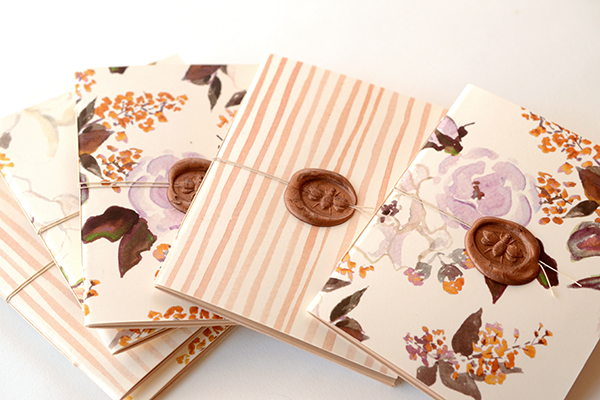
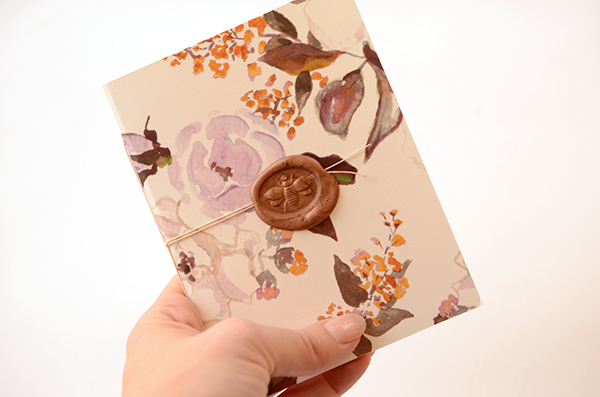
Step 6: Now we decorate! Instead of having loose string on the binding or tying it into a bow, we decided to secure it with sealing wax! Pull your two binding threads across the center front of the journal. Drip hot wax (we use a wax formulated for a glue gun-for ease) in the center over the threads (see above). Using your wax seal of choice, press it into the hot wax until it cools and releases (see below). Trim off and make the thread ends even, if desired.
Step 7: We’re not going to lie… this may be the trickiest step out of the whole process! Once the journal is finished and  folded, you’ll need to make the edges of the book even so that they’re crisp and clean, like the journals that you buy in a store. The trick to this is using a REALLY sharp, new blade on your craft knife. If you’re making a lot of these journals, you may need to change your blade more than once!
Line up your ruler with the edge of your front cover. Make sure that all of your pages and the back cover are flat and pressed down (we kinda lean on the whole journal and ruler at the same time so that it doesn’t shift). Now, start trimming off the excess. It will take a few passes but will eventually be a clean, straight edge!
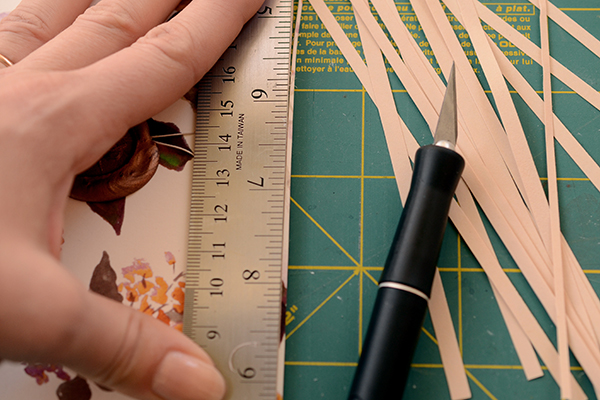
Et voila! Now your journal is finished and ready to give! We guarantee that your loved ones will cherish these little pretties for years to come. They may even ask for them year after year.
Materials
“Annabelle” Â Patterned Paper, in Cover
“Annabelle Violet” Â Patterned Paper, in Cover
“Watercolor Stripe” Coral Patterned Paper, in Cover
Text Paper for interior pages
Metal Ruler, Self Healing Mat and Craft Knife
Scoreboard
Needle
Sealing Wax and Glue Gun
Scissors
Beeswax (optional)
Photos: Antiquaria for Oh So Beautiful Paper

Thanks so much for the lovely tutorial! I’ve been making many notebooks like this for the past year. I realized that a breakaway knife from the dollar store gives the cleanest cuts and there’s always a fresh blade. TFS.
-Rae
Hi Rae,
What a great idea! Thank you for the suggestion. We’re so glad that you liked the tutorial!
xo
Bailey
That’s really smart! What a great tip, I’m going to go pick some up!
Oh my goodness!!! I love this SO much!!! Am definitely going to try this. What a perfect handmade item for holiday gift baskets!
Yay! We’re so glad that you like it Naomi. Happy crafting!
xo
Bailey
I love the idea of finishing the binding thread off w/ the wax stamp! Very cool alternative to knotting inside.
I’m in the process of making 10 flip books for a homemade version of Telestrations. It’s been a long, drawn-out process, but will hopefully be worth it in the end.
Shelby…that sounds really neat! Good luck with your project. We’re so glad that you enjoyed the tutorial!
xo
Bailey
These turned out beautifully! I love handbound notebooks, so these are a definite heart winner for me.
Stacia,
Thank you! We’re so glad that you liked the tutorial. Hand-bound journals are favorites of ours as well. We’ve made many over the years.
xo
Bailey
These are lovely. I did some by myself yesterday and they turned out very cute. You can see them on my blog if you want to.
Thank you for this tutorial and have a merry christmas!
Anna,
They look great!! Thanks for sharing your project. It’s always so fun to see different interpretations!
xo
Bailey