Hi kids, it’s Nichole from Coral Pheasant bringing you some tips on how to style stationery like a boss. Beautifully styled stationery images are important details when telling the full wedding day story. And for submitting them for publication on sites like Oh So Beautiful Paper!

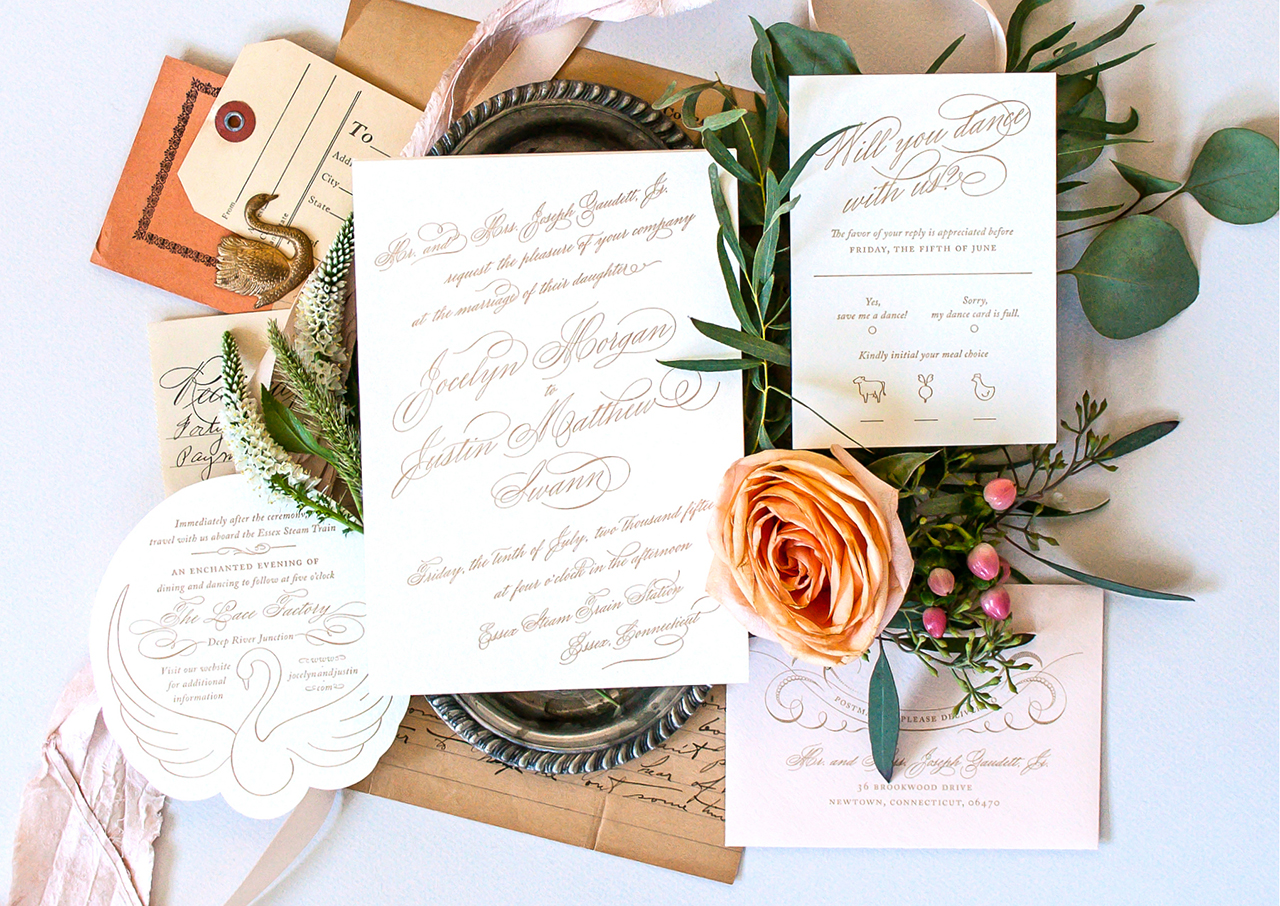
Photo by Kat Harris Photography
The first, most essential tip is to plan. Planning is vital for the smooth running of a photo shoot – and will ensure that you have a road map in place to capture the most significant details. The day before the shoot, I gather all the invitation components (multiple sets are very helpful to have), a variety of backgrounds and styling props. I have a dedicated space in my studio where I keep most of my props so they are all within arm’s reach. Having them close by gives me lots of options. Options are major key!
With everything gathered, I start to lay out compositions. My goal is to tell the whole paper story through a series of images. IÂ start big picture, laying out the main pieces of the suite. This typically includes the invitation, reply card, coordinating envelopes and any enclosures. When you compose an image, consider why you are taking the photograph. What is the story? What are you trying to convey? Is the print method stunning? Maybe the colors are unique or the design is out-of-the-box.
I experiment adding and subtracting different props until I arrive at a configuration that I am happy with – both a vertical and a horizontal layout – and take quick pictures using my iPhone. I then move on to smaller vignettes where I highlight details of the suite. None of these arrangements are 100% perfect, they are simply there to reference for the actual photo shoot. Think of them as a rough draft. Once I’ve got all the compositions planned out, I upload the photos to my computer and create a visual shot list.

I find this to be immensely helpful! I personally do not excel at doing multiple things at once – like talking and styling – and having a visual cheat sheet keeps me on track. I’ve already been super thoughtful about the arrangements in the quiet of my studio the day prior. This allows me to obsess over the details of spacing and alignment on the day of the shoot. And of course there is always room to free style because you’ve done your homework and you have a solid sense of what you want to accomplish that day.
On to the actual styling! Below are some essential “tools” for getting started.
SUGGESTED TOOLS
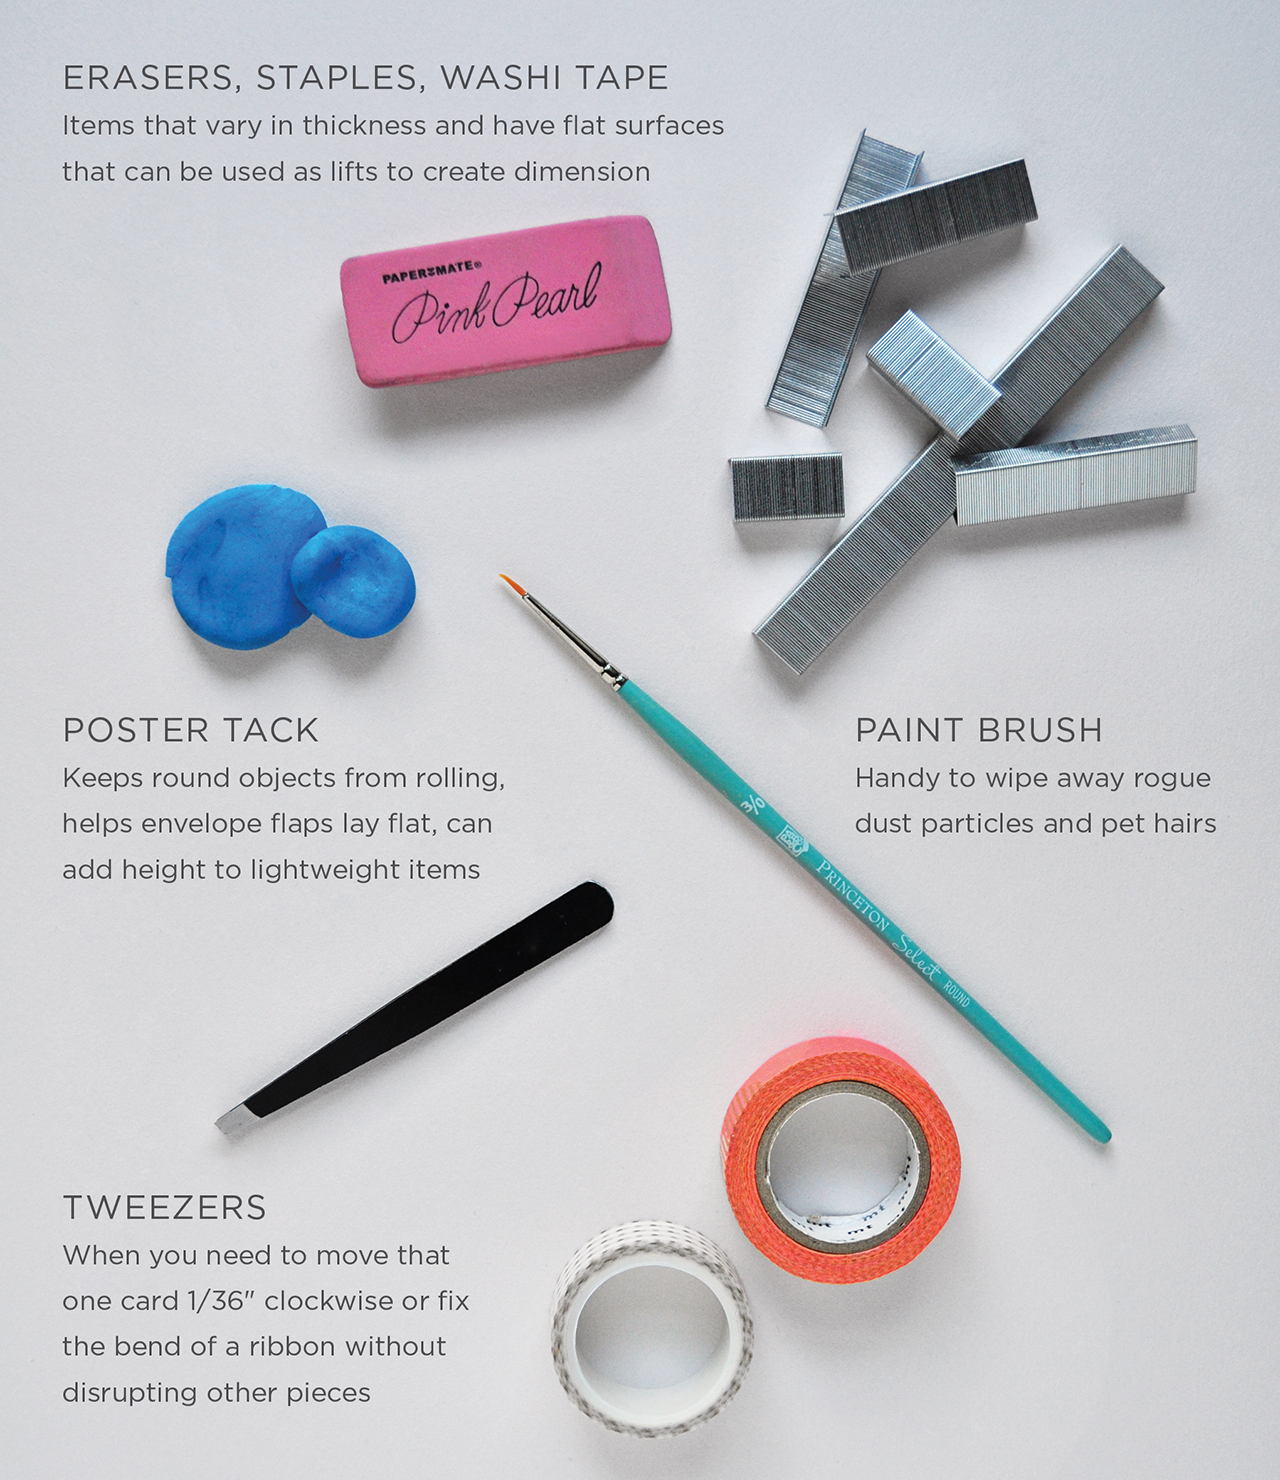
• Erasers, staples, washi tape
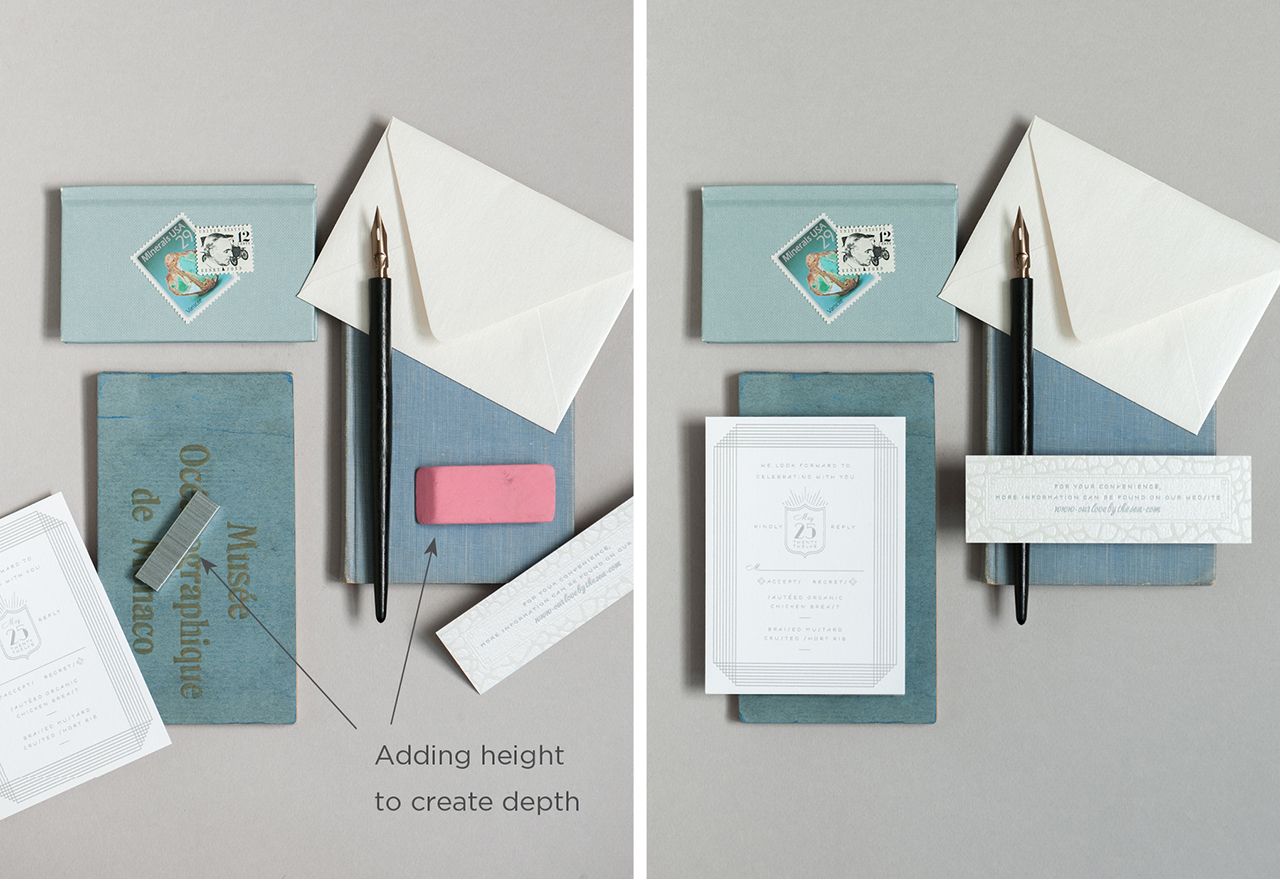
Stationery photos are more interesting when items are on different levels. Flat cards on a flat background = boring. You need to vary the height of the cards to create depth. Items that vary in thickness and have large flat surfaces are what you’re looking for. Staples are great because they are cheap and can be broken into different lengths. Erasers and rolls of washi tape work well, too, and are taller than staples giving you a mix of heights.
• Poster tack
This pliable tack keeps round objects from rolling, helps envelope flaps lay flat and can be used to add additional height to lightweight items.
• Paint brushes
Paint brushes are great for wiping away rogue dust particles and pet hairs. (I should mention that I have 2 dogs. Pet hair is a constant at my studio!)
• Tweezers
You have everything laid out just so when you notice one card is not quite straight. Ugh! Tweezers (or the pointed end of your paint brush) can be used to delicately move that one card 1/36″ to get it perfect without disrupting the other pieces. Anal retentive, OCD who me??
• Backdrops
Get creative! I keep a mix of different colored, large sheet papers on hand. You could also get sheets of plywood and paint them to coordinate with your paper story. Or you could be baller and get yourself styling boards from Heirloom Bindery.
• Foam core
White foam core can be used as a reflector to bounce light onto your layout and to soften harsh shadows.
• Diffuser
Another way to soften strong shadows. I have one similar to this that can be used as a reflector and a diffuser.
Photos by Charlotte Jenks Lewis
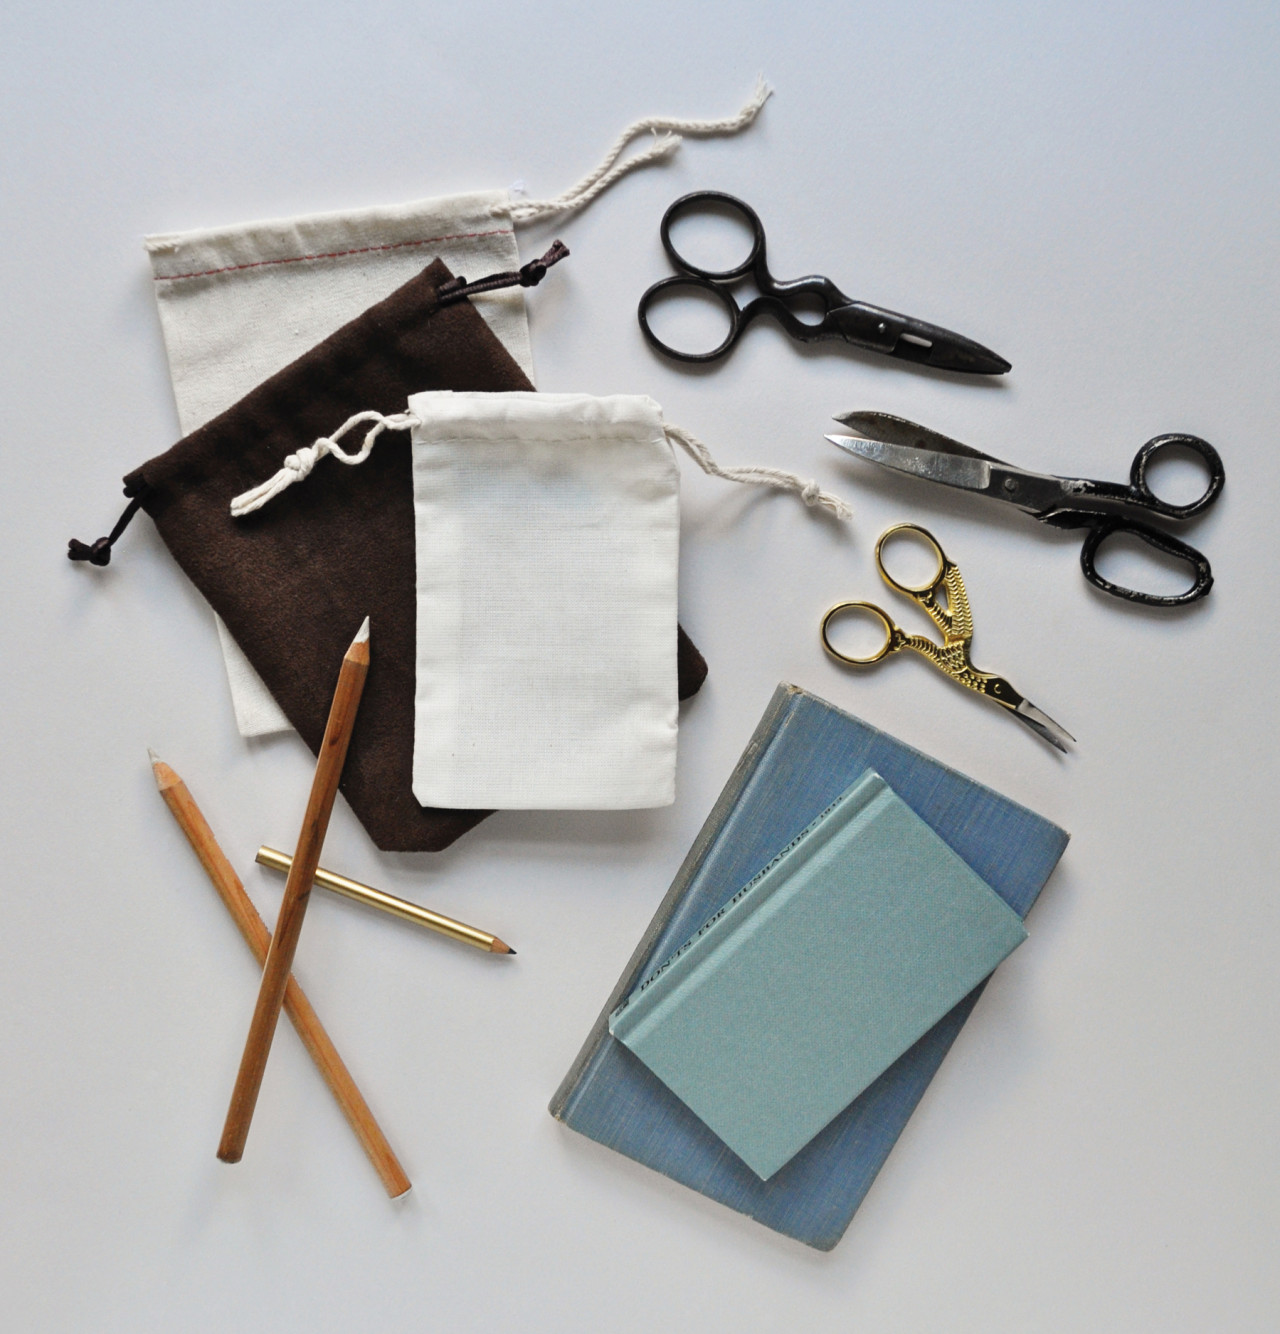
In the beginning I mentioned props – and how having them is major key when styling stationery photos. I am constantly collecting items to add to my prop closet. Having a variety of items on hand makes it so much easier to style. Some will work, some will be a flop, but it’s all good because you will have options! Look for items that are smaller in scale. You want a mix of sizes but you also want to mindful of how their proportions relate to the paper. Consider items with great color, patina and texture.
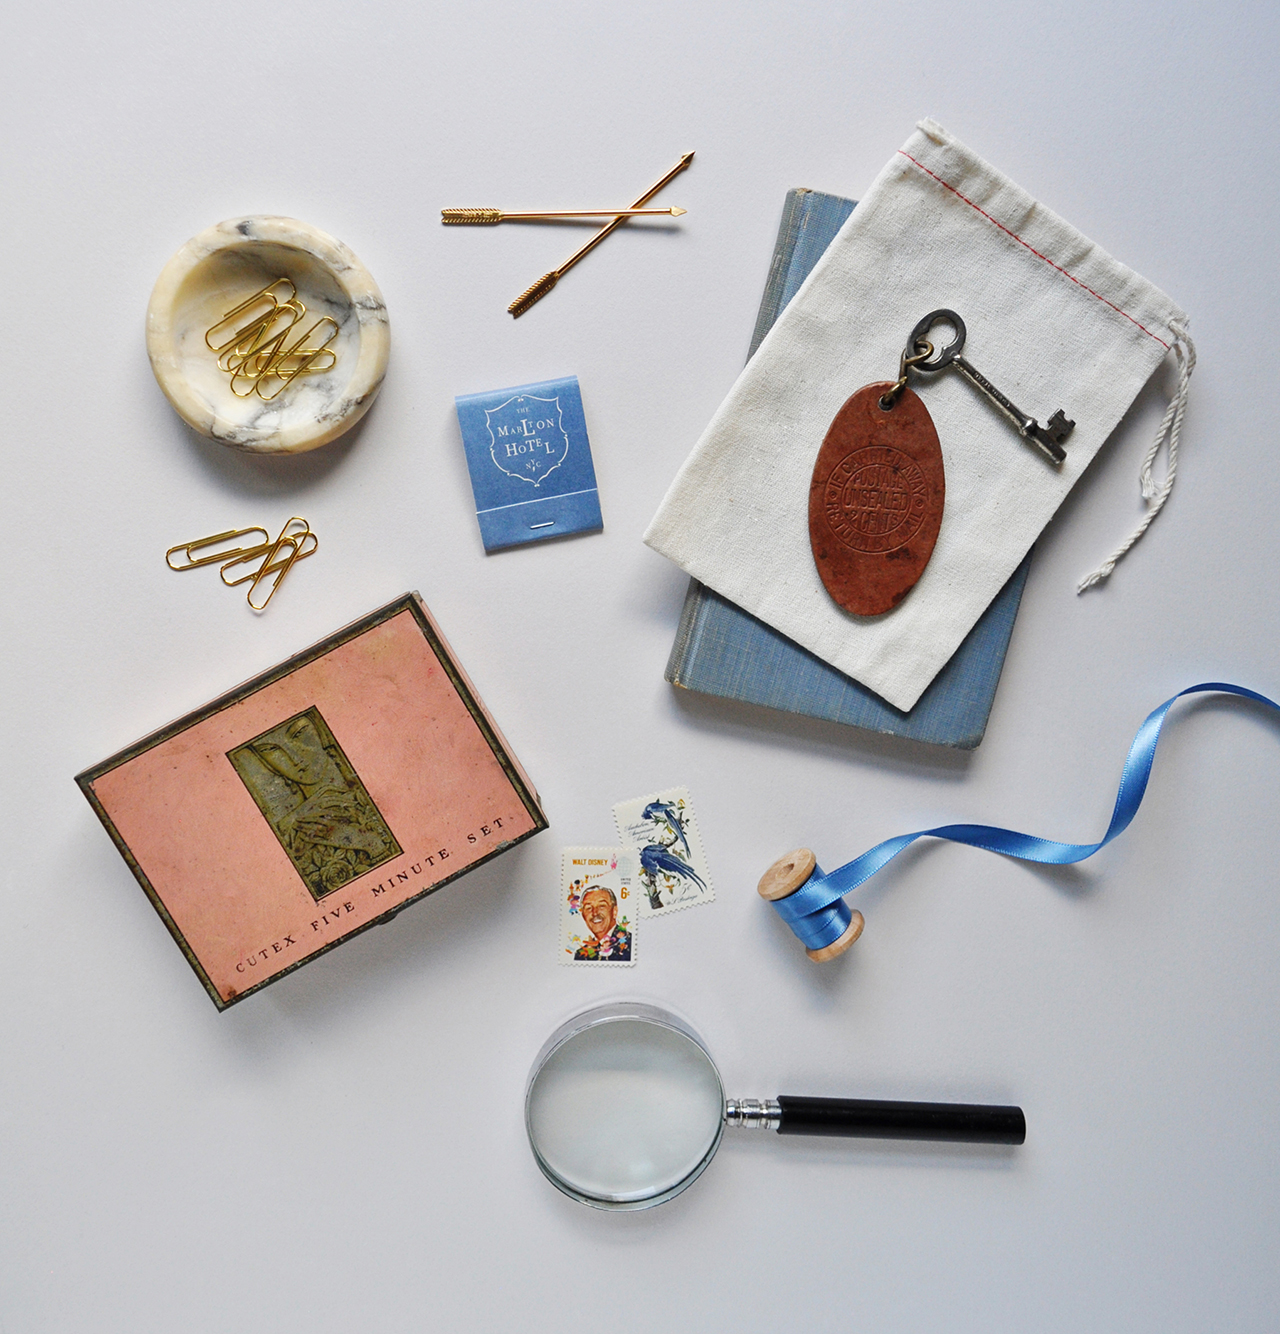

Having multiples of things, once again, gives you options. Are you noticing a constant here? Hint: OPTIONS. A particular pair of scissors might be too small for your setup or not the right color, but you’re not stressed, you have OPTIONS!
Petite dishes are great for corralling other smaller props. They help to give those small things a sense of place and also add dimension and texture to the overall image.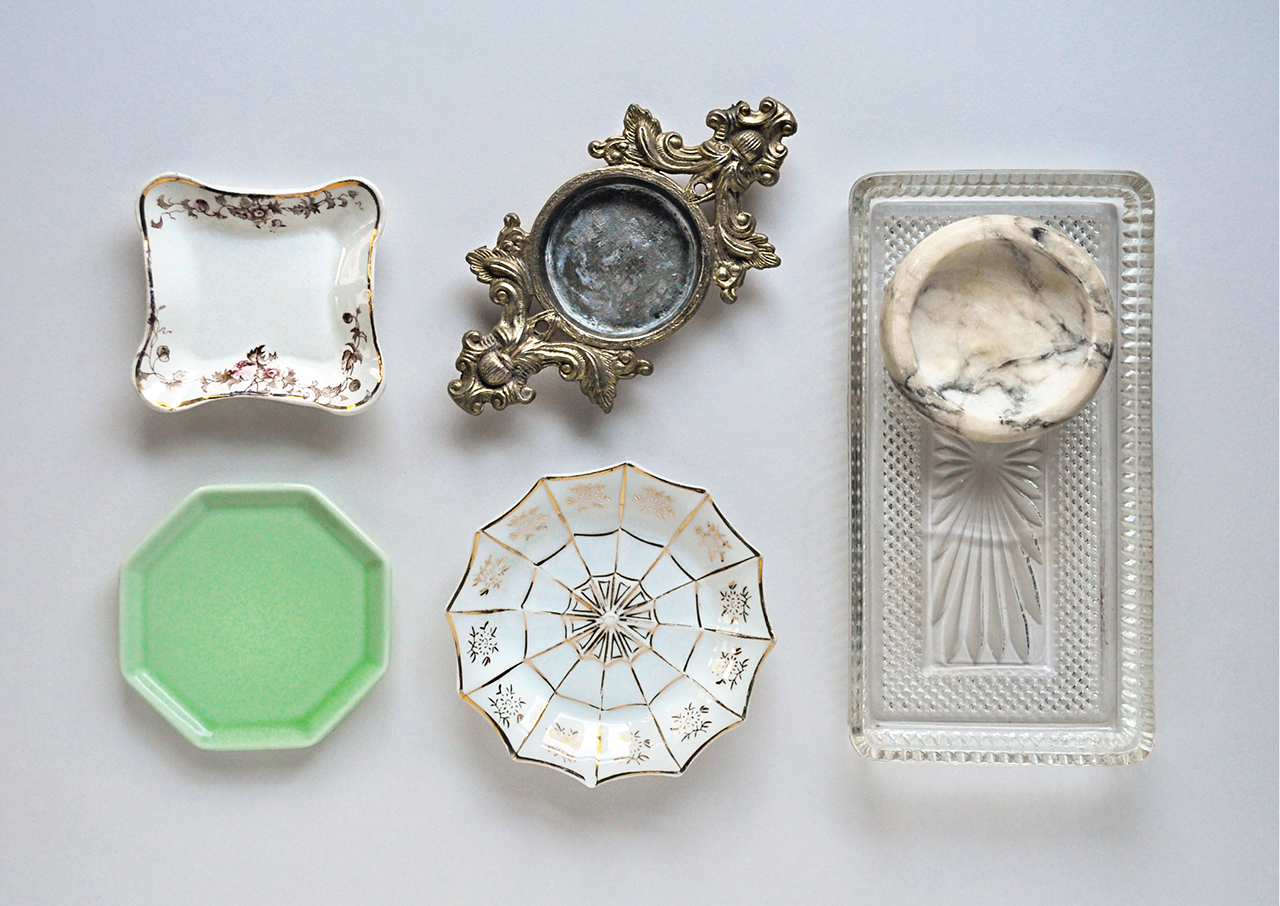
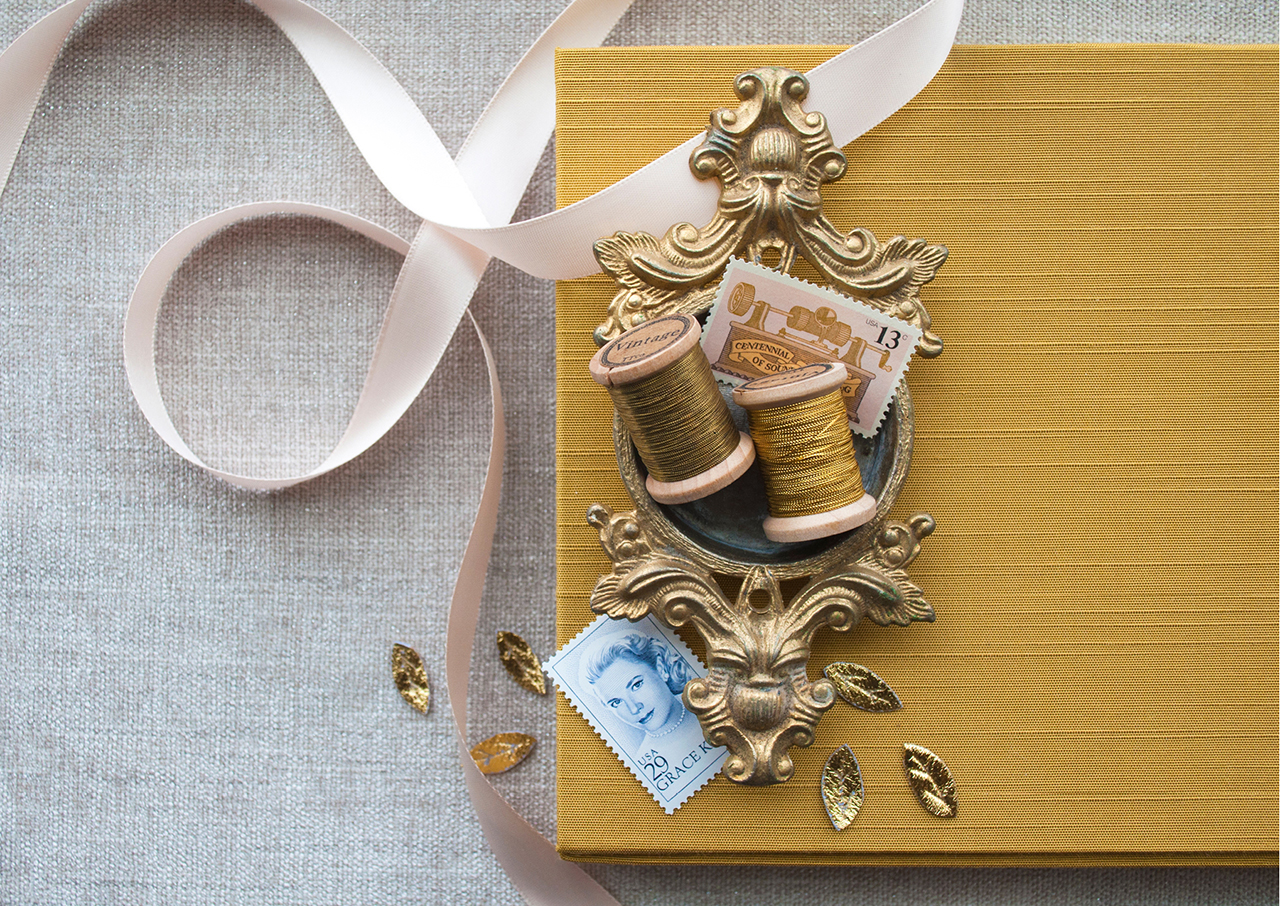
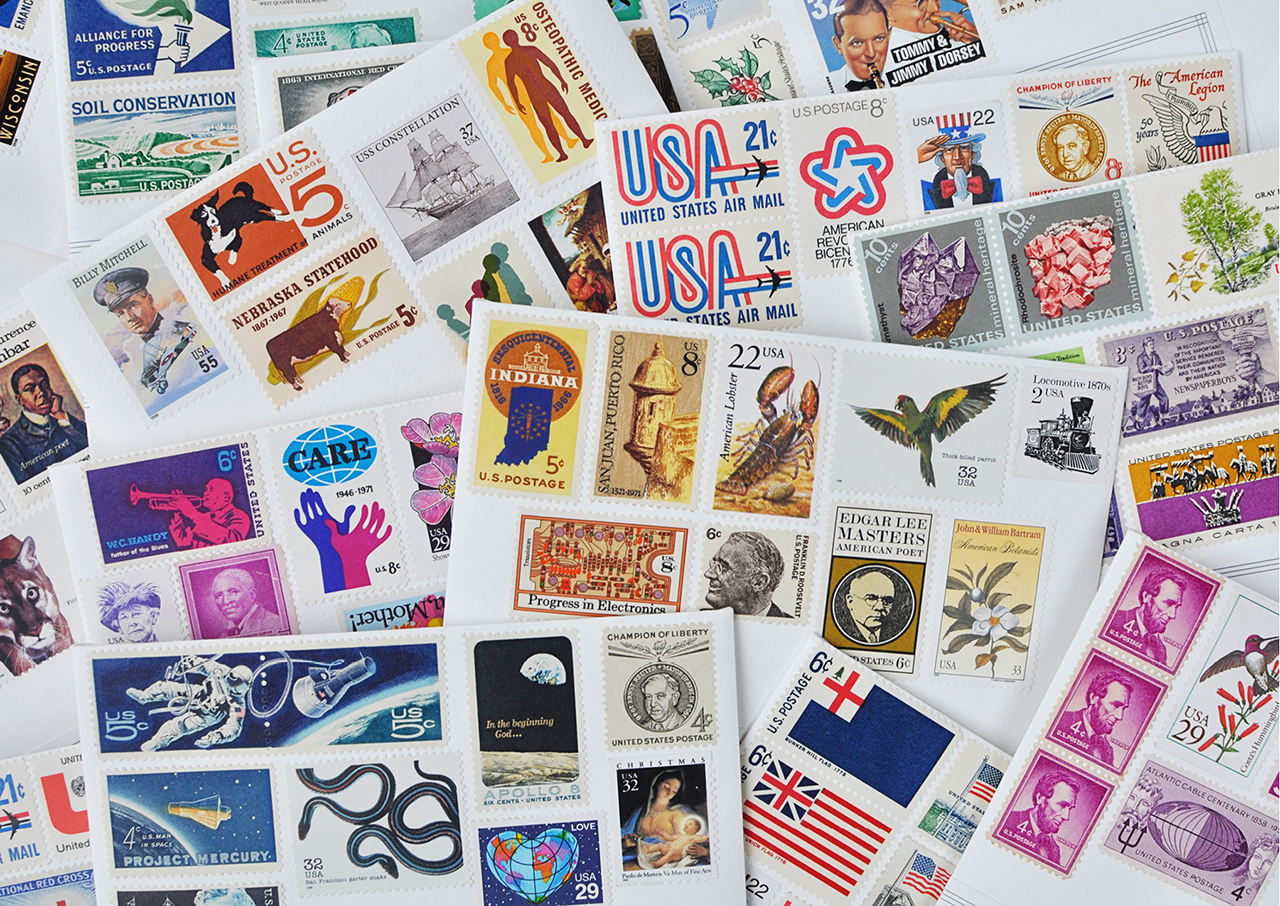
I use vintage postage a LOT when styling. As in Every. Single. Time. They’re mini pieces of art and bring delightful color to the composition. Nole did an awesome write-up about vintage postage and where to find it. I strongly encourage you to give that a read if you are on the hunt!
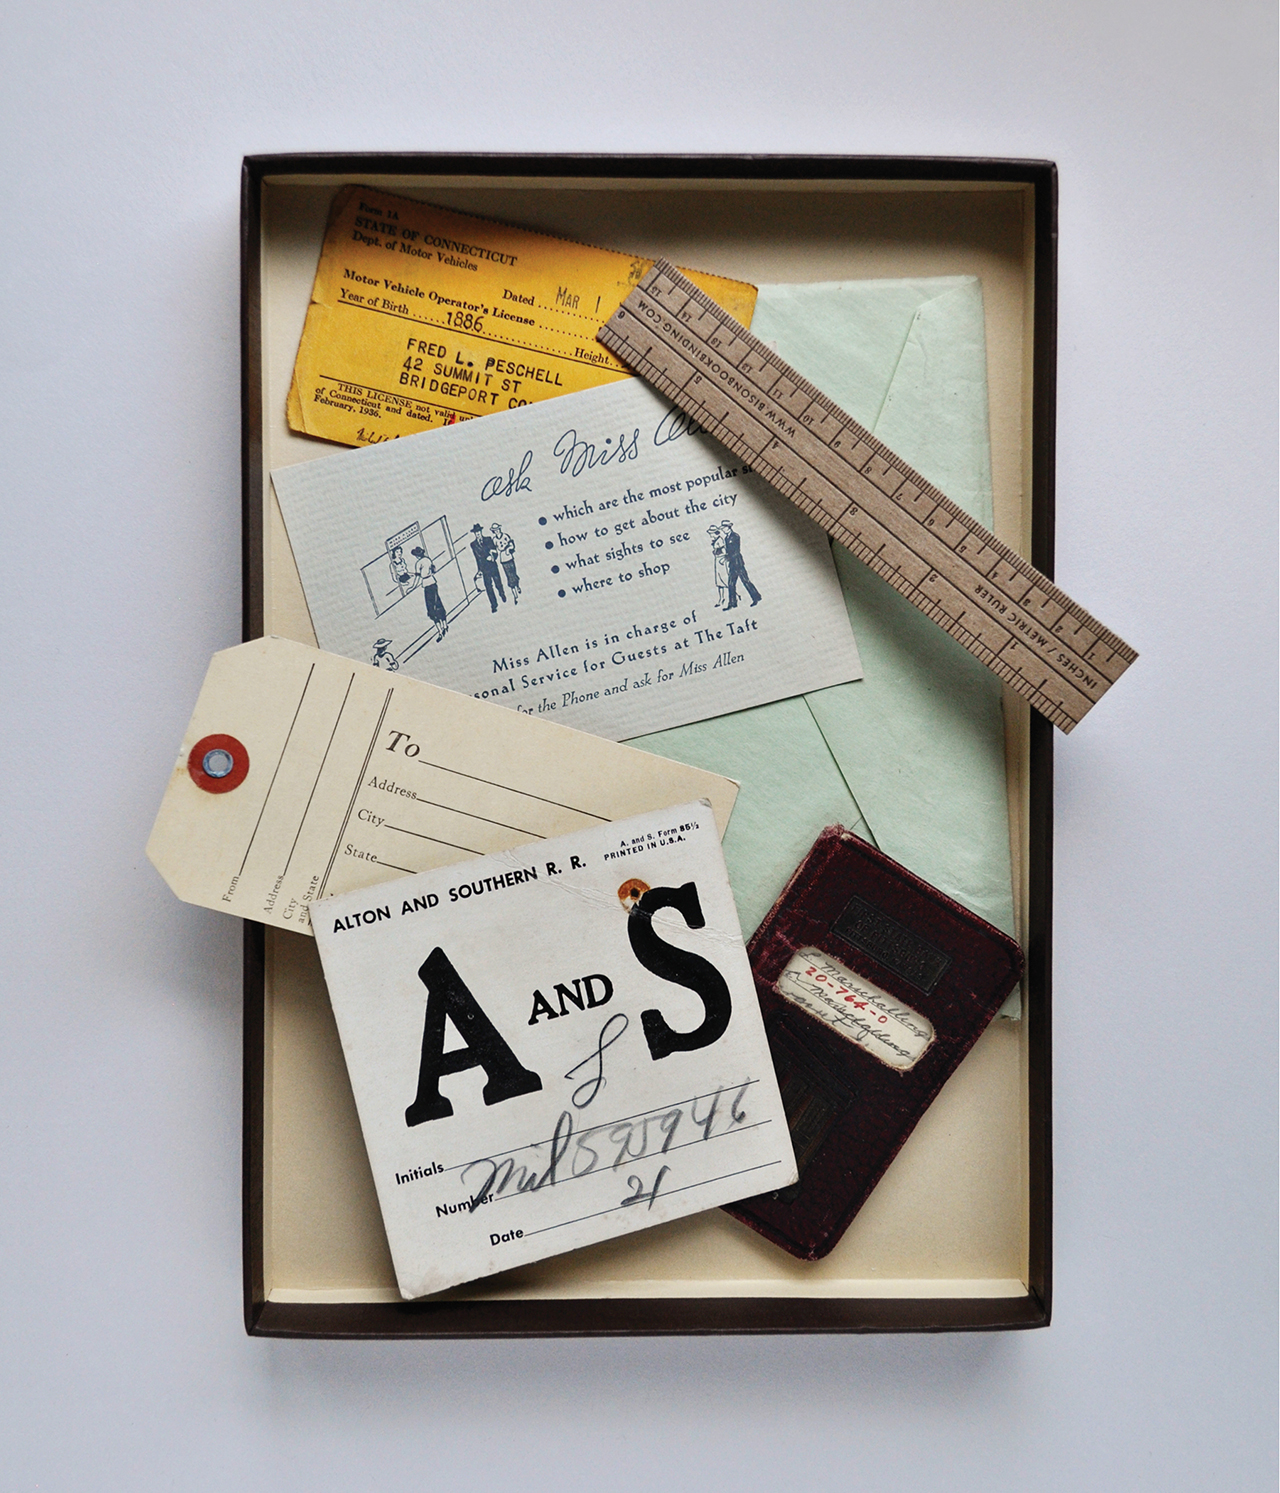
I also like adding bits of vintage paper ephemera when styling. The dog-eared edges, interesting typography, and varying colors are yet another way to add interest to your composition.
I think it goes without saying that bringing natural elements to your styling sesh can be a real game changer. But I just said it. So there, take note.
You’re now equipped with the tools and the props and you’ve got your beautifully designed stationery. That doesn’t automatically spell success. You must also be thoughtful how you compose your image.
COMPOSITION TIPS
• Balance
Your image should be balanced. I don’t mean that the composition needs to be symmetrical, but the selection of props should relate to one another and not compete. And remember, your goal here is for your stationery shine!
• Negative space
Be mindful of the spacing between each element and how they relate to each other. Is it even? Is everything straight? It’s much harder to retouch these things in post-processing!
• Alignment
If there is too much going on, it will feel cluttered and your eye won’t know where to land. Consider carving out negative space.
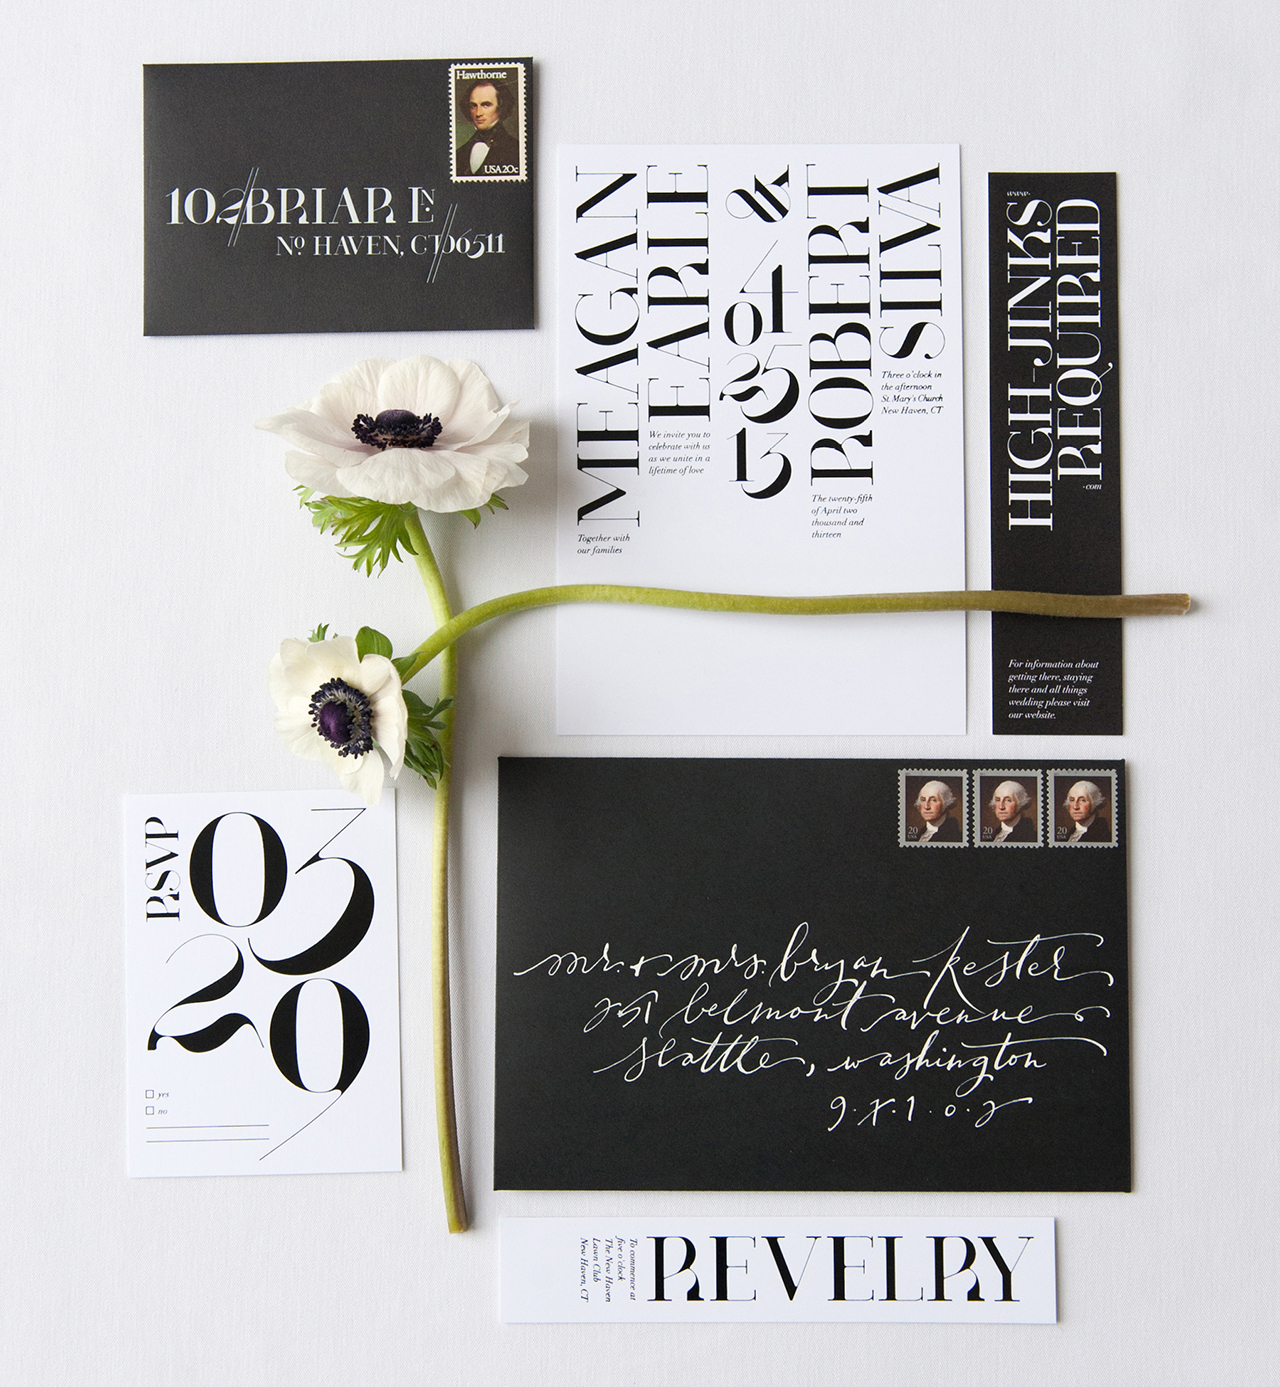
Photo by Carla Ten Eyck Photography
That’s a wrap! I would love to hear some of your tried and true tips for perfect paper pics!
Photo and Styling Credits: Coral Pheasant (except where noted)Save
I can never seem to find the right size dishes–they’re either too deep or too big. Are there any specific search terms to include when looking online?
Also, for building depth, I find children’s building blocks perfect. They can be stacked (obviously), but the different sizes allow for varying paper sizes and they’re easily stored.
Hi Michael! I’ve always picked up little dishes at tag sales or antique shops. Online, try searching using “ring dish” or “tea bag dish”. Both of those are usually small as they’re designed to hold small things 🙂
Hi Nicole,
I appreciated you sharing your styling tips . I have a question. You mentioned you use your IPhone for quick mock-up shots so you can hone your ideas. Do you use the same phone camera as well for the refined studio shots when you use other tools to help with lighting or are you using a different camera? If so, what camera have you found useful? Thanks!
~Carol
Hi Carol!
Most times I am using my Nikon D5000 for picture taking. Or if I’m fortunate to be working with a photographer, they’ll be using a professional DSLR. Having said that, there have been times that my iPhone 6 has performed well for me. Most all of the photos I shared on this post were taken with my iPhone.
http://ohsobeautifulpaper.com/2016/08/unique-and-memorable-save-the-date-ideas/
I do always bring my images into Photoshop for retouching regardless of what camera I use!
Thanks for these great tips! I never thought to add dimension by propping up the paper slightly. I was always afraid I’d get harsh shadows, but I can totally see the difference in your photos. Excited to try it out for myself!
Nichole, these tips are great! So many that I haven’t even thought of before. I especially love the tip about the paintbrush for pet hair…so smart! I do have a question that I was wondering if you could help with. What kind of lighting do you use? I try to shoot with natural light, but often find that the whites are off and when lighter, more delicate colors are used in the stationery I am photographing, they tend to wash out. Any tips on how to help with that? I am using a DSLR camera. Thanks!
Hi Maria!
I am so glad you found the tips helpful! And girl, the struggle is real with getting whites to read as the white you want! I cannot tell a lie, my Photoshop files have many layers with all the tweaking and adjusting I do. For a long time, I made things even harder for myself by insisting that all my paper be shot on white. Um, attempting to shoot white paper on white paper will make you go crazy!! I now avoid white backgrounds altogether and instead seek out anything BUT white – greys, blues, tans, etc. Like you, I also shoot in natural light. That too is tricky because the light is always changing but c’est la vie. And if you’re like me, you probably need to cut yourself some slack 🙂
My recco is to use a background that is a different color from your stationery. Also, when retouching in Photoshop I will often create a “Selective Color” adjustment layer. Layer>New Adjustment Layer>Selective Color. Change the Colors option to Whites and then reduce the Black slider down towards -100% until the whites are whiter. Hope this helps!
This is so helpful! I used to style my beauty products in a similar way but could never articulate it the way that you have here. Really good post!