Making marbled paper is something that I’ve always wanted to try, but, thanks to the extensive supply list and unfamiliar ingredients, I’ve been too scared to even attempt. But today we’re in luck! Heather, Creative Director at May Designs, is here to demystify paper marbling and walk us through the entire process. The team at May Designs basically spent an entire day playing around with marbled paper patterns, with some seriously stunning results. We’ll start with Heather’s detailed tutorial (thanks Heather!!) for how to make marbled paper, followed by some photos of the GORGEOUS new May Designs collection inspired by their marbling experiments!

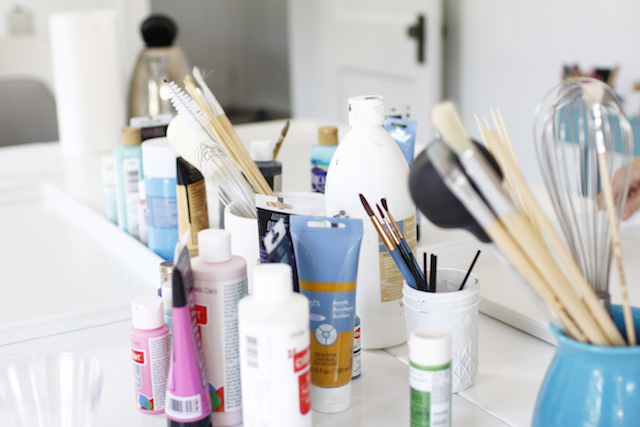
Supplies
Spray bottle
Measuring spoons
Whisk
Dish soap
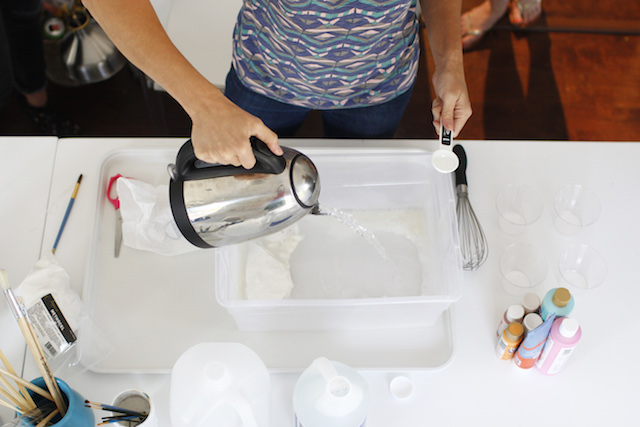
Bucket or large bowl (must have a capacity greater than one gallon)
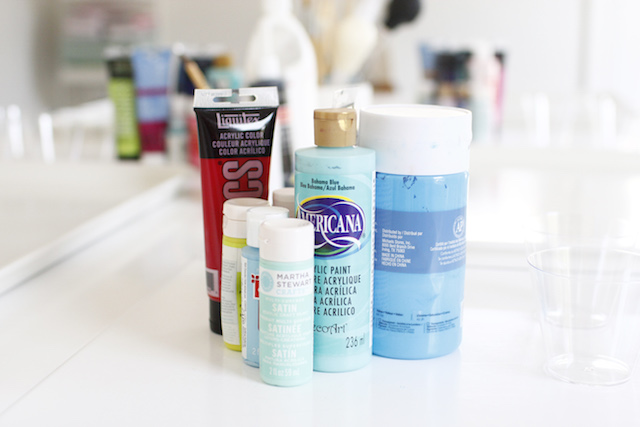
Acrylic paint
Small cups
Clothesline + clothespins
How to make marbled paper:
Step 1. First, prep your paper. Fill a spray bottle with warm water. Add 2 tablespoons of alum and mix well. Let the mixture cool and spray a thin layer onto your cotton paper. Lay flat to dry! Make sure to mark the side that you sprayed because it can be hard to tell once it’s dried.
Step 2. Next, prepare the water bath. In a bucket, mix 4 tablespoons of Methocel with 1 gallon warm, distilled water, and one tablespoon of ammonia. Mix with a whisk. Find a shallow tray that is just a little larger than your paper. We found the perfect shallow tray to use for our water bath at a restaurant supply store (these trays from Amazon will also work!). Pour water mixture into shallow dish and let sit until all bubbles are gone! This can take a while, sometimes an hour or so.
Step 3. You’ll also need to add a dispersant to your water bath. To mix a dispersant, fill a cup with ½ cup water and a few drops of dish soap and mix.
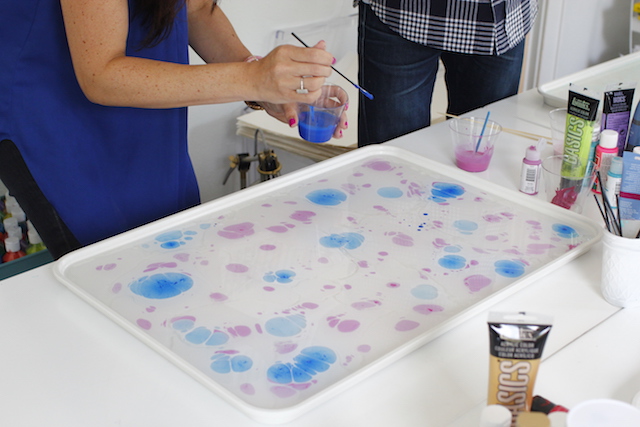
Step 4. Gather up your favorite colors of acrylic paints and squeeze them into cups. Add water to each color until you have the consistency of whole milk. Add one drop of dispersant/dish soap mixture to each color of paint. (A coffee straw works well for this!)
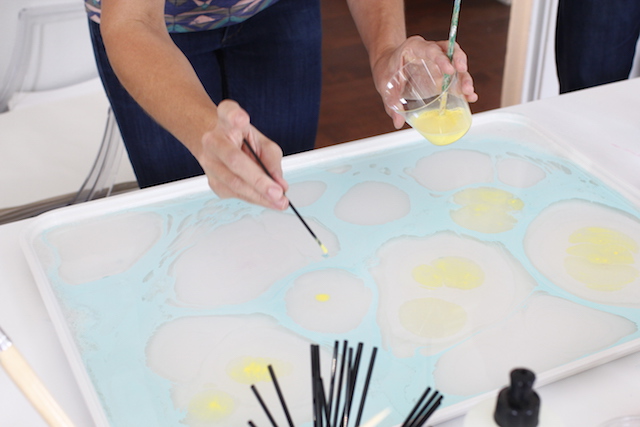
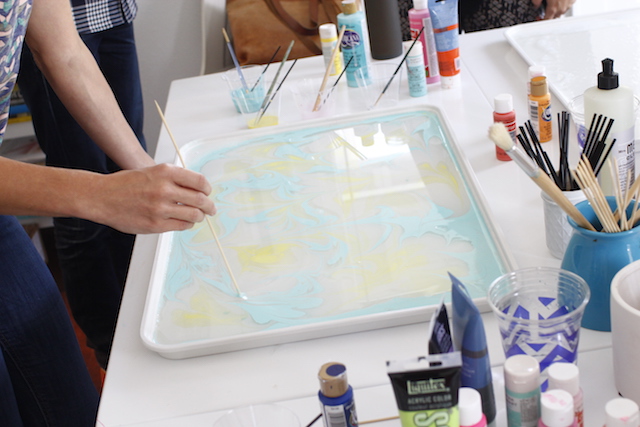
Step 5. Next, add diluted paint to the water bath. This is the fun part! Using coffee straws begin to drop paint onto the surface of the water bath. Keep dropping paint onto the water bath until it is pretty well covered with color.
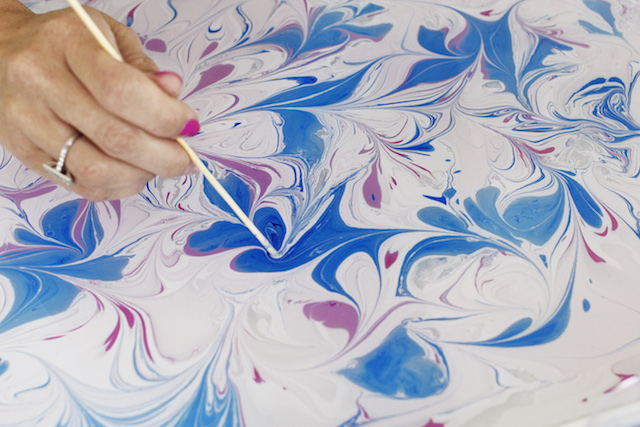
Step 6. Time to Marble! Take a clean straw and begin to drag it across the top of the water bath to create designs. You can also use the dispersant mixture you made to move the paint around, but only use a small drop to start. A little goes a LONG way.
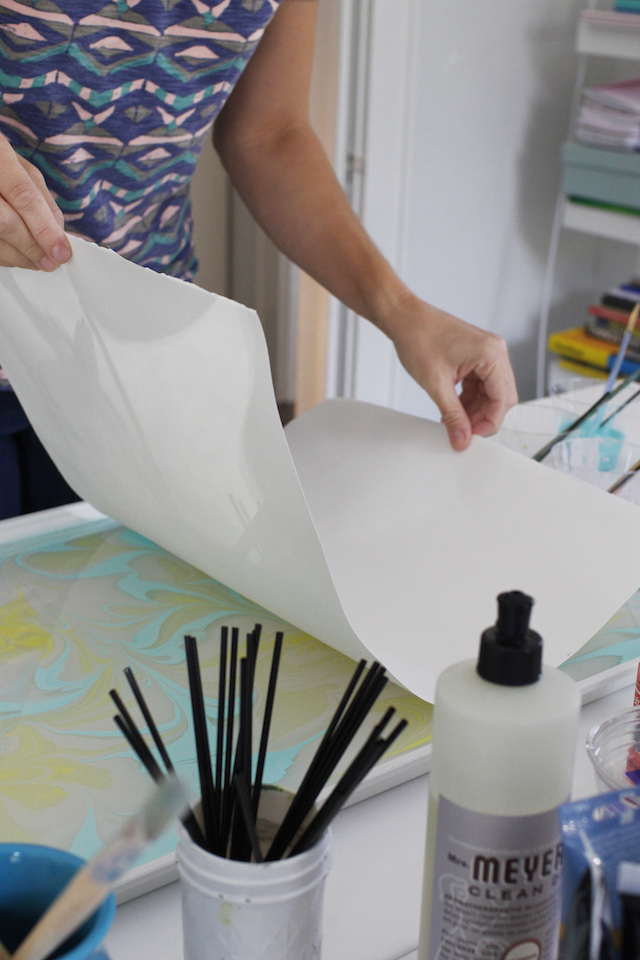
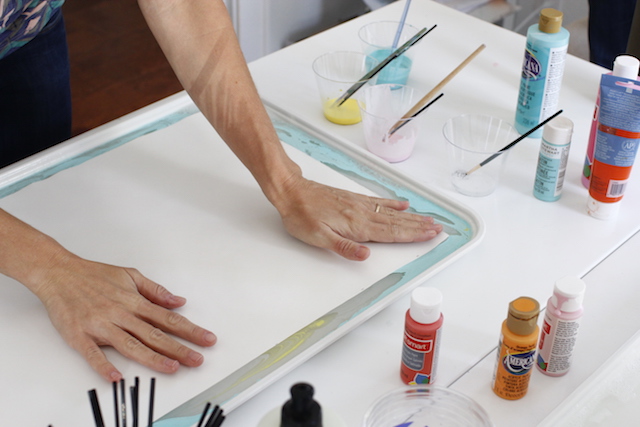
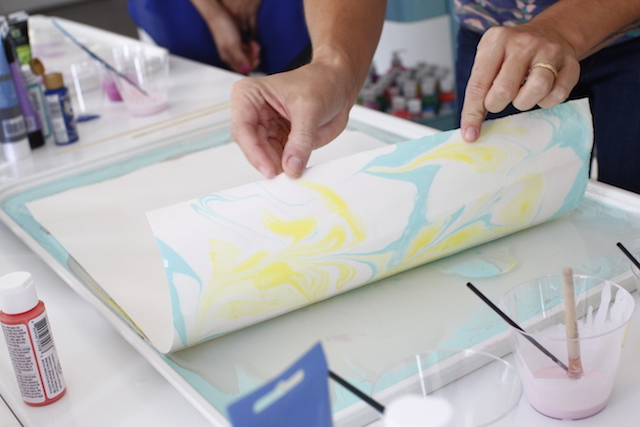
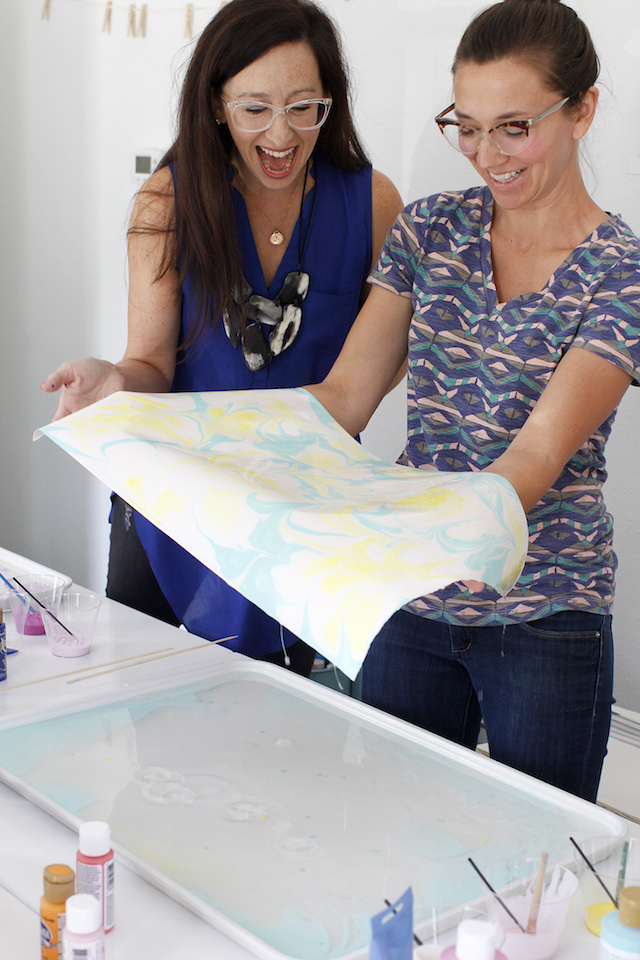
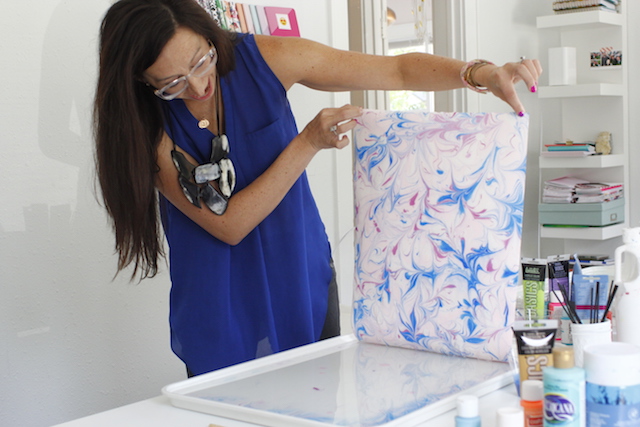
Step 7. Once you have a design that you like, take your prepped paper and gently lay it face down on the top of the bath. (Make sure you are placing the paper, prepped side down). Pat it down to make sure there are no air bubbles and then pull the paper up out of the bath starting with one corner and peeling it all the way up.
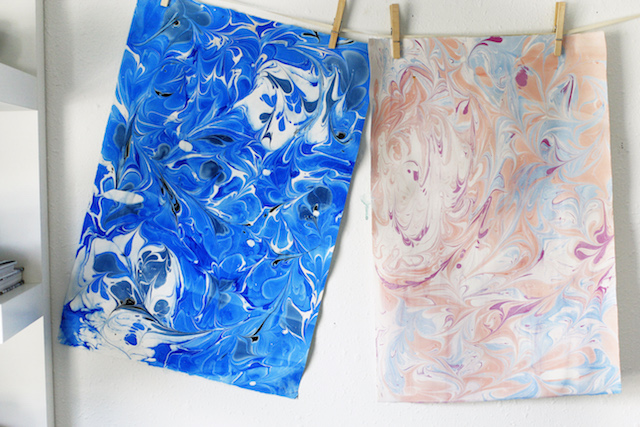
Step 8. Rinse paper with water. Don’t be afraid to get in there and clean the paper off with your hands. The paint is there to stay. Hang paper to dry!


From Heather: We’ve been excited to introduce this fun trend as a pattern collection since spotting it at the National Stationery Show. We first envisioned it as a collaboration. We thought we might need an expert, to guide us through the process, so that we could get the results we desired for the collection. BUT, when Mica had the idea to incorporate the marbling process into our brand new Desk Calendars, it changed our timeline quite a bit and we decided to roll up our sleeves and get our hands dirty!
We set aside a day that same week to set up our very own marble workshop in the studio. We’ve hosted a few different workshops in the studio; calligraphy, painting, cocktail classes, etc., but this was my personal favorite. The process is so free and each piece almost creates itself! We collected tips and tricks from several different videos and blogs to create the process outlined in the tutorial above. Here’s a list of little things that we feel made this a success:
- Cotton paper is a must! The other papers we tried broke down in the water bath
- Don’t go on a crazy search for fancy “dispersant†– dish soap works the same way! Oh and remember, a little goes a LONG way!
- Turns out, restaurant supply stores have the perfect large, shallow dishes for water bath. And they’re white!
We hoped that by the end of the day, we would have 12 gorgeous pieces to work with, but the pressure was off. It was SUCH a fun day. Doors open, messy desks, lunch ordered in (of course) and selfies galore. A perfect exercise for our team to let loose and bond, and BONUS… we ended the day with walls covered in gorgeous marbled paper. We are so happy with the end result! The new calendars are are beautiful and the pattern collection for notebooks is a new favorite!
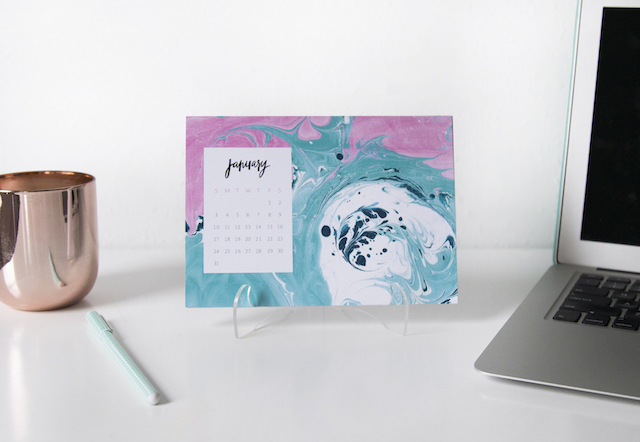

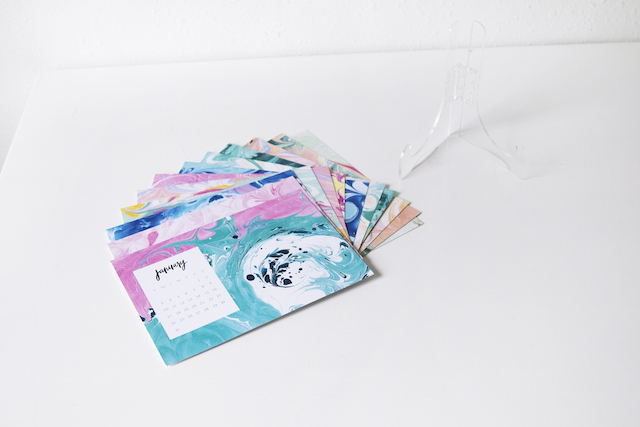
Photo Credits: May Designs
Do you have to dump the shallow tray each time you marble? As in you’d need a 1 gallon mixture for each paper? Or can you clean out the paint somehow?
The paper is stunning and I love the calender!! 🙂
http://www.makeupisdelish.com