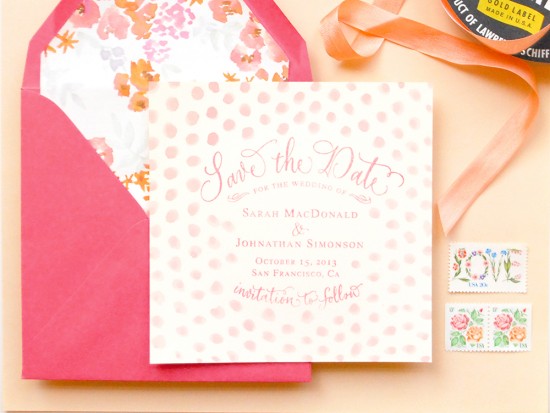
With Valentine’s Day speedily approaching, we’ve got definitely got  love on the brain. Today’s save the date DIY tutorial is a great example of pattern mixing in stationery – and of course includes a ton of pink! This look is super easy to achieve, and the colorful design will help set the tone for a fun nuptial bash!  – Bailey and Emma of Antiquaria
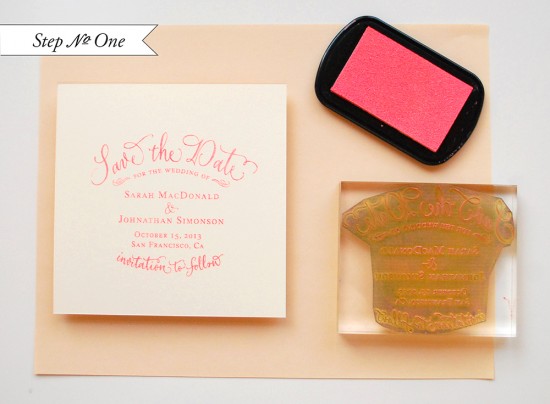
Step One: Lay a 5 1/2″ square notecard down on a firm, clean work surface. Ink your stamp (we used our Vintage Calligraphy Save the Date stamp) and center it over the square card. When ready, press the stamp down on the card, using moderate pressure (too much can give a muddy image). Lift stamp off and set aside to let the print dry. For more details on how to ink and print the stamp please visit here (see step 1).
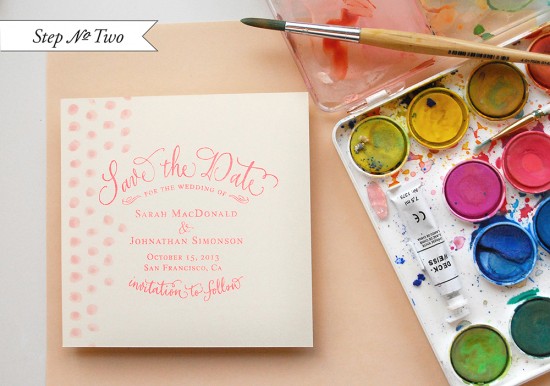
Step Two: Once you’ve made all of your prints and they are dry, you will move on to the watercoloring. With a pastel pink watercolor, paint dots in vertical rows from left to right (if right handed or right to left if left handed). Be cautious not to use too much water as it may run or warp the paper.
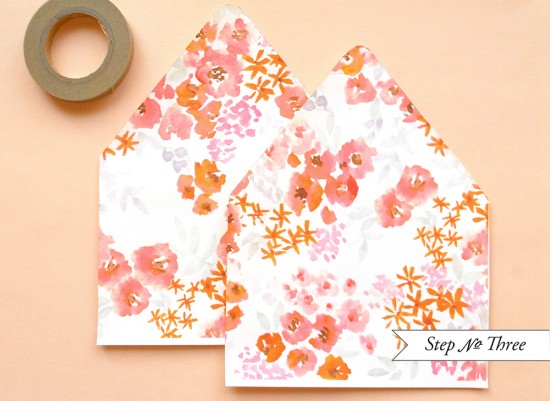
Step Three: Using envelope liner templates, cut liners out of a fun pattern. Simply use stick glue or double sided tape to install the liners into the envelopes (adhere around the top triangle).
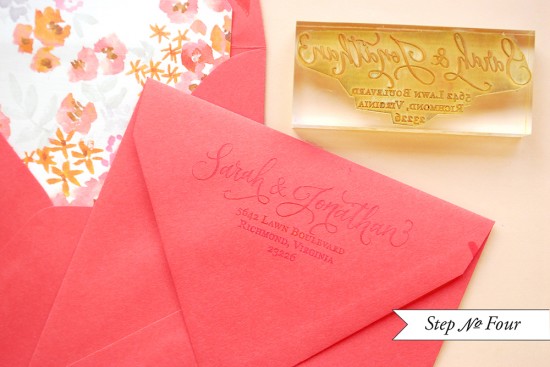
Step Four: Lastly, you’ll want to stamp your return address (we used our Calligraphy Ampersand Return Address stamp) on the back flap of the envelope. We’ve been loving the tonal look lately (gold on gold, pink on pink…etc.) so that what we’ve chosen here with this design. Now all you have to do is address them, add postage, and send them on their merry way!
Materials:
Vintage Calligraphy Save the Date Stamp
Calligraphy Ampersand Return Address Stamp
Watercolors, paintbrush, and water jar
Liner Paper – custom watercolor floral pattern from Antiquaria Design Studio
AntiÂquaria is a memÂber of the Designer Rolodex – you can see more of their beauÂtiÂful work right here or visit the real wedding invitations gallery for more wedding invitation ideas!
Photo Credits: Antiquaria


Love the invites! Can you please tell me which colour ink pad you used? It looks like Peony or Magenta? Thanks!
Hi Holly! Thanks:)
The stamp pad is actually Coral. It’s a new color that we will be carrying on our shop in the very near future!
The color combos here are awesome!