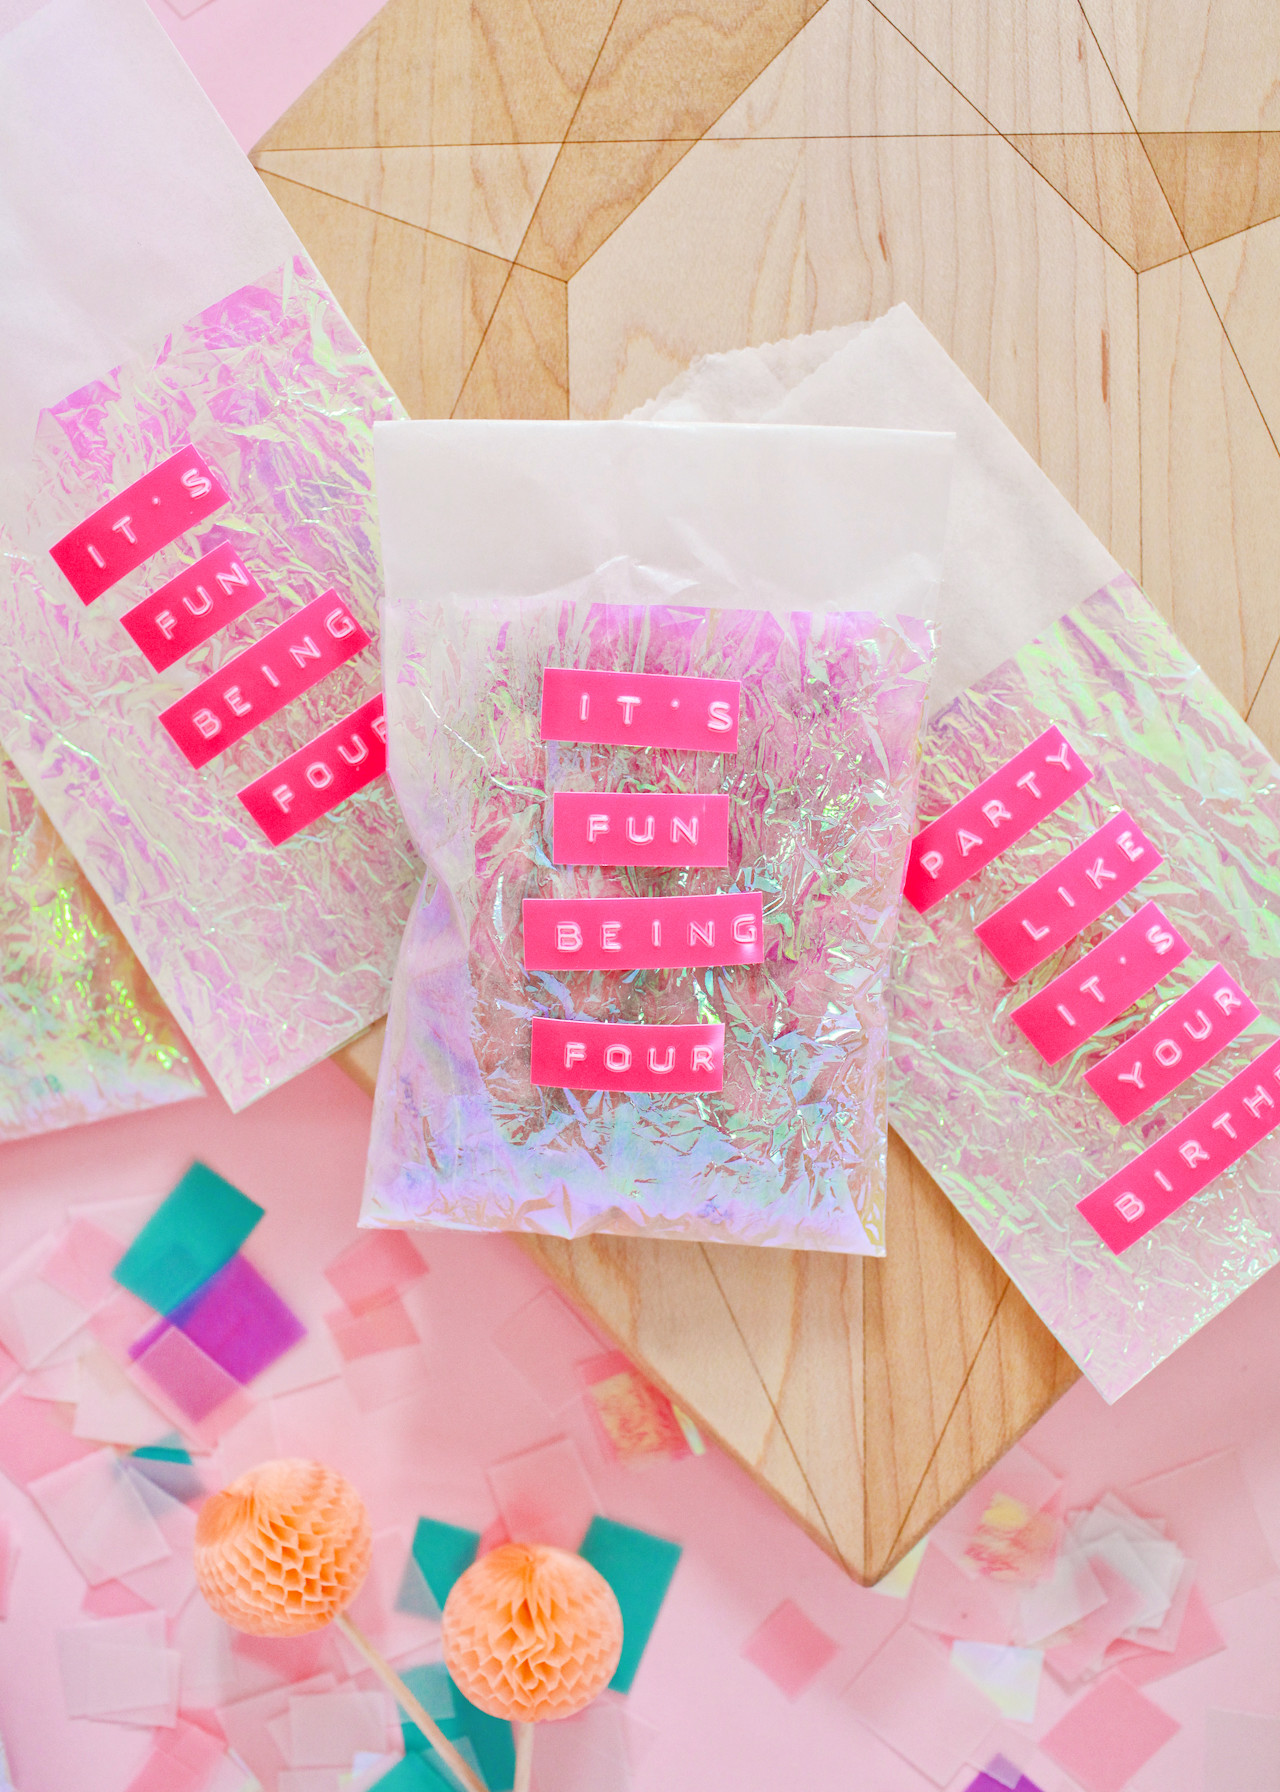
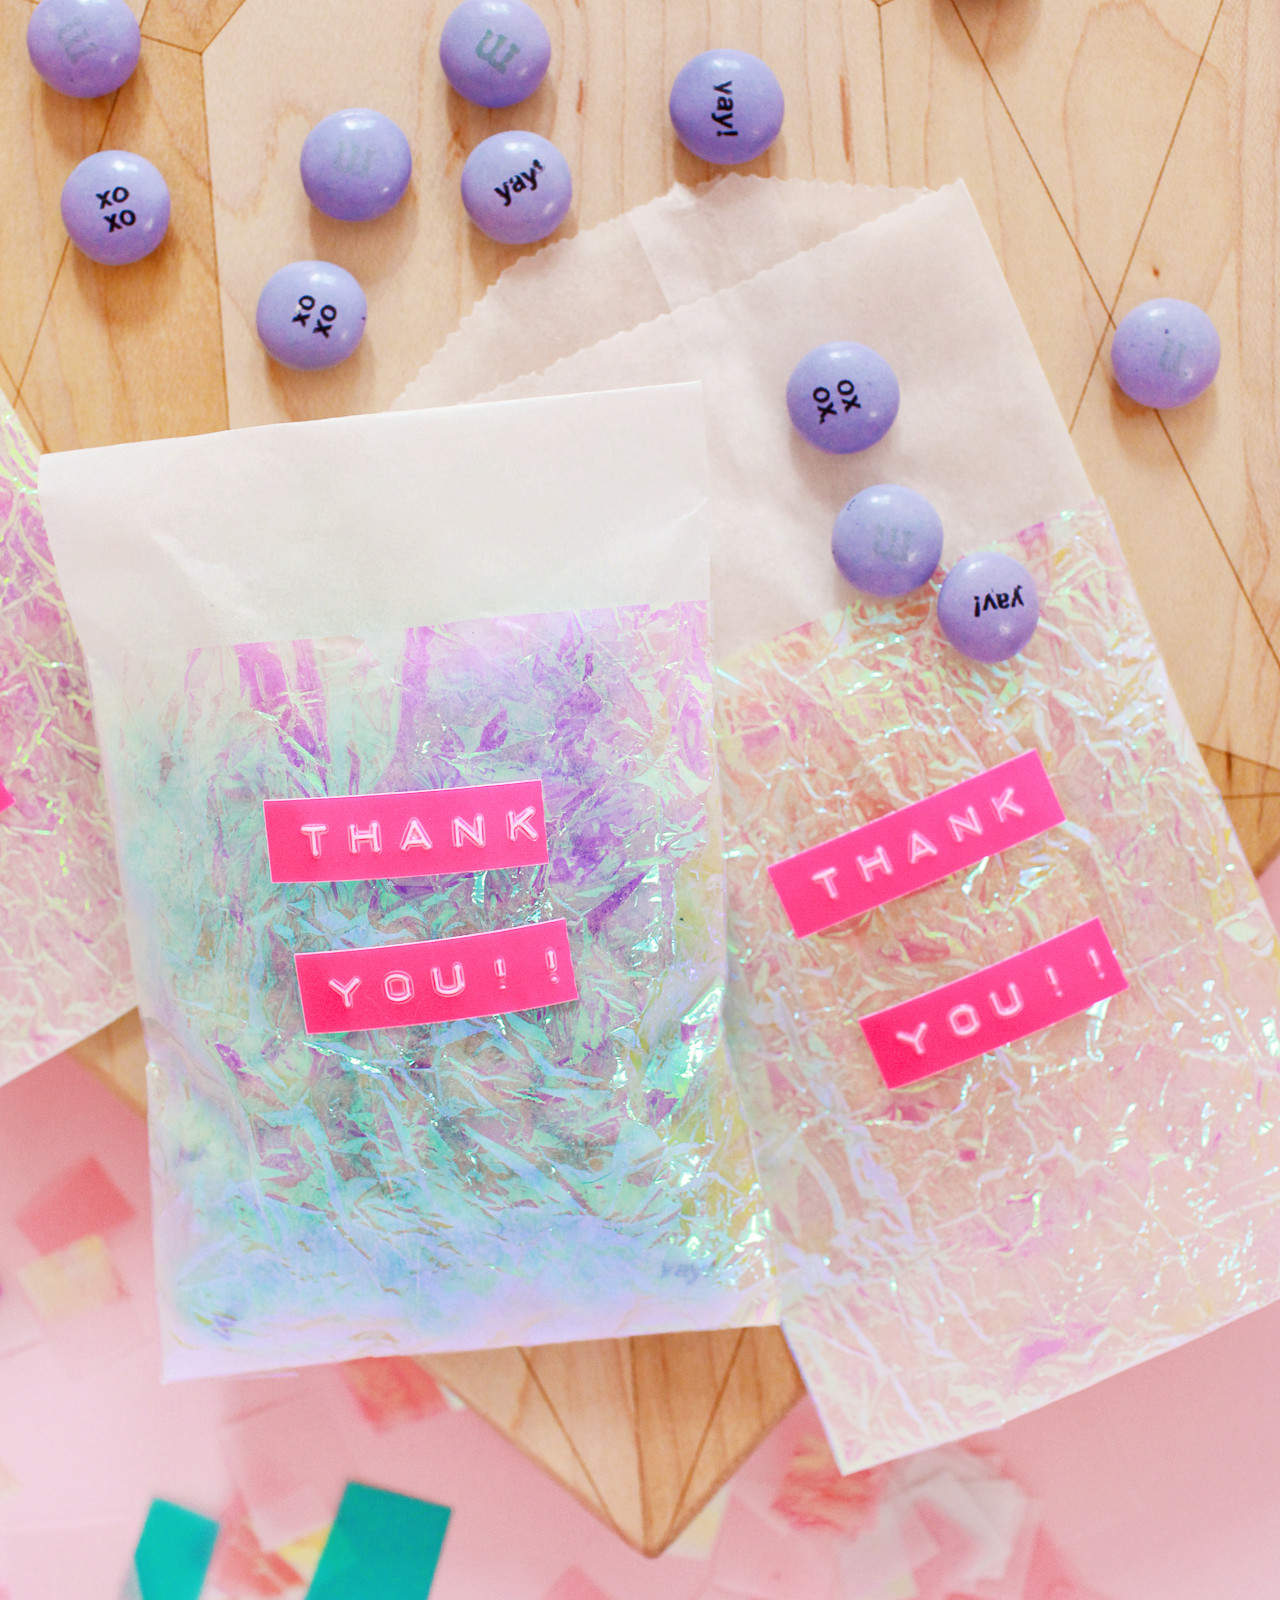
Yesterday I shared a few DIY party favor ideas, all with iridescent and pastel elements. Glassine bags are a quick and easy way to package party favors, and I originally searched for some readymade iridescent glassine bags to use in the post – but I couldn’t find any! So I decided to take matters into my own hands and make some DIY iridescent favor bags. It was so simple, and I absolutely loved how they turned out, so I thought I’d share the steps with you along with a quick and easy idea for personalizing your party favor bags!

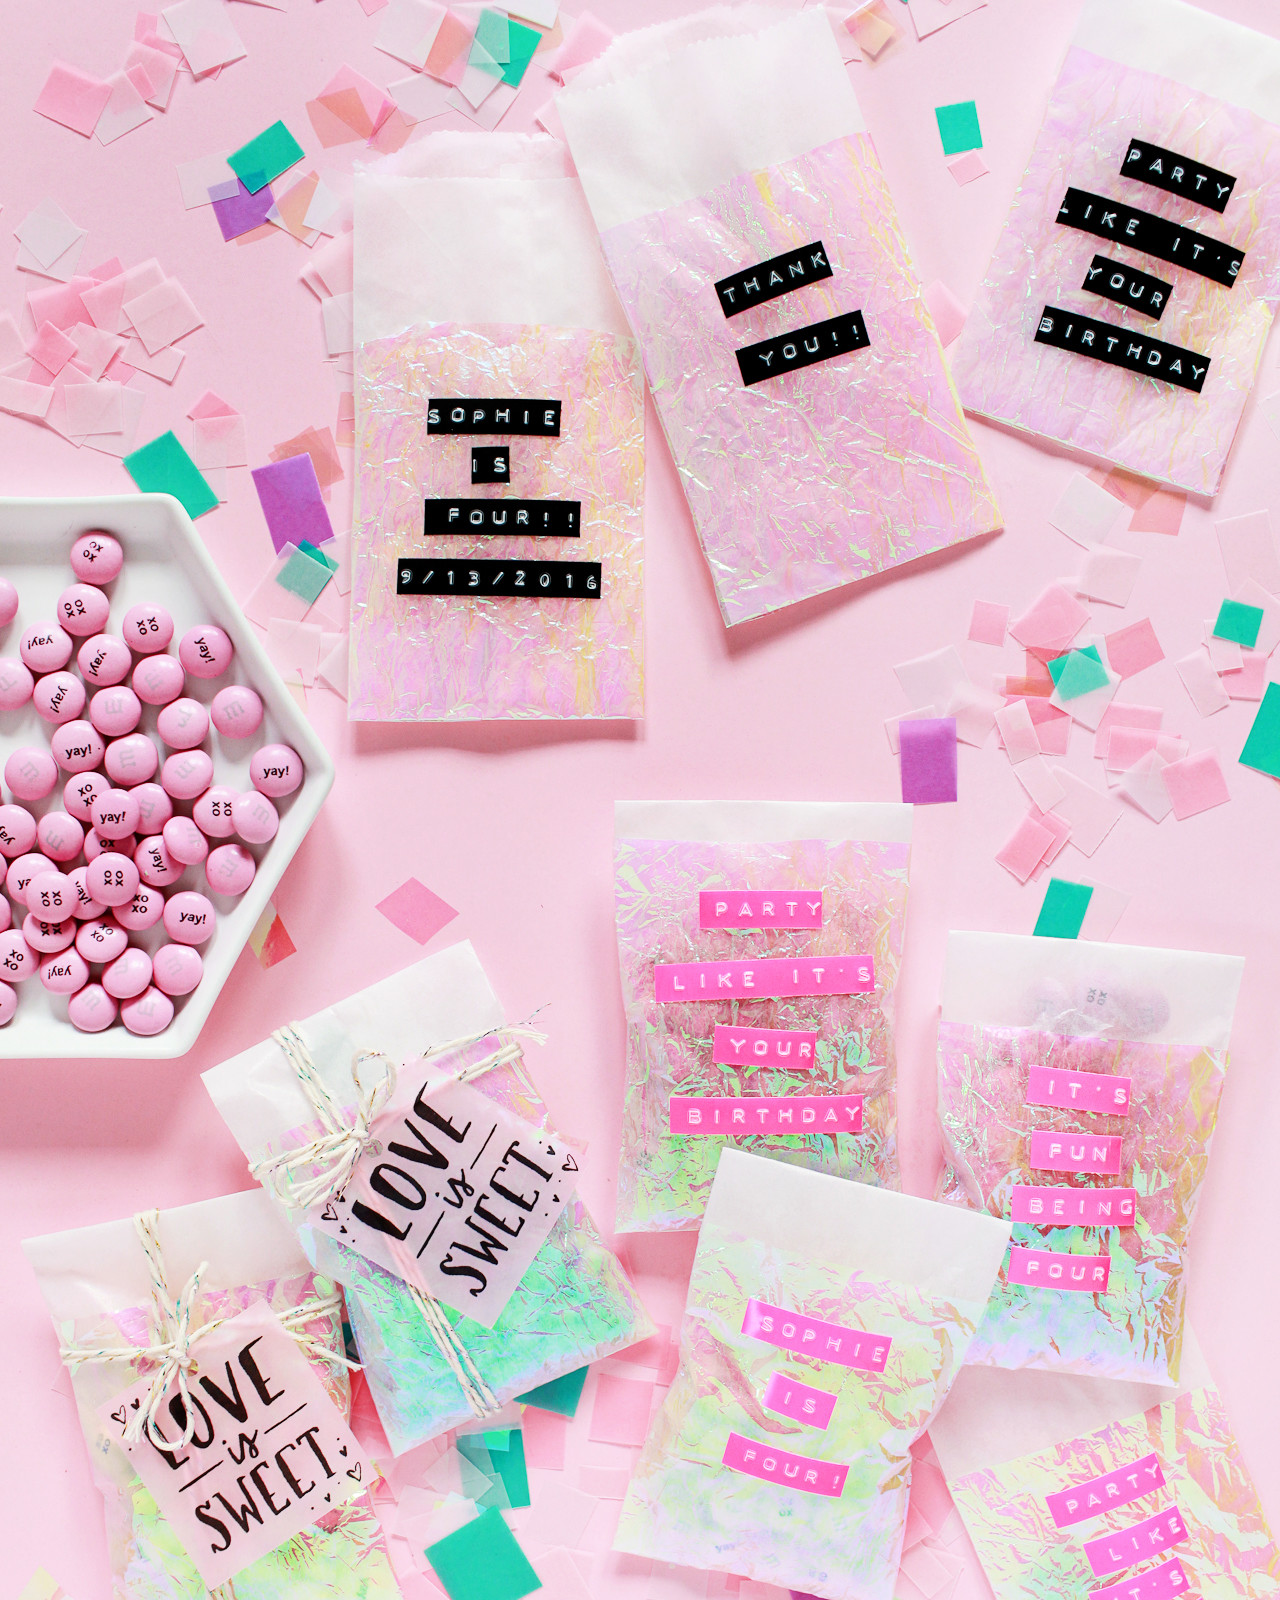
I absolutely loved the iridescent favor bags paired with prism twine from Knot & Bow and vellum party favor tags from Swiss Cottage Designs (which you can download here), but I wanted to add even more personalization to the favor bags. So I turned to my favorite DYMO label maker! I use the classic black embossing tape to label and organize just about everything at home, and it seemed like a fun and modern way of adding a personalized message to the bags. I had my daughter’s upcoming 4th birthday party in mind when creating these favor bags, so I was thrilled to discover the neon pink label tape! Neon pink and iridescent party favors? Done and done. Here’s how to make your own!

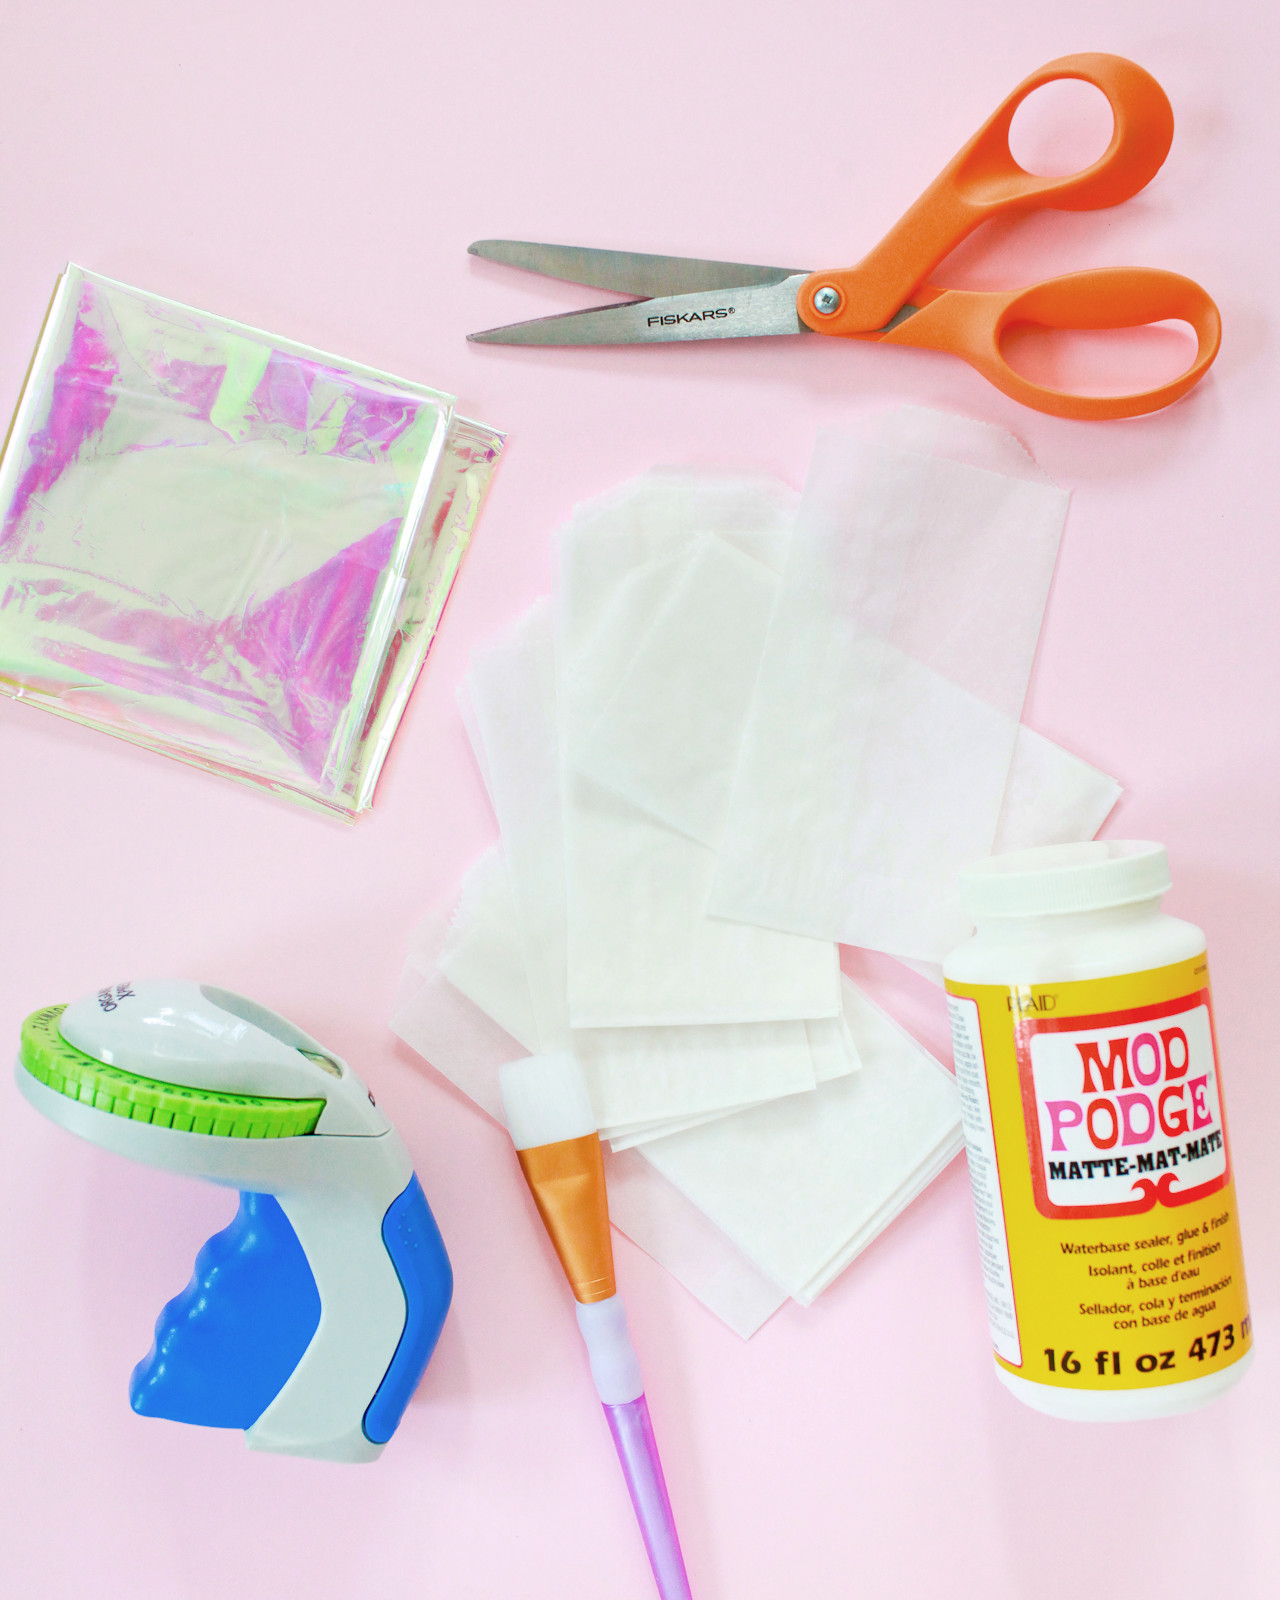
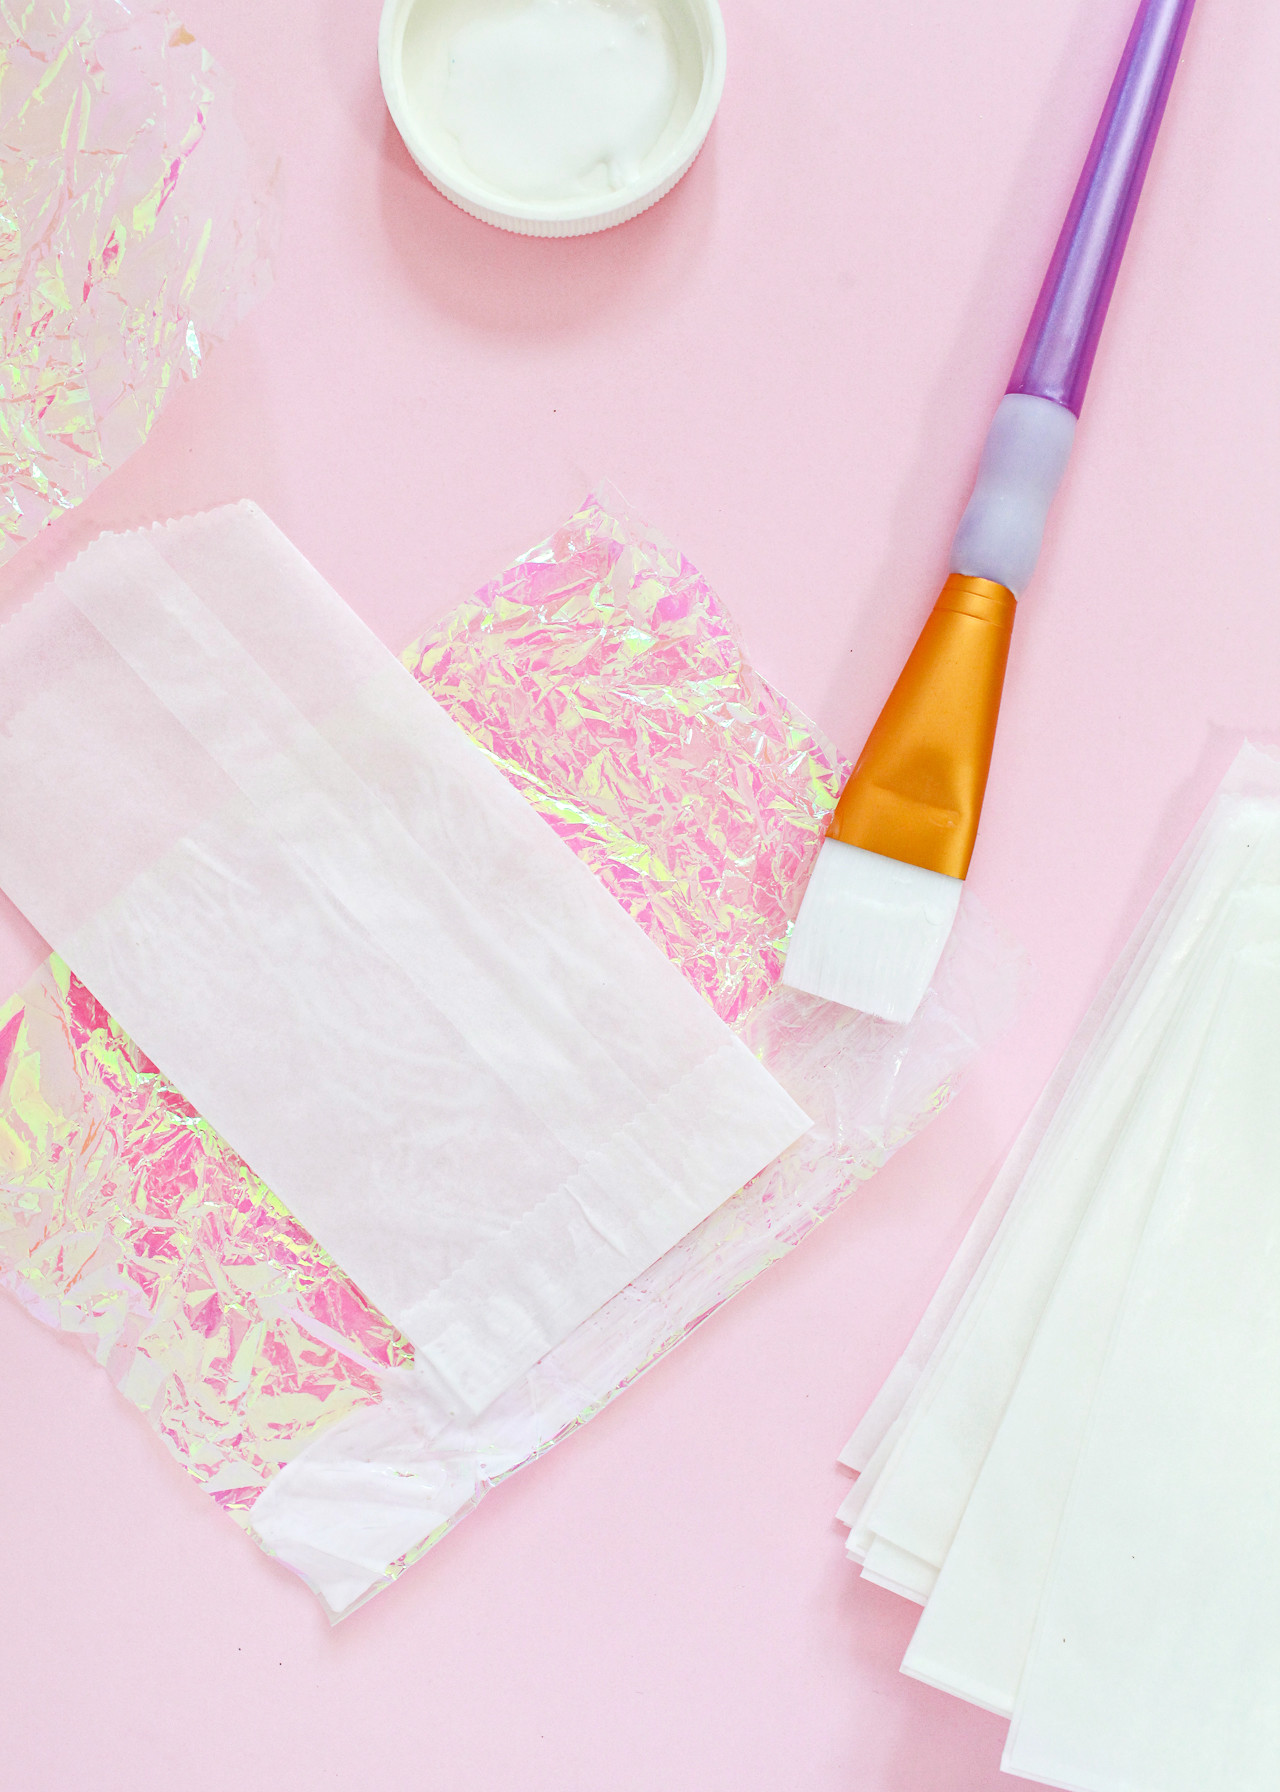
Supplies
- Iridescent cellophane or iridescent tissue
- Glassine Bags
- Scissors
- Mod Podge
- Paintbrush
- DYMO embossing label maker and label tape (I used neon pink and black)
- Washi tape
To make the iridescent favor bags:
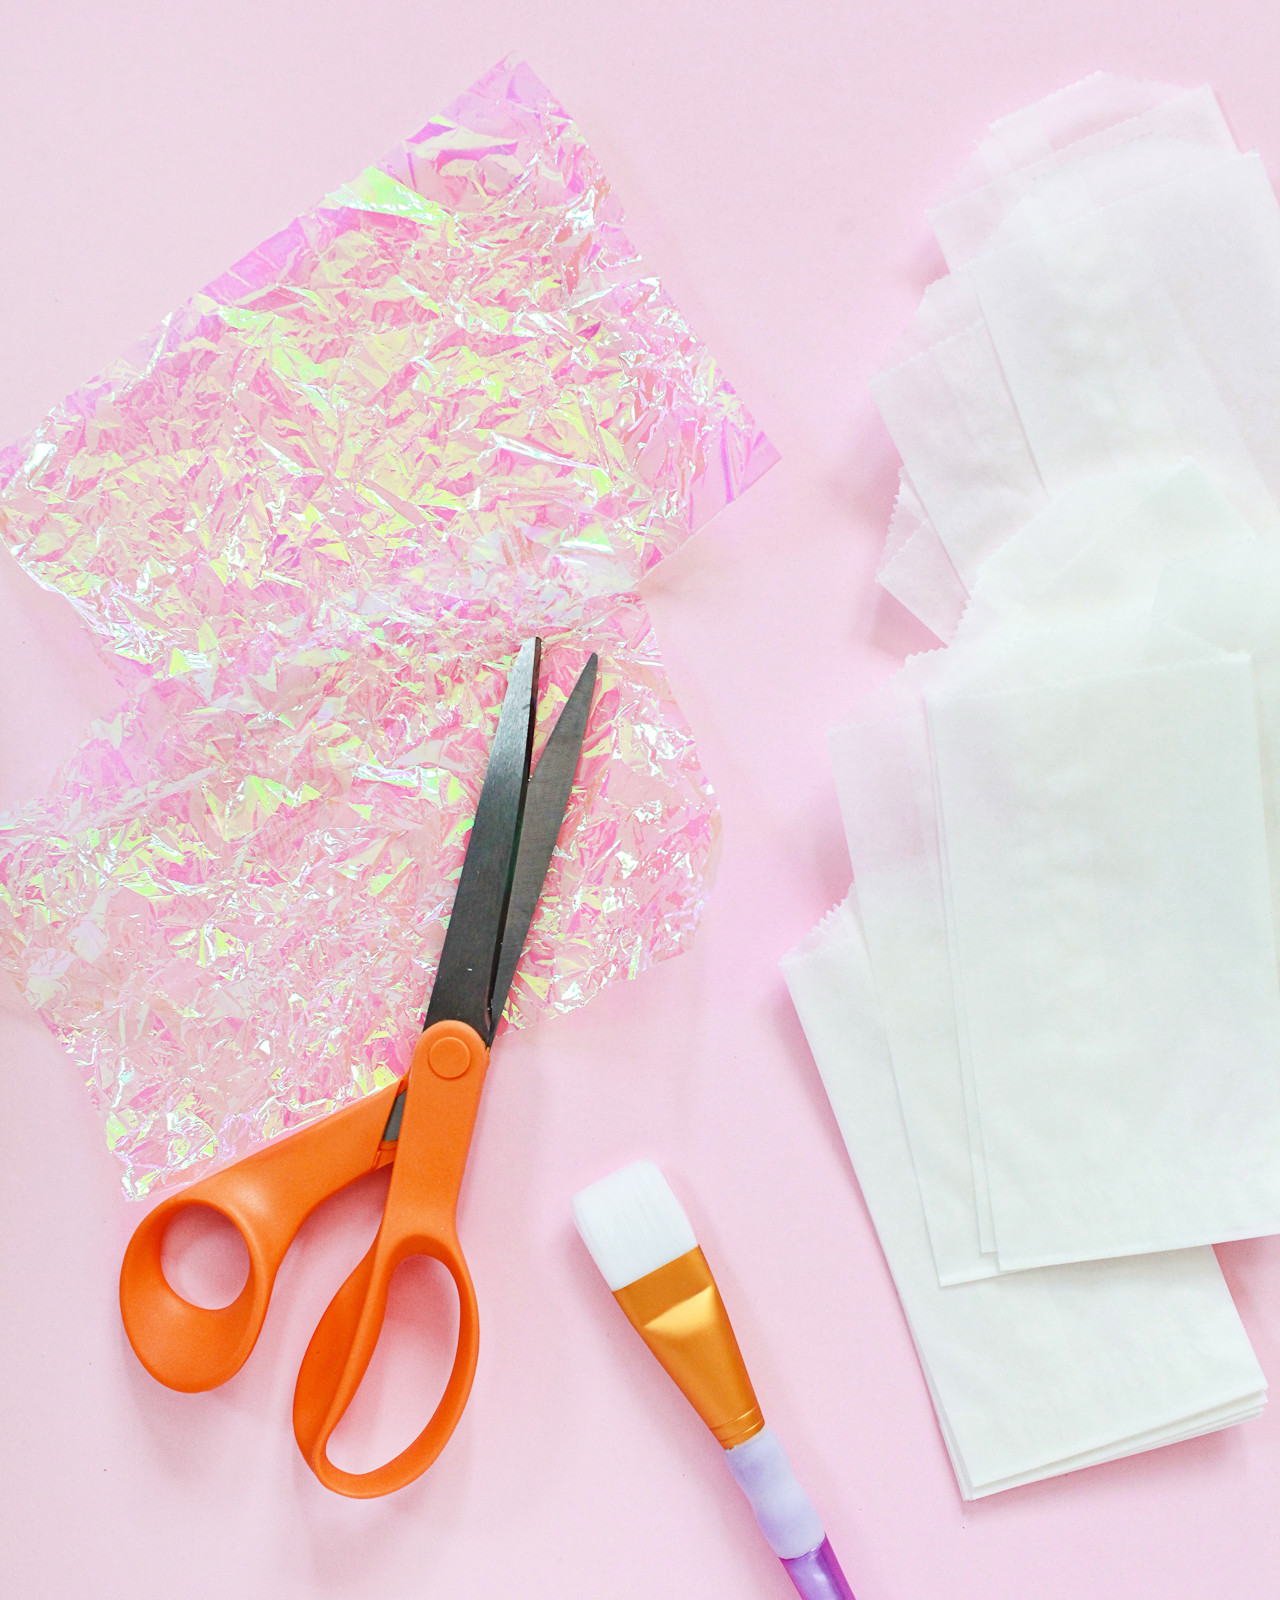
Step 1. Cut a piece of iridescent cellophane or tissue that is twice as wide as the glassine bag and comes about 3/4 of the way up the glassine bag, plus another inch. My glassine bags were 3″ wide by 5.5″ tall, so my pieces were approximately 6″ wide and 4.5″ tall. You’ll need one piece of iridescent cellophane per glassine bag. I made each of my cellophane pieces super crinkly by crumpling several pieces together in my hand, then once again laying them out flat.
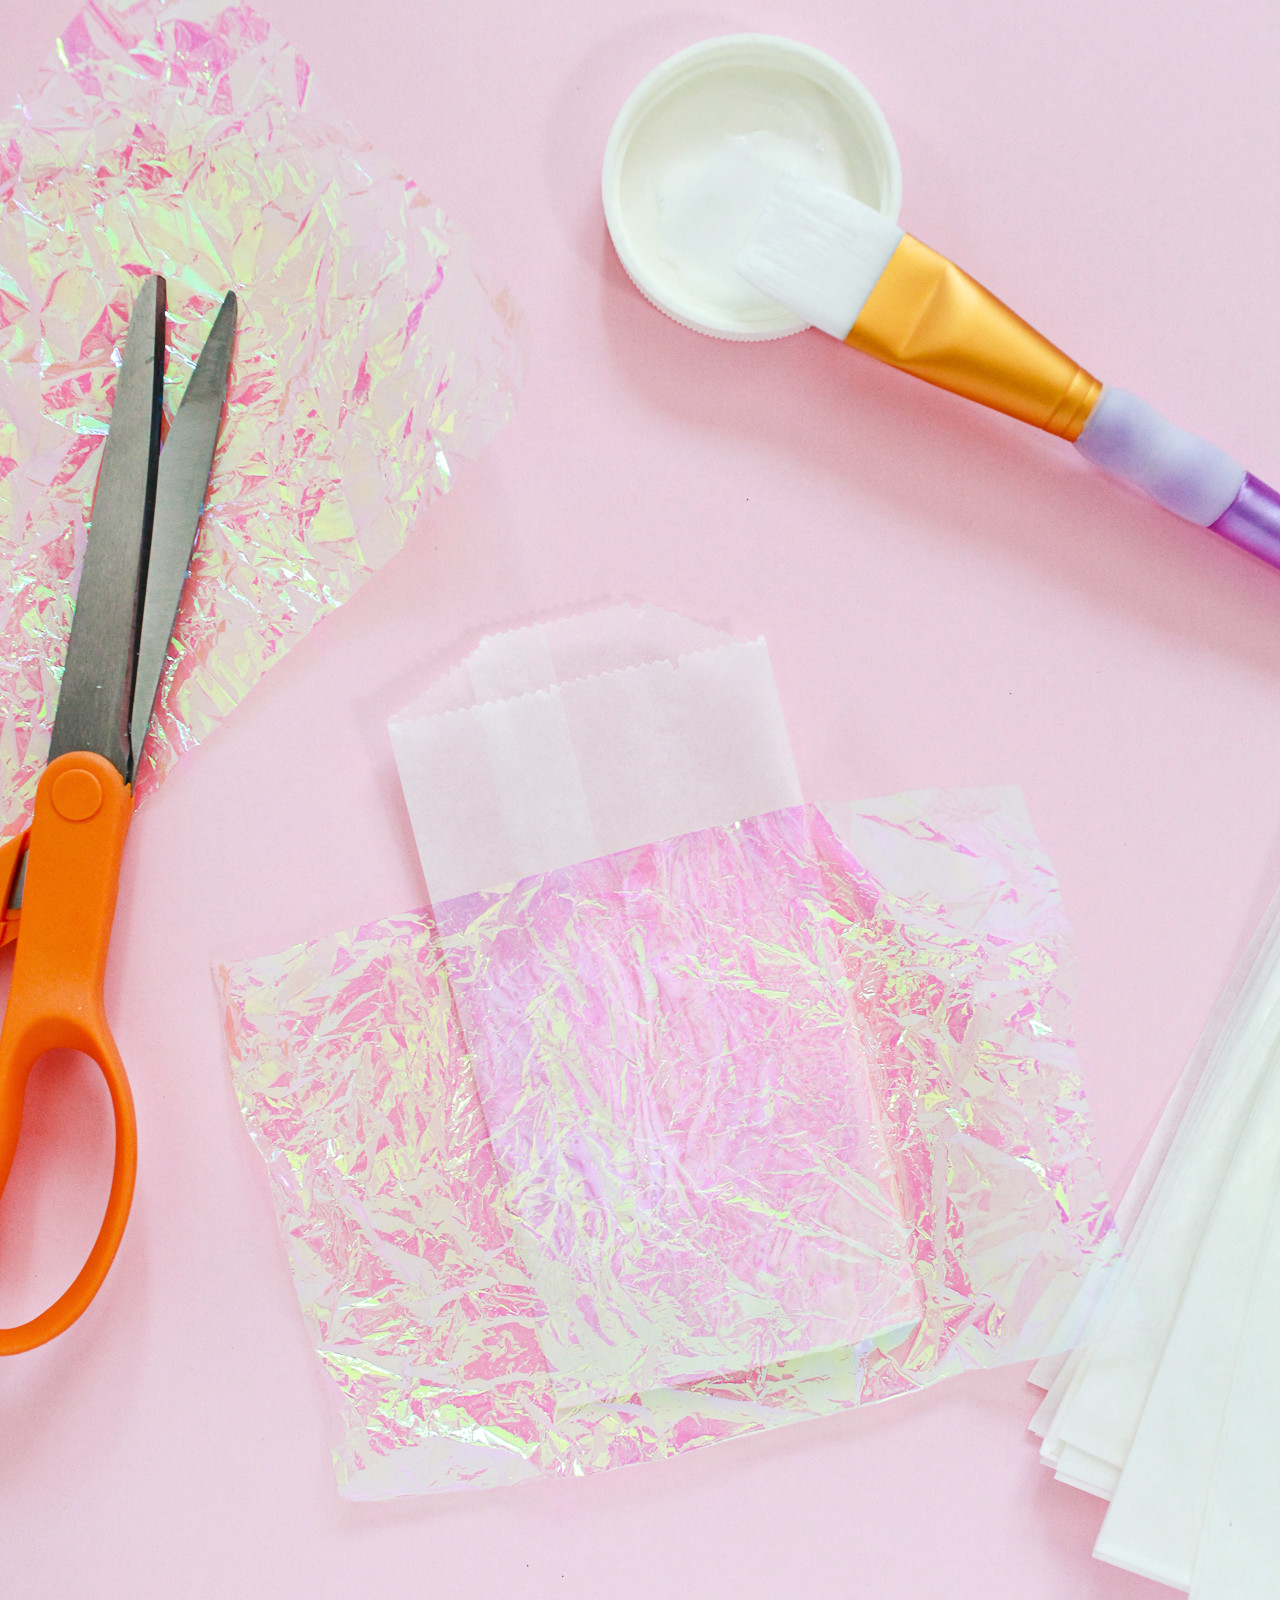
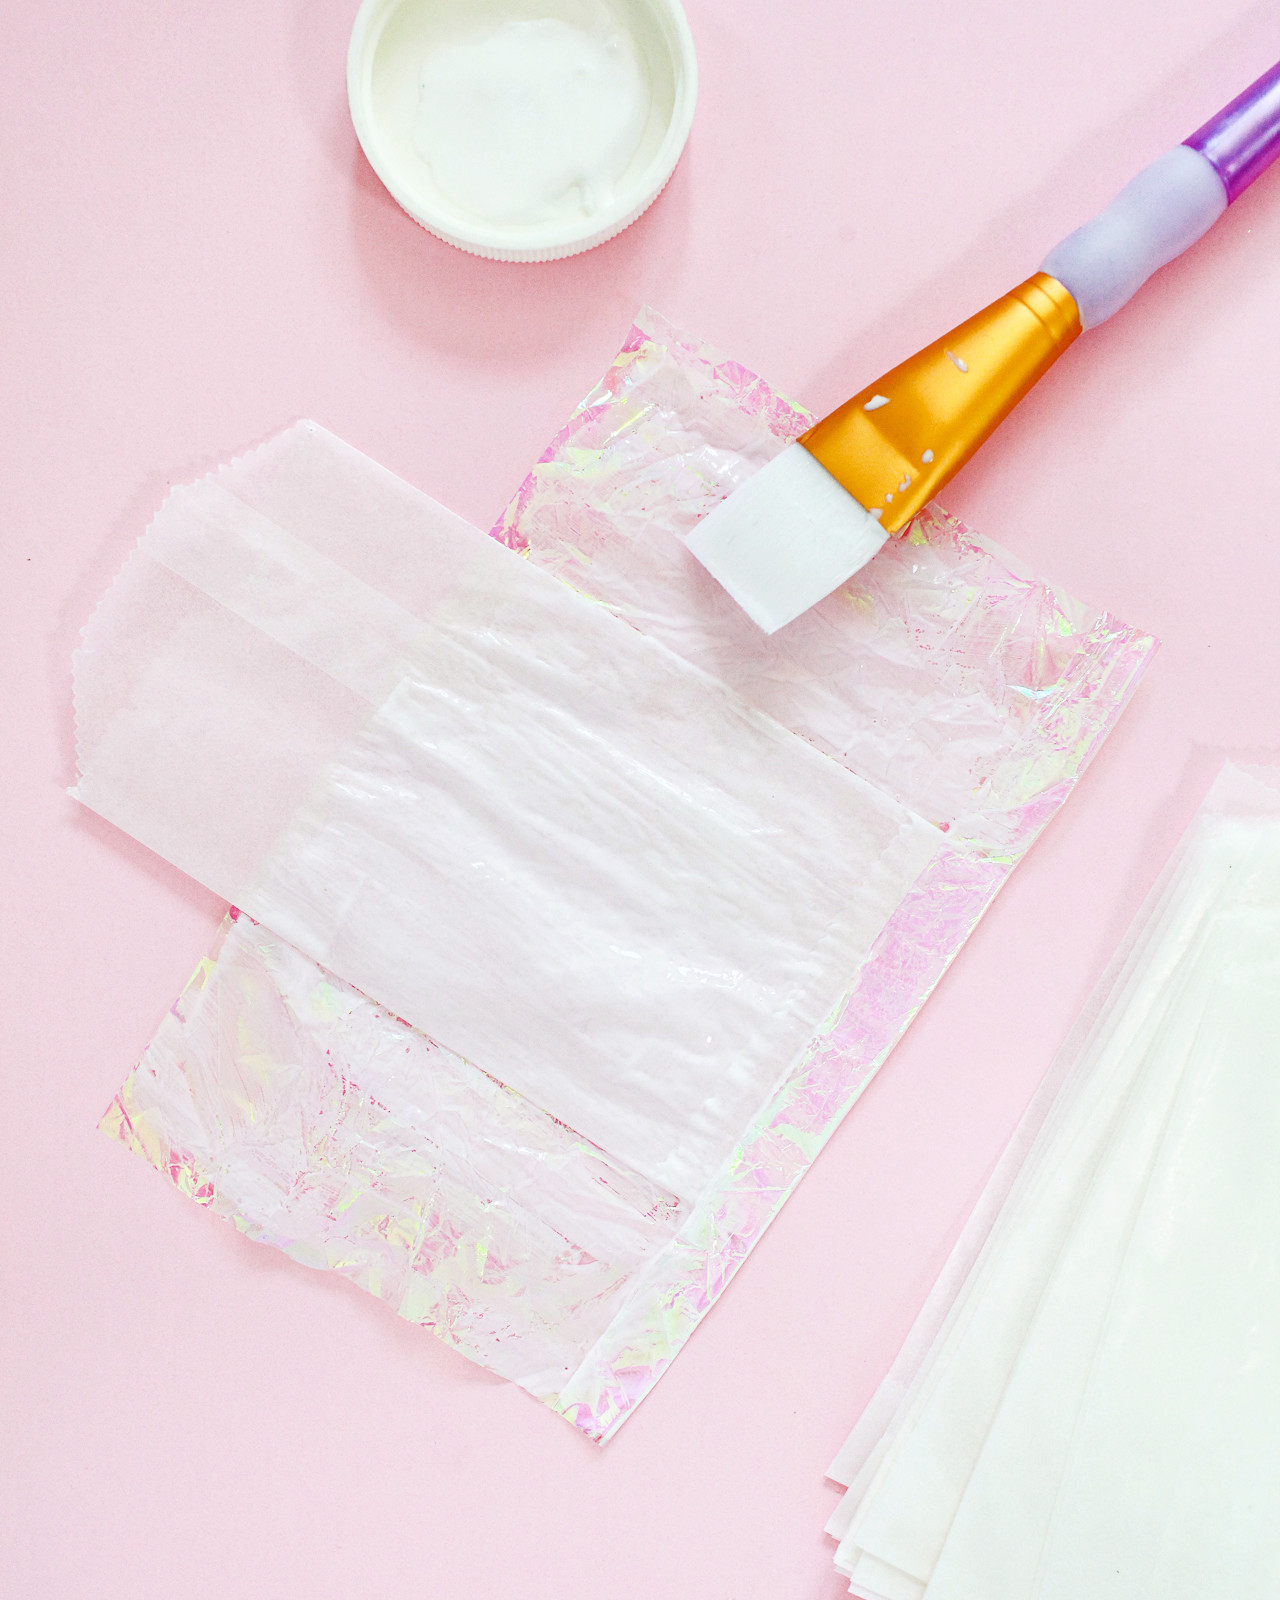
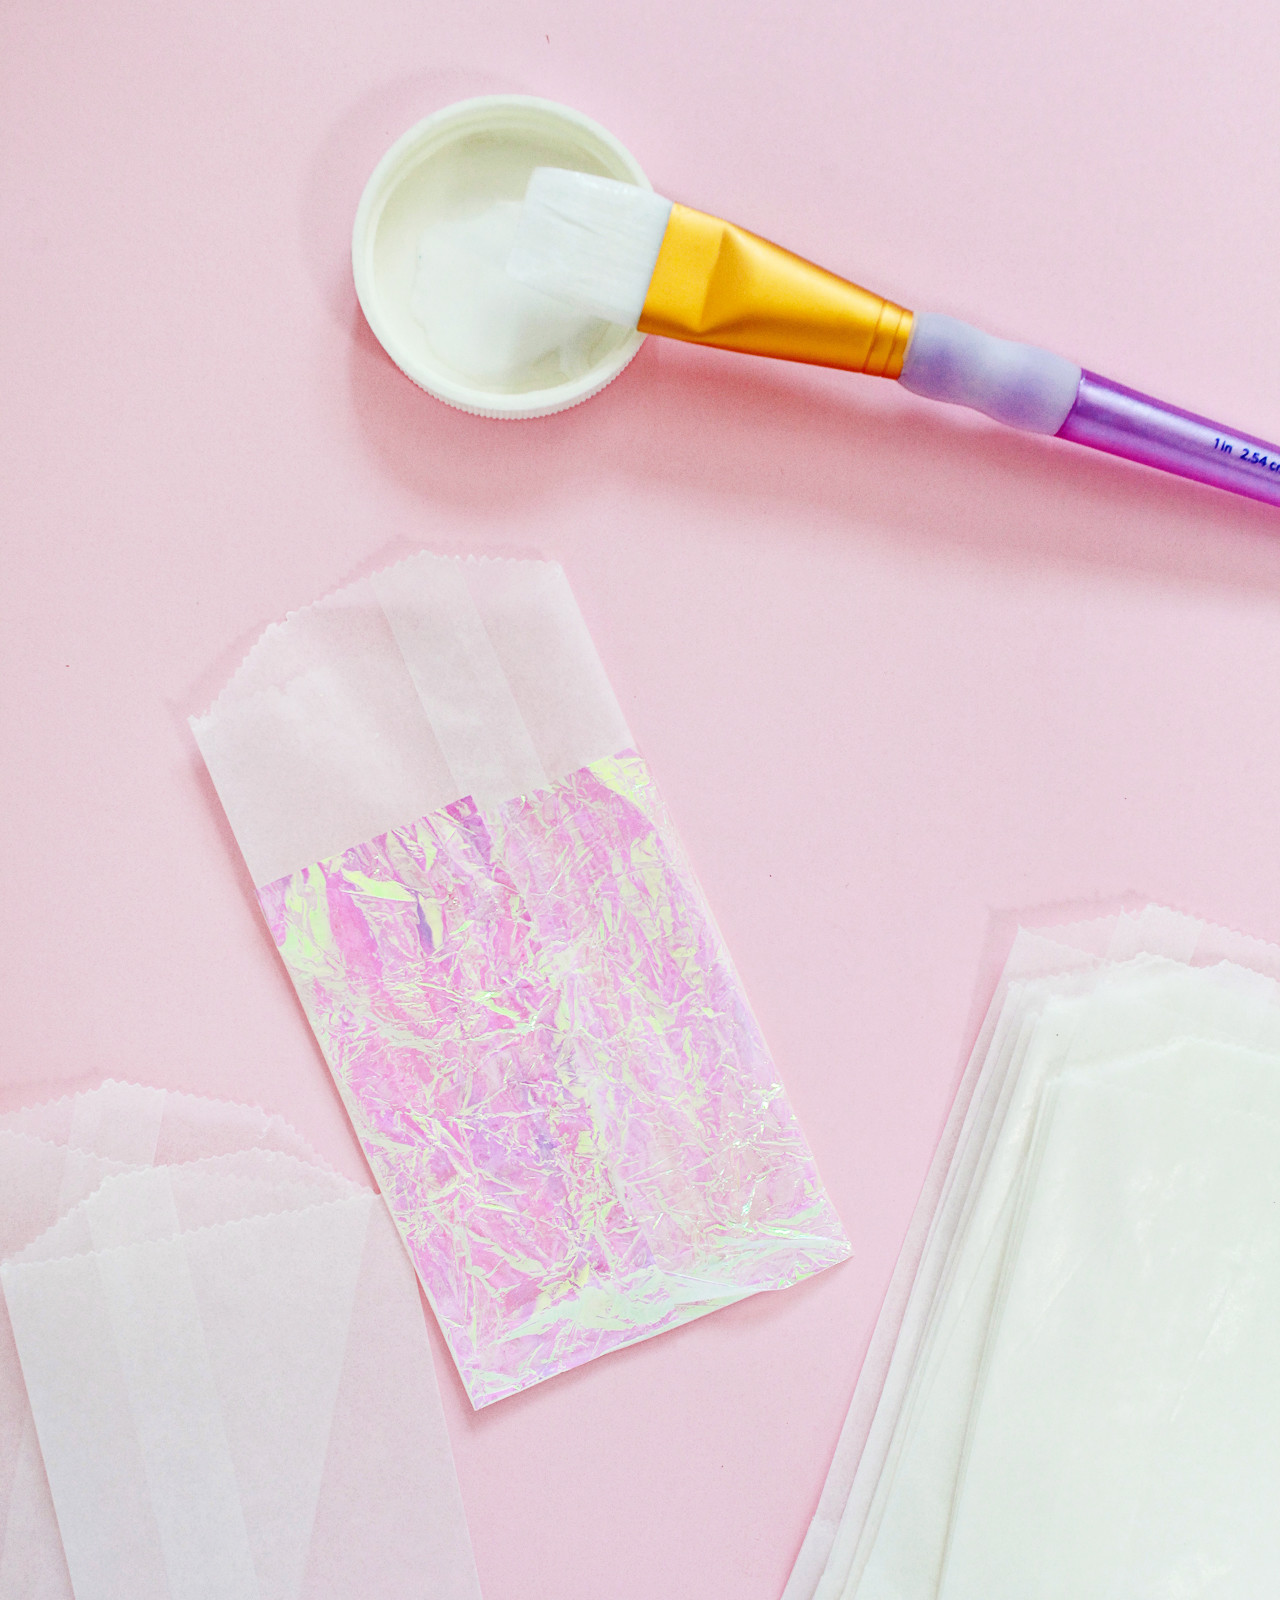
Step 2. Use your paintbrush to apply a thick coat of Mod Podge to the front of the glassine bag. Place the piece of iridescent cellophane (roughly centered) over the glassine bag and press down. Flip the glassine bag and iridescent cellophane over and apply another strip of Mod Podge to the bottom of the glassine bag and iridescent cellophane, then fold the iridescent cellophane over the bottom of the glassine bag and press down. Repeat on both sides until the entire bag is covered in iridescent cellophane. Allow everything to dry completely, ideally overnight.
Step 3. Use your label maker to create a few fun and personalized party messages, and apply the phrases directly to the favor bag. For a kids birthday party I think it would be super cute to have the child’s name, age, and the party date on each bag! For a wedding, the names of the couple and the wedding date. Or keep it simple with a short thank you message – whatever works for your event!
Step 4. Fill each bag with a sweet treat and seal them in the back with a piece of washi tape. Place them in a tray or basket so party guests can grab a bag on their way home!

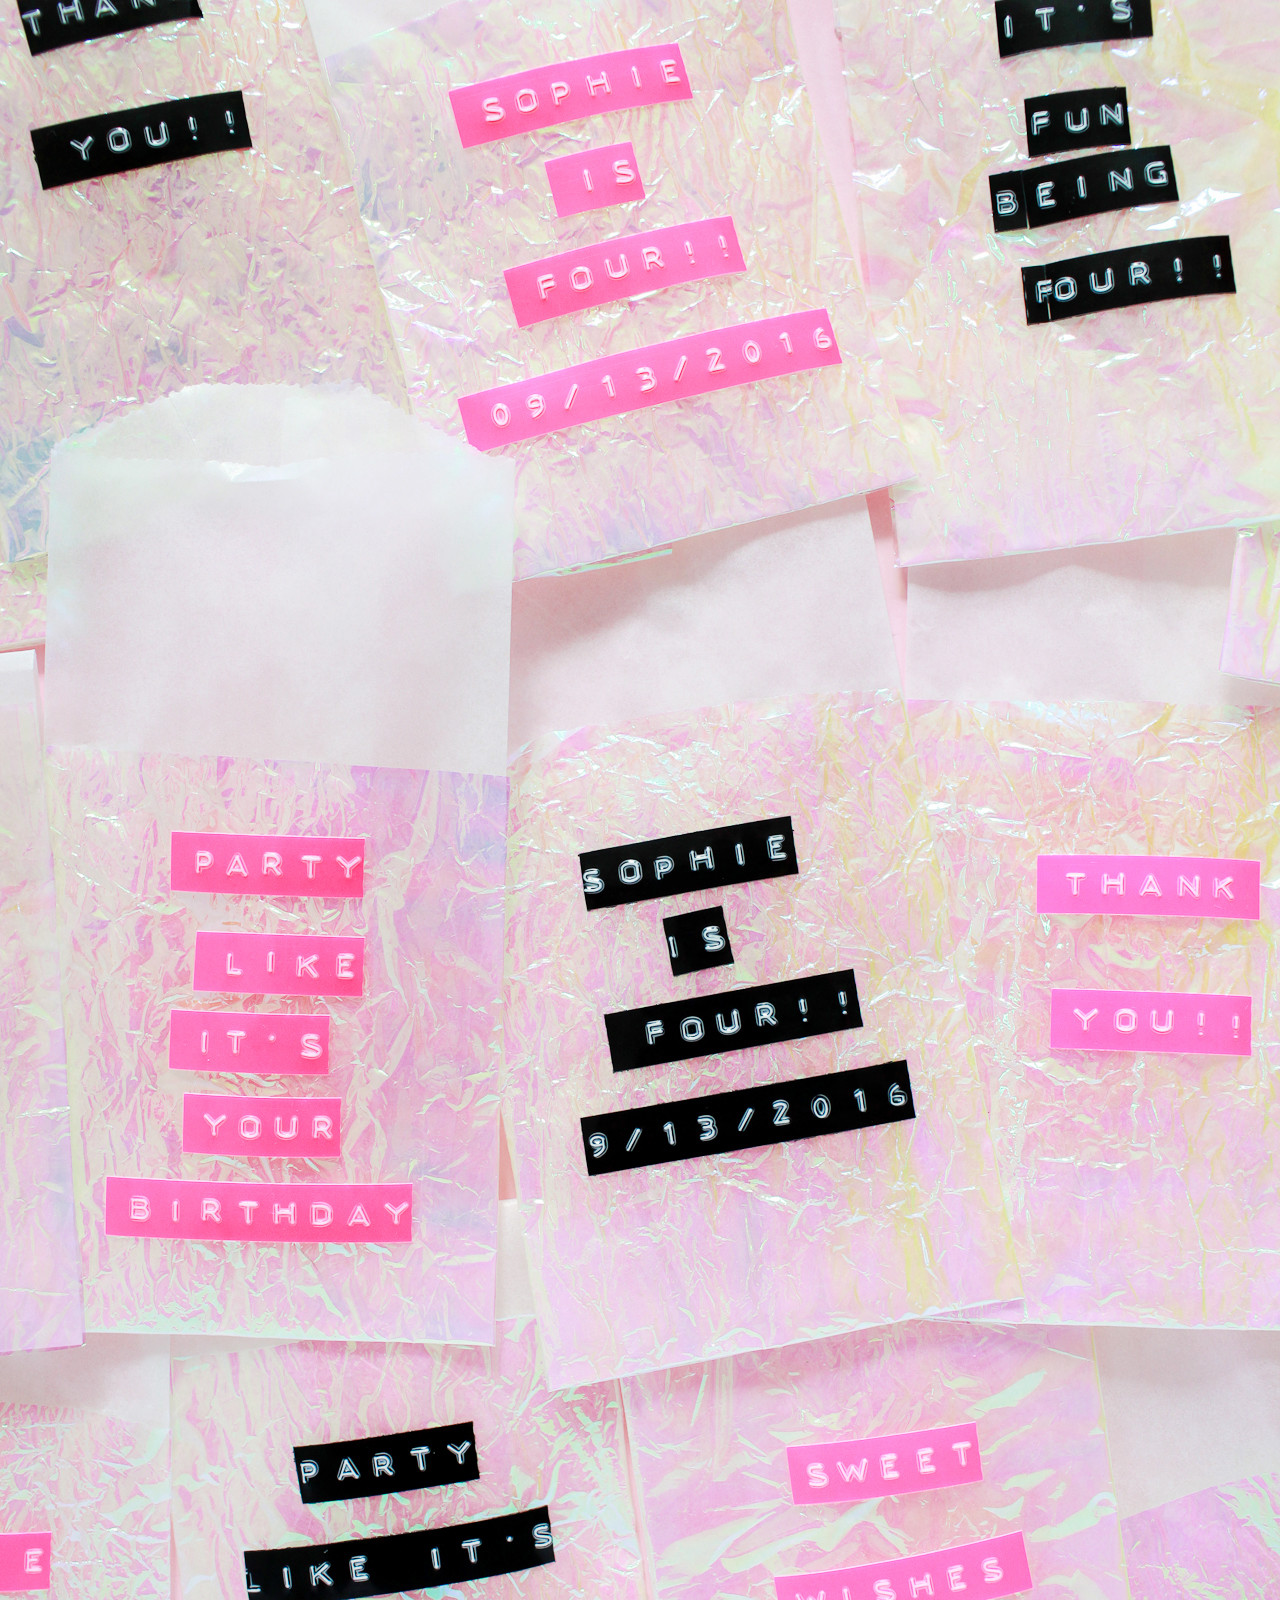
The black label tape is still totally cute, BTW! I love the neon pink for a kids birthday party, but black and iridescent would be a fun combination for a modern wedding, don’t you think??
Aaaaaannnd….. now I kind of want to add an iridescent layer to ALL THE THINGS. It’s so fun and sparkly! What should we iridescent-ify next??
p.s. Iridescent and pastel party favor ideas with printable favor tags!
Photos by Nole Garey for Oh So Beautiful Paper
Eek! These are so gorgeous- and I love the contrast of the old school label maker!