Every morning this week, I’m running a series of guests posts about different printing methods – so if you’ve ever wondered why certain printing methods are best for certain kinds of designs (or cost more than others), this is for you! You can read the previous installments covering digital printing, engraving, screen printing, letterpress printing with antique type, and foil stamping all right here. Today Michael from Czar Press is here to walk us through edge painting!
What is Edge Painting?
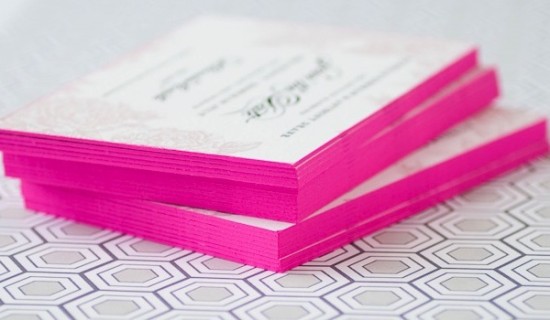
Edge painting at its surface sounds pretty simple – it’s a process by which color is applied to the edges of cards, invitations, even books or journals. Edge painting can be done in any color, including metallics and foils (!), and is usually mixed by hand to be matched to a specific Pantone color.
I’m a huge fan of edge painting for a bold pop of color on business cards and wedding invitations, like the new invitation collections from Bella Figura, Dauphine Press, and many others. While edge painting is a commonly used technique, there is a whole lot of mystery surrounding the process – and printers seem to have different methods or processes for applying edge paint. Today we have Michael from Czar Press walking us through his edge painting process and removing some of the mystery from this popular technique!
The Process
The edge painting process takes place after all graphics and text have been printed and all paper materials cut down to size. For this example, we’re focusing in on a recent business card project. I like to make sure my blade is especially nice and sharp when trimming out cards that are going to be edge painted.
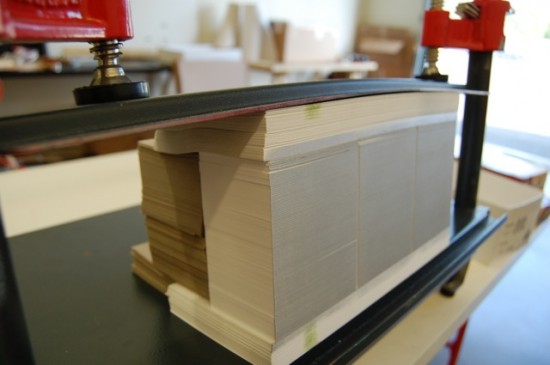
Edge painting involves a padding press (pictured above), ink, and a brayer. The cards should be stacked on the padding press, making sure that the cards are pressed against one wall of the padding press as evenly as possible. Crank down the vice(s) on the press, applying pressure to the cards, making them nice and snug. Remove the outer wall off the padding press, leaving one side exposed. This the side that will receive the ink.
Then using just a little bit of ink, ink up your brayer. Roll the brayer around and around on a piece of glass if possible in attempt to make the ink spread even across the brayer roller. Then I apply the ink to the exposed side of the card, applying as little pressure as possible with the brayer to get good ink coverage on the cards. Once the ink has been applied, I like to gently wipe down the inked side of the cards with a cotton cloth to remove any excess ink.
Let them dry for a while – maybe an hour, depending on conditions – until they are dry to the touch. Put the outer wall back on the padding press, spin the cards around to the next side and repeat until all sides are complete.
Tips and Advice
Most printers recommend thicker papers – usually 160 lb and up – for maximum results with edge painting. Edge painting can be done on thinner paper, but heavier (thicker) paper weights will better show the color and saturation of the ink color.
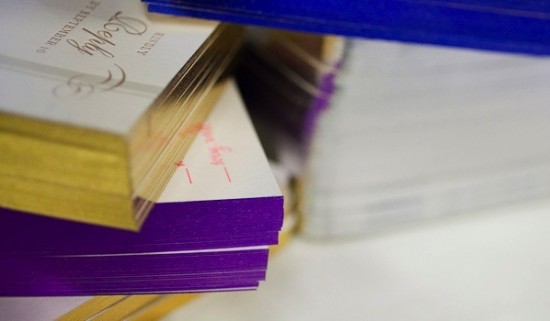
Similarly, most letterpress printers recommend darker or more saturated colors for edge painting. Think bright red, cobalt blue, or even bright neon or metallic foils! As with any custom process, most printers hand mix inks to match a specific Pantone color, so keep in mind that there may be slight variations in tone and saturation depending on the number of cards being painted.
Thanks Michael! Check out more of Michael’s letterpress work right here!
Photo Credits: Example images via Bella Figura, process photos by Czar Press


Love that metallic edge!
What kind of paint did he use?
The foil edge is gorgeous. Do you use a crafting grade gold leaf? I have seen the foil used for letterpress and I would think that there is a different type used for this. Also are you using regular oil based inks to do the edge paiting? So beautiful and what a nice finishing touch!!!
I love the pink and purple edges!
the edge painting police are going to be upset. – thank you for sharing your technique, everyone seems to guard this info with their life.
I’ve tried the brayer myself without greatest of luck but I’ll give it another whirl.
So true! I laughed a little when I read your comment, but it’s the truth. Must hide from the edge-painting police for sure!
thank you for the post! i will be opening my print shop in a few months once our C&P 10×15 is up and running. this is such a valuable resource—finding tutorials on edge painting is like looking for a needle in a haystack.
Thank you for posting this! I’ve always loved edge painting ever since I saw Cheree Berry’s work. I never really knew how it was done though! I’d love to do this to some of our invitation designs too. Such a beautiful and subtle way to add a pop of color.
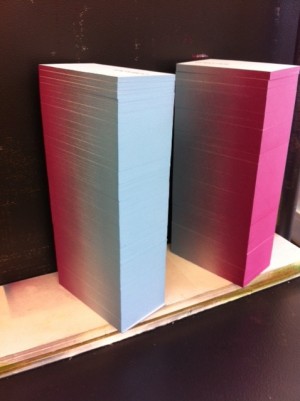
surely the two-toned fade was airbrushed. you can see the overspray on the bottom paper.
i thought that too actually and I have tried a brayer myself and it did not work out so well. I have heard airbruching is best but matching the colour is the usual problem.
I agree. Those cards definitely looked airbrushed. Maybe the edge-painting police got to him first and said to throw everyone off. Now there are hundreds of people tryng to edge paint with a brayer…terrible results, for me anyway.