Oh So Beautiful Paper

  • Contact
  • Submissions
  • Advertising
  • Subscribe
  • real wedding invitations
  • real save the dates
  • designer rolodex
  • about

DIY Tutorial: Perforated Modern Save the Date

08/04/2011

It’s the ladies of Anti­quaria, back with another fab­u­lous and cre­ative DIY project for you all!  This week they’re here with instructions on creating a perforated enclosure for your invitations or save the dates!

For this Save the Date DIY, we were inspired to create a suite that appealed to a more modern aesthetic.  The clean lines of  the black & white design create a classic look while the handmade touches add texture and personality to these otherwise simplistic pieces.  The most exciting part??  It’s so easy to do perforation yourself!!

preforated 550x352 DIY Tutorial: Perforated Modern Save the Date

preforated 1 550x352 DIY Tutorial: Perforated Modern Save the Date

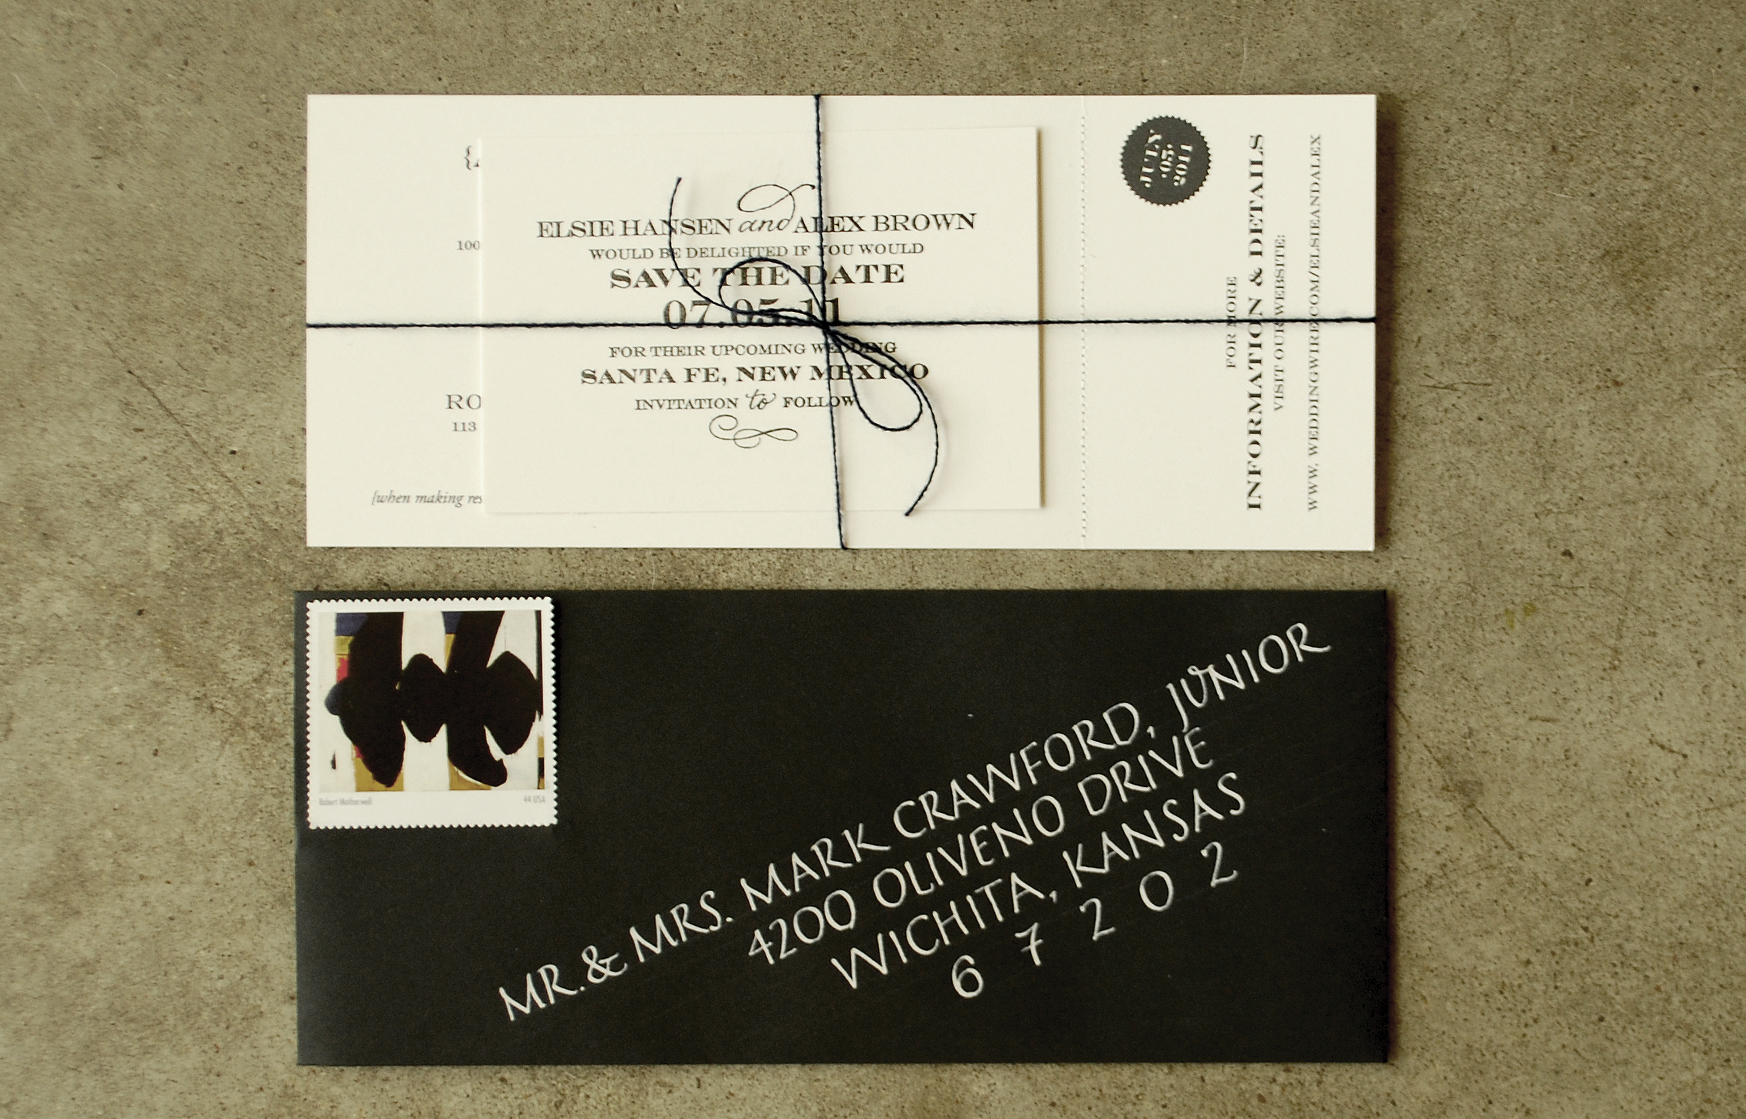
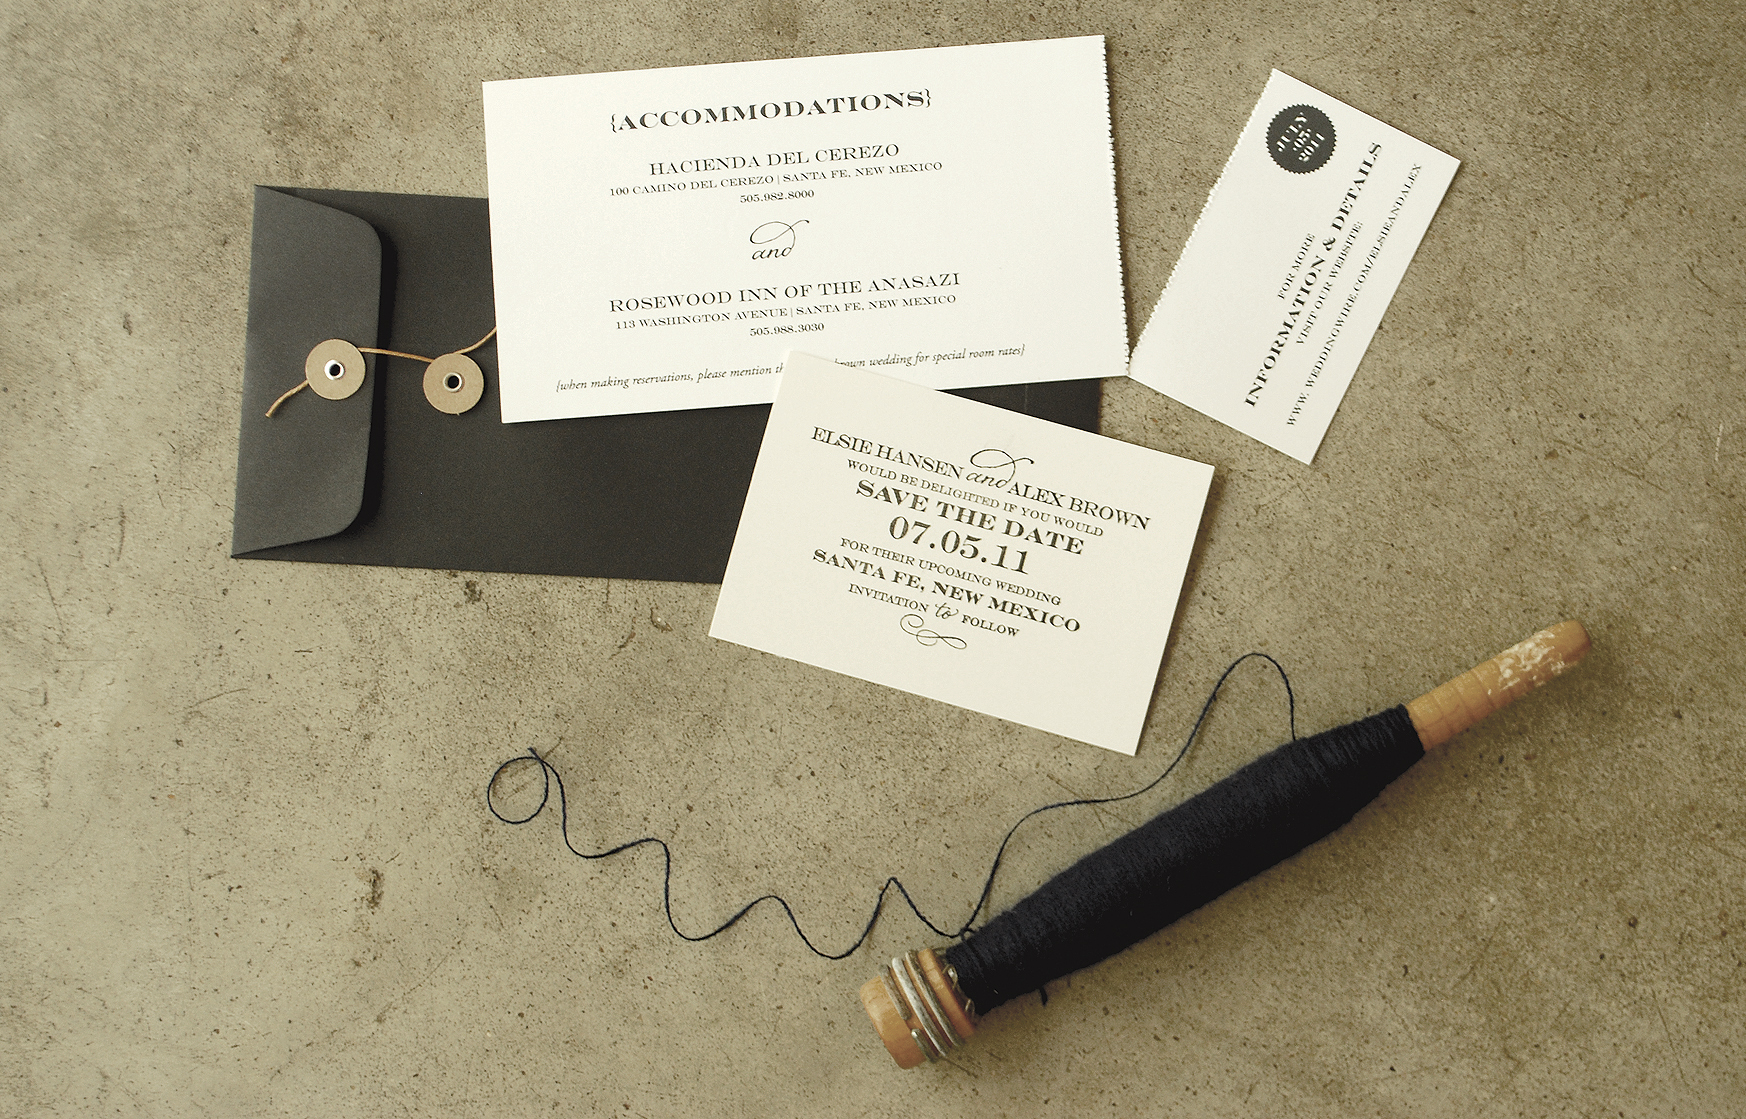
For this suite, we combined a printed accommodations/website card with our “Sophisticate” save the date stamp to provide layers of texture.  We recommend sending out the accommodations and website information with your save the date so that guests have plenty of time to make arrangements.  The perforated website card is small and useful.  Guests can take this small piece to the computer or travel agent to book their trip.

preforated1 550x352 DIY Tutorial: Perforated Modern Save the Date

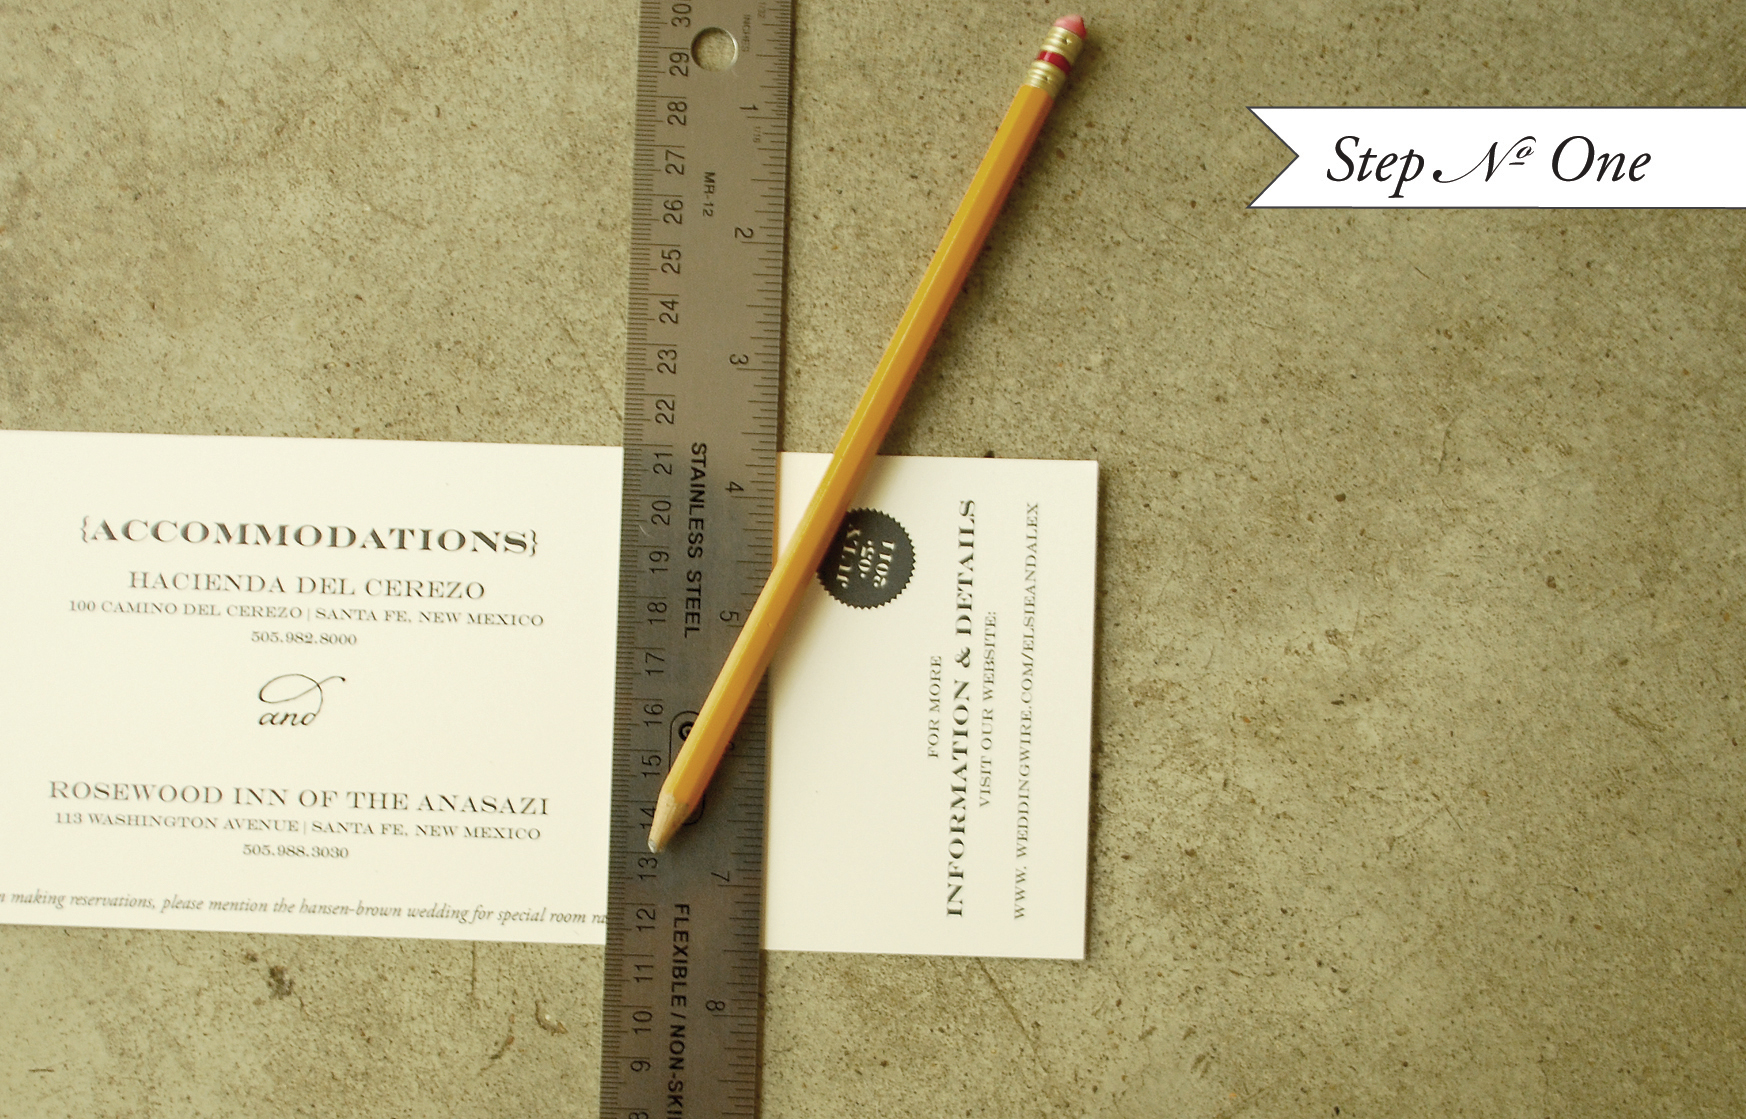
Step One: Using a pencil & ruler, faintly mark where you want the perforated line to be.

Preforated2 550x352 DIY Tutorial: Perforated Modern Save the Date

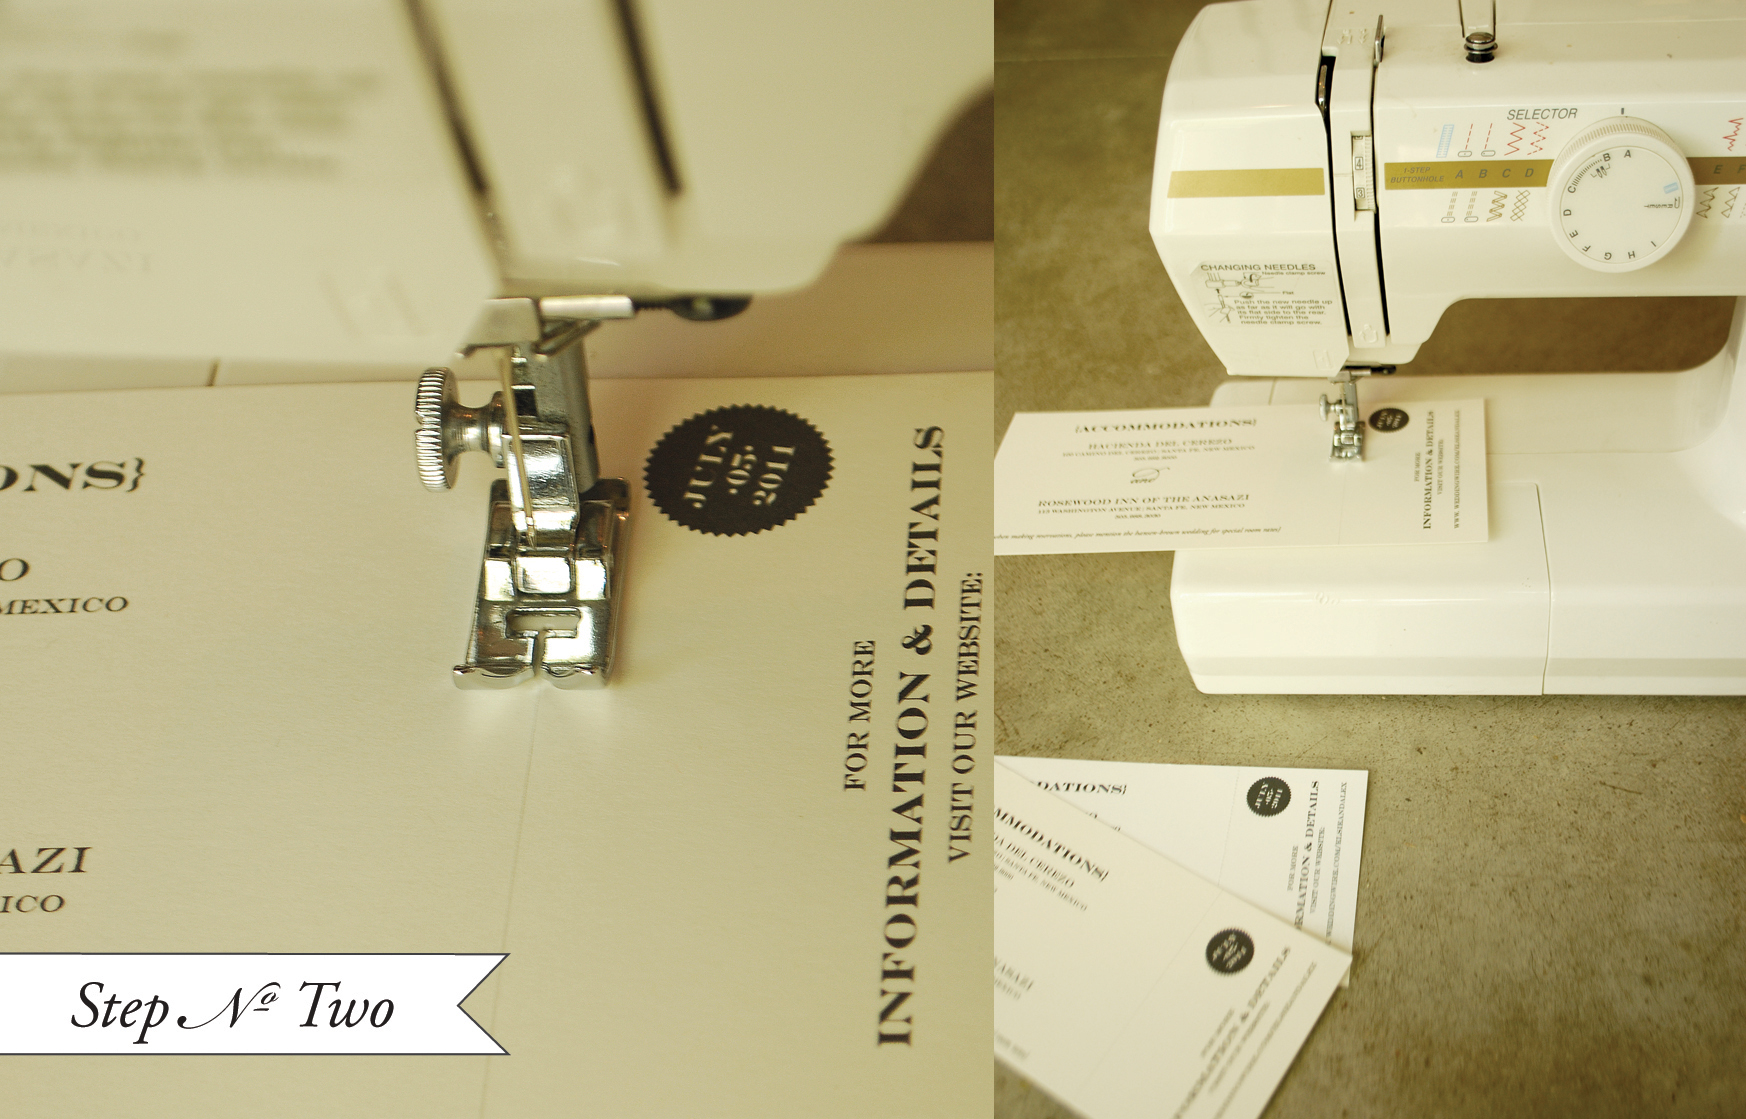
Step Two: Remove the thread from your sewing machine (top spool & bobbin).  Set your stitch length to be relatively small (we set it on 2 on a scale of 1-4).  Sew along the pencil line.  Since there is no thread in the machine, all that will be left are tiny needle holes that create the perforation.

preforated3 550x352 DIY Tutorial: Perforated Modern Save the Date

preforated4 550x352 DIY Tutorial: Perforated Modern Save the Date

Step Three: On a hard, flat surface, lay out your paper that you want to stamp.  Ink your stamp (we used the “Sophisticate” save the date) in desired color, lay down gently on paper and give the stamp even pressure. Remove the stamp to reveal your inked image.

Preforated5 550x352 DIY Tutorial: Perforated Modern Save the Date

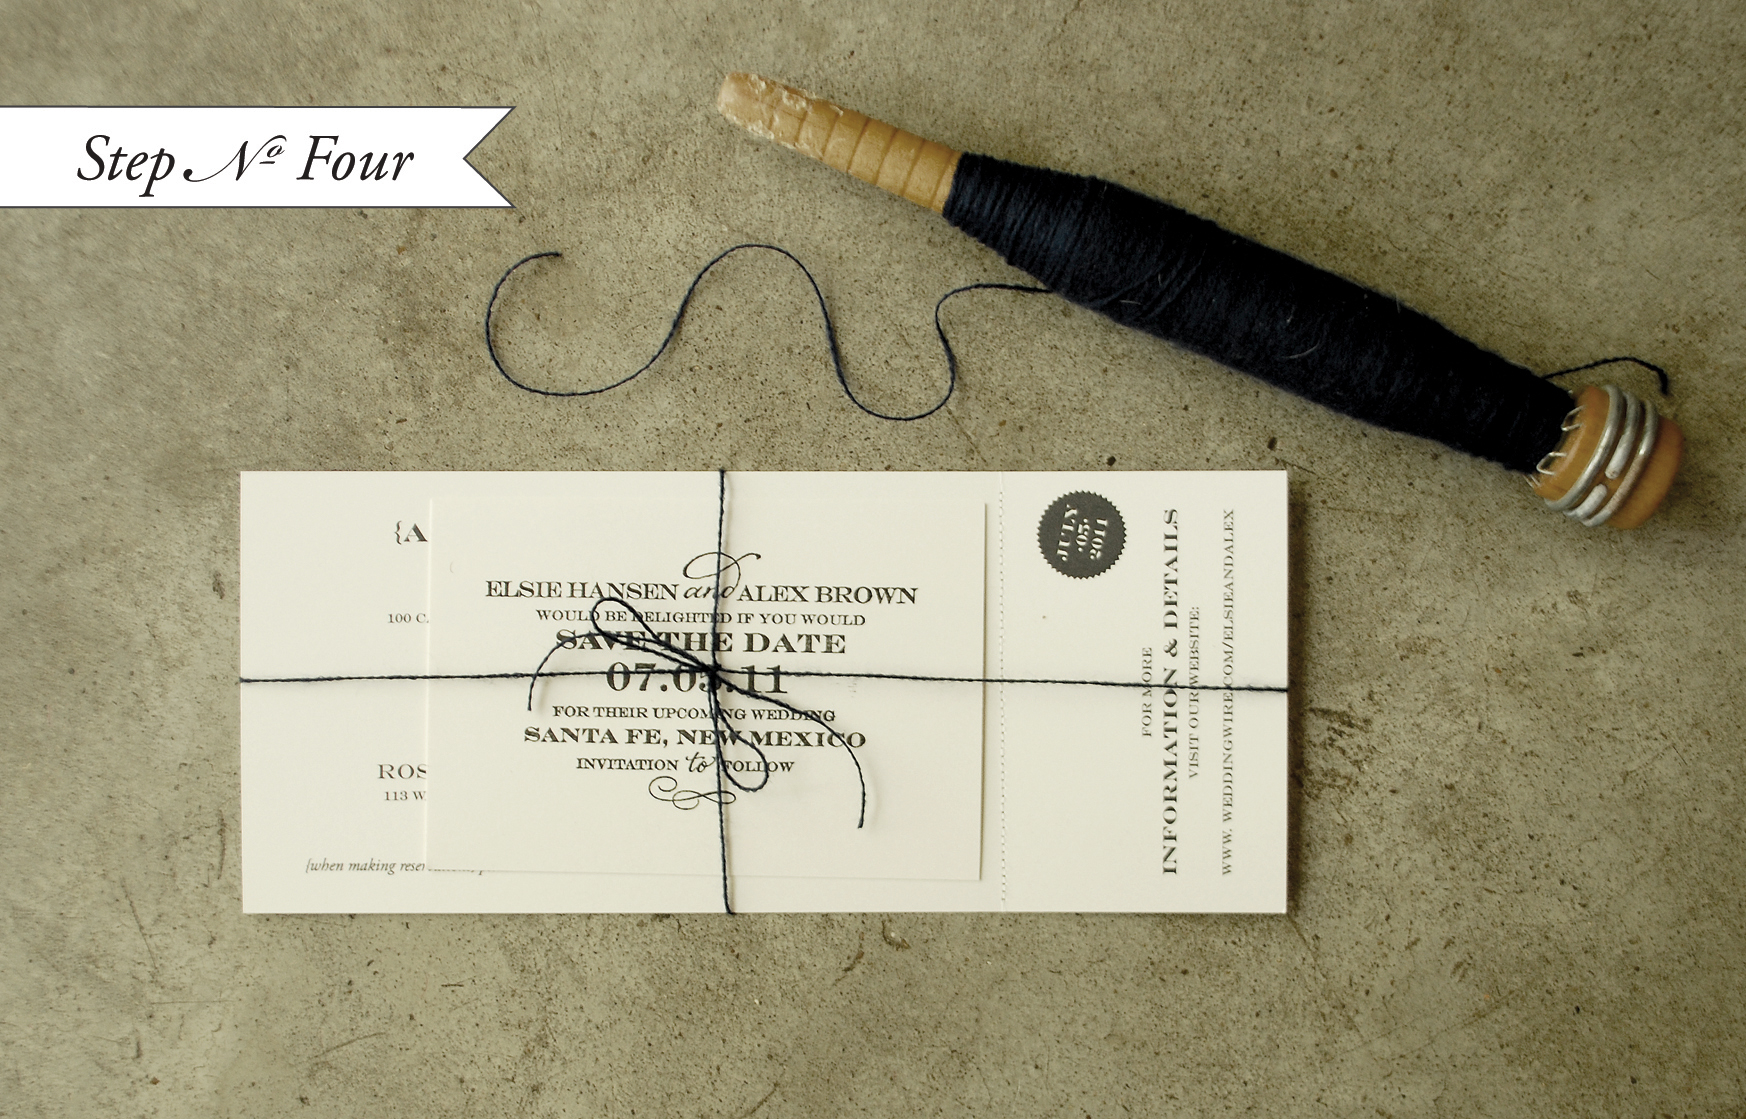
Step Four: Tie the pieces together with a string.  Now all that’s left is address and mail them!!

** Please make sure to “hand cancel” the postage if you use the string and button envelopes.  This will help to make sure the Save the Date arrives in pristine condition.


Materials:

Custom Rubber Stamp – we used our “Sophisticate” Save the Date stamp

Accommodations/website card – Use a word processing program or design software to create an #10 card.  We have also just recently added an accommodations rubber stamp to our webstore, see the whole collection here.

Paper – We used the Paper Source Luxe, white cover stock (8.5″x11″) for this tutorial. Have the paper cut to size to fit the #10 envelope (3.75″x9″) for the accommodations/website card. Have the paper cut to (3″x4″) for the Save the Date card.

Envelope – We love the string and button tie of this #10 envelope

Ink – We used black for this suite.

Black embroidery thread – you can find this at your local craft or fabric store.

Photo Credits: Antiquaria

pixel DIY Tutorial: Perforated Modern Save the Date
posted by Antiquaria   /   filed under antiquaria, diy, guest posts, ideas + inspiration, save the dates   /   7 Comments
Comments
7 Responses to “DIY Tutorial: Perforated Modern Save the Date”
  1. Michelle @ Hey Love Designs
    Twitter: heylovedesigns
    says:
    08/08/2011 at 10:26 AM

    So beautiful!

  2. Gudrun says:
    08/05/2011 at 3:12 PM

    In the first photo is that a stamp with a Robert Motherwell image on it?!? If so, how cool! And how do you come by these????

  3. Danelle
    Twitter: danelle_b
    says:
    08/05/2011 at 4:00 AM

    Was just about to repeat what Ashley said! I don’t have a sewing machine and don’t know anyone with one so the x-acto perforator is absolutely perfect. So cheap and you can get different types of blades for it. I used it to create the tear off RSVP card on the passport wedding invitation I designed! http://www.danellebourgeois.com/blog/2011/02/wedding-invitation-obsessed

  4. Ashley says:
    08/04/2011 at 2:04 PM

    Instead of using a sewing machine, Fiskars and x-acto knife brands sell blades for perforated lines. They sell them at Michaels starting at $2. I bought one and it’s so easy to use–much easier than dealing with a sewing machine.

  5. Punctuation Mark
    Twitter: eliefournier
    says:
    08/04/2011 at 1:21 PM

    i love that these look very elegant… somehow very jane austen like!

  6. Danielle B
    Twitter: BDRstudio
    says:
    08/04/2011 at 12:53 PM

    What a great idea! I never thought to use a sewing machine to perforate, thanks of the hot tip!

Trackbacks

Check out what others are saying about this post...
  1. BLACK + WHITE | Slope + Sea says:
    12/20/2011 at 1:05 AM

    [...] classy black and white from ohsobeautifulpaper. [...]


Social media menu and search

  • Twitter
  • Facebook
  • Pinterest
  • Instagram

Sidebar – Premium Ads


Rolodex Featured Member – Top

Rolodex Featured Member – Photo

Rolodex Featured Member

ALBERTINE PRESS

From classic and elegant to witty and irreverent, Albertine Press is a Boston-area letterpress design and print studio that works closely with couples to help craft unique paper goods for their weddings. All of our work is hand-printed with antique presses onto 100% cotton (tree free) paper – the exquisite texture and quality of our finished work is certain to make an impression!

Check out Albertine Press in the Designer Rolodex here!

Rolodex Featured Member – Bottom Border

Sidebar – Half Banners + Small Banners


Categories

Categories
  • announcements
  • baby stationery
  • business collateral
  • calendars
  • calligraphy
  • cocktail recipes
  • dc guide
  • design trends
  • designer profiles
  • diy
  • engraving
  • fashion
  • gift wrap
  • greeting cards
  • guest posts
  • holiday
  • home + interiors
  • ideas + inspiration
  • kids party invitations
  • letterpress
  • media + packaging
  • office stationery
  • paper artwork
  • paper goods
  • party invitations
  • place cards
  • real invitations
  • save the dates
  • screen printing
  • stationery
  • studio tours
  • the printing process
  • today I love…
  • trade shows
  • wedding details
  • weekly round-up

Printing Methods Header

Printing Methods

  • Block Printing
  • Die Cutting
  • Digital Printing
  • Edge Painting
  • Engraving
  • Foil Stamping
  • Letterpress Printing
  • Letterpress Printing with Antique Type
  • Offset Printing
  • Screen Printing

Favorite Posts

A tour of Crane & Co. stationery:
Part 1, Part 2, Part 3, Part 4

Alyson + Levi's Nature-Inspired Wedding Invitations

Mitchell + Dent Wedding Invitation Collection

Afternoon at the Athenaeum

Pink + Gold Wedding Invitations

Kate + Nick's Typography Save the Dates

Jen + Dan's Wedding Scrapbook + Polaroid Album

Alyson's DIY Scratch Pad Notebooks

DC Guide – Top

DC Guide – Illustration

DC Guide – Text

Planning a visit to Washington, DC? Check out my mini-guide to DC, including where to go, places to eat, and more!

DC Guide – Bottom

Favorite Places header

Favorite Places

Blogroll

  • FPO: For Print Only
  • lovely stationery
  • making it lovely
  • mint
  • oh happy day
  • oh joy!
  • poppytalk
  • snippet + ink
  • the haystack needle
  • the sweetest occasion
  • unruly things
  • wit + delight
  • you are my fave
  • {frolic!}

More OSBP


TWITTER | FACEBOOK | PINTEREST | SUBSCRIBE

Designer Rolodex

Archives header

Archives

Archives

  • 2012
    • January
    • February
    • March
    • April
    • May
  • 2011
    • January
    • February
    • March
    • April
    • May
    • June
    • July
    • August
    • September
    • October
    • November
    • December
  • 2010
    • January
    • February
    • March
    • April
    • May
    • June
    • July
    • August
    • September
    • October
    • November
    • December
  • 2009
    • January
    • February
    • March
    • April
    • May
    • June
    • July
    • August
    • September
    • October
    • November
    • December
  • 2008
    • September
    • October
    • November
    • December

Press · Policies · © 2008-2012, Oh So Beautiful Paper, all rights reserved · Advertise · Badges