Amy + Doug’s Western Romance Lace-Inspired Wedding Invitations

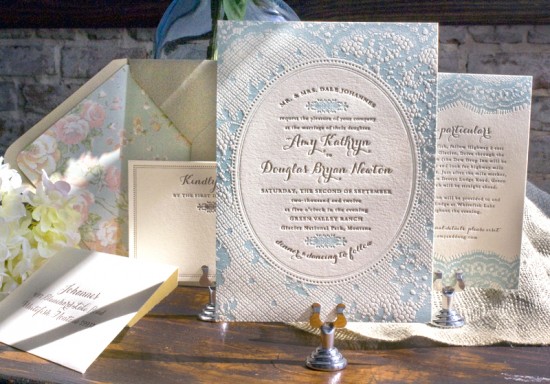
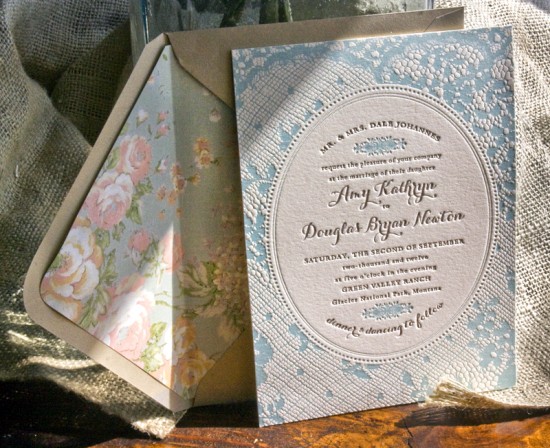
Amy and Doug wanted wedding invitations that reflected their romantic and rustic wedding style while also maintaining a certain level of formality and sophistication.  They worked with the team at Lucky Luxe Couture Correspondence to create a beautiful lace-inspired invitation suite that incorporates traditional but non-fussy wording and envelope liners made from vintage floral wallpaper.  So pretty!
Vintage-Inspired Country Lace Wedding Invitations by Lucky Luxe Couture Correspondence via Oh So Beautiful Paper (5)
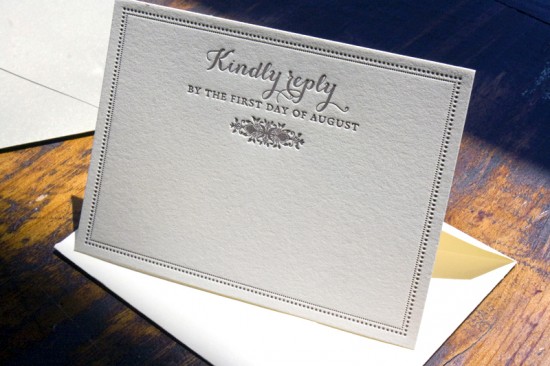
From Erin at Lucky Luxe Couture Correspondence: Amy told us that she was planning a romantic western wedding overlooking Glacier National Park, with a wooden barn and log lodge as backdrops.  The wedding weekend will start with a kitschy Western theme rehearsal dinner, followed by a more formal and refined wedding with rustic linen and lace.

Vintage-Inspired Country Lace Wedding Invitations by Lucky Luxe Couture Correspondence via Oh So Beautiful Paper (3)
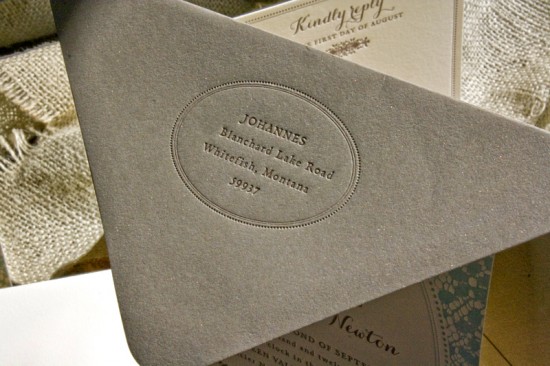
We imagined homemade cotton dresses, lace, and simple fonts without any fussy language.  The envelope liners are made from vintage floral wallpaper in shades of blue, peach, and cream.

Vintage-Inspired Country Lace Wedding Invitations by Lucky Luxe Couture Correspondence via Oh So Beautiful Paper (7) Vintage-Inspired Country Lace Wedding Invitations by Lucky Luxe Couture Correspondence via Oh So Beautiful Paper (6)
We created handkerchief save the dates for the wedding with kraft paper envelopes, and since Amy was looking for something a little more refined but nothing too traditional, we used a metallic sand-colored envelope that looks like kraft paper’s glamorous sister for her invitation suite.

Vintage-Inspired Country Lace Wedding Invitations by Lucky Luxe Couture Correspondence via Oh So Beautiful Paper (2)
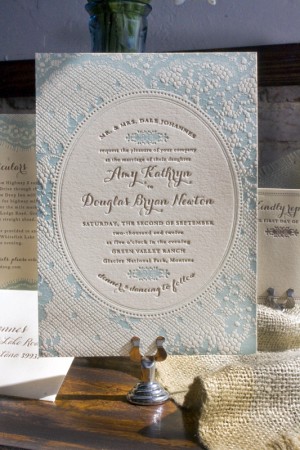
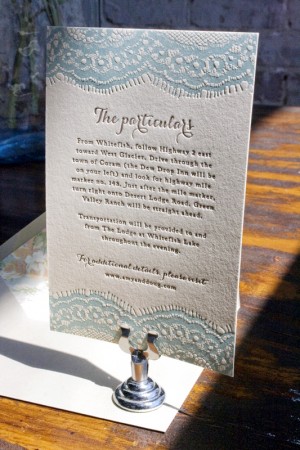
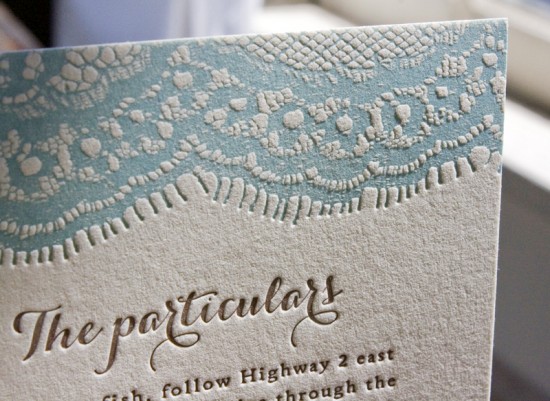
We used vintage eyelash lace to create the artwork used throughout the suite and printed in robin’s egg blue and subtle metallic bronze on 100% cotton ecru paper.  The small floral icons are from a circa-1900 cookbook that tie in with the vintage envelope liners.

Vintage-Inspired Country Lace Wedding Invitations by Lucky Luxe Couture Correspondence via Oh So Beautiful Paper (4)
Vintage-Inspired Country Lace Wedding Invitations by Lucky Luxe Couture Correspondence via Oh So Beautiful Paper (1)
Thanks so much Erin!

Lucky Luxe Couture Correspondence is a member of the Designer Rolodex – you can see more of their beautiful work right here or visit the real invi­ta­tions gallery for more wedding invitation ideas!
Photo Credits: Lucky Luxe Couture Correspondence
Lauren + Josh’s Pacific Northwest Summer Wedding Invitations

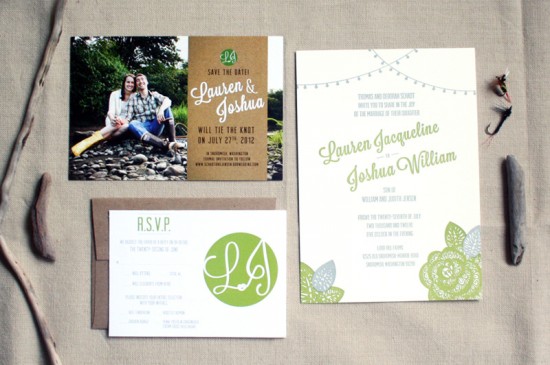
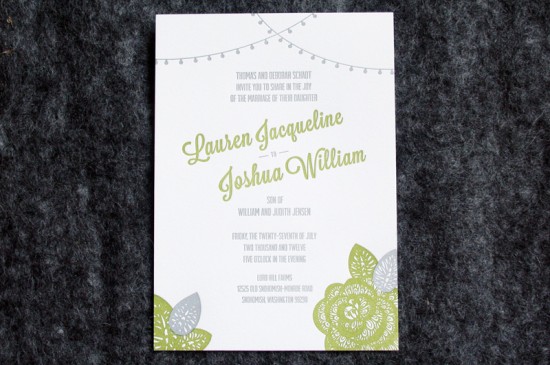
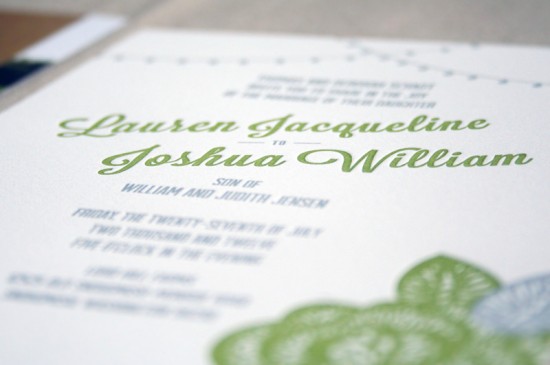
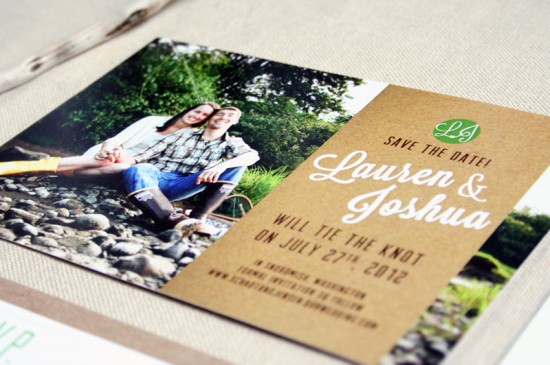
I’ll always be a huge fan of outdoor weddings – my own wedding took place on a beautiful Memorial Day Weekend evening four years ago.  Lauren from Balue/Co. sent over these beautiful save the dates and wedding invitations that she designed for her best friend’s outdoor summer wedding in the Pacific Northwest.  Lauren chose a natural color palette of blue and green with kraft paper elements to reflect the bride and groom’s love for fishing and the outdoors, along with sophisticated details perfect for an evening wedding.

From Lauren: When one of my best friends, also named Lauren, told me she was getting married this summer, I immediately knew I wanted to design their wedding suite.  Lauren and Josh are true Pacific Northwesterners and share a love for fishing and the outdoors.  Their wedding invitation design needed to reflect that love in a tasteful, subtle way.

Using soft tones of grass green and kraft paper, the color palette and design unifies the playful elements of the summer in the Northwest while remaining elegant for an outdoor evening July wedding.

Working with Seattle letterpress shop Pike Street Press, we created two-color wedding invitations complemented by a more informal save the date featuring a beautiful portrait by Kristin Boyett.

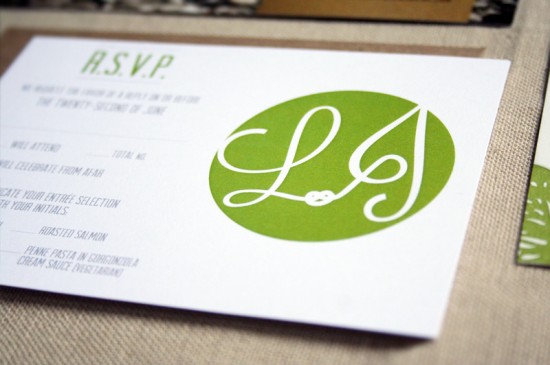
That same lighthearted feeling is carried through to the RSVP cards, which encourage guests to write a handwritten note to the couple on the back.

Thanks Lauren!

Design: Lauren Wallace of Balue/Co.
Letterpress Printing: Pike Street Press
Save the Date Portrait: Kristin Boyett Photography

Check out the Designer Rolodex for more tal­ented wed­ding invi­ta­tion design­ers and the real invi­ta­tions gallery for more wedding invitation ideas!

Photo Credits: Balue/Co.

{happy weekend!}

Happy Friday everyone!  It’s really starting to feel like summer here in DC – which kind of freaks me out when I think about everything that I need to get done between now and the baby’s arrival in early October.  We passed the halfway mark a couple of weeks ago, and all of a sudden time seems to be moving so much faster – eek!  Off I go to tackle the next item on my to do list.  But in the meantime…

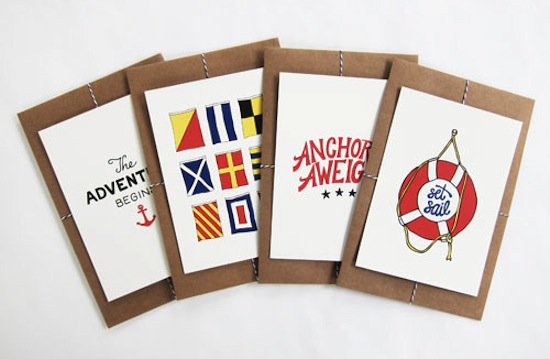
Pretty new nautical prints by Scout’s Honor Co.

…a few links for your weekend!

This week on Oh So Beautiful Paper:

As usual, we have a fun cocktail coming up for you this afternoon, so check back a bit later for the recipe!  I hope you all have a wonderful weekend, and I’ll see you back here on Monday!  xoxo

DIY Tutorial: Wax Seal + Ribbon Belly Band

Hi Everyone!  Today is going to be a full DIY Day – with another fun tutorial from the ladies of Ladyfingers Letterpress!  Like many of you, I’ve fallen in love with wax seal details on wedding invitations and other custom paper projects.  Janie + David’s oversize wedding invitations from a few weeks back featured a really fun wax seal and ribbon closure, so today Arley-Rose and Morgan are here to walk us through the step-by-step process of applying a wax seal!

Using a wax seal to secure a belly band around your invitations is a great way to excite your guests and keep your pieces an orderly and presentable fashion. Here are some guidelines to creating a great looking wax-sealed ribbon around a set of invitations. – Arley-Rose and Morgan of Ladyfingers Letterpress

(FYI: It can be helpful to have a friend or honey around to lend an extra set of hands for this project. )

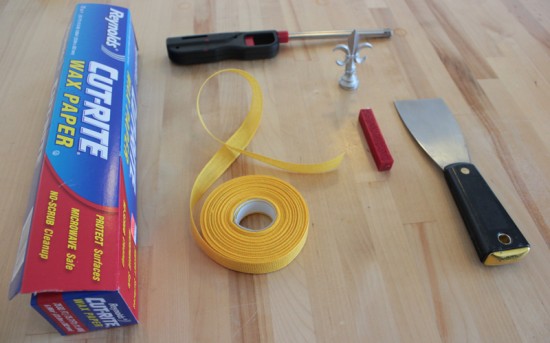
Step 1: Gather Supplies

You will need the following: Wax paper, Ribbon (we used Carta wide weave ribbon which allowed the wax to create a bond between the overlapping ribbon), Sealing wax, wax stamp, lighter, palate knife.

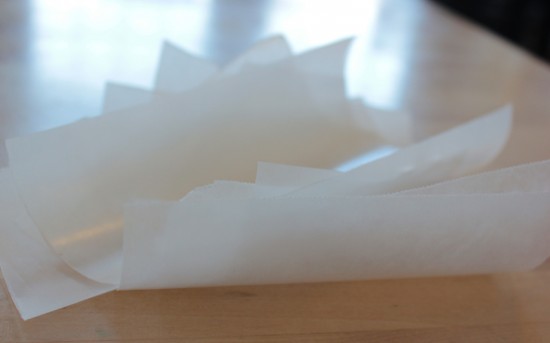
Step 2: Tear your Wax Paper Down

The wax paper will be placed between the invitation and the ribbon to protect the invitation from the wax sealing directly to the paper.  Cut the wax paper down to slightly smaller than the size of your invitation or card.  You can reuse the wax paper, a quantity of 20 torn sheets is perfect.

Step 3: Cut your ribbon to length 

Measure your ribbon, allowing for a few inches of overlap. Cut one piece for each invitation.

Step 4: Prepare Ribbon

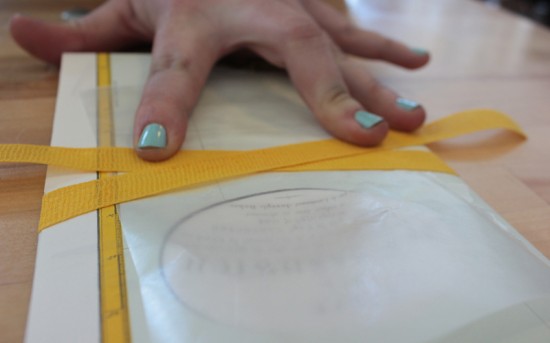
Place the wax paper on top of your invitation or card. Wrap the ribbon around the invitation, holding it snug and allowing for the ribbon to overlap in the center.

Step 5: Drip the wax

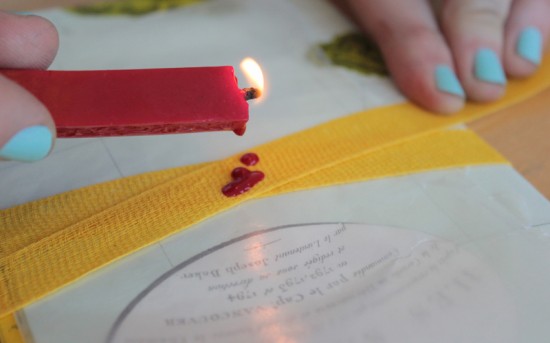
Using a lighter (a match will burn out too quickly), light the sealing wax and allow it to drip onto the ribbon. The larger the pool of wax the larger your seal will be.  Practice once or twice before you start to see how much wax you will need for your seal.

Step 6: Apply Seal

Count to five before applying the seal to the wax!

Step 7: Let it cool 

Allow the wax to cool for a few seconds – 10 or so – and gently rock the seal back and forth to free it from the wax.

Step 8: Almost done! 

Your seal is there…

Step 9: Free the Wax from the Protective Wax Paper

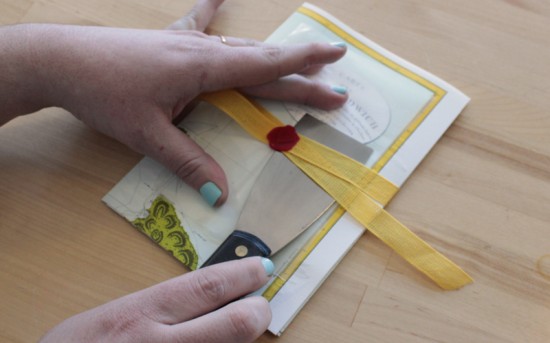
Place your palate knife between the ribbon and the wax paper and break its bond to free the wax seal from the wax paper.  This is best accomplished when the wax is still warm but not hot.

Step 10: Trim Ribbon

Finish off your invitation by trimming the tails of the ribbon down to size.

Alright, off you go to seal up the world’s lose ends!

Ladyfingers Letterpress is a member of the Designer Rolodex â€“ check out more of their beautiful work right here or visit the real invi­ta­tions gallery for more wedding invitation ideas!

Photo Credits: Ladyfingers Letterpress

DIY Tutorial: Rubber Stamp Fireworks Invitation

We love the challenge of creating an invitation suite based off of a unique theme, venue or color palette.  For this DIY tutorial, we were inspired by a fabulous vintage firework postcard (that we found while hunting at a local thrift shop)!  This combo would be so perfect for New Years Eve or July 4th nuptials – or even a Fourth of July party!  The mixture of colors and patterns is sure to make a statement to all of your guests. – Bailey and Emma of Antiquaria

DIY Tutorial: Rubber Stamp Fireworks Invitation by Antiquaria

DIY Tutorial: Rubber Stamp Fireworks Invitation by Antiquaria

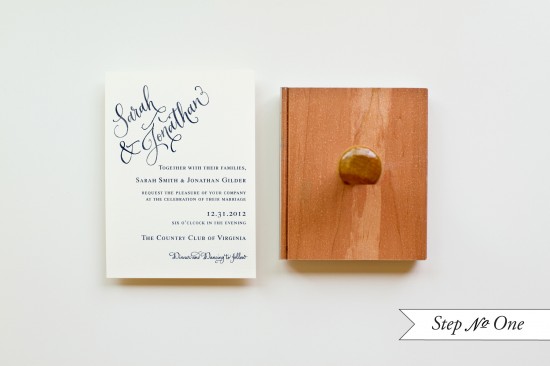
Step One: Lay a 4.25 x 6″ card (preferably a heavyweight card stock) on a stable and hard surface.  Ink your invitation stamp (we used our Calligraphy Accent Invitation Stamp) and center it over card.  Press down firmly with moderate pressure, using the handle as the anchor point.  Lift off the stamp and set card aside to dry.

DIY Tutorial: Rubber Stamp Fireworks Invitation by Antiquaria

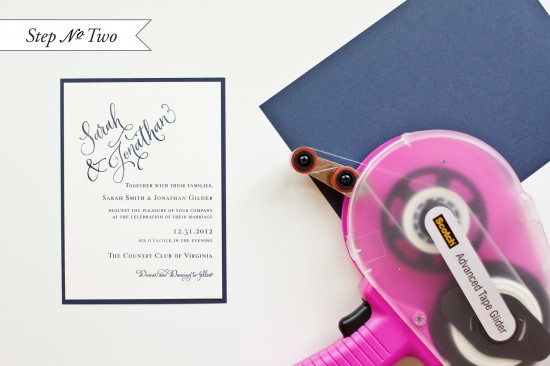
Step Two: Cut a navy sheet of paper into a 4.5 x 6.25″ rectangle.  Once the printed invitation piece is dry, flip over and adhere double stick tape to each edge.  Center over the navy card and stick it down pressing the edges to make sure that the two pieces are stuck together properly.

DIY Tutorial: Rubber Stamp Fireworks Invitation by Antiquaria

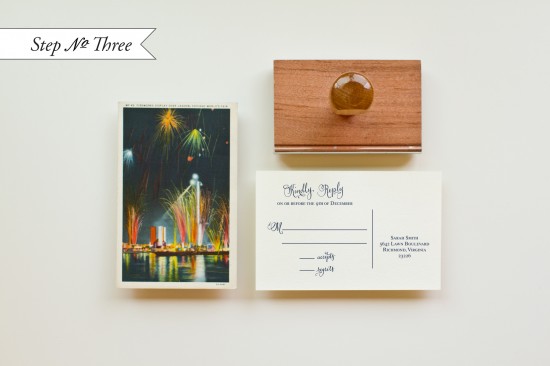
Step Three: In order to use our found postcard for all of our guests, we scanned the front image into the computer and printed out enough cards to suit our quantity.  (The cards ended up being 3.5 x 5.5″ rectangles).  We stamped the back of each card using our Calligraphy Accent Reply Postcard Stamp.  Of course, let the cards dry after inking.

DIY Tutorial: Rubber Stamp Fireworks Invitation by Antiquaria

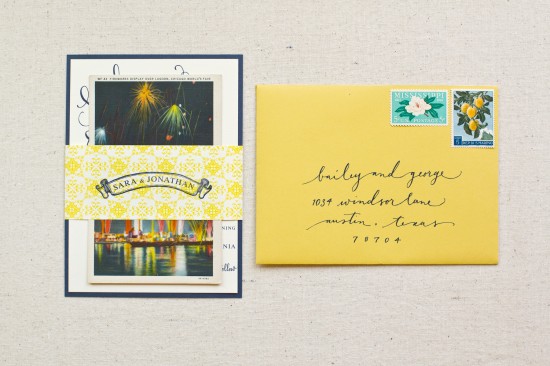
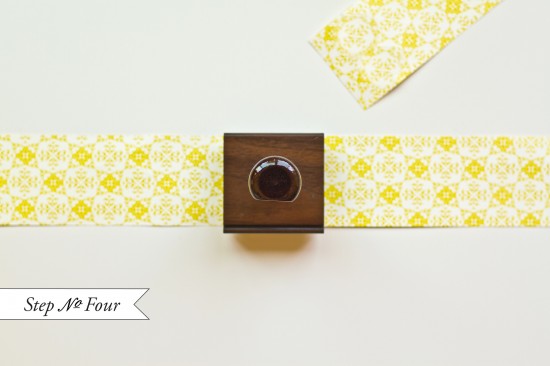
Step Four: To make the belly band, cut a fun, patterned paper into 2 x 11″ or 2 x 12″ (depending on the length of your paper) strips.  Stamp a monogram (we used our Banner Name Monogram Stamp) in the middle and wrap the band around your invitation suite, securing it in the back with double sided or decorative washi tape.  Now all of your pieces will stay together and look cute at the same time!

DIY Tutorial: Rubber Stamp Fireworks Invitation by Antiquaria

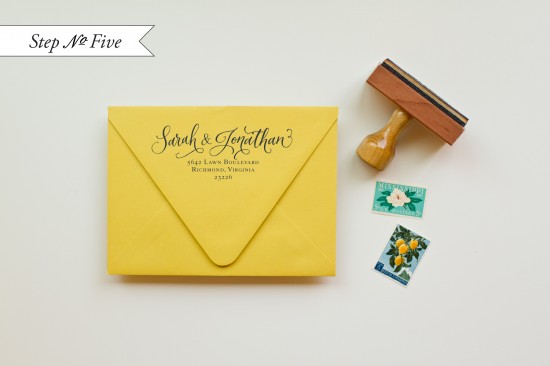
Step Five: Stamp an A6 envelope with your return address (we used our Calligraphy Ampersand Return Address stamp), address the front, pick out your postage and send them on their way!

Materials:

Calligraphy Accent Invitation Stamp

Calligraphy Accent Reply Card Stamp

Calligraphy Ampersand Return Address Stamp

Banner Name Stamp

Stamp Pad (we used Midnight)

Cream Cardstock cut to 4.25 x 6 inches

Vintage Postcard measuring 3.5 x 5.5 inches, found locally

Navy Blue Cardstock cut to 4.5 x 6.25 inches

Patterned Paper (ours was custom designed and printed by Antiquaria)

A6 Envelope (we used Curry)

Double sided tape

Washi Tape

Tape Gun (optional but definitely helpful in taping on the navy backers)

Photo Credits: Jamie of Intertwyned