Kristen + Tim’s Hermès-Inspired Wedding Invitations and Save the Dates

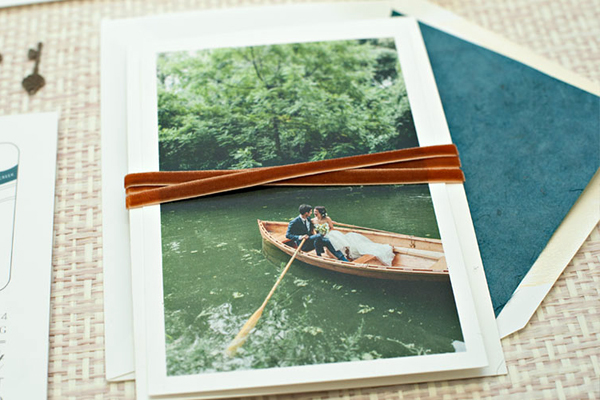
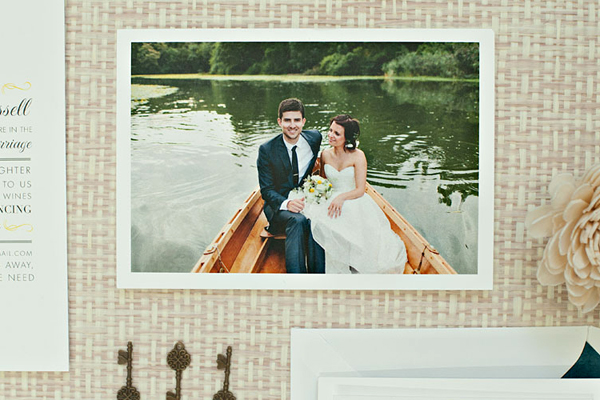
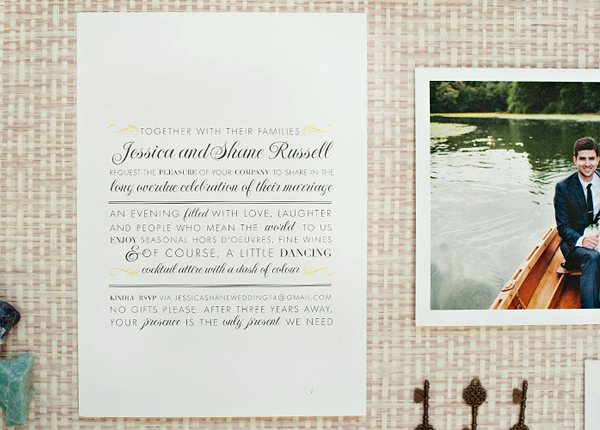
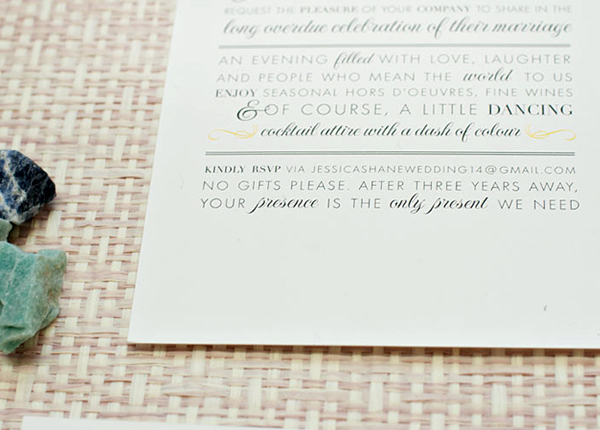
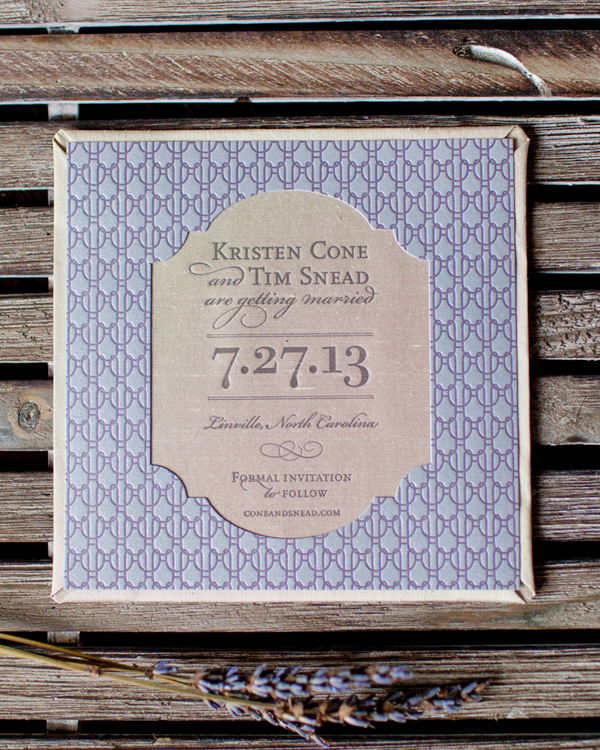
Any time I hear that a couple wanted something they’d never seen before for their wedding invitations or save the dates – I know the results are bound to be good! These wedding invitations and save the dates from Melissa at Atheneum Creative are elegant and classically beautiful, but also innovative – starting with the letterpress printed SILK save the dates!

Sophisticated-Silk-Letterpress-Save-the-Dates-Atheneum-Creative-OSBP3

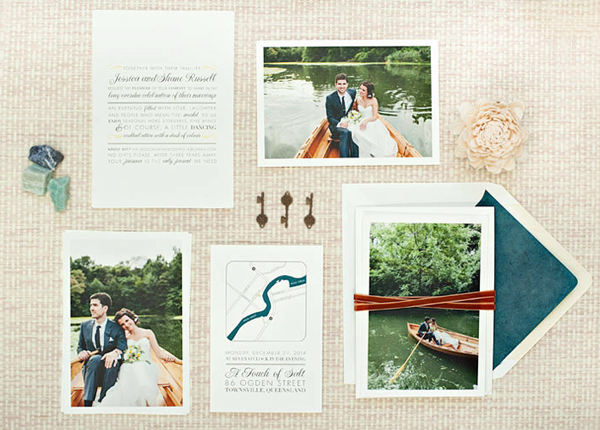
From Melissa: Kristen and Tim wanted something they had never seen before for their save the dates – always a great challenge! We letterpress printed their text on silk and layered it with a letterpress printed die cut cover with a custom pattern inspired by a Hermès scarf.

Sophisticated-Silk-Letterpress-Save-the-Dates-Atheneum-Creative-OSBP2

Sophisticated-Silk-Letterpress-Save-the-Dates-Atheneum-Creative-OSBP4

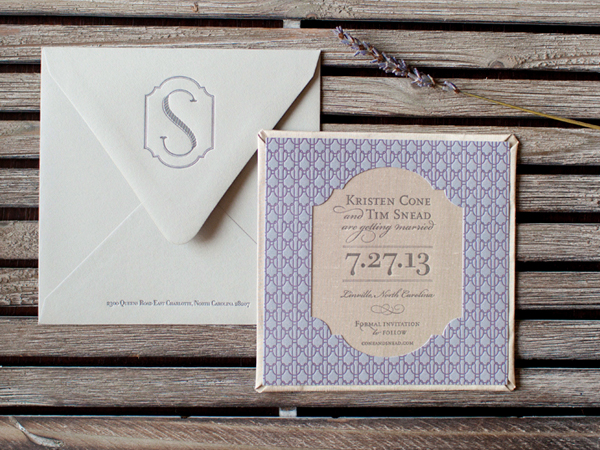
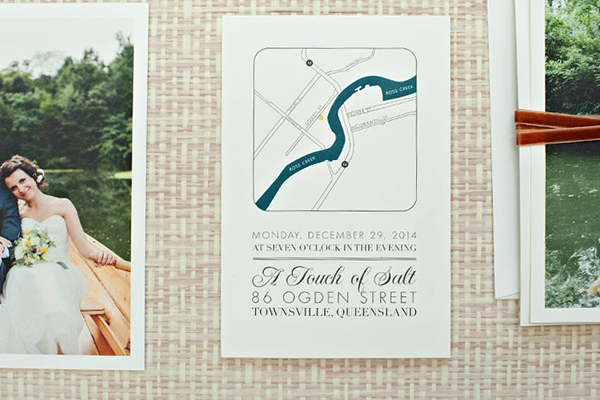
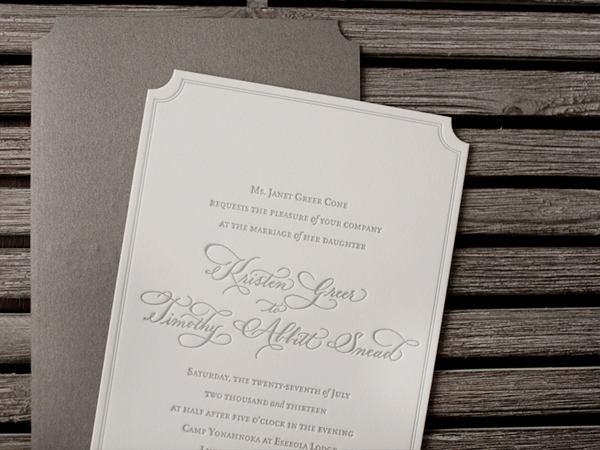
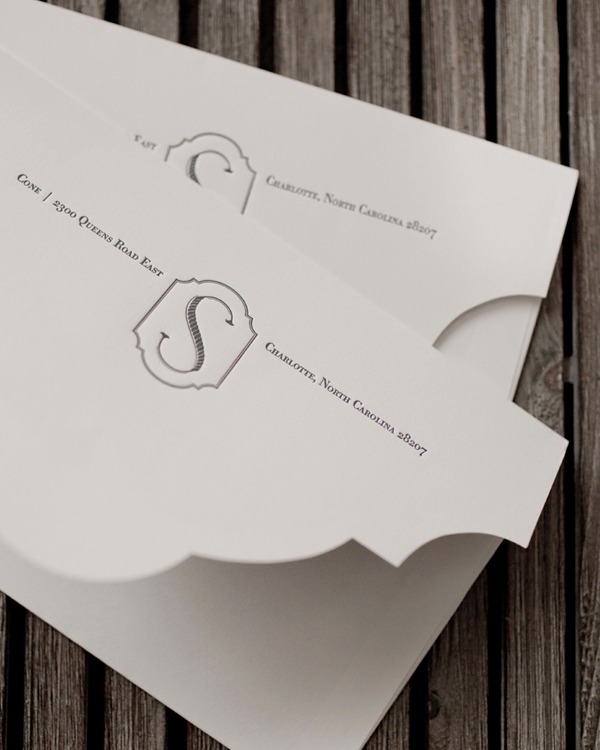
Their invitation picked up all the elements of the save the date, incorporating the silk fabric into a bellyband with a die cut logo tag.

Elegant-Classic-Letterpress-Wedding-Invitations-Atheneum-Creative-OSBP6

Elegant-Classic-Letterpress-Wedding-Invitations-Atheneum-Creative-OSBP

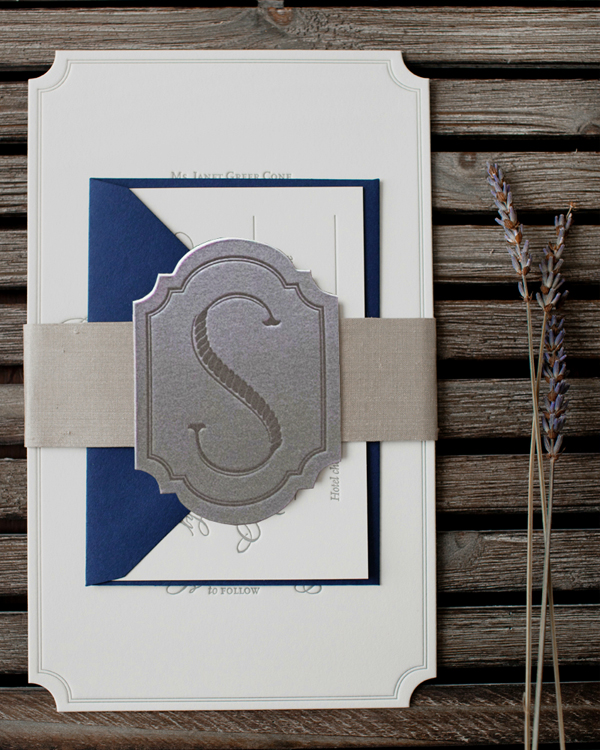
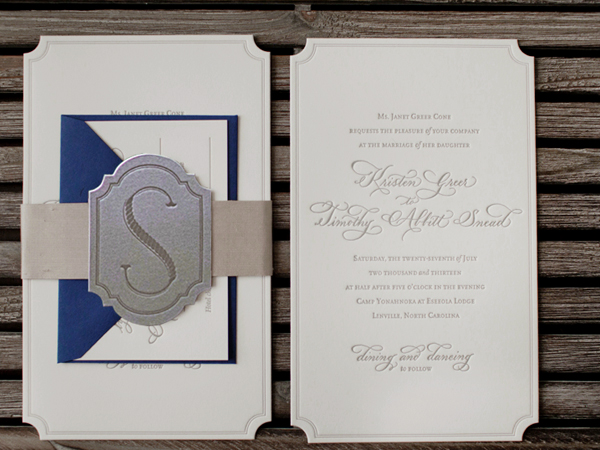
For their wedding logo, Kristen wanted a monogram that resembled her favorite Hermès bracelet. We created a wedding logo/monogram with the letter “S” that emulated the rope pattern on her bracelet. In addition to the invitations and save the dates, the logo was used on the reception floor and ceremony backdrop.

Elegant-Classic-Letterpress-Wedding-Invitations-Atheneum-Creative-OSBP2

Elegant-Classic-Letterpress-Wedding-Invitations-Atheneum-Creative-OSBP3

Elegant-Classic-Letterpress-Wedding-Invitations-Atheneum-Creative-OSBP4

Thanks Melissa!

Design: Atheneum Creative

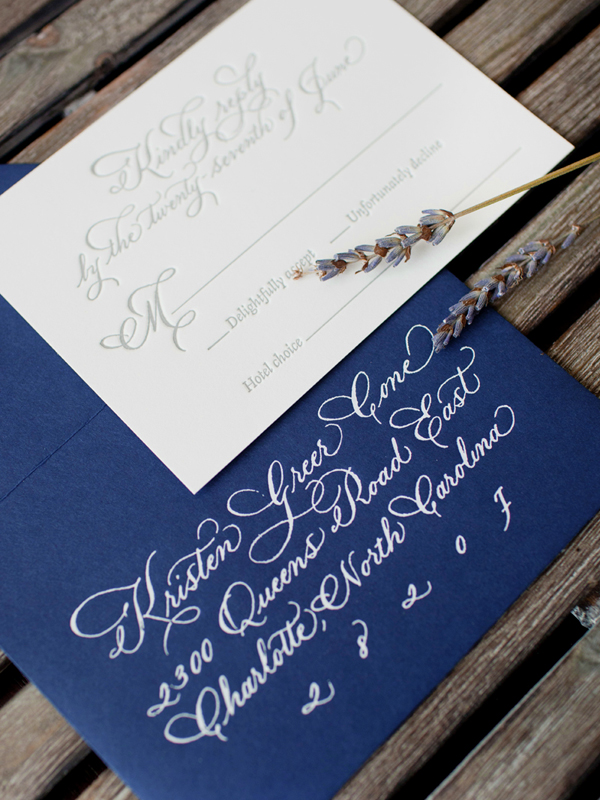
Calligraphy: Grace Edmands

Atheneum Creative is a member of the Designer Rolodex – you can see more of their beautiful work right here or visit the real invitations gallery for more wedding invitation ideas!

Photo Credits: Chelsea Davis Photography

Maggie + Steven’s Neon Split Fountain Wedding Invitations

I love colorful wedding invitations, so it’s no surprise that I’m a fan of these neon split fountain wedding invitations from photographer Maggie Winters. Maggie designed and hand lettered the invitations, then letterpress printed them herself (under the tutelage of Old City Press) using a neon split fountain technique!

Neon-Hand-Lettered-Wedding-Invitations-Maggie-Winters-Old-City-Press-OSBP9

From Maggie: I designed these myself (mostly hand lettered) and we printed them at Old City Press in Alexandria, Virginia. Pete at Old City Press helped us to print our own invitations, teaching us how to letterpress print and then setting us free with his amazing letterpress! We went with a neon color roll and some blind embossing of the confetti bits around the edges. It was really fun to try a bunch of different printing styles.

Neon-Hand-Lettered-Wedding-Invitations-Maggie-Winters-Old-City-Press-OSBP7

Neon-Hand-Lettered-Wedding-Invitations-Maggie-Winters-Old-City-Press-OSBP10

We also included a couple dinosaurs in the photos, they were our cake toppers. We made an intro video for our new business (Pop Wed Co) late last year with the same dinosaurs, so we thought it would be fun to bring them back to life in our wedding.

Neon-Hand-Lettered-Wedding-Invitations-Maggie-Winters-Old-City-Press-OSBP4

Neon-Hand-Lettered-Wedding-Invitations-Maggie-Winters-Old-City-Press-OSBP3

Neon-Hand-Lettered-Wedding-Invitations-Maggie-Winters-Old-City-Press-OSBP11

Neon-Hand-Lettered-Wedding-Invitations-Maggie-Winters-Old-City-Press-OSBP12

Neon-Hand-Lettered-Wedding-Invitations-Maggie-Winters-Old-City-Press-OSBP13

Thanks Maggie!

Design: Maggie Winters

Letterpress Printing: DIY at Old City Press

Check out the Designer Rolodex for more tal­ented wed­ding invi­ta­tion design­ers and the real invi­ta­tions gallery for more wedding invitation ideas!

Photo Credits: Maggie Winters / Pop Wed Co

Jess + Shane’s Post-Elopement Wedding Celebration Invitations

I love the idea of an elopement in a faraway destination followed by a big celebration with family and friends back at home! As Aussie expats living in NYC, that’s exactly what Jess and Shane chose to do! They turned to Becca at Suite Paperie for the invitations for their post-wedding celebration in Australia, using some of the photos from their quiet NYC elopement to share with family and friends.

Elopement-Wedding-Invitations-Suite-Paperie-OSBP4

From Becca: A little different from our usual wedding clients, Jess and Shane came to us with a unique request: as Aussies living together in NYC, they had already eloped here in the States and wanted to invite guests to a celebration of their marriage back home in Australia.

Elopement-Wedding-Invitations-Suite-Paperie-OSBP8

Jess brought us three stunning photos from the shoot they did after their elopement, wanting to incorporate them into the invitation suite so friends and family back home could catch a glimpse of their quiet wedding experience. We printed all three photos on a beautiful smooth soft white paper, allowing Jess and Shane to pick and choose which guests received which photo and adding a playful variety to the invitations.

Elopement-Wedding-Invitations-Suite-Paperie-OSBP3

We custom designed a simple map to highlight the party’s location, and the sweet invitation asked guest to “share in the long overdue celebration of their marriage.” We wrapped the whole stack with a velvet ribbon in a rich cognac shade and paired with a handmade paper liner that matched the hues of Shane’s suit and the map’s river.

Elopement-Wedding-Invitations-Suite-Paperie-OSBP2

Elopement-Wedding-Invitations-Suite-Paperie-OSBP5

Elopement-Wedding-Invitations-Suite-Paperie-OSBP6

Elopement-Wedding-Invitations-Suite-Paperie-OSBP7

Thanks Becca!

Check out the Designer Rolodex for more tal­ented wed­ding invi­ta­tion design­ers and the real invi­ta­tions gallery for more wedding invitation ideas!

Photo Credits: Lindsay Nathanson

Happy Weekend!

Happy Friday everyone! Spring is in the air – my favorite season here in DC! Sadly my entire family seems to be working through a cold this week – so I’m really looking forward to a couple of days of rest and recuperation. But in the meantime…

Thuss Farrell Paper to Petal via Instagram

Photo by Thuss Farrell via Instagram

…a few links for your weekend!

This week on Oh So Beautiful Paper:

Check back this afternoon for this week’s cocktail recipe! Have a wonderful weekend, and I’ll see you back here on Monday! xoxo

DIY Tutorial: Neon Floral Save the Dates

After the dreary days of winter, we are in serious need of bright colors and cheerful designs. This save the date was inspired by an eye grabbing neon floral paper that we recently found. We used a standard highlighter to create the awesome pop of color on the save the date card. Who knew that it would make such a fun addition to the design? –Bailey and Emma of Antiquaria

DIY Neon Floral Save the Date Tutorial by Antiquaria for Oh So Beautiful Paper

Materials

Camellia Floral Save the Date Stamp

Laurel Wreath Return Address Stamp

Stamp Pad

Embossing Stamp Pad

Embossing Heat Tool

Embossing Powder

A6 Notecard (we used Pure White)

A6 Envelope (we used Fuchsia)

Highlighters

Decorative Paper

Envelope Liner Templates

Double Sided Tape

Calligraphy Pen

Finetec metallic watercolor set

DIY Neon Floral Save the Date Tutorial by Antiquaria for Oh So Beautiful Paper

Step One: First, you will want to stamp your save the date (we used our Camellia Save the Date design) on an A6 card. When stamping your card, ink the stamp with the stamp facing you. Center the stamp over your card and press firmly and moderately (not too hard or the image will smudge) and gently lift the stamp off of the paper. Set aside to dry. Please watch this video for more information on inking and stamping an oversized stamp.

DIY Neon Floral Save the Date Tutorial by Antiquaria for Oh So Beautiful Paper

Step Two: To add a fun pop of color, we used a highlighter to color in the leaves and the center of the stamped flowers. This simple touch really makes the design come alive!

DIY Neon Floral Save the Date Tutorial by Antiquaria for Oh So Beautiful Paper

Step Three: Wanting to bring in some of the awesome neon pink from the patterned paper, we decided to use fuchsia envelopes and a tonal, neon grapefruit embossing powder to pull everything together. To emboss, simply stamp your desired return address stamp on the back flap (either in matching ink or with Versamark glue ink, as pictured) dust the powder over it, tap off the excess and heat set the print. For more information about how to emboss using stamps, please watch this instructional video.

DIY Neon Floral Save the Date Tutorial by Antiquaria for Oh So Beautiful Paper

Step Four: Since this suite was directly based off of this amazing paper, it was an easy decision to incorporate it into the design as an envelope liner. We traced the liner template and cut out each liner by hand. Then, we used double sided tape (alternatively, you could use stick glue) to install the liners into the envelopes (adhere around the top triangle).

DIY Neon Floral Save the Date Tutorial by Antiquaria for Oh So Beautiful Paper

DIY Neon Floral Save the Date Tutorial by Antiquaria for Oh So Beautiful Paper

Step Five: It’s time to address your save the dates! We used a beautiful finetec metallic paint palette (the silver one) with a calligraphy pen for this design. Experiment with styles until something feels natural to you! You could also use a silver gel pen and your fanciest handwriting to achieve a similar look.

DIY Neon Floral Save the Date Tutorial by Antiquaria for Oh So Beautiful Paper

Anti­quaria is a mem­ber of the Designer Rolodex – you can see more of their beau­ti­ful work right here!

Photography by Antiquaria for Oh So Beautiful Paper