April + Matt’s French Garden Party Wedding Invitations

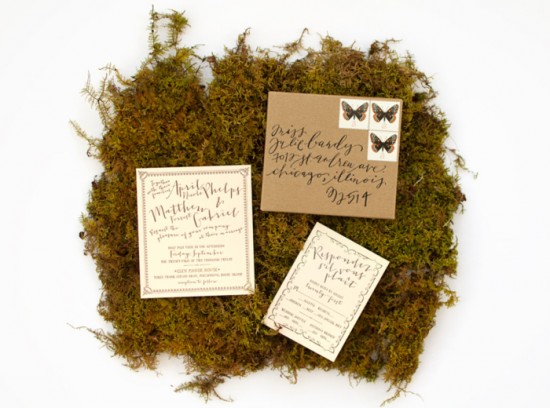
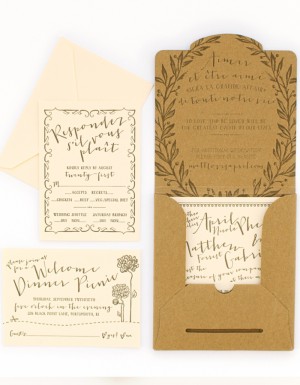
These beautiful wedding invitations from Nichole at Coral Pheasant combine garden parties with French inspiration with such delightfully whimsical results! Nichole also made sure to adhere to the bride’s wish to use sustainable materials and practices when producing the wedding invitations. The quirky font and calligraphy by Brown Linen is the perfect finishing touch!

French Garden-Inspired Wedding Invitations by Coral Pheasant via Oh So Beautiful Paper (11)

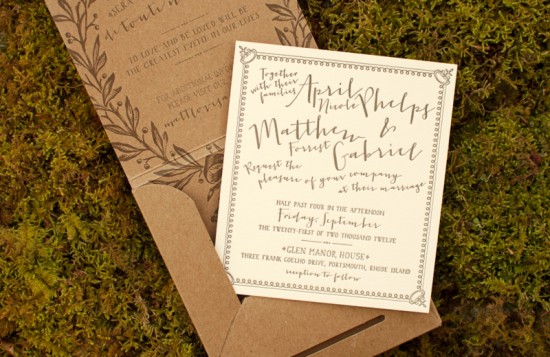
From Nichole: April and Matt were married late last summer. The vision for their day was inspired by 1920s garden parties and the delightful French movie Amelie. It was also important to April that sustainable materials be used. With this inspiration in hand we developed a playful suite with free-flowing text typeset in a quirky calligraphy font.

French Garden-Inspired Wedding Invitations by Coral Pheasant via Oh So Beautiful Paper (5)

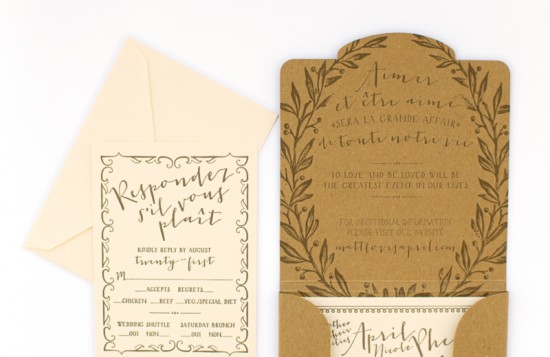
The main invitation was letterpress printed on double-thick 220# ecru Crane’s Lettra while all the enclosures were letterpress printed on 110# Lettra. Lettra is a 100% cotton sheet is made from cotton fibers gleaned from the cotton seeds, after having been cleaned for garment production and before being processed for cotton seed oil. This made it a perfect choice to honor April’s request of using sustainable materials.

French Garden-Inspired Wedding Invitations by Coral Pheasant via Oh So Beautiful Paper (3)

French Garden-Inspired Wedding Invitations by Coral Pheasant via Oh So Beautiful Paper (7) French Garden-Inspired Wedding Invitations by Coral Pheasant via Oh So Beautiful Paper (8)

French Garden-Inspired Wedding Invitations by Coral Pheasant via Oh So Beautiful Paper (6)

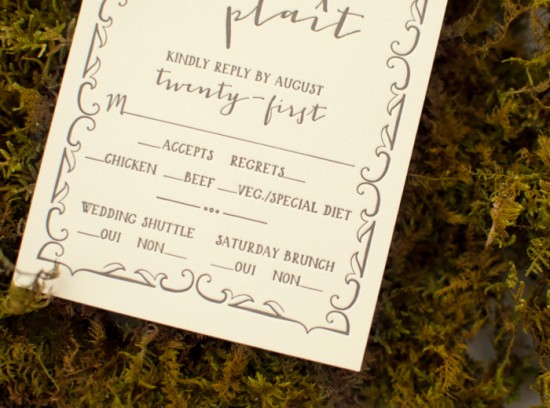
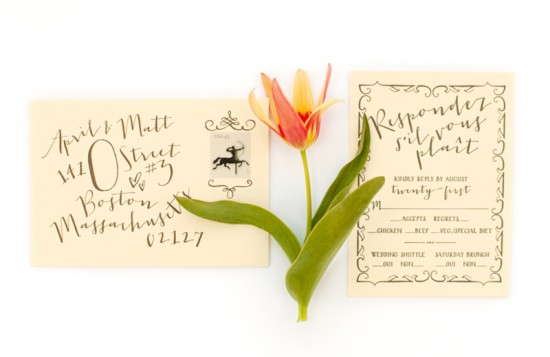
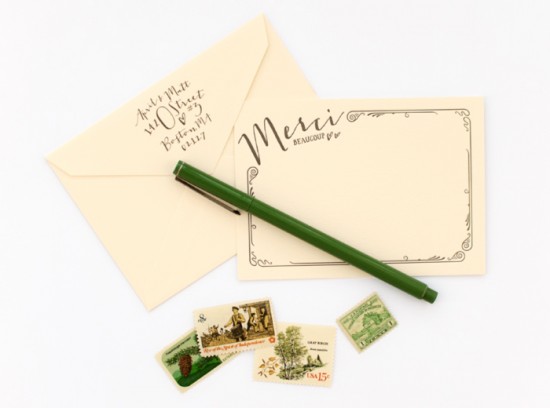
French elements were brought into the design on the RSVP and the quote that graces the inside of the kraft mailer. I love when I’m given the opportunity to have fun with the RSVP envelope and can integrate the stamp in a dynamic way. In this instance, the stamp was framed in flourishes the complimented the font. To ensure the envelope would travel successfully through the mail, we did a test mailing before having the envelopes printed. The cards were tucked inside the kraft mailer creating a unique package for guests to open and experience.

French Garden-Inspired Wedding Invitations by Coral Pheasant via Oh So Beautiful Paper (10)

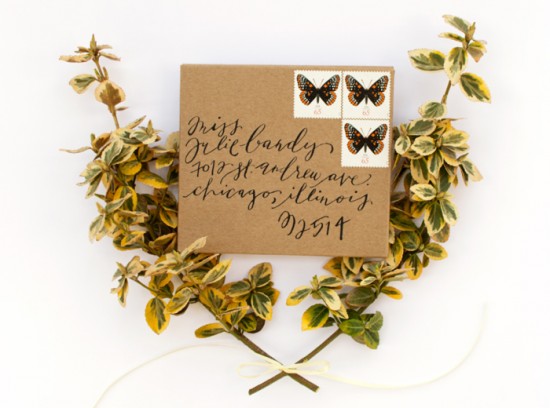
The kraft mailer was made from 100% post consumer waste and all the inks were soy based. The cherry on top? My printer has a strict recycling and conservation program and uses bicycle messengers for the majority of their local deliveries. The mailer was sealed with a strip of wash tape and addressed with the beautiful calligraphy of Brown Linen.

French Garden-Inspired Wedding Invitations by Coral Pheasant via Oh So Beautiful Paper (4)

French Garden-Inspired Wedding Invitations by Coral Pheasant via Oh So Beautiful Paper (1)

Thanks Nichole!

Design: Coral Pheasant

Calligraphy: Brown Linen

Check out the Designer Rolodex for more tal­ented wed­ding invi­ta­tion design­ers and the real invi­ta­tions gallery for more wedding invitation ideas!

Photo Credits: Coral Pheasant

Janet’s Nautical Vintage Map Party Invitations

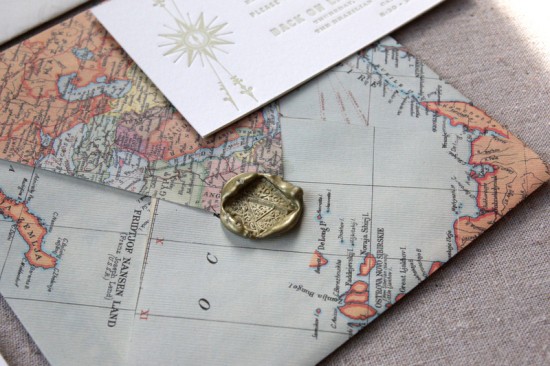
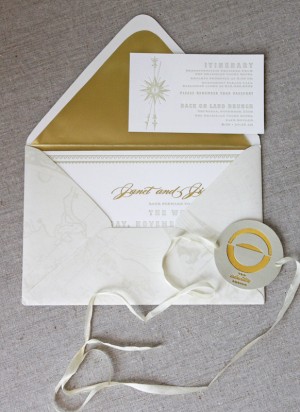
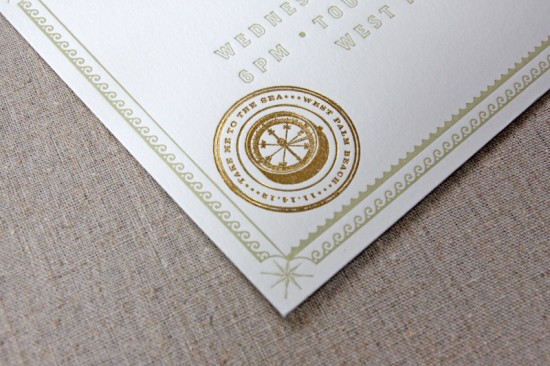
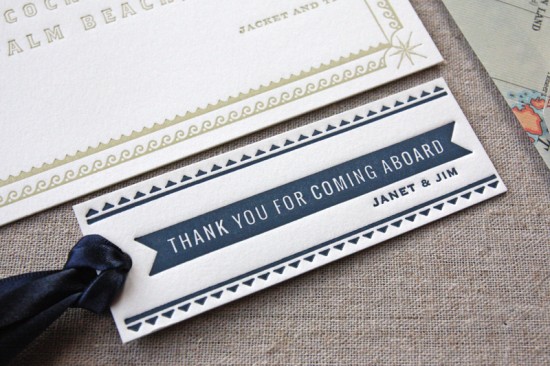
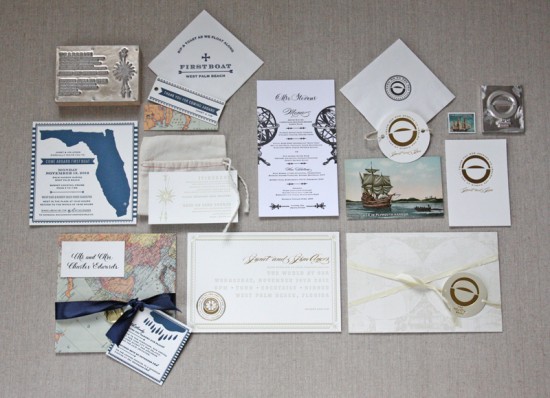
Happy Monday everyone! I’m feeling refreshed after spending the weekend working in our garden, enjoying the beautiful spring weather, and visiting one of my favorite spring spots, the Mount Vernon estate just outside of DC. We’re starting the week with some really fun nautical and travel-inspired party invitations from Bonnie at Tenn Hens Design. I’m particularly loving the amazing map envelopes and gold wax seal!

Nautical Map Party Invitations by Tenn Hens Design via Oh So Beautiful Paper (9)

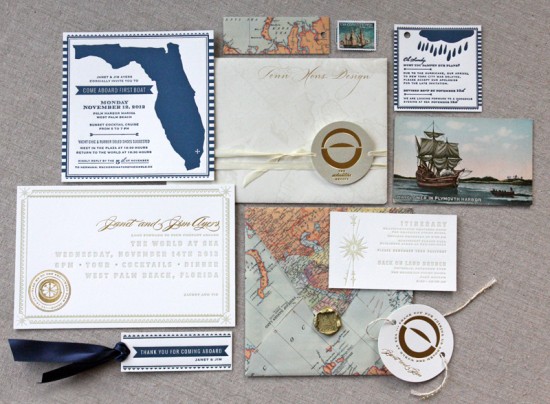
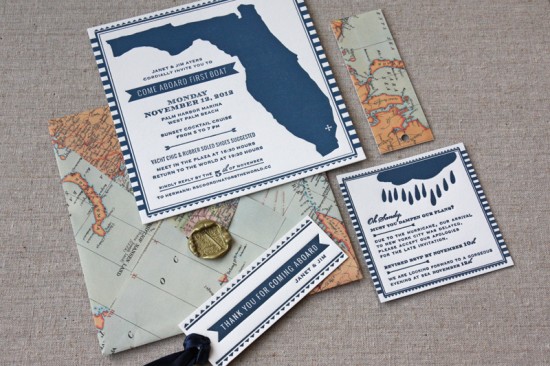
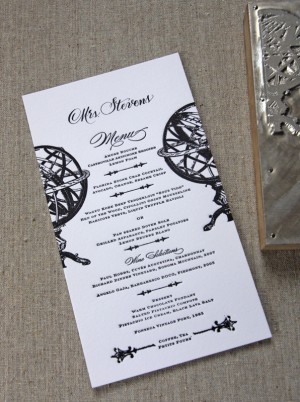
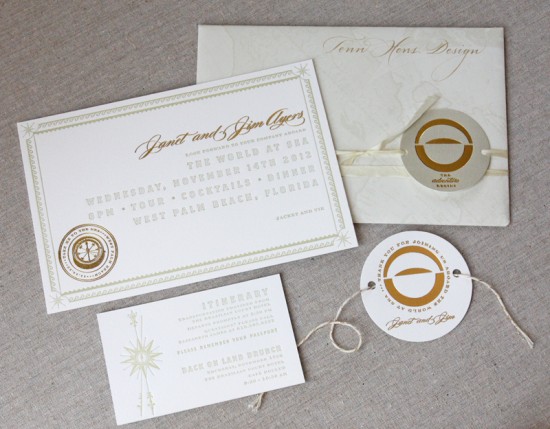
From Bonnie: An event planner in Nashville that we’ve partnered with over the years, Elizabeth James, came to us with a very special project this past winter. Her client was hosting an intimate party at sea. And not just on any old boat, but a ship. They wanted to treat their guests to a truly unique affair. There were various parties tied around this weekend so we designed two different looks that still complemented one another.

Nautical Map Party Invitations by Tenn Hens Design via Oh So Beautiful Paper (8)

Each invitation was hand delivered in an envelope made from map paper and secured with a gold wax seal. The first invitation was letterpressed on both sides and duplexed (just to make the cotton paper even more luxurious). We ended up adding an addendum tag at the last hour when Hurricane Sandy came into the picture, but mother nature certainly has a way of being unpredictable!

Nautical Map Party Invitations by Tenn Hens Design via Oh So Beautiful Paper (7)

Nautical Map Party Invitations by Tenn Hens Design via Oh So Beautiful Paper (6) Nautical Map Party Invitations by Tenn Hens Design via Oh So Beautiful Paper (5)

Nautical Map Party Invitations by Tenn Hens Design via Oh So Beautiful Paper (3)

The main invitation was a more subdued palette of warm grey letterpress + gold foil. I adore the look of the foil and the texture it adds.

Nautical Map Party Invitations by Tenn Hens Design via Oh So Beautiful Paper (2)

Nautical Map Party Invitations by Tenn Hens Design via Oh So Beautiful Paper (4)

Nautical Map Party Invitations by Tenn Hens Design via Oh So Beautiful Paper (1)

Thanks Bonnie!

Photo Credits: Tenn Hens Design

Friday Happy Hour: The Dark & Stormy

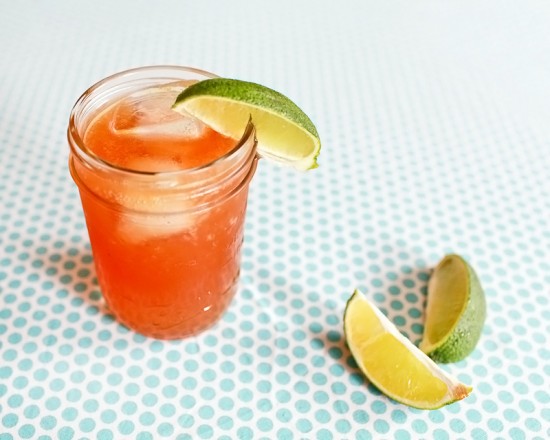
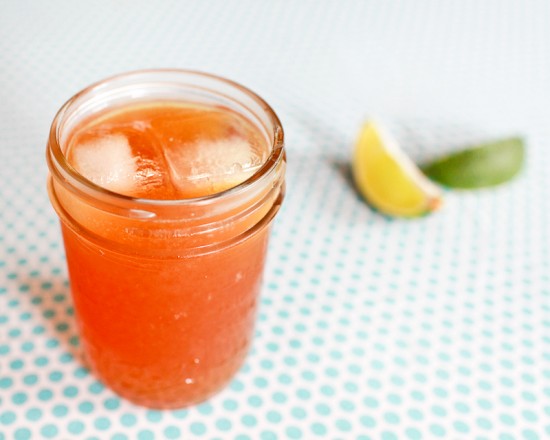
About this time last year, Nole and I were enjoying our first trip to the Caribbean. To celebrate the memories of the trip, here’s a quintessential Caribbean cocktail, the Dark & Stormy. This is a drink that’s really great on a hot day, rich and fizzy and full of flavor, and somehow both spicy and smooth at the same time. – Andrew

Signature Cocktail: The Dark & Stormy by Oh So Beautiful Paper (20)

Oh So Beautiful Paper Signature Cocktail Recipe Card: The Dark & Stormy

Illustration by Caitlin Keegan for Oh So Beautiful Paper

The Dark & Stormy

2 oz Dark Rum
3-4 oz Ginger Beer
1/2 oz Lime Juice

Combine everything with ice, give it a good stir, garnish with a lime wedge and enjoy!

The proper rum to use here is Gosling’s, a Bermudan rum that’s a little spicy and a touch funky. But any dark and heavy rum, like a rich Demerara, could do nicely. The lime is not original to the recipe, which also hails from Bermuda, but is a great addition that really makes the other flavors pop.

Signature Cocktail: The Dark & Stormy by Oh So Beautiful Paper (21) Signature Cocktail: The Dark & Stormy by Oh So Beautiful Paper (22)

The Dark & Stormy is a trademark of Gosling’s, which has been making rum since 1806, since the early 20th century. But the drink’s origins probably go a little further back than that. British sailors started receiving a daily rum ration sometime in the 17th century* which, by the mid-1800s, was two ounces of heavy, dark rum of the sort Goslin’s made. Sometime later, the British navy also decided to build a ginger beer bottling plant (weird, right?). Some enterprising sailors (the original inventors of so much of what we drink today) likely started putting together their rum rations and ginger beer quickly thereafter; Gosling’s just made it official.
Signature Cocktail: The Dark & Stormy by Oh So Beautiful Paper (4)

*British sailors received their last rum ration on July 31st, 1970 – Black Tot Day. There’s a very small amount left from the last consignment, and I hear it’s very unusual and very delicious. It’s also very, very expensive – I’ve seen bottles for sale for nearly a thousand dollars – so, sadly, I don’t think we’ll be featuring it in any Cocktail Fridays any time soon.

Photo Credits: Nole Garey for Oh So Beautiful Paper

Christina + Aaron’s Quirky “Awkward Family Photo” Save the Dates

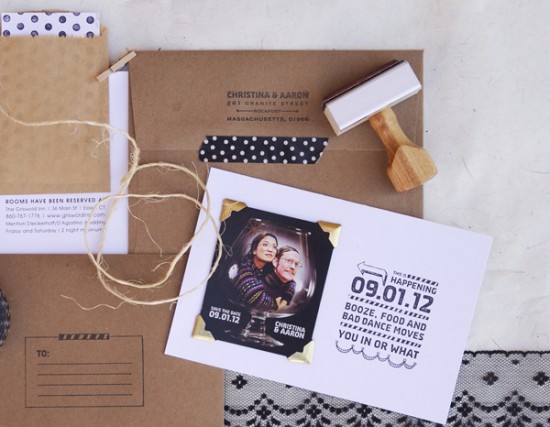
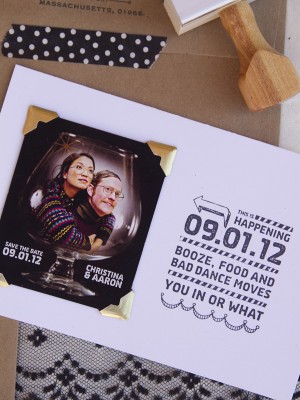
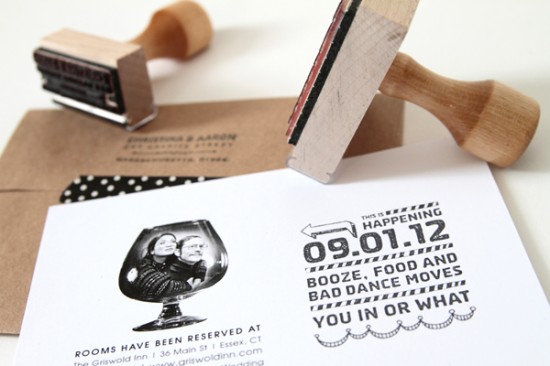
Sometimes we just need a reminder of happy occasions, silly memories, or a little something to make us laugh. Enter these quirky and silly save the dates from Patti Murphy Design Boutique & Paperie. Christina and Aaron wanted to play off the idea of an awkward family photo, so Patti designed a postcard-size save the date incorporating a custom rubber stamp. Definitely made me smile!

Funny Rubber Stamp Postcard Save the Date by Patti Murphy Designs via Oh So Beautiful Paper (6)

From Patti: Christina and Aaron wanted their save the dates to correspond with their personalities: fun, light-hearted, quirky, and silly. To achieve this, they collaborated with photographer Michelle Gardella and decided on the “awkward family photo” pose, incorporating gold wire-frame glasses with an ugly sweater theme. The photo was also turned into a magnet save the date.

Funny Rubber Stamp Postcard Save the Date by Patti Murphy Designs via Oh So Beautiful Paper (4) Funny Rubber Stamp Postcard Save the Date by Patti Murphy Designs via Oh So Beautiful Paper (3)

Not wanting to take anything away from the effect of the photo, Christina and Aaron wanted a simple design. I decided on white postcards, and added the gold corners to accentuate the photo.  I created a custom stamp with the event details—made the wording fun and silly to match their personalities, but also simple and to-the-point—and then used black ink to contrast with the white postcard.

Funny Rubber Stamp Postcard Save the Date by Patti Murphy Designs via Oh So Beautiful Paper (1)

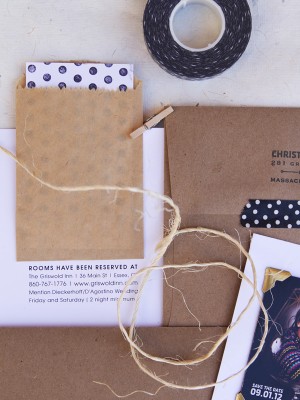
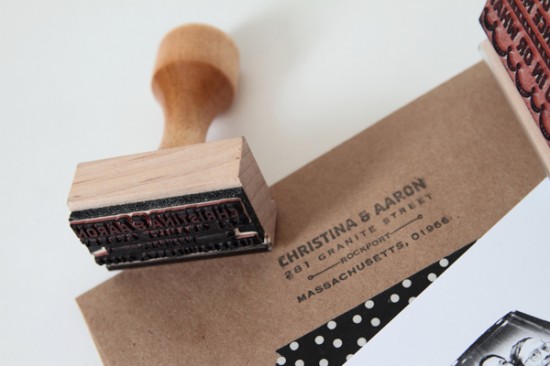
The envelopes were designed in the same simple fashion with custom “to” and “from” stamps.

Funny Rubber Stamp Postcard Save the Date by Patti Murphy Designs via Oh So Beautiful Paper (7)

Thanks Patti!

Check out the Designer Rolodex for more tal­ented wed­ding invi­ta­tion design­ers and the save the date gallery for more beau­ti­ful cus­tom save the dates!

Photo Credits: Save the Date photos by Patti Murphy Design Boutique & Paperie, engagement photo by Michelle Gardella

DIY Tutorial: Neon and Kraft Paper Save the Dates

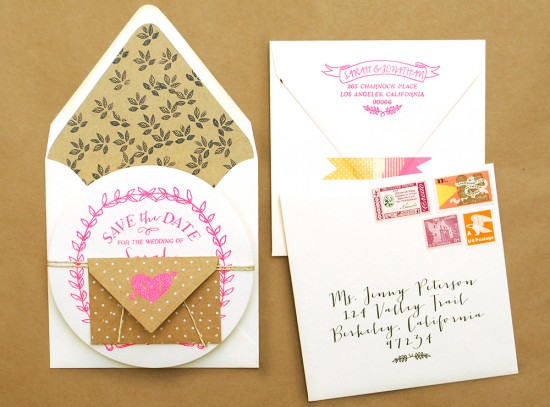
Neon has been the “in” thing for a while…but using it as inspiration for your wedding is definitely not for the faint of heart. We put together a fun and punchy neon save the date design that is perfect for spring. By mixing in kraft paper and black, we were able to tame the neon and make it quite modern. – Bailey and Emma of Antiquaria

DIY Tutorial: Neon and Kraft Paper Save the Date by Antiquaria via Oh So Beautiful Paper

DIY Tutorial: Neon and Kraft Paper Save the Date by Antiquaria via Oh So Beautiful Paper

DIY Tutorial: Neon and Kraft Paper Save the Date by Antiquaria via Oh So Beautiful Paper

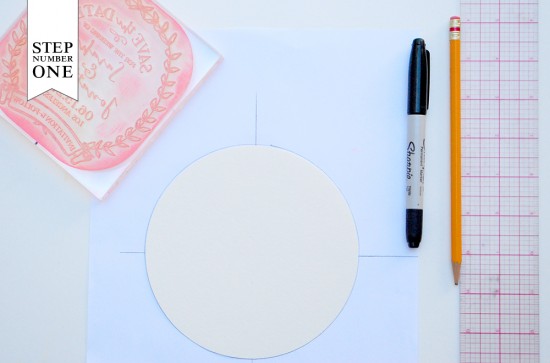
Step One: For this save the date, we are using a circular card. It may be a bit trickier to eyeball the placement of the stamp, so measuring out center is a good idea. First you’ll want to trace the circle card on a piece of scrap paper and then mark the center. Mark perpendicular lines through the center. Next you will measure and mark center of stamp and line it up on the circle template guide.

DIY Tutorial: Neon and Kraft Paper Save the Date by Antiquaria via Oh So Beautiful Paper

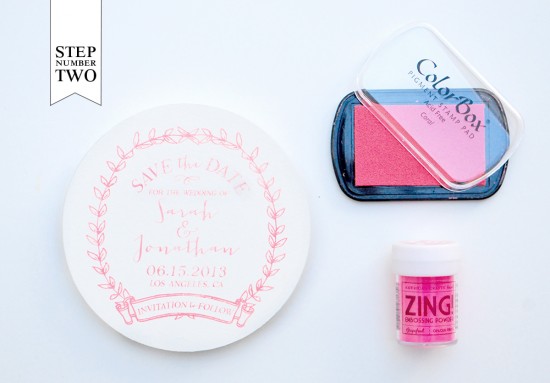
Step Two: We were so excited to find this awesome neon pink embossing powder! Place your circular card on a stable and firm surface. Ink your save the date stamp (we used our Mod Wreath Save the Date stamp) and center the stamp over your card. When ready, press the stamp down with moderate pressure to make the print. Lift the stamp off and quickly move on to adding your embossing powder. For more information about inking your stamp or making prints, please watch this video that shows the process in more detail.

Once you’ve made your print, immediately cover it with embossing powder by sprinkling it across the paper. Shift the powder around until you have covered the entire image. Now, you will pour the excess powder off of the card onto a scrap piece of paper so that you can reuse it for future prints. Heat set the print, using an Embossing Heat Tool. You will be able to see the powder melt into an opaque and solid color when it’s done.

Note: One key thing about embossing is that it is wise to try to closely match your ink color with your powder color. By doing this, you will get much more crisp and opaque results.

DIY Tutorial: Neon and Kraft Paper Save the Date by Antiquaria via Oh So Beautiful Paper

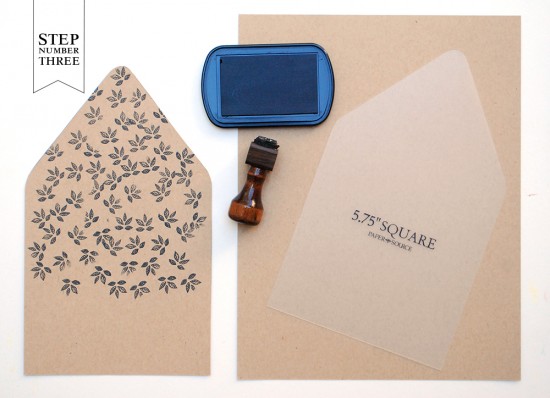
Step Three: Adding a liner is one fun way that you can add some pattern to your save the date. For this liner, we just stamped our Small Leaves pattern stamp in black on a kraft paper liner. To make the liner, trace the template onto your kraft paper and cut it out with scissors. To install, simply use stick glue or double sided tape to adhere them into your envelope.

DIY Tutorial: Neon and Kraft Paper Save the Date by Antiquaria via Oh So Beautiful Paper

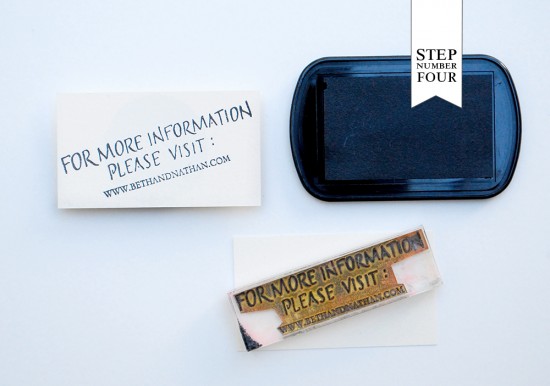
Step Four: It’s wise to include a website card with your save the dates so that guests can access all of the travel information and wedding details that they will need in order to make plans to attend your nuptials. For this card, we simply stamped our (Art Deco Website Card stamp) on a cream business card in black, diagonally.

DIY Tutorial: Neon and Kraft Paper Save the Date by Antiquaria via Oh So Beautiful Paper

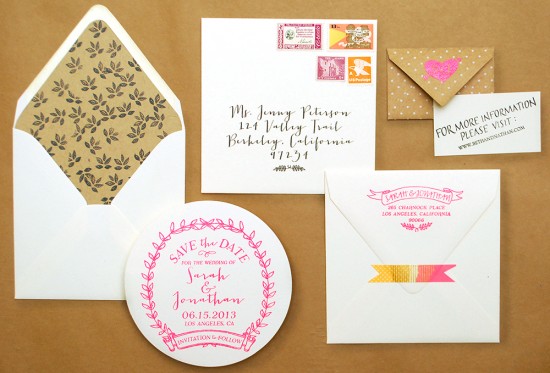
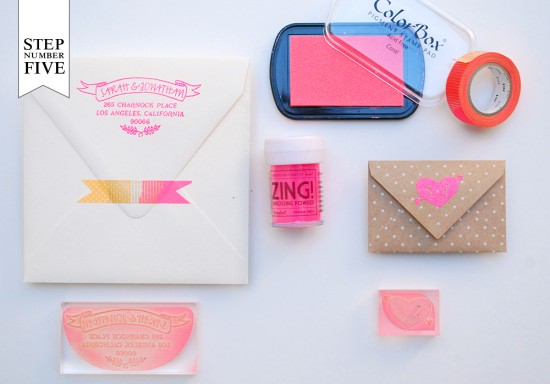
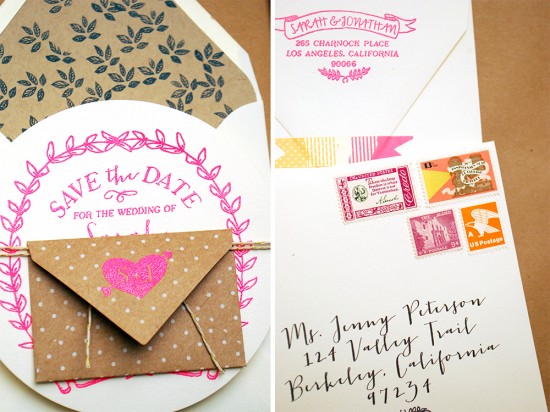
Step Five: Putting it all together: First, we embossed a return address stamp (we used our Mod Banner Return Address stamp) on the back flap of our outer envelope to coordinate with the save the date design. We also embossed our Cross My Heart Initials monogram stamp on the back flap of an adorable polka dot craft envelope that will hold the website card.

DIY Tutorial: Neon and Kraft Paper Save the Date by Antiquaria via Oh So Beautiful Paper

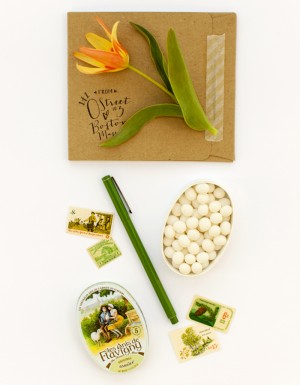
Now all that’s left is to address the save the dates, adhere postage (we used Verde Studio’s vintage stamps), add some fun neon washi tape and send them on their way!

Materials

Mod Wreath Save the Date stamp (circular option)

Art Deco Website Card stamp

Small Leaves Pattern stamp

Mod Banner Return Address stamp

Cross my Heart Initials Monogram stamp

5 1/2 Circular Card in Luxe Cream

5 3/4 Square Envelope in Luxe Cream

Business Card in Luxe Cream

Small Polka Dot Kraft Envelope from Martha Stewart

Stamp Pad in black and peony

Embossing Powder

Embossing Heat Tool

Envelope Liner Template

Kraft Paper (text weight)

Double sided tape

Scissors

Pencil

Postage Stamps from Verde Studio

Photo Credits: Antiquaria