{happy weekend!}

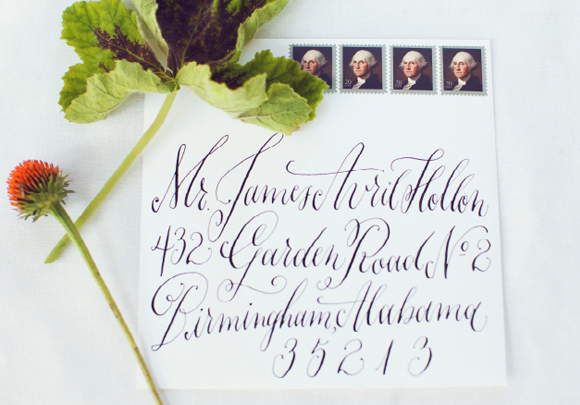
Happy Friday everyone! I spent all day yesterday thinking it was Wednesday, so it feels like the weekend kind of snuck up on me! And do you know what else is sneaking up? The National Stationery Show – it’s only two weeks away! Stationery Show mailers are starting to arrive and one of the photos below is a little sneak peek of something very special that I’ll be sharing in greater detail after the show. Next week I’m kicking off my NSS sneak peek coverage with some new exhibitors and returning favorites. Yay! But in the meantime…

Paper Party Invitation Sneak Peek by Oh So Beautiful Paper via Instagram Stationery Show Mailers by Oh So Beautiful Paper via Instagram

Roses by Oh So Beautiful Paper via Instagram Lilacs by Oh So Beautiful Paper via Instagram

Photos by me via Instagram

…a few links for your weekend:

This week on Oh So Beautiful Paper:

Check back soon for this week’s cocktail!  I hope you all have a wonderful weekend, and I’ll see you back here on Monday! xoxo

Allie + Ryan’s Baby Gender Reveal DVD Covers

Allie of Allie Ruth Design and her husband Ryan are expecting their first baby later this year (congrats you two!), and they wanted a fun way of sharing the baby’s gender with their family scattered around the country. They put together a sweet little video, burned some DVDs, and Allie printed these DVD covers using a rubber stamp with one of her illustrations. Too cute!

Baby Gender Reveal DVD Covers by AllieRuth Design via Oh So Beautiful Paper (3)

From Allie: For the announcement itself, we made a quirky video, but we needed a cute way to get the news to my family in Florida, and Ryan’s family here in the midwest (without giving it away to any of our friends first). So I burned the video onto some DVDs and created this block-printed sleeve in which to send them.

Baby Gender Reveal DVD Covers by AllieRuth Design via Oh So Beautiful Paper (2)

For the block, I had a custom rubber stamp made of one of my calligraphed illustrations. Our last name is Peach, so I was sure to incorporate a cute little peach at the bottom. I printed the image onto blank kraft DVD sleeves. For the envelope, we went with a gender neutral mint, so as to not give away the secret before our families saw the video.

Baby Gender Reveal DVD Covers by AllieRuth Design via Oh So Beautiful Paper (1)

I used my vintage typewriter to print each set of grandparents’ names onto little handmade, vintage-inspired tags and tied them on with black and white baker’s twine.

Baby Gender Reveal DVD Covers by AllieRuth Design via Oh So Beautiful Paper (4)

Thanks Allie – and congratulations again!

Photo Credits: Allie Ruth Design

Friday Happy Hour: The Normandy Mule

After last week’s Dark & Stormy, I’ve been on something of a ginger beer kick. So we played around with some other drinks that use ginger beer to produce a drink that’s pretty spicy and effervescent but also light and crispy. The resulting cocktail is just as perfect for a spring day: the Normandy Mule. – Andrew

Signature Cocktail Recipe: The Normandy Mule via Oh So Beautiful Paper (1)

The Normandy Mule Cocktail Recipe Card by Caitlin Keegan for Oh So Beautiful Paper

Illustration by Caitlin Keegan for Oh So Beautiful Paper

The Normandy Mule

2 oz Calvados (or Apple Brandy in a pinch)
4 oz Ginger Beer
1/2 oz Lemon Juice

Combine everything over ice, give it a good stir, garnish with lemon and enjoy!

Signature Cocktail Recipe: The Normandy Mule via Oh So Beautiful Paper (16) Signature Cocktail Recipe: The Normandy Mule via Oh So Beautiful Paper (14)

Calvados is an apple eau de vie, a brandy distilled from apple cider made exclusively in Normandy (hence the name). It tastes very much of apples, with plenty of spice and earthiness. It’s great for fall drinks, but I think the ginger beer (especially all those bubbles) and lemon juice lighten it up perfectly for the spring. You could use an American apple eau de vie just as easily, though we’d probably have to come up with another name for that one…

Signature Cocktail Recipe: The Normandy Mule via Oh So Beautiful Paper (7)

We named this one after the Moscow Mule, another drink that combines vodka with lime juice and ginger beer. The Moscow Mule was invented back in the 1940s and help introduce America to vodka, which might otherwise have remained hidden behind the Iron Curtain. Why didn’t we feature the Moscow Mule this week instead of making our own? Well, we have a simple rule in this house: no vodka! Vodka, by law, must be flavorless and odorless, a neutral spirit that adds nothing to a drink but alcohol. Since cocktails are an important part of classic American cuisine, and not just a way to get smashed, we think it’s important that our spirits have flavors too, and not just booze. So no vodka, and no vodka drinks. Which just means we get to improvise tasty drinks like the Normandy Mule instead.

Signature Cocktail Recipe: The Normandy Mule via Oh So Beautiful Paper (28)

David Embury, in his classic The Fine Art of Mixing Drinks, had this to say on the subject:

I have known people who preferred grain alcohol or vodka, which is the same thing…These people drink primarily for the “kick,” and not for the taste. In my opinion, such people should not drink at all. Unfortunately, however, they are usually the ones who drink the most.

This from a guy who wrote a 400 page book on drinking. Amen.

Photo Credits: Nole Garey for Oh So Beautiful Paper

DIY Tutorial: Indigo Floral Print Wedding Invitations

We’ve always had a love affair with indigo – in fact, the wedding quilt that Emma’s mother created for her is made from scraps of vintage Japanese indigo fabrics. With its recent rise in popularity we decided that indigo would make the perfect inspiration for an invitation suite. The deep blue and white color scheme, mixed with floral elements and classic typography, makes it a design suitable for any season! – Bailey and Emma of Antiquaria

DIY Tutorial: Floral Indigo Wedding Invitations by Antiquaria via Oh So Beautiful Paper

Tie the square invitation and enclosure pieces together with indigo dyed twine and your guests will feel like they’re opening a gift!

DIY Tutorial: Floral Indigo Wedding Invitations by Antiquaria via Oh So Beautiful Paper

Step One: Lay a  5.5″ square card down on a firm surface. Ink your stamp (we used our Sophisticate Invitation Stamp) thoroughly and center it over your card. Once it is positioned correctly, press down to make a print. Use both hands to ensure even pressure. Lift off and let the print dry. For more information on this process go here.

DIY Tutorial: Floral Indigo Wedding Invitations by Antiquaria via Oh So Beautiful Paper

Step Two: You will repeat the printing technique from Step 1 for your reply card (we used our Sophisticate Reply Card Stamp) on a 4bar (3.5″x4.75″) card.  This time, instead of centering the stamp, you will print it toward the bottom of the card. This leaves space to print the floral pattern (we used our Daisy Pattern & Small Leaves Pattern Stamps) at the top. It’s best to start with the larger pattern stamp and then fill in with the smaller leaf stamp.

DIY Tutorial: Floral Indigo Wedding Invitations by Antiquaria via Oh So Beautiful Paper

Step three: We love to incorporate patterns in to our invitation suites, whether it’s an envelope liner, backer or belly band…it adds so much style and personality to the design. We created this indigo pattern by randomly stamping pattern stamps (we used our Camellia Pattern, Daisy Pattern and Small Leaves Pattern Stamps) in frost white ink on 8.5″ x 11″ card stock. The effect that it creates is so lovely!

DIY Tutorial: Floral Indigo Wedding Invitations by Antiquaria via Oh So Beautiful Paper

Step Four: To make the accommodations card, you will need to cut the 8.5″ x 11″ patterned paper into 5″ squares (you will get 2 per sheet). Next, ink and stamp your accommodations information (we used our Calligraphy Accent Accommodations Stamp) on the front of the navy blue card.

DIY Tutorial: Floral Indigo Wedding Invitations by Antiquaria via Oh So Beautiful Paper

Step Five: Using the same printing technique as above, you will print your return address and reply address (we used our Wildflowers Return Address Stamp) on the outer and reply envelopes. Now all that’s left is to tie everything together, address your envelopes, add postage (we used awesome blue vintage postage from Verde Studio) and send them on their way!

DIY Tutorial: Floral Indigo Wedding Invitations by Antiquaria via Oh So Beautiful Paper

Materials:

Sophisticate Invitation Stamp

Sophisticate Reply Card Stamp

Calligraphy Accent Accommodations Stamp

Pattern Stamps – Camellia, Daisy, Small Leaves

Wildflowers Return Address Stamp

Stamp Pad – Frost White, Midnight

5.5″ Cards in Luxe Cream

5.75″ Envelope in Night

4bar Flat Card in Luxe Cream

4bar Envelope in Night

8.5″x11″ Cardstock in Night

Vintage Postage Verde Studio

String or twine

Anti­quaria is a mem­ber of the Designer Rolodex – you can see more of their beau­ti­ful work right here or visit the real wedding invitations gallery for more wedding invitation ideas!

Photo Credits: Antiquaria

Calligraphy Inspiration: Holly Hollon

This month, I’m happy to share the work of a calligrapher who has been popping up more and more around these parts. You may have seen her work in Martha Stewart Weddings, Southern Weddings, or right here on OSBP! Holly of Holly Hollon Design & Calligraphy has built herself a beautiful portfolio of work following a career in the field of advertising. Holly’s skills in design, calligraphy, and illustration make her a triple threat in the world of event stationery. Take a look and I’m sure you’ll agree! – Julie

Calligraphy Inspiration: Holly Hollon Design & Calligraphy via Oh So Beautiful Paper

Holly Hollon calligraphy envelope detail

Calligraphy Inspiration: Holly Hollon Design & Calligraphy via Oh So Beautiful Paper

I love the way Holly combines her lettering with illustrations; there’s a feeling that every aspect of the suite is tailor made for you!

Calligraphy Inspiration: Holly Hollon Design & Calligraphy via Oh So Beautiful Paper

Calligraphy Inspiration: Holly Hollon Design & Calligraphy via Oh So Beautiful Paper

Holly has a wonderful gallery of custom maps, as well. Featuring charming hand-drawn and handwritten elements, it’s hard to resist having one made for your event, isn’t it?

Calligraphy Inspiration: Holly Hollon Design & Calligraphy via Oh So Beautiful Paper

You can see more of Holly’s work on her blog, Holleeanne. You can also catch up with Holly’s dogs Daisy and Dottie on Doodles and Poodles, which features more of her illustrations and calligraphy!

Photo credits: 1 Stacy Richardson; 2 Holly Hollon; 3 l+r Kelly Cummings; 4 Stephen DeVries; 5 l+r, 6 Jessica WrightÂ