Friday Happy Hour: The Last Ship Home

Two years ago (!), Nole and I spent a fantastic week in St. Lucia, a tiny and gorgeous Caribbean country. I, of course, tried the local drinks, and they were as you might expect: full of rum and pineapple and coconut. Tropical. But I also noticed something interesting in between cups of rum punch –advertisements all over the country for Campari, the bitter Italian amaro that’s key to cocktails like the Negroni. This made no sense to me. Why would the people of a Caribbean island – with all that rum and lime and pineapple, rich spices and coconut – drink bitter, bitter Campari? So I asked a bartender and he told me that St. Lucians loved Campari, on the rocks or with soda water, just like in Italy. Go figure. So I wanted to give something an experiment, to balance the touristy fantasy of the ideal Caribbean drink with the reality of what St. Lucians actually drink. And I think I came up with something pretty interesting and pretty good: The Last Ship Home. – Andrew

Signature-Cocktail-Recipe-The-Last-Ship-Home-OSBP-1

Signature-Cocktail-Recipe-Card-The-Last-Ship-Home-Shauna-Lynn-Illustration-OSBP

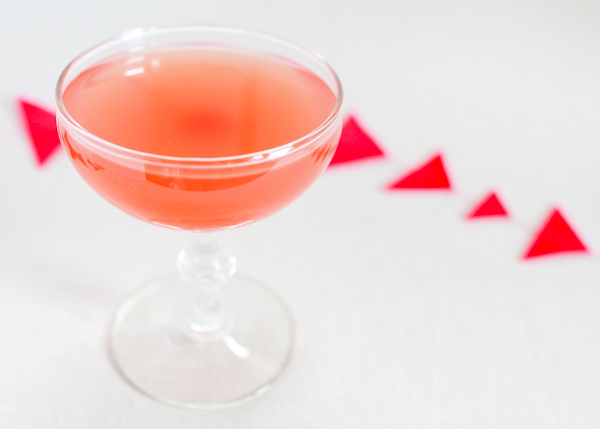
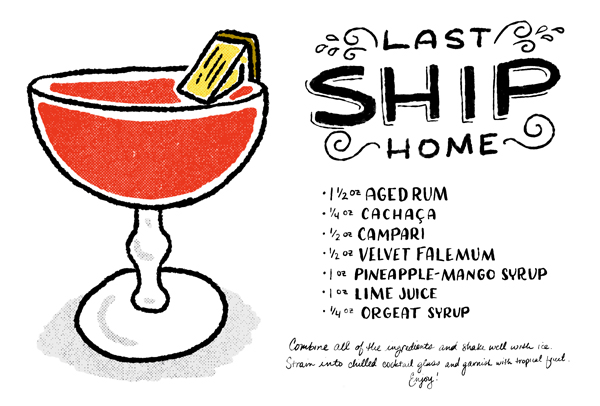
Illustration by Shauna Lynn for Oh So Beautiful Paper
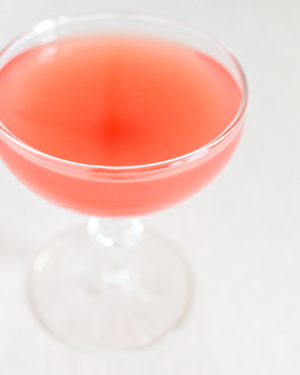
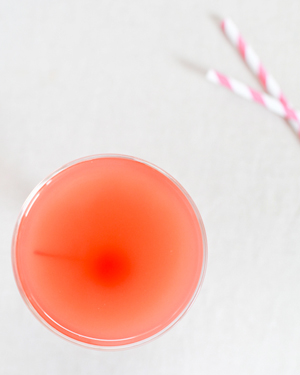
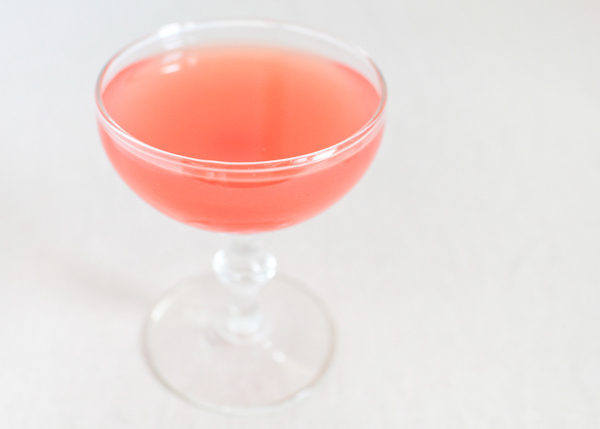
The Last Ship Home

1 1/2 oz Aged Rum
1/4 oz Cachaca
1/2 oz Campari
1/2 oz Velvet Falernum
1 oz Pineapple-Mango Syrup
1 oz Lime Juice
1/4 oz Orgeat Syrup

Combine all of the ingredients and shake well with ice. Strain into a chilled cocktail glass and garnish with tropical fruit. Enjoy!

Signature-Cocktail-Recipe-The-Last-Ship-Home-OSBP-12Signature-Cocktail-Recipe-The-Last-Ship-Home-OSBP-14

There’s a lot going on in this recipe, but it works: smooth and tangy, sweet and sour, sweet and bitter, with tropical spiciness but also amaro herbal notes. I won’t lie: if you don’t have all of these ingredients at home, you can still make a really interesting bitter Daiquiri with rum, lime, sugar, and Campari. But if you do have all these handy, give it a try: it’s enormously complicated but somehow all works together, balancing the richly sweet tropical flavors with a classic bitter Italian aperitif.

Signature-Cocktail-Recipe-The-Last-Ship-Home-OSBP-19

Weird. But good.

Don’t forget to let us know if you try any of our recipes. And if you do make one at home, you can use #osbphappyhour to share photos of these (or your own creations) on Instagram.

Photo Credits: Nole Garey for Oh So Beautiful Paper

NSS 2014 Sneak Peek: Belle & Union

If you’ve followed my National Stationery Show coverage from the last couple of years, you know that I’m a huge fan of Meg from Belle & Union. Meg totally knocked it out of the park with her very first booth and has been going strong ever since! This year, Belle & Union will have a ton of new goodies in Booth 1856, from notepads to calendars to art prints from some of their most popular greeting cards, including everyone’s favorite You Make Me  a Happy Camper. For greeting cards, the 2014 collection features 30 new cards, including the debut of Mama’s Missives, Mindful Manners for Modern Correspondence – six cards that will make Mama proud as your cross your t’s and dot your i’s with a card for every occasion. I’m also a big fan of Meg’s commitment to U.S. sourcing and manufacturing, from 100% cotton tea towels that start from West Texas cotton pods to blue pine repurposed from the Colorado forest floor.

NSS-2014-Sneak-Peek-Belle-and-Union-Art-Print

NSS-2014-Sneak-Peek-Belle-and-Union-Cream-of-the-CropNSS-2014-Sneak-Peek-Belle-and-Union-Stronger-Moonshine

NSS-2014-Sneak-Peek-Belle-and-Union-Mamas-Missives

NSS-2014-Sneak-Peek-Belle-and-Union-Notepads

NSS-2014-Sneak-Peek-Belle-and-Union-USA-Made

NSS-2014-Sneak-Peek-Belle-and-Union-Pickled-PerfectionNSS-2014-Sneak-Peek-Belle-and-Union-Winds-of-Change

NSS-2014-Sneak-Peek-Belle-and-Union-Calendar

Thanks Meg!

Photo Credits: Belle & Union

Hello Brick & Mortar: How to catch a Retailer’s Eye at NSS

For those prepping for NSS, I know you’re elbow deep in painting your booth and not sleeping. This post is not intended to add to your list of to-dos. It is meant to 1) put the finishing touches on what you’ve already done and 2) have a task ready when someone asks how they can help. – Emily of Clementine

OSBPEmilyMcdowellIllustration

Illustration by Emily McDowell for Oh So Beautiful Paper

1. Pre-Show:

  • Send a pre-show email. If you have an hour/an intern, send a reminder email to retailers: Include a sneak peak and remind us of any show specials. This is also a great way to encourage orders from retailers who aren’t attending.
  • Document your process and #hashtag it: Photos of booth building and sneak peeks are my amuse bouche on instagram these days. They’re low-effort but can put you on retailer radars quickly. {side note: what hashtags are we using? #stationeryshow, #nss, #nss2014? Let’s agree on one and put it in letterpress}.
  • Put your booth number in your social media profiles. Now.

2. Your Booth: It looks great already, this is just a final checklist from a retailer’s view.

  • Flowers and candy. Flowers draw people in, candy brings them closer (so put it further back). I don’t want to give you another task, I want to give it to your kind friend/partner who asks what they can do to when you’re overwhelmed.

NSSwildinkboothflowersWild Ink Press 2013 booth. Who can resist those peonies? Photo via Wild Ink Press

OSBPPDSLLnssbooth2013

Parrott Design Studio and Letter & Lark made their booth feel like home with hanging succulents and potted plants. Via Letter & Lark

Rifle-Paper-Co-New-York-International-Gift-Fair-August-2012-2

Rifle Paper Co. has mastered the art of floral and paper mixing. Photo via Oh So Beautiful Paper from Winter NYIGF 2012

  • Make your social media handles visible. Last year I took several photos of booths and cards, but the vendor was engaged in a conversation and I couldn’t properly credit them. You can solve that easily, like so:

OSBPfarewellP

Farewell Paperie 2013 booth, with their @farewellpaperie easy to find. Photo via Farewell Paperie

  • Make sure your booth number is visible. Can you see it from every angle (or at least 2)? I once spent 20 minutes and 3 trips down the same isle trying to find a booth that I swear just didn’t exist.
  • Your Business Cards, plus. Make sure a retailer can quickly see your business name, your social media handles and your show specials, even if you’re in the middle of an order with someone else. A stack of business cards may be enough, but I’d suggest a simple table tent card (with large font) visible to someone who is hovering in the aisle. That can encourage a retailer walking by to stay, come back, and/or to credit you if she takes an instagram shot of your booth.
  • Bring a bit of your studio into your booth. An Open Sketchbook took this to new levels with their 2013 booth, but you can give retailers a glimpse into your work with just a few well styled tools.

OSBPyellowowlworkshop

Yellow Owl Workshop 2013 booth. Photo via The Sweetest Occasion

3. You:

  • Smile. So simple, right? Just like a thank you note, it makes a big difference and can invite a hesitant retailer in to your booth.
  • Hand out your card. It can be awkward to ask retailers for their cards over and over. I find that when someone hands me a card, my reflex is to hand one back. So rather than asking constantly, be ready to give yours.
  • Relationship building. If a retailer places an order, this is a great time to ask a few questions that will help clarify and strengthen your relationship going forward. I addressed what to ask in this post. Even if you don’t get an order, this is a great opportunity to connect. Don’t be afraid to ask retailers what they’re drawn to in your line, and consider suggesting your ‘must see’ booths in the show. (You know, what goes around, comes around.)

4. Your Promos & Swag. Don’t stress about this in the final week. Use this list to help winnow what you bring; to divvy up last minute tasks; and to remind you of that drawer of leftover goodies.

  • It’s only happening this week: Show specials are great because you could decide to run one at the last minute. I suggest promos that encourage retailers to buy more (ie, free shipping or an extra set of cards for all orders over $200 rather than just free shipping on all orders.)
  • It’s useful: I still have my These Are Things tote, which I needed after one day of catalog gathering. The floral magnets from Sycamore Street Press are still on my fridge. I also thought the suitcase tags from 9th Letter Press were a great mix of super cute and functional. These things were all useful and I think of each company each time I see them. (Which reminds me, this is a great read pre-show).

OSBP9thlp

9th Letterpress 2013 luggage tag giveaway. Photo via 9th Letterpress

  • It’s crafty. Albertine Press postards are one of my favorite giveaways: trimmed from prior year calendars (brilliant), they made great promos. You* (aka your intern/devoted friends) could repurpose deadstock cards or material trimmings to make bookmarks/ornaments/garlands/something else Pinterest makes you think is a good idea.
  • It makes you memorable. There’s a reason you are going to NSS. Ladyfingers Letterpress offered hand lettering demos that were such a hit and a true treat, different from the normal retailer/vendor interaction. It was also uniquely them. Whether you’re a great hugger, or a phenomenal hand-letterer, you’re at NSS for a reason. Remember your youness. And, Bring It. 

OSBPLFLhandlettering

Ladyfingers Letterpress amazing hand lettering demos at NSS 2013. Photo via Ladyfingers Letterpress

5. Post Show.

  • Send a follow-up note to key retailers: Namely those who made orders and those you want to make orders. I know, I’m cringing at giving you this suggestion when you are already so busy, but this is often the touch that gets the order. If you’re really on the ball you could bring a stack of cards to the show (if you have any lying around), as you take a retailer’s business card, clip it to one of your cards, et voila! A ready to write/mail stack when you return.
  • Celebrate!

Screen Shot 2014-05-06 at 9.31.35 PM

Pistachio Press & Blackbird Letterpress with, arguably, the best instagram photo of 2013

See you soon! (Now, get some sleep…)

DIY Modern Personal Stationery Gift Set

With Mother’s Day right around the corner and a ton of summer birthdays on our calendar, we’ve had DIY gifts on the brain. As you might could guess, we typically prefer to make our friends and family gifts so that we know that they’re both thoughtful and unique. Today, we’ve put together a gorgeous DIY stationery set, perfect for all of those summer occasions that pop up requiring a killer gift. We used a mix black and white patterned paper for the envelopes and added a punchy coral card to make these sets modern and fun! – Bailey and Emma of Antiquaria

DIY Tutorial: Modern Personal Stationery Gift Set

DIY Tutorial: Modern Personal Stationery Gift Set

Step One: First, you’ll need to make your template for the handmade envelopes. We deconstructed one of our favorite sizes (it also fit nicely on an 8.5″ x 11″ inch sheet of paper, so use that as a consideration) and traced it onto card stock. We then cut it out with scissors to use as our tracing guide for the patterned paper.

DIY Tutorial: Modern Personal Stationery Gift Set

Step Two: Trace your envelope template onto the backs of your patterned paper (we used our Brushed Floral No.1, Brushed Floral No.2, Brushed Geo No.1 and Brushed Geo No.2) and cut them out with scissors.

DIY Tutorial: Modern Personal Stationery Gift Set

Step Three: Fold each side of your envelope inward  to crease. Fold in the two sides (as shown above) and affix double sided tape to the lower fold’s edge. Fold it up to meet the sides and press to adhere. If there are stray pencil lines on the top flap of the envelope, gently erase them with your pencil (see below).

DIY Tutorial: Modern Personal Stationery Gift Set

DIY Tutorial: Modern Personal Stationery Gift Set

Step Four: Adding an address label will make writing on the patterned envelopes much easier. We found cute black and white labels and stuck them onto the front of each envelope. This also helps all of the patterns come together into a cohesive set. In addition, you’ll need to add scrapbooking tape onto the top flap of the envelope in lieu of the typical gumming you find in commercial envelopes. (So that they can be sealed for mailing)

DIY Tutorial: Modern Personal Stationery Gift Set

Step Five: Next, we made our patterned note cards using 2 floral pattern stamps. First we stamped the largest floral stamp (our Daisy Pattern Stamp) randomly across the back of the card. As you can see, we stamped some of the prints off of the edge of the card to give it the look of a pattern repeat.

DIY Tutorial: Modern Personal Stationery Gift Set

Step Six: After the large stamping is done, we filled the rest in with our Small Leaves Pattern Stamp. Again, we stamped some off of the edge. Once we were happy with the clusters and spacing, we set the card aside and repeated Step 5 and 6 on the rest of the note cards.

DIY Tutorial: Modern Personal Stationery Gift Set

Each card back is a little different which makes the assortment really fun! You can also experiment with different colored cards and ink colors!

DIY Tutorial: Modern Personal Stationery Gift Set

The set is ready to be gifted! Add in some pretty washi tape and some fun postage to complete the gift!

Materials

Patterned Paper (Brushed Floral No.1, Brushed Floral No.2, Brushed Geo No.1, Brushed Geo No.2)

Pattern Stamps (Daisy Pattern, Small Leaf Pattern)

Address Labels

Note Cards cut to fit in your handmade envelope

Card Stock

Double Sided Tape

Scrapbooking Tape

Pencil

Scissors

Washi tape and Postage for gifting

Photography: Antiquaria for Oh So Beautiful Paper

Annie + Nate’s DIY Gold Rubber Stamp Save the Dates

I used a rubber stamp to create my own wedding save the dates approximately eight thousand years ago, and I’ve had a special place in my heart for rubber stamps ever since. Annie also went the rubber stamp DIY route for her own wedding save the dates last September, pairing a typography-focused design with gold ink and long kraft paper envelopes. Love!

DIY-Gold-Rubber-Stamp-Wedding-Save-the-Date-OSBP

From Annie: Going into the design I knew I wanted something simple and pretty, but not overly feminine or locked into a theme. I love the look and feel of letterpress, and I wanted to find a way to achieve a similar tactile quality while remaining budget conscious. I immediately thought a rubber stamp would be perfect.

DIY-Gold-Rubber-Stamp-Wedding-Save-the-Date-OSBP10DIY-Gold-Rubber-Stamp-Wedding-Save-the-Date-OSBP7

I had a custom rubber stamp made and lovingly hand printed each piece. I love how the stamp creates texture, interest, and depth, and each piece feels special as no two are the same. The crisp white paper and bold typography feel classic and modern, and and I love how the gold ink creates shimmer and shine without going over the top. I paired it with kraft envelopes to compliment the hand crafted look and neutral color palette.

DIY-Gold-Rubber-Stamp-Wedding-Save-the-Date-OSBP2

Thanks Annie!

Check out the Designer Rolodex for more tal­ented wed­ding invi­ta­tion design­ers and the save the date gallery for more beau­ti­ful cus­tom save the dates!

Photo Credits: Annie Carlson