Farm Fresh Birthday Party

Hi guys! It’s been so fun guest blogging over here this week! I am beyond excited for Nole and Andrew and cannot wait to meet their newest little cutie pie! For my last and final Urbanic guest post, I’ll be sharing yet another birthday party we hosted, but this time for my younger son Ian who said he wanted his party to be “like a farm.”

Farm Theme Kids Birthday Party by Urbanic via Oh So Beautiful Paper

Since Ian has an October birthday, the weather this time of year made the perfect canvas to serve yummy farm fresh foods. We had fried chicken, mac and cheese, buttermilk biscuits and a cranberry pecan salad. We also had the popcorn machine popping and some jars of red licorice around for the adults. We sourced a few giant hay stacks at a local feed ranch and decorated the yard to compliment them with blue gingham linenes, fall flowers and little plastic farm animals. We made tiny hats for the animals and placed them around the party, amd on the food tables to accent the arrangements.

Farm Theme Kids Birthday Party by Urbanic via Oh So Beautiful Paper Farm Theme Kids Birthday Party by Urbanic via Oh So Beautiful Paper

We were so blessed that a  good friend of ours made the adorable ‘pin the tail on the donkey’ game just for Ian! It worked perfectly when we put it into an old frame. We had a bandanna print hair-band which made it easy for kids to slide it off and on for their turn. After the party was over, each of the little ones took home a farm animal favor bag that we crafted out of brown paper bags and construction paper.  It was a perfect day on the birthday farm!

Thanks everyone, I’ll be back again soon.

Audrey


Guest Post: Good on Paper

I’ve asked some of my favorite creative mamas to help out while I’m away with our new baby. Today, one of my favorite stationers – and mama of two boys! – Lisa from Good on Paper is sharing some thoughts about motherhood! –Nole

Hi guys! While Nole is out on maternity leave, she asked me to share something I love or found surprising about motherhood. Since Nole is soon to be a mother of two, I thought I would share a few stories and tips about being “Mama” to my two boys, (Lucas, 4, and Theo, 2), and in particular, preparing the older sibling for the newest member of the family. – Lisa from Good on Paper

Good-on-Paper-Theo-and-Lucas4

One thing that surprised me about motherhood was how much emotional energy is involved (in addition to the physical demands of chasing two boys around). From the fun and silly moments to the complete meltdowns for no apparent reason, motherhood has been rewarding, but exhausting. There are so many good days and a fair number of not-so-good, but I try to remember that the difficult phases will pass. Rather than focus on the negative, I’ve found that the important thing is to cherish every moment, take lots of pictures, and write down all those delightful toddler phrases and “preschooler-isms” for posterity. (Lucas recently observed, after sending a Hot Wheel car off a ramp, “Whoa! That one was extra does it!”)

A few things that worked for us to prepare Lucas for Baby Theo:

1. Refer to the baby-to-be as “your baby brother/sister,” rather than “my baby” or “our (the parents’) baby.” This seemed to resonate with Lucas, and he felt very special and proud to be such an important figure  in Theo’s life.

Good-on-Paper-Theo-and-Lucas3

Good-on-Paper-Theo-and-Lucas11

2. Invest in some “older sibling primer” books.  I bought three books for Lucas about being a big brother, and his favorite by far was “I’m a New Big Brother” by Nora Gaydos.  The illustrations in particular seemed to help him understand what to expect from his new baby brother, and how he could help Mama and Daddy out in this new family adventure.

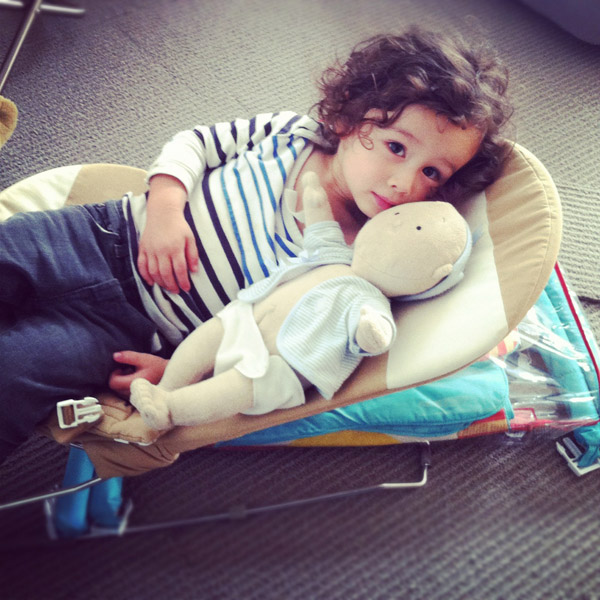
3. Get a “trainer baby.”  I bought Lucas this adorable baby brother doll that (as far as we knew) might resemble the real baby Theo. Lucas carried him around gently (only occasionally tossing him across the floor), and always referred to him as “baby brother.”

Good-on-Paper-Lucas

4.     Buy the older kid a “birth-day” present.  At the hospital, we made it a point to get a gift for Lucas that was “from his baby brother.” We got him a new backpack, a book, and a toy fire engine. To this day, he remembers that Theo gave him those things.

Now that Theo has been around for a couple of years, I’ve also learned a few things that have helped our boys start their lifelong friendship on a positive note. So far so good.

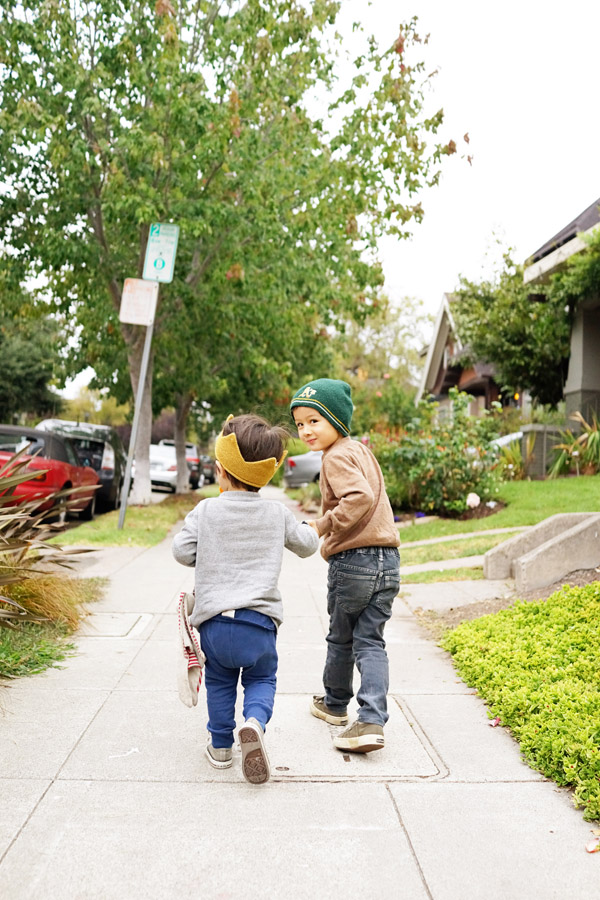
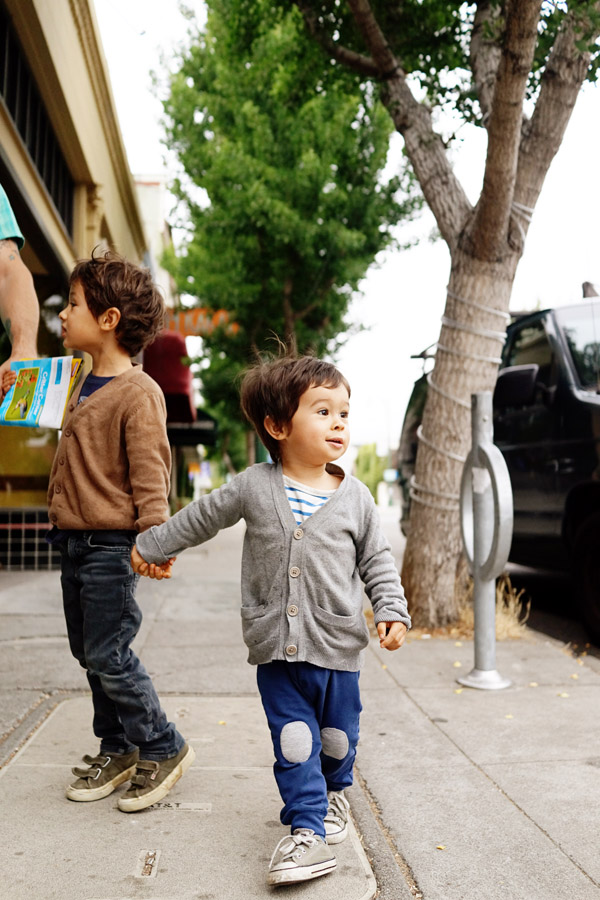
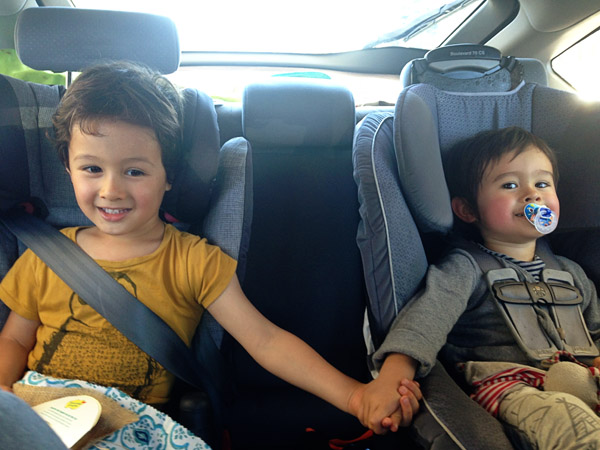
1. Make the older kid feel extra special. We give lots of praise to Lucas for being a great helper, a kind and sweet big brother, and a teacher to his little brother. Theo copies everything Lucas does. And I mean everything, both good and bad. Lucas hides in the laundry hamper; Theo does, too. Lucas takes off his shirt; Theo does, too. Lucas holds hands; Theo does, too. Lucas throws sand; Theo does, too. We are always telling Lucas how much Theo loves him, appreciates him, and wants to do everything just like him. I think, for the most part, this builds Lucas’ self-esteem and encourages more good behavior than bad. Lucas always wants to hold his brother’s hand and take care of him when we leave the house, which has been incredibly sweet to watch.

Good-on-Paper-Theo-and-Lucas5

2. Make one-on-one time with each kid. My husband Nick and I like to use the “divide and conquer” parenting tactic on a regular basis. We do a lot of things as a family, but we also find that taking one-on-one adventures is rewarding in its own way. I’ll take Lucas to swim lessons, breakfast, play dates, etc., while Nick stays home with Theo during his nap (aka “nap jail”), then takes him to the park or on a hike. I realized just how much these one-on-one dates mean to Lucas when he said in the car one day, “Mama, I really like it when we do things just me and you. No one else. Just me and you.”

3. Reward good behavior. Whenever I see the boys playing nicely together, I make sure to give them lots of praise. One of the best toddler books I’ve read is “The Happiest Toddler on the Block” by Harvey Karp, M.D. The methods in this book worked well with both kids, and it has been a life saver. One little trick I’ve  learned is “gossiping,” i.e. praising a child’s behavior to a third party, within earshot of the child, but pretending you don’t want the child to hear. It’s a fun little game, and it seems to make the praise more effective. For example, I’ll say to my husband (in an audible whisper):  “Hey Nick, look how sweet Lucas is, holding Theo’s hand and making sure he gets down the stairs safely. I love that!” Or, “Hey Nick, I loved seeing Lucas and Theo taking turns with their toys today. It made me feel so happy.” Or, “Did you see how Theo gave Lucas his car when he was done with it? He probably learned that from Lucas!”

Good-on-Paper-Theo-and-Lucas6

Good-on-Paper-Theo-and-Lucas15

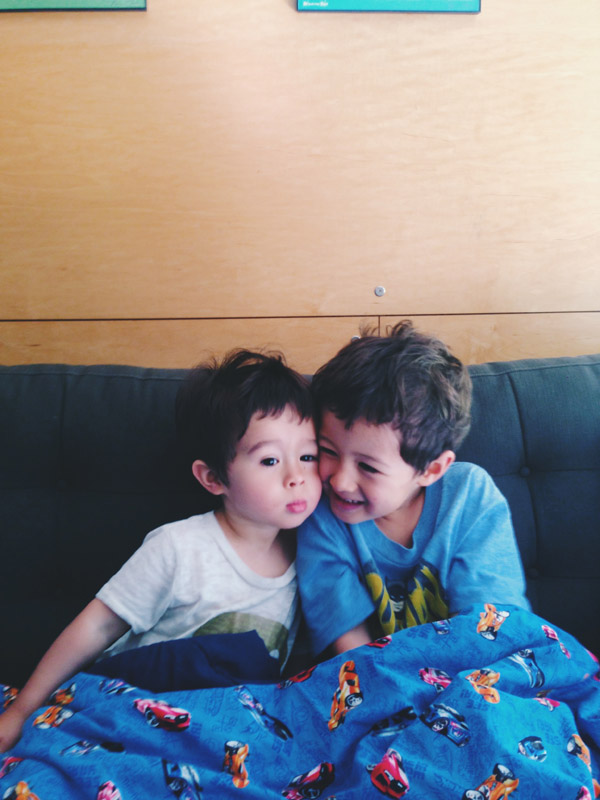
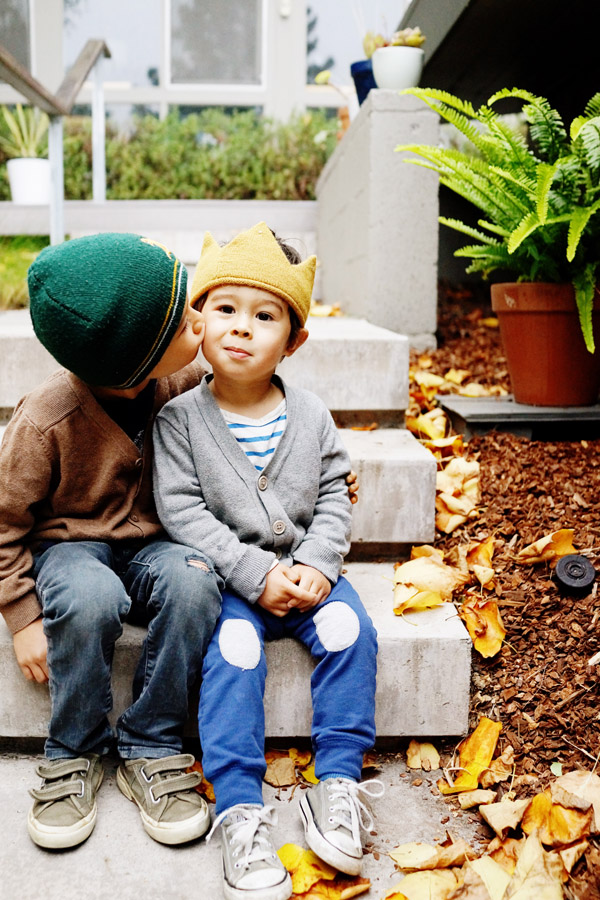
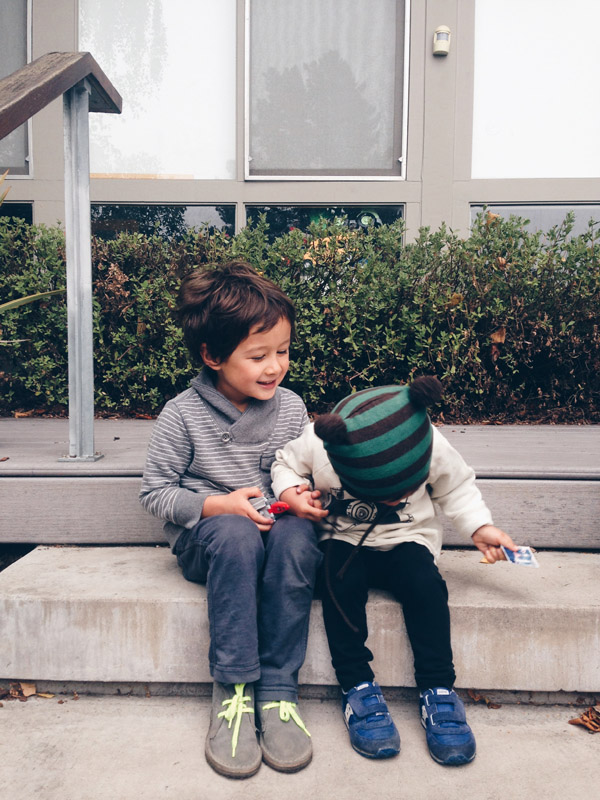
It’s been such a treat for me to watch my two boys interact and grow together.  Of course, they don’t always agree on things (especially whose turn it is with the cool new toy), but I love how proud Lucas is of his baby brother; how he always says Theo is the cutest baby brother in the whole world;  how he introduces all of his friends to his baby brother;  how he holds his hand, kisses him, and pats his head; and how he teaches him to say new words (good, bad, and invented).  I honestly didn’t know what to expect when Theo was born, but I couldn’t be happier about the great big brother Lucas has become.

Bug Birthday Party

Hi there, Oh So Beautiful Paper readers! Audrey here again, and this time I’m giving you a peek into some of my family life at home when I’m not working at Urbanic. When my eldest son Javin came to me and said that he wanted a ‘bug party’ for his 6th birthday, I admittedly wasn’t too excited about this. I imagined that it was going to be tough to find a way to keep this party from becoming overly cutesy or un-attractively creepy. I spent some time searching for design inspiration and came up with a plan to make it work with a little bit of crafting and some food fun.

Bug Theme Kids Birthday Party by Urbanic via Oh So Beautiful Paper

For decor, I mounted plastic insect ‘specimens’ to hexagon colored card stocks and strung a bitten leaf  birthday banner which we had punched lots of holes in! All of the foods were healthy small bites inspired by insects. We had ‘lady bug bites’, ‘caterpillar kabobs’, ‘ants on a log’, and then sang Happy Birthday with a ‘dirt cake’ made up of chocolate mousse, whipped cream and cookie crumbs. The kids each had their own adorable serving crowned with a gummy worm! Bug Theme Kids Birthday Party by Urbanic via Oh So Beautiful Paper

The activities we hosted for the children consisted of a bug bounce and a bee toss. We also made kids sized play stations that involved little games and challenges with plastic bugs.

Bug Theme Kids Birthday Party by Urbanic via Oh So Beautiful Paper

For favors, we punched holes in the lids of mason jars and turned them into lady bug habitats. The kids got to take them home and release into their yards. We added a little legend to each jar about how special lady bugs are and they ways they can benefit a garden. They whole thing was so fun … except getting those lady bugs into the mason jars!

xo

Audrey

PS Here’s where I found everything: ladybugs , dirtcake, cute signage,  spaceships & laserbeams invitation download,  plastic bugs, mason jars + magnifying glasses


DIY Tutorial: Industrial Lightbox Typography Sign

Industrial signs always catch my eye. Especially ones that light up. And since it’s become “a thing” to have similar (neon!) signs in your home, for your wedding, or in your office, i’ve had the urge to make something with a simple industrial feel that contrasts against the pretty things we’d display around it. I love the versatility of the one I made… you can paint it, change out the quotes and words, prop it up or hang it, and move it around from room to room. I decided to do something fun for our bedroom but would love to make another for the entry way and change quotes with the seasons! Read on to see how to make your own! – Lauren

DIY Tutorial: Industrial Lightbox Typography Sign by A Fabulous Fete for Oh So Beautiful Paper

DIY Tutorial: Industrial Lightbox Typography Sign by A Fabulous Fete for Oh So Beautiful Paper

Materials

lightbox

balsa wood (found at craft stores, it’s VERY light and thin)

glue gun

vinyl to cut or letter stickers

razor blade/scissors/x-acto knife

DIY Tutorial: Industrial Lightbox Typography Sign by A Fabulous Fete for Oh So Beautiful Paper

Step One: Start by measuring pieces of your wood that will cover the sides of the lightbox. Since most will have a slight tilt on the face, make sure you follow the highest measurement all the way across the length of your wood panel. When you glue them down, you want to create an even box so that the face will be flat when you display. Cut all four pieces out. Remember to cut around the switch and plug as seen below.

DIY Tutorial: Industrial Lightbox Typography Sign by A Fabulous Fete for Oh So Beautiful Paper

Step Two: Use your glue gun to attach the pieces to the sides first. Make sure to lay the lightbox face down when glue the pieces on so that the lighted part of the box is flat on the front.

DIY Tutorial: Industrial Lightbox Typography Sign by A Fabulous Fete for Oh So Beautiful PaperDIY Tutorial: Industrial Lightbox Typography Sign by A Fabulous Fete for Oh So Beautiful Paper

Step Three: Cut two pieces to cover any part of the light box that is not the frosted plastic piece, this will create the “frame” on the front of the box.

DIY Tutorial: Industrial Lightbox Typography Sign by A Fabulous Fete for Oh So Beautiful Paper

Step Four: Cut out your letters or use some pre-made letter stickers to add a word or quote you like.

DIY Tutorial: Industrial Lightbox Typography Sign by A Fabulous Fete for Oh So Beautiful Paper

If you want to hang, you will have to drill holes through the top of the wood AND through the plastic top of your box (the wood and glue will not hold the weight). To secure the string, I tied the ends to some washers bigger than the hole I drilled on the inside of the box.

DIY Tutorial: Industrial Lightbox Typography Sign by A Fabulous Fete for Oh So Beautiful Paper

Find a place to hang and style!

DIY Tutorial: Industrial Lightbox Typography Sign by A Fabulous Fete for Oh So Beautiful PaperDIY Tutorial: Industrial Lightbox Typography Sign by A Fabulous Fete for Oh So Beautiful Paper

I love that with the stickers it will be really easy for us to change out our quote whenever we’d like!

What would you guys use your new lightbox sign for?

Styling + Photos by Lauren Saylor of A Fabulous Fete for Oh So Beautiful Paper

10 Tips on opening a retail shop | Urbanic


In the course of having Urbanic over these last 8 years I’ve had many people come to me for advice in starting their own business. I’m guessing there are more of you like this out there, so I’ve come up with 10 quick tips that hopefully will be helpful if opening a shop is something that you’re considering.

The  identity of your business will be apparent in the product that you choose for the shop and the way you display it. Your edit will be key here! The best shops are the curated ones which provide the customer with a shopping ‘experience’.  There is nothing worse than going into a shop that is all over the place with confusing product categories and placement.  It’s best to keep your business model and concepts unique to who you are and what you are passionate about.  Challenge yourself to come up with original ideas instead of copying the work of what is already out there. Keep your offerings on point with your business model and if it helps you get started, create a mood board and mission statement in addition to your business plan!

It is extremely important to know you are targeting.  Awareness of who you want to target is a good thing but it’s best to make sure you know where these people are  –  and this takes research!  If your business style is edgy, you need to know where these like-minded people are shopping.  If your taste in product is on the more expensive side, then it’s imperative to do you research about household incomes and financial demographics in your area. Documenting who your target customer is will be a crucial part of your business plan.

Once you know who your target customer is and have found out where they shop, you’ll want to make sure that you choose your location with all things in mind. You’ll be working hard enough to build your business in the beginning (wherever you are!) so visibility and street presence weigh a lot to the initial launch of your store.  If you are pioneering an area that is off the beaten path or is potentially up-and-coming, have your promo and marketing plan in place to best get the word out to your target customers. We opened Urbanic on a great street, but at the time our location was on the end of the block that had much less foot traffic. Before we signed our lease, we sought out advice from the local realtors to learn about the growth of the block over the past few years and get insight on the real estate forecasting. We also considered the other businesses that were slotted to open near our location, all of which was helpful in making our decision.

We learned from experience that this is not a good place to cut corners! If you are signing a lease, make sure you have a lawyer look over it first.  If you’re not great with numbers, hire a bookkeeper & accountant that has great reviews from other retailers. If you are offering custom work, make sure you have the proper contract in place to protect yourself and your business. Believe me when I tell you this stuff can be a huge can of expensive worms that you don’t want to open if not set up properly from the start.

A Point of Sale System is essential for entering and receiving inventory, pricing goods, formulating financial reports and keeping track of vendor & customer information. There are many options out there to choose from, so it’s important to make sure that you are doing your research and considering one that has all that you need to get started.  ie. – Are you wanting to access your POS from home? If so, a cloud based system would be best for you.  Do you need your POS to integrate with your e-commerce shop? Make sure that the one that you’re considering is compatible to your shopping cart platform.

The way you engage with the people surrounding your business will determine the personality of your brand. Our goal at Urbanic is to treat each person that walks through our doors as a special guest. We love greeting our regular customers by name and catching up with them if we haven’t seen them in a while.  Our store events have allowed us to get to know these people in a new way, and the relationships we’ve built with folks over the years make this whole experience more valuable and priceless than any bottom dollar ever could.  Joshua and I are firm believers that if you love your staff, – show them! At Urbanic we celebrate birthdays, work-a-versaries, and host staff parties twice a year. We have a coffee meeting every month and are going to our first team building outing to decorate cakes together next week.  We operate in a family environment which in turn makes our customers feel at home when they shop with us.

Getting to know the other businesses in your industry and neighborhood can be hugely rewarding and lead to great things. Consider teaming up with other brands who have a business identity that compliments your own. In working together you can point business to back to one another and grow.  Over the years, we have found great collaborations with calligraphers, printers, planners, bloggers, designers and photographers to name just a few!

I’ll be writing a little bit more about this  in tomorrow’s post, …. so stay tuned!

It’s always good idea to make sure you have a product mix that works for a variety of different people and budgets.  You don’t need to sacrifice your identity in order to do this,  just make sure you are thinking through your offerings so that you don’t pigeon hole yourself into a corner. For example, if you have mostly expensive items you may want to mix in a few great things that are less pricey as well so that you don’t become off limits for people. If you have mostly feminine products, but find that men are shopping in your store as well, create a handsome section just for them.

If you have been desperately wanting to open a retail shop and it’s a burning desire within you, you’ll need to get to a place where you are ready to take a risk.  When we signed the lease 8 years ago, it was the biggest decision I had ever made in my life and by far the scariest. Although I didn’t know exactly what I was doing at the time, I realized I would rather die one day having tried to move forward with my dream (whether it was going to work or not),  instead of wishing that I would had tried the rest of my life.

– Audrey


Hand Lettering by Gold Press Paper