DIY Tutorial: Hand Tinted Letterpress Save the Dates

Hand tinting was historically used to color black and white photographs before color photography was invented. It was also used on prints made by etching as a means to color them. For this tutorial, we’ll show you how to use this technique to bring a unique, vintage look to your letterpress save the dates or wedding invitations. Not only is it beautiful, it’s also super easy (as in two steps)! – Bailey and Emma of Antiquaria
Hand-tint-Save the Date-Final-1

Hand-tinted-Save the Date-Step1

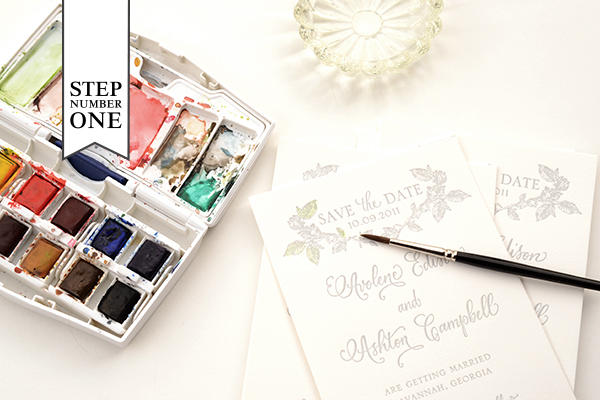
Step One: We chose two colors for this design: green and pink. When deciding what to do with your letterpress design, consider historical references for colors (searching hand tinted etching or photographs yields nice results).

First, we mixed our green color. We wanted it to be a little yellow tinged so we added some yellow to the green in our palette (see the upper left mixing area). The color needs to be very diluted to have it tint and not paint too heavily cover your letterpress print. Make sure to test your colors on an extra piece to make sure you have the technique down before starting the project.

Another key factor is how dry the brush is when it’s tinting the paper. You do not want it to be wet. Brushing it first against a paper towel helps keep the tint from being to watery. Again, it helps to work through this in testing.

Paint your first color in the desired area (in our case, green on the leaves) and set it aside to dry. Repeat on all cards.

Hand-tinted-Save the Date-Step2

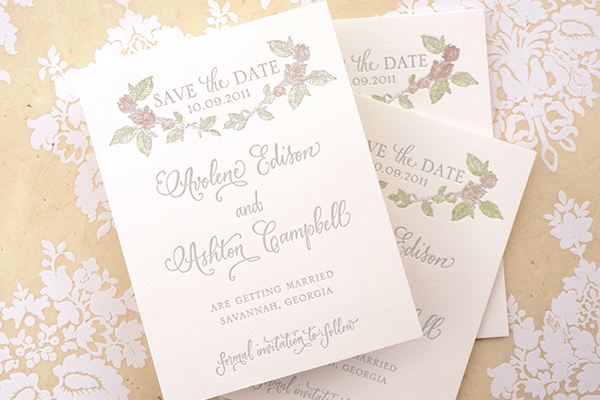
Step Two: Next, you’ll be adding in your second color to the flowers on the design. Mix up your desired color and test it on your spare piece until the color and dilution is right. Brush on the color (in our case, pink) in the desired areas. Set aside to dry and repeat on the rest of your cards.
Hand-tinted-Save the Date-Final-5

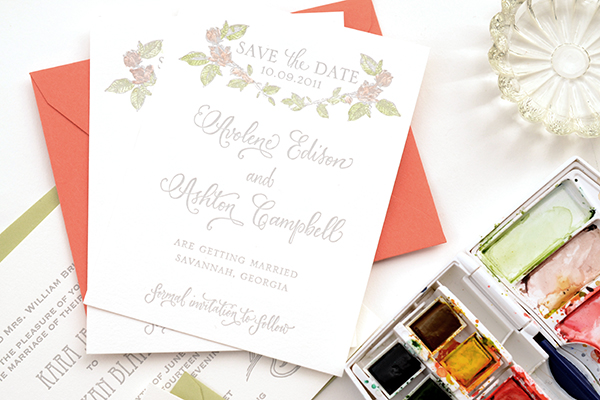
Letterpress printing works exceptionally well with hand tinting because it created an indented texture when the print is made. This helps keep your tint in place and prevents coloring outside the lines or blotchiness. If you do end up with too much water on the print, it’s easy to quickly dab it with a clean paper towel and absorb any excess. No harm done!
Hand-tint-Save the Date-FInal-2

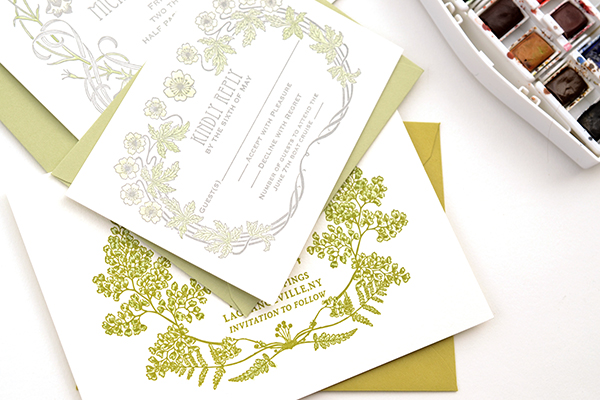
We found that the tinting technique worked most beautifully and effectively on our botanical collection of letterpress cards. The softness and vintage appeal lends to the charm of the designs. Of course, the possibilities are as endless as your imagination!

Materials

Savannah Letterpress Save the Date Card. We recommend ordering extra pieces (10% overage) for testing.

Watercolors

Paint brush. We recommend a very nice, small brush so that you have control and precision.

Water cup

Anti­quaria is a mem­ber of the Designer Rolodex – you can see more of their beau­ti­ful work right here or visit the real save the dates gallery for more save the date ideas!

Photo Credits: Antiquaria for Oh So Beautiful Paper
Abigail + Tim’s Art Nouveau Wedding Invitations

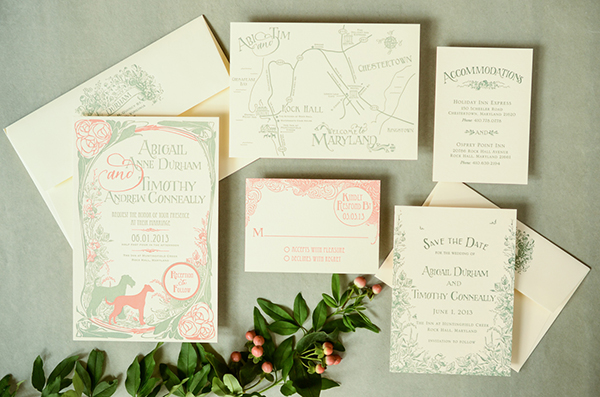
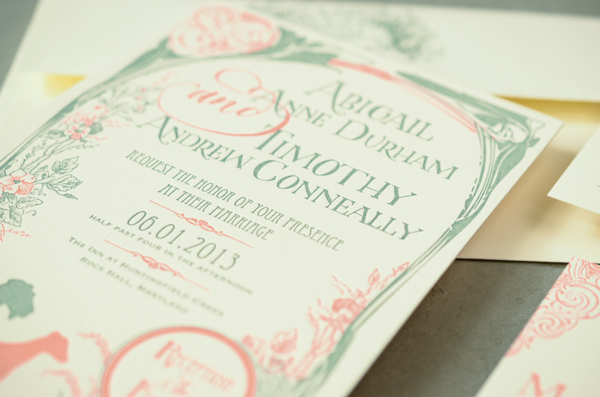
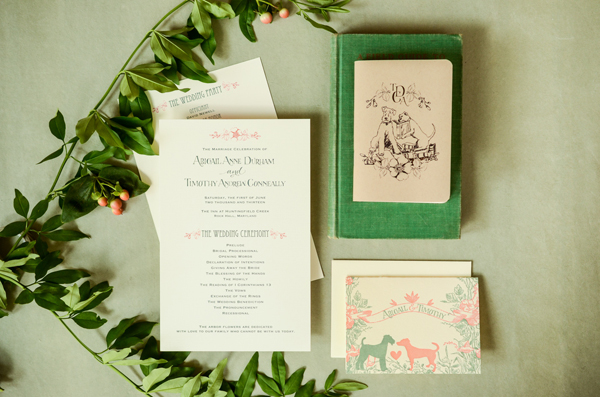
Ooooh, I’m loving the combination of green and coral in these vintage-inspired wedding invitations from our friends (and DIY contributors!) Bailey and Emma of Antiquaria. Inspired by the bride’s love of Art Nouveau era posters and the idea of an outdoor garden party, the invitations feature hand lettering and illustrations of the couple’s two dogs. So cute!

Art-Nouveau-Custom-Wedding-Invitations-Antiquaria

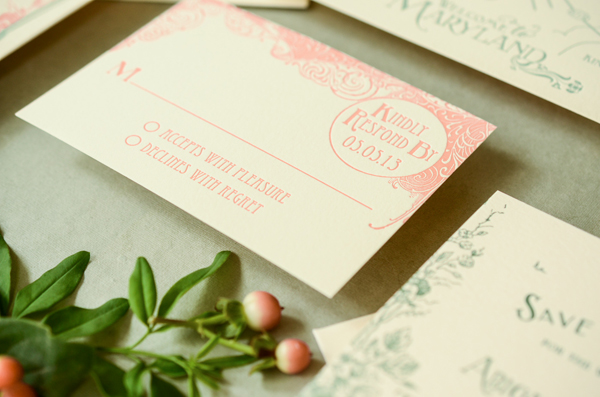
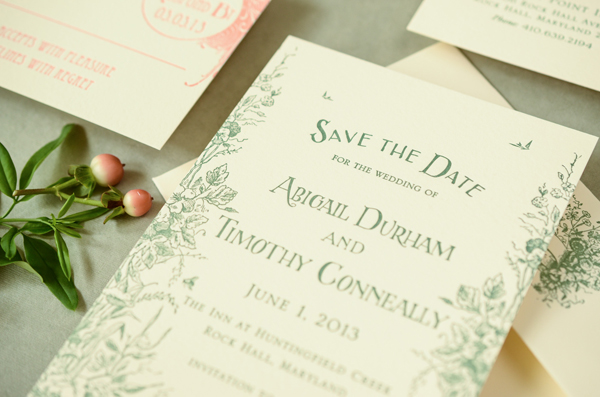
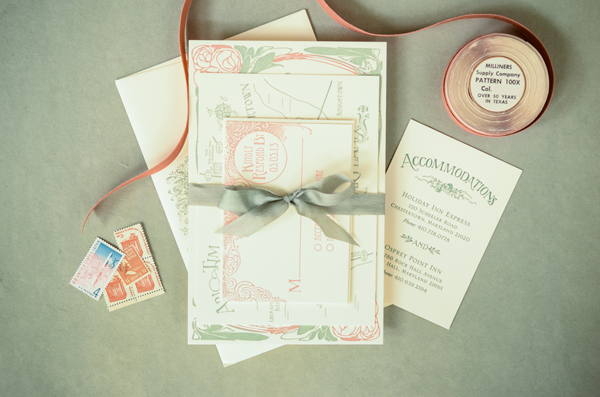
From Bailey and Emma: Abigail and Tim asked us to design an invitation suite for their wedding this past June. Abigail described the wedding as being a vintage garden theme using shades of green and coral. She wanted an invitation that looked like a vintage Art Nouveau poster and that incorporated her two beloved dogs, Nipper and Ginny. We took the challenge head on and designed a poster-like invitation that incorporated everything on her wish list.

Art-Nouveau-Custom-Wedding-Invitations-Antiquaria2

The design itself included illustrations of her dogs and accents of hand lettering which helped make the design look vintage. The design really came to life once it was letterpress printed on cotton paper using coral and succulent green inks. In the end, the invitation suite included A6 save the dates, A9 invitations, 4bar reply cards, and a 4×6 hand illustrated map.

Art-Nouveau-Custom-Wedding-Invitations-Antiquaria4

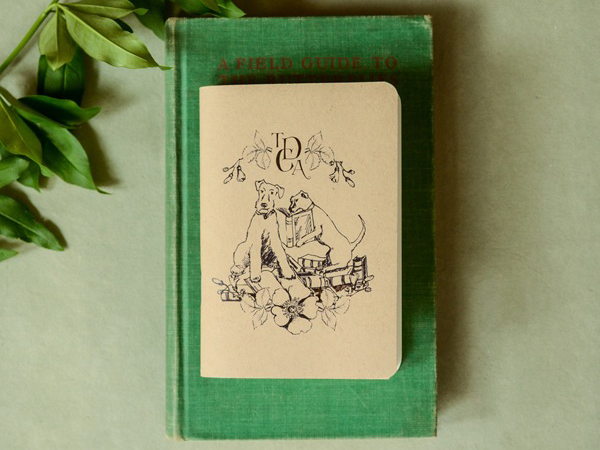
We carried the invitation theme through to the reception stationery including programs and thank you cards. Abigail has a love of books, so as favors for the guests we made little keepsake notebooks with an illustration of her dogs reading on the cover.

Art-Nouveau-Custom-Wedding-Invitations-Antiquaria5

Art-Nouveau-Custom-Wedding-Invitations-Antiquaria3

Art-Nouveau-Custom-Wedding-Invitations-Antiquaria7

From the bride, Abigail: We are very much dog people and wanted to find a way to show our love for our pups while keeping the invitations elegant and within our vintage garden party theme. The attention to detail within the design really helped to personalize the invitation and we especially loved the map with the silhouettes of our dogs. Tim and I are both big readers and love to write, draw, and create. The notebook favors illustrated this side of us perfectly and looked gorgeous paired with Blackwing pencils (a favorite of famous composers and writers) on the tables with all the flowers.

Art-Nouveau-Custom-Wedding-Invitations-Antiquaria8

Before the wedding I was thinking of not putting much effort into wedding invitations, but I am so glad I changed my mind because these are one of my favorite things from the wedding and will be a treasured keepsake for years to come.

Art-Nouveau-Custom-Wedding-Invitations-Antiquaria9

Thanks ladies!

Anti­quaria is a mem­ber of the Designer Rolodex – you can see more of their beau­ti­ful work right here or visit the real wedding invitations gallery for more wedding invitation ideas!

Photo Credits: Antiquaria

DIY Tutorial: Seed Packet Wedding Ceremony Program

By the time most couples get around to finalizing their wedding program, they’ve waited until the last minute. They’re also desperately trying to stay within their budget since the big day is right around the corner. But making your own ceremony programs at home doesn’t have to yield ho-hum results! In our tutorial today, we’ll show you an adorable way to make custom programs every guest is sure to love. – Bailey and Emma of Antiquaria

DIY Tutorial: Seed Packet Wedding Program by Antiquaria for Oh So Beautiful Paper
DIY Tutorial: Seed Packet Wedding Program by Antiquaria for Oh So Beautiful Paper
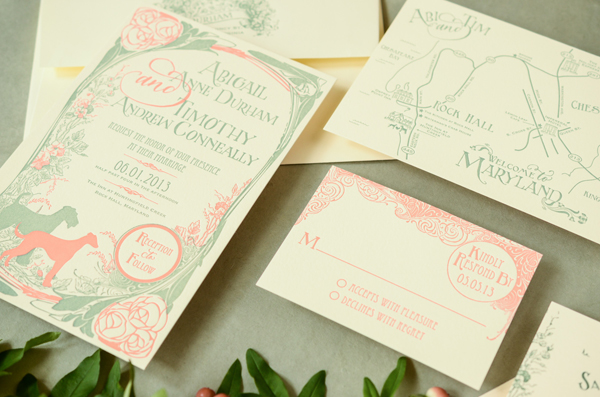
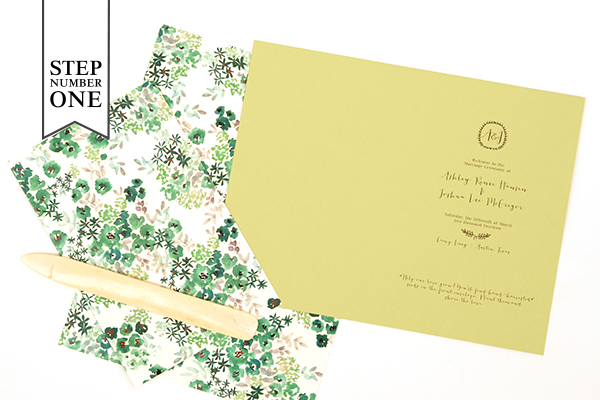
Step One: First, you’ll need to gather your papers together and fold them exactly in half, using a bone folder. The cover of this program uses 8.5″ x 11″ patterned text weight paper (we used a version of our popular Paloma pattern). You could also use a scrapbook paper, so long as nothing is printed on the back side. For the text inside, you can use a design program, such as Illustrator or InDesign or simply use Word to lay out all of your information in two columns. We printed front and back by flipping the paper and re-running it through our home printer. You could also send the file to a copy store and have them print it for you.

DIY Tutorial: Seed Packet Wedding Program by Antiquaria for Oh So Beautiful Paper
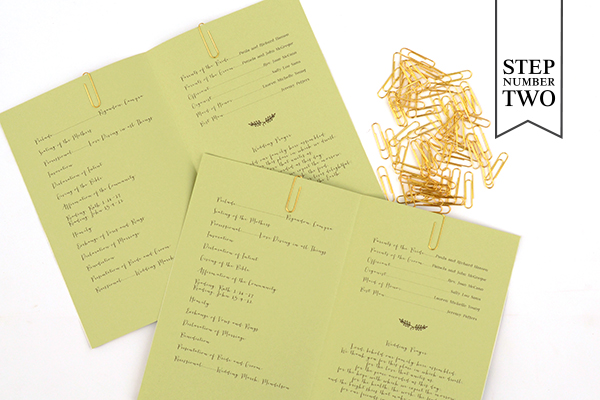
Step Two:  Assemble your booklets with the cover on the back and the inner pages in the middle. Use paper clips to hold them together in preparation for sewing. This helps prevent shifting when you’re running a stitch down the center.

DIY Tutorial: Seed Packet Wedding Program by Antiquaria for Oh So Beautiful Paper
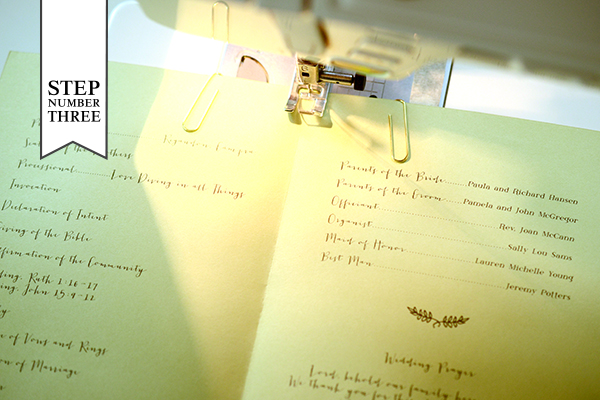
Step Three: With your needle in the middle position, sew straight down the center fold. Trim off any thread ends after the booklet is finished.

DIY Tutorial: Seed Packet Wedding Program by Antiquaria for Oh So Beautiful Paper
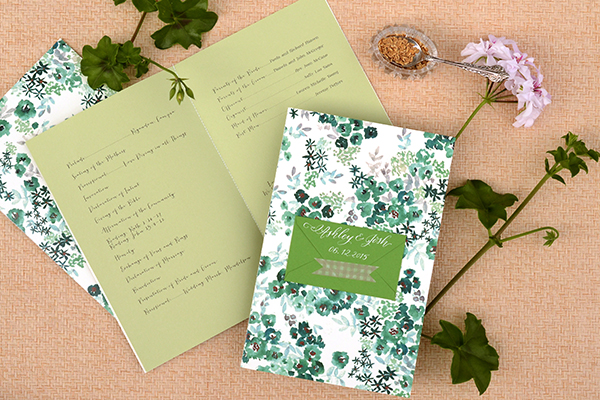
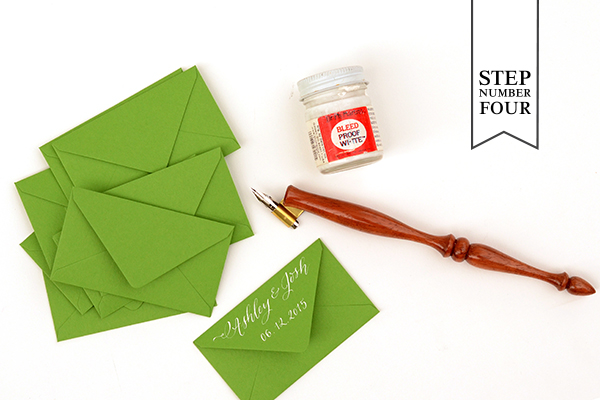
Step Four: We wanted to gussy up our program a bit by adding a little envelope containing home-grown seeds to the front for guests to take home. Instead of leaving the envelope blank, we added the couple’s name and wedding date in white calligraphy on the back flap. Don’t feel comfortable tackling calligraphy on your own? You could also use a monogram stamp with white ink to get a similar result!

DIY Tutorial: Seed Packet Wedding Program by Antiquaria for Oh So Beautiful Paper
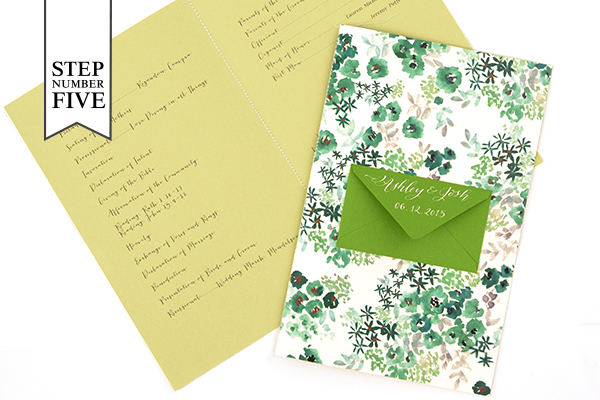
Step Five: Adhere the envelope to the front cover (approximately in the center) using double sided tape or stick glue. We found that our  ATG Tape Gun worked the best on this project.

DIY Tutorial: Seed Packet Wedding Program by Antiquaria for Oh So Beautiful Paper
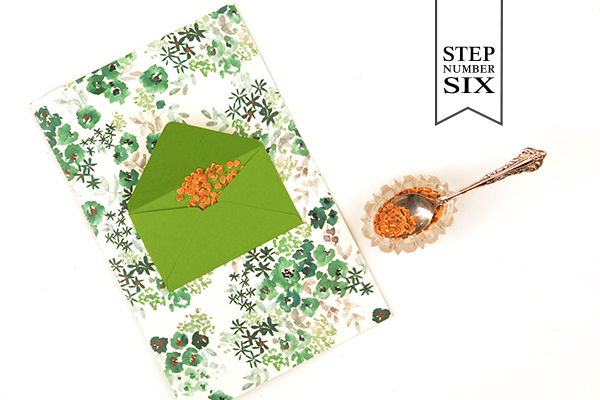
Step Six: Give your guests a little take away with your program! We spooned hand-harvest seeds into the envelopes so that each guest could plant flowers in honor of the couple. You could also fill the envelope with rice, confetti or anything else you can dream of! Have fun making it suit your own special day.

We also included a little note about the gift in the program itself, “Help our love grow! You’ll find hand-harvested seeds in the front envelope. Plant them and share the love.” Be sure to also include the type of seeds and some general growing instructions as well, either in the envelope itself or on the back page of your program.

DIY Tutorial: Seed Packet Wedding Program by Antiquaria for Oh So Beautiful Paper
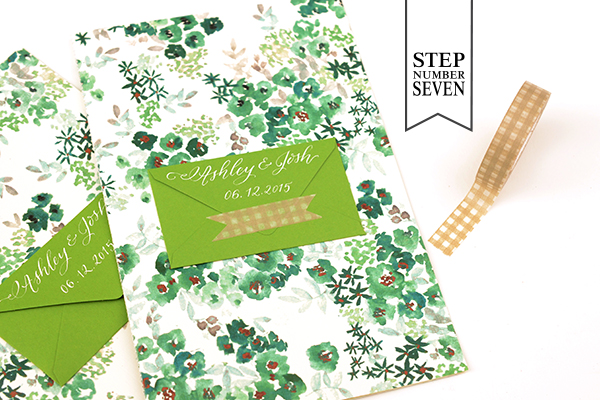
Step Seven: Lastly, you’ll just need to close up the envelope so that the seeds don’t spill out. We used a fun patterned washi tape, which is easy to remove yet stays put!

Materials

Patterned paper in 8.5″ x 11″ text weight

Text weight paper in sage

Home Printer

Paper Clips

Sewing Machine and Thread – have fun with your thread color selection!

Mini Envelopes

Calligraphy Pen and Ink, or Monogram Stamp and White Stamp Pad

ATG Tape Gun

Seeds (or rice or confetti)

Washi Tape

Photography: Antiquaria for Oh So Beautiful Paper
DIY Tutorial: Travel-Inspired Save the Date

We’ve been having an unusually cold winter here in Texas and all of these winter storms have us dreaming of warmer places. With destination weddings more popular than ever, this travel inspired save the date is sure to excite your guests and have them booking their flights pronto. Our favorite part of this design? The one-of-a-kind vintage maps we used for the liners! – Bailey and Emma of Antiquaria

Step One: First of all, you’ll need to stamp your save the date on a kraft paper card cut to 3.75″ x 5.75″. For this design we used our Air Mail Save the Date stamp and a black stamp pad. For a step-by-step video tutorial about this printing process go here.

Step Two: To add a pop of color into the design, we mounted our kraft paper card onto a red-orange A6 backer. To do this, simply apply stick glue or double sided tape around the back edges of the kraft paper card. Center it over the A6 red card and press down. If you used glue, let it dry.

Step Three: We’re simply swooning over this gorgeous vintage map paper. Each sheet is different so the results are fun and varied. Trace an A6 envelope liner template with a pencil on the back of the map paper and cut out the pattern. Use double sided tape or stick glue to adhere the liner into the mint envelope just below the gumming.

Step Four: We just couldn’t stand to waste any little bits map paper so we used the leftovers from the liners in Step 3,  stamped a monogram (we used our Cross my Heart Initials monogram stamp) in black and then cut them out around the design, in a cute heart shape.

Step Five: The last step is to pull it all together! We punched holes on either side of the heart tag so that it would lay flat and straight when we threaded the twine around the save the date. Once that’s done, just address your envelopes and add postage so that you can mail them off!

Materials

Air Mail Save the Date Stamp

Cross my Heart Monogram Stamp

Stamp Pad in Black

Kraft Card Stock

A6 Cards in Persimmon

A6 Envelopes in Mint

Map Paper

Twine in Teal

Double Sided Tape or Stick Glue

Scissors

â…› inch Hole Punch

Anti­quaria is a mem­ber of the Designer Rolodex – you can see more of their beau­ti­ful work right here or visit the real save the dates gallery for more save the date ideas!

Photography: Antiquaria for Oh So Beautiful Paper
DIY Tutorial: Modern Washi Tape Save the Dates

Who doesn’t love washi tape? Ever since this awesome product arrived state side, we’ve been on board. We typically use it to seal envelopes, paper or belly bands but lately, we’ve had a desire to make it the real star. In this DIY, we use different tapes to add a bit of graphic drama to our stamped save the date cards. The effect you get is so much fun, especially considering it’s humble beginnings as tape! – Bailey and Emma of Antiquaria

DIY Tutorial: Modern Washi Tape Save the Dates by Antiquaria for Oh So Beautiful Paper
Each save the date is its own, unique piece of art. The best part is that you can make it as simple or tricked out as you like!

DIY Tutorial: Modern Washi Tape Save the Dates by Antiquaria for Oh So Beautiful Paper
Step One: Before you decorate, you’ll need to stamp your save the date (we used our Art Deco Save the Date stamp) on the bottom of a blank, cream A7 card. Choose an ink color that will coordinate nicely with the tape that you’ve selected. For a step-by-step video tutorial about this printing process go here.

DIY Tutorial: Modern Washi Tape Save the Dates by Antiquaria for Oh So Beautiful Paper
Step Two: Let your creative flag fly! Adorn the top of the card with washi tape in any pattern you like. We used a simple design with straight line and pop of diagonal tape for this example.

DIY Tutorial: Modern Washi Tape Save the Dates by Antiquaria for Oh So Beautiful Paper
Step Three: Next, you’ll need to square up the tape so that you have a clean, professional look. Using a straight edge metal ruler and a craft knife, carefully cut the tape, making sure not to press so hard that it cuts the paper as well.

DIY Tutorial: Modern Washi Tape Save the Dates by Antiquaria for Oh So Beautiful Paper
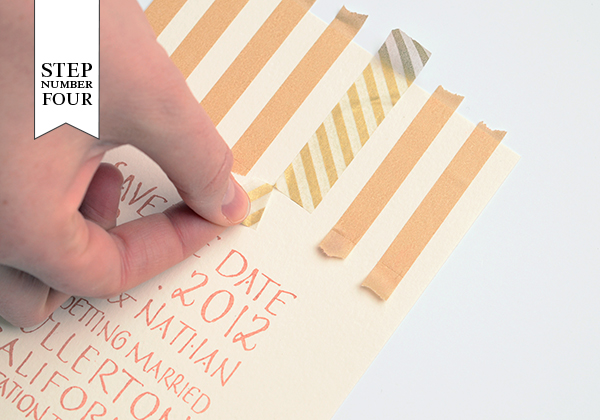
Step Four: Peel off the tape and press down the cut edge. Repeat the process on the top.

DIY Tutorial: Modern Washi Tape Save the Dates by Antiquaria for Oh So Beautiful Paper

There are an infinite amount of possibilities for the tape designs. Get creative and experiment with tape colors and patterns. We love the way that they all look together, so don’t feel limited to one design!

DIY Tutorial: Modern Washi Tape Save the Dates by Antiquaria for Oh So Beautiful Paper

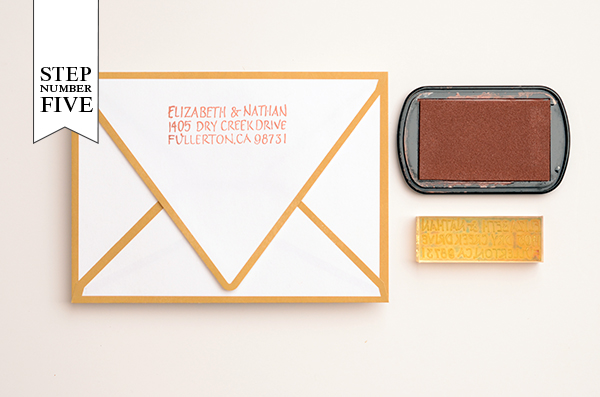
Step Five: Next, you’ll need to stamp your return address (we used our Art Deco Return Address stamp) on the back flap of your envelopes. Now all that’s left is to address them, add postage and send them on their merry way!

Materials:

Art Deco Save the Date Stamp

Art Deco Return Address Stamp

Stamp Pad in Cocoa

Washi Tape

A7 Cream Cards

A7 Envelopes

Metal Ruler and Craft Knife

Anti­quaria is a mem­ber of the Designer Rolodex – you can see more of their beau­ti­ful work right here or visit the real save the dates gallery for more save the date ideas!

Photography: Antiquaria for Oh So Beautiful Paper