The Blackberry Collins

When I start writing a post about a classic and venerable cocktail like the Tom Collins, I do some research. I look into the history of the drink, the development of its recipe, all that jazz. But I also like to do research into how people are drinking a particular cocktail now. And what I found for the Tom Collins bums me out a bit. Did you know that people sell Tom Collins mix? I have to repeat that because it leaves me a little flabbergasted: Tom Collins mix. What the what? Here’s what a Tom Collins is: a gin sour with some soda water. So simple! And perfect for summer, sweet and tart, crisp and effervescent – especially with the addition of some in-season summer fruit. Not at all in need of a bottled mix. – Andrew
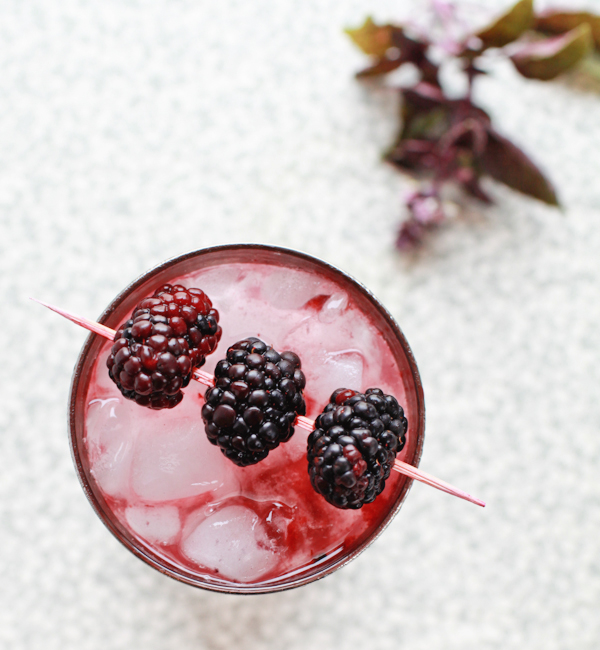
Blackberry-Collins-Cocktail-Recipe-OSBP-18

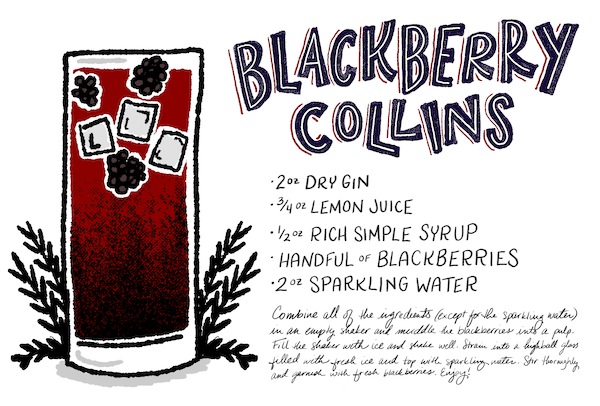
Blackberry-Collins-Cocktail-Recipe-Card-Shauna-Lynn-Illustration-OSBP

Illustration by Shauna Lynn for Oh So Beautiful Paper

The Blackberry Collins

2 oz Dry Gin
3/4 oz Lemon Juice
1/2 oz Rich Simple Syrup
Handful of Blackberries
2 oz Sparkling Water

Combine all of the ingredients (except for the sparkling water, unless you want your shaker to explode) in an empty shaker and muddle the blackberries into a pulp. Fill the shaker with ice and shake well. Strain into a highball glass filled with fresh ice and top with the sparkling water. Stir thoroughly and garnish with fresh blackberries. Enjoy!
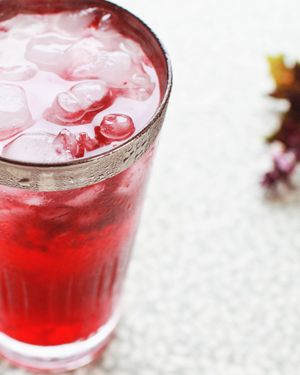
Blackberry-Collins-Cocktail-Recipe-OSBP-16Blackberry-Collins-Cocktail-Recipe-OSBP-36

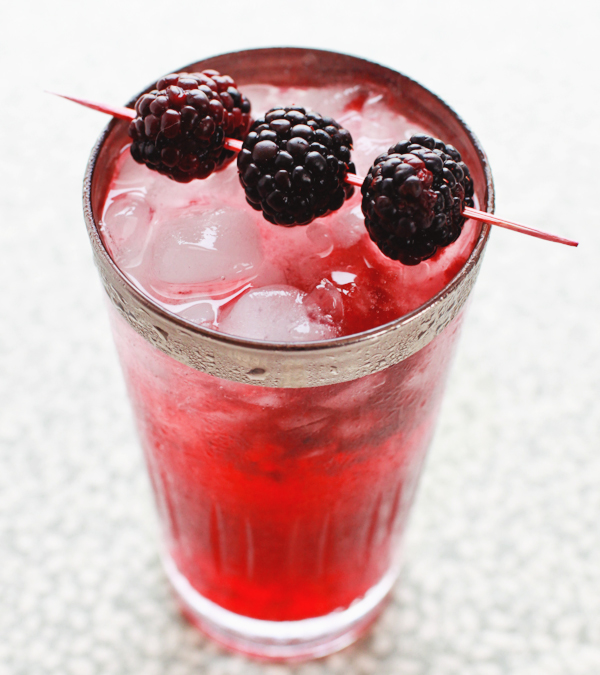
Nole and I went blackberry picking last weekend, and we have a ton of blackberries sitting around. It’s only natural that some of them would end up in a cocktail. So that’s what we did: we took a basic Tom Collins recipe and added some blackberries. And the result is pretty good – bursting with sweet fruit and cold bubbles. Have one or two on the porch before summer is over and you’ll never consider a bottled mix ever.
Blackberry-Collins-Cocktail-Recipe-OSBP-28

Didn’t I say something about history? Right. The Tom Collins is probably a couple hundred years old and, not surprisingly, appeared right after Charles Plinth invented the first soda water dispenser in London in 1813. Credit usually goes to John Collins, a waiter or maybe a bartender at London’s Limmer’s Hotel, who took the commonsense step of adding Plinth’s soda water to a gin sour. By the 1870s, the drink was showing up in print as the Tom Collins, maybe because bartenders had started making the drink with Old Tom Gin instead of the original Genever or maybe because everyone was drinking way too many of them to remember if it was Tom or John or Jim, so let’s all just agree to call them Tom Collins and order a few more.

Photo Credits: Nole Garey for Oh So Beautiful Paper

DIY Mini Disco Ball Place Cards

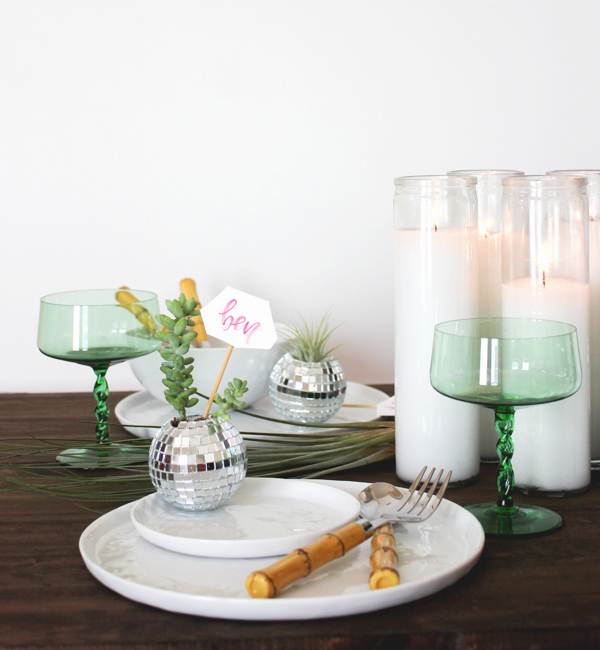
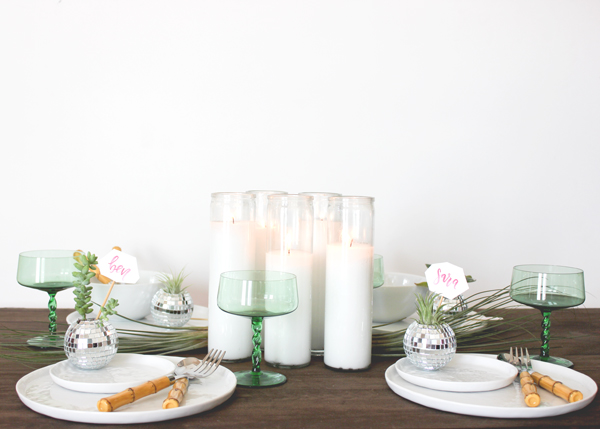
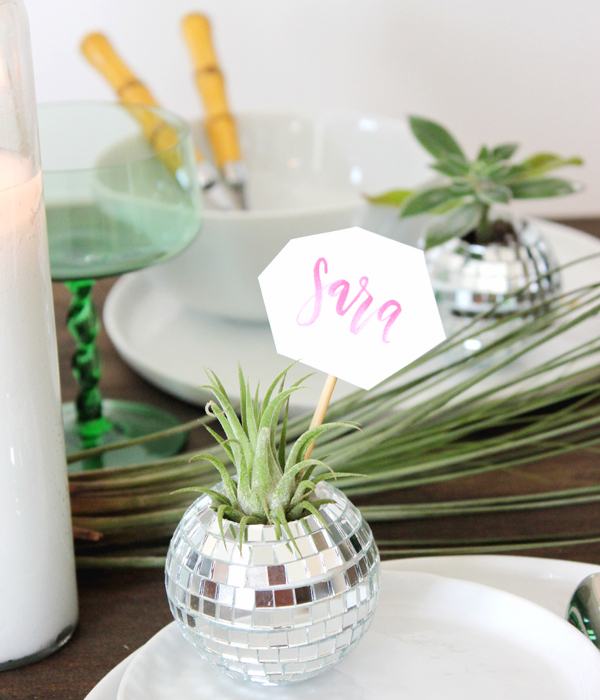
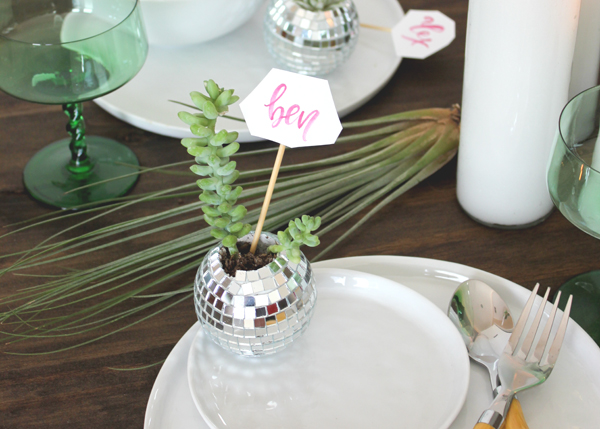
Every now and then, I think people love to see a quirky, maybe even out of place detail, used in an interesting way. These are the conversation starters and the little things that make your event memorable. So when the disco ball started making its way into tropical destinations, I just couldn’t get enough of the boho beach vibes mixed with something usually saved for the club or ballroom. I decided to stick with mini versions and turn them into a super fun place card and favor all in one. These could also easily be made in a larger version as a vase or pot if you are looking for a little more bling to add to your table! – Lauren

DIY Tutorial: Disco Ball Succulent Favor and Place Card by Lauren Saylor for Oh So Beautiful Paper

DIY Tutorial: Disco Ball Succulent Favor and Place Card by Lauren Saylor for Oh So Beautiful Paper

DIY Tutorial: Disco Ball Succulent Favor and Place Card by Lauren Saylor for Oh So Beautiful Paper

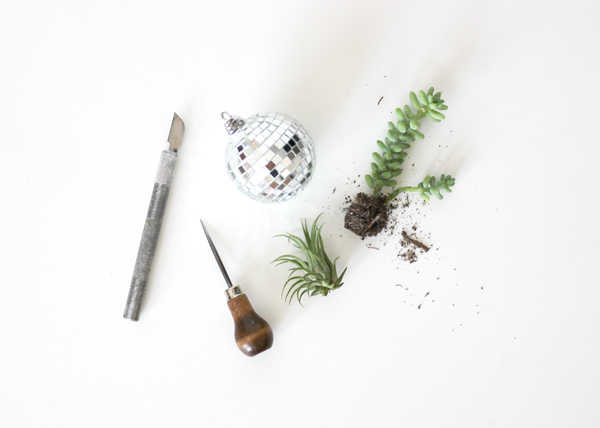
Supplies

Mini disco ball ornaments with styrofoam center (I found mine here… yes they are already selling ornaments! – you can also find them in various sizes on Amazon)

Small succulents or air plants

X-acto knife

Awl (or something just as pointy and made out of metal)

Your choice of name cards

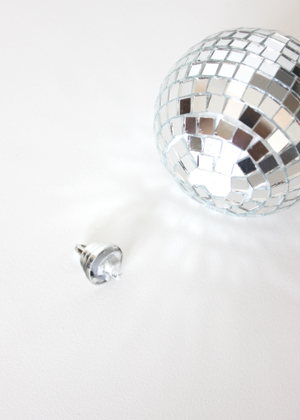
DIY Tutorial: Disco Ball Succulent Favor and Place Card by Lauren Saylor for Oh So Beautiful PaperDIY Tutorial: Disco Ball Succulent Favor and Place Card by Lauren Saylor for Oh So Beautiful Paper

Step 1: Remove the ornament top, this will be the bottom

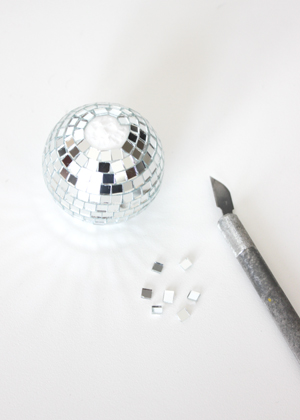
Step 2: Flip over and begin to remove the top mirror pieces with your knife, stopping once you have a circle that is about 1″ in diameter

DIY Tutorial: Disco Ball Succulent Favor and Place Card by Lauren Saylor for Oh So Beautiful Paper

Step 3: Use the knife to cut into the styrofoam around the circle, pop that out and dig into the foam with the awl to create a bowl for your plant.

DIY Tutorial: Disco Ball Succulent Favor and Place Card by Lauren Saylor for Oh So Beautiful Paper

DIY Tutorial: Disco Ball Succulent Favor and Place Card by Lauren Saylor for Oh So Beautiful Paper

Step 4: Plant your succulent or place your air plants inside and you’re done!

DIY Tutorial: Disco Ball Succulent Favor and Place Card by Lauren Saylor for Oh So Beautiful Paper The bigger the plant, the more unstable the ball is going to be. So make sure to pick lightweight plants that aren’t too tall. Finish your table design by adding some candles to the table. The disco balls will catch the light and add a fun light show on the table. Plus with all this glitz at each place setting, you won’t want much competing with them! Photo Credits: Lauren Saylor for Oh So Beautiful Paper

OSBP at Home: Small Bathroom Renovation Inspiration

This is the 30th week of my pregnancy, and I think it’s pretty safe to say that I’ve hit the nesting phase of this pregnancy. I’ve been running around trying to take care of small projects around the house, and my dad is coming down in a couple of weeks to help with a few things that we’re not able to do on our own. Prepare yourselves for a few more home-related posts over the next couple of weeks: it’s all I can think about! And there are a couple of big projects that I can’t seem to shake from my mind. The one that I’m most anxious to check off the list is the renovation of our main bathroom. As I mentioned here – the bathroom really needs to be completely gutted, which is kind of overwhelming for a first time homeowner. So while we figure out how to tackle this project, I thought I’d share some of the inspiration that I’ve gathered so far!

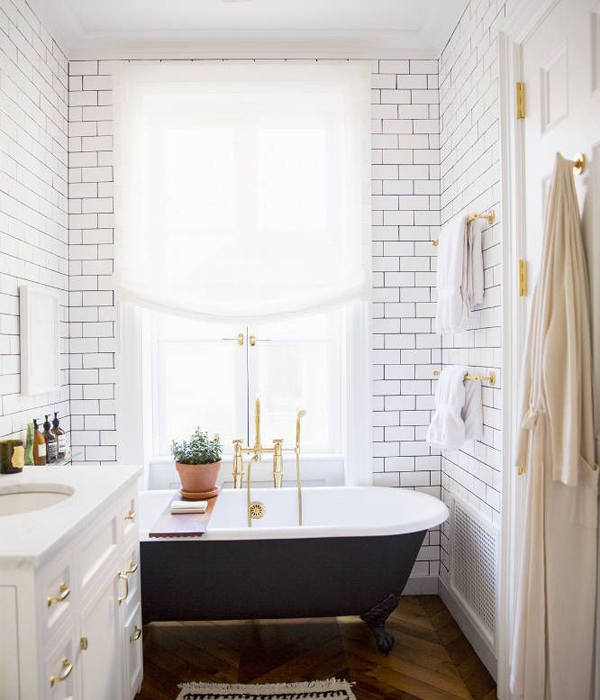
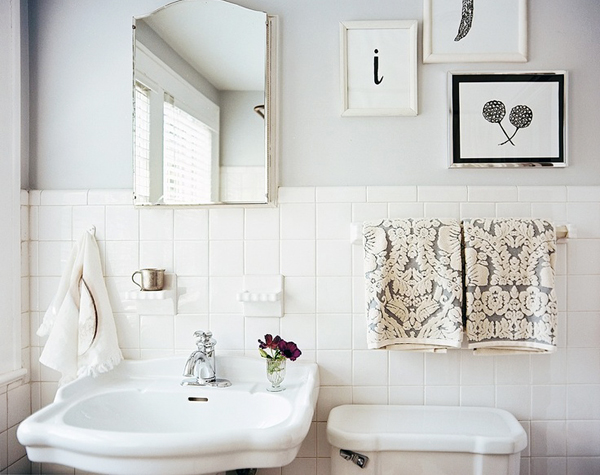
Oh So Beautiful Paper: Small Bathroom Renovation Inspiration / Photo by Brittany Ambridge via Domino from Ali Cayne's Home Tour

Photo by Brittany Ambridge via Domino from Ali Cayne’s Home Tour

Whatever we decide to do, I want to stay true to the traditional feel of our older home. Our current bathroom (and the only full bathroom in the entire house) is dark and unwelcoming, with modern touches that feel out of keeping with our 1920s rowhouse. The walls are painted a dark teal and paired with dark slate tile around the bathtub and dark finishings, all of which make the room feel very small – but aside from all that, the slate tile is literally flaking away and leaking everywhere. I can’t wait to rip the entire thing out! We decided pretty early on that we’d replace the tile around the bath and shower with bright white subway tile, which makes a regular appearance on my Pinterest page. Ahhhh…. like a breath of fresh air!

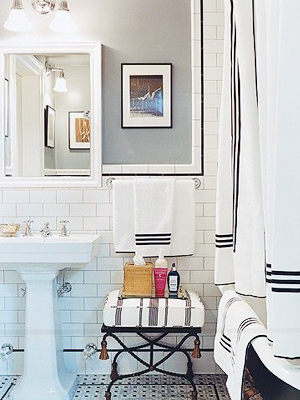
Oh So Beautiful Paper: Small Bathroom Renovation Inspiration / Riesco & Lapres via Desire to Inspire

Riesco & Lapres via Desire to Inspire

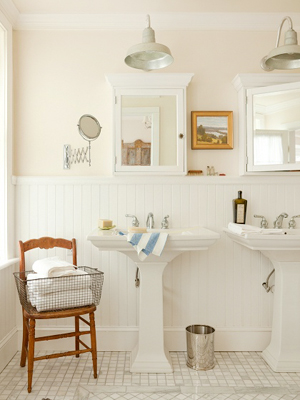
But the other walls? I’m not sure. Continue tile around the room? Another treatment like wainscoting or beadboard? The room is really small and we have shelving running along the wall behind the toilet to provide some much-needed storage, so there probably isn’t enough available wall space to justify wallpaper (as much as I love the idea) but I think I’d like to do something to help break up the rest of the wall space. And a light paint color on the rest of the wall to help the room feel bigger.

Oh So Beautiful Paper: Small Bathroom Renovation Inspiration / via La Dolce Vita by Paloma Contreras

via La Dolce Vita by Paloma Contreras

Oh So Beautiful Paper: Small Bathroom Renovation InspirationOh So Beautiful Paper: Small Bathroom Renovation Inspiration / Pink Walls and Wainscoting via Rue Magazine

Unknown (left) // Rue (right)

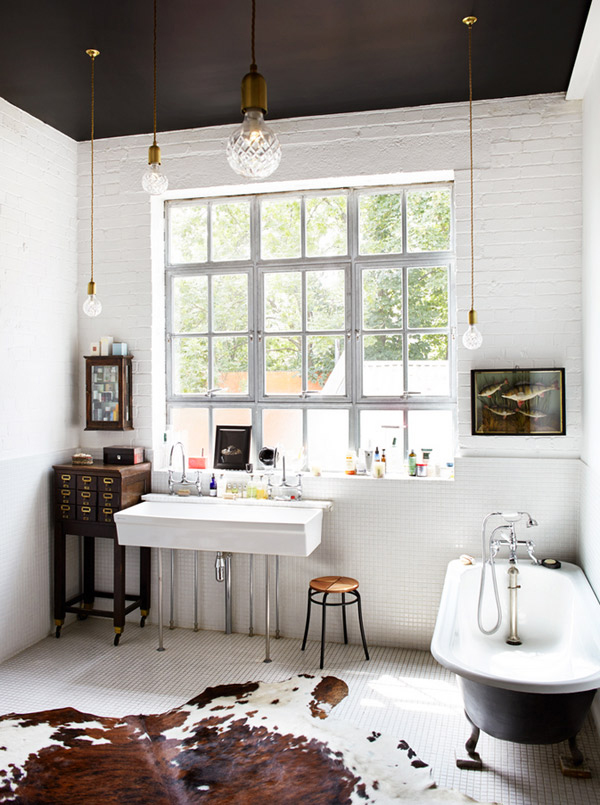
I’ve been loving the look of black and white bathrooms for a couple of years now. Our bathroom doesn’t currently receive any natural light, so I don’t think it could handle a lot of black (and I don’t want to just replicate the dark and unwelcoming feeling of our current bathroom), but we do have the option of opening up an existing skylight box in the ceiling. If we did that, maybe we could pull off a black ceiling or a darker feature wall behind the shelves?

Oh So Beautiful Paper: Small Bathroom Renovation Inspiration / Christopher Sturman via Desire to Inspire

Christopher Sturman via Desire to Inspire

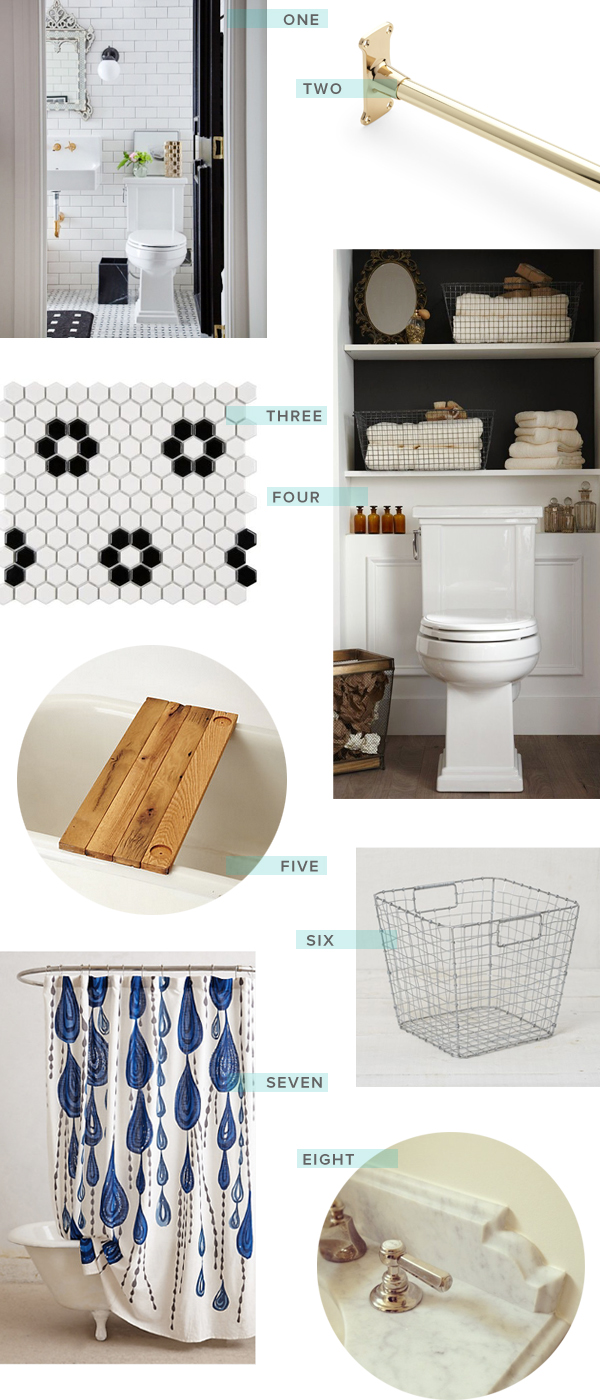
Other than that, I’m pretty sure that we’ll need to replace the floor tile since it’s unlikely to survive the removal of the bathtub and surrounding tile – and we’ve always loved the idea of using classic black and white hex floor tile. I also love the idea of incorporating brass touches in the fixtures, some wire and straw baskets for texture (and pretty storage), and a couple of new accessories. But we have to get through the big stuff first before I can start thinking about accessories!

Oh So Beautiful Paper: Small Bathroom Renovation Inspiration

1. Ashley Capp via Style Me Pretty Living; 2. Brass shower rod from Signature Hardware; 3. Hex tile from Home Depot; 4. Bathroom shelving + storage; 5. Bathtub caddy from Anthro; 6. Wire storage basket from West Elm; 7. Shower curtain from Anthro; 8. Ogee countertop edge detail by Grant K Gibson Interior Design via Granite Gurus

Have any of you gone through a full bathroom renovation? Any advice for this first-time renovator/home owner with a new baby on the way?

OSBP At Home: Garden Update

It’s been well over a year since we moved into our house, and while progress inside the house has been a bit slower than I would have liked, I’ve been spending a lot of time out in the garden. It’s the first time I’ve had any real gardening space since I moved to DC more than 10 years ago, and I’m really really enjoying it. Last year I shared some of my plans for our outdoor space. Time for an update!

OSBP-At-Home-Garden-Update-Summer-2014-23

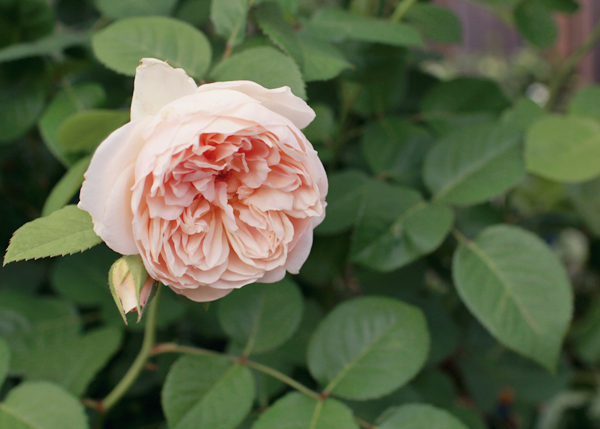
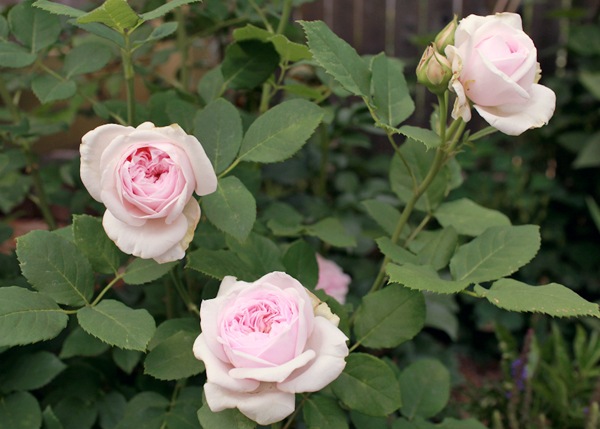
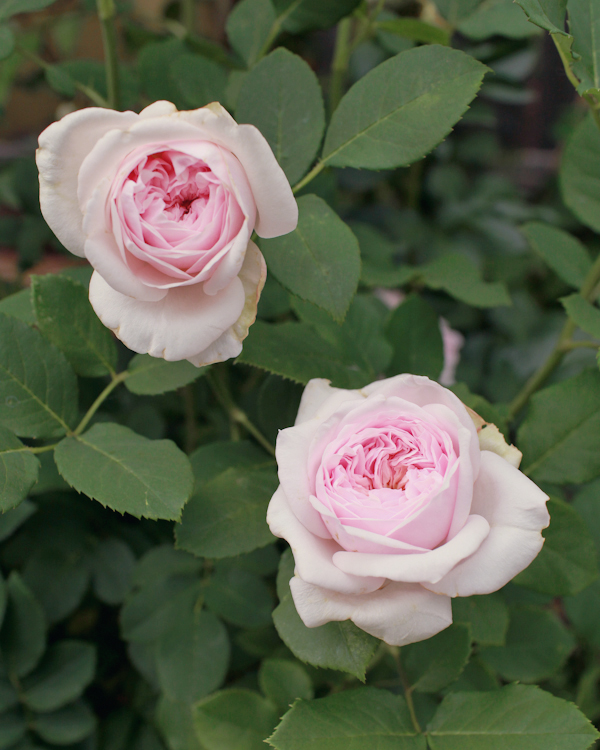
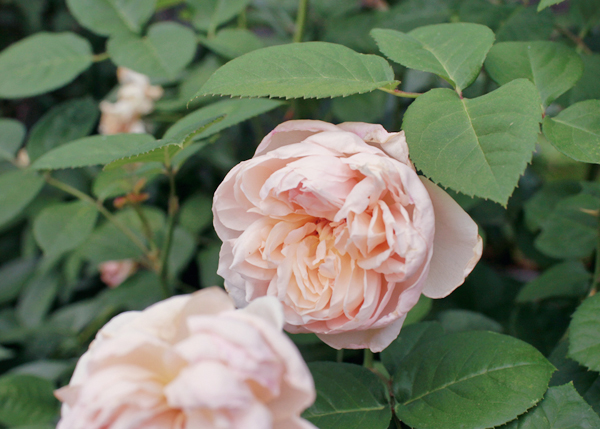
Our house is a typical DC rowhouse: long and narrow. We don’t have a ton of space to work with, but I’ve been trying to maximize what we’ve got. We have a small garden bed in our backyard patio, which I’ve filled with lilacs, peonies, roses, and a few other perennial varieties. I save annuals for pots arranged along the fence on the other side of the patio so that I don’t have to worry too much about them once the cold weather sets in.

OSBP-At-Home-Garden-Update-Lilacs-Instagram

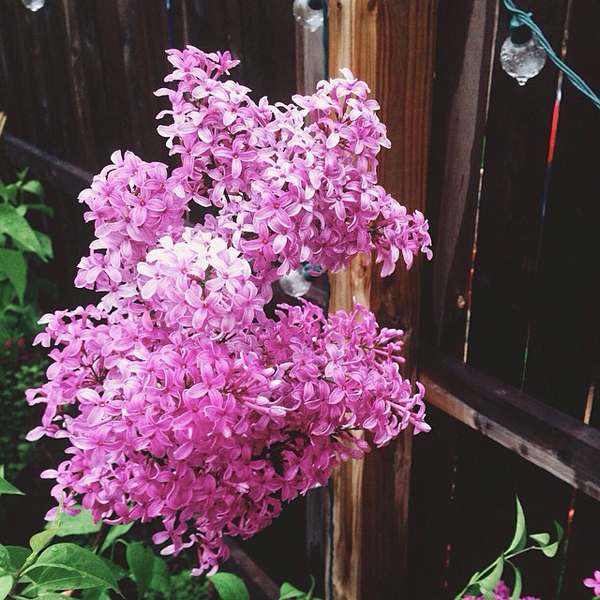
Our backyard garden is my happy place in mid-to-late spring when the peonies and lilacs are blooming. Everything was late this year thanks to the neverending winter, but once the warmer weather arrived in April everything just exploded – especially my lilacs. I have a total of four lilac bushes, all planted in the back of the garden bed closest to the fence, and the smell was positively intoxicating when they all bloomed. I wish they lasted forever!

OSBP-At-Home-Garden-Update-Peony-Coral-Instagram

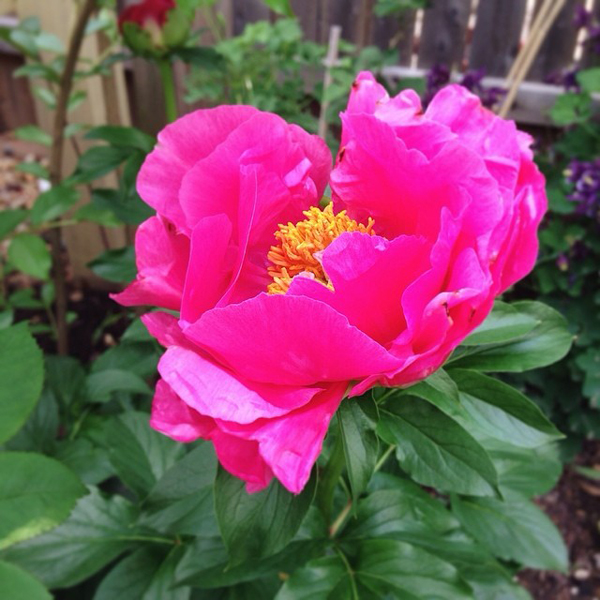
OSBP-At-Home-Garden-Update-Peony-Hot-Pink-Instagram

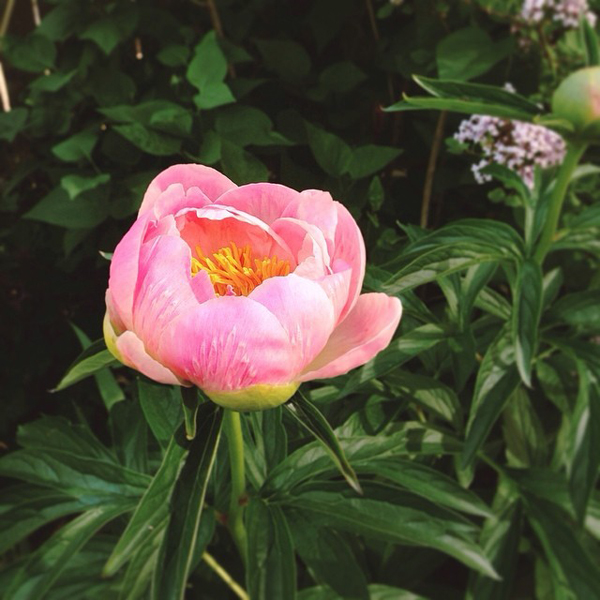
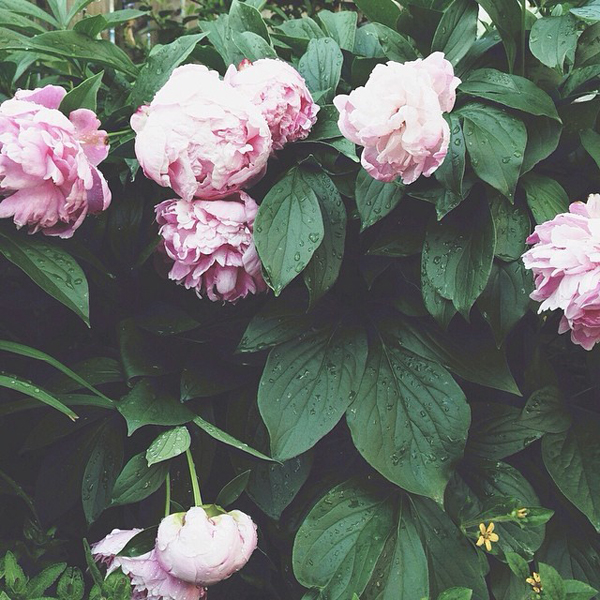
The lilacs were quickly followed by peonies – I have five plants in varying colors of white and pink (pale pink Sarah Bernhardt, Coral and Gold, and a hot pink variety whose name I’ve forgotten). This was the view that greeted me when I came home from the National Stationery Show in late May:

OSBP-At-Home-Garden-Update-Peonies-Instagram

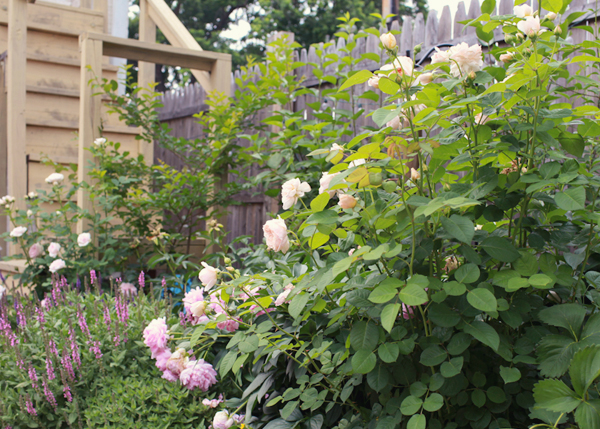
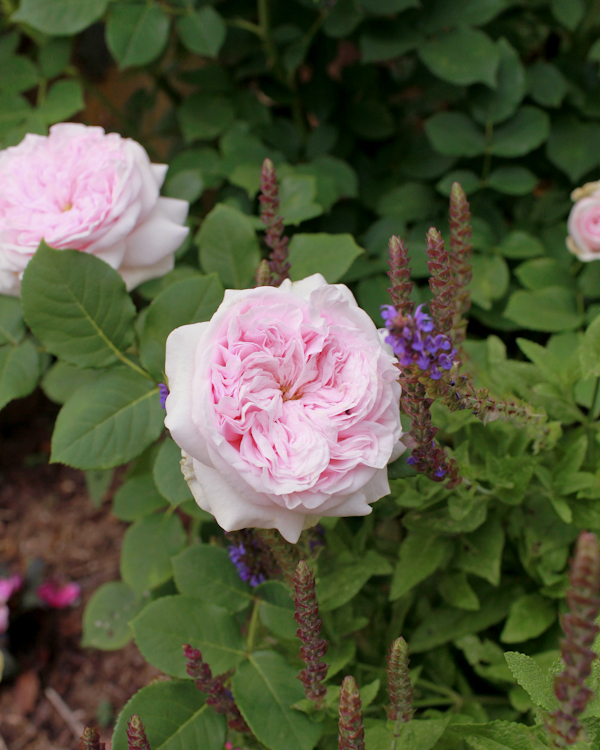
I snapped some more photos a few weeks ago, at the very tail end of peony season, and with the exception of the peonies most of these flowers are still going pretty strong in the garden. We planted a border of pink and purple saliva in the garden bed, and my David Austin rose bushes bloom frequently as long as I deadhead regularly. I planted some impatiens under the rosebushes for a bit of added color, all of which seem to be growing quite happily. There is a small white crape myrtle in the back corner, which has been in bloom the last few weeks and I hope will grow to provide some much-needed shade over the next couple of years. Since these photos were taken, some yellow dinner plate dahlias have grown in around the peonies and are slowly taking over the garden much to my dismay – I need to do more research on (successfully) growing those big monsters!

OSBP-At-Home-Garden-Update-Summer-2014-5

OSBP-At-Home-Garden-Update-Summer-2014-16

OSBP-At-Home-Garden-Update-Summer-2014-19

OSBP-At-Home-Garden-Update-Summer-2014-18

OSBP-At-Home-Garden-Update-Summer-2014-22

OSBP-At-Home-Garden-Update-Summer-2014-7OSBP-At-Home-Garden-Update-Summer-2014-8

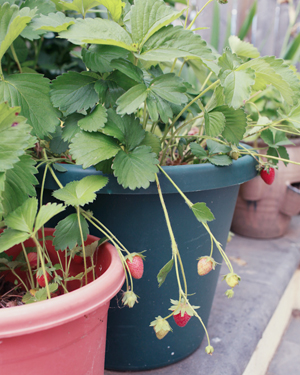
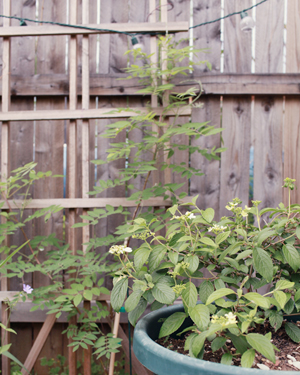
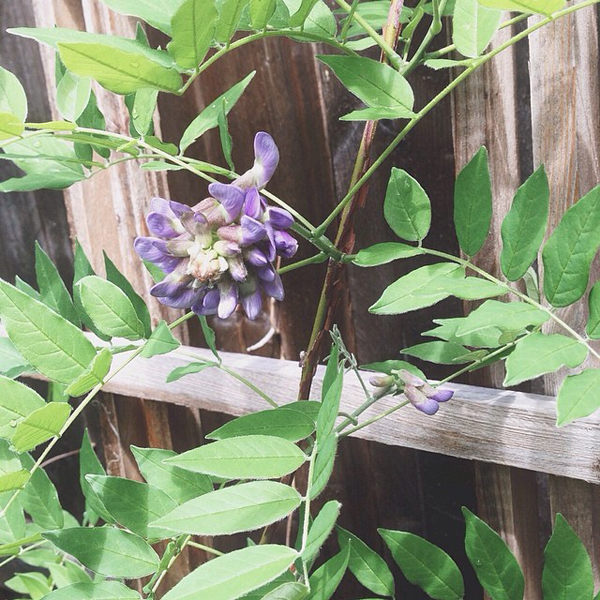
We also have a few potted strawberry plants – Sophie LOVED picking the fresh berries when they were in season. There’s a small bed that runs along the stairs down to our unfinished basement, where I’ve planted a wisteria vine – which surprised me by blooming the tiniest little wisteria this spring! – and a few other partial-sun perennials. I’d love to eventually build a pergola over our back door and train the wisteria to grow over it. I also have a small potted viburnum; I’m waiting for it to get a bit larger before transplanting to its permanent home in the front garden.

OSBP-At-Home-Garden-Update-Wisteria-Instagram

OSBP-At-Home-Garden-Update-Summer-2014-24

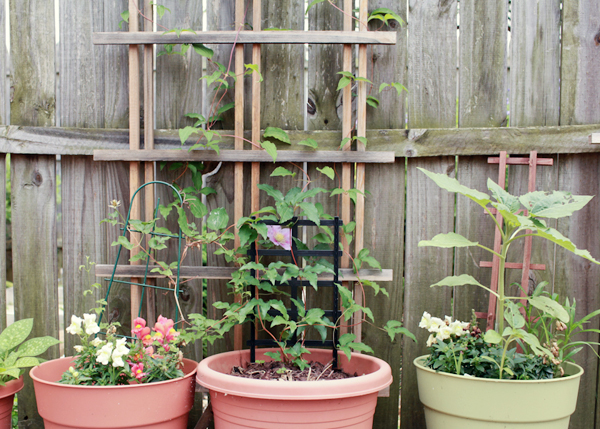
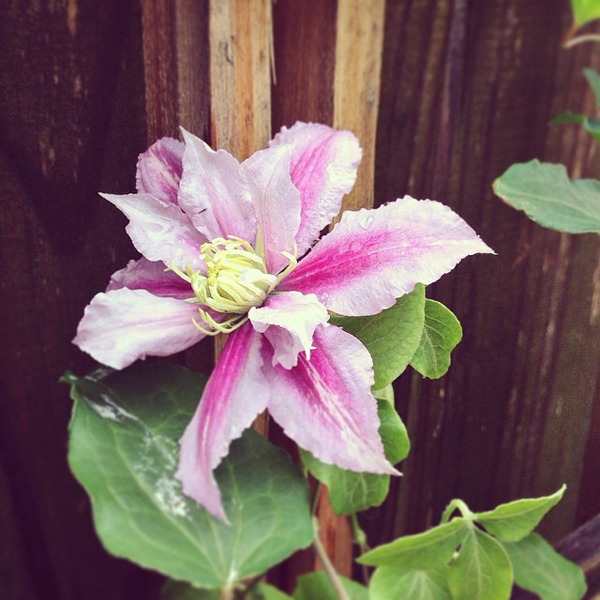
Potted plants along the fence on the opposite side of the backyard. We recently added a few marigolds (to help deter flower-eating pests), a dark purple opal basil plant, and a couple of zinnia for some additional summer color. The clematis vine is one of my favorites in the entire garden. The flowers are so romantic! Future plans for this area include a vertical herb garden and possibly a small vertical vegetable garden – next year!

OSBP-At-Home-Garden-Update-Clematis-Instagram

OSBP-At-Home-Garden-Update-Summer-2014-29

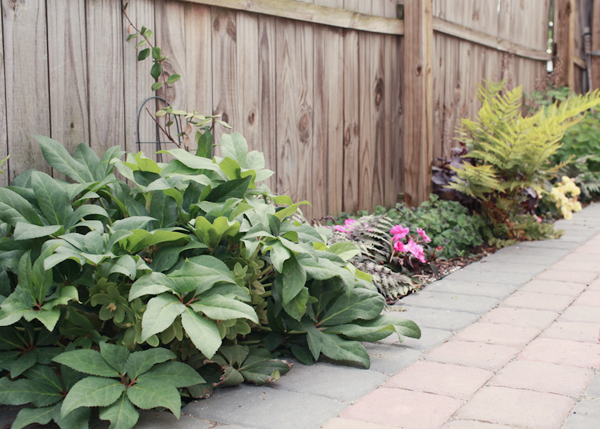
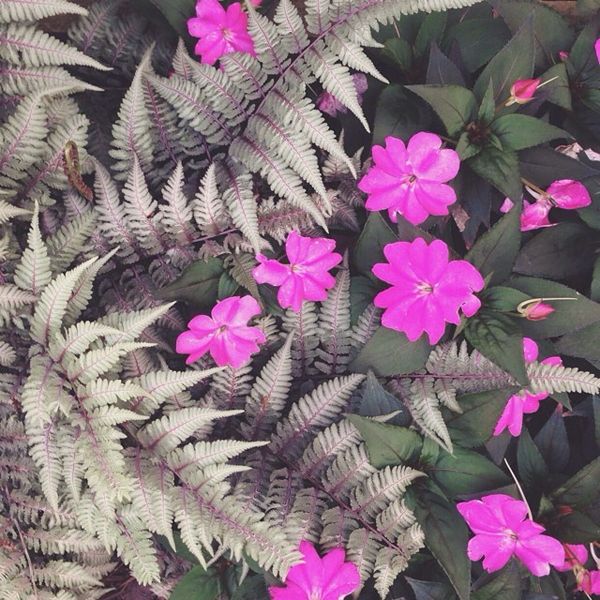
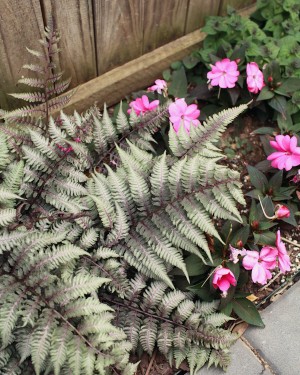
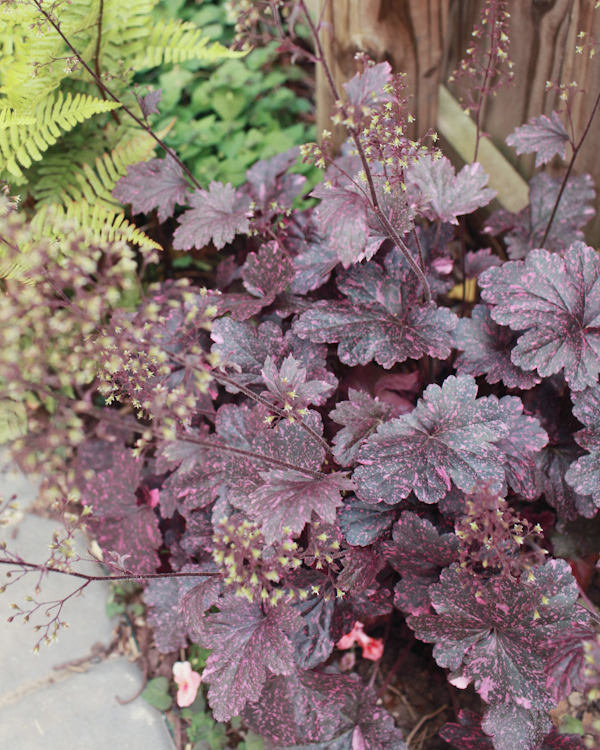
Finally, another small partial sun garden bed that runs along the path next to our garage. I planted a hellebore, some jasmine, a couple of Japanese painted ferns, some impatiens, begonias, purple coral bells, and a bleeding heart all the way in the back (which is now the size of a small hydrangea!). I love love love the combination of the painted fern and impatiens!

OSBP-At-Home-Garden-Update-Japanese-Painted-Fern-Instagram

OSBP-At-Home-Garden-Update-Summer-2014-33OSBP-At-Home-Garden-Update-Summer-2014-36

OSBP-At-Home-Garden-Update-Summer-2014-41

And that’s our garden – at least for the moment! Sadly, along with DC summer heat and humidity, the mosquitos and earwigs have arrived in force. The mosquitos in particular make it difficult to enjoy the backyard for long periods of time, so I haven’t been spending as much time outdoors as I’d normally like to. I’m trying to learn more about garden pest control in general, since I’ve also battled rose slugs and normal slugs in the backyard. We’ve also been contending with an infestation of the horrible-sounding Dead Man’s Fingers in one corner of the garden bed. It pre-dates any of the plants in the garden bed (we started fresh when we moved in last year), so I’m worried there might be some dead tree root buried deep in the soil causing the fungus. Anyone out there have any experience successfully battling Dead Man’s Fingers?? I have so much to learn about gardening!

All photos by me, via my Canon DSLR and via Instagram

Urbanic Faves | Campfire Adventures

Hello Oh So Beautiful Paper friends and happy July to you! It’s right about this time every year that I start craving an escape from the city to an adventure into the great outdoors. There is nothing that quite compares to the wonder of a star filled sky, being surrounded by miles of nature and getting cozy in a sleeping bag. The most magical part for me, is time spent sitting around a campfire. Whether socializing, toasting, roasting, or even just reflecting, campfire time always seems to lift the worries of life away. This month’s inspiration is all things camp! Here are some of our favorites from around Urbanic and beyond. xo – Audrey

Urbanic Faves: Campfire Adventures for Oh So Beautiful Paper 

1. Polar x Stumptown camp mug; 2. Gold Teeth Brooklyn cards; 3. Izola thermos; 4. Hammerpress card 5. Kikkerland camping utensils; 6. Small Adventure card; 7. Ello There camp banner; 8. P.F Candle Co. candles; 9. Ello There explorer’s patch; 10. Wondermade s’mores marshmallows; 11.Rise and Shine Paper card; 12. Field Notes notebooks; 13. Fletcher and Fox arrows; 14.  Ello There national parks print; 15 Now Designs summer camp napkins and  paper placemats; 16. Scout’s Honor Paper cards