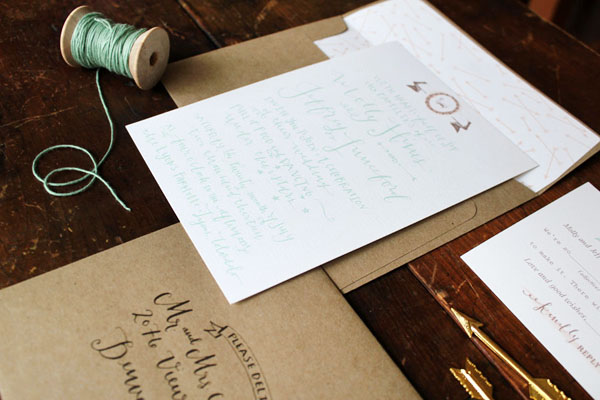
Molly + Jeff’s Rustic Calligraphy Wedding Invitations

Fall may be just around the corner, but I couldn’t resist sharing these sweet summer wedding invitations from Sally of la Happy. Inspired by the farmette wedding venue, Sally created these invitations using her whimsical custom calligraphy and vintage farm motifs, all in shades of mint green and brown. Kraft envelopes and vintage postage are the perfect finishing touch!

Rustic Calligraphy Wedding Invitations by la Happy via Oh So Beautiful Paper

From Sally: This invitation suite was designed for an adorable vintage farm wedding at Lyons Farmette in Lyons Colorado. The design was inspired by the vintage sweetness of the farmette wedding venue, but we also wanted a feminine and somewhat fancy feel to invitations.

Rustic Calligraphy Wedding Invitations by la Happy via Oh So Beautiful Paper

Rustic Calligraphy Wedding Invitations by la Happy via Oh So Beautiful Paper

The invitation suite features my calligraphy, vintage engravings of a lamb, an adorable typewriter typeface for the mad lib rsvp card, and a sweet green twine to tie it all together. The set includes a calligraphy invitation, response card, custom illustrated map, and coordinating envelopes. The outer kraft paper envelope has a custom arrow envelope liner with calligraphy addressing in sepia ink and vintage stamps. The invitation set was digitally printed on white cotton paper.

Rustic Calligraphy Wedding Invitations by la Happy via Oh So Beautiful Paper

Rustic Calligraphy Wedding Invitations by la Happy via Oh So Beautiful Paper

Thanks Sally!

la Happy is a member of the Designer Rolodex – check out more of Sally’s beautiful work right here or visit the real invi­ta­tions gallery for more wedding invitation ideas!

Photo Credits: la Happy

Madeleine + Ben’s Lobster Bake Post-Wedding Party Invitations

The wedding day goes by far too quickly, so I love the idea of a post-wedding party as a way for a much more relaxed bride and groom to spend additional time with friends and family. Diane from Faye & Co. created these invitations for a post-wedding lobster bake on Nantucket, complete with Diane’s signature hand lettering and illustrated nautical details. So fun!

Lobster Bake Post-Wedding Party Invitations by Faye & Co. via Oh So Beautiful Paper (5)

From Diane: Madeleine and Ben wanted a Nantucket Island look to their post-wedding lobster bake party invitations, so through some fun illustration & lettering, we did just that! The tri-fold invitation was tied together with gray and white baker’s twine with a fun little tag reading “We’ve tied the knot, now let’s celebrate!” which surrounded a sailor’s knot. The navy and red color palette was a must for this lobsterfest, and really made the entire set pop.

Lobster Bake Post-Wedding Party Invitations by Faye & Co. via Oh So Beautiful Paper (6)

After unfolding the invitation the guests would find a map of Nantucket Island marking the events of the weekend, the main invitation with a big old red lobster and the details, and a perforated rsvp postcard for easy tearing and sending.

Lobster Bake Post-Wedding Party Invitations by Faye & Co. via Oh So Beautiful Paper (2)

Lobster Bake Post-Wedding Party Invitations by Faye & Co. via Oh So Beautiful Paper (4)

On the reverse side was their return address, hand-lettered alongside of a lobster claw (made into a logo for use at the event), and custom-made return postage featuring the silhouette of Nantucket island.

Lobster Bake Post-Wedding Party Invitations by Faye & Co. via Oh So Beautiful Paper (3)

Each invitation was delivered to guests with hand-addressing on the outer envelopes and beach-themed vintage postage. The flap of the envelope was sealed with a custom address label, which we also turned into a rubber stamp for Madeleine and Ben to use in the future.

Lobster Bake Post-Wedding Party Invitations by Faye & Co. via Oh So Beautiful Paper (1)

Thanks Diane!

Check out the Designer Rolodex for more tal­ented wed­ding invi­ta­tion design­ers and the real invi­ta­tions gallery for more wedding invitation ideas!

Photo Credits: Faye & Co.

DIY Tutorial: Blue and White Rubber Stamp Save the Dates

We love blue and white as a color combo. It’s fresh, clean & add a great vintage touch without going overboard. A few weeks ago, while picking up some paper for my moving announcements (which will probably be a future DIY project), I spotted from across the room, some gorgeous floral fine art paper. This blue and white paper instantly reminded me of an inspiration post we’d written a while back about our very popular Copenhagen China Collection. After choosing the paper as my starting point, this lovely, demure, save the date came together quite quickly!  – Bailey and Emma of Antiquaria

DIY Tutorial: Blue and White Rubber Stamp Save the Dates by Antiquaria via Oh So Beautiful Paper

The blue and white floral patterned paper used as backing adds visual interest and a luxurious quality to the design. It could also easily be used as an envelope liner.

DIY Tutorial: Blue and White Rubber Stamp Save the Dates by Antiquaria via Oh So Beautiful Paper

Step One: You’ll want to first adhere the card to the patterned paper. To do this, use permanent spray mount on the back side of your A2 (4.25″ x 5.5″) card. Let the glue get tacky for a few seconds and then place your card onto the backer paper. Let the two pieces adhere well (like overnight) under a heavy book.

DIY Tutorial: Blue and White Rubber Stamp Save the Dates by Antiquaria via Oh So Beautiful Paper

Step Two: Once you’ve waited for the glue to set, carefully trim the card so that the card and backer are the same size. The easiest way to do this is to use a metal ruler and craft knife on a seal healing mat. Take this step slow so that you don’t warp the size of the A2 front.

DIY Tutorial: Blue and White Rubber Stamp Save the Dates by Antiquaria via Oh So Beautiful Paper

Step Three: Lay your backed A2 card on a hard, flat surface. Ink your invitation stamp (we used our Vintage Calligraphy Save the Date Stamp), using a midnight blue stamp pad and center over the backed card. Press down on stamp making certain to apply even pressure on the entire mount (especially the center). Lift stamp and let the print dry thoroughly.

DIY Tutorial: Blue and White Rubber Stamp Save the Dates by Antiquaria via Oh So Beautiful Paper

Step Four: For a reverse effect, stamp your website card using white ink on a blue card. We used our Art Deco Website Stamp on a standard business sized card. This white ink pad really did the trick and was super opaque!

DIY Tutorial: Blue and White Rubber Stamp Save the Dates by Antiquaria via Oh So Beautiful Paper

Step Five: Before addressing the save the dates, we stamped our return address (we used our Calligraphy Ampersand Return Address Stamp) on our light blue A2 envelopes.  All done!

Materials:

Stamps:

Vintage Calligraphy Save the Date Stamp

Art Deco Website Stamp

Calligraphy Ampersand Return Address Stamp

Stamp Pads: Midnight and Frost White

Paper (available at Paper Source):

A2 Notecards in Luxe White

A2 Envelopes in Bluebell

Business Cards in Lake, for the web card

Fine art paper, used for backer

Other Materials:

Permanent Spray Adhesive

Craft knife, metal ruler, and self healing mat

Photo Credits: Intertwyned

DIY Rubber Stamp Holiday Cards

Hi Everyone!  Before we run off for the holiday weekend, the ladies of Antiquaria are back with a holiday DIY for you!  You can see lots of awesome holiday cards in my holiday card round ups right here, but if you’re planning to DIY your holiday cards this year, check out the post below for a fabulous idea!

Wow! This holiday season has totally crept up on us…however, we couldn’t be more thrilled that it has arrived.  For the past few months, we’ve been busy bees designing a new holiday stamp collection!  This tutorial was born out of our desire to get our hands on some of the new seasonal stamps.  Add vintage grosgrain ribbon and it’s just icing on the cake.  This holiday card design is so simple and lovely… it would be a great afternoon project.

DIY Holiday Card

DIY Rubber Stamp Holiday Card

Step One: Cut card to square dimensions (5.5″ x 5.5″).  Ink the stamp (we used our Holly Berry Greeting stamp) thoroughly and center on the lower half of the square card.  Press evenly to make print.  Let dry.

DIY Rubber Stamp Holiday Card, Step 2

Step Two: Punch 2 holes in the top of the card by either using a 2 hole punch (as shown, makes things really simple) or drawing & punching 2 even dots about 1/2″ from the top and 1″ in on each side.

DIY Rubber Stamp Holiday Card, Step 3

Step 3: Cut ribbon in pieces 10-12 inches long.  Thread ribbon through the holes so that each end is now on towards the back of the card.  Crossing in the back, thread each end back through the holes and toward the front.  Fold ribbon in half and cut to make a crisp V shaped end.

DIY Rubber Stamp Holiday Card, Step 4

Step 4:  With everything going on this time of year addressing your envelopes may seem like the last thing you need to spend time on.  Make the process a bit more fun by trying interesting color combinations that will help your card stand out from the rest.  Save time by using a return address stamp or fun printed labels, and you’re all done!

Materials:

Holly Berry Greeting Stamp  (Greeting stamps work just as well inside a store bought card)

Holiday Wreath Return Address Stamp

Cover paper, cut into 5.5″x5.5″ square cards

Stamp Pad, we used Hunter Green

2 Hole Punch

Grosgrain ribbon, search Etsy, Ebay or local thrifts for the vintage stuff.

5.75″x5.75″ Envelopes, we used Papaya

Photo Credits: Antiquaria

DIY Hand Watercolored Save the Dates + Thank You Cards

It’s the ladies of Anti­quaria, back with another fab­u­lous and cre­ative DIY project for you all!  This project is for wed­ding save the dates, but you can eas­ily apply this tuto­r­ial to any party invi­ta­tions or announcements!

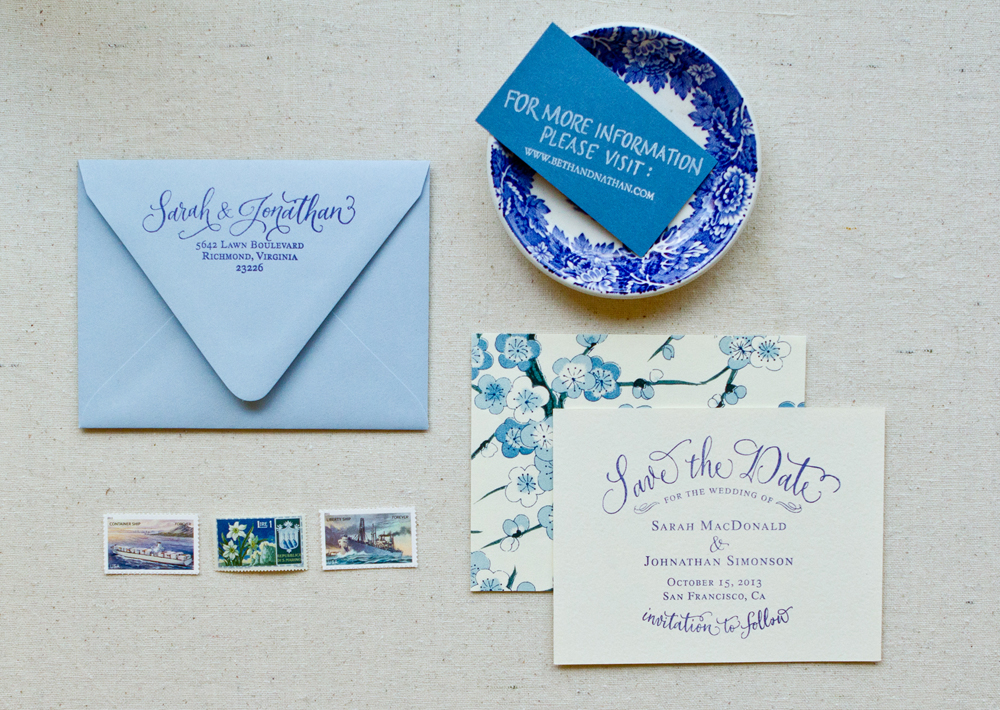
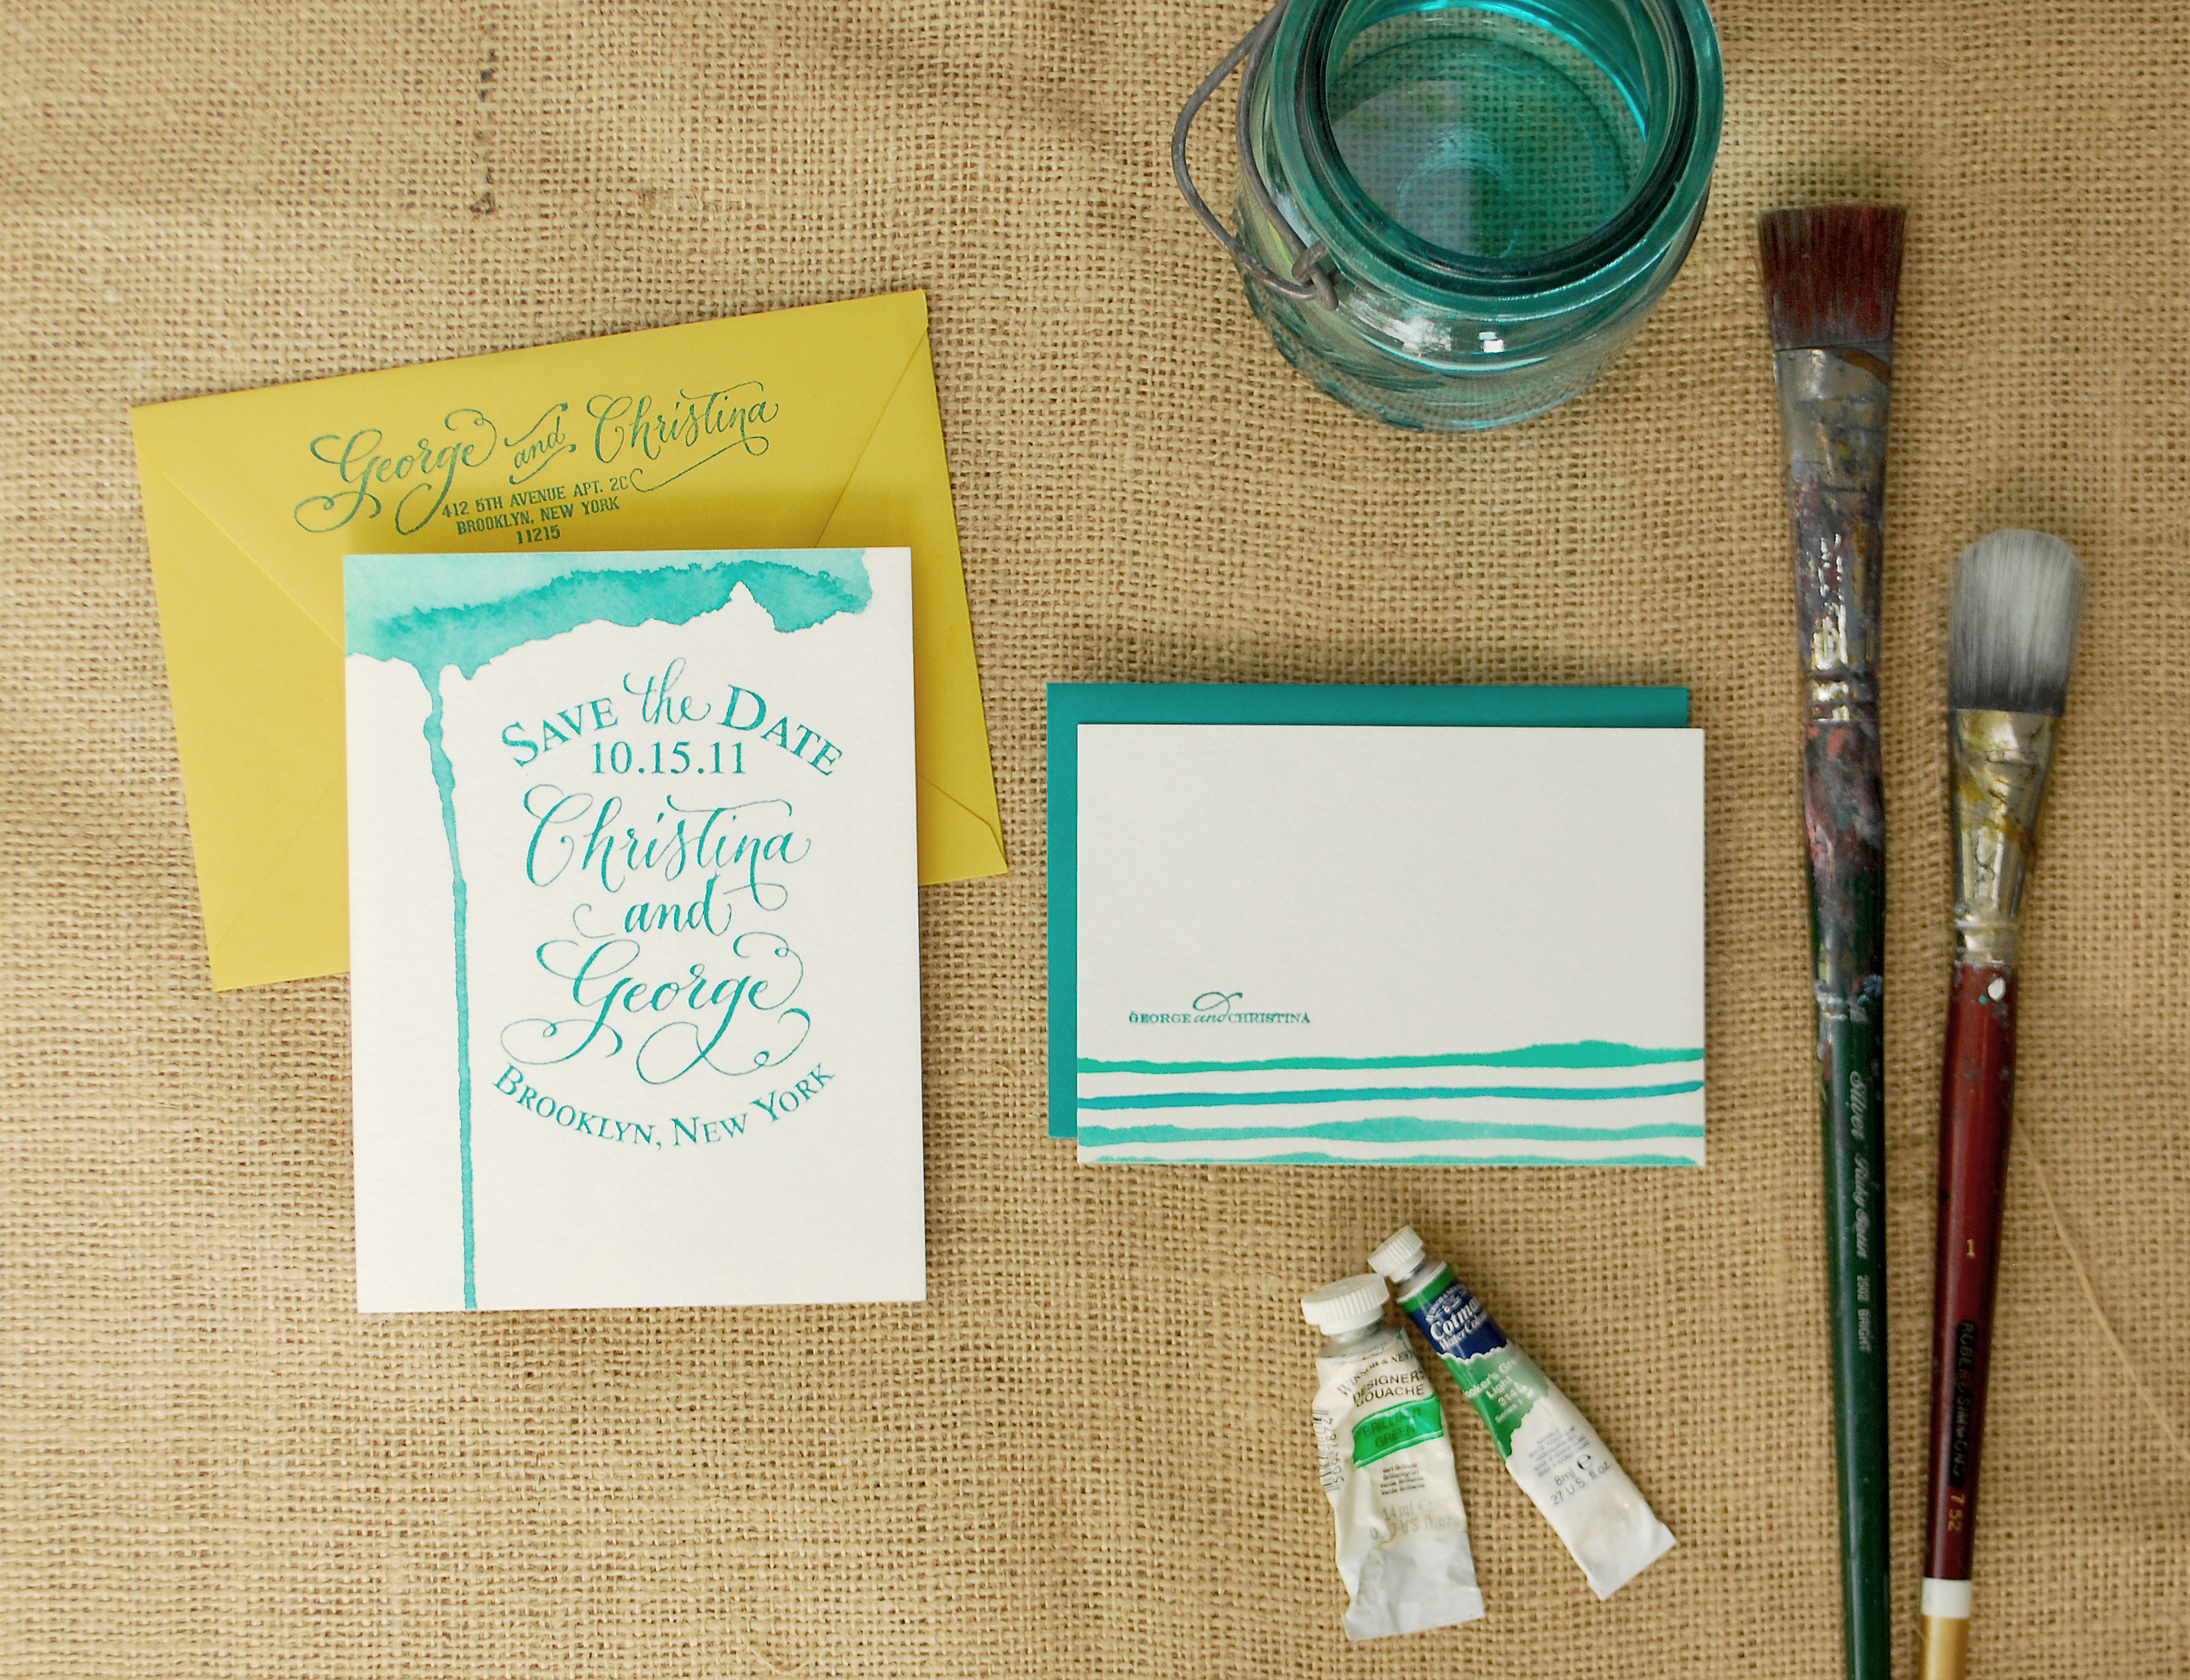
These Save the Dates and matching Thank You Cards combine the use of our custom rubber stamps with hand painted watercolor accents.  This DIY project is inspired by Emma’s reception invitations that we did a while back, after her wedding.  The calligraphy ended up having variegated shades, giving the illusion that it was watercolored.  We ended up loving the way that the calligraphy looked and Emma embellished the invitations with a bit of color on one side, changing the look of the whole thing!

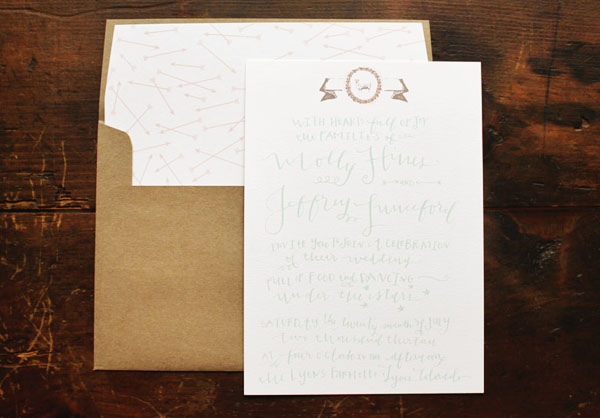
Using beautiful turquoise and blue shades of watercolor and our custom rubber stamps, this DIY save the date looks modern and organic at the same time.  The best part of this is just how easy it is to do!!  You don’t have to be an artist to master these painting techniques.  Also, we love how using different color combinations or shapes yield different results – making each card totally unique and its own little work of art.
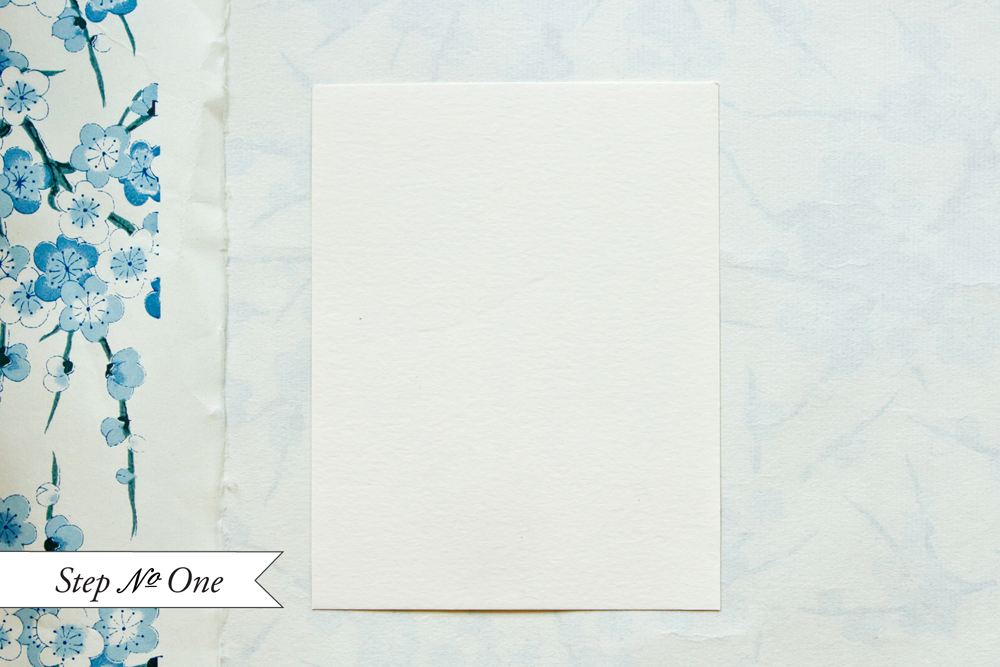
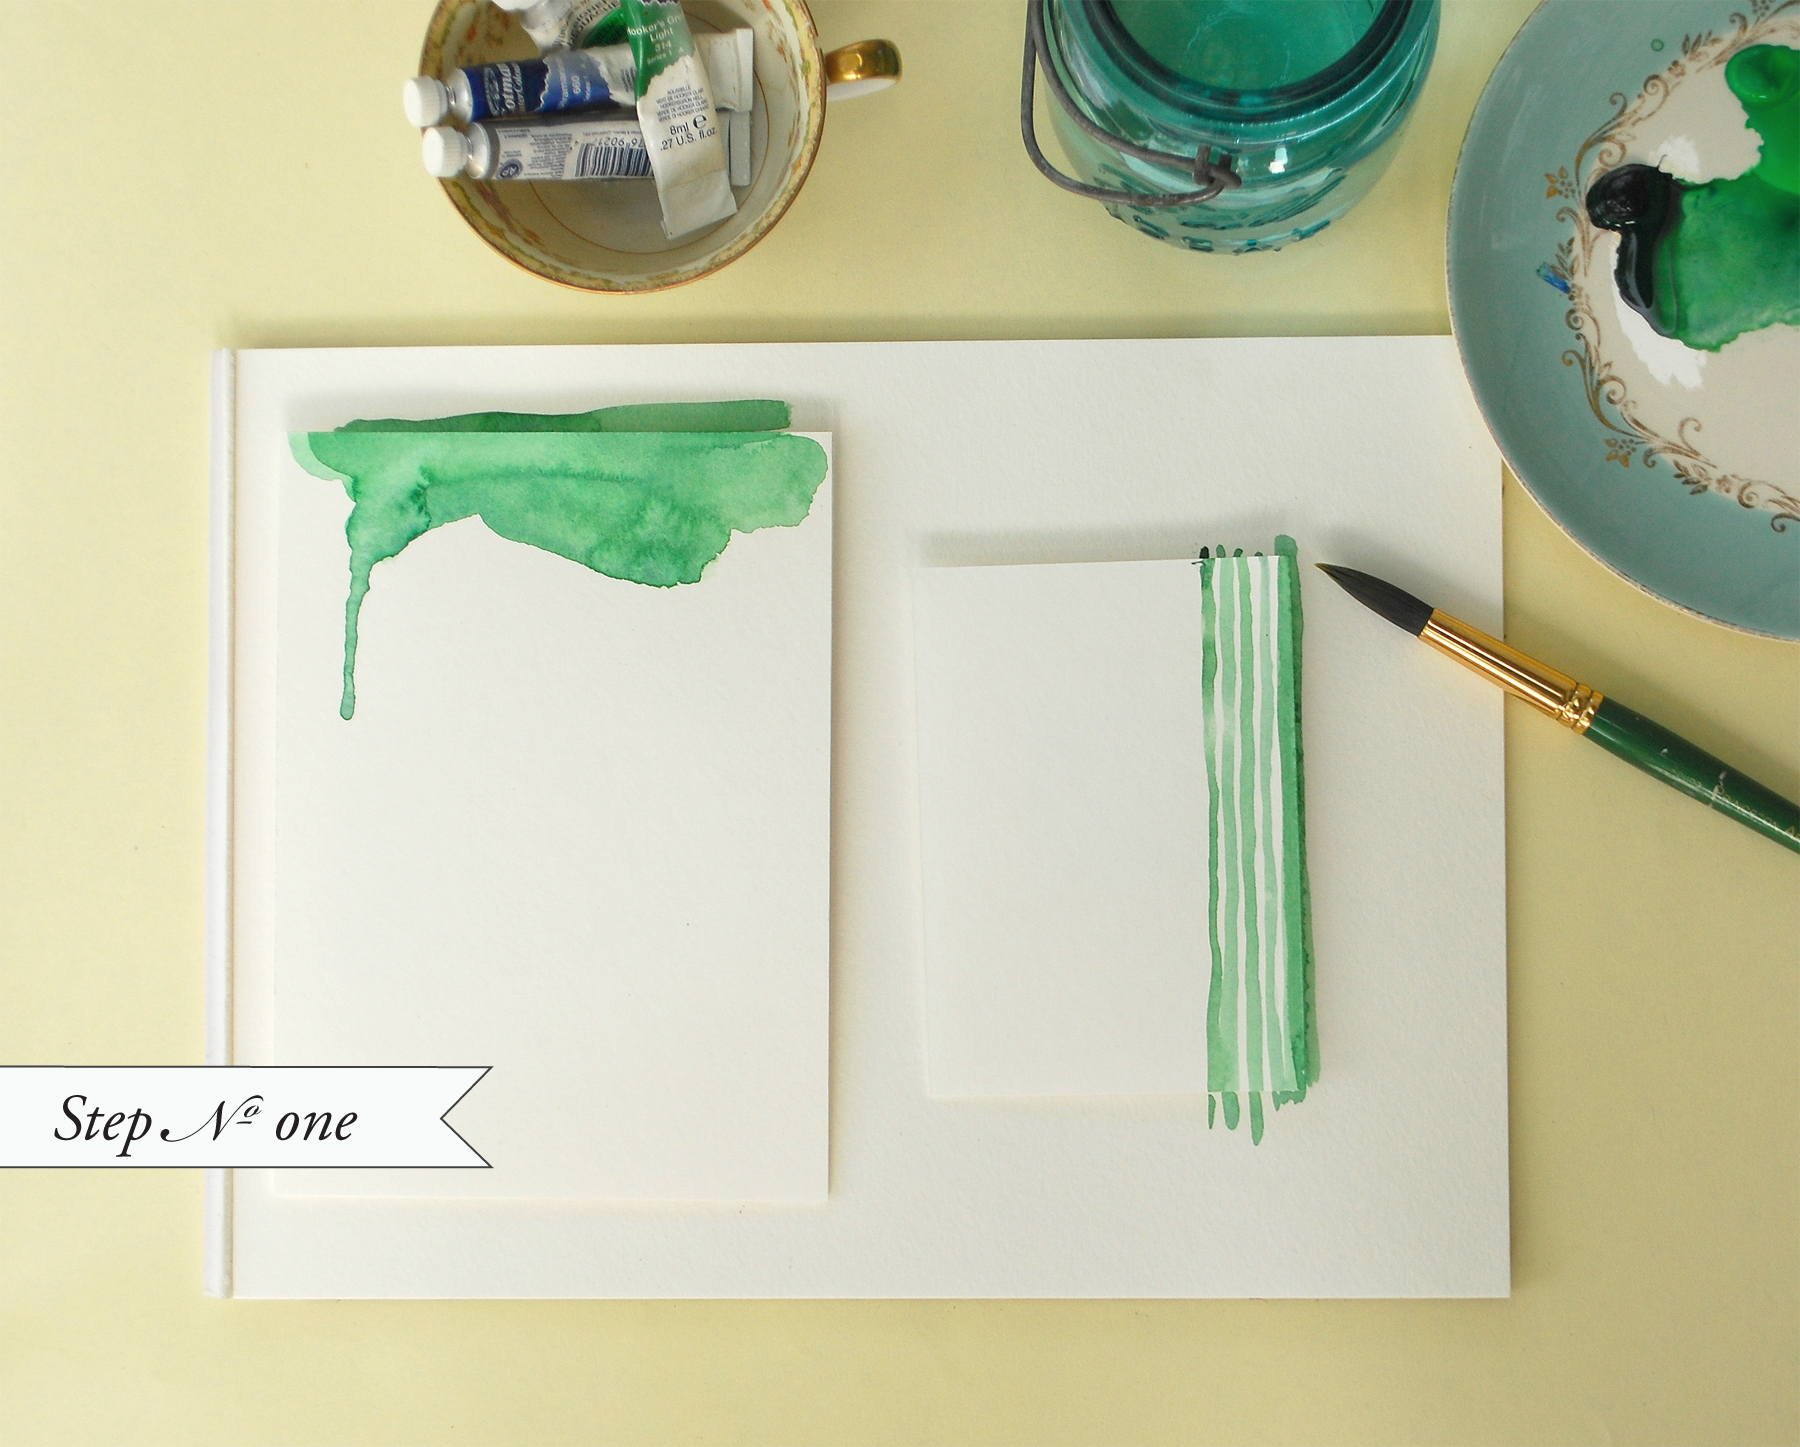
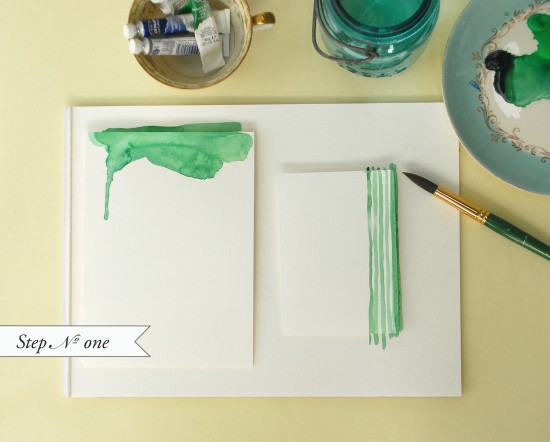
Step One: On pre-cut pieces of watercolor paper, get creative with painting.  We played with uneven painted stripes for the thank you cards and organic watery shapes for the save the dates.

Painting Tip: Go easy on the water to achieve a nice flat card.  Too much water will make your paper buckle or ripple when drying.

Watercolor Save the Dates: Step 1

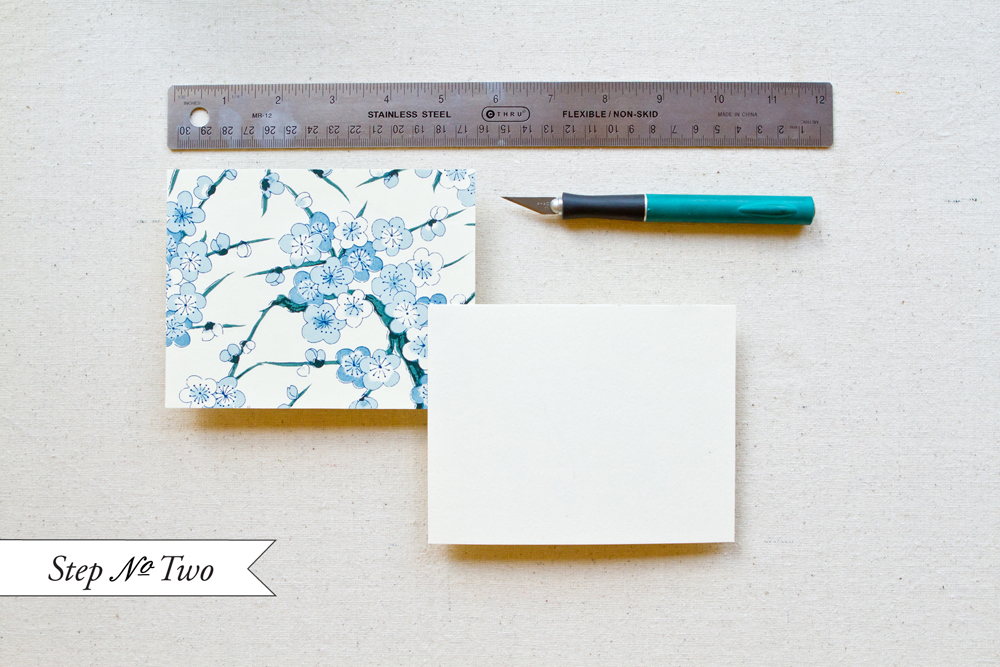
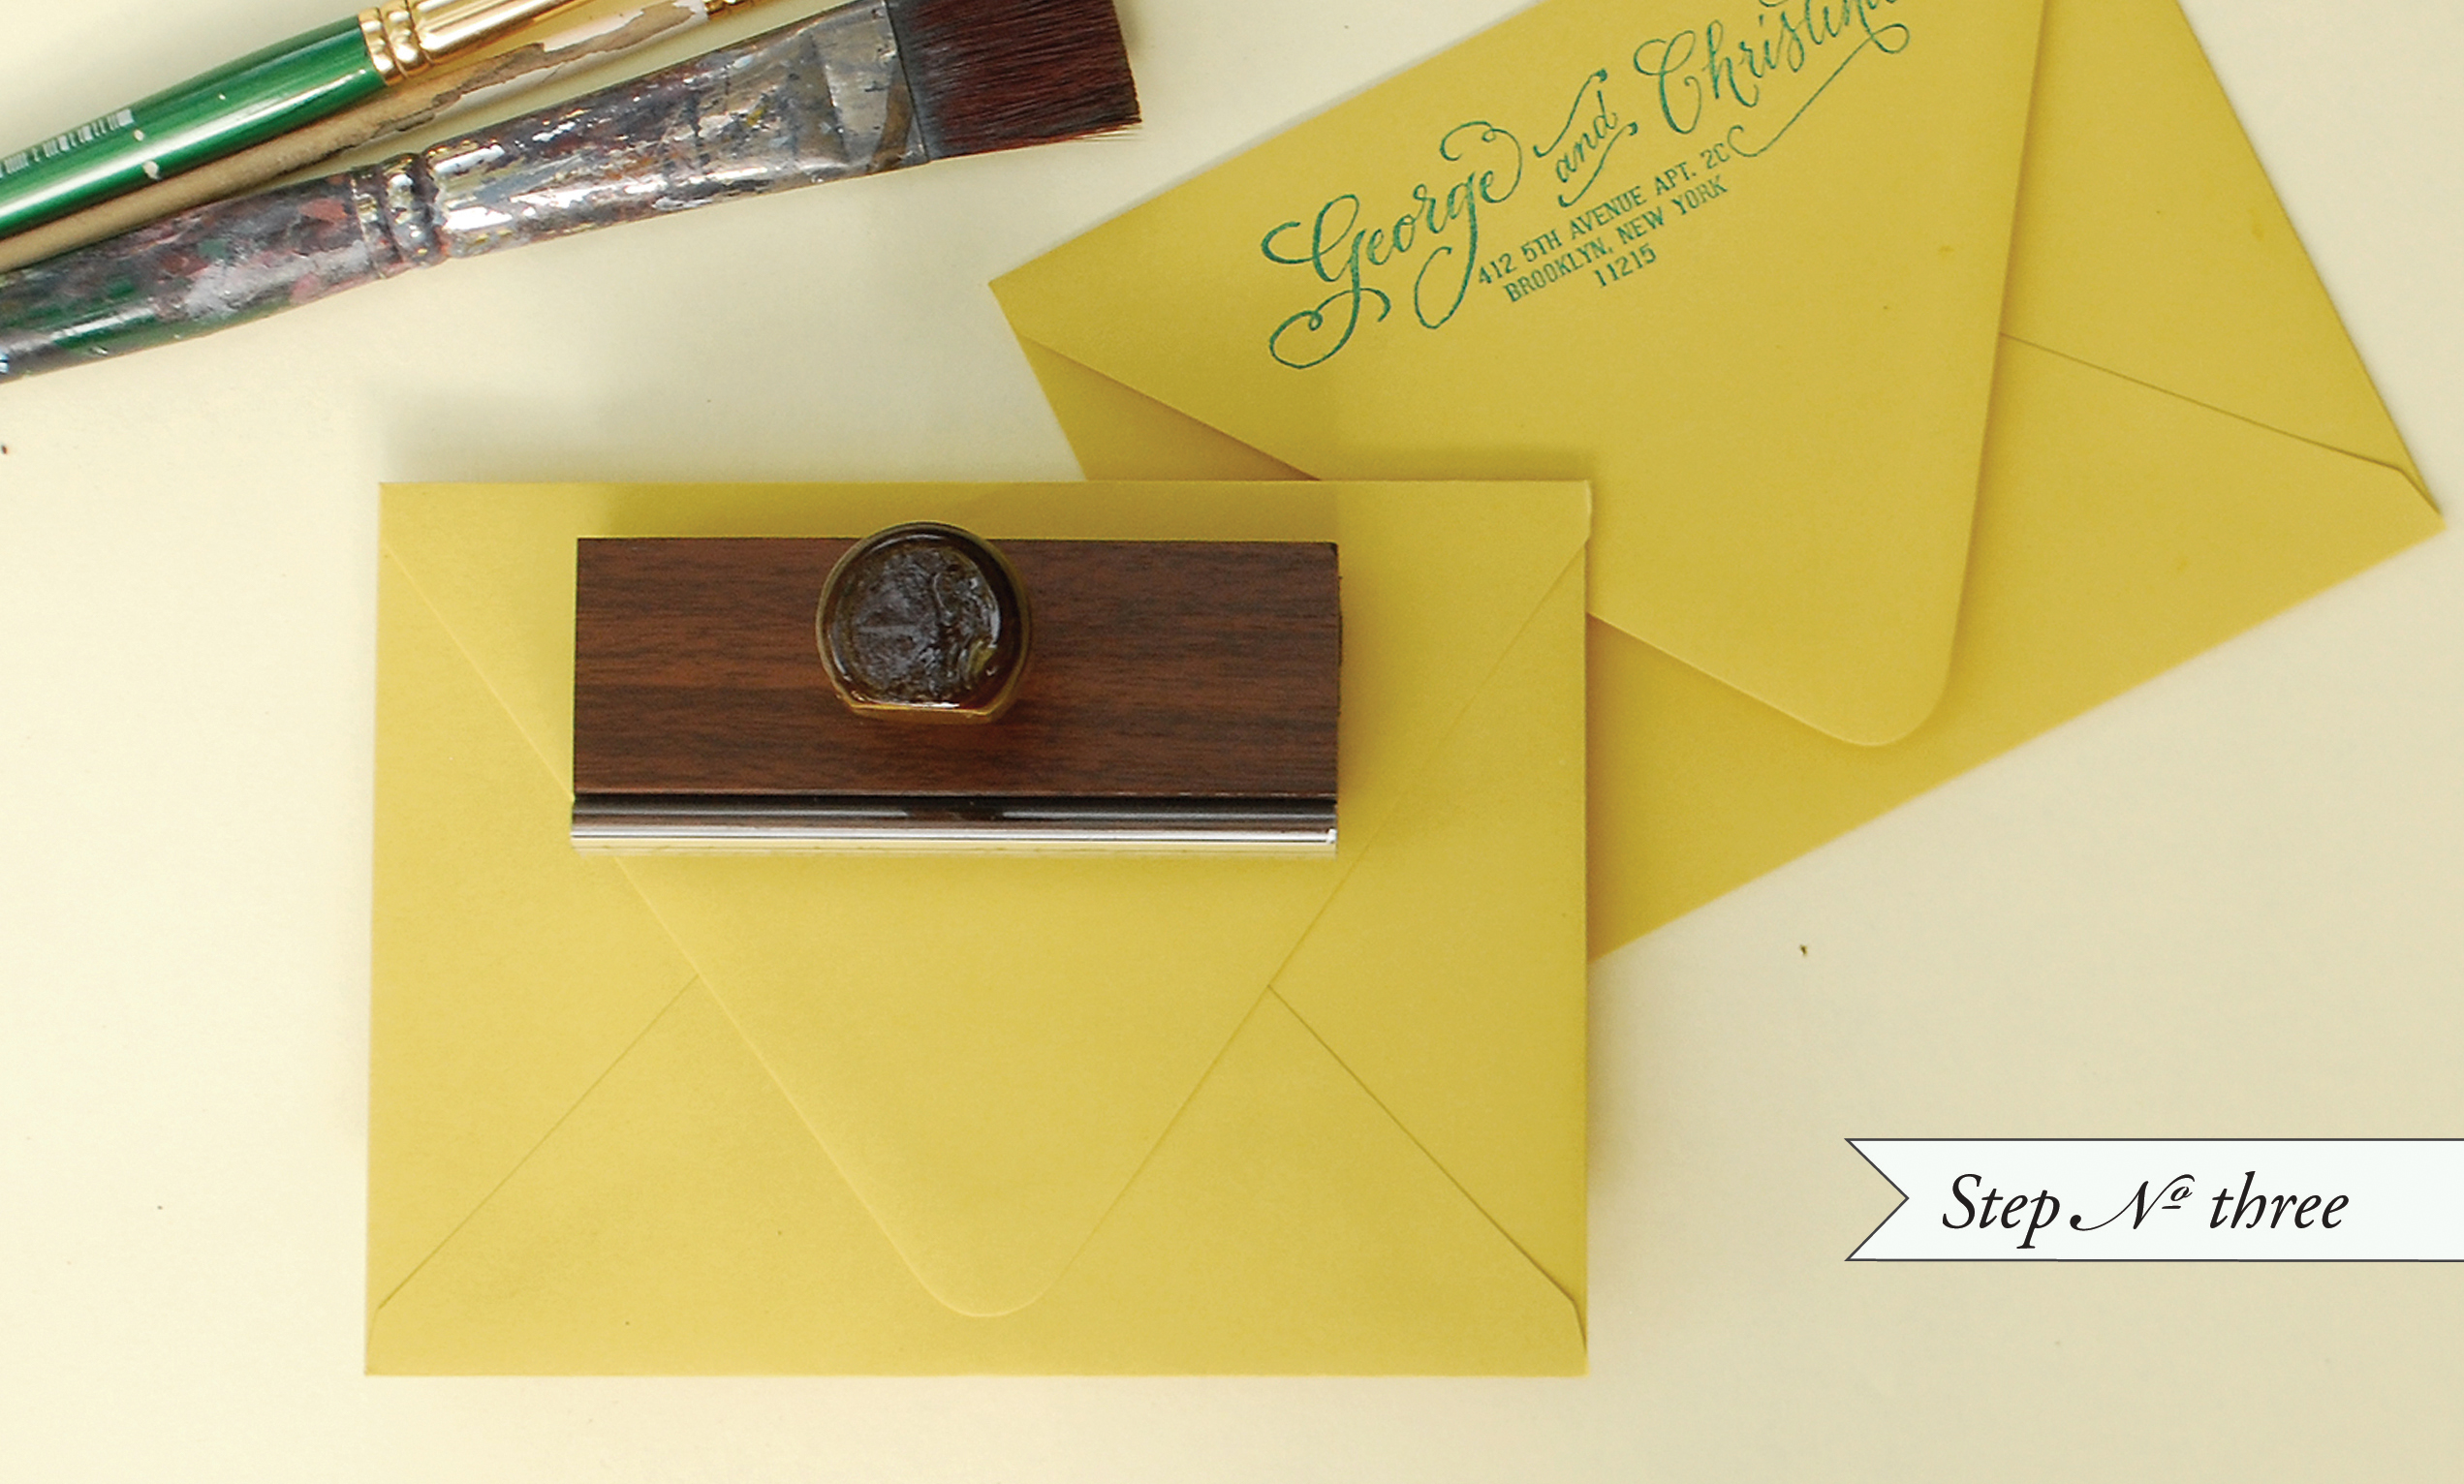
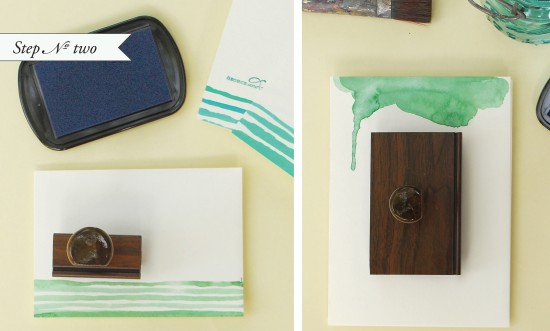
Step Two: Once your paint has dried, on a hard surface, ink your stamp and place it in the center of the card.  Apply even pressure and remove the stamp from the card.

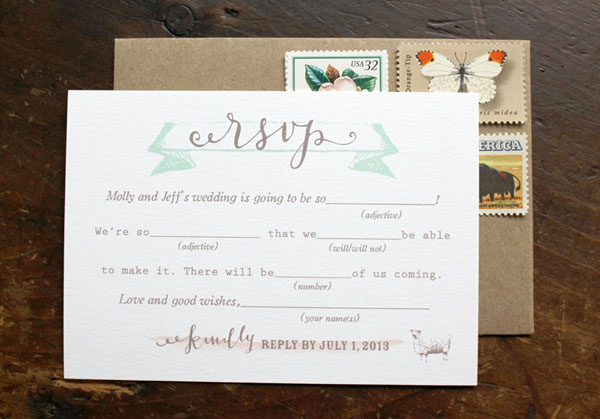
For the Save the Date, we used the “Vintage Label” custom save the date stamp.  For the thank you notes, we used the “Simple but Sophisticated” monogram stamp – using a monogram stamp for your thank you notes can be a fun way to personalize them without breaking the bank after the wedding!

Watercolor Save the Dates: Step 2

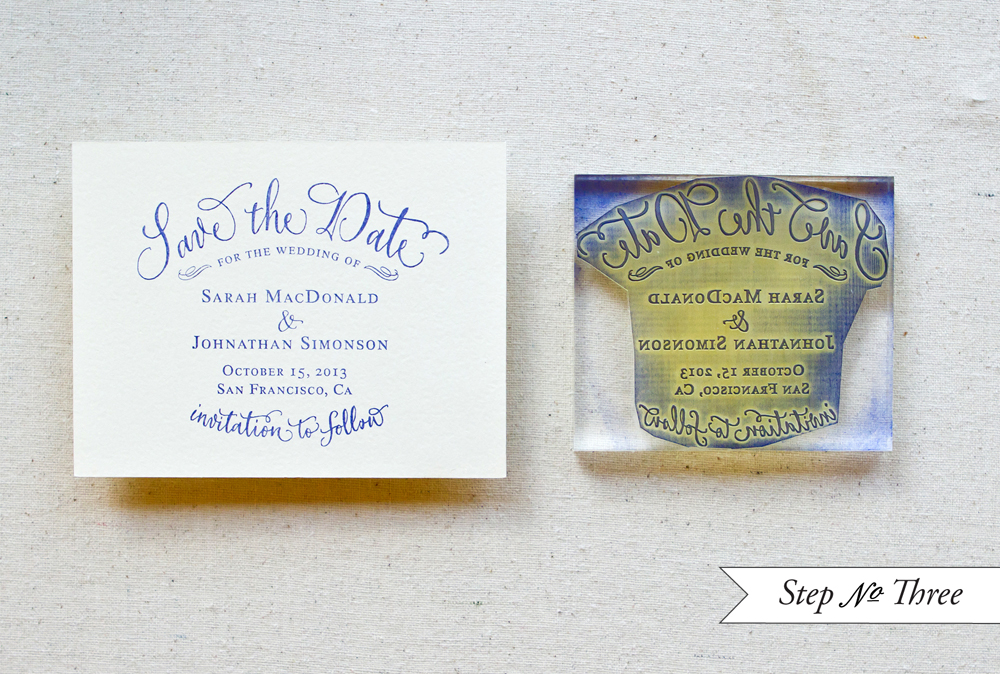
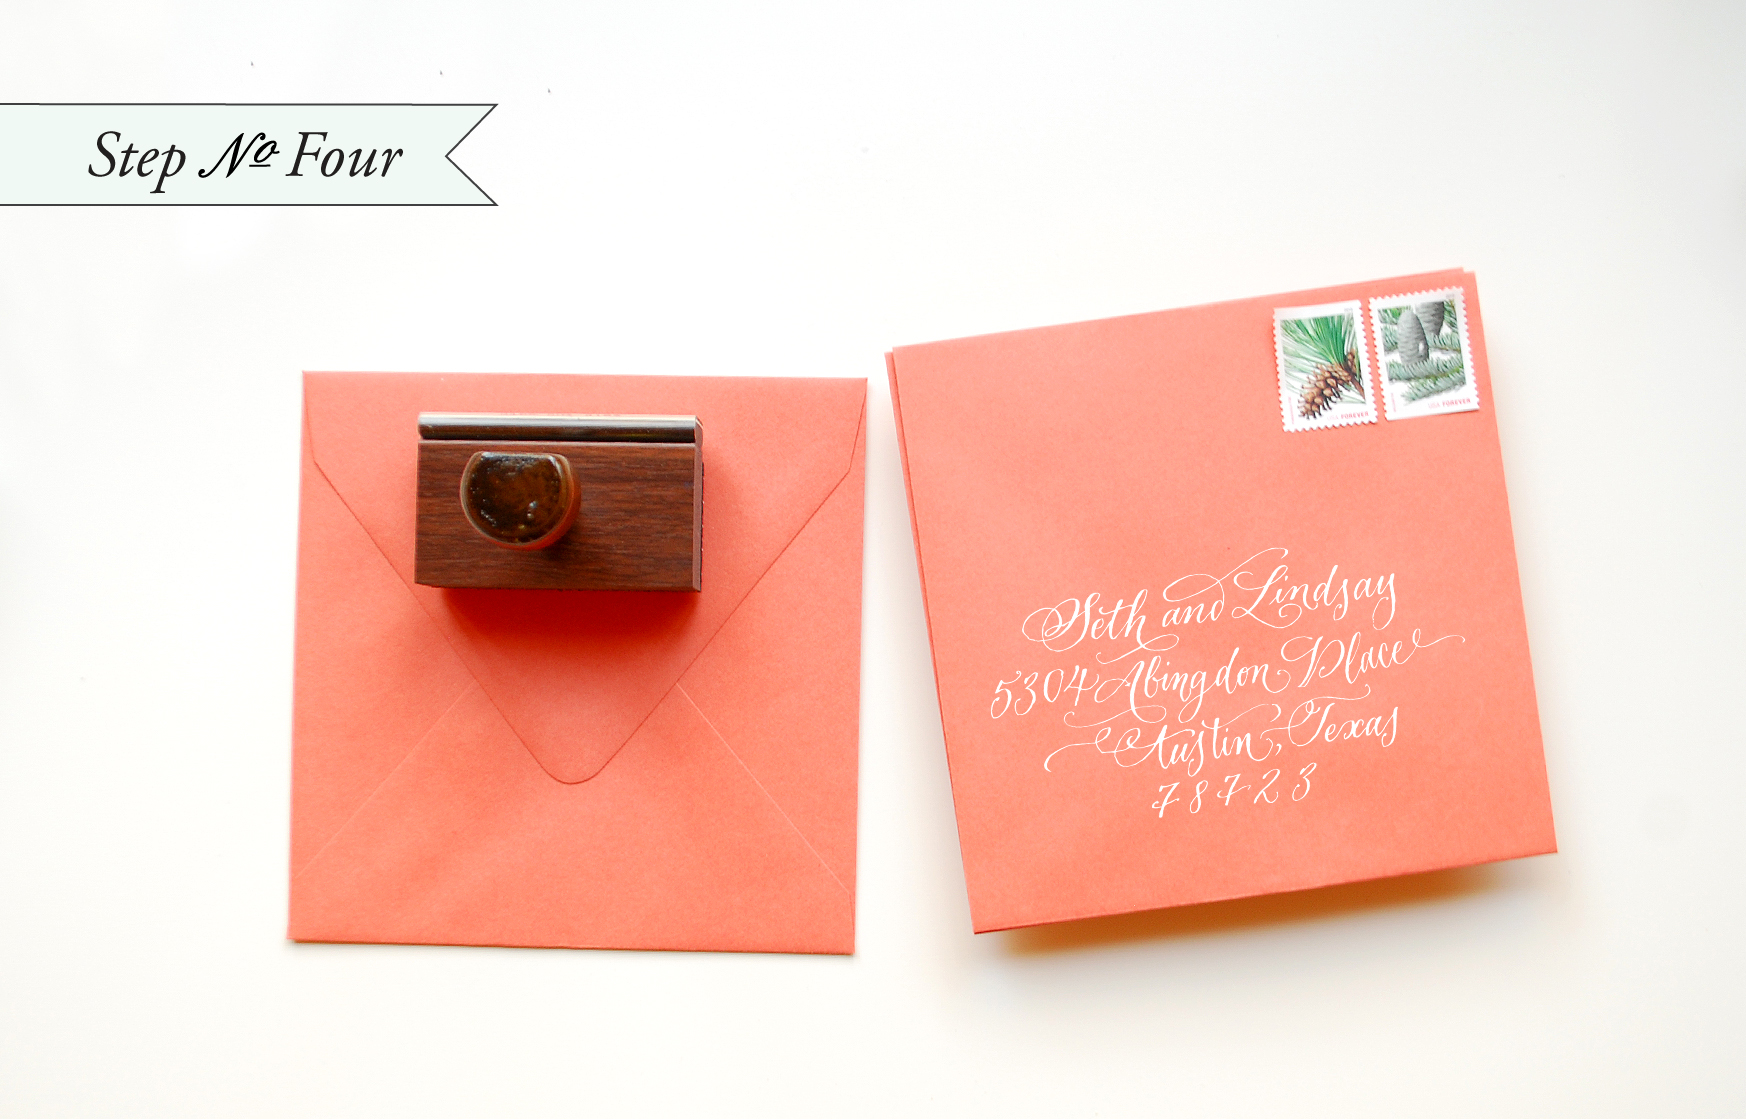
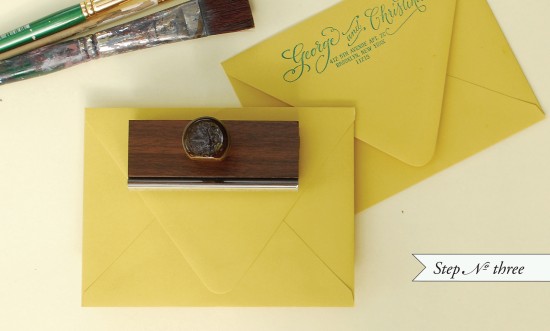
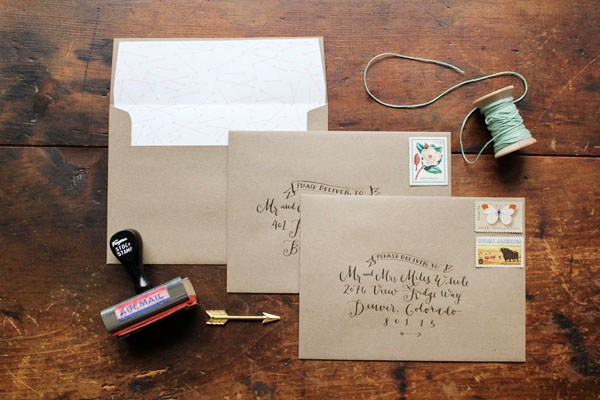
Step Three: We used the “Calligraphy Accent” return address stamp to finish everything off.

Now all that’s left is stuffing and addressing your envelopes!

Watercolor Save the Dates: Step 3

Materials List:

Custom Save the Date & Monogram rubber stamps.  The ones used in this tutorial are:

“Vintage Label” Save the Date Stamp,  “Simple but Sophisticated” Monogram Stamp,  “Calligraphy Accent” Return Address Stamp

Color Box Stamp Pad (we used a variety of teals and blues for this project)

Watercolors and brushes (you can purchase at any craft or art store)

A small dish and a jar of water (used to mix paint and wash brushes)

A6 Envelopes (shown above in Curry)

B4 Thank You Card Envelopes (shown above in Peacock)

Paper Options:

You can have large watercolor sheets or pads – the thicker the better, (purchased from your local art store) cut to size at your local print shop.

Just tell them the dimensions you need based on your envelope choice, the cut cards should be at least 1/4″ smaller than the envelope measurement.

If you are using the Paper Source A6 and B4 sizes that are shown above, ask for your pieces to be cut to

6 1/4″ x 4 1/2″ (A6) and 3 1/2″ x 5″ (B4).

If getting paper cut is too much of a hassle, you can use the luxe papers from Paper Source and buy them pre-cut.

Just be careful with how much water you use with your paints.  If you are using lightweight (90 lb) watercolor paper or the luxe papers from Paper Source, these papers will tend to buckle if you use too much water.

Photo Credits: Antiquaria