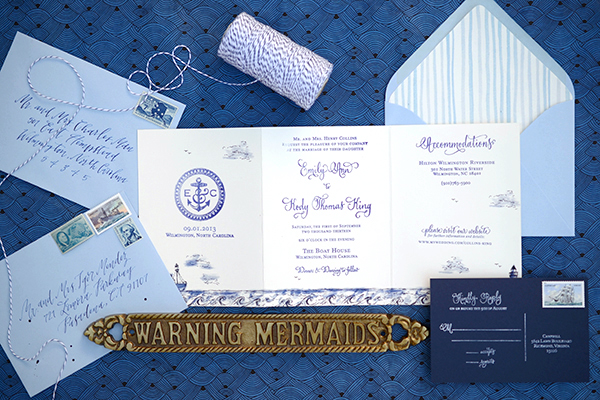
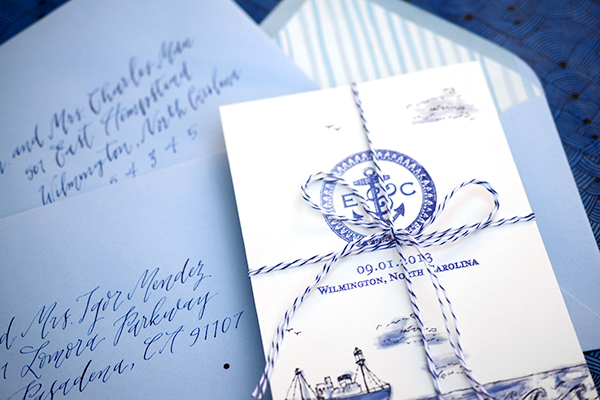
Shades of blue, anchor motifs, ships and rope… you could say that we are a pretty obsessed with nautical design. In this invitation suite, we created a stamped, fold out invitation with nautical details in mind. After discovering how easy and useful a fold out card is in a previous tutorial, we wanted to explore the format more and translate it into a full invitation. This would be perfect for a nautical seaside affair! To make this week even more fun, we’ve included a free download of the watercolor ocean-scape to make this tutorial a breeze. Enjoy! – Bailey and Emma of Antiquaria
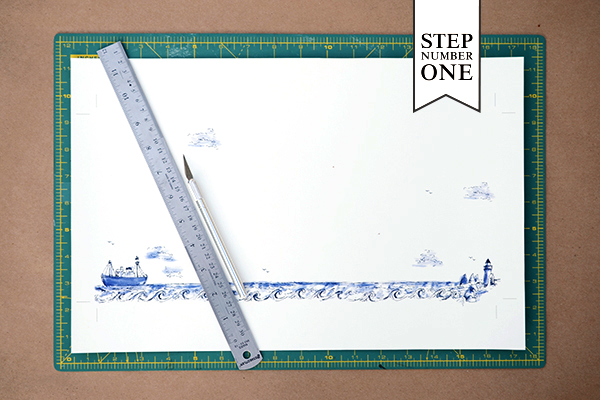
Step One: After downloading and printing the nautical tri-fold design (see bottom of post for download link). You will need 11″ x 17″ card stock to print the ocean scape. Next trim the card down at the crop marks to reach the final size (15″ x 7″). We used a self healing mat, metal ruler and craft knife for this step. If cutting many cards, we recommend taking them to a local printer to have them cut them all at once with an industrial cutter.
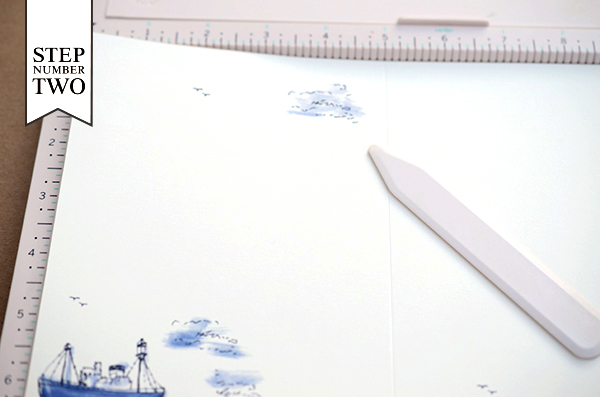
Step Two: Score the card twice: once at the 5″ mark and the other at the 10″ mark. Those will be your fold lines for the card but do not fold it yet!!
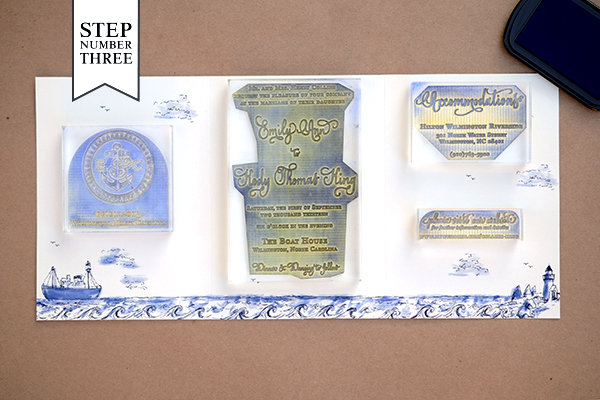
Step Three: Gather all of your stamps and lay them out to make certain that you have a stamping plan. The stamps we used for this design, from left to right are our Anchor Monogram Wedding Date Stamp, Vintage Calligraphy Invitation Stamp, Calligraphy Accent Accommodations Stamp and Calligraphy Accent Website Card Stamp. Once you have your plan, you will ink each stamp and align it into its appropriate space. For a step-by-step video tutorial about the stamp printing process go here.
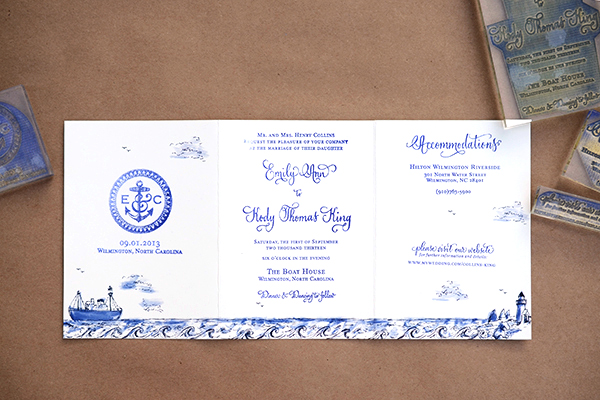
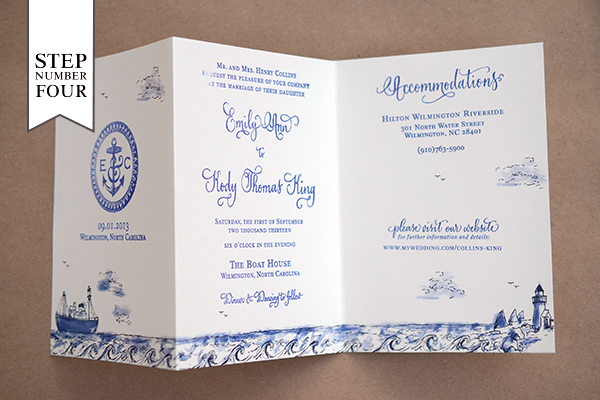
Step Four: Fold the card at the score marks. Use a bone folder to create crisp folds.
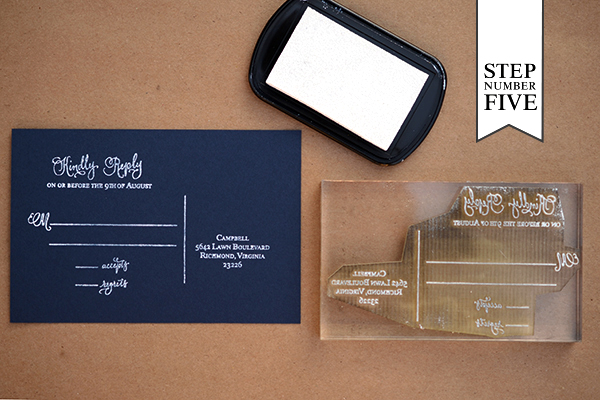
Step Five: Since the reply card will need to be sent back to you, we designed it as a separate piece. We used a white stamp pad with our Calligraphy Accent Reply Postcard Stamp on a navy A6 card (4″ x 6″).
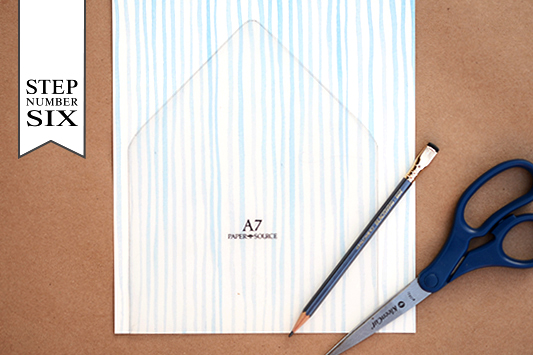
Step Six: Adding a printed envelope liner is a great way to add color and pattern to your save the date design. To make the liner, trace the template onto your printed paper (we used our  Watercolor Stripe in Ocean text weight) and cut it out with scissors. To install, simply use stick glue or double sided tape to adhere them into your envelope.
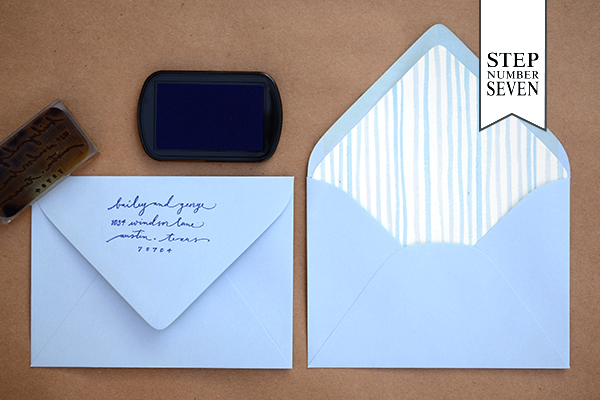
Step Seven: Next, you will stamp your return address on the back flap of your A7 envelope. We used our Scripted Return Address Stamp with navy blue ink for this design.
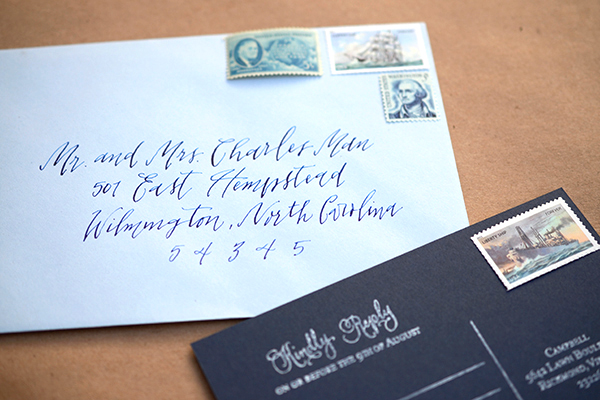
All that’s left is to add some gorgeous vintage postage (ours is from Verde Studio) and address them to your guests! We guarantee that they will be stoked to receive them in the mailbox and will be counting the days until your celebration!
Materials
Anchor Monogram Wedding Date Stamp
Vintage Calligraphy Invitation Stamp
Calligraphy Accent Accommodations Stamp
Calligraphy Accent Website Card Stamp
Calligraphy Accent Reply Postcard Stamp
Scripted Return Address Stamp
Stamp Pad in Midnight and Frost White
Watercolor Stripe Patterned Paper in Ocean Text Weight
Nautical Tri-Fold printed sheet (printed on 11×17 card stock), download file HEREÂ Note: digital download is for personal use only**
Self Healing Mat, Metal Ruler and Craft Knife
A6 Cards in Night
A7 Envelopes in Bluebell
Envelope Liner Templates
Vintage Postage
AntiÂquaria is a memÂber of the Designer Rolodex – you can see more of their beauÂtiÂful work right here or visit the real wedding invitations gallery for more wedding invitation ideas!
Photo Credits: Antiquaria



 Â
 Â
 