DIY Tutorial: Savannah-Inspired Floral Wedding Invitations

Ever since we designed our Savannah invitation suite for this inspiration shoot in collaboration with Camille Styles, it’s been one of our most popular invitations to date. This adaptation of the Savannah design is for the DIY couple that wants a custom suite on a budget. This design is soft and elegant with gorgeous floral accents: our version of a traditional invitation! – Bailey and Emma of Antiquaria
DIY Tutorial: Savannah-Inspired Wedding Invitations by Antiquaria via Oh So Beautiful Paper

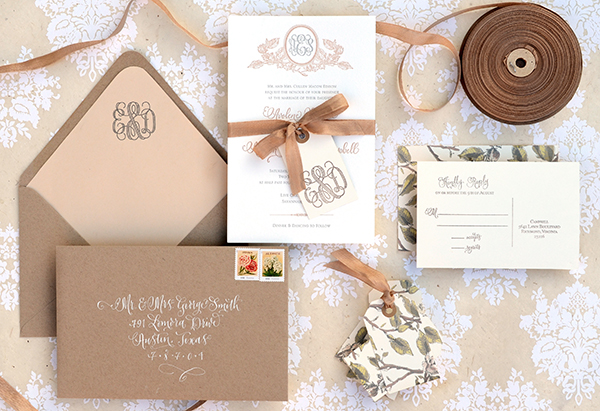
For the foundation of the suite, we used our Letterpress Printed “Savannah” Invitation design. Adding in one piece of letterpress stationery really helps elevate the entire suite. While the single piece is still a bit of a splurge, your savings comes from all of the special DIY details that help complete the look and make it special and unique.
DIY Tutorial: Savannah-Inspired Wedding Invitations by Antiquaria via Oh So Beautiful Paper

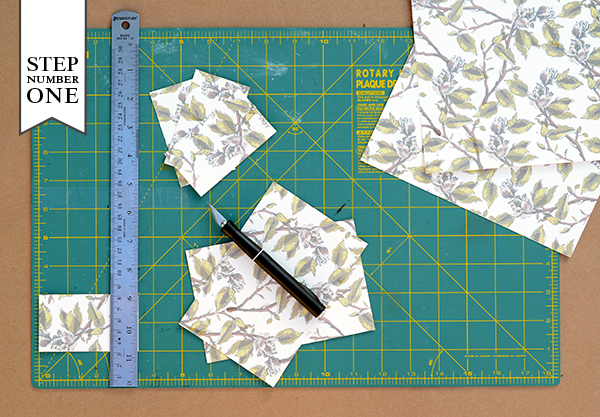
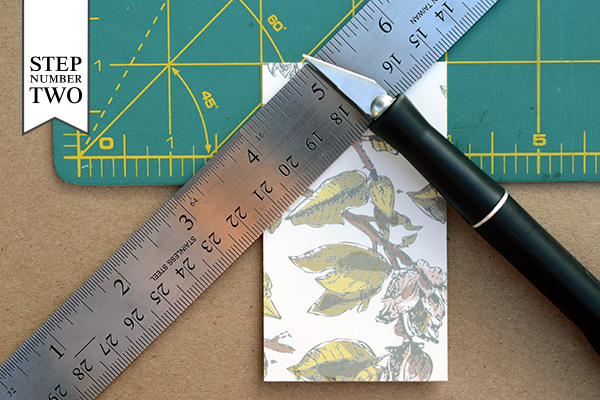
Step One: Since the invitation piece is ready to go…the first step is to cut your cards for the reply postcard and monogram tag that you will be using. With a self sealing mat, ruler and craft knife (X-acto), cut cards to 4 x 6″ (postcard) and 2 x 3.5″ (tag). You should get 2 postcards and 10 tags out of 1 sheet of patterned 8.5 x 11″ paper (we used our Magnolia Branch Patterned Card Stock).
DIY Tutorial: Savannah-Inspired Wedding Invitations by Antiquaria via Oh So Beautiful Paper

Step Two: We added a cute little corner detail to the monogram tag! To do this, simply line up the corner of the card on your mat in the 45 degree triangle and make the cut with your knife against the ruler. Flip and repeat the cut on the other side. It may take a little time to get all the corners trimmed but it’s definitely worth the effort!
DIY Tutorial: Savannah-Inspired Wedding Invitations by Antiquaria via Oh So Beautiful Paper

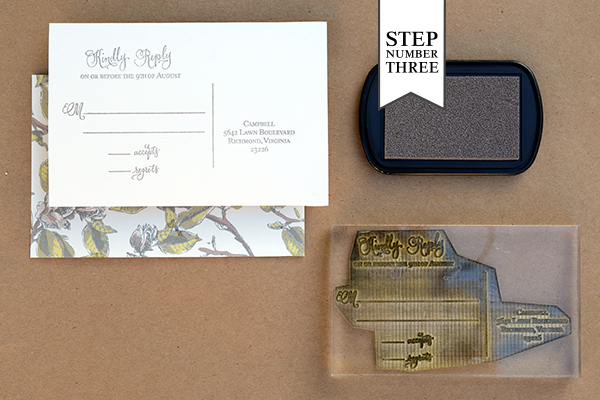
Step Three: Lay your  4 x 6″ patterned postcard down on a firm surface (pattern facing down). Ink your stamp (we used our Calligraphy Accent Reply Postcard stamp) thoroughly and center it over your card. Once it is positioned correctly, press down to make a print. Use both hands to ensure even pressure. Lift off and let the print dry. For a step-by-step video tutorial about this printing process go here.
DIY Tutorial: Savannah-Inspired Wedding Invitations by Antiquaria via Oh So Beautiful Paper

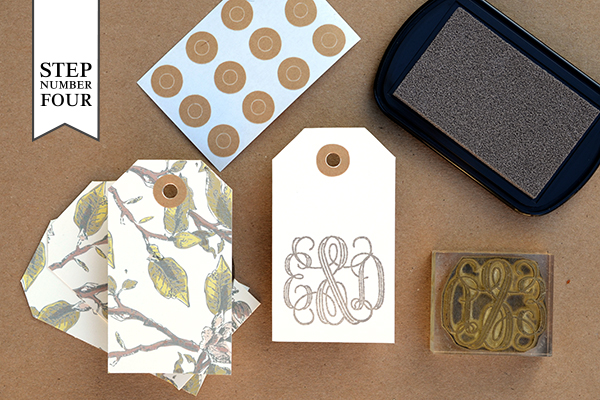
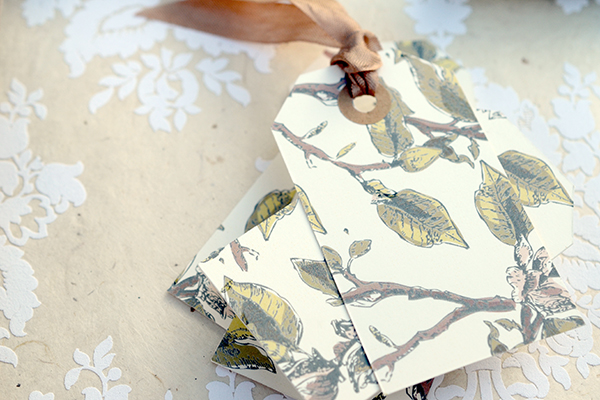
Step Four: How cute are these little tags! Not only are they adorable with this suite but the extras would be great to use as gift tags as well! To make them, punch a 1/8″ hole in the top center of the 2.5 x 3″ card. Then you will print your monogram stamp (we used our Antique Monogram stamp) using the same print technique as in Step 3. Lastly, add those adorable kraft hole reinforcements to your hole punch and the tags are done!
DIY Tutorial: Savannah-Inspired Wedding Invitations by Antiquaria via Oh So Beautiful Paper

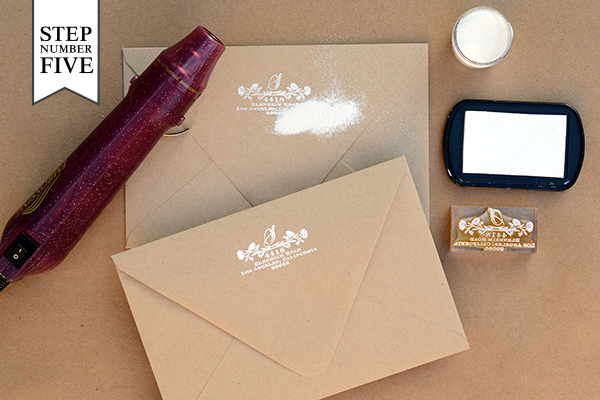
Step Five: One great way to save money with your wedding stationery is to stamp your return address! For this design, we embossed our Wildflowers Return Address Stamp with white so that it would be super opaque and “pop” on the kraft envelope. Place your A7 envelope on a stable and firm surface with the flap facing you. Ink your return address and center the stamp over the flap. When ready, press the stamp down with moderate pressure to make the print. Lift the stamp off and quickly move on to adding your embossing powder.

Once you’ve made your print, immediately cover it with embossing powder by sprinkling it across the envelope. Shift the powder around until you have covered the entire image. Now, you will pour the excess powder off of the envelope onto a scrap piece of paper so that you can reuse it for future prints. Heat set the print, using an Embossing Heat Tool. You will be able to see the powder melt into an opaque and solid color when it’s done. For more information about how to emboss using stamps, please watch this instructional video.

Note: One key thing about embossing is that it is wise to try to closely match your ink color with your powder color. By doing this, you will get much more crisp and opaque results. For example, we used a white pad with white embossing powder on this envelope.
DIY Tutorial: Savannah-Inspired Wedding Invitations by Antiquaria via Oh So Beautiful Paper

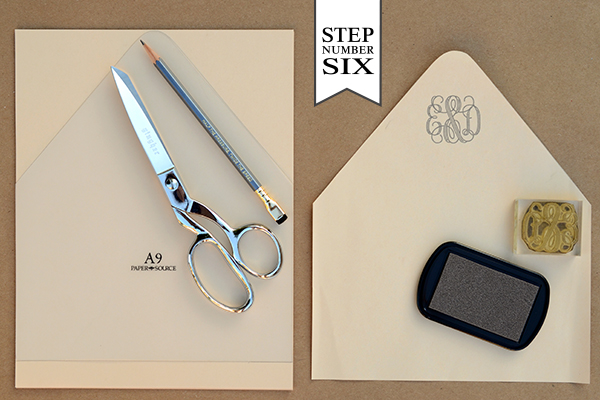
Step Six: While not crucial, adding an envelope liner can really pull your invitation suite together. We kept this liner traditional by using solid tan text weight paper and simply stamping the same monogram on it that we used on our tag. Trace the envelope liner template on your paper, cut it out, stamp it (we used our Antique Monogram stamp) and use double sided tape or stick glue to affix it to your envelope. It’s that simple!
DIY Tutorial: Savannah-Inspired Wedding Invitations by Antiquaria via Oh So Beautiful Paper

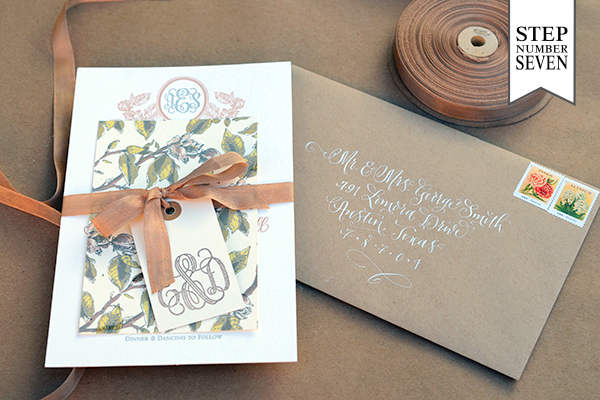
Step Seven: Now all that’s left is the finishing touches! We tied the suite together with tailors ribbon, addressed the envelope with opaque white ink and affixed our postage (we love these new vintage inspired seed packet stamps). Now they’re ready to send on their way!
DIY Tutorial: Savannah-Inspired Wedding Invitations by Antiquaria via Oh So Beautiful Paper

Materials

Savannah Letterpress Invitation on Pearl White with Kraft Envelopes, colors: Warm Grey & Nude

Calligraphy Accent Reply Postcard

Antique Monogram Stamp

Wildflowers Return Address Stamp

Magnolia Branch Patterned Paper in Cover weight

Text Weight Liner Paper

Envelope Liner Templates

Stamp Pads in Antique Pewter and Frost White

Ribbon

Embossing Powder

Heat Embossing Tool

1/8″ Hole Punch

Kraft Hole Reinforcements

Self healing mat, Ruler, Craft Knife, Pencil & Scissors

Postage Stamps

Anti­quaria is a mem­ber of the Designer Rolodex – you can see more of their beau­ti­ful work right here or visit the real wedding invitations gallery for more wedding invitation ideas!

Photo Credits: Antiquaria

Monique + Karl’s Teal and Chipboard Letterpress Wedding Invitations

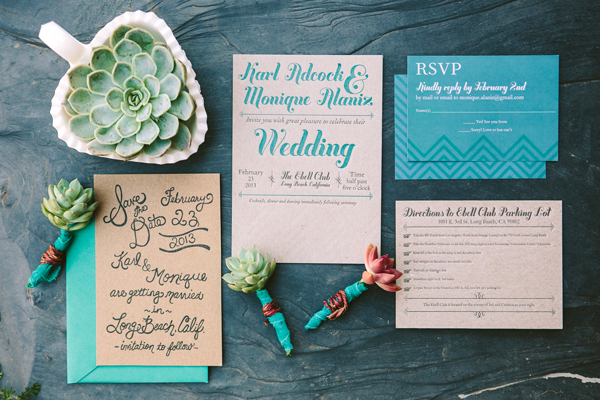
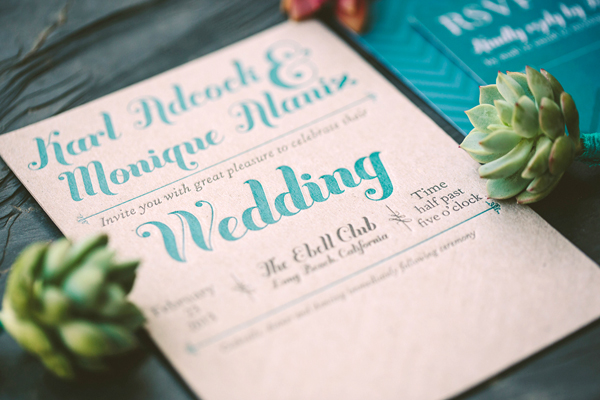
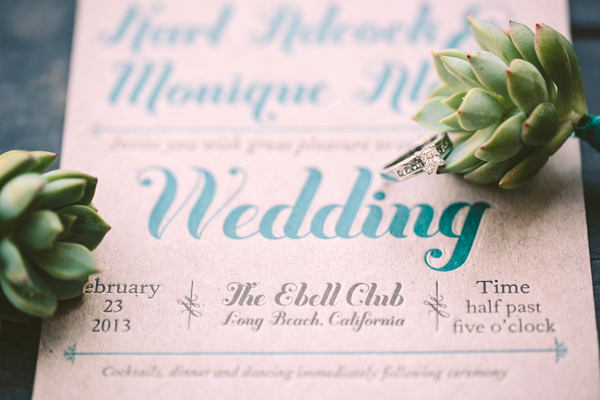
Monique from Metal Doily Press sent over the invitations from her wedding earlier this year – and I love that she chose to print them on thick chipboard! Monique paired the chipboard with a bright teal blue and chevron stripe accents to complement the modern decor in her wedding. So pretty!

Teal + Chipboard Chevron Stripe Letterpress Wedding Invitations by Metal Doily Press via Oh So Beautiful Paper (10)

From Monique: Our wedding took place at the Old Hollywood-inspired Ebell Club of Long Beach. From the moment we got engaged I had a good idea of the elements I wanted use in the invitations: chevron stripes, Jessica Hische’s Buttermilk font, the color teal, and letterpress printing. My husband and I worked on choosing the secondary font and other details together.

Teal + Chipboard Chevron Stripe Letterpress Wedding Invitations by Metal Doily Press via Oh So Beautiful Paper (8)

I started by hand lettering our save the date information, which I then turned into a custom rubber stamp. I stamped the design onto thin chipboard in black ink and paired it with a teal envelope to hint at the colors that would be coming with the invitation suite.

Teal + Chipboard Chevron Stripe Letterpress Wedding Invitations by Metal Doily Press via Oh So Beautiful Paper (7)

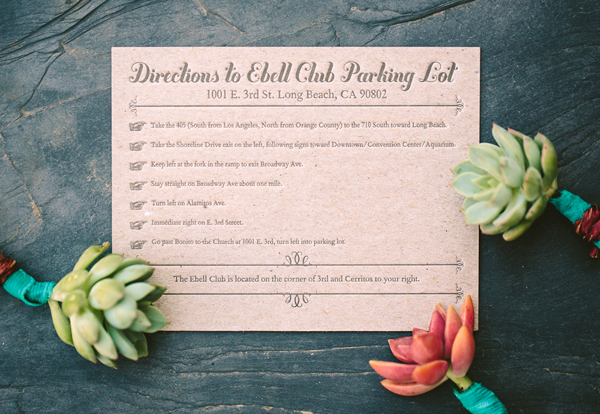
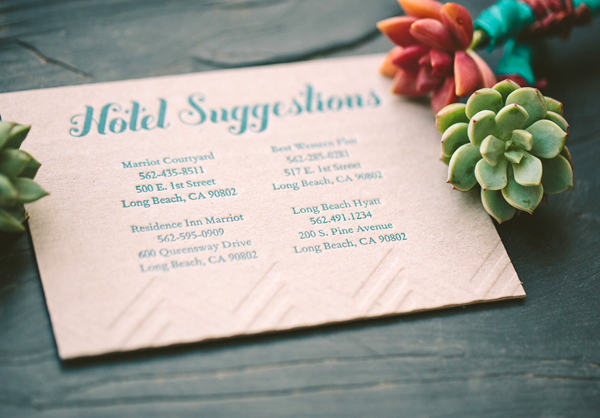
The letterpress printed invitation is a 3-color piece: a blind impression chevron stripe at the bottom and text in teal and black. With our thick 100 pt chipboard, the hotel information was easily letterpress printed on one side and the the driving directions to the venue on the other. I chose to flat print the RSVP card as I would be having those all mailed back to me.

Teal + Chipboard Chevron Stripe Letterpress Wedding Invitations by Metal Doily Press via Oh So Beautiful Paper (4)

Teal + Chipboard Chevron Stripe Letterpress Wedding Invitations by Metal Doily Press via Oh So Beautiful Paper (2)

Thanks Monique!

Check out the Designer Rolodex for more tal­ented wed­ding invi­ta­tion design­ers and the real invi­ta­tions gallery for more wedding invitation ideas!

Photo Credits: Simply Happy Photography

Haley’s Romantic Floral + Lace Bridal Shower Invitations

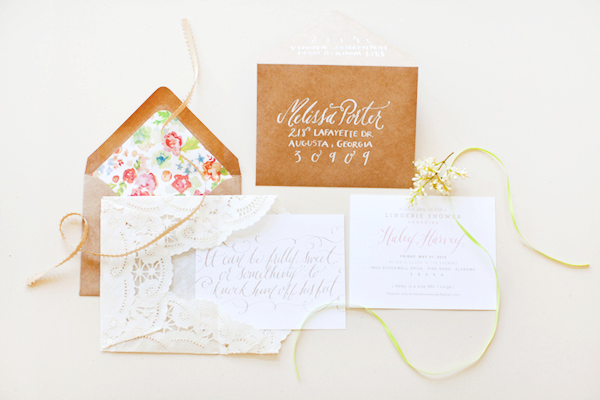
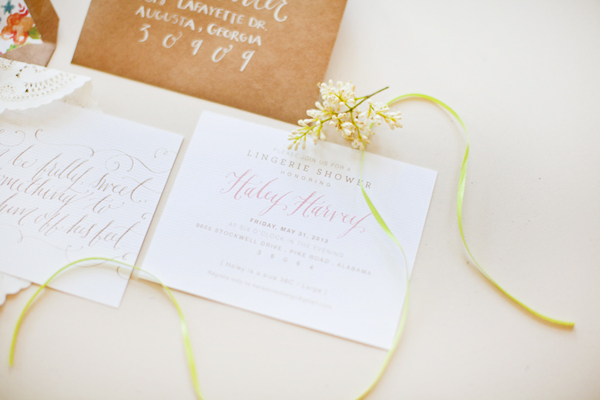
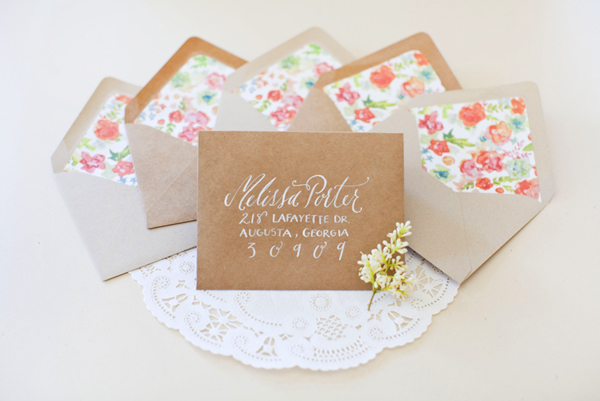
These bridal shower invitations from Kara Anne Design combine three of my favorite things: beautiful calligraphy, kraft paper, and a colorful floral pattern. What could be better for a summer bridal shower in the South? I’m also loving the lace-inspired inner envelopes made from doilies. Such a sweet and feminine detail!

Lace Bridal Shower Invitations by Kara Anne Design via Oh So Beautiful Paper (9)

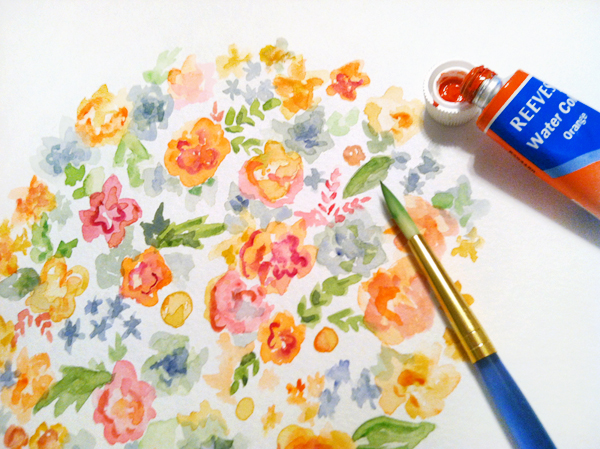
From Kara: For my life long friend, Haley, I wanted to create a beautiful and tasteful bridal shower invitation. The envelope liners are a custom watercolor painting that gave the invitation the perfect pop of color for a summer wedding.

Lace Bridal Shower Invitations by Kara Anne Design via Oh So Beautiful Paper (7)

Lace Bridal Shower Invitations by Kara Anne Design via Oh So Beautiful Paper (8)

Lace Bridal Shower Invitations by Kara Anne Design via Oh So Beautiful Paper (4)

The inner lace envelopes were hand made using paper doilies and silk ribbon that enclosed the invitation.

Lace Bridal Shower Invitations by Kara Anne Design via Oh So Beautiful Paper (6)

Lace Bridal Shower Invitations by Kara Anne Design via Oh So Beautiful Paper (3)

The invitation was printed on a bright white laid paper to add a little texture to the paper suite. For the final touch I used white calligraphy ink on kraft envelopes. The invitation set the tone for the party! For Haley’s special event, Lulu’s Cake Shop in Montgomery, Alabama created a delicious and beautiful cake that embodied exactly what I had in mind: lace and flowers!

Lace Bridal Shower Invitations by Kara Anne Design via Oh So Beautiful Paper (2)

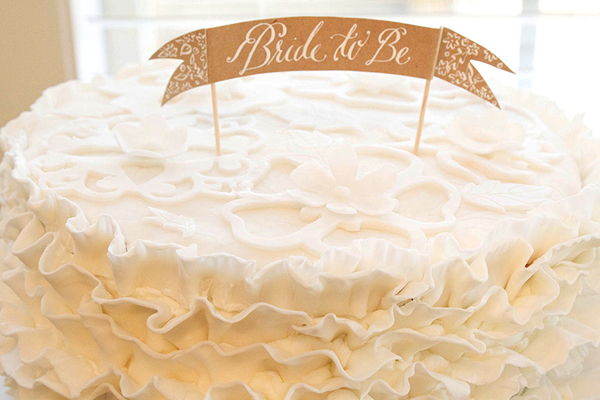
We made a cake banner with kraft paper, little wooden sticks, and white calligraphy ink to match the invitation envelopes.

Lace Bridal Shower Invitations by Kara Anne Design via Oh So Beautiful Paper (1)

Thanks Kara!

Photo Credits: Jessie Barksdale Photography

Melissa + Graham’s Whimsical Hand Painted Wedding Invitations

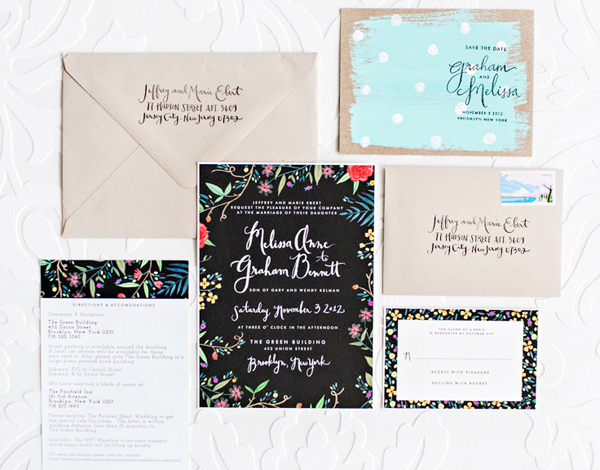
I’m always fascinated when artists apply their talents outside of their primary medium, so I was definitely intrigued when textile designer Melissa Kelman sent over her wedding invitations. Melissa was inspired by her love of pattern, florals, and color – all wonderful elements for wedding stationery! Melissa hand painted each design and created rubber stamps with her own calligraphy to use throughout the invitation suite. Gorgeous!

Creative and Whimsical DIY Wedding Invitations and Save the Dates via Oh So Beautiful Paper (6)

From Melissa: I have always had a passion for stationery design and as a professional textile designer I knew I had to create something special for our wedding invitations. The designs were inspired by my love of color, florals and pattern. I was also very inspired by our  venue – The Green Building – in Brooklyn. The building itself has a rustic, industrial feel so incorporating lots of color was a must. As a designer, it is rare that I have a chance to design for myself. My goal was to create something that felt joyful but elegant at the same time.  Each element was designed and painted by myself: it was definitely a labor of love!

Creative and Whimsical DIY Wedding Invitations and Save the Dates via Oh So Beautiful Paper (1)

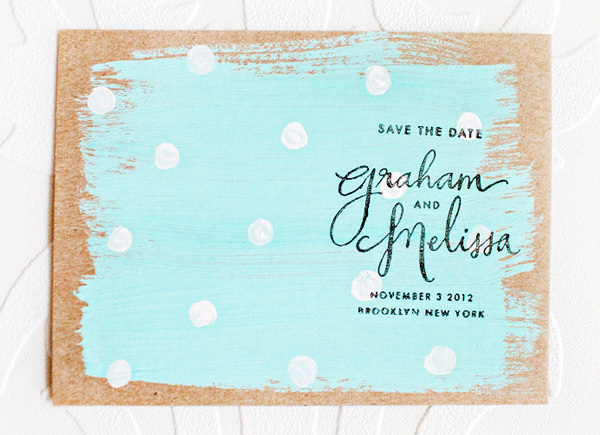
The save the dates were each hand painted on kraft card stock. I designed a custom stamp using my calligraphy and stamped each one. I love that each one is a little bit different!

Creative and Whimsical DIY Wedding Invitations and Save the Dates via Oh So Beautiful Paper (5) Creative and Whimsical DIY Wedding Invitations and Save the Dates via Oh So Beautiful Paper (4)

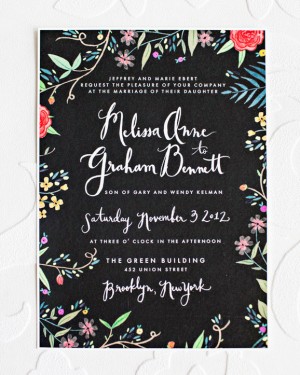
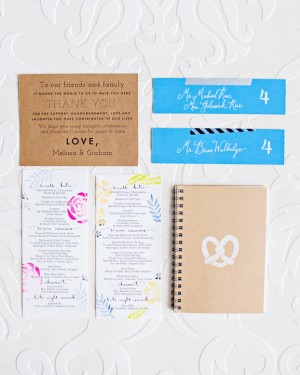
The wedding invitations were originally hand painted in gouache and watercolor. I scanned the artwork in and created the layout digitally. For our day-of elements, I hand carved some stamps and stamped each menu with colorful floral motifs. Our favors were small Muji notebooks, stamped with a hand carved pretzel stamp. The pretzel symbolized New York City and Philadelphia: the two cities we lived in together.

Creative and Whimsical DIY Wedding Invitations and Save the Dates via Oh So Beautiful Paper (3) Creative and Whimsical DIY Wedding Invitations and Save the Dates via Oh So Beautiful Paper (7)

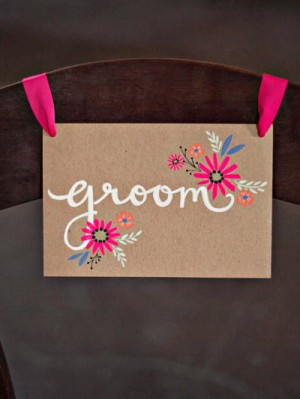
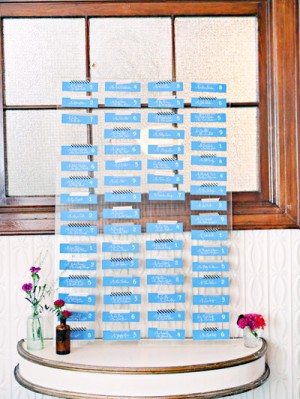
The “bride” and “groom” chair signs were hand painted using gouache on kraft paper. The seating chart was created using a large scrap piece of plexiglass. At an antique store I found a box of old boxing tickets and wrote names and table numbers on the backside. I then used washi tape to attach them to the plexiglass.

Thanks so much Melissa!

Design and Calligraphy: Melissa Kelman

Invitation Printing: Skink Ink Fine Art Printing in Brooklyn, New York

Check out the Designer Rolodex for more tal­ented wed­ding invi­ta­tion design­ers and the real invi­ta­tions gallery for more wedding invitation ideas!

Photo Credits: Jillian Bisinger