DIY Tutorial: White ‘Leather’ Heart Placemats

When it comes to Valentine’s decorations, there’s little that’s less subtle than hearts, right? Honestly, I’m an unabashed lover of hearts, so today we’re embracing them with a set of easy heart placemats. I would argue, however, that the addition of a rich leathery texture and the elegant pop of simple white makes these guys a standout addition to a Valentine’s get-together. – Mandy of Fabric Paper Glue

DIY-White-Leather-Heart-Placemats-OSBP-8

DIY-White-Leather-Heart-Placemats-OSBP-11DIY-White-Leather-Heart-Placemats-OSBP-10

DIY-White-Leather-Heart-Placemats-OSBP-1

Materials

1/2 yard white leather-look vinyl
2 sheets paper
tape
pen/pencil
scissors

DIY-White-Leather-Heart-Placemats-OSBP-2

Step One: Tape the two sheets of paper together long edge to long edge.

DIY-White-Leather-Heart-Placemats-OSBP-3

Step Two: Sketch a half heart onto the paper.

DIY-White-Leather-Heart-Placemats-OSBP-4

Step Three: Cut out your half heart template.

DIY-White-Leather-Heart-Placemats-OSBP-5

Step Four: Trace the half heart onto the back of the vinyl. Flip and trace again to create a full heart outline.

DIY-White-Leather-Heart-Placemats-OSBP-6

Step Five: Carefully cut out the hearts. They’re great placemats, but I discovered that they also look pretty amazing as a table runner!

DIY-White-Leather-Heart-Placemats-OSBP-7

DIY-White-Leather-Heart-Placemats-OSBP-9

Photo Credits: Mandy Pellegrin for Oh So Beautiful Paper

Hello Brick & Mortar: We’re in this together (also, You’re Killing it)

This was going to be a nuts-and-bolts post about orders, but January has been full of ups (new ideas, new vendors!) and downs (all of the germs from daycare in my home/nose). Effectively useless at work, I had time to ruminate: As retailers and stationers, we’re often on opposite sides of the business equation, but our bond as small, creative business owners ushers us into the same boat. As a woman hell-bent on the belief that a rising tide lifts all ships, I thought I’d focus this post on how we can continue to swell the tide for our businesses in 2014. All aboard!  â€“ Emily of Clementine

OSBP-Hello-Brick-and-Mortar-Clementine-by-Emily-McDowell-Illustration

Illustration by Emily McDowell for Oh So Beautiful Paper

1. We’re in this together. Let’s start with the obvious: Owning a small business is hard. Whether you’re a retailer, stationer or small business owner, there are lonely times. It is more rewarding that anything we ever imagined, but let’s also assume we’ve all cried on the bathroom floor and vowed to go back to a 9-5. I don’t find blog lists about achieving that elusive work/life balance particularly helpful. However, when I connect with other small business owners to share tips and resources, I am buoyed and my business grows stronger. In that vein, here are my tops:

  • Gather together. Most of us work alone, which is great, except when it’s not. Last year, I organized an informal group of small-business owning women. We have drinks and unpack the tough stuff (shipping, taxes, online sales), volley ideas, cheer each other on, and three of us spun off to create a great pop-up shop. I am always flush with love for them. Because they get it.
  • Listen in. I’m a huge fan of Design Sponge’s Biz Lady columns. Even better for the multi-tasking small-business owner: Grace Bonney’s new(ish) podcast, After the Jump. You can listen while making dinner, or packing orders.
  • Adopt a Mentor. She doesn’t even need to know you’ve adopted her. I devour everything Rena Tom writes/compiles. She’s smart, on-point and makes you feel like your small business is a part of something greater. Want a snippet?

“I met more people who were doing their own thing, and that actually meant more women. My friend Maggie calls this The Lady Web. It’s a mystical land where women recommend other women to each other and get shit done. We joke about it, but it kind of exists.” Sound familiar? Read more: here.

  • Consider your strengths. Take/retake a Meyers Briggs, or other personality test. Revel in your skill set, write it down, start telling people. When clients ask you to take on projects, reply based on a knowledge of your strengths. Recommend people you admire if you can’t take the project on. Also, think about what you’re not good at and…
  • Offload the thing that makes you want to hide under the covers. I recently interviewed a bookkeeper and had to refrain from hugging her. My bookkeeping is not hard and doesn’t take long, but it hangs over my head every day. It’s time to pay someone to do it.
  • Indulge. Vacation, massage, art class, perfume, I don’t care what it is, if it brings you joy, please do it. Small business-owning is beyond full-time, find your way to turn it off.
  • Share your tips and resources. The comments section here is a great start, in-person is even better.

OSBPbrunchtherapy

Brunch/Group Therapy with my ladies at the delectable, Vergennes Laundry.

2. Brunch Is The New Golf. I’m not trying to justify my degree in feminist theory with this point, I’m just genuinely excited that so many small businesses are thriving because good people are connecting, rather than because people with connections are playing golf. So let’s keep connecting:

  • Start a Biz Ladies/Dudes group. Did we already cover this? It’s that important. Reach out to people you know well and those you barely know. Especially people you barely know. Give praise, ask for advice on something you’re struggling with. This is where the magic happens. Make coffee dates a priority. Schedule brunch.
  • Use social media to highlight fabulous businesses around you. Connections are made and businesses are growing because of social media. Pinterest can (with proper links/credit) generate free interest in the products you covet (and, in return, the products you make that others covet), Instagram can grow your personal and professional community and give you a way to preview and gather feedback for your work, Twitter can make you a relevant part of conversations in your field. If you want these things for your business, use these platforms to highlight other businesses you admire.
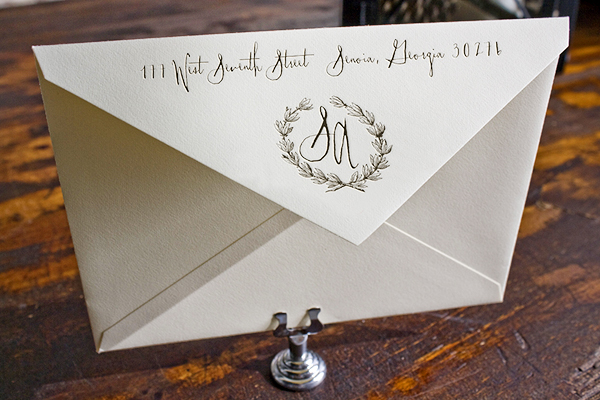
  • Be generous with information. You may not want to share your amazing source for radiant orchid envelopes, but when you do share the vendors who treat you well and the systems that make your life easier, the benefit will undoubtedly come back in your favor when you need it. I am always impressed with the gracious and generous spirit of the stationery community. Trade Show Bootcamp is a stellar example of this.
  • Say thank you, give praise, and be kind. I know, this is precariously close to hokey, but I can assure you that these things have done wonders for my business, and my happiness.

kindnessisthenewblack

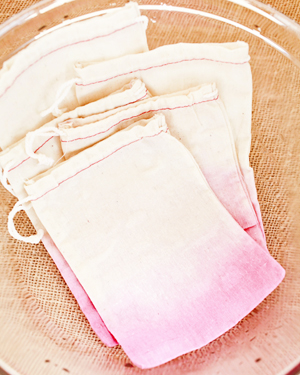
Found via Pinterest (anyone know the original source?)

3. You’re killing it. So, keep killing it.

  • Now is the time to hone your lineIf you’re brimming with ideas, wonderful, go create. But editing is just as important. Don’t be afraid to cut that card that sells well if you can’t stand it. It’s your line.
  • Gather your cheerleaders, confidants & critical thinkers. I have a rotating list of 60+ people who I can call on for quick advice, legitimate feedback and just general cheer. I barely know some of them but they’re all invaluable to making my business thrive.
  • Don’t go to the places that make you feel unworthy. Whether it’s scrolling twitter, reading about the habits of highly successful people or attending a conference or trade show. Go if it pushes your comfort zone, don’t go if it makes you feel unworthy or exhausted.
  • Gather inspiration, create a spot that sparks your creativity, and visit it often. Mine are the Shanna Murray decal next to my desk, Sibella Court’s books, past episodes of Man Shops Globe, and the teepee I gave my son for Christmas, which I totally re-appropriated for late night ordering. (I highly recommend getting one and pretending it’s for your children.)

For what it’s worth, I think you’re great. Regardless of whether I sell your work at my shop, and even if I do, no matter how quickly it sells. I’m excited that you’re doing what you’re doing and can’t wait to see what comes next.

Processed with VSCOcam with g3 preset

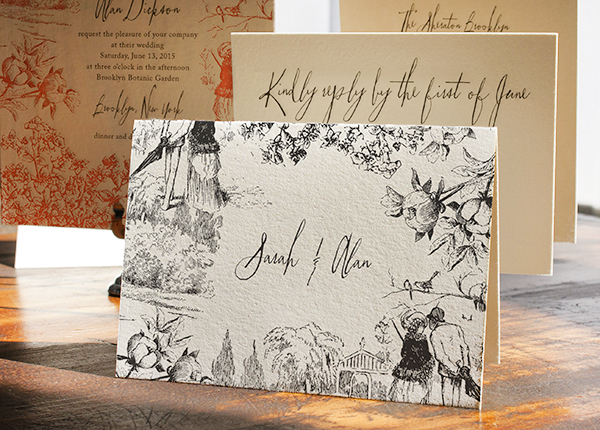
Eva Jorgensen of Sycamore Street Press, Instagram series: #EvasEverydayLettering

Party Paper: Valentine Crafting Party

Who said making valentines had to just be for kids!? I think throwing a little adult valentine crafting party sounds like the perfect way to spend a chilly February day! Provide cute supplies to turn into valentines… like heart sparklers and stickers, and little tags and cute printables. And don’t forget the sparkly decorations, and pretty pink cocktails too! —Kelly

Party Paper: Valentine Crafting Party

No. 1 Swoon Banner from michiemay, No. 2 Glitter Hearts from Shop Sweet Lulu, No. 3 Heart Gift Tags from Seasprout, No. 4 Heart Sparklers from TOPS Malibu, No. 5 Party Horns from Shop Sweet Lulu, No. 6 Valentine Printables by Oh So Pretty for Sugar & Cloth

{images via their respective sources}

DIY Tutorial: Dip Dye Heart Favor Bags

I can’t be trusted in craft stores. When I was out shopping for materials for our New Year’s Eve cocktail party shoot with St-Germain, I came across some gold glitter iron-on transfer sheets and immediately knew I wanted to use them… I just didn’t know how. I’ve also wanted to share one of my favorite (and quick and easy!) ways for dressing up muslin favor bags. Then it hit me: combine the two! So today I’m sharing some adorable dip dye heart bags, perfect for Valentine’s Day treats, weddings, birthday parties, and so much more!

OSBP-DIY-Tutorial-Dip-Dye-Heart-Bags-40

OSBP-DIY-Tutorial-Dip-Dye-Heart-Bags-52OSBP-DIY-Tutorial-Dip-Dye-Heart-Bags-53

Materials

White Muslin Bags (available from Paper Source in small packs or here in bulk)
Fabric Dye
Iron-on Gold Glitter Transfer Sheets
Scissors or Craft Punch
Iron

OSBP-DIY-Tutorial-Dip-Dye-Heart-Bags-20

Step 1: Prepare your materials. You’ll want to thoroughly pre-rinse your muslin bags to prepare them for absorbing the dye, and it’s important to make sure you get them completely wet both inside and outside the bag. Don’t skip this step or your bags will come out splotchy! You can pre-wash them in a washing machine, but I usually just run the bags under a faucet or soak them in a large bowl. You’ll also need to prepare your dye bath. I used a measuring cup with two cups of warm water, a teaspoon or so of salt, and eyeballed the amount of dye (maybe three tablespoons). For more saturated color, just use more dye. You can test the color with a piece of scrap fabric or paper towel.

OSBP-DIY-Tutorial-Dip-Dye-Heart-Bags-22OSBP-DIY-Tutorial-Dip-Dye-Heart-Bags-26

Step 2: Dye and rinse. (Note: This entire process should be done next to a sink) Dip a muslin bag into the dye bath very quickly – it really only takes a second to absorb the color! Slowly raise and lower the bag into the dye bath several times to achieve the gradient effect, gradually raising the bag as you go and leaving the bottom in the dye bath for the longest amount of time. The entire dyeing process takes about 30-45 seconds. Once the bottom of the bag looks saturated enough, immediately rinse the bag under cool water to remove any remaining dye. Set aside and repeat this process with your remaining bags.

OSBP-DIY-Tutorial-Dip-Dye-Heart-Bags-30OSBP-DIY-Tutorial-Dip-Dye-Heart-Bags-38

Step 3: Dry and cut. Throw all of your muslin bags in the dryer to set the fabric dye. While you’re waiting for everything to dry, cut out your shapes from the iron-on sheets. You can trace a template onto the back of each transfer sheet or use a craft punch. My hearts were approximately 2″ wide and I was able to get 16 hearts from each iron-on transfer sheet.

OSBP-DIY-Tutorial-Dip-Dye-Heart-Bags-63

Step 4: Iron. Place a heart on your muslin bag (I aimed for the middle of mine), then place a kitchen towel or pillowcase on top. Using the highest temperature setting, press firmly with your iron for approximately 40 seconds. Repeat for each bag.

OSBP-DIY-Tutorial-Dip-Dye-Heart-Bags-56

Step 5: Done! Fill with your favorite goodies and hand them out!

OSBP-DIY-Tutorial-Dip-Dye-Heart-Bags-45

OSBP-DIY-Tutorial-Dip-Dye-Heart-Bags-42

Photo Credits: Nole Garey for Oh So Beautiful Paper

Sarah + Alan’s Modern Toile Wedding Invitations

I love toile. Really really love. So I was thrilled when Erin at Lucky Luxe sent over these beautiful wedding invitations with a modern take on classic toile! The custom toile pattern is made from vintage engravings and was inspired by 18th century French toile textiles. Erin paired bright persimmon ink with classic black and white and mixed whimsical lettering with traditional serif text – all with incredibly chic results!

Toile-Pattern-Wedding-Invitations-Lucky-Luxe-Couture-Correspondence

From Erin: To make the toile pattern for the invitation, we pieced together several vintage engravings of beautiful outdoor scenery and florals, and I was tickled to death to find the sweet couple taking a stroll deep in our bag of tricks.

Toile-Pattern-Wedding-Invitations-Lucky-Luxe-Couture-Correspondence2Toile-Pattern-Wedding-Invitations-Lucky-Luxe-Couture-Correspondence3

French toile is typically printed in red, black, or blue, but we wanted to take this toile down a different aesthetic path. By combining it with quirky hand drawn lettering and a small, traditional serif, it just felt right to print in punchy persimmon ink with black text. The bride is a fashion maven and the bold color pairing looks like her wardrobe — another inspiration for the outdoor event.

Toile-Pattern-Wedding-Invitations-Lucky-Luxe-Couture-Correspondence6

Toile-Pattern-Wedding-Invitations-Lucky-Luxe-Couture-Correspondence7

Toile-Pattern-Wedding-Invitations-Lucky-Luxe-Couture-Correspondence4

Toile-Pattern-Wedding-Invitations-Lucky-Luxe-Couture-Correspondence5

Toile-Pattern-Wedding-Invitations-Lucky-Luxe-Couture-Correspondence8

Thanks Erin!

Lucky Luxe is a member of the Designer Rolodex – you can see more of their beautiful work right here or visit the real invi­ta­tions gallery for more wedding invitation ideas!

Photo Credits: Lucky Luxe