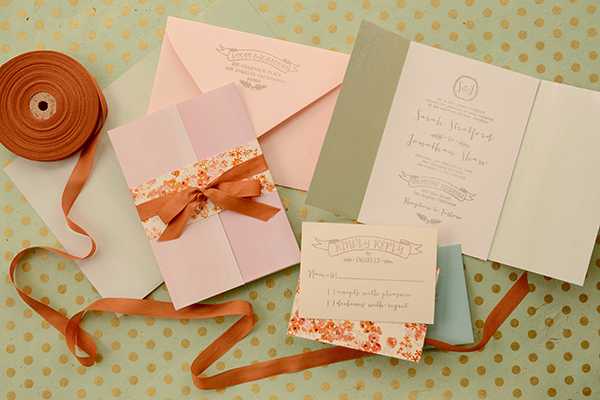
Spring is finally here and we couldn’t be more excited! When we stumbled across this gorgeous double sided watercolor paper by Rifle Paper Co., we just knew that it would be making a starring appearance in a future DIY tutorial. To kick off the season, we’ve designed a gorgeous, pastel invitation suite that would be perfect for any spring or summer event. The decorative watercolor paper trifold is just icing on the cake! We absolutely love it  this season as an alternative to the envelope liner! – Bailey and Emma of Antiquaria
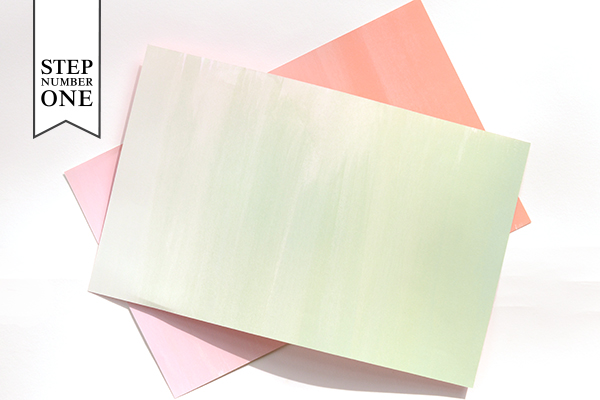
Step One: Gather and cut the decorative paper that is destined to be your trifold wrap around your invitation. To fit an A7 (5″ x 7″) card cut the paper into rectangles measuring 7″ tall by 11″ long. This will allow for an inch of overlap around your invitation card. The decorative paper that you choose doesn’t have to be double sided like ours is but we would recommend selecting a paper with a pretty back, either clean white or a color or pattern. Remember that the back will be seen when your guests view the invitation!
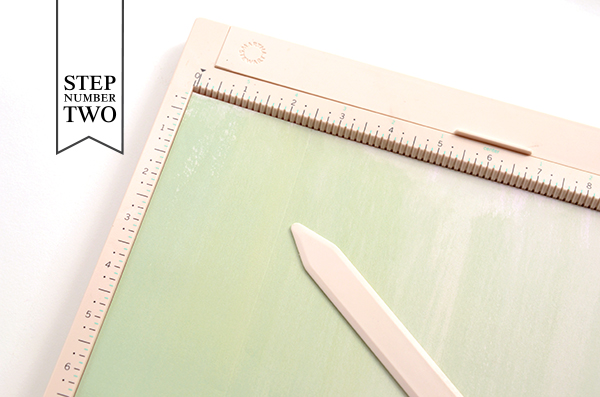
Step Two: For ease of folding and to make sure the line was straight, we scored one side of our decorative paper at the 2.5″ mark. Fold along the line and set the paper aside.
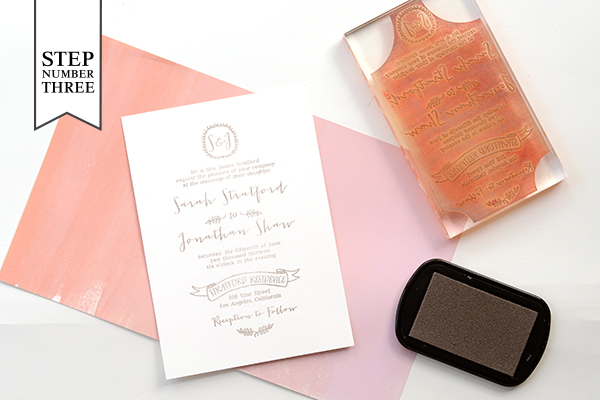
Step Three: Next we stamped our invitation piece on an A7 card. For this design we used our Mod Invitation Stamp and an antique pewter stamp pad. For a step-by-step video tutorial about this printing process go here.
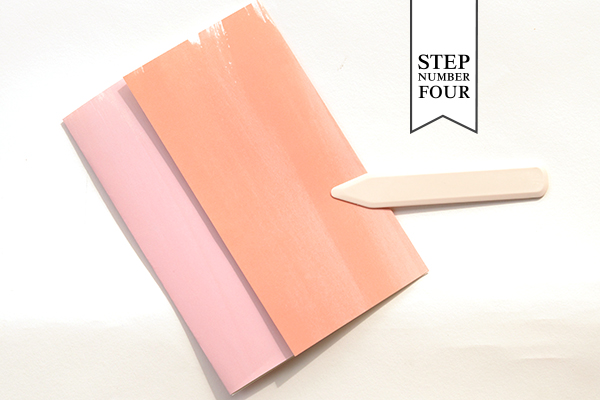
Step Four: Next, we folded the other side of our decorative paper trifold around the A7 card, making sure it was a snug fit. We used a bone folder to make a crisp, folded edge.
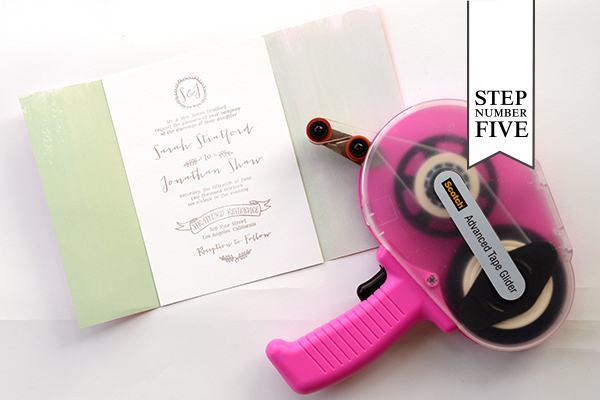
Step Five: Insert the A7 invitation card into the trifold decorative paper with double sided tape or stick glue. Put the tape on all four corners of the back of your card. Carefully place it over the center of the trifold and press it down to adhere it to the decorative paper.
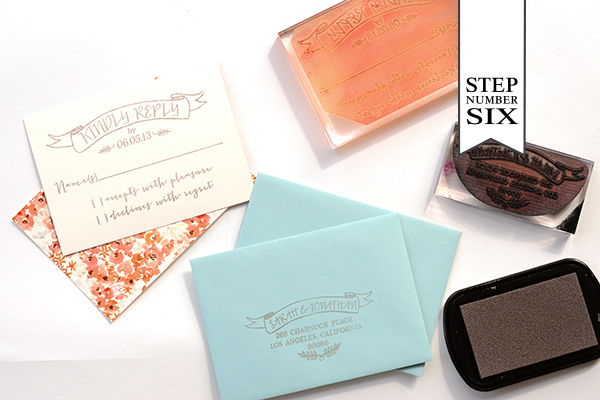
Step Six: For the reply card, we wanted to add some pattern and color to tie together the coral and turquoise sides of our decorative paper. For the reply card itself, we cut 4bar cards (3 1/2″ x 4 7/8″) out of our Paloma Patterned Coral Cover Paper and stamped our Mod  Reply Card Stamp on the blank, non-patterned side. We used a turquoise colored 4bar envelope stamped with our Mod Banner Return Address Stamp to coordinate. You will get four 4bar cards out of one sheet of card stock.
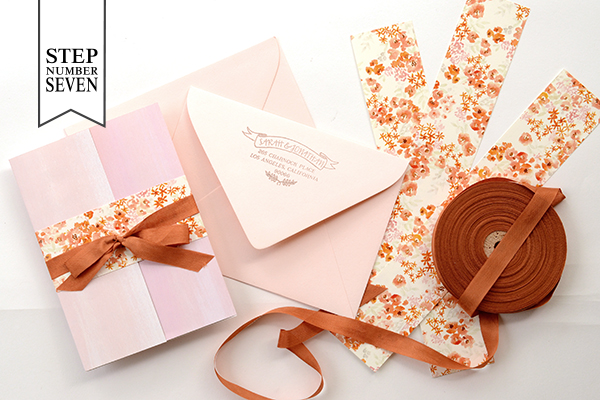
Step Seven: The last step puts all of the gorgeous finishing touches on the suite. We used the Paloma Coral Paper again, except in text weight, to make the belly bands wrapped around the suite. We cut them into strips of 2″ x 11″ – meaning you will get four belly bands per sheet of paper. After taping the belly band, we tied a piece of ribbon around the band to soften the look and add a bit of texture to the design.
We stamped the same return address (Mod Banner Return Address Stamp) on the back flap of a blush envelope before addressing them and sending them on their merry way! We promise that each guest will be truly delighted to receive such a present in their mailbox!
Materials
Mod  Invitation Stamp
Mod  Reply Card Stamp
Mod Banner Return Address Stamp
Stamp Pad in Antique Pewter
Decorative Paper (we used these ombré gift wrap sheets from Rifle Paper Co.) cut to 7″ x 11″
A7 Cards in Superfine White
A7 Envelopes in Luxe Blush
Paloma Coral Patterned Paper in Cover and Text weight
4bar Envelopes in Pool
Double sided tape or stick glue
Scoring Board
Ribbon
AntiÂquaria is a memÂber of the Designer Rolodex – you can see more of their beauÂtiÂful work right here or visit the real wedding invitations gallery for more wedding invitation ideas!
Photo Credits: Antiquaria for Oh So Beautiful Paper
