DIY Tutorial: Rubber Stamp Clay Save the Dates

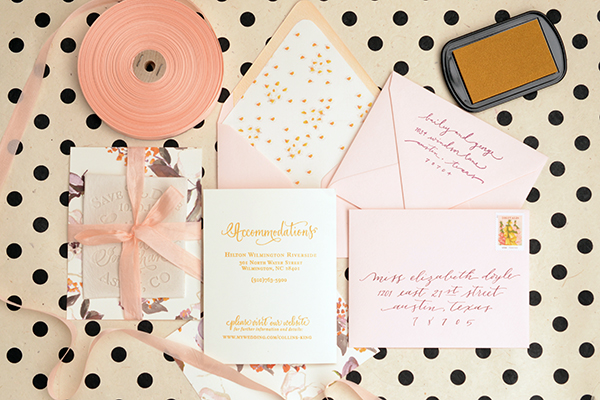
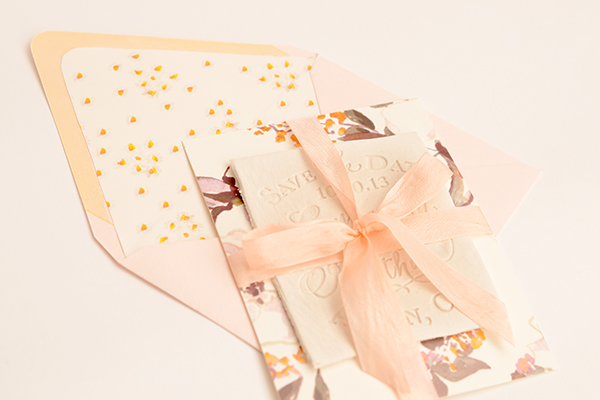
Texture is subtle but boy does it make a huge impact! When we found some paper clay at the art store a while back, we knew it would make a great DIY but we weren’t quite sure what to do with it. After obsessing over textured clay pottery now for ages, we decided that a “pottery” save the date was in order. The natural off-white color of the paper clay comes alive when paired with a mix of floral patterns and a unique lilac, eggplant, and ochre color palette! – Bailey and Emma of Antiquaria
DIY Tutorial: Rubber Stamp Paper Clay Save the Dates by Antiquaria for Oh So Beautiful Paper

DIY Tutorial: Rubber Stamp Paper Clay Save the Dates by Antiquaria for Oh So Beautiful Paper

DIY Tutorial: Rubber Stamp Paper Clay Save the Dates by Antiquaria for Oh So Beautiful Paper

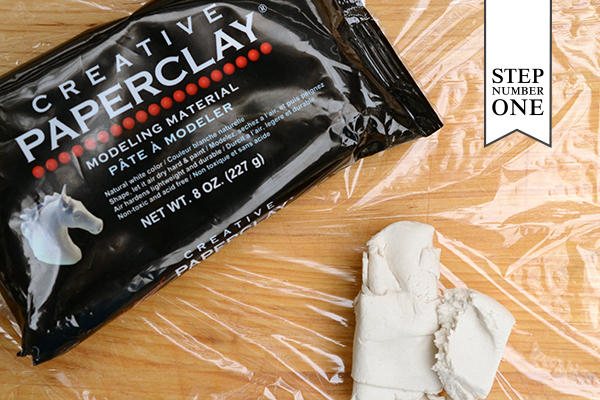
Step One: Gather your paper clay supplies: bag of clay, wooden cutting board (you don’t want any texture in your rolling surface – unless it’s the look you’re going for), clear plastic wrap, and a rolling pen. Break your paper clay into approximately 2 oz pieces. There will be scraps that you can re-roll together.
DIY Tutorial: Rubber Stamp Paper Clay Save the Dates by Antiquaria for Oh So Beautiful Paper

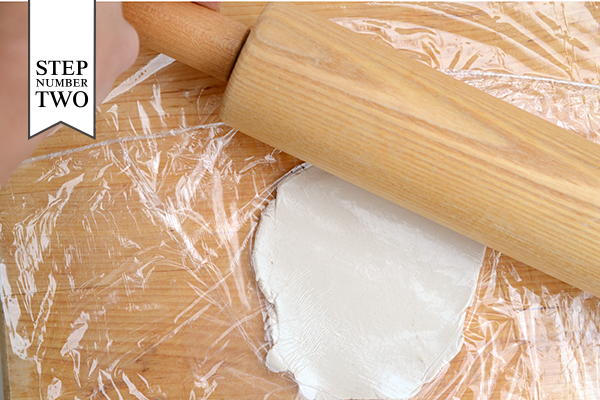
Step Two: Squish the paper clay into a small rectangle with your fingers (this doesn’t need to be precise). Place it in the middle of your plastic wrap and fold the other end of the wrap over the top. Now, you’ll start rolling! It’s basically like rolling out a pie crust or cookies – just keep the thickness even and it will be good. We suggest a thickness of around â…›” or maybe a little less. Remember: it does need to fit in an envelope!
DIY Tutorial: Rubber Stamp Paper Clay Save the Dates by Antiquaria for Oh So Beautiful Paper

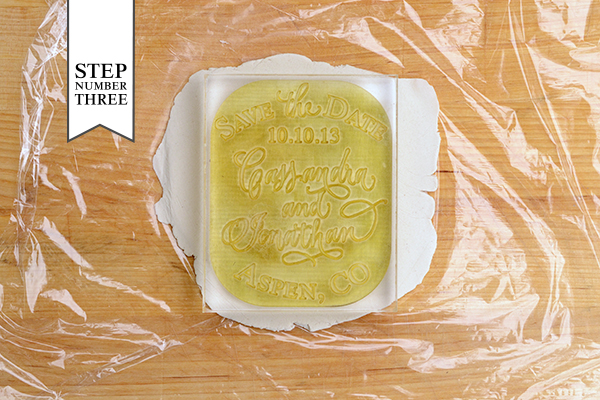
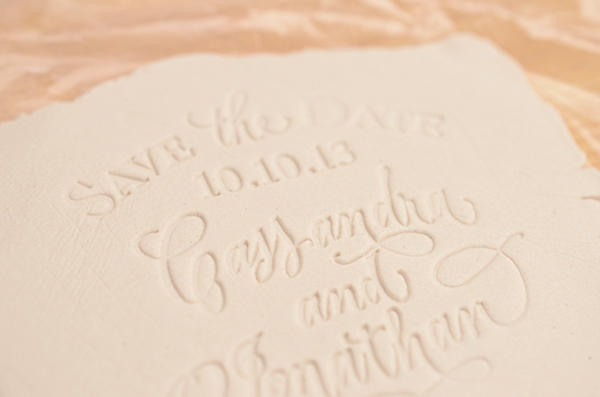
Step Three: Once it’s rolled out thin and even (and approximately the size of your stamp mount, you’re ready to print the design. With an un-inked stamp (we used our Vintage Label Save the Date stamp) center it over the clay and carefully set it down. With your fingertips, press each section of the design evenly to make the print. This printing method feels different than printing paper so it may take some extra time to get the hang of it! Not to worry though, you can just re-roll the clay so there is no waste in the practice process!

Once you get a good print, trim the clay around the design with a kitchen knife (we used the mount size as a guide). Carefully flip the clay over in your palm and transfer it to a plastic lined tray or baking sheet. Let dry 1 – 3 days or until firm.
DIY Tutorial: Rubber Stamp Paper Clay Save the Dates by Antiquaria for Oh So Beautiful Paper

DIY Tutorial: Rubber Stamp Paper Clay Save the Dates by Antiquaria for Oh So Beautiful Paper

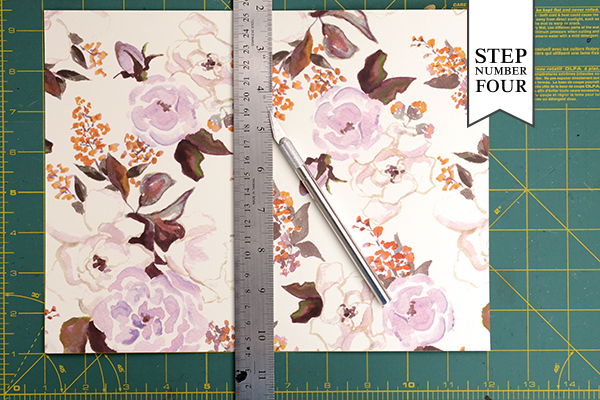
Step Four: Now that your clay save the dates are complete, you can move on the the rest of the pieces that you’ll need for the design. Cut patterned card stock (we used our Annabelle Violet Paper) into A2 sized cards (4.25″ x 5.5″) with a craft knife and ruler on a self healing mat. You will get four cards out of one 8.5″ x 11″ sheet.
DIY Tutorial: Rubber Stamp Paper Clay Save the Dates by Antiquaria for Oh So Beautiful Paper

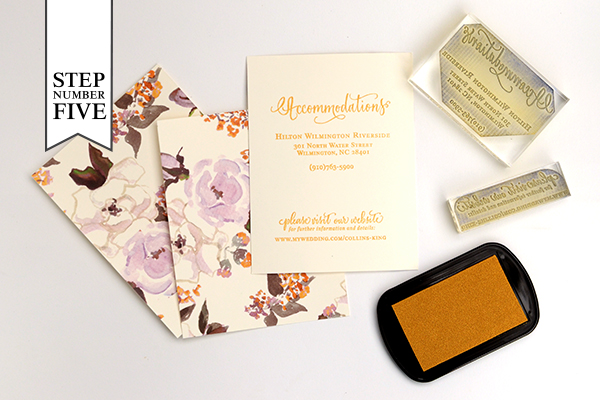
Step Five: Stamp your accommodations and website information on the back of your patterned card. We used our Calligraphy Accent Accommodations and Calligraphy Accent Website stamps for this design. You can watch our step-by-step video tutorial about the stamp printing process here.
DIY Tutorial: Rubber Stamp Paper Clay Save the Dates by Antiquaria for Oh So Beautiful Paper

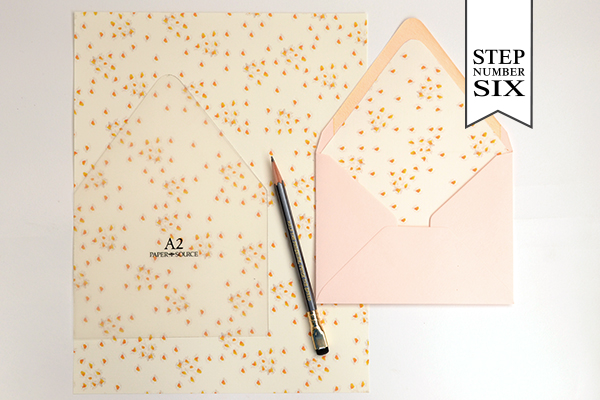
Step Six: A coordinating liner really dresses up an envelope, don’t you think? For this design, we used our daisy paper. The process is simple! Trace the template with a pencil and cut out the pattern. Use double sided tape or stick glue to adhere the liner into the envelope just below the gumming.
DIY Tutorial: Rubber Stamp Paper Clay Save the Dates by Antiquaria for Oh So Beautiful Paper

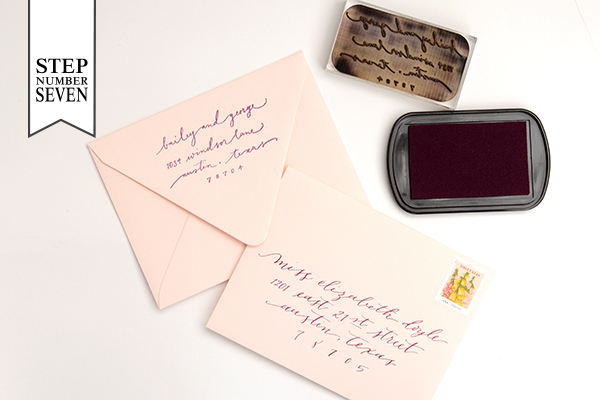
Step Seven: Now we’ll switch our focus to the outside of the envelope! We stamped our Scripted Return Address  stamp in eggplant on the back flap. To coordinate, we addressed the front in an eggplant colored ink as well and used (our favorite) seed packet postage to finish it all off!

Materials

Vintage Label Save the Date Stamp

Calligraphy Accent Accommodations Stamp

Calligraphy Accent Website Card Stamp

Scripted Return Address Stamp

Annabelle Violet Patterned Paper

Daisy Patterned Paper

Paper Clay

Cutting board, plastic wrap, rolling pen and knife

Trays or baking sheets for air drying

Self healing mat, kraft knife and metal ruler

Envelope liner templates

Pencil and Scissors

Stamp Pads in Ochre and Eggplant

A2 Envelopes in Luxe Blush

Calligraphy Ink for addressing in Red Violet

Grecian Pink Tailors Ribbon to tie the suite together

USPS Postage

Anti­quaria is a mem­ber of the Designer Rolodex – you can see more of their beau­ti­ful work right here or visit the real save the dates gallery for more save the date ideas!

Photo Credits: Antiquaria for Oh So Beautiful Paper

Inspired By: Rose Gold

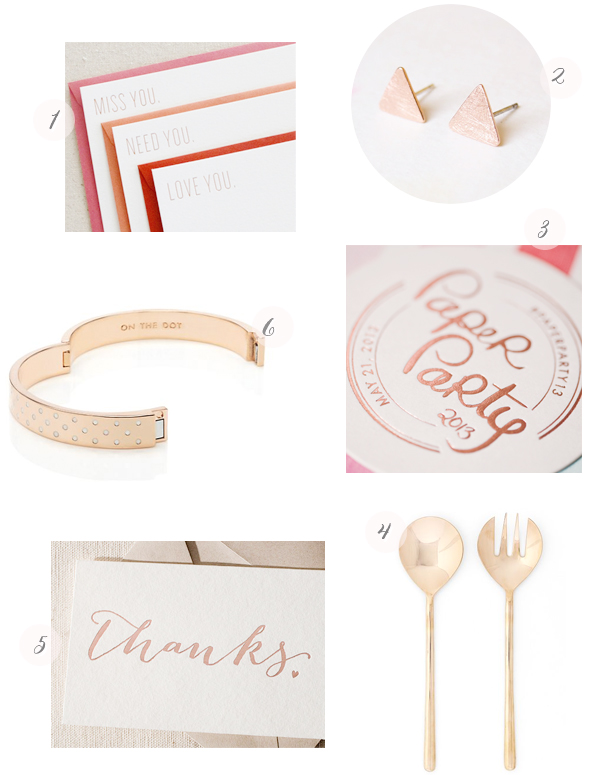
Since we’re already on the subject of beautiful metallic foil today, I couldn’t help but think of my current favorite metallic hue: rose gold! Don’t get me wrong, I still love gold, silver, and copper, but there’s something so soft and romantic about rose gold. I just can’t get enough, from jewelry to stationery to utensils. I’m looking forward to seeing lots, lots more beautiful rose gold over the coming months!

Inspired-By-Rose-Gold

1. Seesaw (sadly no longer available); 2. Re: Coco from New York; 3. Rose Gold Foil Coasters by For Your Party for the 2013 Paper Party, photo by Charlie Juliet Photography; 4. West Elm; 5. Smock; 6. Kate Spade

{images via their respective sources}

Huilin + Martin’s Gold Foil Boarding Pass Wedding Invitations

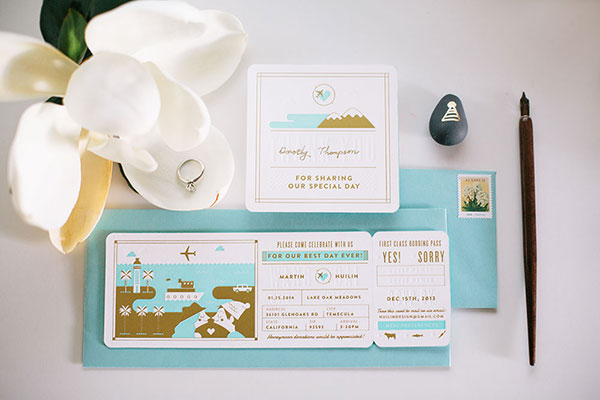
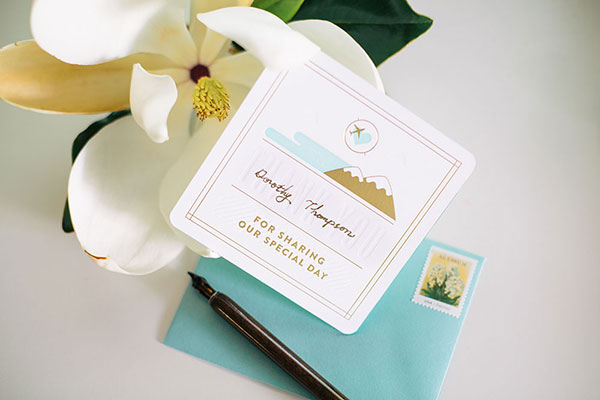
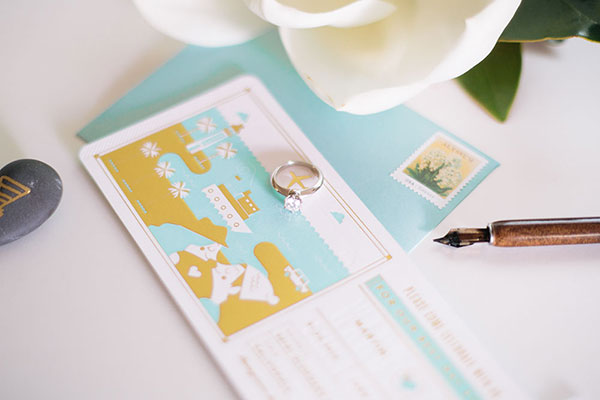
After years working as a freelance designer, Huilin Dai finally had the chance to design for herself: invitations for her upcoming wedding! Inspired by a recent move to San Diego, California and a love of travel, Huilin drew design inspiration from an airplane boarding pass. The invitation suite was letterpress printed by Mama’s Sauce in seafoam green and gold foil, then finished with seafoam edge painting!

Mint-Gold-Foil-Destination-Wedding-Invitations-Huilin-Dai

From Huilin: After working as a freelance designer for many projects, I was excited to have an opportunity to design my own wedding invitations! Our invitation was inspired by a plane ticket for two reasons. First, we both love traveling, so we would like to have a travel theme goes along our wedding. Second, we both moved to San Diego and are getting married here – most of our guests will fly into town without knowing each other.

Mint-Gold-Foil-Destination-Wedding-Invitations-Huilin-Dai5

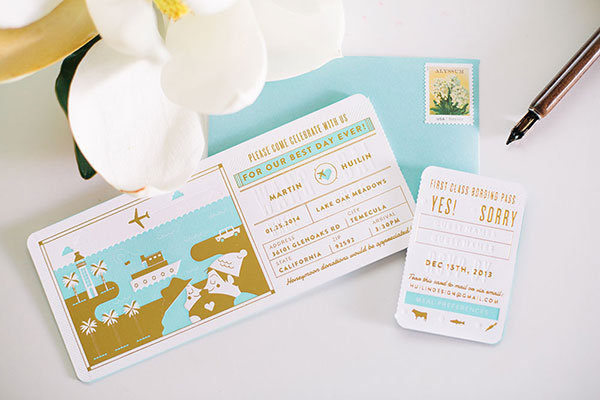
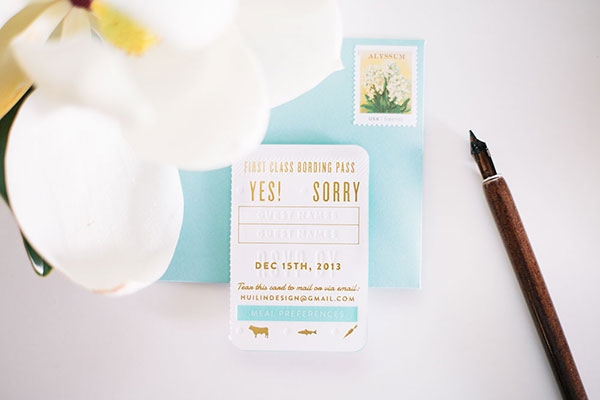
We thought it would be a fun idea to give them a “plane ticket.” The ticket was created in two parts: the invitation and a perforated RSVP that can be torn off and mailed back to us, just like the boarding ticket! I also created a set of 4″ x 4″ coasters that will also be used as escort cards for the reception.

Mint-Gold-Foil-Destination-Wedding-Invitations-Huilin-Dai4

The invitations and coasters were printed by Mama’s Sauce – they were so nice and willing to do what I asked for. The invitations were printed in three colors: gold foil, seafoam, and blind, with edge paint in seafoam. The detail on finished product was incredible, and I was so glad I found them!

Mint-Gold-Foil-Destination-Wedding-Invitations-Huilin-Dai6

Mint-Gold-Foil-Destination-Wedding-Invitations-Huilin-Dai7

Thanks Huilin!

Design: Huilin Dai

Letterpress Printing: Mama’s Sauce

Check out the Designer Rolodex for more tal­ented wed­ding invi­ta­tion design­ers and the real invitations gallery for more wedding invitation ideas!

Photo Credits: Huilin Dai

Sam + Adam’s Hand Lettered NYC Wedding Invitations

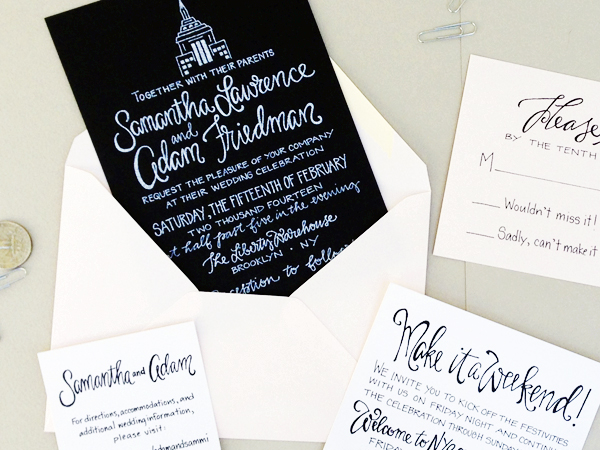
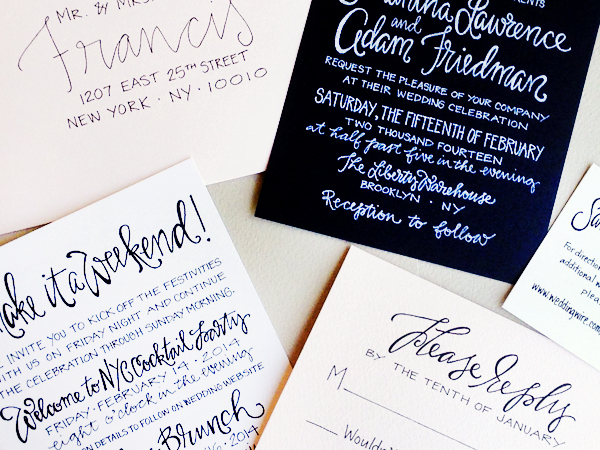
I love a modern twist on a classic black and white wedding invitation! J from Grey Snail Press sent over these New York City wedding invitations featuring her hand lettering and custom illustrations of New York icons like the Statue of Liberty and Empire State Building. I’m particularly loving the white ink on black paper for the main invitation. Such a bold and modern choice!

Hand-Lettered-NYC-Wedding-Invitations-Grey-Snail-Press4

From J: Sam and Adam came to me to create a custom invitation suite for their wedding in Brooklyn. They wanted to incorporate some iconic elements of New York City into their suite.  Their venue at the Liberty Warehouse is the only location in New York where the Statue of Liberty is face front as she looks onto France.

Hand-Lettered-NYC-Wedding-Invitations-Grey-Snail-Press3

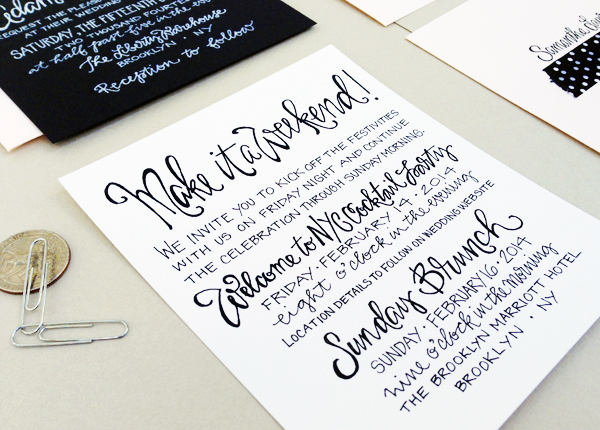
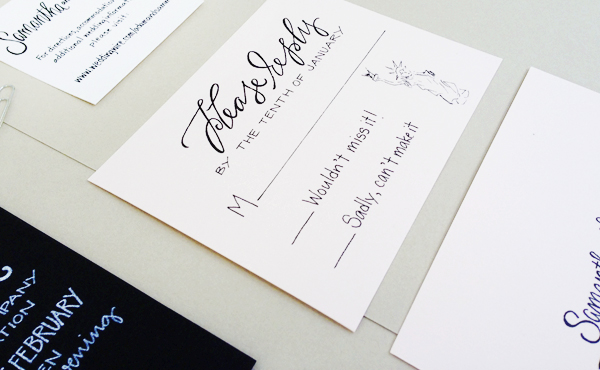
The invitations were hand lettered and screen printed on black card stock in white ink with a simple drawing of the Empire State Building. Textured blush RSVP postcards, with a stylized illustration of the Statue of Liberty were printed flat in black ink. Corresponding enclosures were printed on 120# cream cardstock in black ink. Blush envelopes completed the suite and were hand lettered by Grey Snail Press.

Hand-Lettered-NYC-Wedding-Invitations-Grey-Snail-Press6

Hand-Lettered-NYC-Wedding-Invitations-Grey-Snail-Press5

Thanks J!

Grey Snail Press is a member of the Designer Rolodex – you can see more of their beautiful work right here or visit the real invi­ta­tions gallery for more wedding invitation ideas!

Photo Credits: Grey Snail Press