James + Sona’s Modern Colorful Wedding Invitations

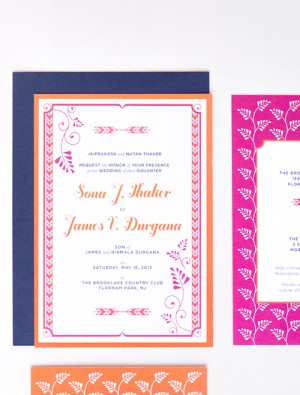
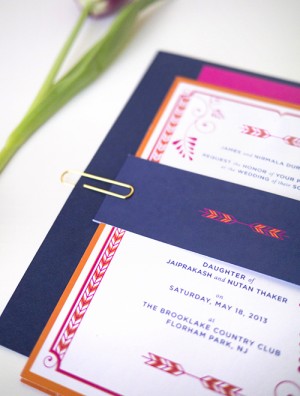
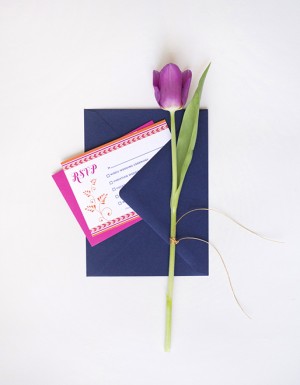
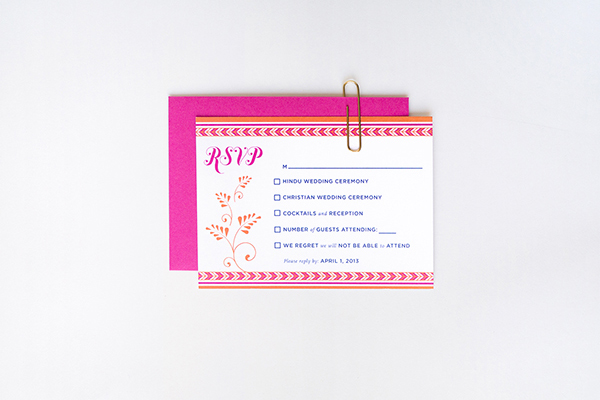
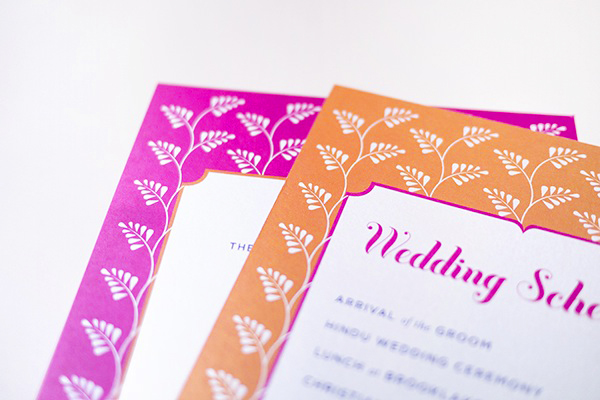
I’m loving the bright and bold color in these wedding invitations from designer Rashi Birla! Rashi drew inspiration from the respective cultures of the bride and groom – Indian and Guyanese – and the vibrant color palette of orange and magenta. The final design is absolutely stunning!

Modern Colorful Indian Guyanese Wedding Invitations by Rashi Birla via Oh So Beautiful Paper (8)

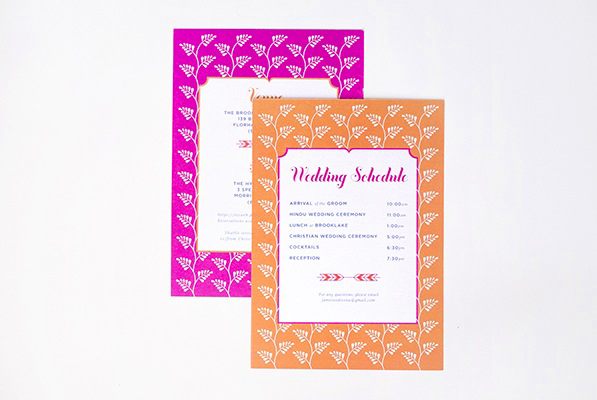
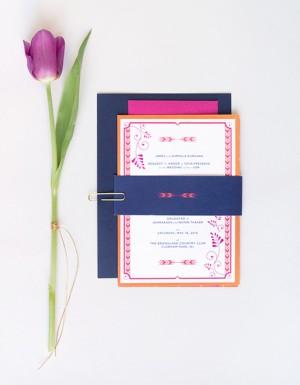
From Rashi: Sona and James wanted an invitation that was able to fuse together their individual cultures (Indian and Guyanese) but still felt very modern and clean. The main colors they wanted to use were orange and magenta. Since the orange and pink are pretty feminine, I chose to add navy blue as a complimentary color.

Modern Colorful Indian Guyanese Wedding Invitations by Rashi Birla via Oh So Beautiful Paper (6) Modern Colorful Indian Guyanese Wedding Invitations by Rashi Birla via Oh So Beautiful Paper (3)

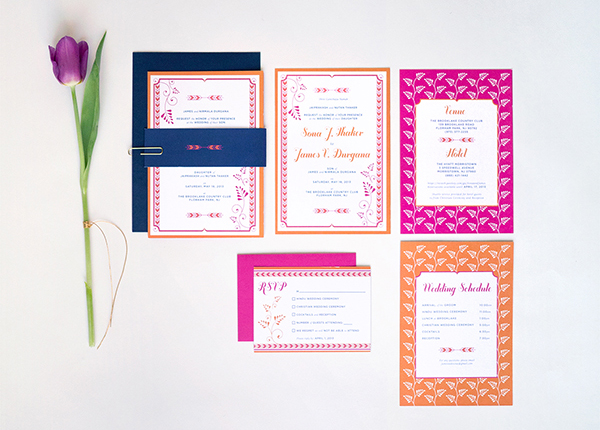
Small hits of this more masculine color helped ground and balance the invitation. The final suite had the main invitation, an RSVP card accompanied with a magenta envelope, and a double sided information card. I packaged the suite together with a navy blue belly band and a navy blue outer envelope.

Modern Colorful Indian Guyanese Wedding Invitations by Rashi Birla via Oh So Beautiful Paper (2)

Modern Colorful Indian Guyanese Wedding Invitations by Rashi Birla via Oh So Beautiful Paper (7) Modern Colorful Indian Guyanese Wedding Invitations by Rashi Birla via Oh So Beautiful Paper (4)

Modern Colorful Indian Guyanese Wedding Invitations by Rashi Birla via Oh So Beautiful Paper (5)

Modern Colorful Indian Guyanese Wedding Invitations by Rashi Birla via Oh So Beautiful Paper (1)

Thanks so much Rashi!

Design: Rashi Birla

Check out the Designer Rolodex for more tal­ented wed­ding invi­ta­tion design­ers and the real invi­ta­tions gallery for more wedding invitation ideas!

Photo Credits: Rashi Birla

Emma + Paul’s Floral Block Printed Wedding Invitations

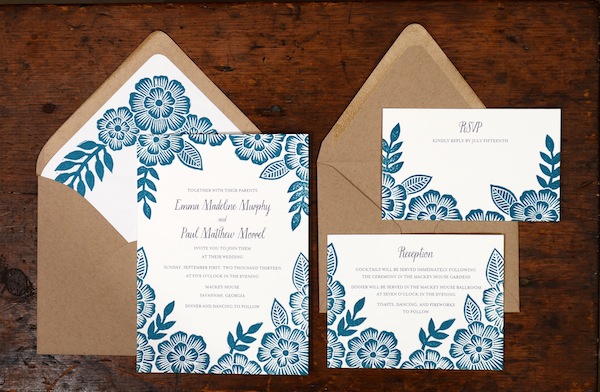
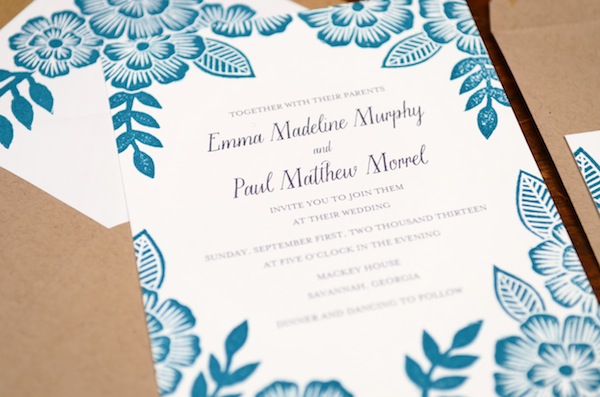
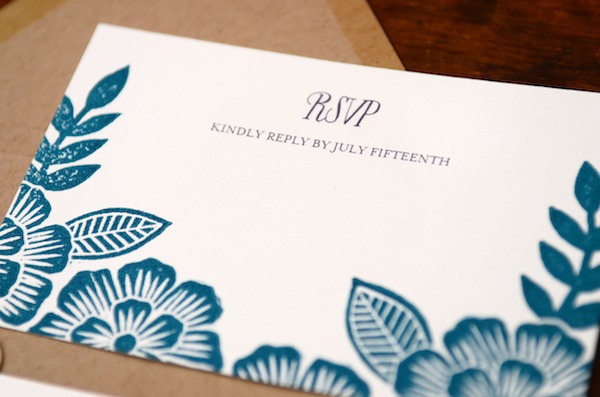
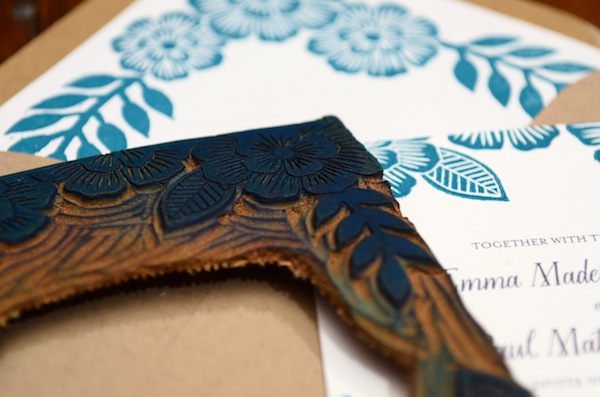
I’ve always loved floral prints, but my love for anything floral seems to quadruple in the spring and summer. Katharine Watson creates some incredibly beautiful floral patterns – all carved by hand on linoleum blocks! Katharine created these invitations for a couple with a shared love of nature – first drawing and carving the floral border, then letterpress printing the entire design. So pretty!

Floral Block Printed Wedding Invitations by Katharine Watson via Oh So Beautiful Paper (4)

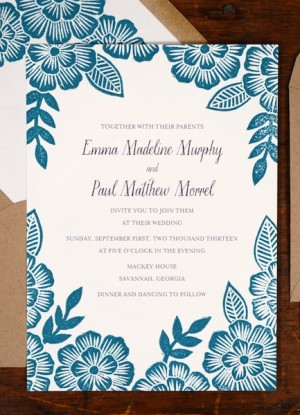
From Katharine: This invitation was created for a couple that loves the outdoors. Emma is a yoga teacher and Paul is a runner, and they wanted to translate this love of nature into their invitations. I created a floral design for them in a deep turquoise, that brought to mind an image of the outdoors without being too literal.

Floral Block Printed Wedding Invitations by Katharine Watson via Oh So Beautiful Paper (6)

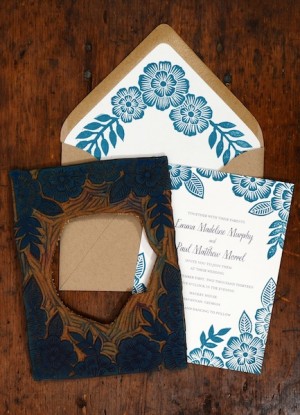
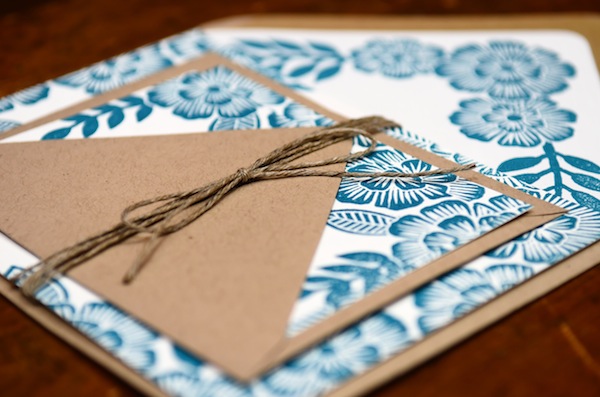
The floral design was hand-carved from a linoleum block, using one block for the invitation cards and another for the envelope liner. The suite was then printed on a Chandler and Price [letterpress] printing press, and tied together with twine to finish off the natural look. 

Floral Block Printed Wedding Invitations by Katharine Watson via Oh So Beautiful Paper (1) Floral Block Printed Wedding Invitations by Katharine Watson via Oh So Beautiful Paper (2)

Floral Block Printed Wedding Invitations by Katharine Watson via Oh So Beautiful Paper (7)

Floral Block Printed Wedding Invitations by Katharine Watson via Oh So Beautiful Paper (5)

Floral Block Printed Wedding Invitations by Katharine Watson via Oh So Beautiful Paper (3)

So beautiful!  Thanks Katharine!

Check out the Designer Rolodex for more tal­ented wed­ding invi­ta­tion design­ers and the real invi­ta­tions gallery for more wedding invitation ideas!

Photo Credits: Katharine Watson

{happy weekend!}

Happy Friday everyone! I’ve been doing a lot of thinking lately along the lines of the quote in this week’s font post… inspired in part by some of the conversations that I had with friends in California. The last year has been amazing with the arrival of Sophie, but it has also been really hard with house hunting, moving, and trying to get settled into (much less fix up) our new house with a young baby at home and a very limited budget. It’s so easy to get weighed down by our problems and lose sight of our bigger goals and dreams. So I’ve been thinking about what I really want, not in my normal immediate sense but more in the big picture sense – like Jordan’s list from a few years ago. I don’t have any answers yet, but it’s what keeps me up at night these days. I’ll keep you all posted. And in the meantime…

California! by Oh So Beautiful Paper (15)

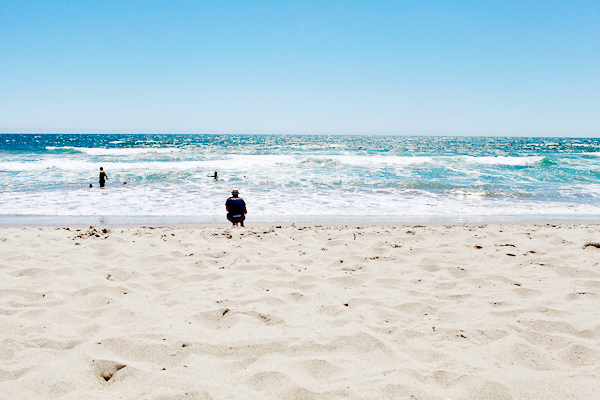
Photo by me from our trip to California

…a few links for your weekend!

This week on Oh So Beautiful Paper:

Check back soon for this week’s cocktail! I hope you all have a wonderful weekend, and I’ll see you back here next week! xoxo

DIY Tutorial: Modern Banner Tri-Fold Save the Date

It can be a challenge to fit all of the necessary information into your save the date or wedding invitations. Hotels, directions, maps and websites can weigh down your envelope and easily distract guests from the main message. Today’s tutorial is the perfect solution to the headache… and couldn’t be simpler! Using one letter size piece of paper, we’ve created a tri-fold save the date that’s fun, modern and informational. – Bailey and Emma of Antiquaria
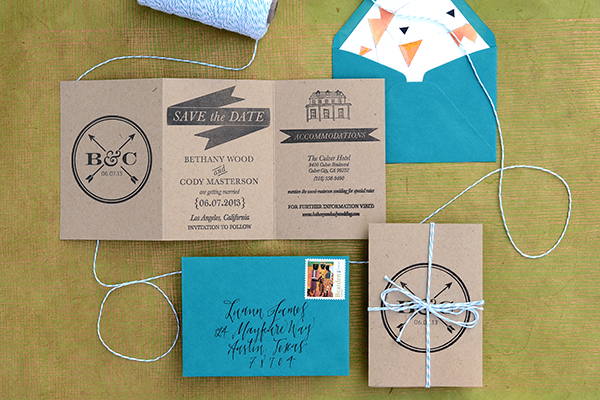
DIY Tutorial: Kraft Paper Trifold Save the Date by Antiquaria

DIY Tutorial: Kraft Paper Trifold Save the Date by Antiquaria

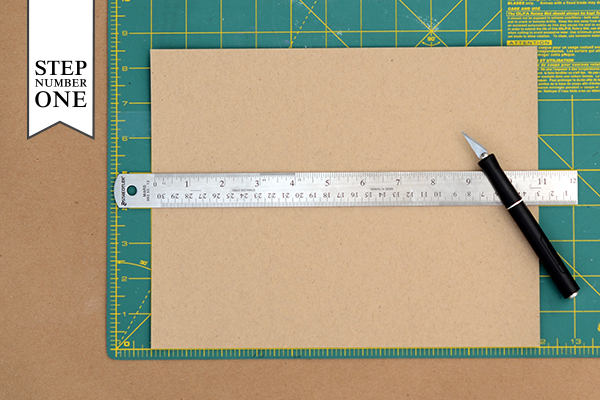
Step One: Cut your 8.5″ x 11″ piece of kraft card stock into cards sized at 5″ x 10.5″

DIY Tutorial: Kraft Paper Trifold Save the Date by Antiquaria

Step Two: Once cut, you will want to make score marks every 3.5 inches using a bone folder and scoreboard tool. Do not fold the card yet!
DIY Tutorial: Kraft Paper Trifold Save the Date by Antiquaria

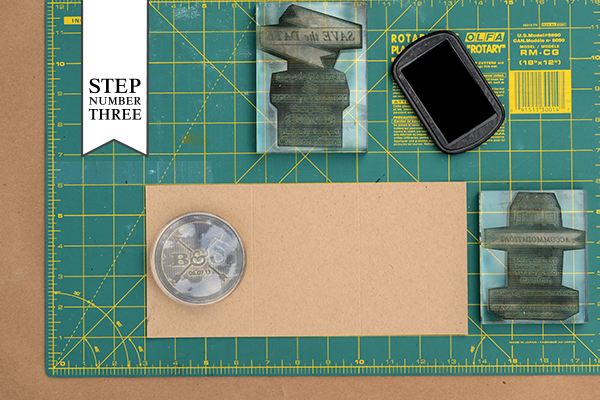
Step Three: While the card is scored but still flat, stamp your monogram (we used our Modern Arrow Monogram Stamp, No.2), centering on the first third (the one on the left). Repeat with your save the date stamp (we used our Modern Banner Save the Date Stamp) in the center and your accommodations stamp (we used our Modern Banner Accommodations Stamp, No.2) in on the right-hand side. To make a stamped print, ink your stamp thoroughly and center it over your card. Once it is positioned correctly, press down to make a print. Use both hands to ensure even pressure. Lift off and let the print dry. For a step-by-step video tutorial about this printing process go here.
DIY Tutorial: Kraft Paper Trifold Save the Date by Antiquaria

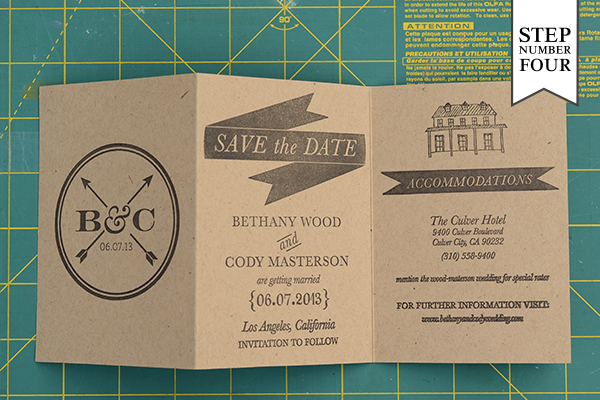
Step Four: Now you can fold your card! Carefully bend along score marks and use a bone folder to make certain the folds are crisp.
DIY Tutorial: Kraft Paper Trifold Save the Date by Antiquaria

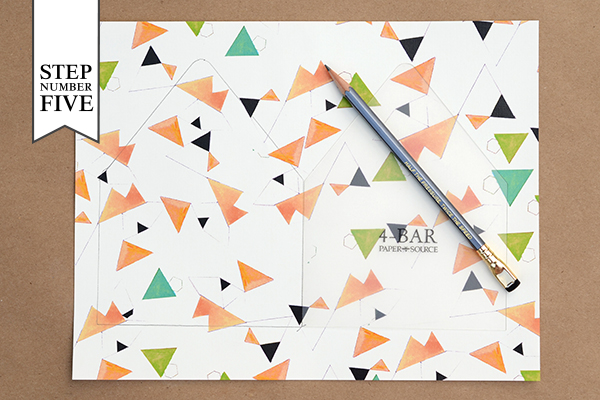
Step Five: Adding a printed liner is a great way to add color and pattern to your Save the Date design. To make the liner, trace the template onto your printed paper (we used our “Geo” Patterned Paper in text weight) and cut it out with scissors. To install, simply use stick glue or double sided tape to adhere them into your envelope.

DIY Tutorial: Kraft Paper Trifold Save the Date by Antiquaria

Step Six: Next, you will stamp your return address on the back flap of your 4bar envelope using the same technique for printing as in step three. We used our Scripted Return Address Stamp for this design.
DIY Tutorial: Kraft Paper Trifold Save the Date by Antiquaria

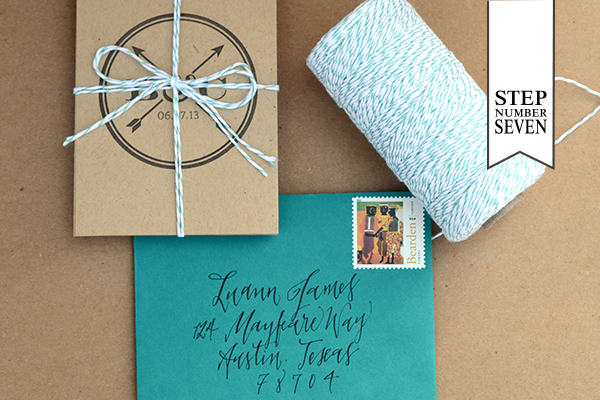
Step Seven: Now all that’s left is to tie the trifold design with twine, address the envelopes, add postage and send them on their way!

Materials:

Modern Arrow Monogram Stamp, No.2

Modern Banner Save the Date Stamp

Modern Banner Accommodations Stamp, No.2

Scripted Return Address Stamp

Stamp Pad in Black

Card stock 8.5″ x 11″ sheets in paper bag

Self Healing Mat and Craft Knife

Score Board

Bone Folder

4Bar Envelopes in Peacock

Liner Paper

Envelope Liner Templates

Pencil and Paper

Twine

Anti­quaria is a mem­ber of the Designer Rolodex – you can see more of their beau­ti­ful work right here or visit the real wedding invitations gallery for more wedding invitation ideas!

Photo Credits: Antiquaria
Carly + Michael’s Classic Copper and Gray Wedding Invitations

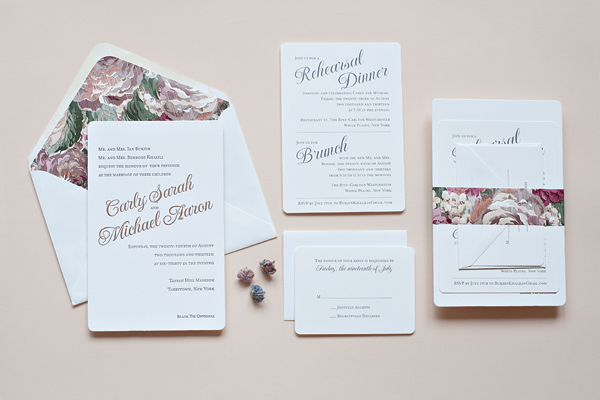
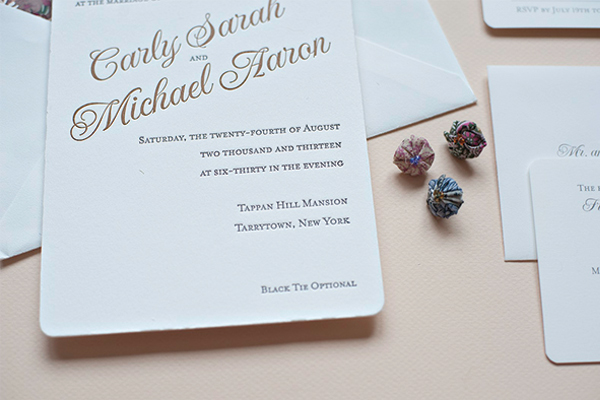
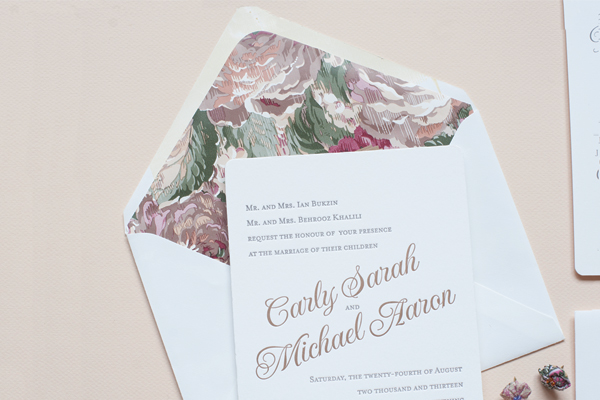
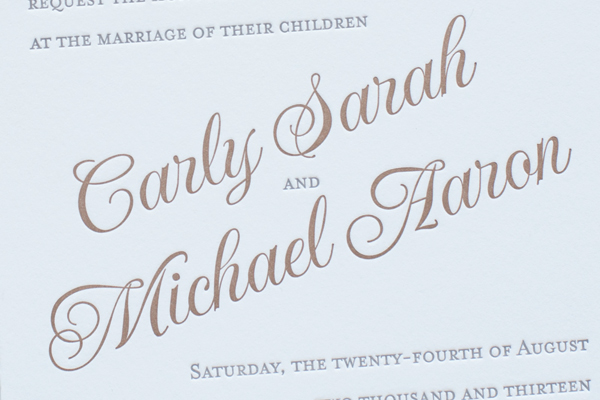
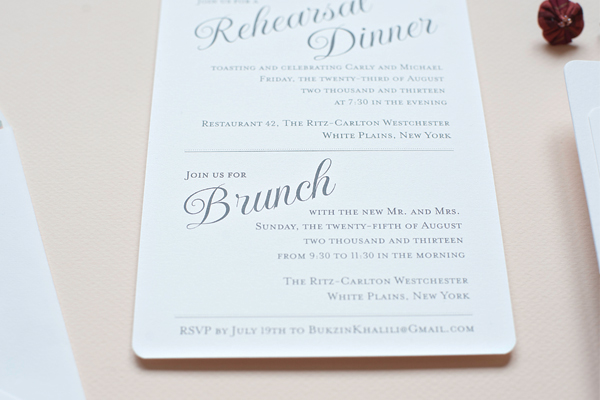
I love it when designers put a modern spin on classic design, which is exactly what Becca from Suite Paperie did with these letterpress wedding invitations! Becca paired an au currant metallic (and one of my personal favorites – copper!) with timeless dove gray and incorporated a floral wallpaper as an envelope liner. An unexpected combination, but absolutely beautiful!

Classic Copper and Gray Wedding Invitations by Suite Paperie via Oh So Beautiful Paper (5)

From Becca: When Carly first described her ideal wedding invitation to me, I could hardly contain my excitement! She wanted classic with a bit of a modern edge and lots of texture. The end result is one of my favorites to date!

Classic Copper and Gray Wedding Invitations by Suite Paperie via Oh So Beautiful Paper (1)

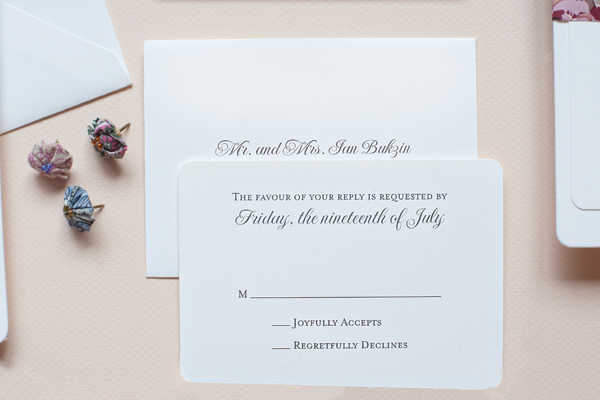
We letterpress printed her invitations on Crane’s luxurious Lettra 220# felt cover in copper and dove grey ink, keeping the design simple and elegant. Rounded edges throughout the suite gave each piece a soft finish and cohesive look.

Classic Copper and Gray Wedding Invitations by Suite Paperie via Oh So Beautiful Paper (3)

To add some texture and color to the suite, we chose to use a vibrant, floral patterned wallpaper for the envelope liners and belly bands. I can’t put my finger on what it is about this specific pattern, but from the moment I saw it, I fell absolutely in LOVE with it.

Classic Copper and Gray Wedding Invitations by Suite Paperie via Oh So Beautiful Paper (2)

Classic Copper and Gray Wedding Invitations by Suite Paperie via Oh So Beautiful Paper (4)

Classic Copper and Gray Wedding Invitations by Suite Paperie via Oh So Beautiful Paper (6)

Thanks Becca!

Check out the Designer Rolodex for more tal­ented wed­ding invi­ta­tion design­ers and the real invi­ta­tions gallery for more wedding invitation ideas!

Photo Credits: Suite Paperie